
PIWIS reading, R1 and R2, then what ??
 03-06-2016, 06:56 PM
#61
Rennlist Member

I think you press the red "bushing" IN towards the pump, then pull the hose out of the pump. You want to drain the fluid out of the pump 1st.
 03-06-2016, 09:24 PM
#62
Rennlist Member
Thread Starter

Thanks a LOT ByProDriver,
Yes, just tried it, on my "spare" pump that is on my bench, and it worked like a charm.
But, doing that "down there", ..it should not be a piece of cake !
I'm thinking that this is most probably the place (this "joint") where I currently have a leak.
Now, I can see that below the "red bushing", there is another (small) O Ring that insure the joint between the return pipe and the lower part of the tank.
Last edited by GVA-SFO; 03-08-2016 at 11:58 PM.
03-08-2016, 06:15 PM
#63
Rennlist Member
Thread Starter
That "drive cycle" has been around for a while. Based on my experience it doesn't match what I have found works for my cars, but it doesn't hurt if you follow it.
The important thing is to get all the readiness monitors set to complete and get the car checked and it passed and be done with this.
The important thing is to get all the readiness monitors set to complete and get the car checked and it passed and be done with this.

After reading this, I went to the station with full confidence, and the car went through the test very nicely !
I could have saved 30 bucks (the Retest cost, i.e.: half price as the Test) if I would have been clever and : ..simply, before hitting the smog test station, I should have connected the Durametric, and read the sensors ! (I would strongly recommend to the readers here, that have a Durametric, to do that in order to be able to pass the test at the first try !)
This is now done. ..Except that to do that, I removed the Li-Ion to put the piece of Lead back in place. (Kind of going to the "gym" !!
 ) this, if I had to do more than one day "retest". I will have to reverse this operation, to stop again being a "Lead mover" !
 By the way, I pick today as the good day to do that, as no rain was on forecast, and while I was on my 50 mph / 15 minutes run on freeway, ..guess what ?
Yes, I got rain. Not only, I have no roof, I have also Nitto NT01 or, the best friends of the rain (like having a BMW and having snow !!), so, I had really a full test : smog, rain and shower !
Last edited by GVA-SFO; 03-08-2016 at 07:17 PM.
03-14-2016, 01:31 AM
#64
Rennlist Member
Thread Starter
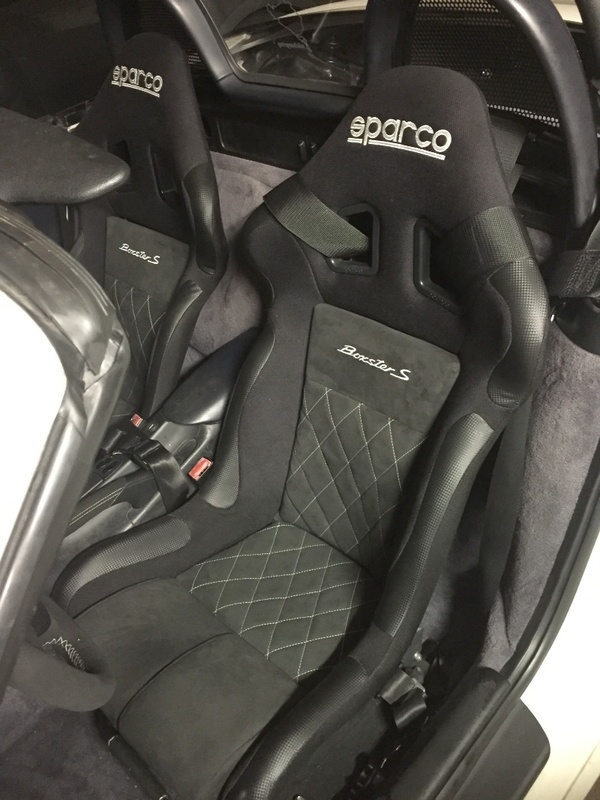
After the smog test, I decided to do some aesthetics mods in the cabin.
First, I did not liked the original material “inside” the Sparco.
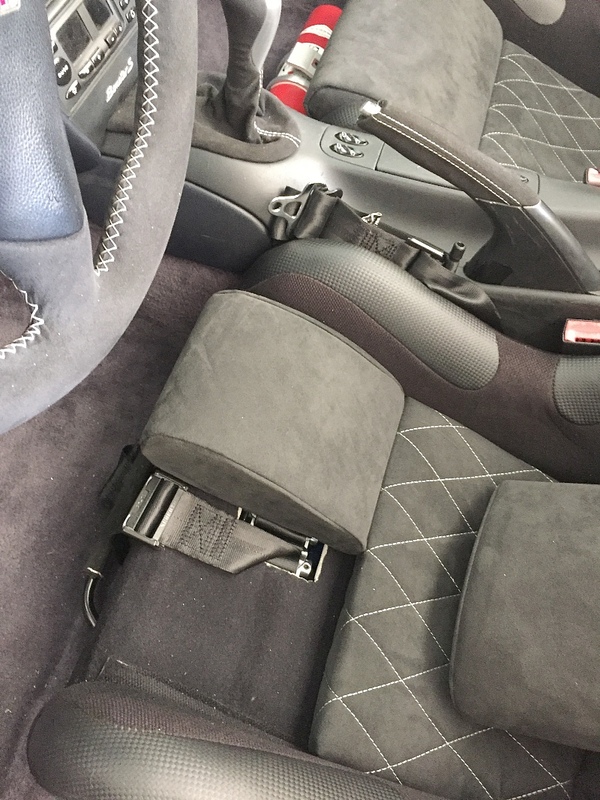
I decided to remodel these, using Alcantara with Boxster logo embroidering and diamond stitching.
Note that the front cushion is in two part for the driver seat, this in order to accommodate the passage of the 5th and 6th points of the harness.
Here is how the seats look now :
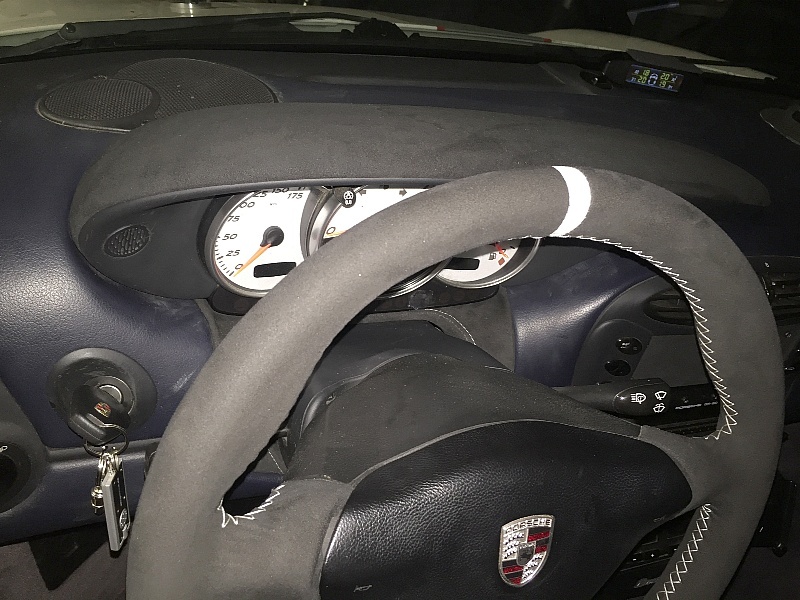
I also decided to have Alcantara in the top of the gauge cluster cover, together with the piece that is under the cluster !
I think I will redo the top cover, to include a “French stitching”, and do that, when I will do the upgrade of the cluster against one from a 996. (I really want an oil pressure gauge). And now, that I have removed that set one time, I should say that it is pretty easy to do that again.
Now, the current dashboard set looks like that :
First, I did not liked the original material “inside” the Sparco.
I decided to remodel these, using Alcantara with Boxster logo embroidering and diamond stitching.
Note that the front cushion is in two part for the driver seat, this in order to accommodate the passage of the 5th and 6th points of the harness.
Here is how the seats look now :
I also decided to have Alcantara in the top of the gauge cluster cover, together with the piece that is under the cluster !
I think I will redo the top cover, to include a “French stitching”, and do that, when I will do the upgrade of the cluster against one from a 996. (I really want an oil pressure gauge). And now, that I have removed that set one time, I should say that it is pretty easy to do that again.
Now, the current dashboard set looks like that :
04-01-2016, 07:55 PM
#65
Rennlist Member
Thread Starter
Ok, ..another post off topic : no Boxster, no Laguna Seca, no Sears Point in view these days, ..I’m too far away ! Being in Germany the other day, we did a stop at N�rburg.
All of that to report that the “Ring” track (that I still do NOT like at all !) is getting even worse, i.e.: the asphalt really becomes in a quite bad shape.
So, beside being very narrow, having 60 percent of the (about 150) curves being blind, and for sure, no flagmen at all on this place, I still let you think “what” it is !
Ah, for sure, the infrastructure is awful, i.e.: such a mess to unload a car of a trailer, and doing this in the dirt. This is just in line about what I think about this place.
(Btw: yes, I did refused to drive nor to enter in the car to do some laps.)
Here, a view of the entrance, where you buy laps in advance, (29 €/lap) in the “ticket office”, and then at the gate, you open it, by using this card :

Note that you have to exit before re-entering in order to be able to do your next lap ! (quite fun, right ?)
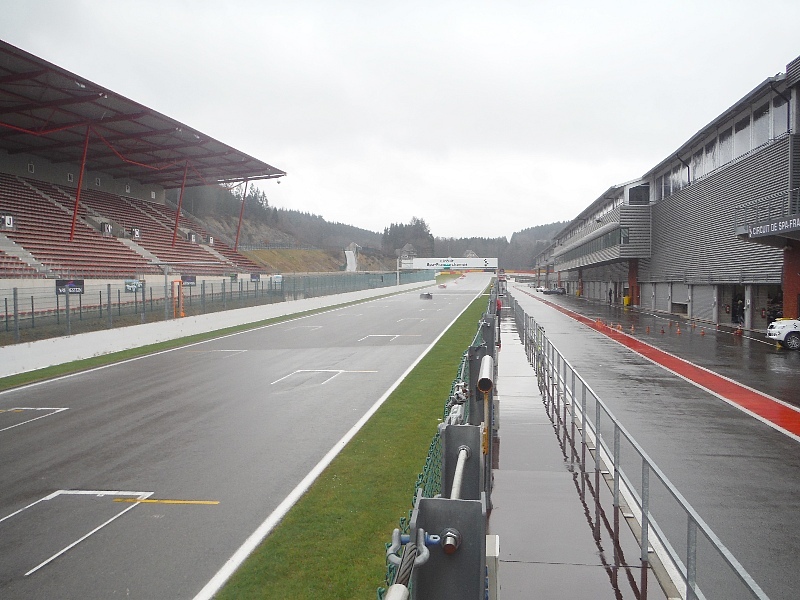
But, Spa Francorchamps, which was our next stop, (about 60 miles North of the Ring), but in Belgium, DO remain in my opinion “the nicest track of the World”. It was so great to spend another track day here, even if (very) rainy all day long. Sure driving Spa on a very wet day is quite hectic, (..with no rain tires !) but, it is still fabulous. I would recommend to all of you, traveling in Europe, to look at this track, with priority #1 and trying to get organized to spend a track day here.
Nothing can beat that !
The track (start line, and at the end of the straight, Turn 1 : La Source hairpin) and the pit lane, with great huge boxes. I.e.: you can unload the car off the trailer, ..having the trailer, (and the towing vehicle) ..inside the box !!
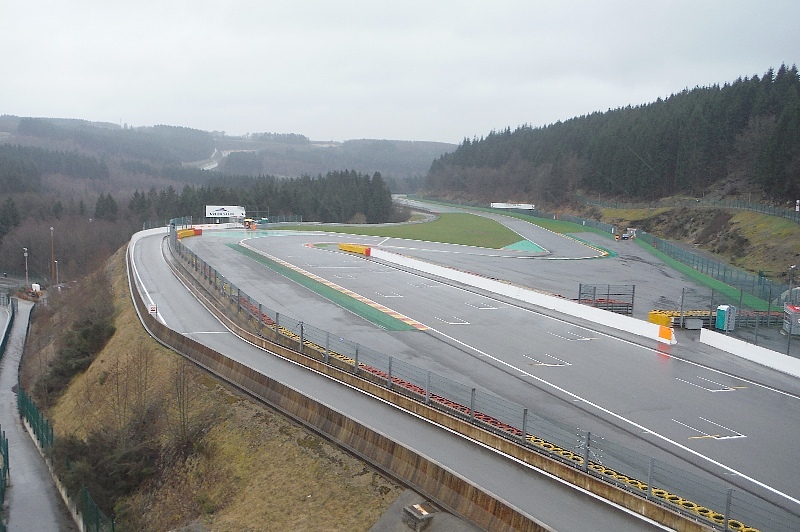
The “Chicane” with pit lane entry :
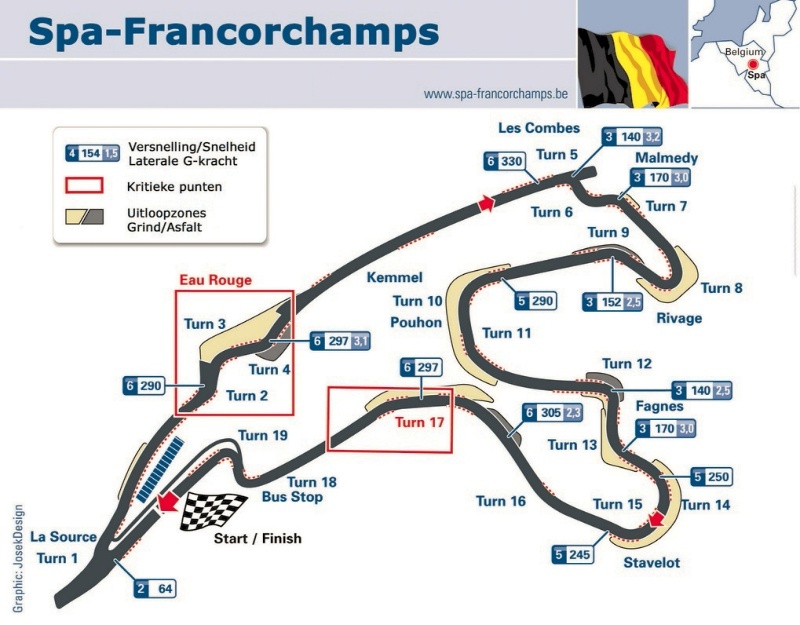
About “Beautiful Spa”, I would like to try (..off topic again !!) to illustrate this track that I consider personally as one of the nicest track of the World.
Let start with a pretty good track map :
Then, some photos directly from the track :
In the early morning, we did few laps, being two in the car (we normally never do that !), this to “re-memorize it” a bit.
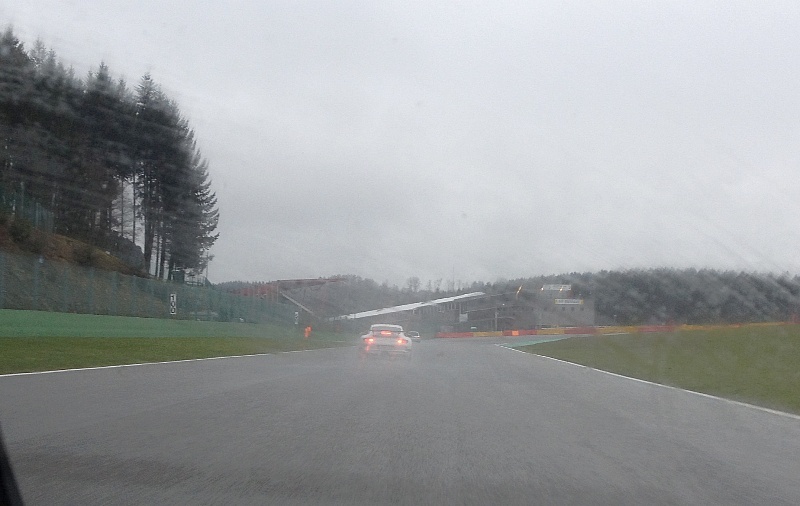
So, I was able to take some picture (only had my iPhone with me at that time, so quality is “so-so”), but still, it could gives (I hope !!) some idea of this great track.
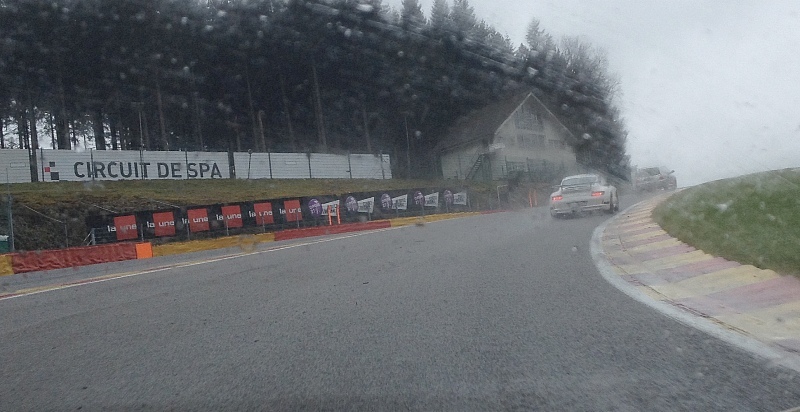
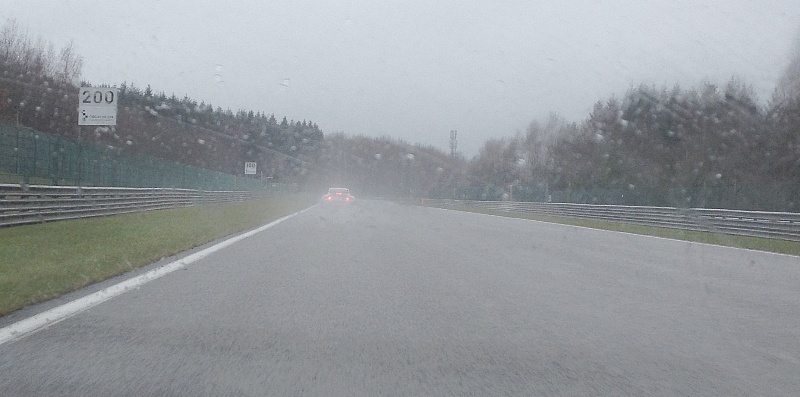
After la Source (hair pin, turn 1) going downhill in the front of the old pits, to take Eau Rouge. We can see the Raidillon
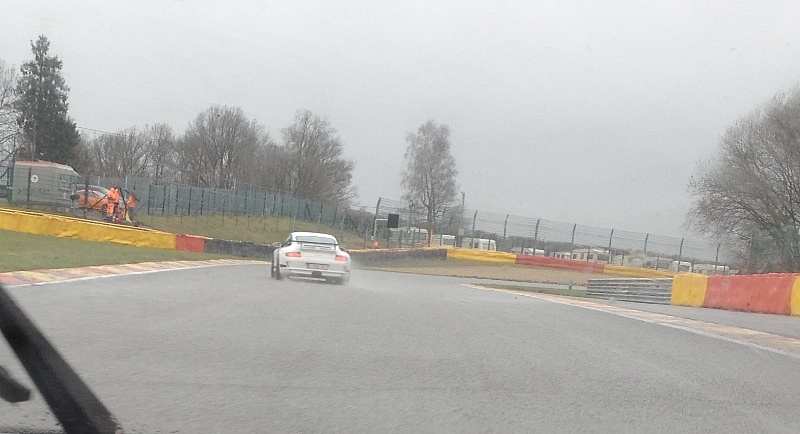
In the Raidillon, just before Kemmel (the longest) straight :
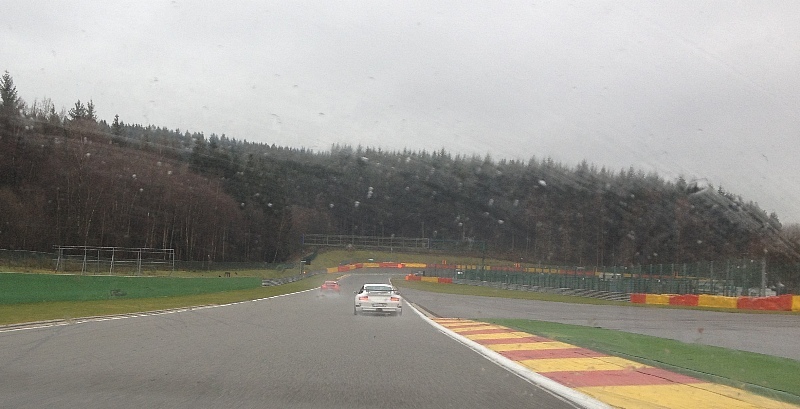
In the Kemmel Straight, not much view in the back of this GT3 Cup !
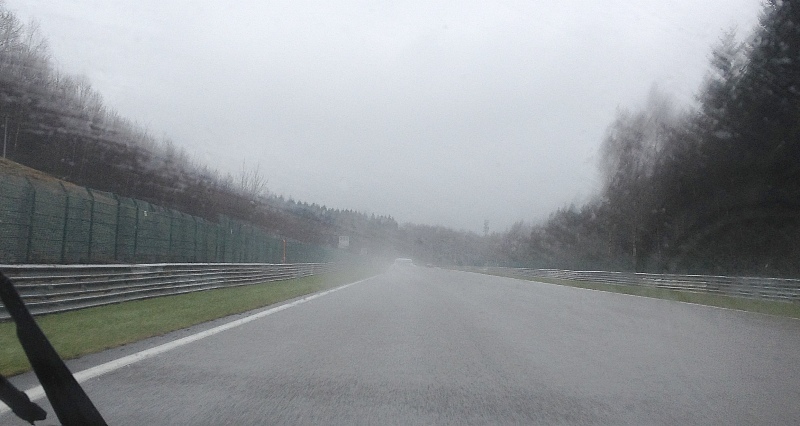
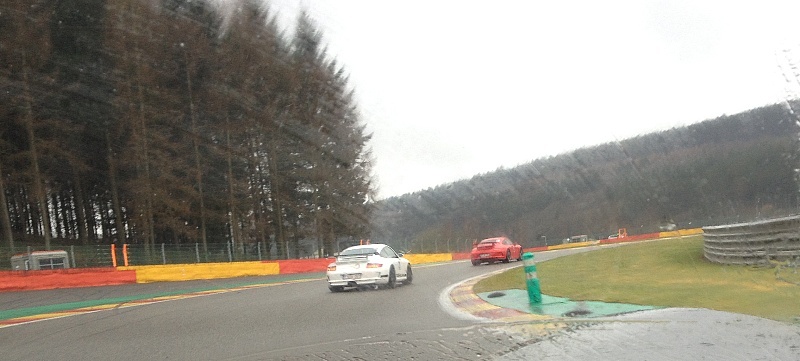
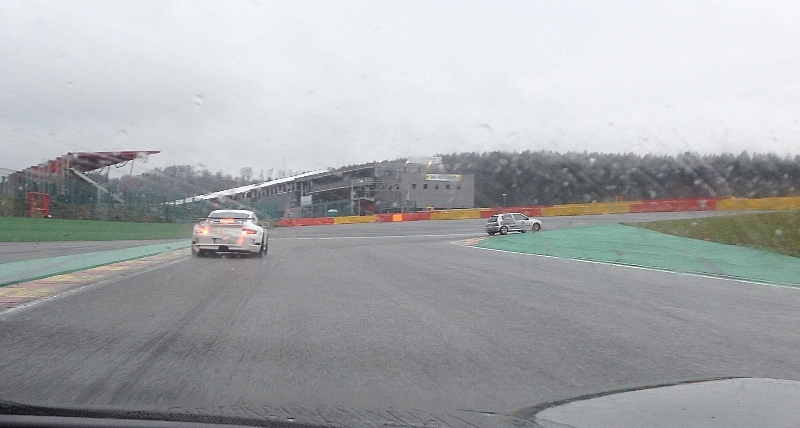
The braking point on Kemmel straight, before taking “Les Combes” (turn 5) :
Entering Malmedy, the turn 7 :
Exiting turn 11 down to Fagnes (turn 12) :
Turn 14 :
Before Turn 18
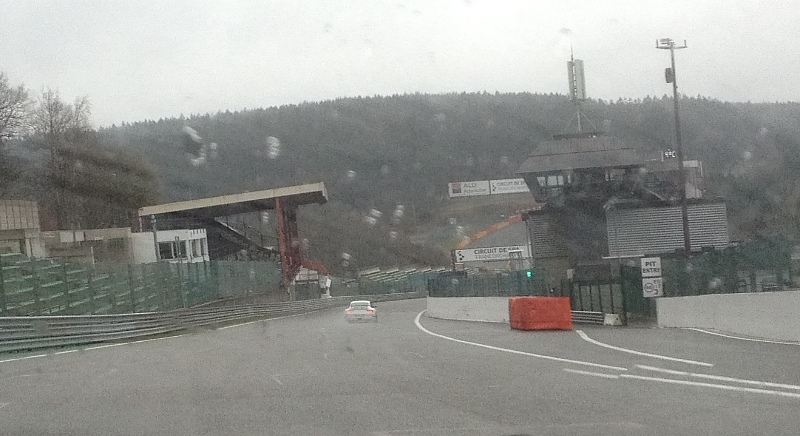
Entering Turn 18, “the Bus stop”, and then chicane and the new main pits
All of that to report that the “Ring” track (that I still do NOT like at all !) is getting even worse, i.e.: the asphalt really becomes in a quite bad shape.
So, beside being very narrow, having 60 percent of the (about 150) curves being blind, and for sure, no flagmen at all on this place, I still let you think “what” it is !
Ah, for sure, the infrastructure is awful, i.e.: such a mess to unload a car of a trailer, and doing this in the dirt. This is just in line about what I think about this place.
(Btw: yes, I did refused to drive nor to enter in the car to do some laps.)
Here, a view of the entrance, where you buy laps in advance, (29 €/lap) in the “ticket office”, and then at the gate, you open it, by using this card :
Note that you have to exit before re-entering in order to be able to do your next lap ! (quite fun, right ?)
But, Spa Francorchamps, which was our next stop, (about 60 miles North of the Ring), but in Belgium, DO remain in my opinion “the nicest track of the World”. It was so great to spend another track day here, even if (very) rainy all day long. Sure driving Spa on a very wet day is quite hectic, (..with no rain tires !) but, it is still fabulous. I would recommend to all of you, traveling in Europe, to look at this track, with priority #1 and trying to get organized to spend a track day here.
Nothing can beat that !
The track (start line, and at the end of the straight, Turn 1 : La Source hairpin) and the pit lane, with great huge boxes. I.e.: you can unload the car off the trailer, ..having the trailer, (and the towing vehicle) ..inside the box !!
The “Chicane” with pit lane entry :
About “Beautiful Spa”, I would like to try (..off topic again !!) to illustrate this track that I consider personally as one of the nicest track of the World.
Let start with a pretty good track map :
Then, some photos directly from the track :
In the early morning, we did few laps, being two in the car (we normally never do that !), this to “re-memorize it” a bit.
So, I was able to take some picture (only had my iPhone with me at that time, so quality is “so-so”), but still, it could gives (I hope !!) some idea of this great track.
After la Source (hair pin, turn 1) going downhill in the front of the old pits, to take Eau Rouge. We can see the Raidillon
In the Raidillon, just before Kemmel (the longest) straight :
In the Kemmel Straight, not much view in the back of this GT3 Cup !
The braking point on Kemmel straight, before taking “Les Combes” (turn 5) :
Entering Malmedy, the turn 7 :
Exiting turn 11 down to Fagnes (turn 12) :
Turn 14 :
Before Turn 18
Entering Turn 18, “the Bus stop”, and then chicane and the new main pits
Last edited by GVA-SFO; 09-07-2020 at 04:26 AM.
05-03-2016, 07:21 PM
#66
Rennlist Member
Thread Starter
Long time, no post !
Just back from Europe after some very nice trips across the "land".
Again, about Spa Francorchamps, do not forget to take a look this week-end, Porsche (i.e.: the 919) and Audi (with the fast and great oil burner), will compete for the second race of the year in the WEC series, ..on this super fabulous track.
Just a dream to have been on this track again.
About the Boxster, no new modifications yet, but it is true that I’m getting prepared to upgrade my front brakes, (going “big brakes” 6 pistons) but, trigger is not pulled at this time !
Well, hard to bring in more power, so, let put more brake (first !!!)
The only very little news : When I was in Gibraltar, I walked on the front of a nice Chopard store, ..and got a great key holder for the Boxster.
I felt this would be a nice “sponsor tribute”, (thinking about the "Chopard" stickers on the 919 !) but, for sure, my left wrist still have the same watch brand, also made in Geneva, ..but, from another company !
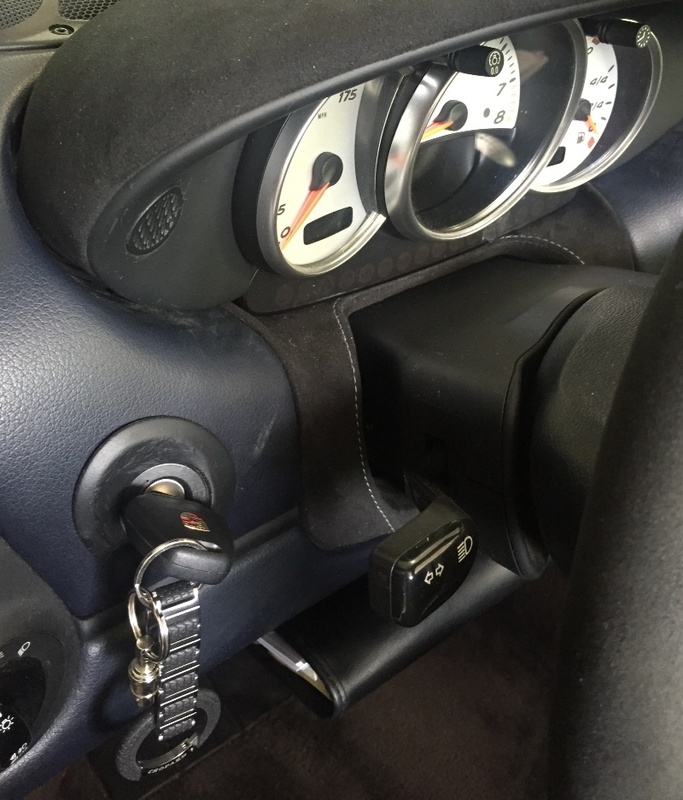
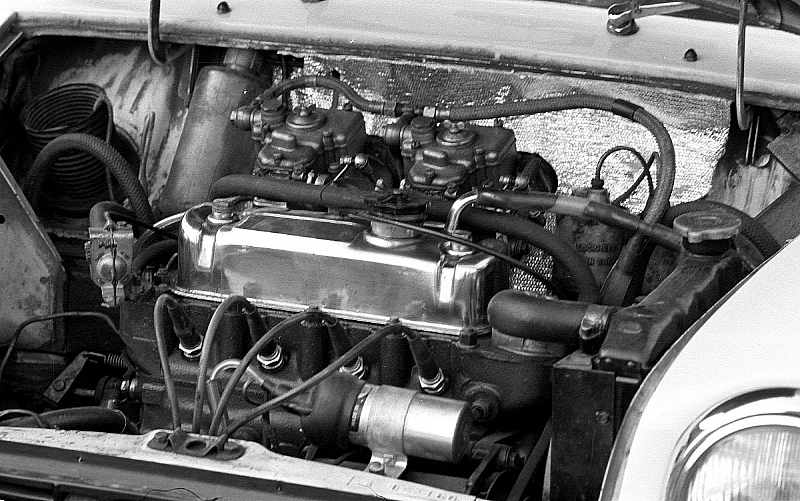
By the way, the rubber design from Chopard let me remember about the tires design, that I had on my very first car, ..45 years ago (i.e.: Dunlop Racing green dot), see, ..it is the same ! :
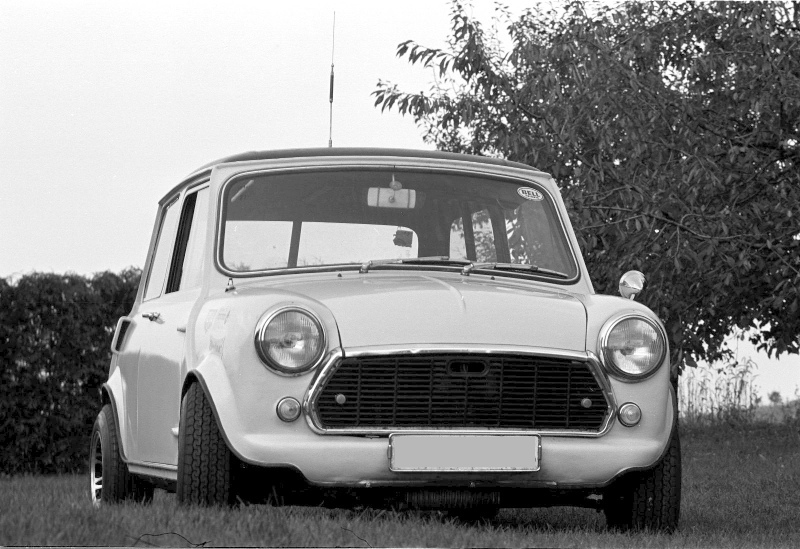
May be, you could ask why i was using racing tires on a Mini ?
Well, the engine was quite a machine ! It was one of the very rare engine used by the BMC (factory team) when Mini was winning the Monte Carlo Rallye.
Then, this engine, a "1299cc", was bored and rebored, and most probably end up well over 1300cc, so, this is how, it became "available". I bought it from a Mini racing specialist team in Geneva, called "Baumann & Schutz", that had very strong ties with BMC (they had 3 of these engines), and after multiple requests, I was finally able to get one, installed in my car, with all the front and rear semi-chassis. It was a hell of a car, with extremely short gears ratio. I think at 100mph, I was close to 7'000rpm ! Btw, no limiter, ..except keeping on mind the cost to rebuild it ! Here is a photo of what was under the hood. (Those of you knowing about these old Mini should recognize well this very rare engine.)
About these (old) tires, a funny story : These Dunlop Racing tire were very hard to find at that time (early 70’) in Switzerland, and my source was a company near Z�rich, named “Horag Racing”.
Recently, during a RennSport Reunion, I was walking in the pits, to take a look at one of my favorite car, i.e.: a RS Spyder. And, the car in question did carry “Horag Racing” paintings.
Asking if Mr. Markus Hotz was around, and found him, we had a great talk about this tires, and he told me, “funny, I do remember well, as you were one of our very first customer” !
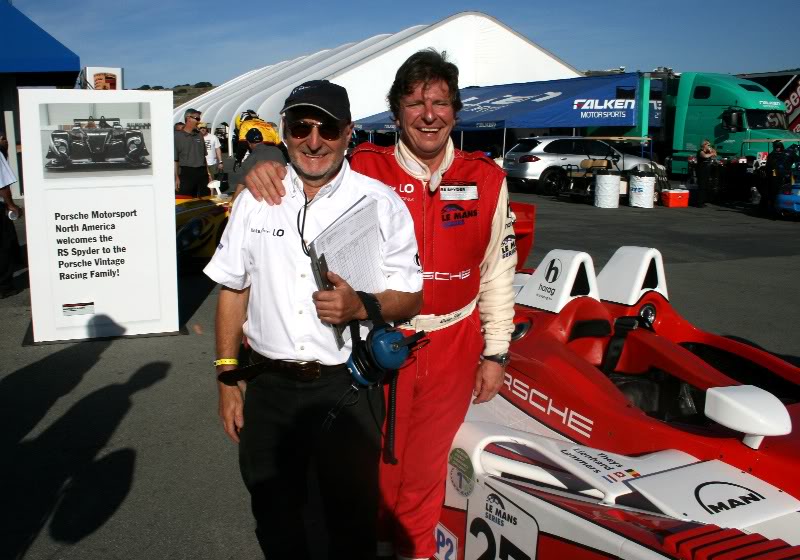
Here a great picture of that day, with the RS Spyder, Markus Hotz (owner of Horag Racing) together with the winner of the RS Spyder series during this Porsche Reunion : Didier Theys. (The car owner was Fredy Lienhard, also owner of Lista.)
(Personal photo, a pose organized with Markus and Didier, after his winning series)
So, yes, the story of these tires had a long path, ..going back to a great Porsche !
Note that this was the chassis #2008/711 Evo, originally #711 was the spare chassis of the #707 and, after retiring 707, this chassis has been “fully equipped” to become a complete car (i.e.: n�27 RRIV Monterey 2011). The original owner of #707 (and #711) was Mr. Fredy Lienhard, (owner of LISTA) who did a lot of races together with Didier Theys and others famous drivers. I know that since some time, #711 has been sold.
Note : the original (RS Spyder) #707 is still owned by Mr. Fredy Lienhard and is visible on his private Museum (and incredibly nice place to visit) called Autobau and located in Romanshorn, in Switerland (Btw, do not miss such visit if you are near by. See : https://www.autobau.ch/)
Just back from Europe after some very nice trips across the "land".
Again, about Spa Francorchamps, do not forget to take a look this week-end, Porsche (i.e.: the 919) and Audi (with the fast and great oil burner), will compete for the second race of the year in the WEC series, ..on this super fabulous track.
Just a dream to have been on this track again.
About the Boxster, no new modifications yet, but it is true that I’m getting prepared to upgrade my front brakes, (going “big brakes” 6 pistons) but, trigger is not pulled at this time !
Well, hard to bring in more power, so, let put more brake (first !!!)
The only very little news : When I was in Gibraltar, I walked on the front of a nice Chopard store, ..and got a great key holder for the Boxster.
I felt this would be a nice “sponsor tribute”, (thinking about the "Chopard" stickers on the 919 !) but, for sure, my left wrist still have the same watch brand, also made in Geneva, ..but, from another company !
By the way, the rubber design from Chopard let me remember about the tires design, that I had on my very first car, ..45 years ago (i.e.: Dunlop Racing green dot), see, ..it is the same ! :
May be, you could ask why i was using racing tires on a Mini ?
Well, the engine was quite a machine ! It was one of the very rare engine used by the BMC (factory team) when Mini was winning the Monte Carlo Rallye.
Then, this engine, a "1299cc", was bored and rebored, and most probably end up well over 1300cc, so, this is how, it became "available". I bought it from a Mini racing specialist team in Geneva, called "Baumann & Schutz", that had very strong ties with BMC (they had 3 of these engines), and after multiple requests, I was finally able to get one, installed in my car, with all the front and rear semi-chassis. It was a hell of a car, with extremely short gears ratio. I think at 100mph, I was close to 7'000rpm ! Btw, no limiter, ..except keeping on mind the cost to rebuild it ! Here is a photo of what was under the hood. (Those of you knowing about these old Mini should recognize well this very rare engine.)

About these (old) tires, a funny story : These Dunlop Racing tire were very hard to find at that time (early 70’) in Switzerland, and my source was a company near Z�rich, named “Horag Racing”.
Recently, during a RennSport Reunion, I was walking in the pits, to take a look at one of my favorite car, i.e.: a RS Spyder. And, the car in question did carry “Horag Racing” paintings.
Asking if Mr. Markus Hotz was around, and found him, we had a great talk about this tires, and he told me, “funny, I do remember well, as you were one of our very first customer” !
Here a great picture of that day, with the RS Spyder, Markus Hotz (owner of Horag Racing) together with the winner of the RS Spyder series during this Porsche Reunion : Didier Theys. (The car owner was Fredy Lienhard, also owner of Lista.)
(Personal photo, a pose organized with Markus and Didier, after his winning series)
So, yes, the story of these tires had a long path, ..going back to a great Porsche !
Note that this was the chassis #2008/711 Evo, originally #711 was the spare chassis of the #707 and, after retiring 707, this chassis has been “fully equipped” to become a complete car (i.e.: n�27 RRIV Monterey 2011). The original owner of #707 (and #711) was Mr. Fredy Lienhard, (owner of LISTA) who did a lot of races together with Didier Theys and others famous drivers. I know that since some time, #711 has been sold.
Note : the original (RS Spyder) #707 is still owned by Mr. Fredy Lienhard and is visible on his private Museum (and incredibly nice place to visit) called Autobau and located in Romanshorn, in Switerland (Btw, do not miss such visit if you are near by. See : https://www.autobau.ch/)
Last edited by GVA-SFO; 09-07-2020 at 04:23 AM.
05-13-2016, 06:53 PM
#67
Rennlist Member
Thread Starter
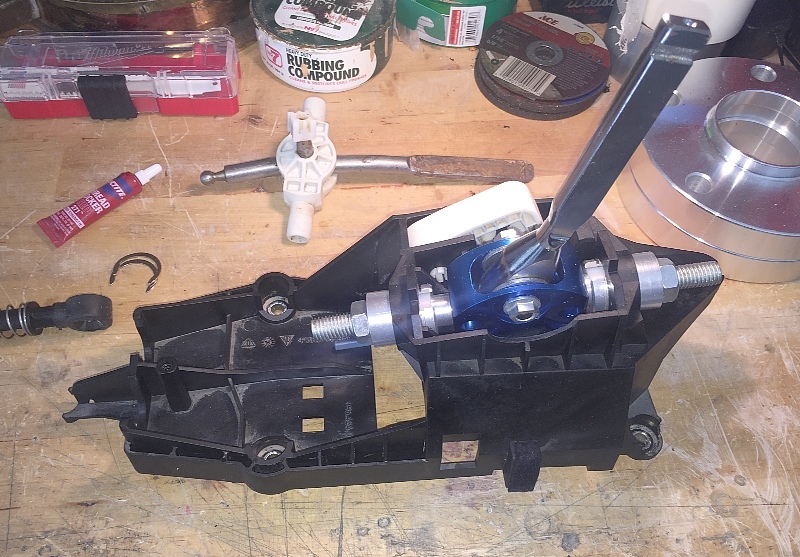
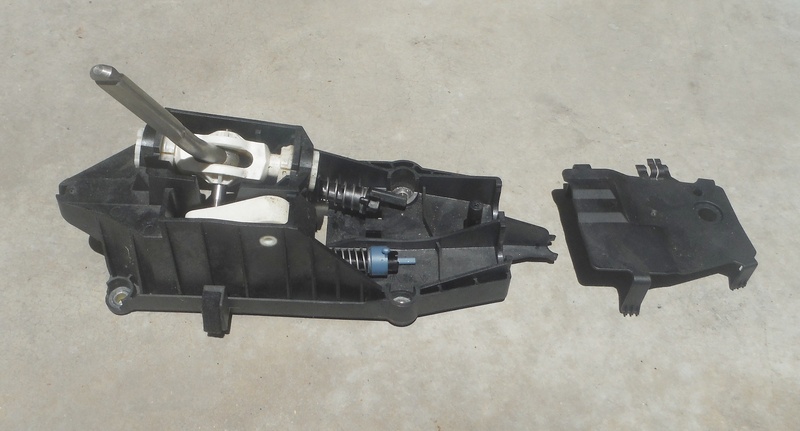
In the mean time, a �side work� on the future installation of a short throw shifting kit. The goal is also to do some work to eliminate the play, ..some of it, created by more of 60�000 miles of shifting !
In order to have all the time to fine tune the mounting, I bought a used (super low miles) OEM shifter base.
I found that the install of such kit do require some good preparation in order to have all in good shape and insure the minimal play.
I even had some �Dremel adjustments� to have a fit that would makes me happy. Next step is going to have an adequate greasing and then having all the critical nuts being thread locked. I want the minimal play and, for sure, I do not want to be back here because something become loose down there. ..It would not be a real pleasure to remove everything in the center console to do such �fixing� again !
Then it would be ready for the install one of these days !
Note that I did seriously hesitate to buy a more complete kit, i.e.:
http://www.tarett.com/items/986-987-...-cs-detail.htm
But, I was not sure that such kit would enable to have everything under the OEM center console. (It looks like the common use of such high end kit, is without the presence of any center console !
05-22-2016, 03:43 PM
#68
Rennlist Member
Thread Starter
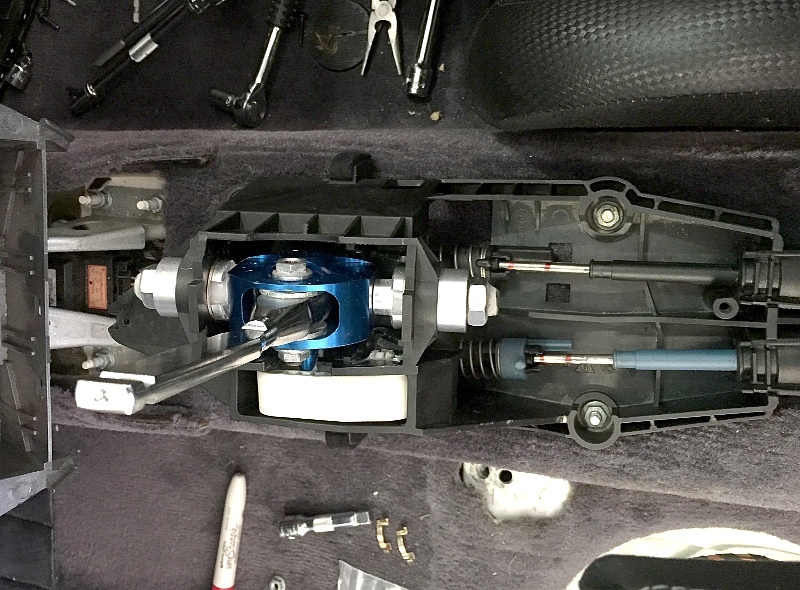
After fine tune and adjustments, then thread lock and greasing, and : now, time to install it.
Well, a good half of afternoon of this week-end (I'm not so fast !) was needed. Removing the center console is really NOT something that is pleasant to do !
I did removed the bottom part of the “upper/front center console” and the driver seat as well, to try to make it a bit easier, still !
Here is now the piece in place :
The very important comment is : “Why the hell, I did not made this "mod” earlier ??”
The results are fantastic, no more play, accurate shifting, all is real as this car must be for shifting. I really recommend this mod big time.
Everything back in place, again, such a GREAT mod to have, ..it feels really really good :

Last edited by GVA-SFO; 05-28-2016 at 07:29 PM.
05-28-2016, 07:39 PM
#69
Rennlist Member
Thread Starter
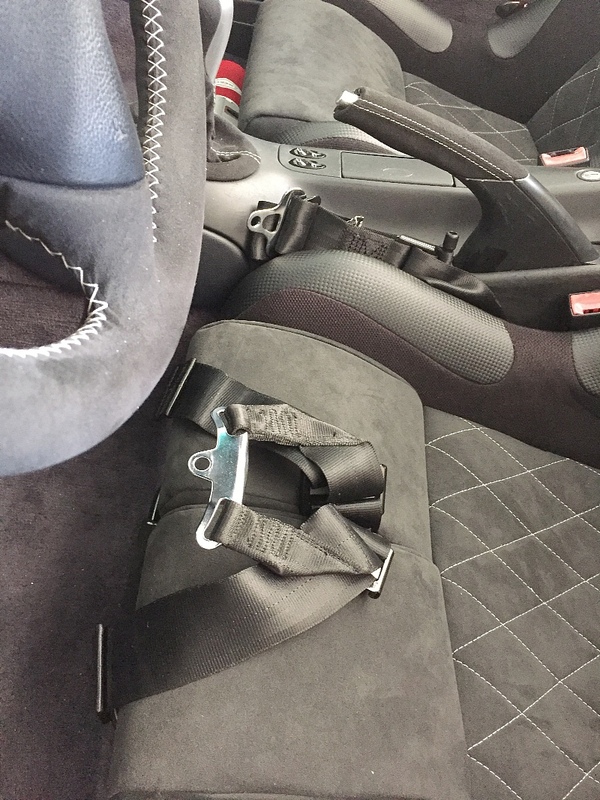
As I had to remove the driver seat, I decided to spend some time, working on the Sparco side plates to create an “antisub fixation bar”, that would fit under the Sparco, and be attached on the side mounting plates of the seat.
I used aluminum to make it, so, it is not too heavy.
When I did remodel the inside cushions of the Sparco, I asked to get the front cushions of the driver side to be split in two separated pieces, so the 5th and 6th point of the Schroth harness can go through and be at the desired place. When not in use, it is super easy to hid these under the cushions, they do fold under the front of the seat and do not disturb at all.
The mounting that I made, using removable pins does not seem to be needed yet. At least, I can remove them if needed !


Last edited by GVA-SFO; 05-28-2016 at 10:09 PM.
 06-13-2016, 06:17 PM
#71
Rennlist Member
Thread Starter
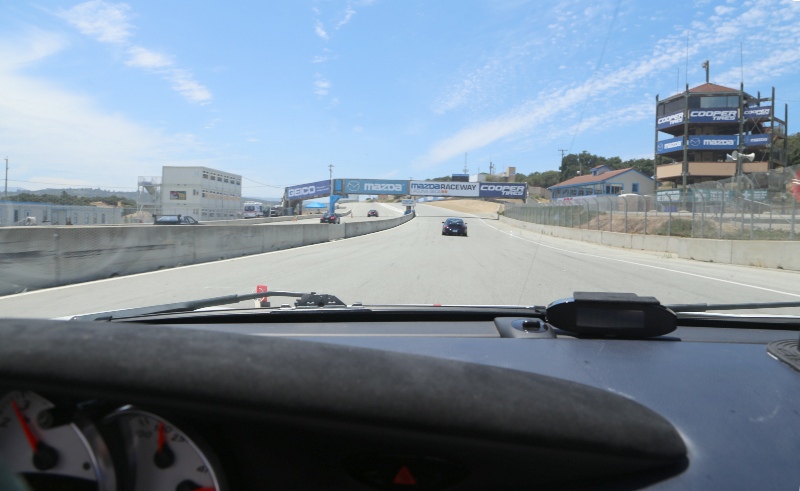
Very happy to be in Laguna Seca again.
This time, with PCA GGR.
Had some troubles at the beginning of the Session 2, as I learnt that the PCA rules are set in such way that if you run with the top down (..I do not have a top in my car anymore !!), than you have to have Arm Restraints !)
I do have a set of these, but, I can tell you that they stays at home !
Also, another rule of PCA is that in any group, you have to “Point to Pass”. When I think that “Point to Pass” is a good and very safe thing for any friendly DE event, I wonder how you can “point” ..with arm restraint attached !!!!
So, if I want to go to another PCA event, then I have to have a roof again !!
But, I do not like roofs and frankly, I think that in case of serious problem, I have very serious doubts that a thin piece of fiberglass, ..or a piece of canvas, would make any “differences” over a no roof situation.
(I even think that a thin piece of fiberglass can even been more dangerous than ..no fiberglass at all !)
Well, the rules are the rules, but, ..in a democracy, ..we have the right to discuss these, right ?
PS : “no worries”, I took this picture during the “lunch time parade laps” (very low speed, i.e.: no helmet) !
Last edited by GVA-SFO; 12-14-2016 at 11:06 PM.
06-21-2016, 07:16 PM
#72
Rennlist Member
Thread Starter
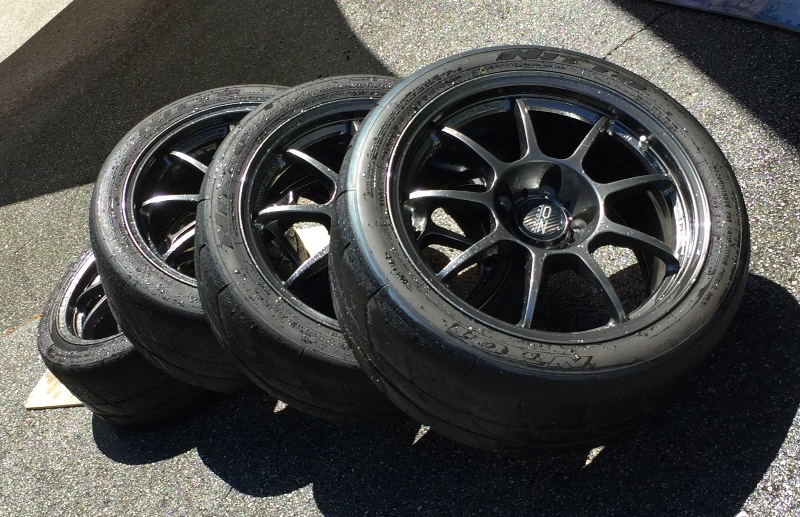
After my decision to not use the Nitto's on open roads anymore (to save them for track days), I did re-commission my old “set”, that I kept "in souvenir" of my last 996.
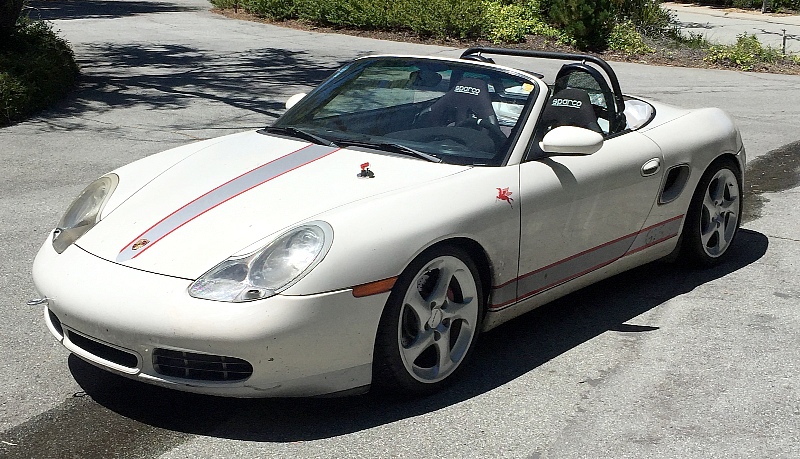
By the way, the front are “hollow” (18x8, ET50) while the back are “solid spokes”, (18x10 ET65). The rear is “half a set” that originally comes from a 996 C4S while the front is another "half of a set", coming originally from a 996 Turbo. Well, to have the tires on these ET65 not touching the tubes of the PSS9, I had to put spacer (to be back on "ET40" !! (or, a little more than 25 mm !! with long bolts). I do not like that so much but, this is an open road config, so, no hard driving, it should be all fine.
I tried to use the rears from from the turbo set (hollow = lighter), but as they are wider (18x11), they would not fit a Boxster, so, I end up selling these, as well as the front that had solid spokes ! Or now, a kind of "hybrid" set.
And this, with the front equipped with PS Sport Plus 225 x 35, not 40, as the usual equipment (with the Billstein in pretty low adjustment, I tend to rub the inside of the fender in turns, so, I decided to try if 35's would be easier on that than 40's !!)
The look is kind of strange, definitively "souvenir of a 996" :
The Nitto are now all clean, ready for one more track day, waiting in the garage !
I also realized, that my front brake pads are getting thin and I really do not like that for track days, as the heat can go too fast from rotors to pistons, and ..to the brake fluid. So, next thing to do, before next track day, is front pads.
I think I will not do “pads alone”, but will go for a “big brake kit”, ..that comes with pads !
(& new 6 pistons calipers together with larger rotors).
By the way, my current rotors are like brand new (zero lip), so, if someone want “S” front calipers together with rotors, ..it will be available soon !
Last edited by GVA-SFO; 07-14-2016 at 02:08 AM.
07-06-2016, 12:55 AM
#73
Rennlist Member
Thread Starter
The next mod is now confirmed as “on the way”.
Checking my pads recently, I found that I'm getting close to end of life, (i.e.: something between an half and a third of pad meat left over). I consider that for a car that spend about a 1/3 of its time on track, I should not have pads that have below 50% of "meat", as the heat from the rotors can then go "too fast" to the pistons, and ..then to the liquid !
Instead of putting new pads, as I had anyway the plan to install big brakes "later", ..this “news” is simply rushing the plan. (Will be back to Laguna Seca in two weeks !!)
It will be interesting too to see the lap gain of such kit ! (Was in Laguna Seca about 3 weeks ago, and nothing else will be different in the car !)
(..and the driver should be still the same slow one !! )
So, very soon my front brakes should be like :
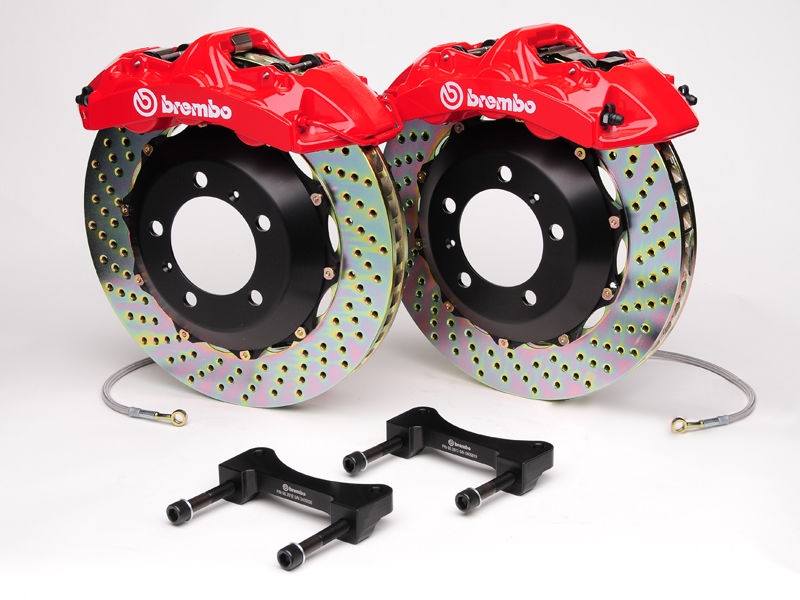
..Or, now, I think the car should be ready for an engine that has more ponies !
Checking my pads recently, I found that I'm getting close to end of life, (i.e.: something between an half and a third of pad meat left over). I consider that for a car that spend about a 1/3 of its time on track, I should not have pads that have below 50% of "meat", as the heat from the rotors can then go "too fast" to the pistons, and ..then to the liquid !
Instead of putting new pads, as I had anyway the plan to install big brakes "later", ..this “news” is simply rushing the plan. (Will be back to Laguna Seca in two weeks !!)
It will be interesting too to see the lap gain of such kit ! (Was in Laguna Seca about 3 weeks ago, and nothing else will be different in the car !)
(..and the driver should be still the same slow one !!
)So, very soon my front brakes should be like :
..Or, now, I think the car should be ready for an engine that has more ponies !
Last edited by GVA-SFO; 07-11-2016 at 02:37 PM.
07-08-2016, 07:24 PM
#74
Rennlist Member
Thread Starter
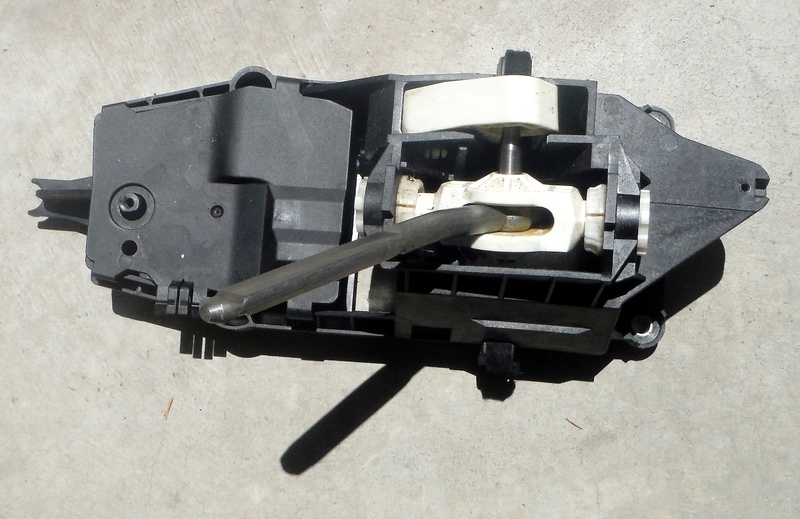
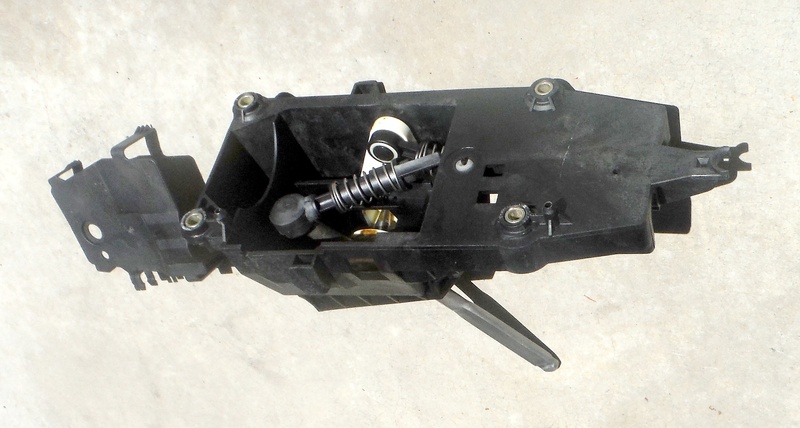
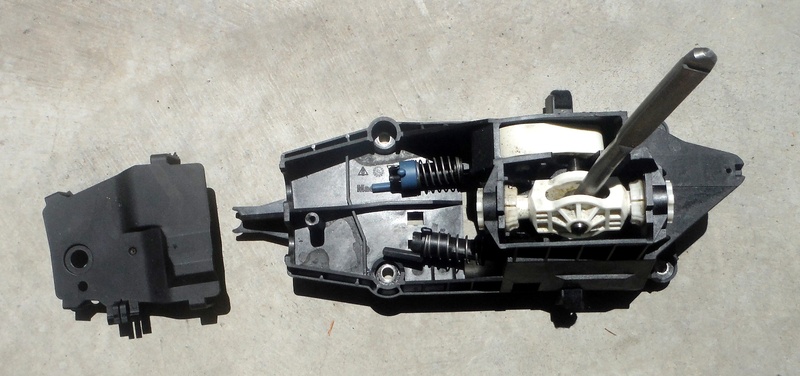
Now, that I have done it (I only regret to not have done this earlier, as it is one the best mod to do to increase the pleasure of driving), my OEM original Shifter kit available, this in order to have time rebuild it with an aluminum short throw kit, and only proceed to the install by “switching” the kits, when all done, installed and tuned on the bench !
Note that I would recommend changing the ball joints (63k miles on this kit) before re-installation.
(Aluminum short throw kits, (not included here), are available on eBay for around US$ 60.00 !)
The first US$ 30 plus effective shipping will take it.
Photos of the actual kit :
Note that I would recommend changing the ball joints (63k miles on this kit) before re-installation.
(Aluminum short throw kits, (not included here), are available on eBay for around US$ 60.00 !)
The first US$ 30 plus effective shipping will take it.
Photos of the actual kit :


Last edited by GVA-SFO; 07-09-2016 at 01:39 AM.