When you click on links to various merchants on this site and make a purchase, this can result in this site earning a commission. Affiliate programs and affiliations include, but are not limited to, the eBay Partner Network.
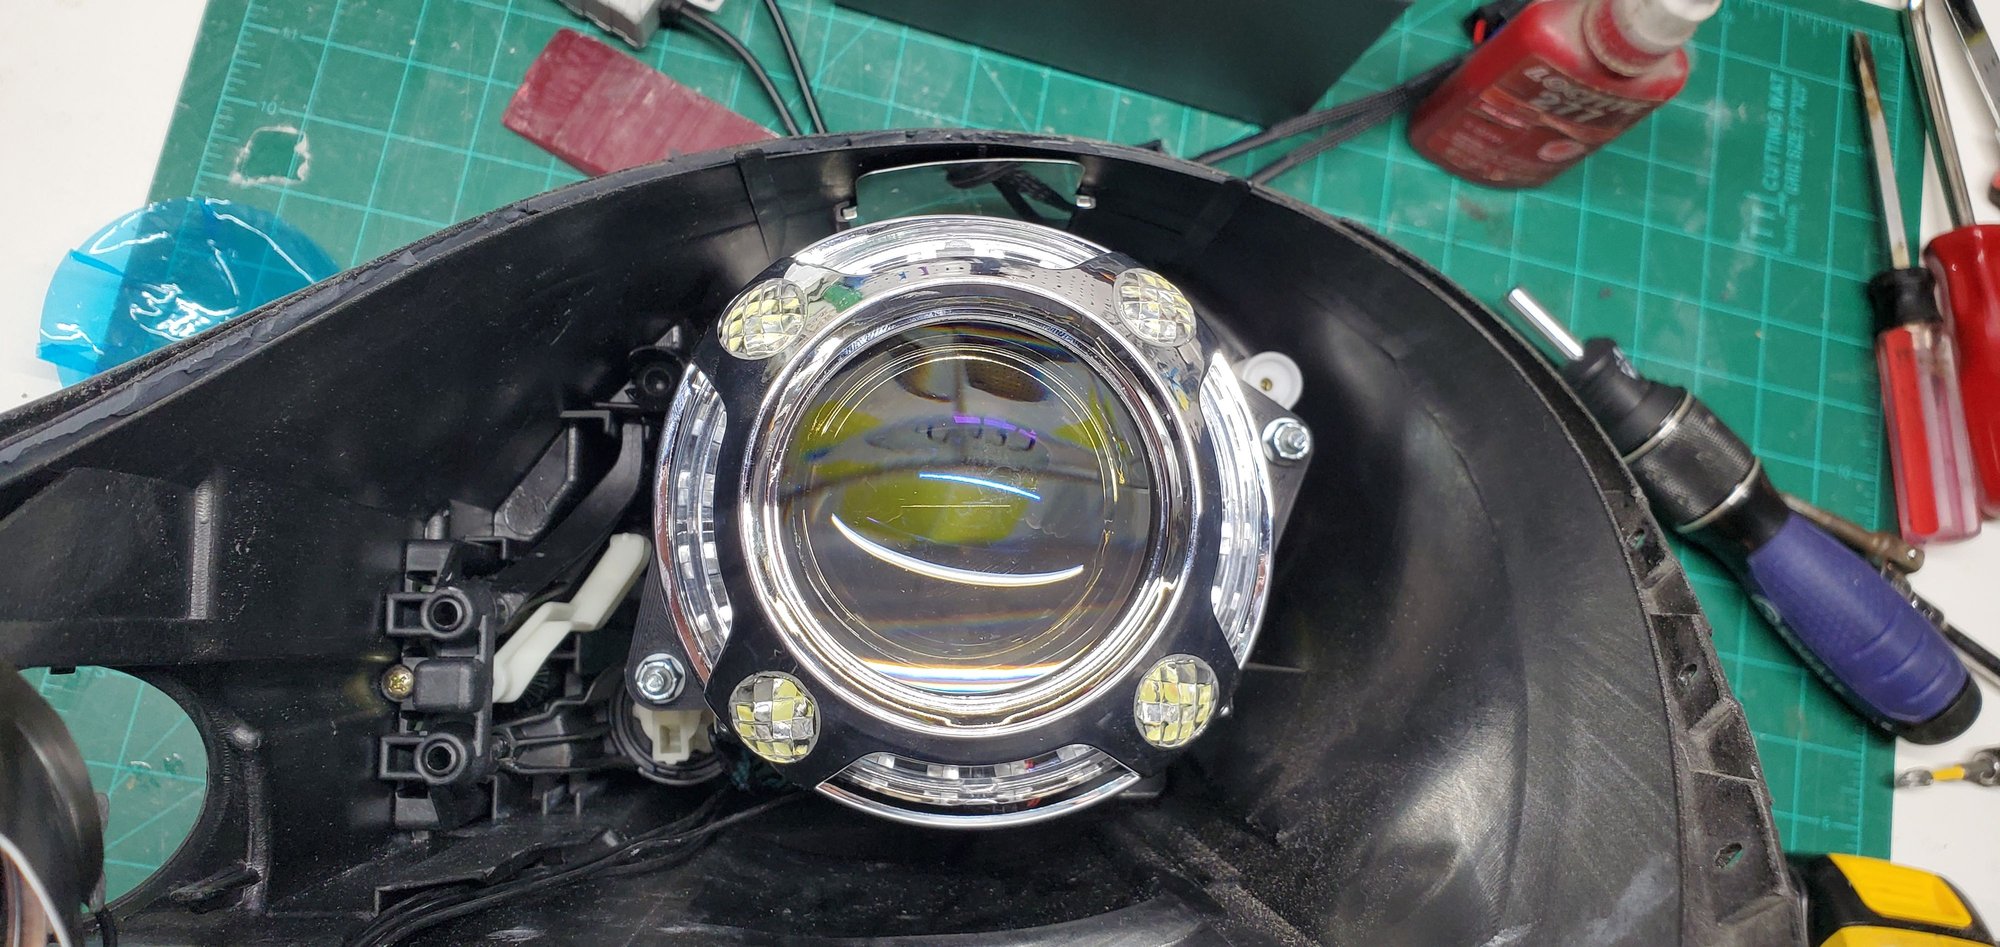
I'm the proud new owner of a 99 Boxster 986.1. I've been having an absolute blast fixing every tiny neglected part on this car and making it my own. I am a huge headlight nerd and every vehicle I've owned for the past 10 years has had a headlight retrofit done to it. This 986 is no exception. I wanted to share what I built for this project. I'm big into 3D printing and I have a business and Etsy store selling mostly life size video game items, but I design all kinds of things all the time. This is a bracket that will allow you to bolt up a Morimoto M.LED 2.0 Projector and reuse the OEM ball joint mounting. You will be able to push this assembly into the factory headlights and maintain all factory alignment features.
Link to part on Printables
Recommended print out of Polycarbonate to withstand headlight temperatures and temperatures needed to assemble/reassemble the headlight housing. Also, I recommend using a large brim to help prevent warping. Print settings I used was 270c/105c @60mm/s with no cooling fan. Printed on PEI sheet.
If anybody without a 3D printer wants a set of these, send me a PM. I'm not sure if forum rules allow me to post a link to my store or not, so please just message me.
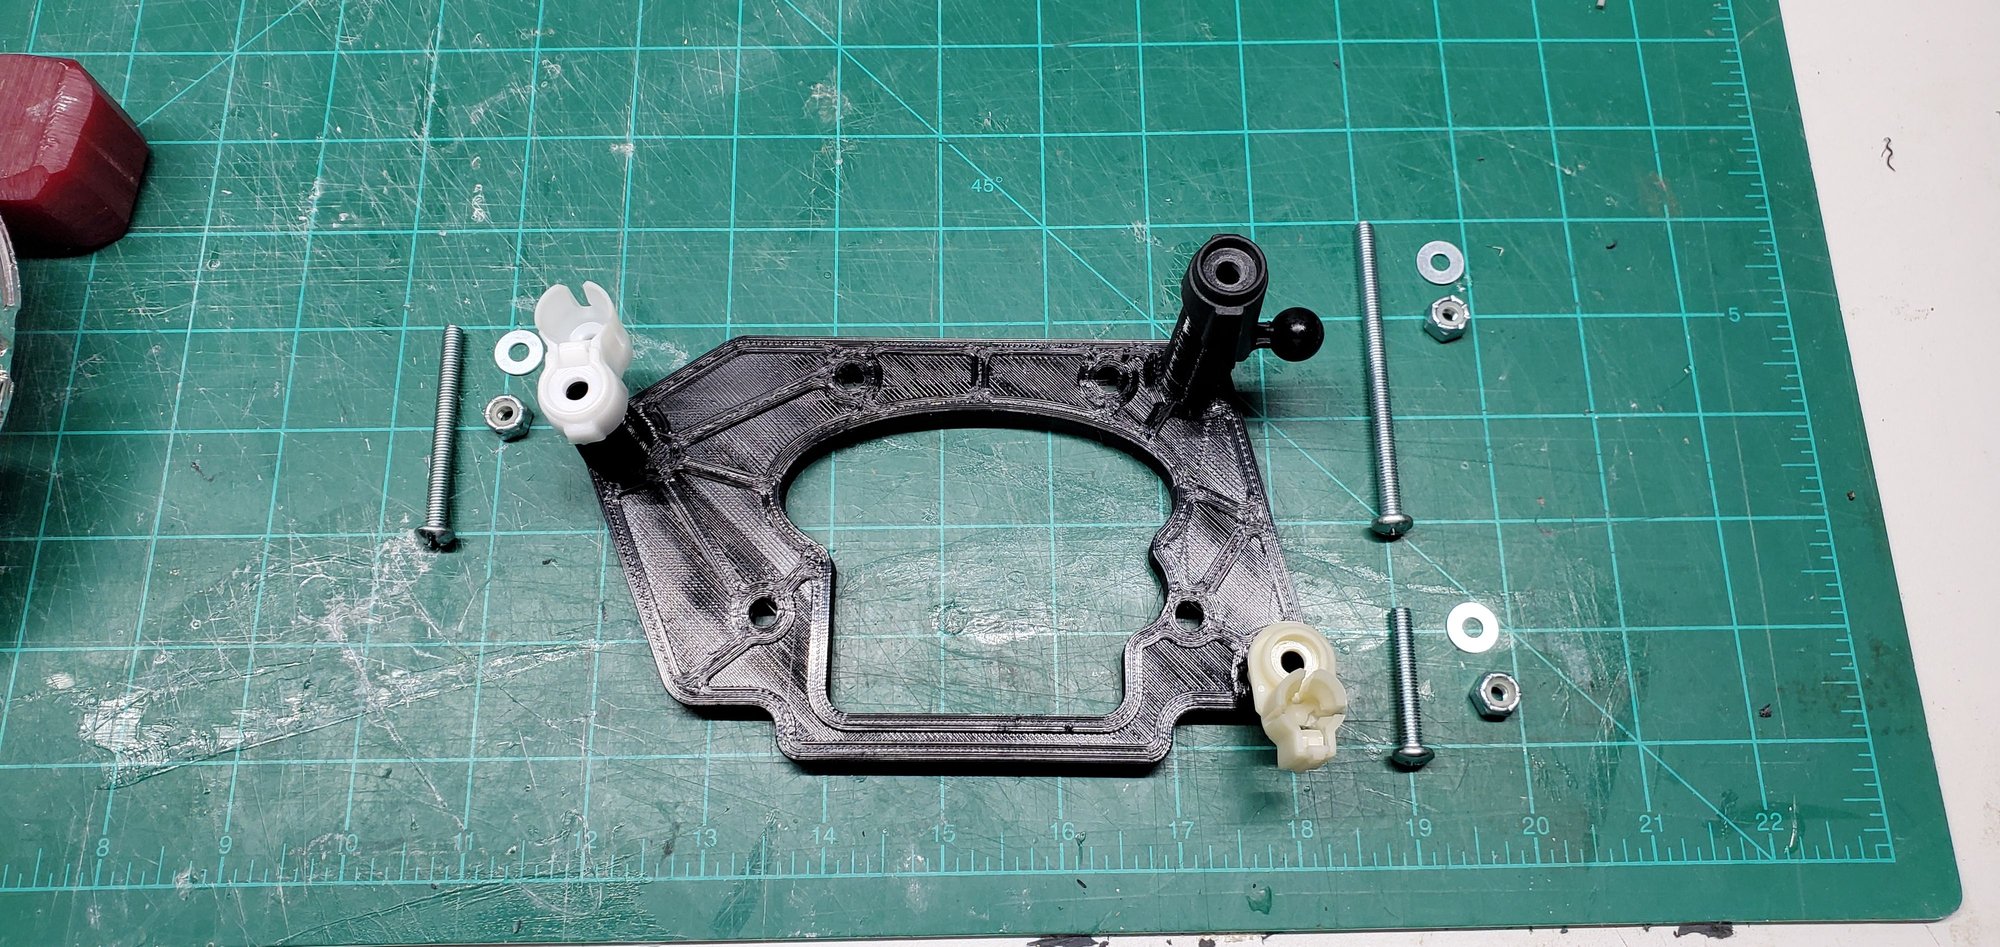
Parts needed
x2 3" 10-32 Machine Screw
x2 2" 10-32 Machine Screw
x2 1.25" 10-32 Machine Screw
x8 .75" 10-32 Machine Screw
x22 #10 Flat Washer
x16 10-32 Nylon Locking Nut
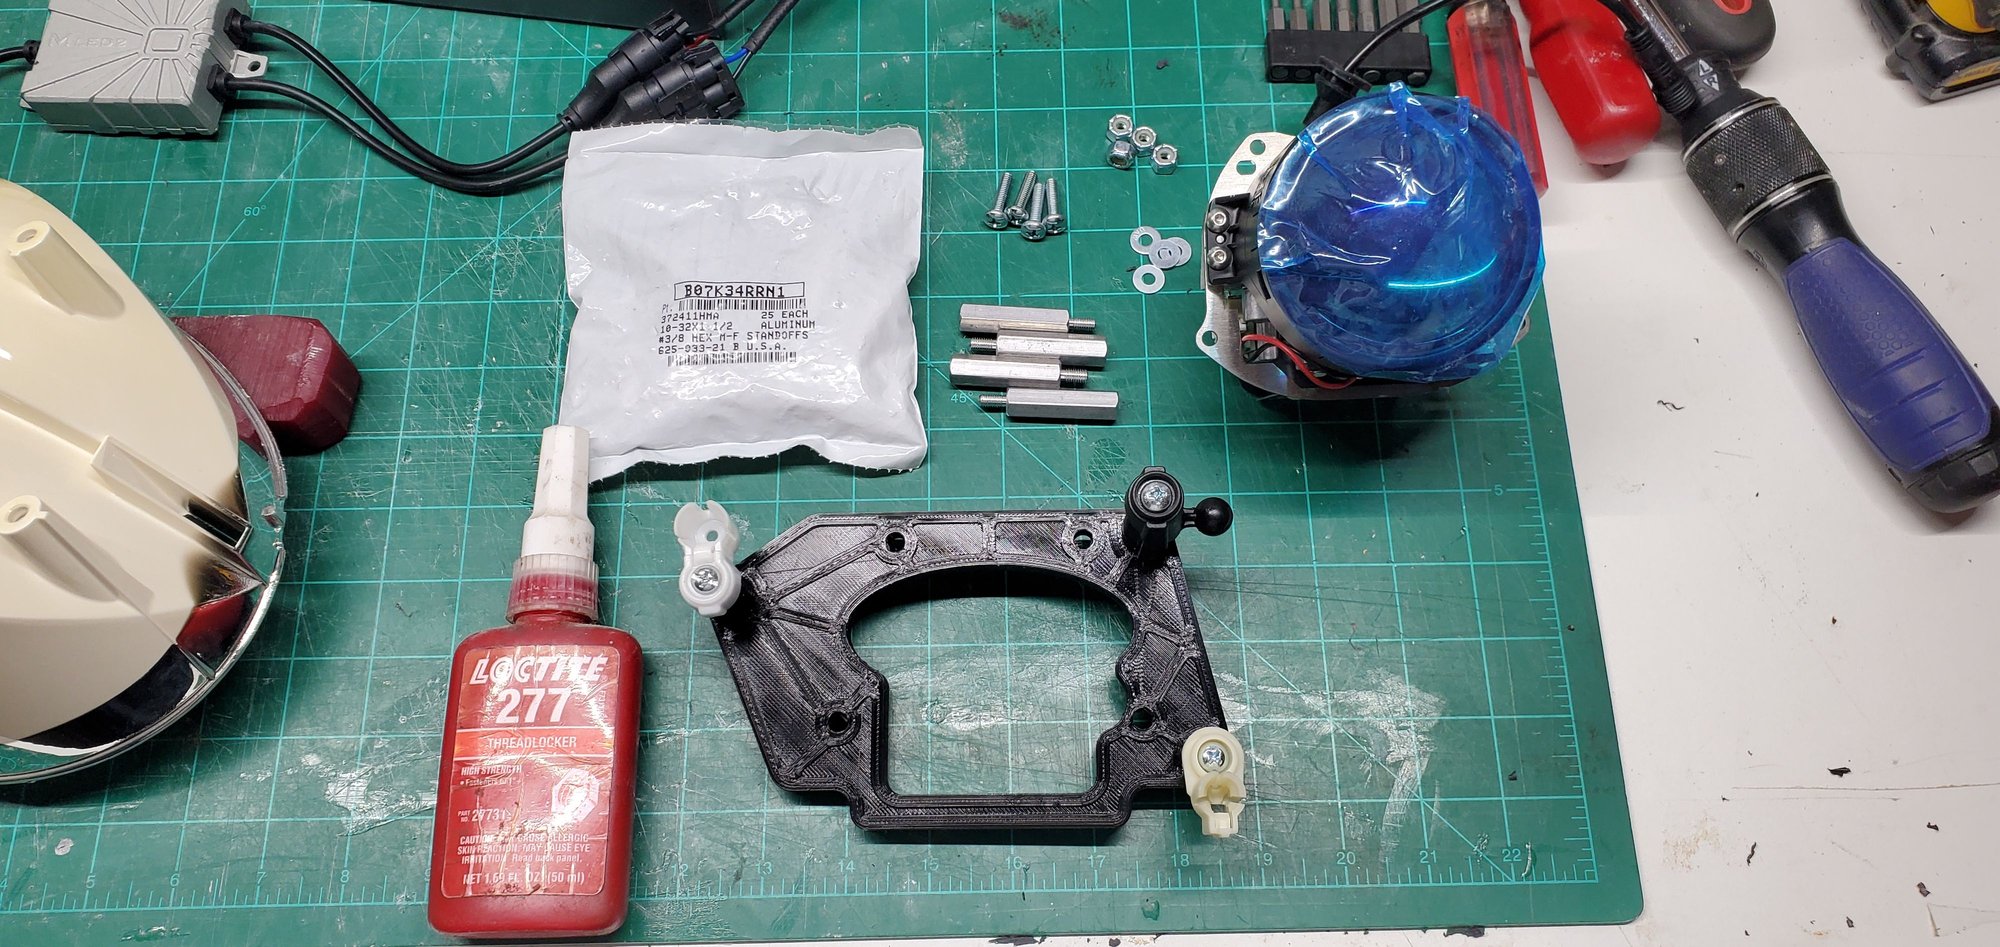
x8 1.5" 10-32 thread HEX Stand Off
Begin by removing the OEM halogen lamp from your headlights.
Remove the Black, White, and Cream ball joints from the back of the halogen lamp. Install them using the 3" 2" and 1.25" 10-32 screws in their matching positions on the 3D printed bracket.
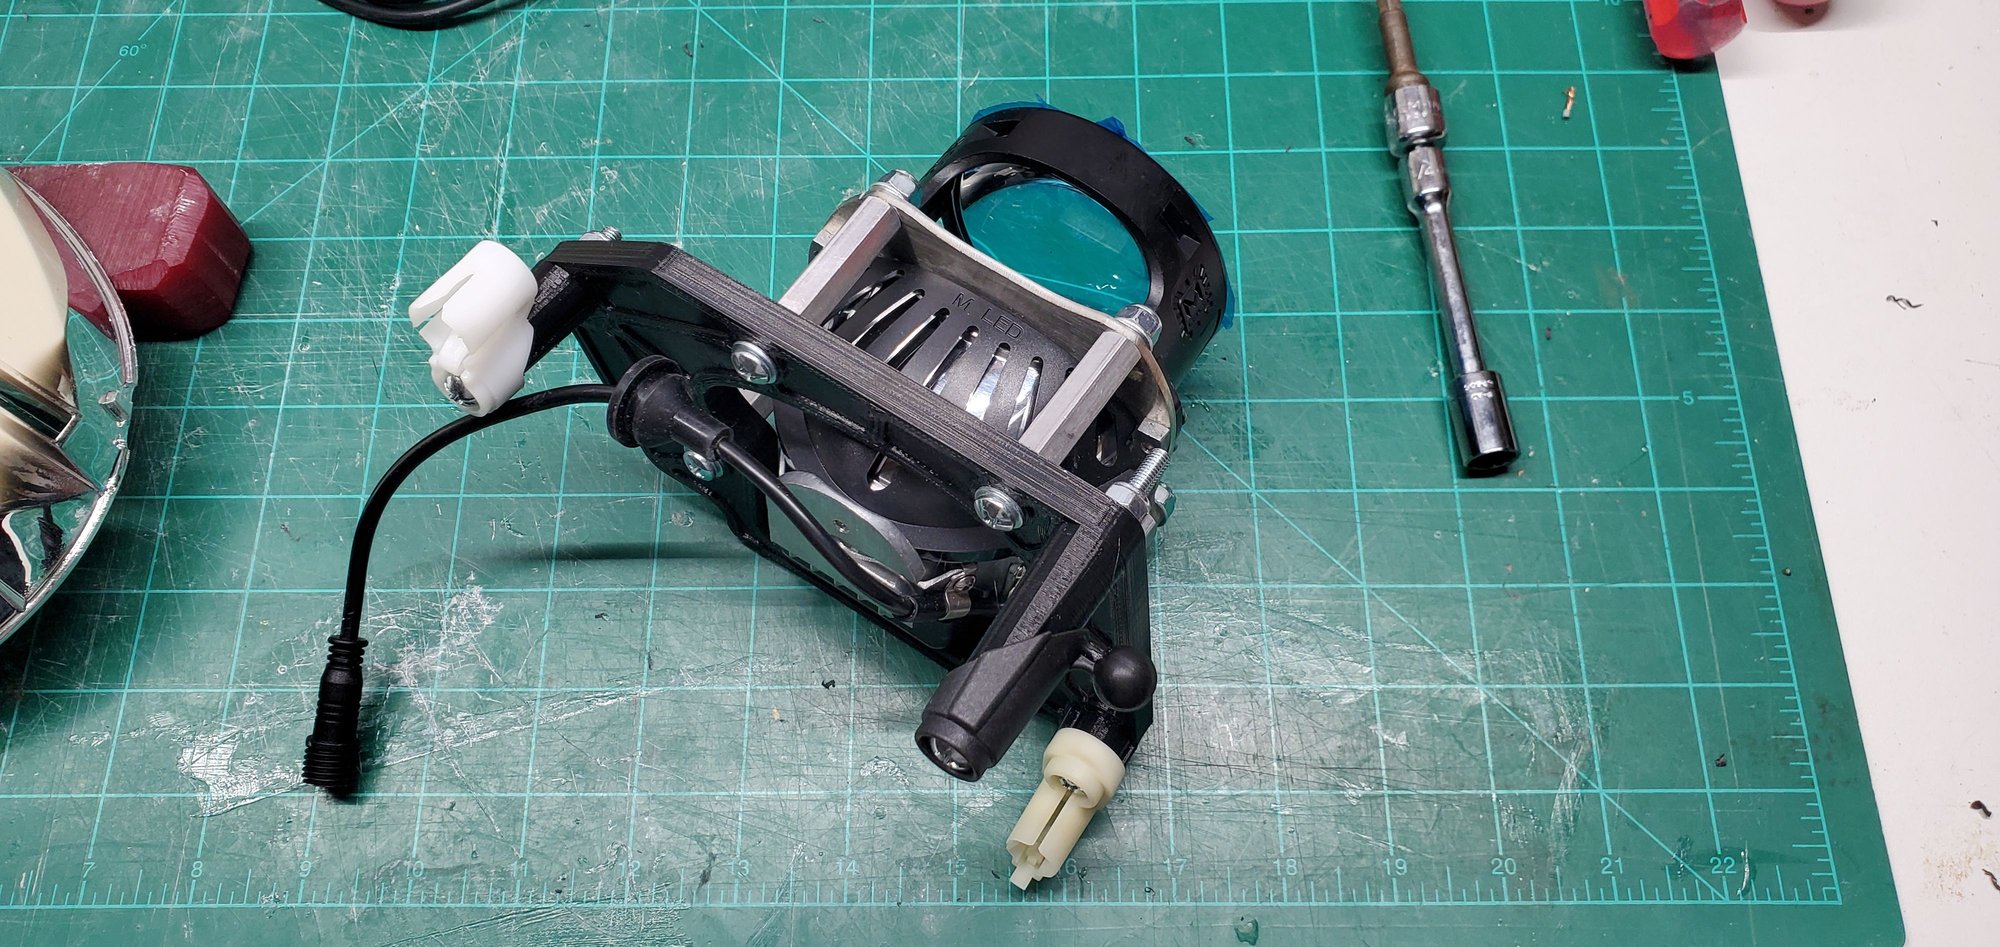
Install the stand offs in the 4 mounting locations on the bracket for the projector. Use a thread lock on these parts.
Install your projector lamp on the stand offs and secure with washers and locking nuts.
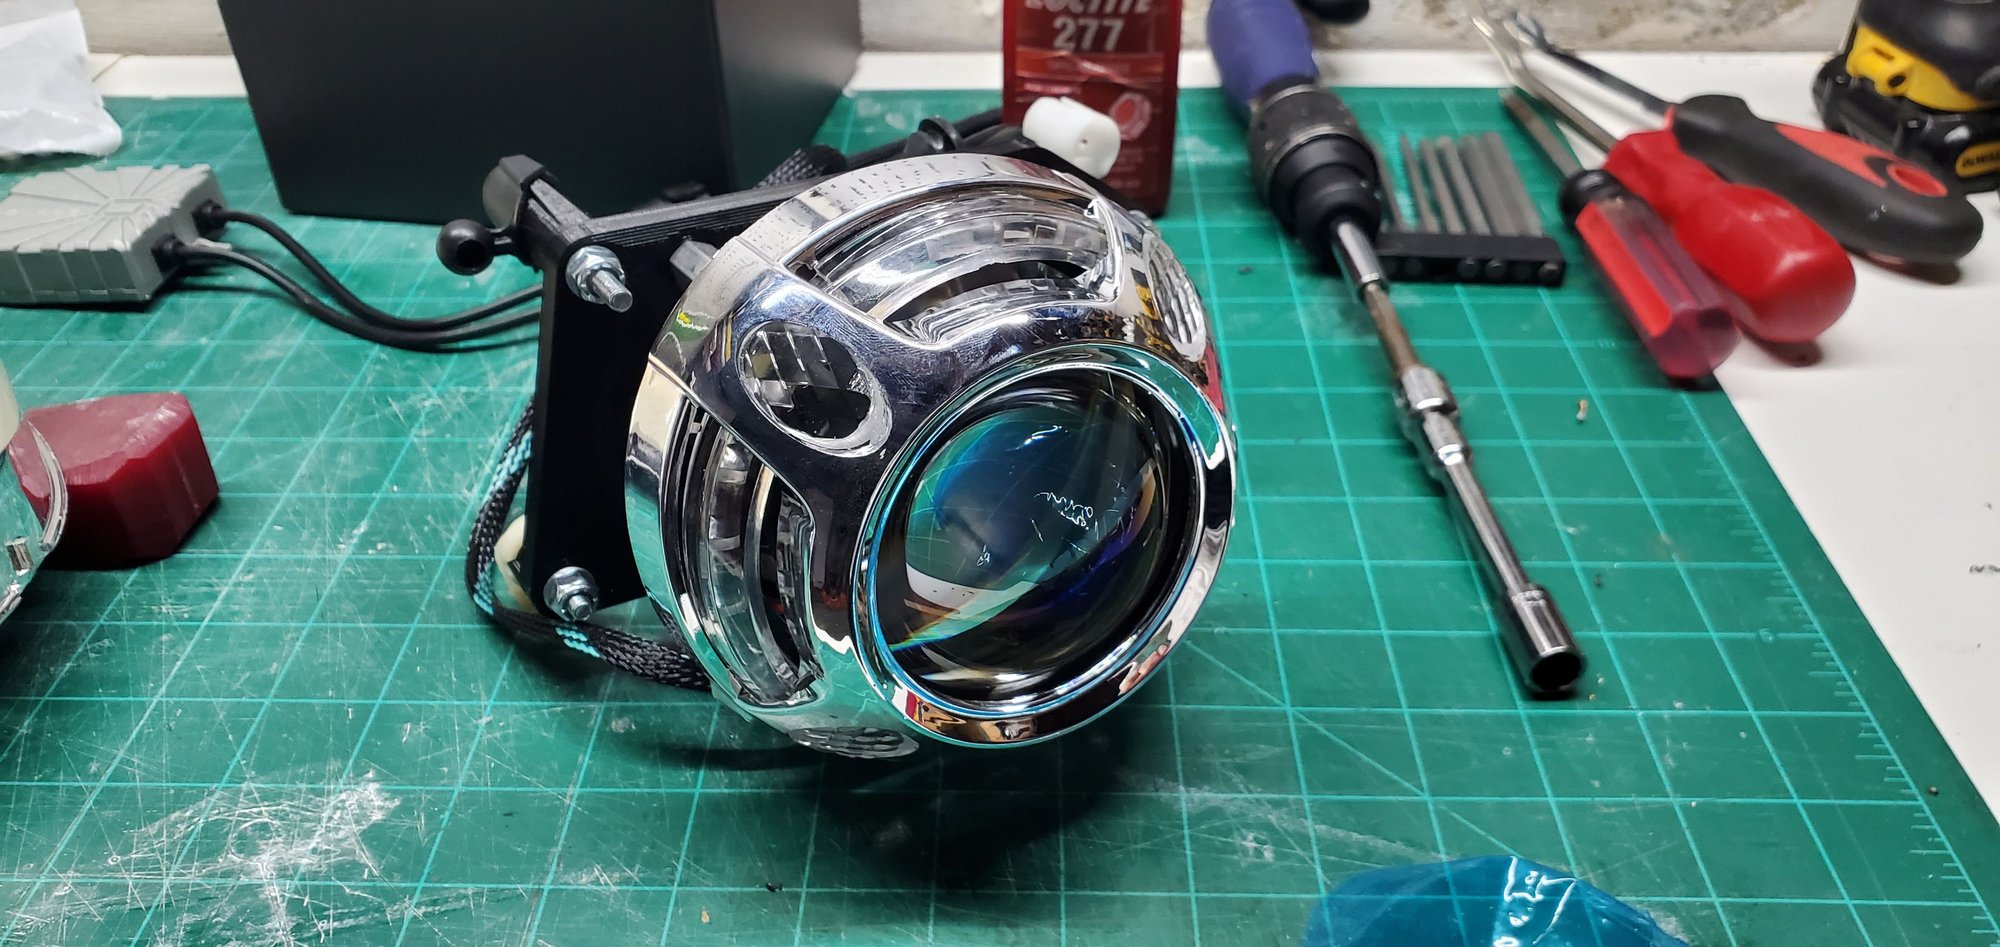
Push your new projector assembly into the headlight lamps original mounting and you're all done! Morimoto Panamera 1.0 Shroud with amber switch back


 04-28-2022, 09:16 AM