When you click on links to various merchants on this site and make a purchase, this can result in this site earning a commission. Affiliate programs and affiliations include, but are not limited to, the eBay Partner Network.
Does anyone have any DIYs for the TT for either serpentine belt or just airbox removal?
I'm in the middle of a belt replacement. I took care of the obvious bits, but to get access I need to remove the airbox and I thought i'd ask before i break something. It seems to be attached not only to the intakes via simple clamps, but also to the y-pipe with weird plastic/rubber connectors:
Nothing else needs to be removed to do the belt beyond the airbox and y pipe. it is tight but doable.
To remove the airbox you need to remove the y pipe, which has pins that sit in a rubber grommet on the airbox. after that the airbox is just seated in some grommets on the body.
Nothing else needs to be removed to do the belt beyond the airbox and y pipe. it is tight but doable.
To remove the airbox you need to remove the y pipe, which has pins that sit in a rubber grommet on the airbox. after that the airbox is just seated in some grommets on the body.
ah. I was hoping there was a way to remove the airbox without removing the ypipe. I guess not. thanks!
Yes....the Y pipe has to come off. Once removed, and the two inlet pipe clamps and vent tube, the box just pulls straight up, out of the rubber grommets. I have it documented in a couple of my DIYs.
Thanks all, I finished this today. Indeed the y-pipe had to be detached from the intercooler hoses. It doesn't have to come off the throttle body though. Once detached from the hoses, the y-pipe can move up just enough for it to disengage the air box
casica- let us know how hard this was to replace belt- i've replaced it easily on my previous non turbo 996 very easily & also on wife's 987- but it looks more difficult on the 07 997TT with not nearly as much room in there. i had my997TT belt replaced at dealer few yrs ago when they were doing plugs/coils/ EP1 install. haven't done it myself yet-
Sure thing. it wasn't too bad of a diy and took ~1hr being careful. The process was pretty much as documented in the video below. A few notes:
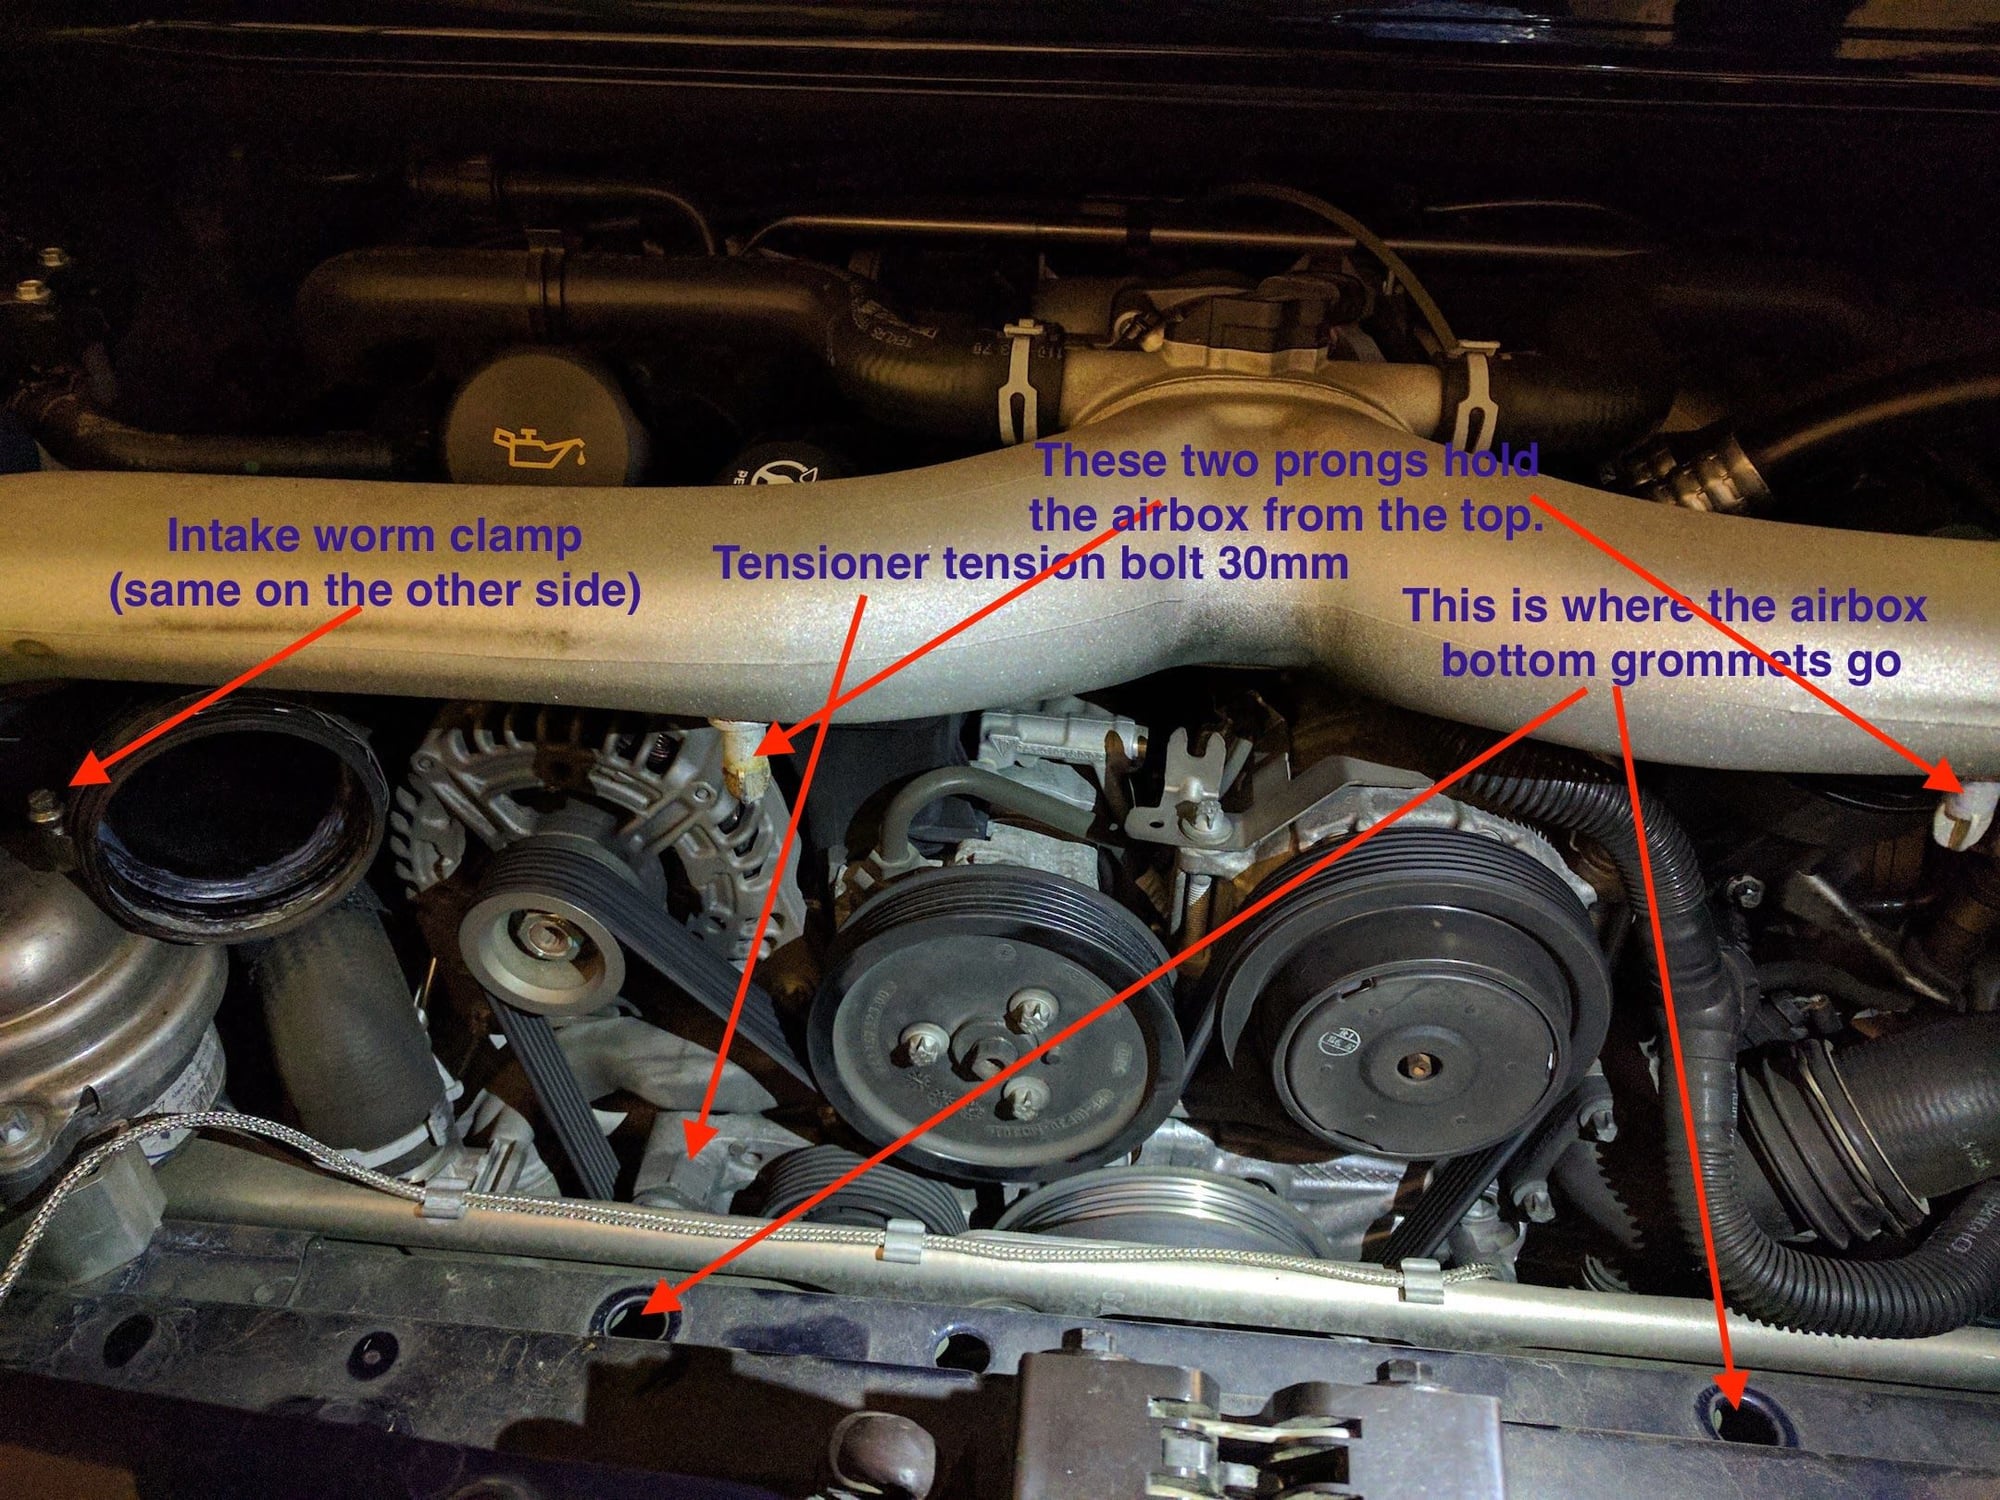
* you do not have to touch the torx screw as shown in the video. Just use a large 30mm wrench to apply counter pressure on the tensioner bolt (see pic)
* On the turbo, you don't have to remove the y-pipe completely, but have to remove the air box. It is held in place by the y-pipe, and the two intake pipes.
** First remove the filter cover (just pull straight up and it pops out)
** Unscrew the torx screws for the air filter (maybe consider replacing it if it's been a while)
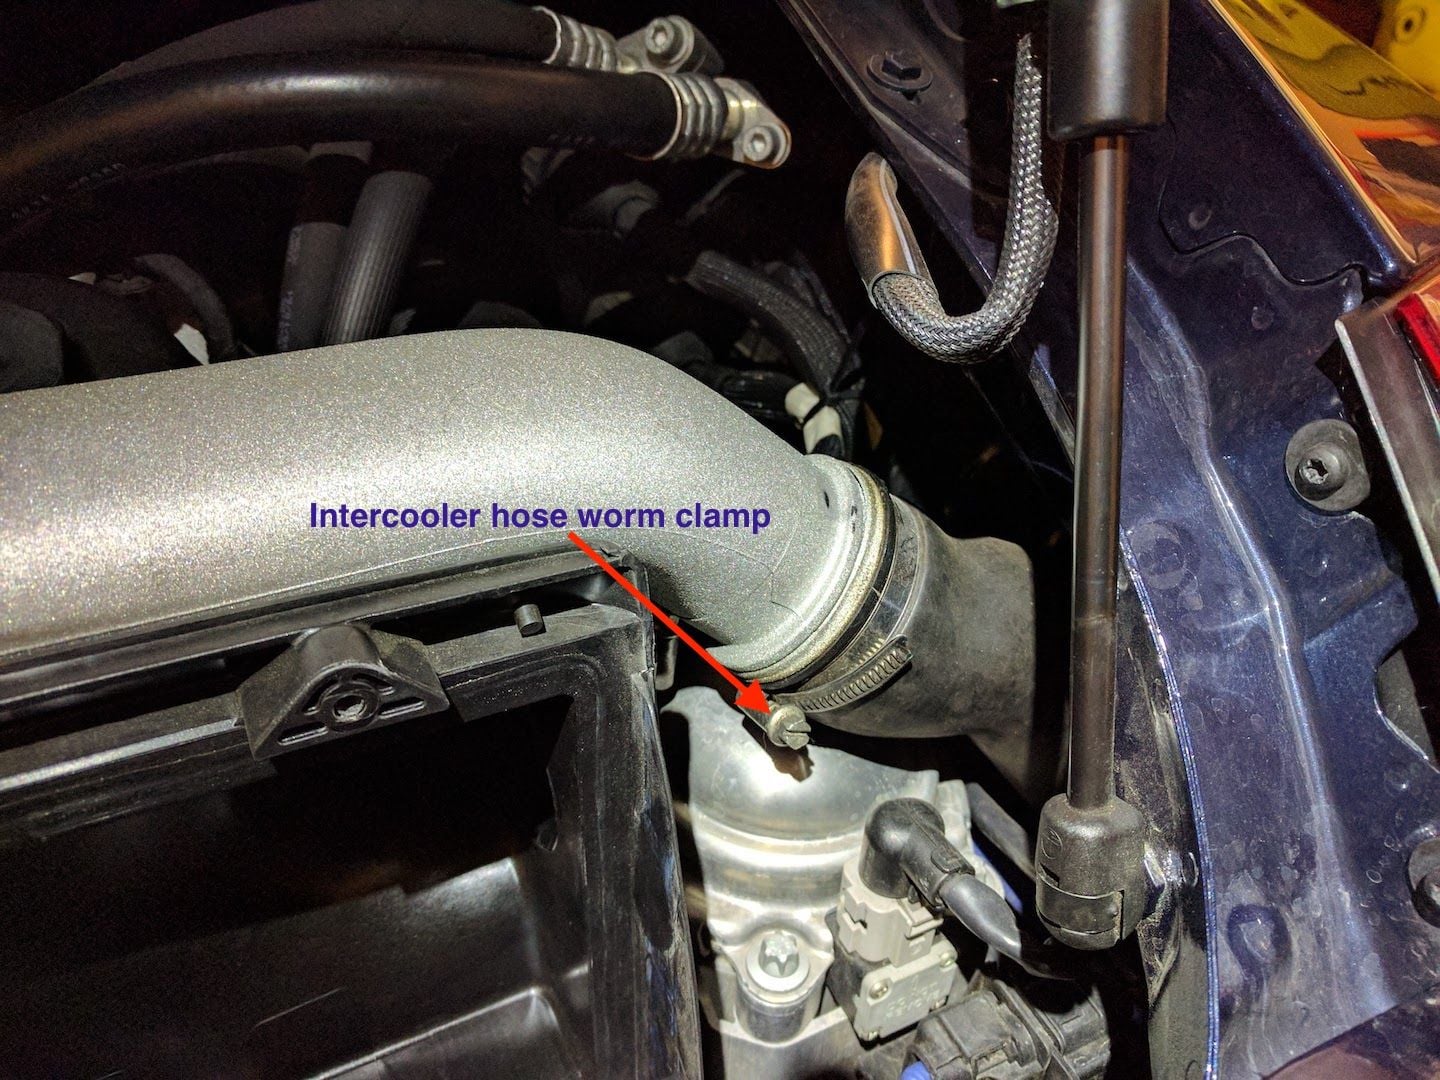
** Loosen the air-intake worm clamps
** Loosen the intercooler hose worm clamps and pull the y-pipe slightly up (~1-2"). The y-pipe should pop out of the intercooler hoses, and the two prongs holding the air box should now be clear of the box.
** pull the air box out
* The belt has a sparkly side and a felt-like side. Make sure you install it so that you can read the letters on the edge at top curve (you will see the sparkles at the top). Another way to think about it - the inside of the belt should be sparkly. The outside of it is felt.
* The belt which I used for the .2 was: http://www.pelicanparts.com/More_Inf...21&SVSVSI=5918
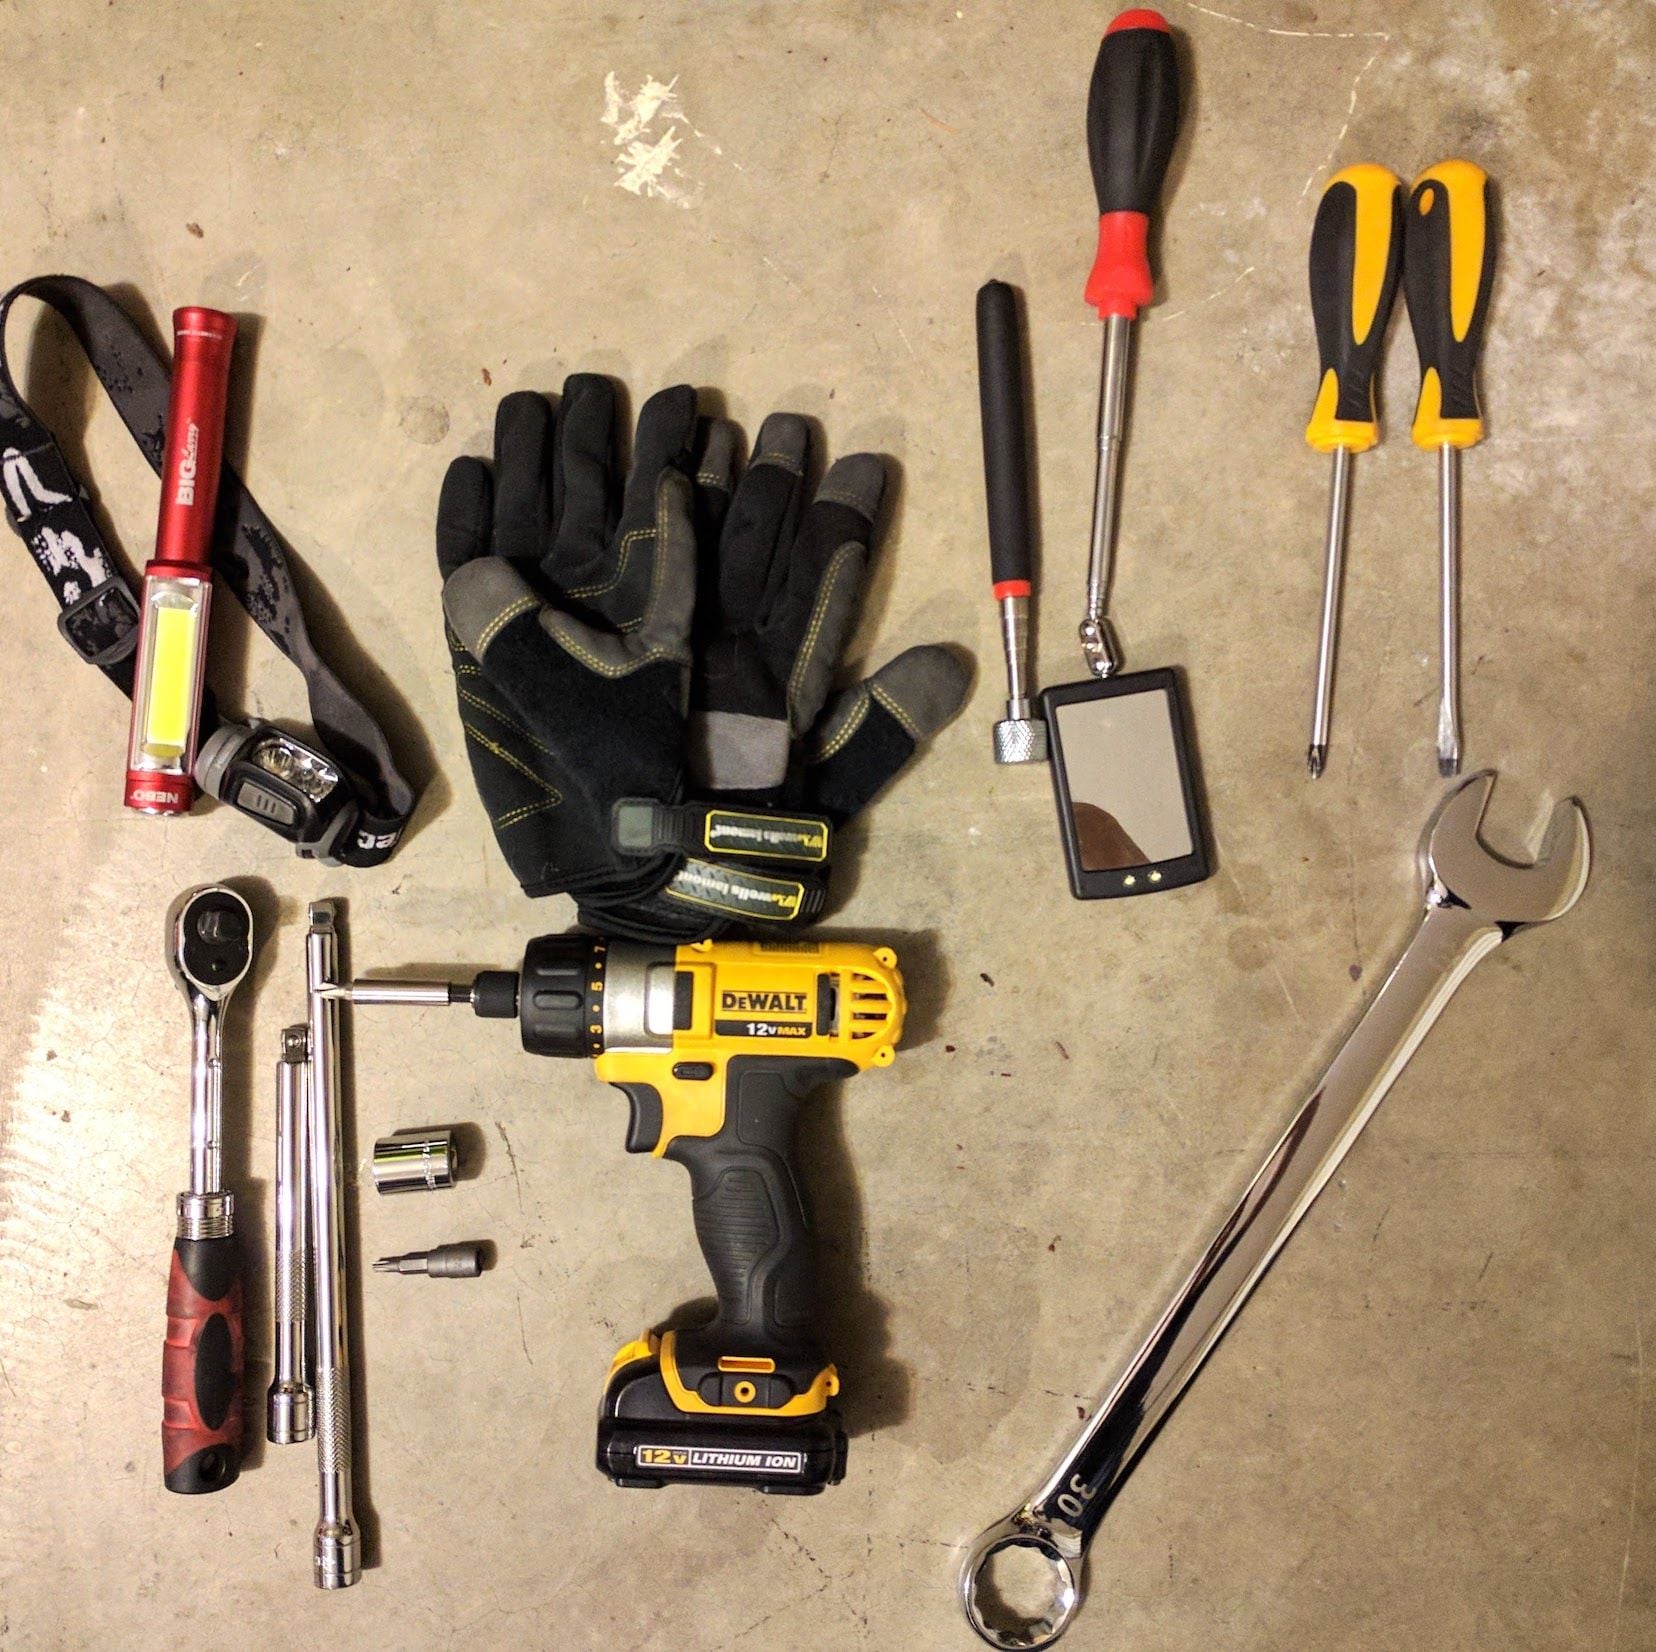
* You will need a long-reach magnet to pull out the engine mount bolt through the license plate hole
* Be careful when you push the air cover back on (the one with the "turbo" plaque) The two prongs are prone to snapping if you don't align them with the rubber grommets
* I lifted the car a bit on one side just enough to peek under and make sure the belt is properly seated
* I used a small mirror with a light and telescopic handle to make sure the boost hoses from the intercoolers are correctly fitted to the y-pipe when I put it back together. It also came in handy to make sure the belt is seated properly
Tools you'll need:
* phillips screw driver for the license plate
* flat-head screw driver for the worm clamps
* #25 torx for the air filter
* 30mm wrench for the tension bolt
* long-reach magnet to pull out the engine-bumper bolt
* 16mm socket with extension (20" should be good) for the engine-bumper bolt The bolt is torqued to 48ftlb/65nm
One other tip, I found the belt to be snug to get on the last pulley even when leaning on the tensioner by another person. A little isopropyl alcohol and water for lubrication let is slip right on.
 04-22-2017, 04:41 AM