When you click on links to various merchants on this site and make a purchase, this can result in this site earning a commission. Affiliate programs and affiliations include, but are not limited to, the eBay Partner Network.
I recently did a modification on the 997 GT2 folding sports seats to allow for a more reclined seat position. For the people that own these, you�ll know that while the seats are beautiful to look at, hold you in place wonderfully and are for the most part- comfortable once in you�re them; the thing that sucks about them is that the seat positioning is too far upright. Being a fixed design and non reclinable is where this seat suffers, and so I decided to find a solution to this.
I�ll note that I purchased these seats a year ago and have had plenty of time in them on multiple long road trips. The factory seating position is by no means hateful, and you do get used to it after a bit. However, for the price you pay for them, I feel like it needs just a tiny bit of adjustment to make them perfect (for me). This mod may not be for everyone, and I understand that there are other solutions out there. I just wanted to share what I felt was the best route of achieving:
-A more reclined seat position
-Avoid using spacers in between the seat rail front mounting points and the body
-Avoid using aftermarket side brackets
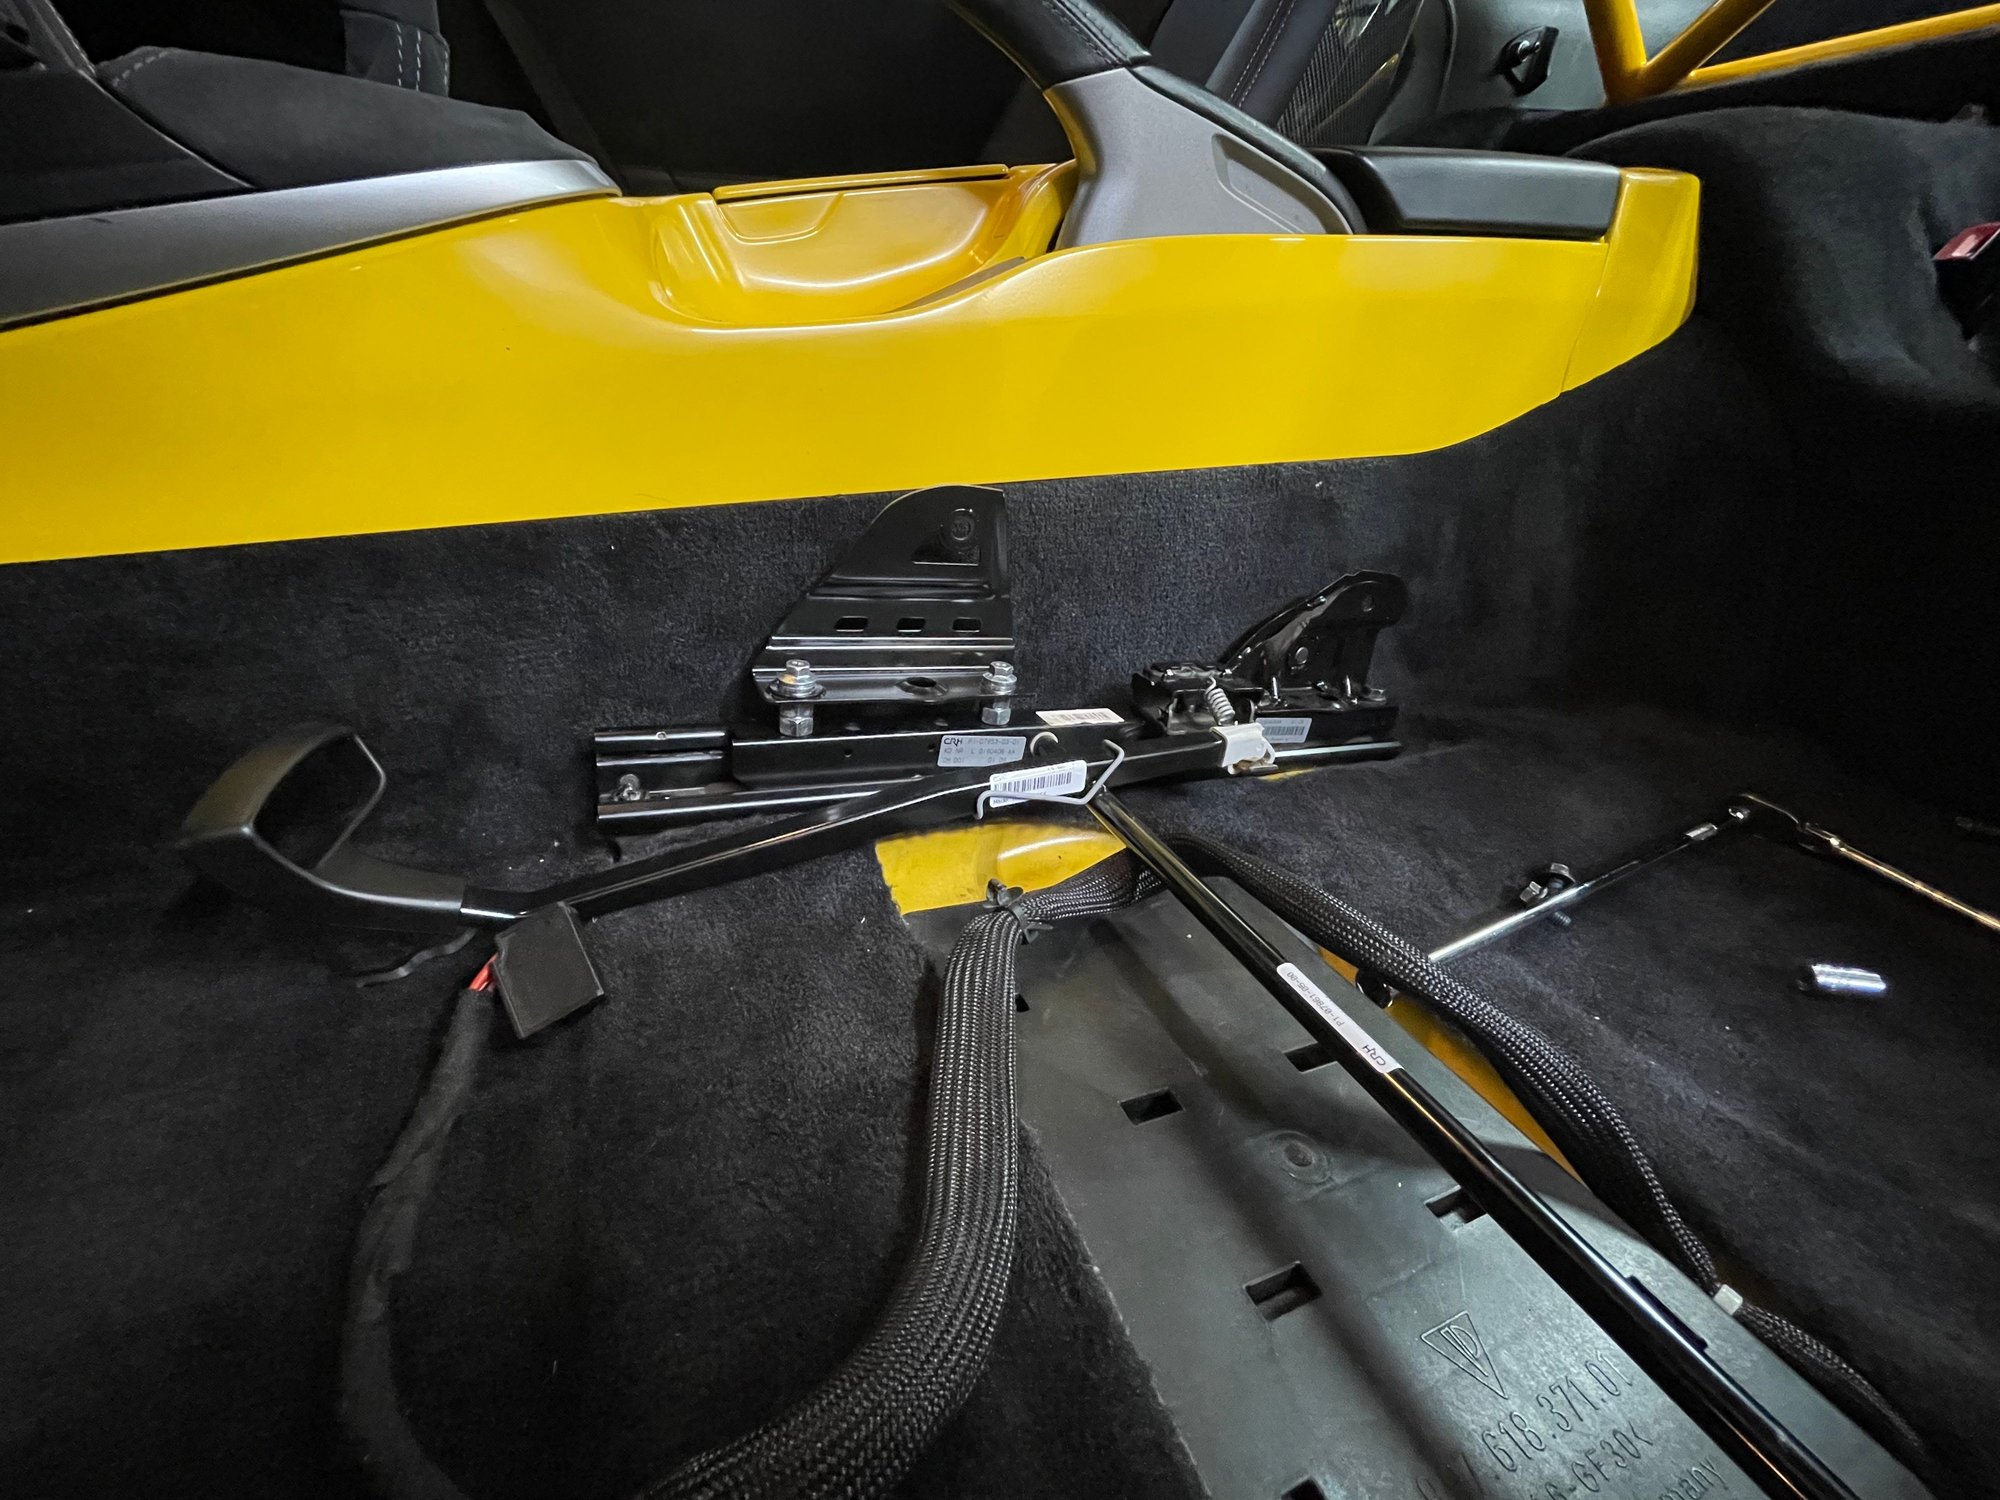
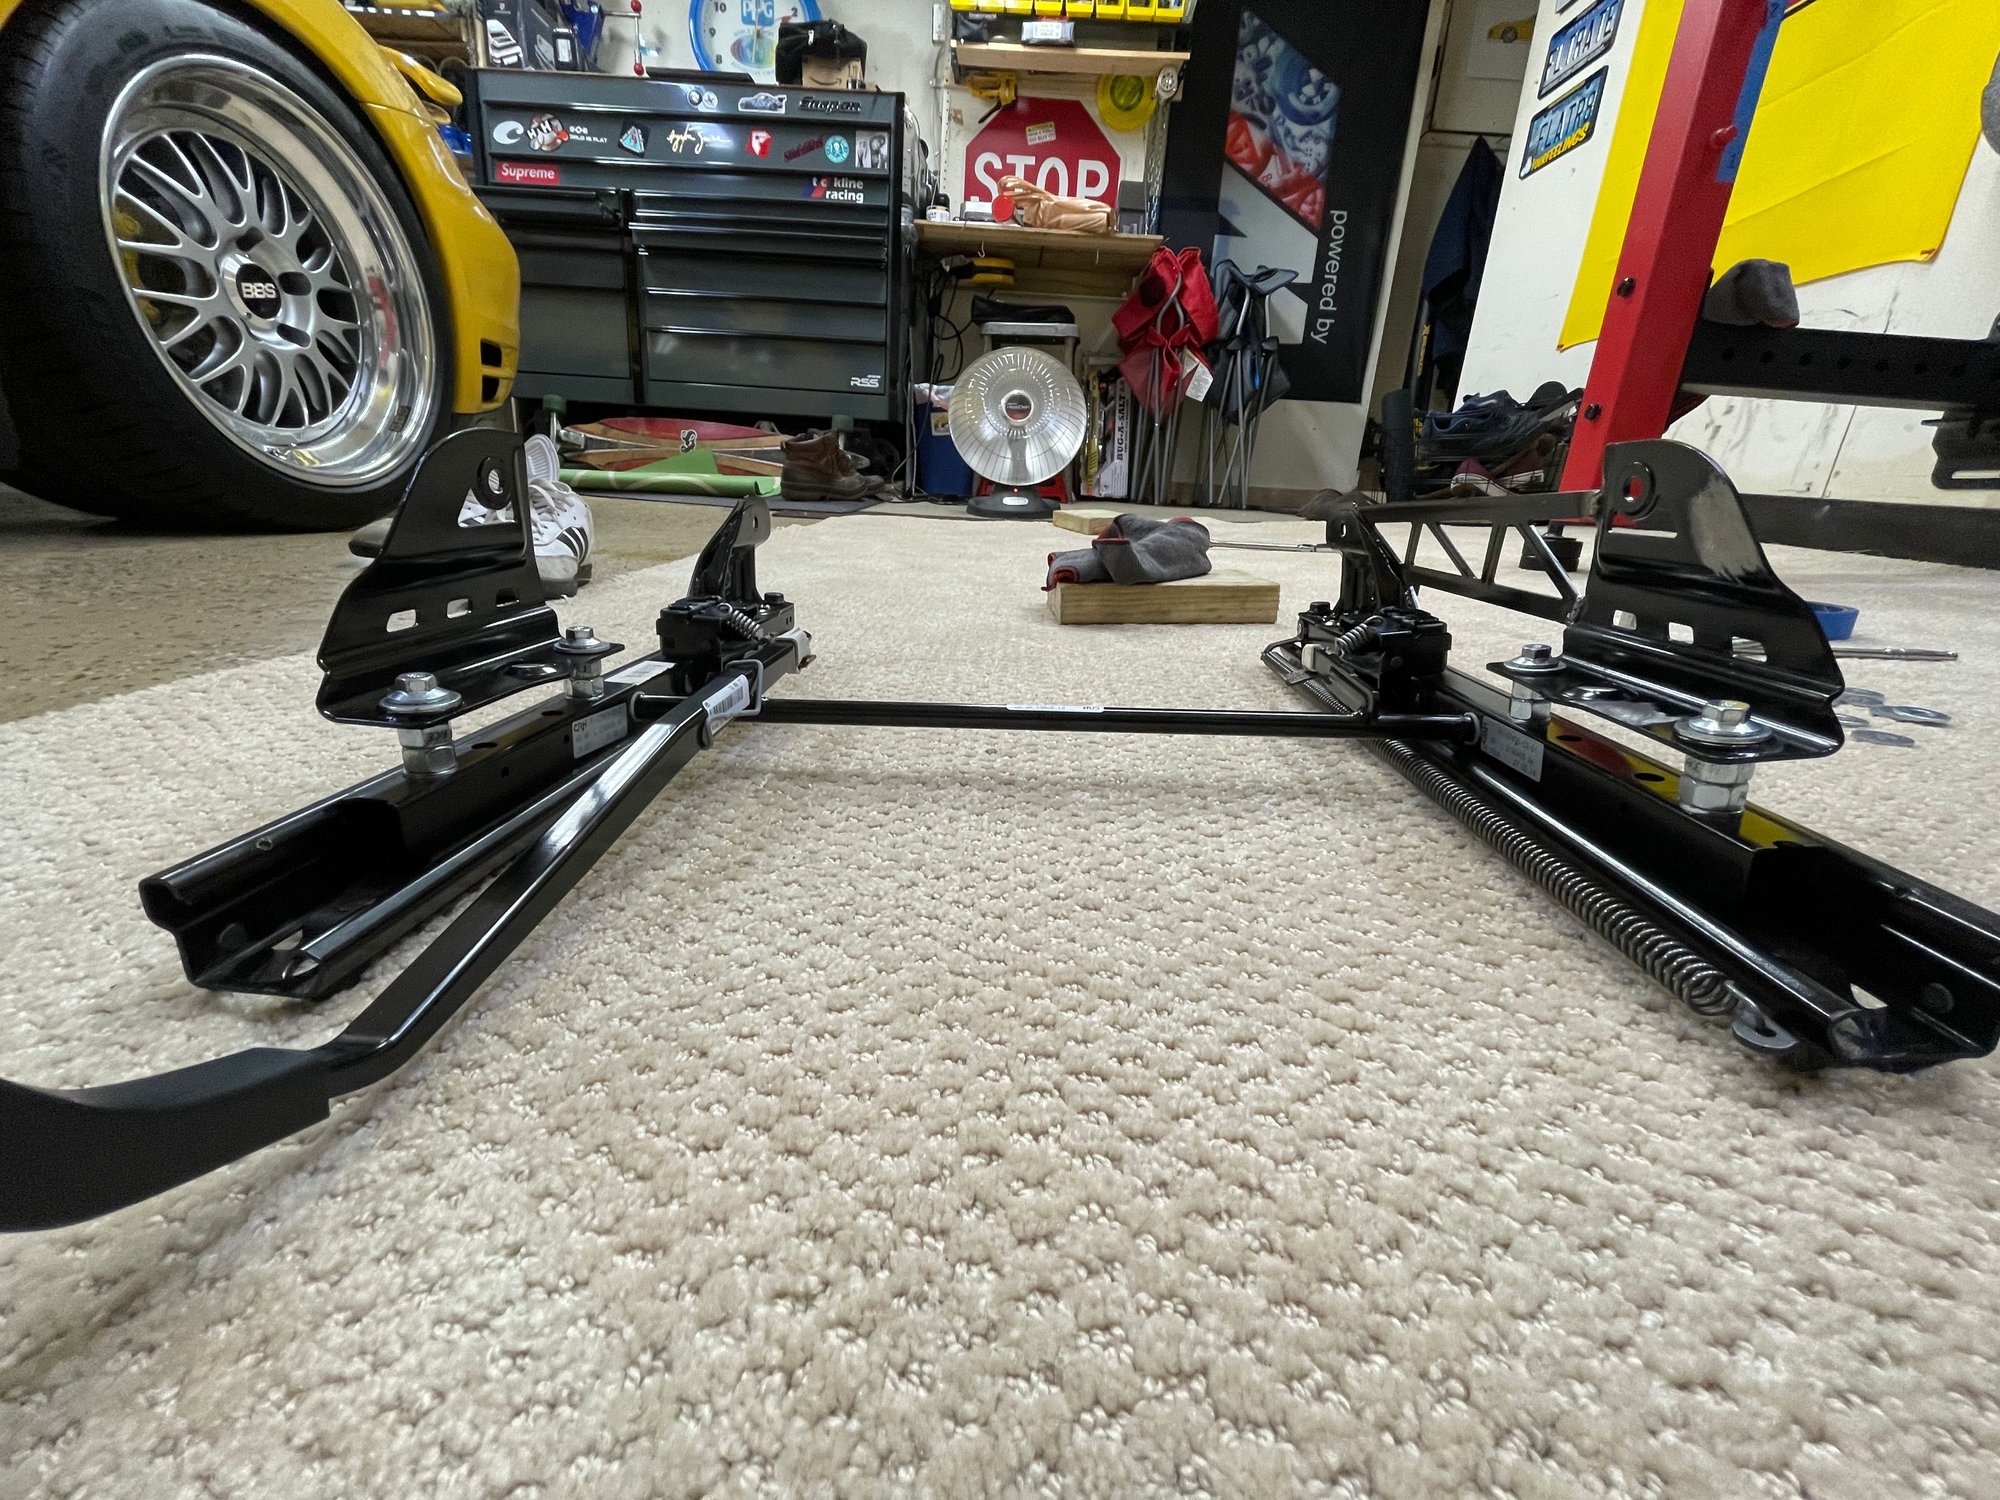
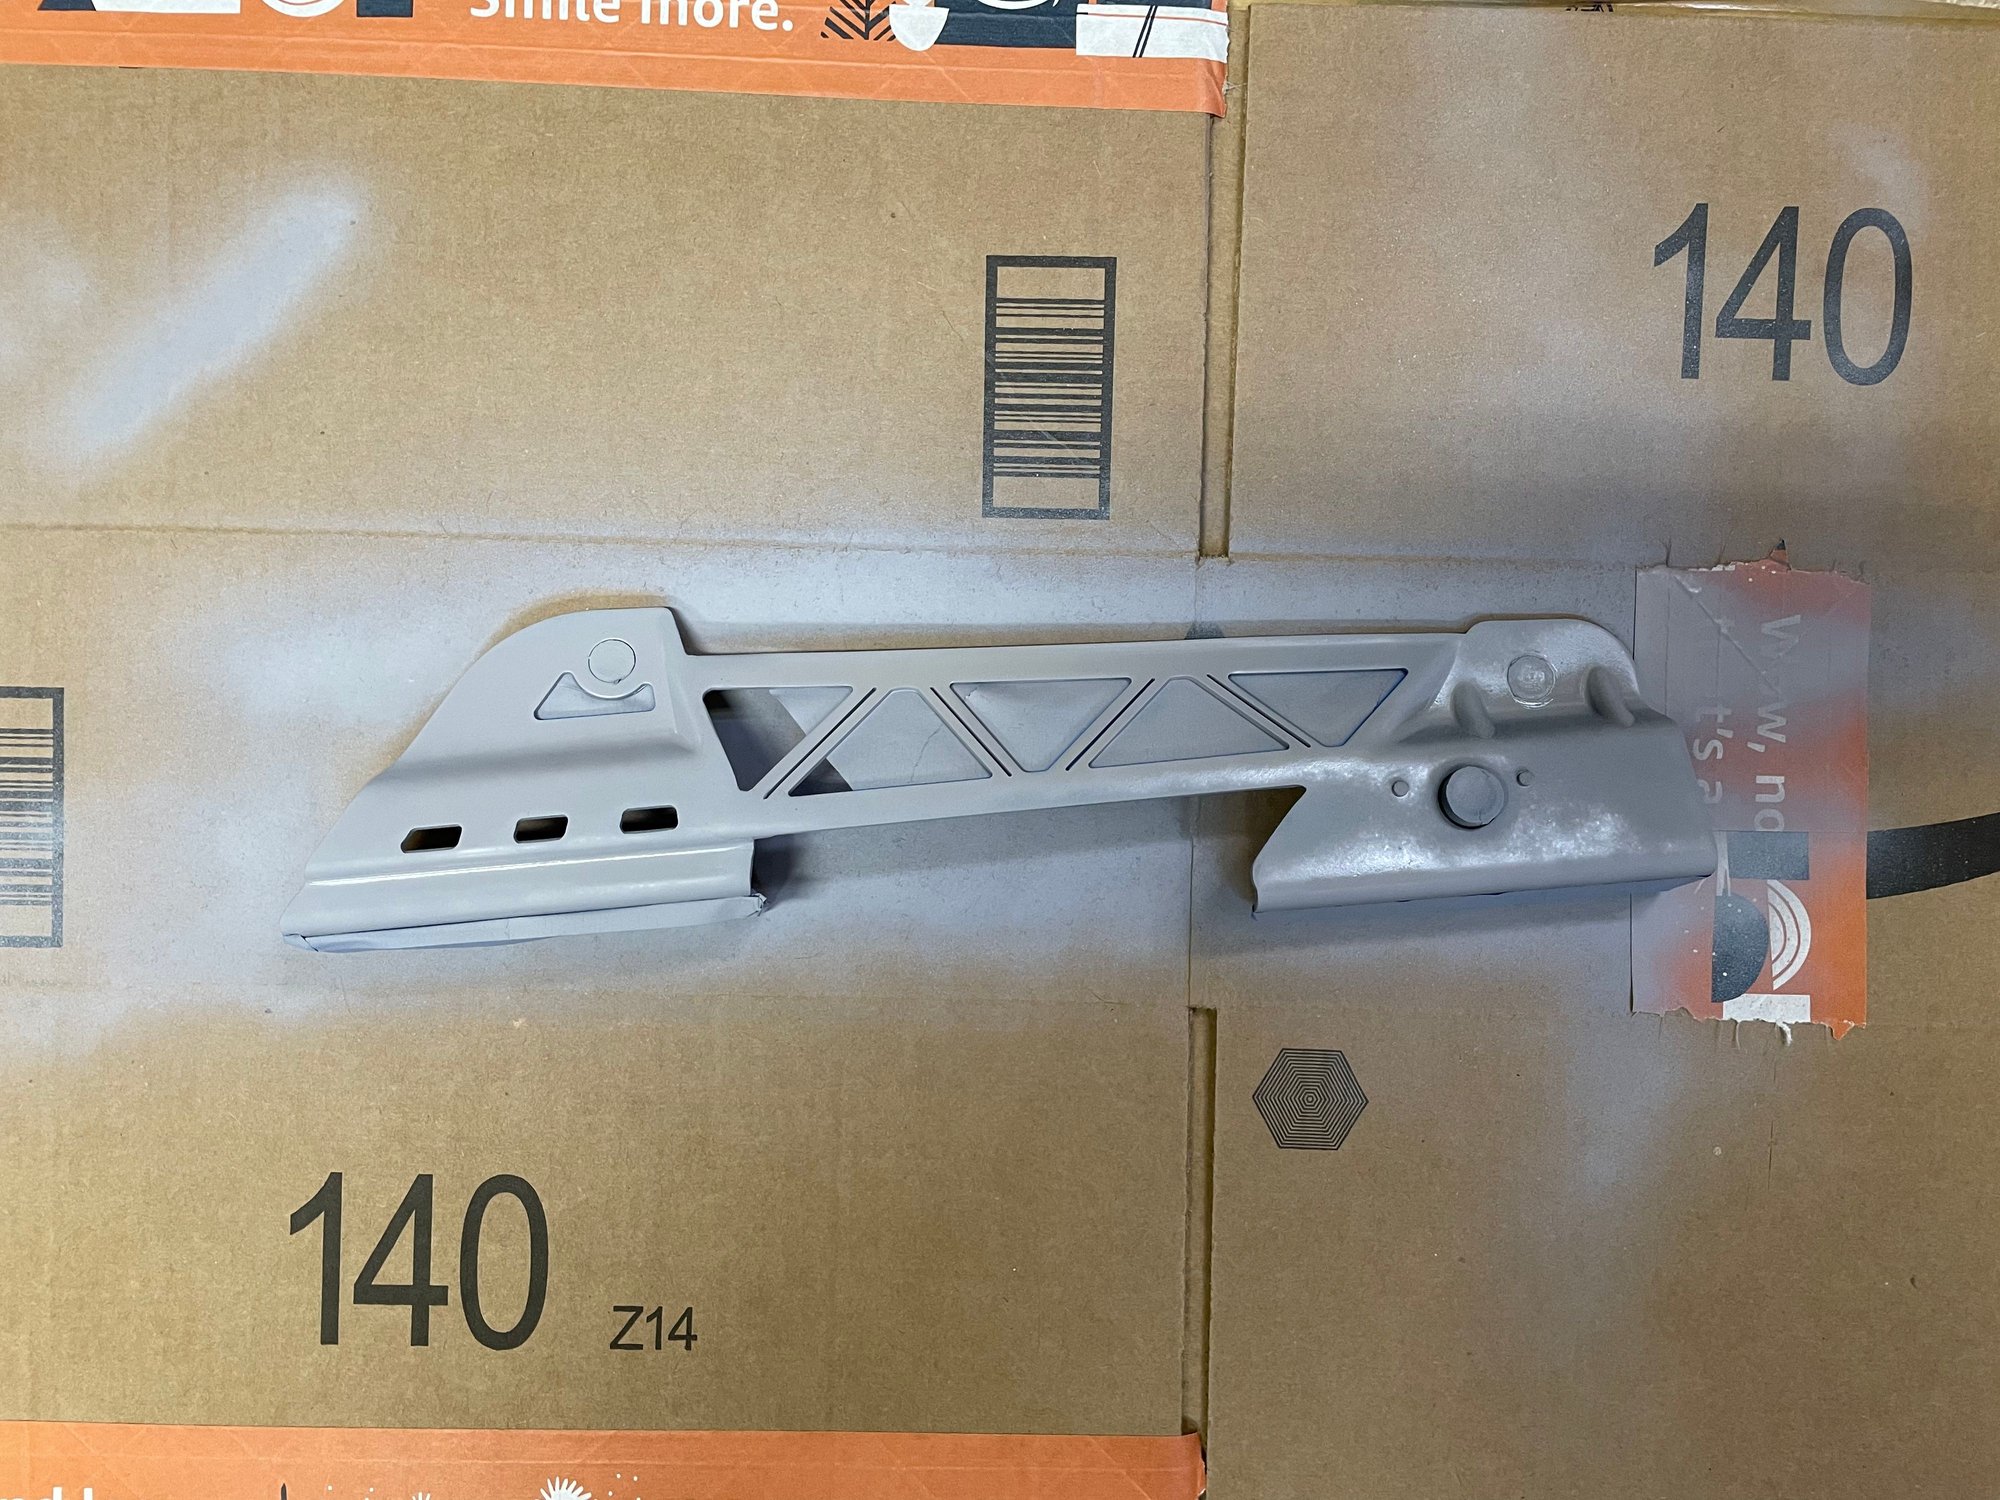
Studying the seat and taking it apart shows a pretty simple and tried and tested race seat design. Bucket seats bolted to side brackets mounted to slidable seat rails.
I consulted with a good friend of mine and former Chassis Design Engineer for Honda motor company about the safety of even modifying a seat rail and bracket that ultimately raises the height of the front portion of the fixed seat which would in turn, tilt the entire assembly back. From what he told me, doing so in the manner that I had planned would have no effect on structural integrity and strength of the seat. Further, he even started alluding to �just shim the front portion of the rail� but stopped himself mid sentence and said that if you were to do that, the fasteners that bolt the rear portion of the rails to the body would not line up correctly against the rail itself and thus, would put more stress on that area and more stress on the bolts, as the flanged portion of the bolts would be pressed against an angled seat rail assembly. I know some have done this before, but I wanted to avoid that method at all costs for the exact reasons stated above.
He further went into explanation about how the hardware that holds the seat together isn�t 100% loaded all the time, and that they are only under stress and loaded fully in the event of a collision; specifically rear end collisions being the most stressful on the hardware. As a vehicle impact from the rear abruptly pushes the vehicle forward, your body is pushed back into the seat which would �pull up� on the front mounting point of the seat and �push down� on the rear mounting point of the seat. As long as the new hardware being used is the same strength and grade as what was originally removed, there should be no change in seat assembly integrity.
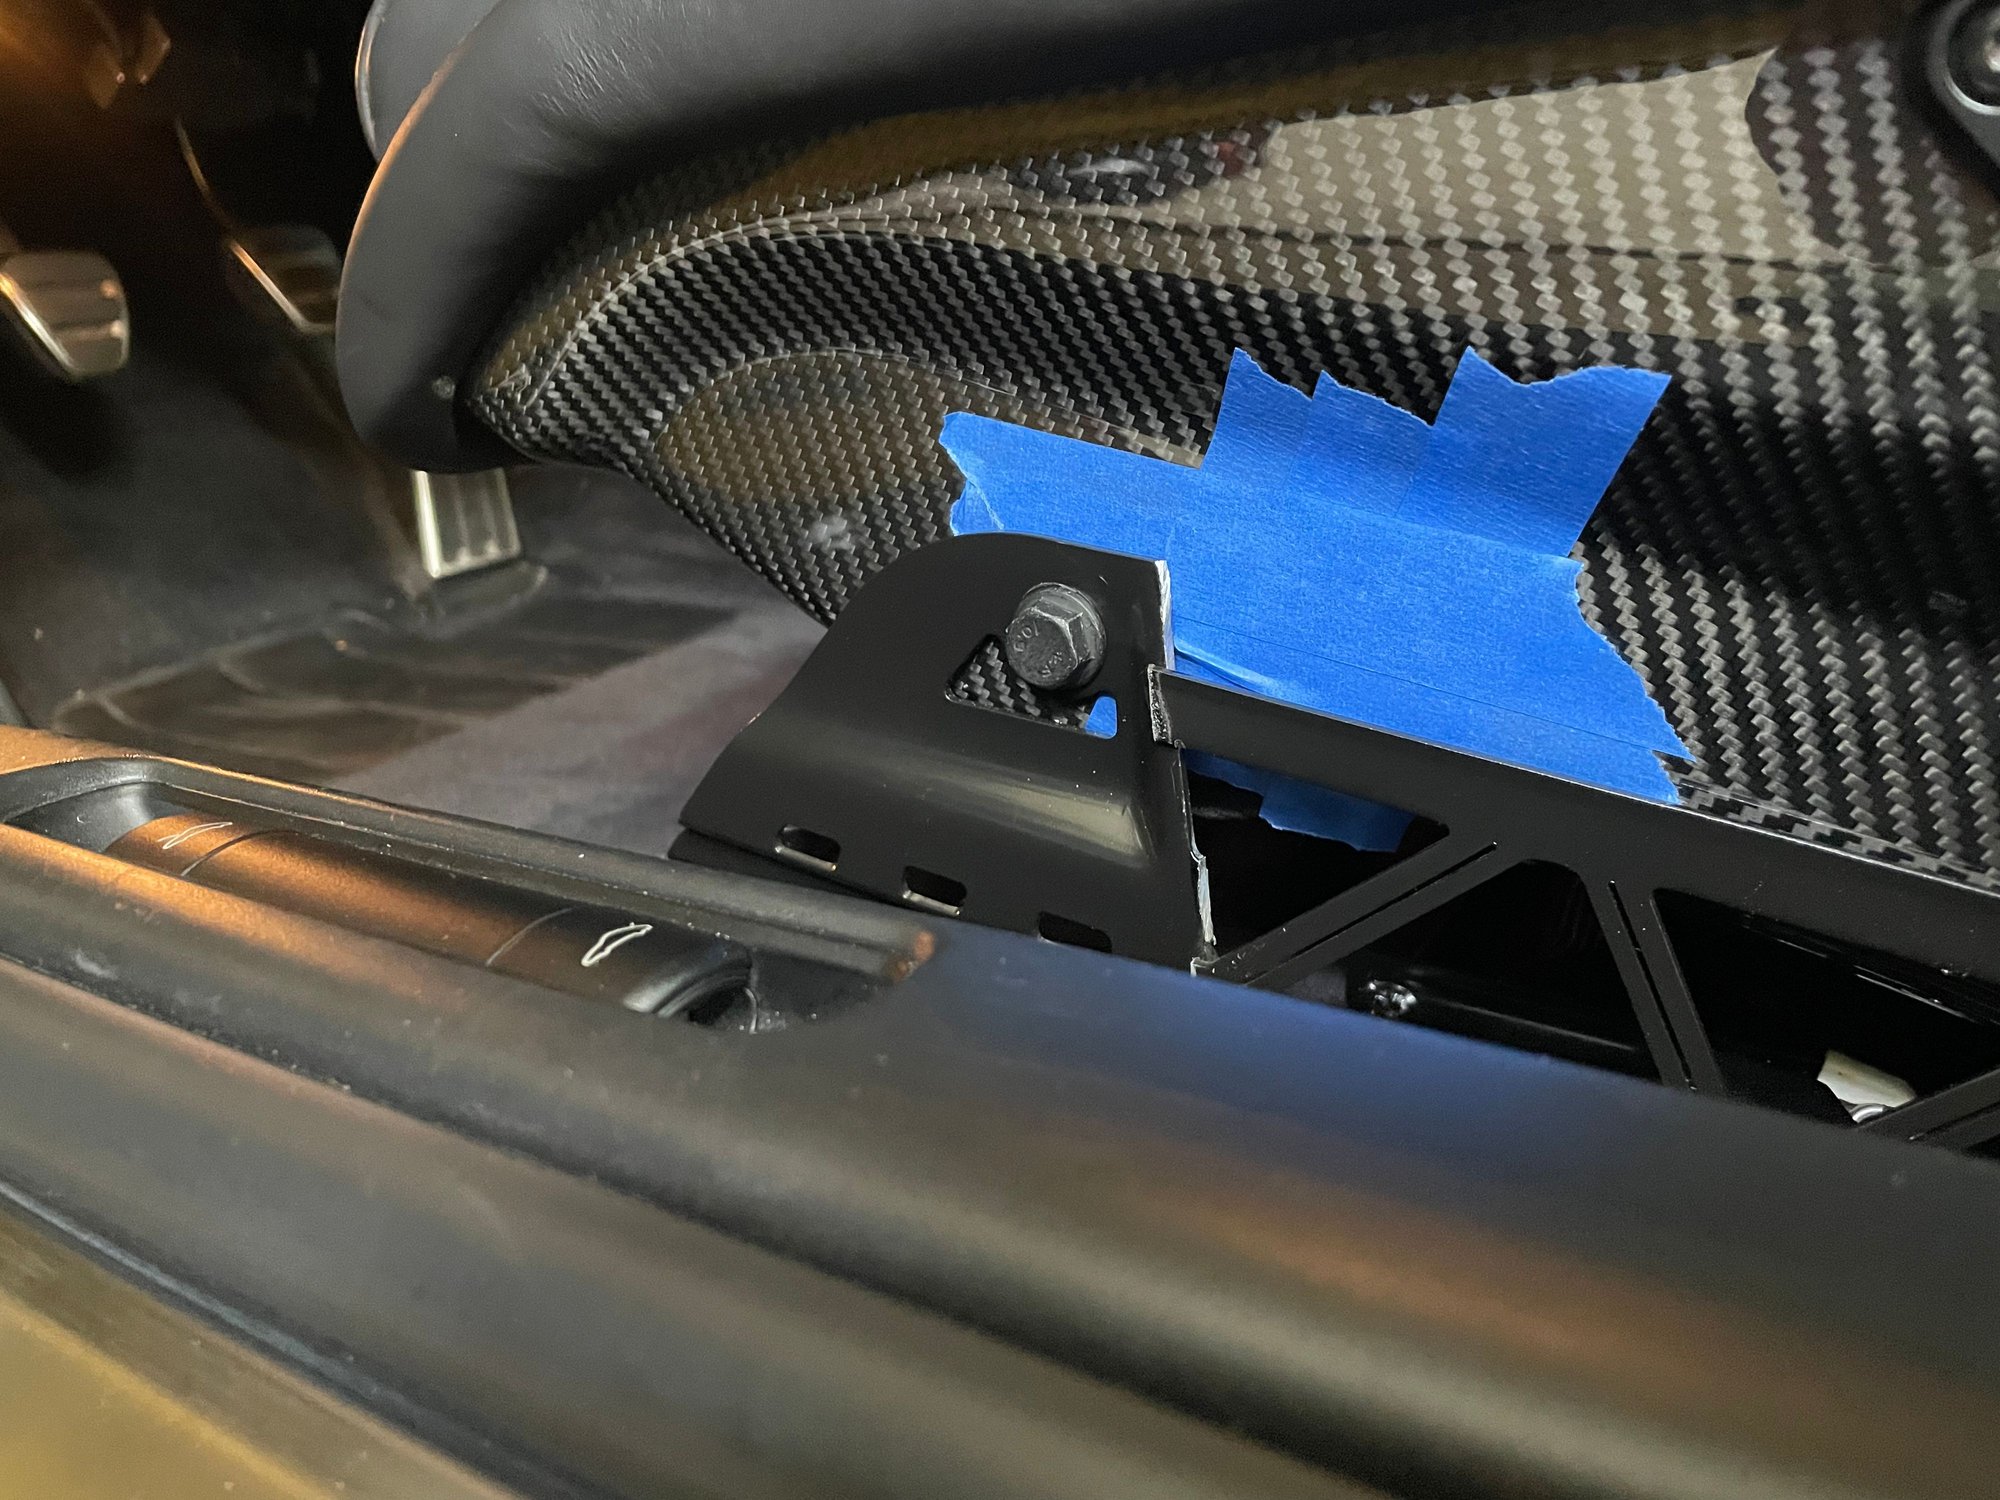
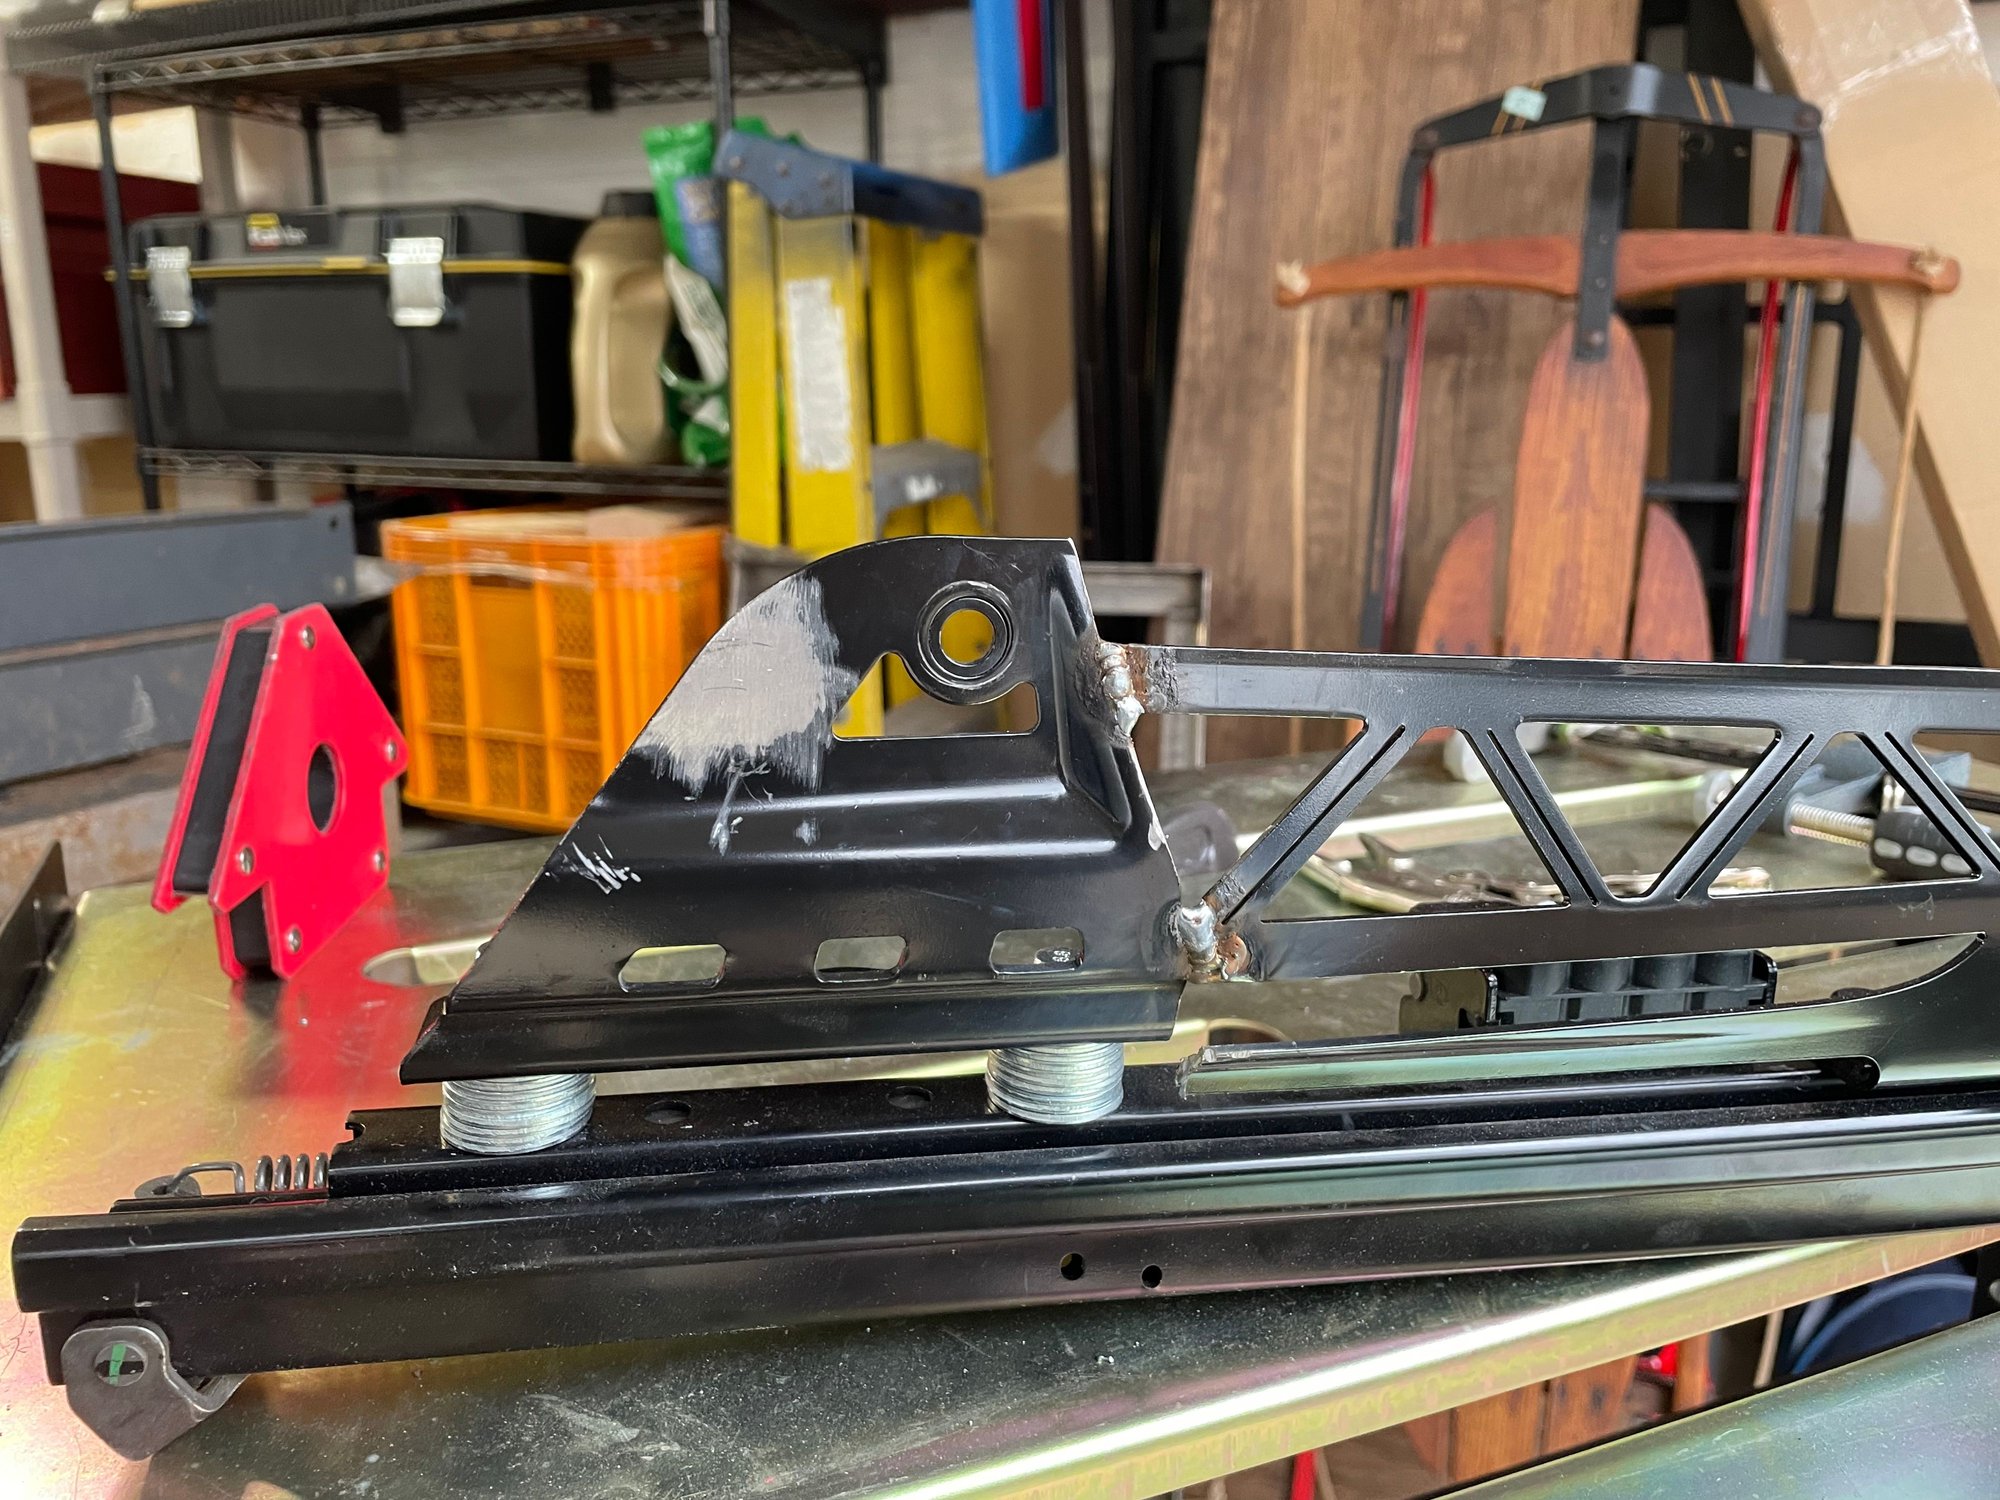
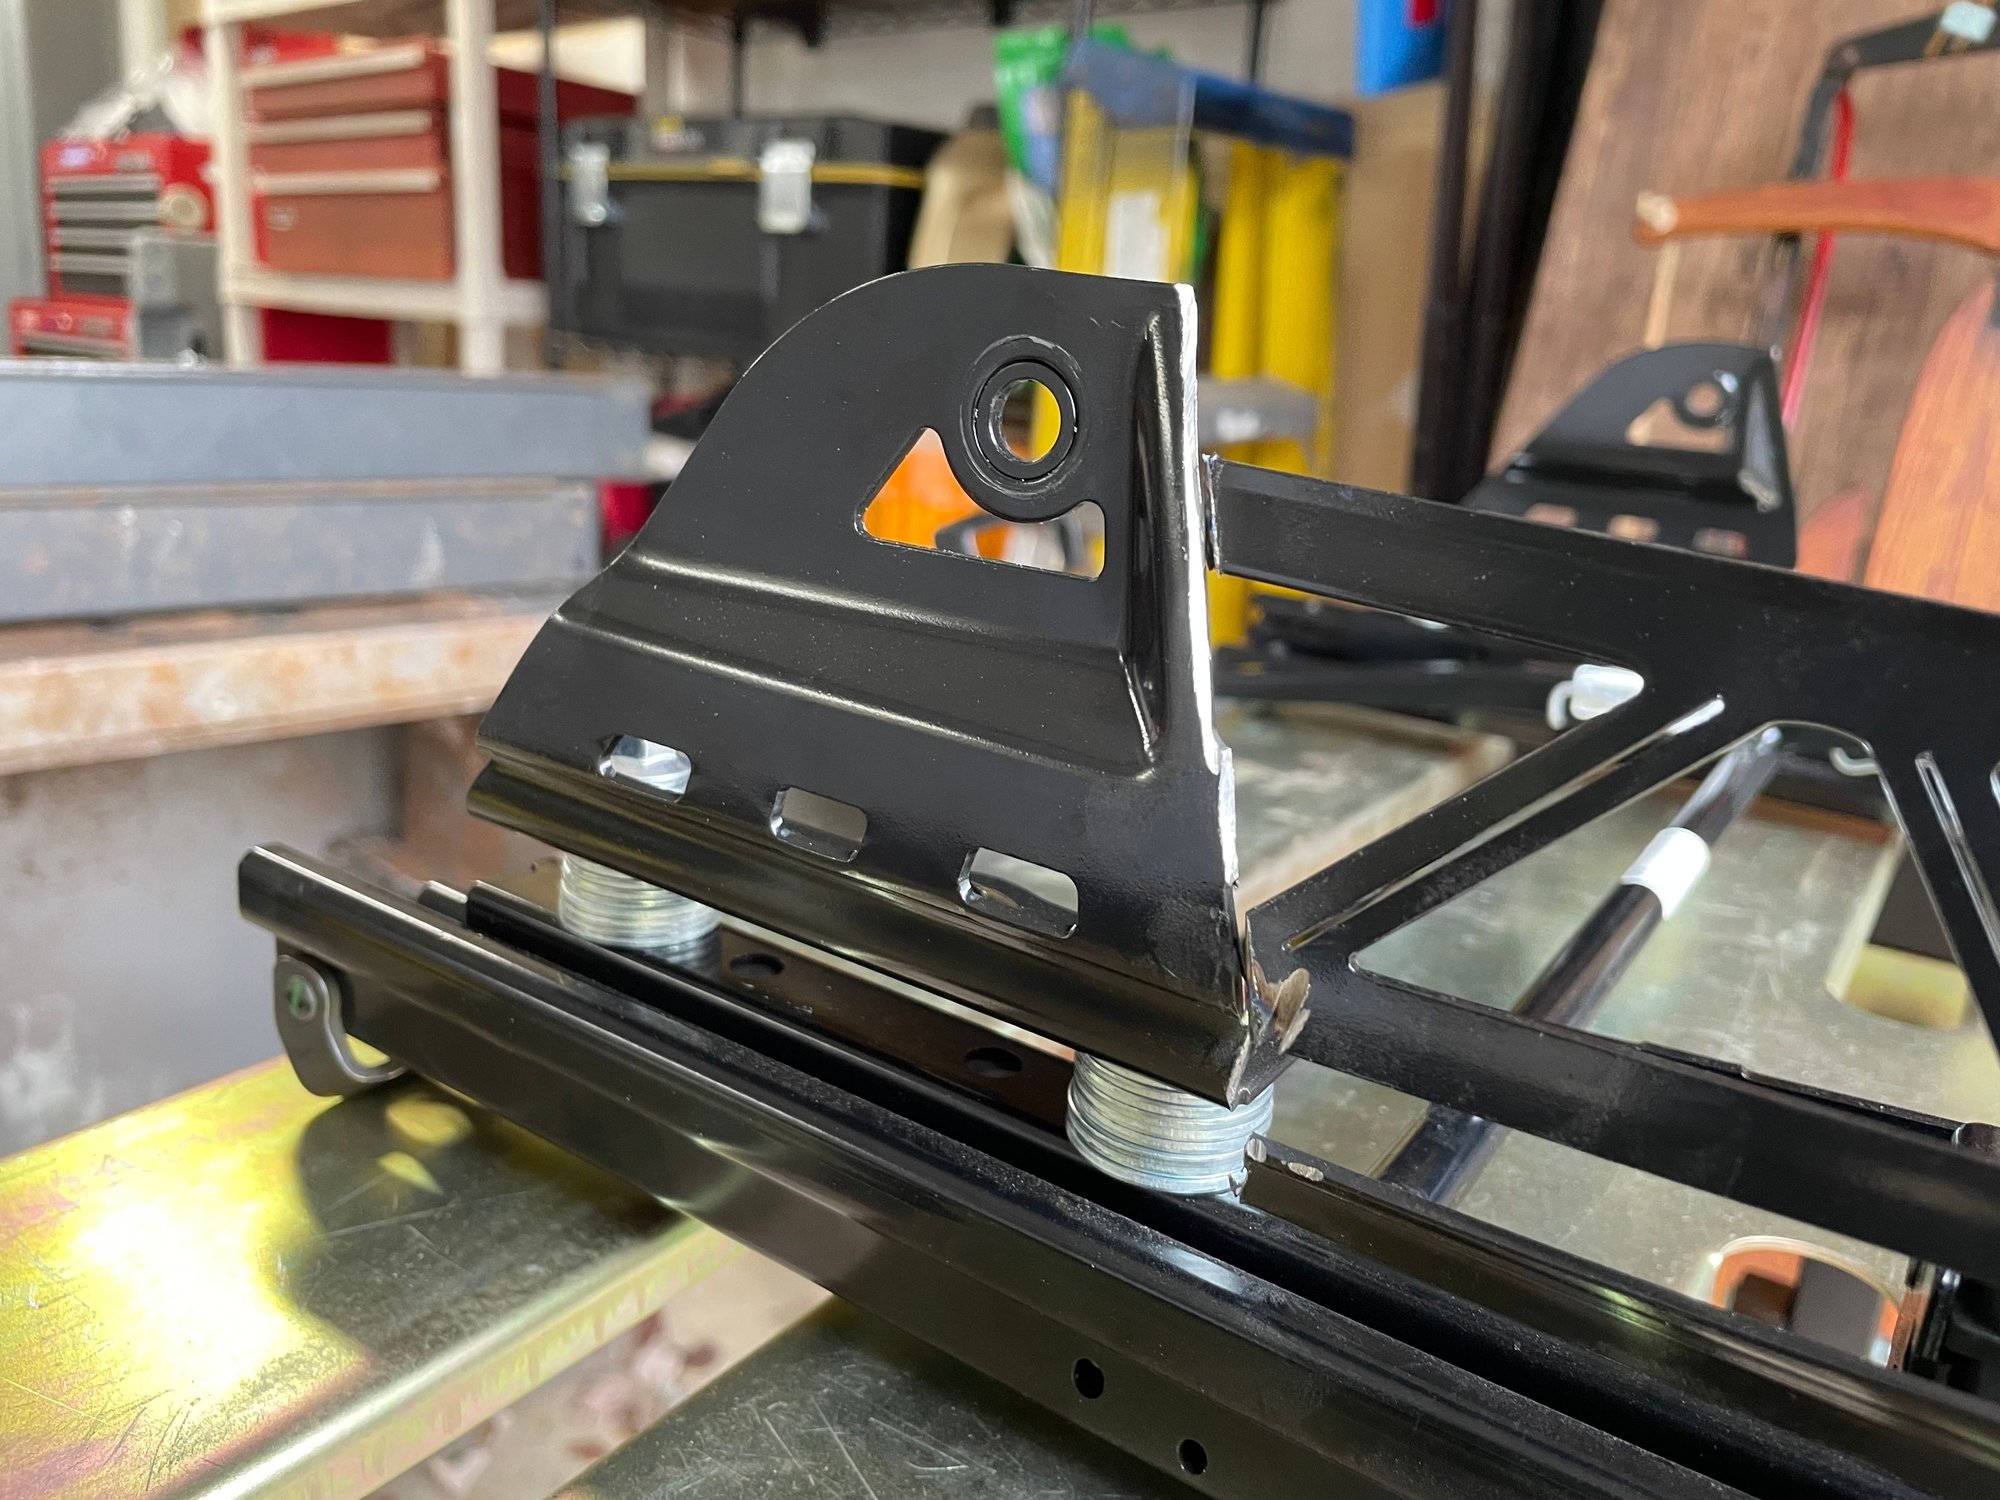
After taking all this information in, and verifying the safety of it, I decided to try out the modification that I had planned. I decided to raise the front portion of the seat by installing spacers and longer bolts in between the front portion of the side brackets and the seat rails as pictured below.
For those who have taken these seats apart, you�ll know that doing this is pretty easy to do on the inboard rail and bracket(s), as the brackets are two pieces (front and rear) and all that�s needed to tilt the seat is to add spacers to the front brackets. The outboard bracket poses the problem, as it is a one piece design.
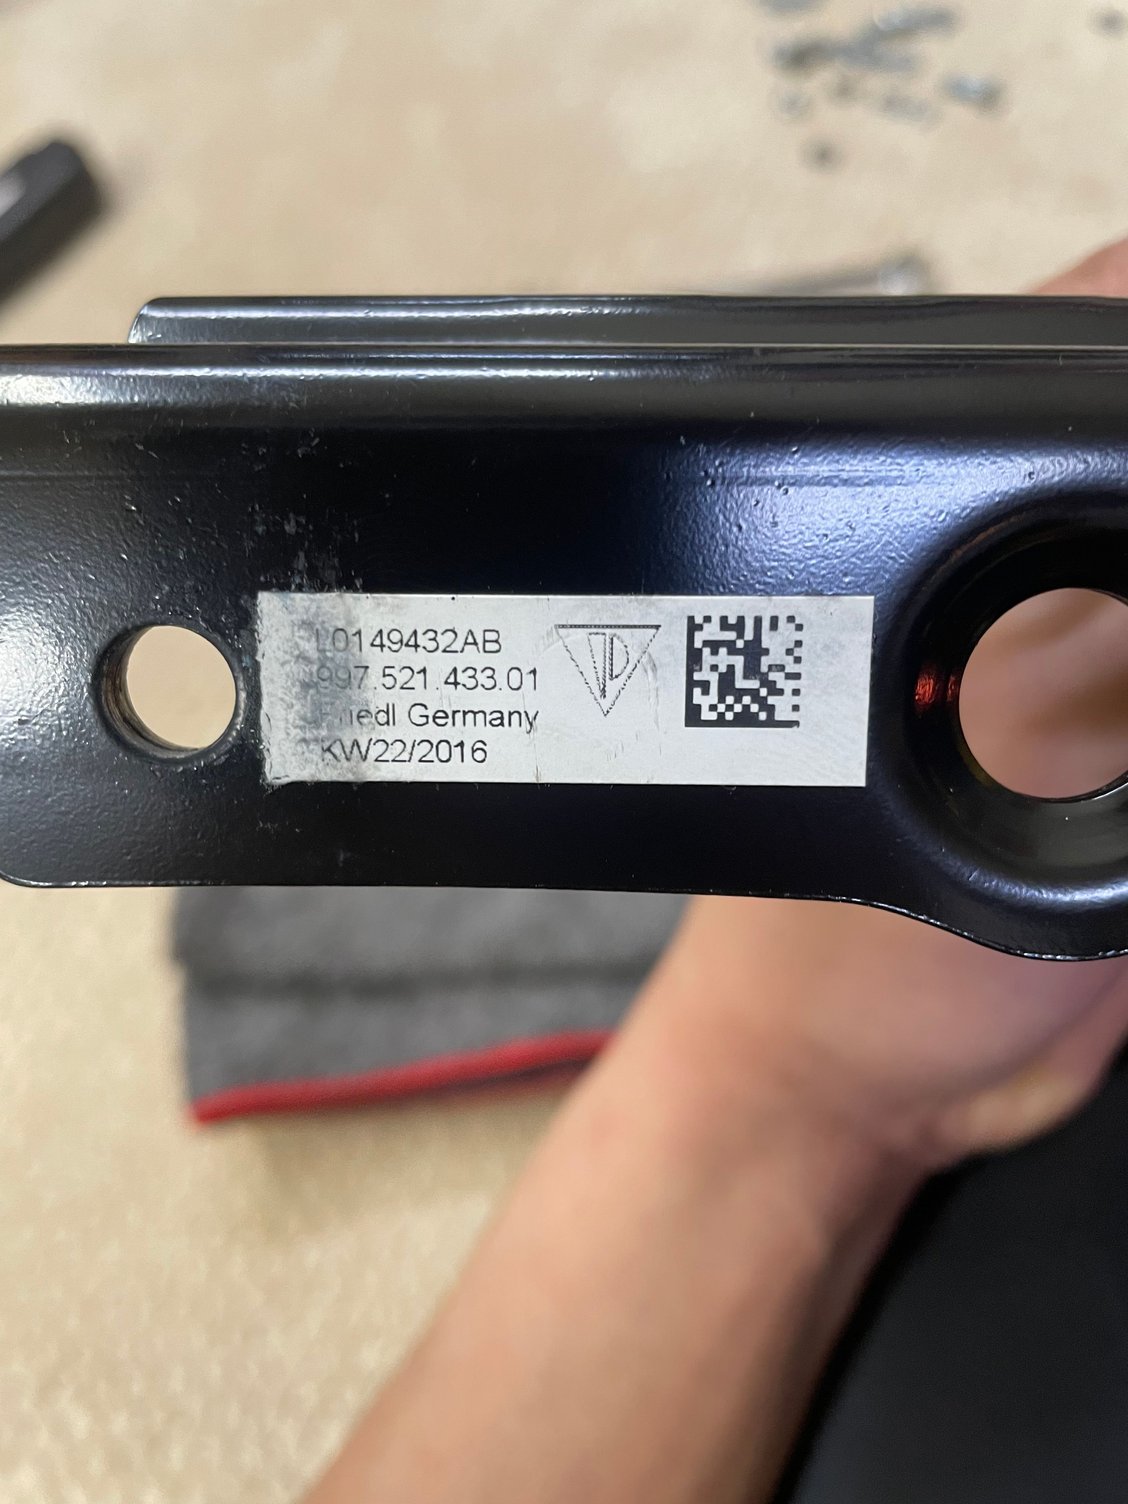
Good news is that this part is available separately through PORSCHE for only $100, so if I want to go back to stock at a later date, I can.
You cannot simply add spacers to the front portion of the bracket, as it would cause the entire one-piece bracket to elevate thus causing a huge misalignment of the mounting holes for the carbon seat.
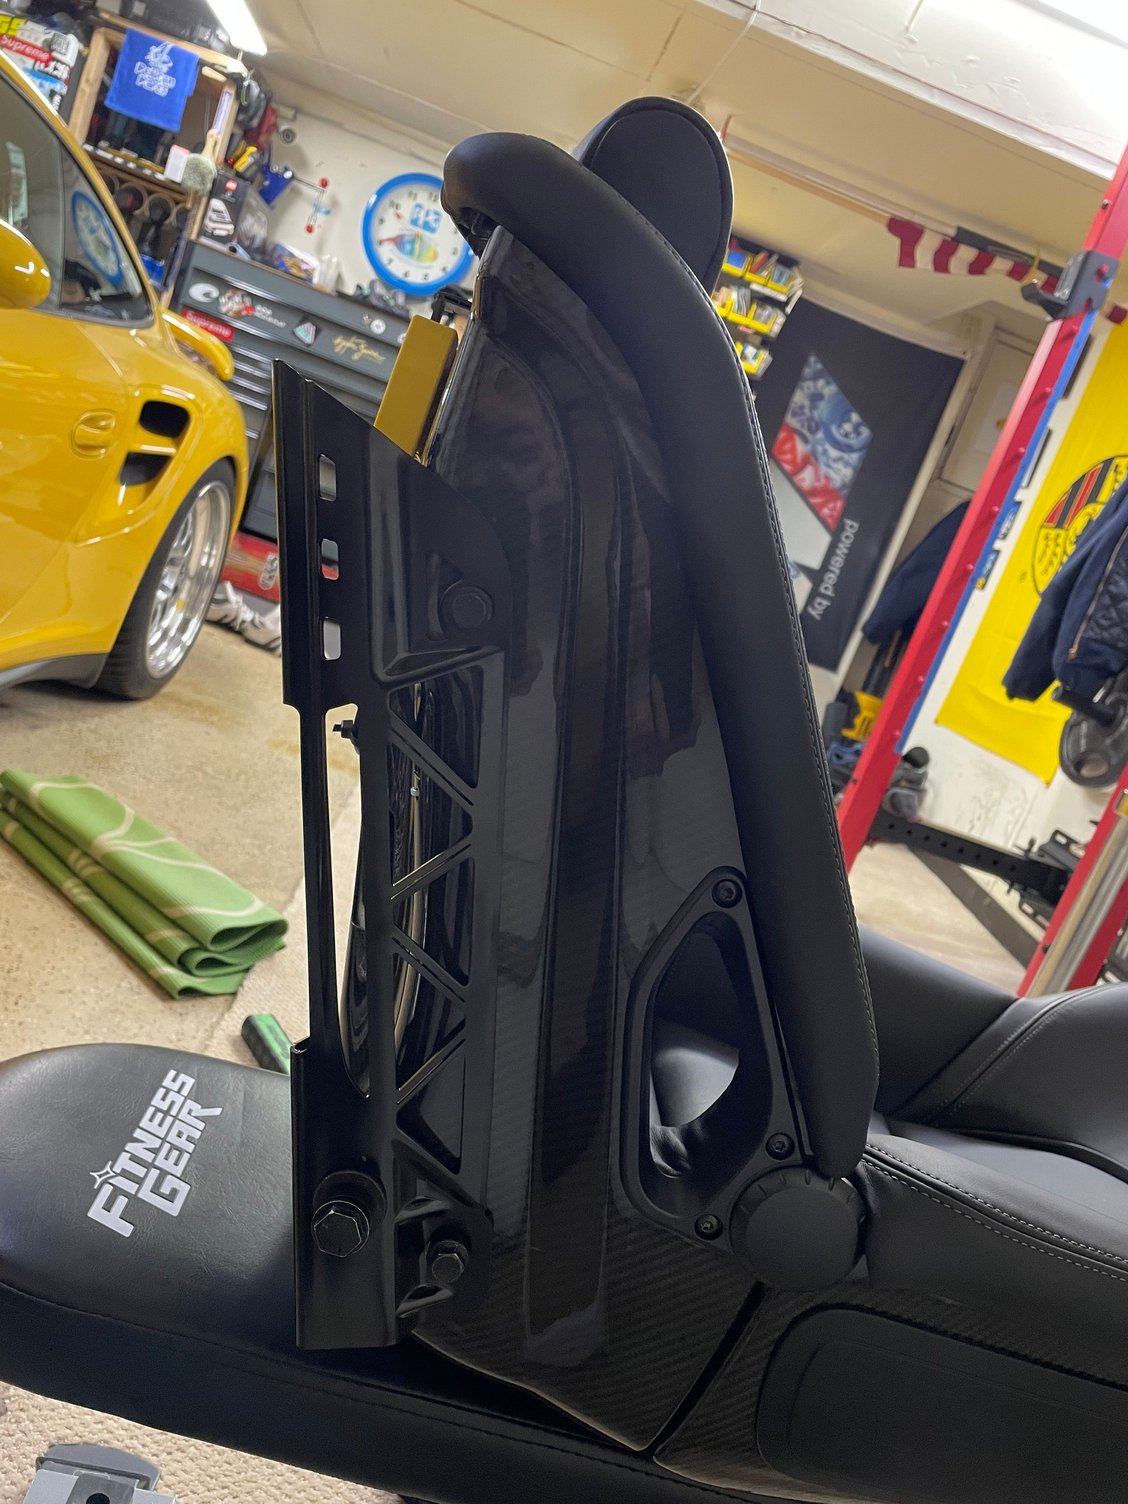
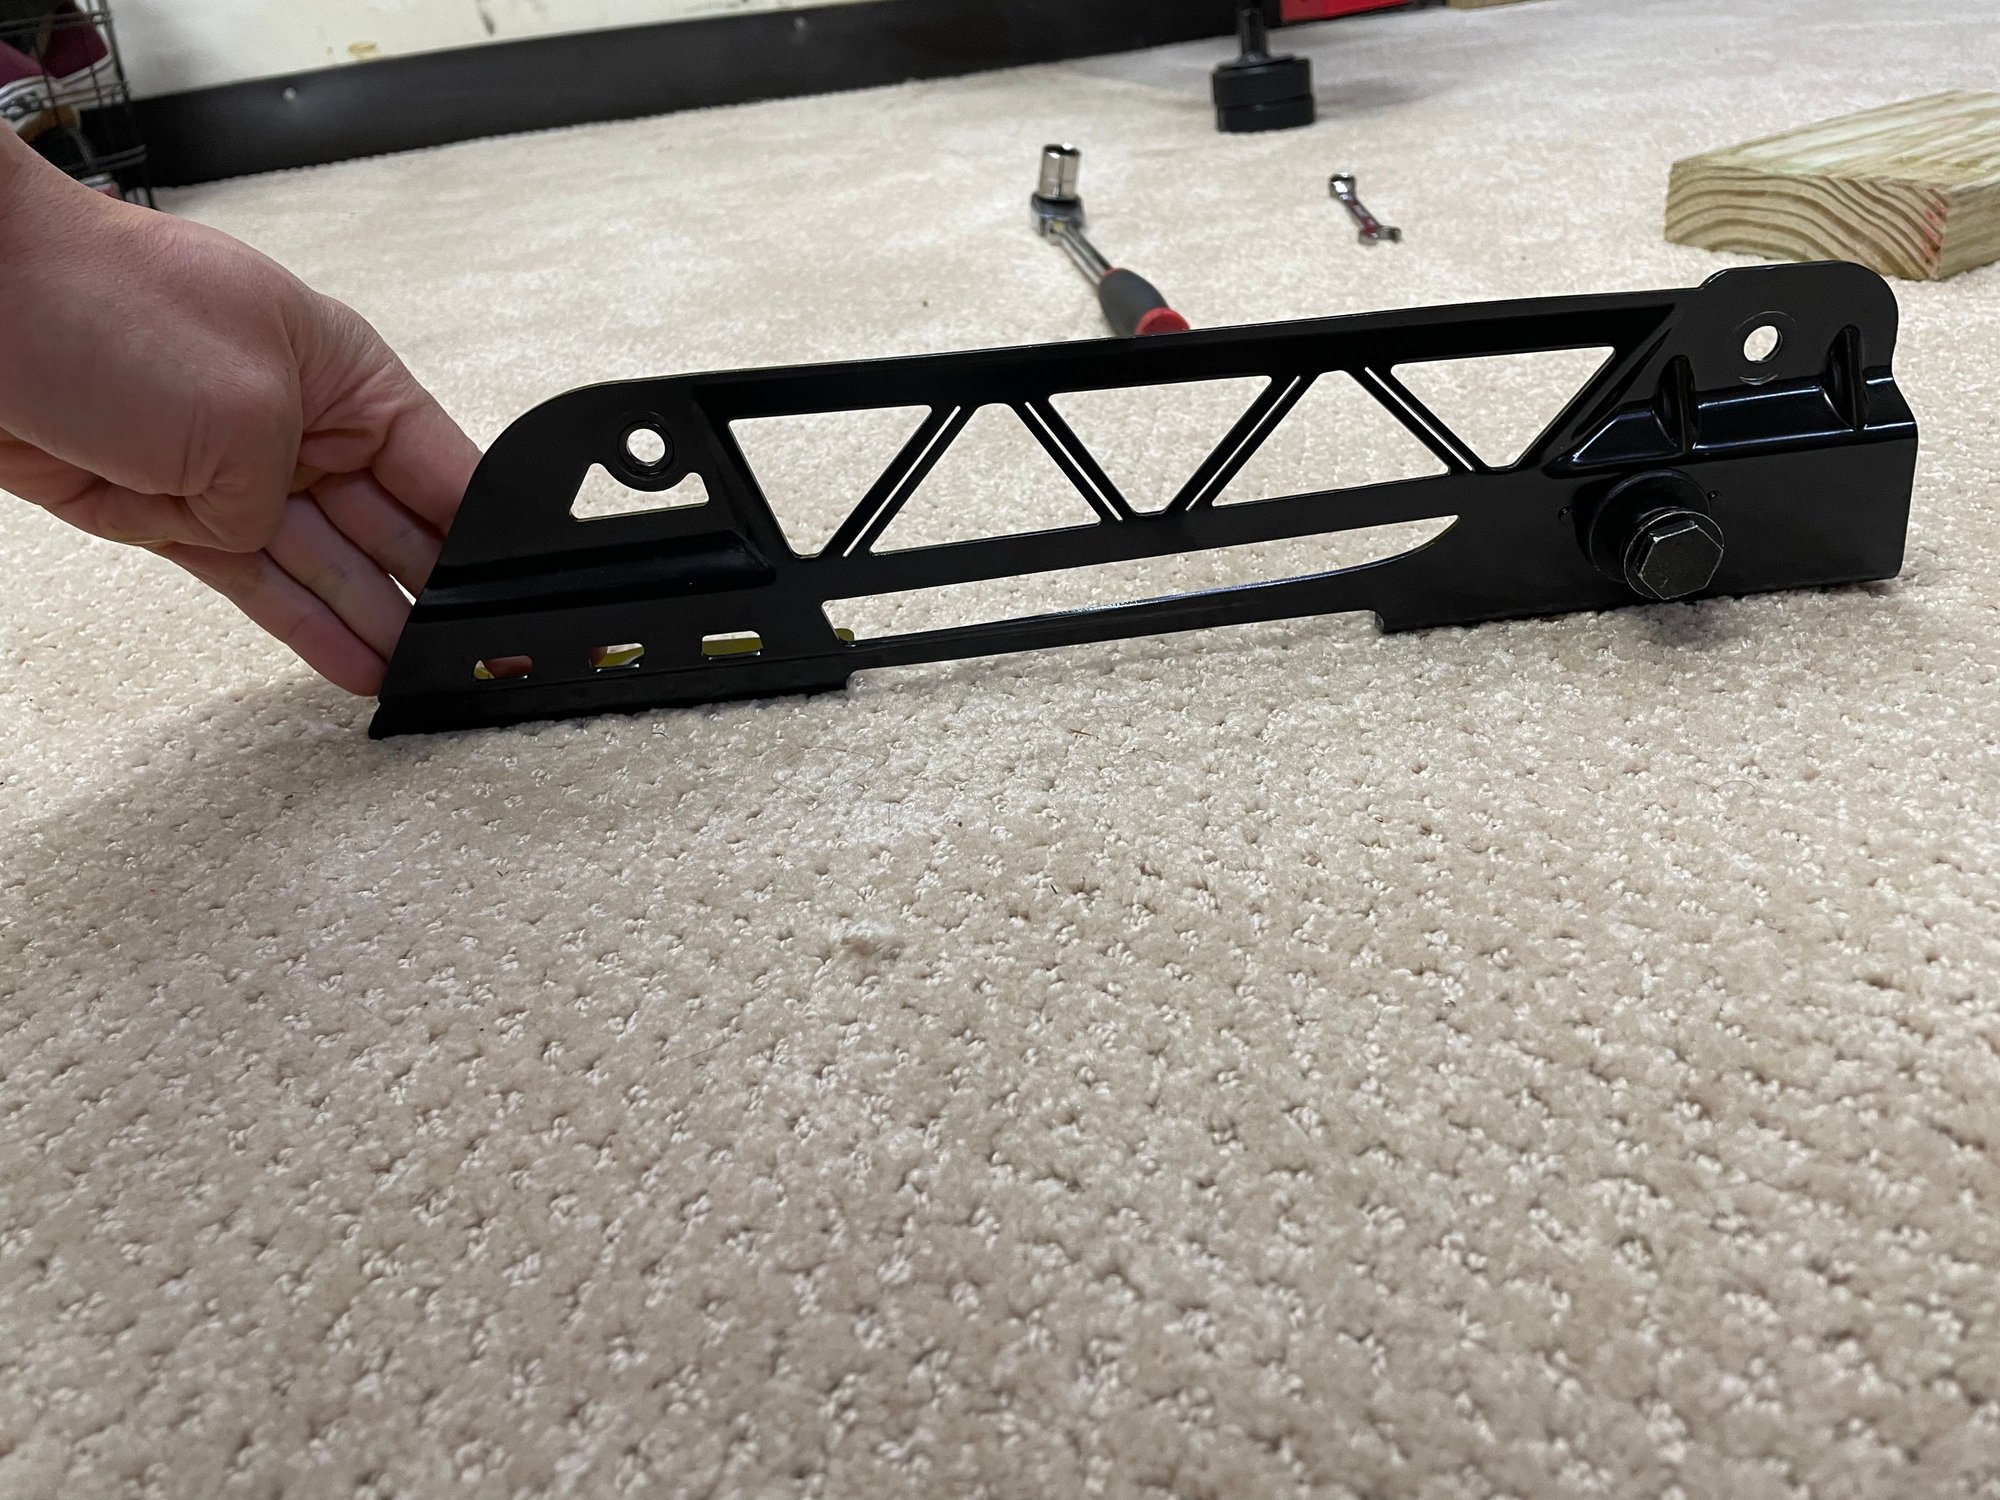
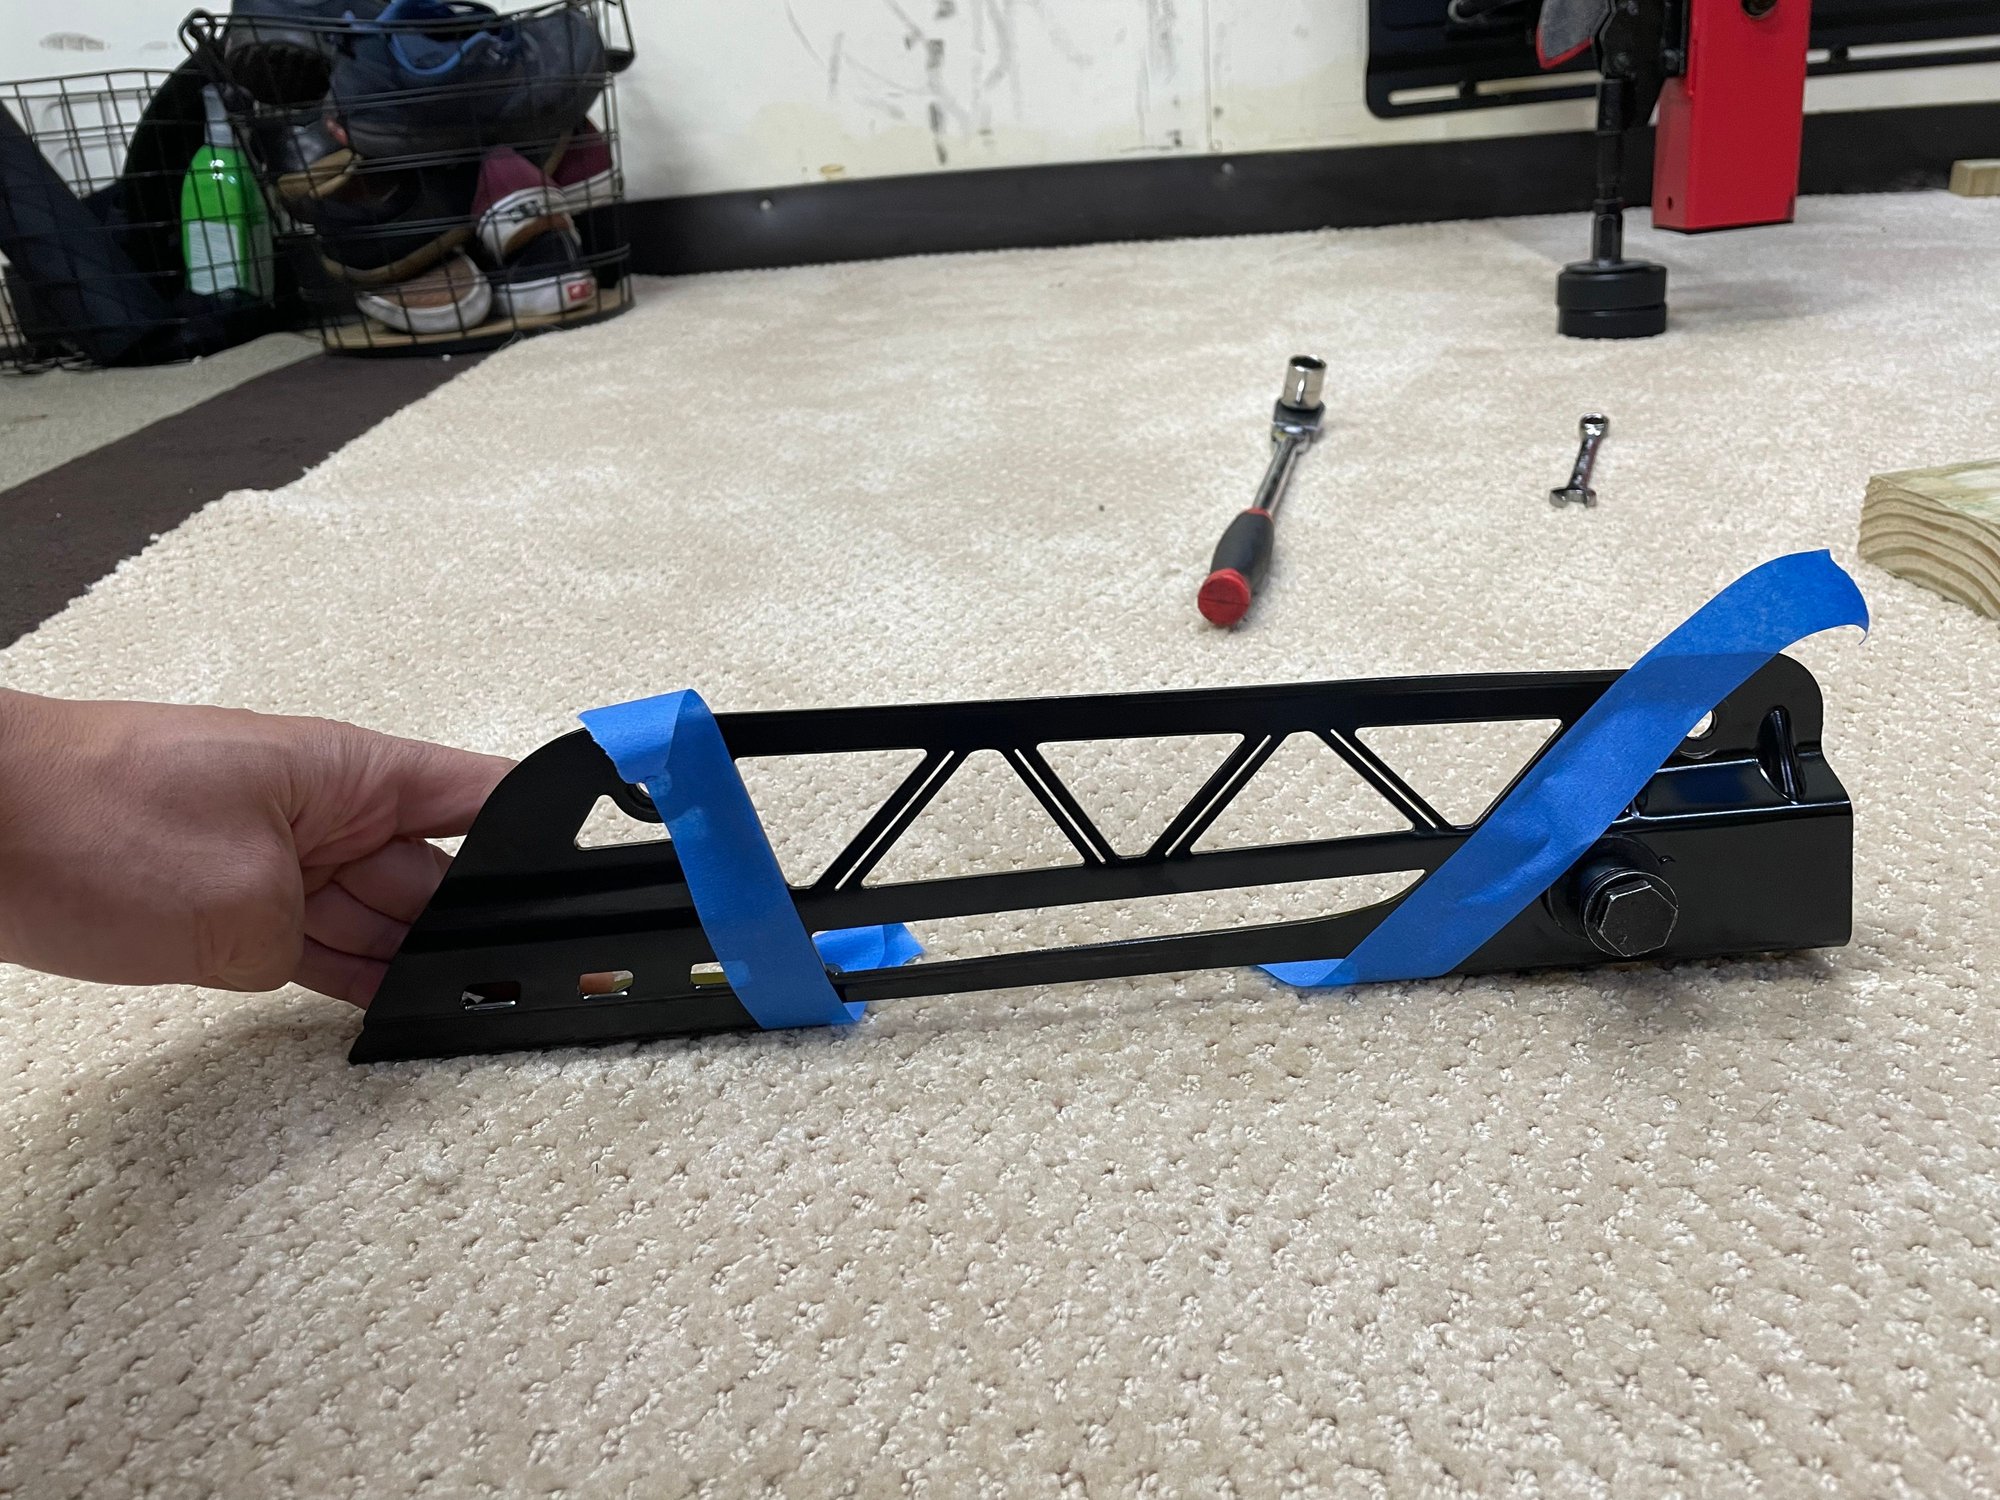
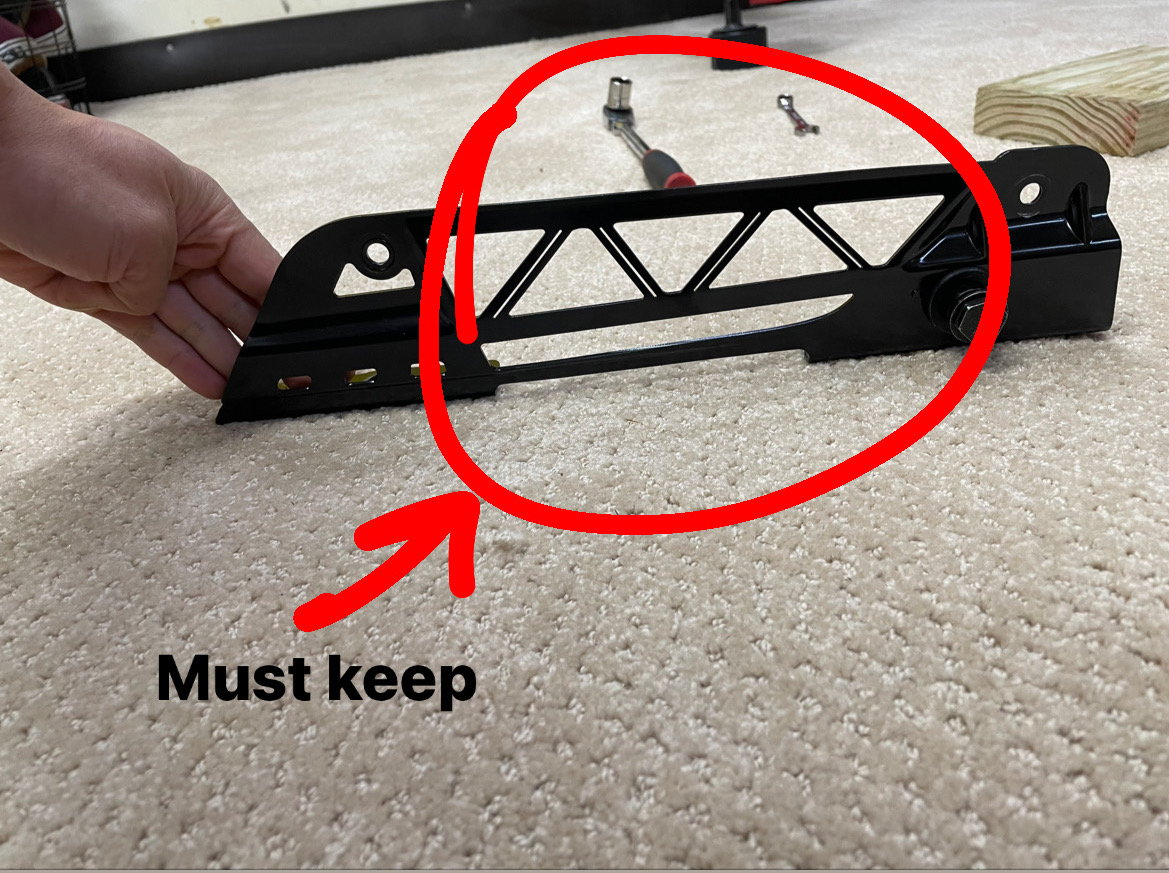
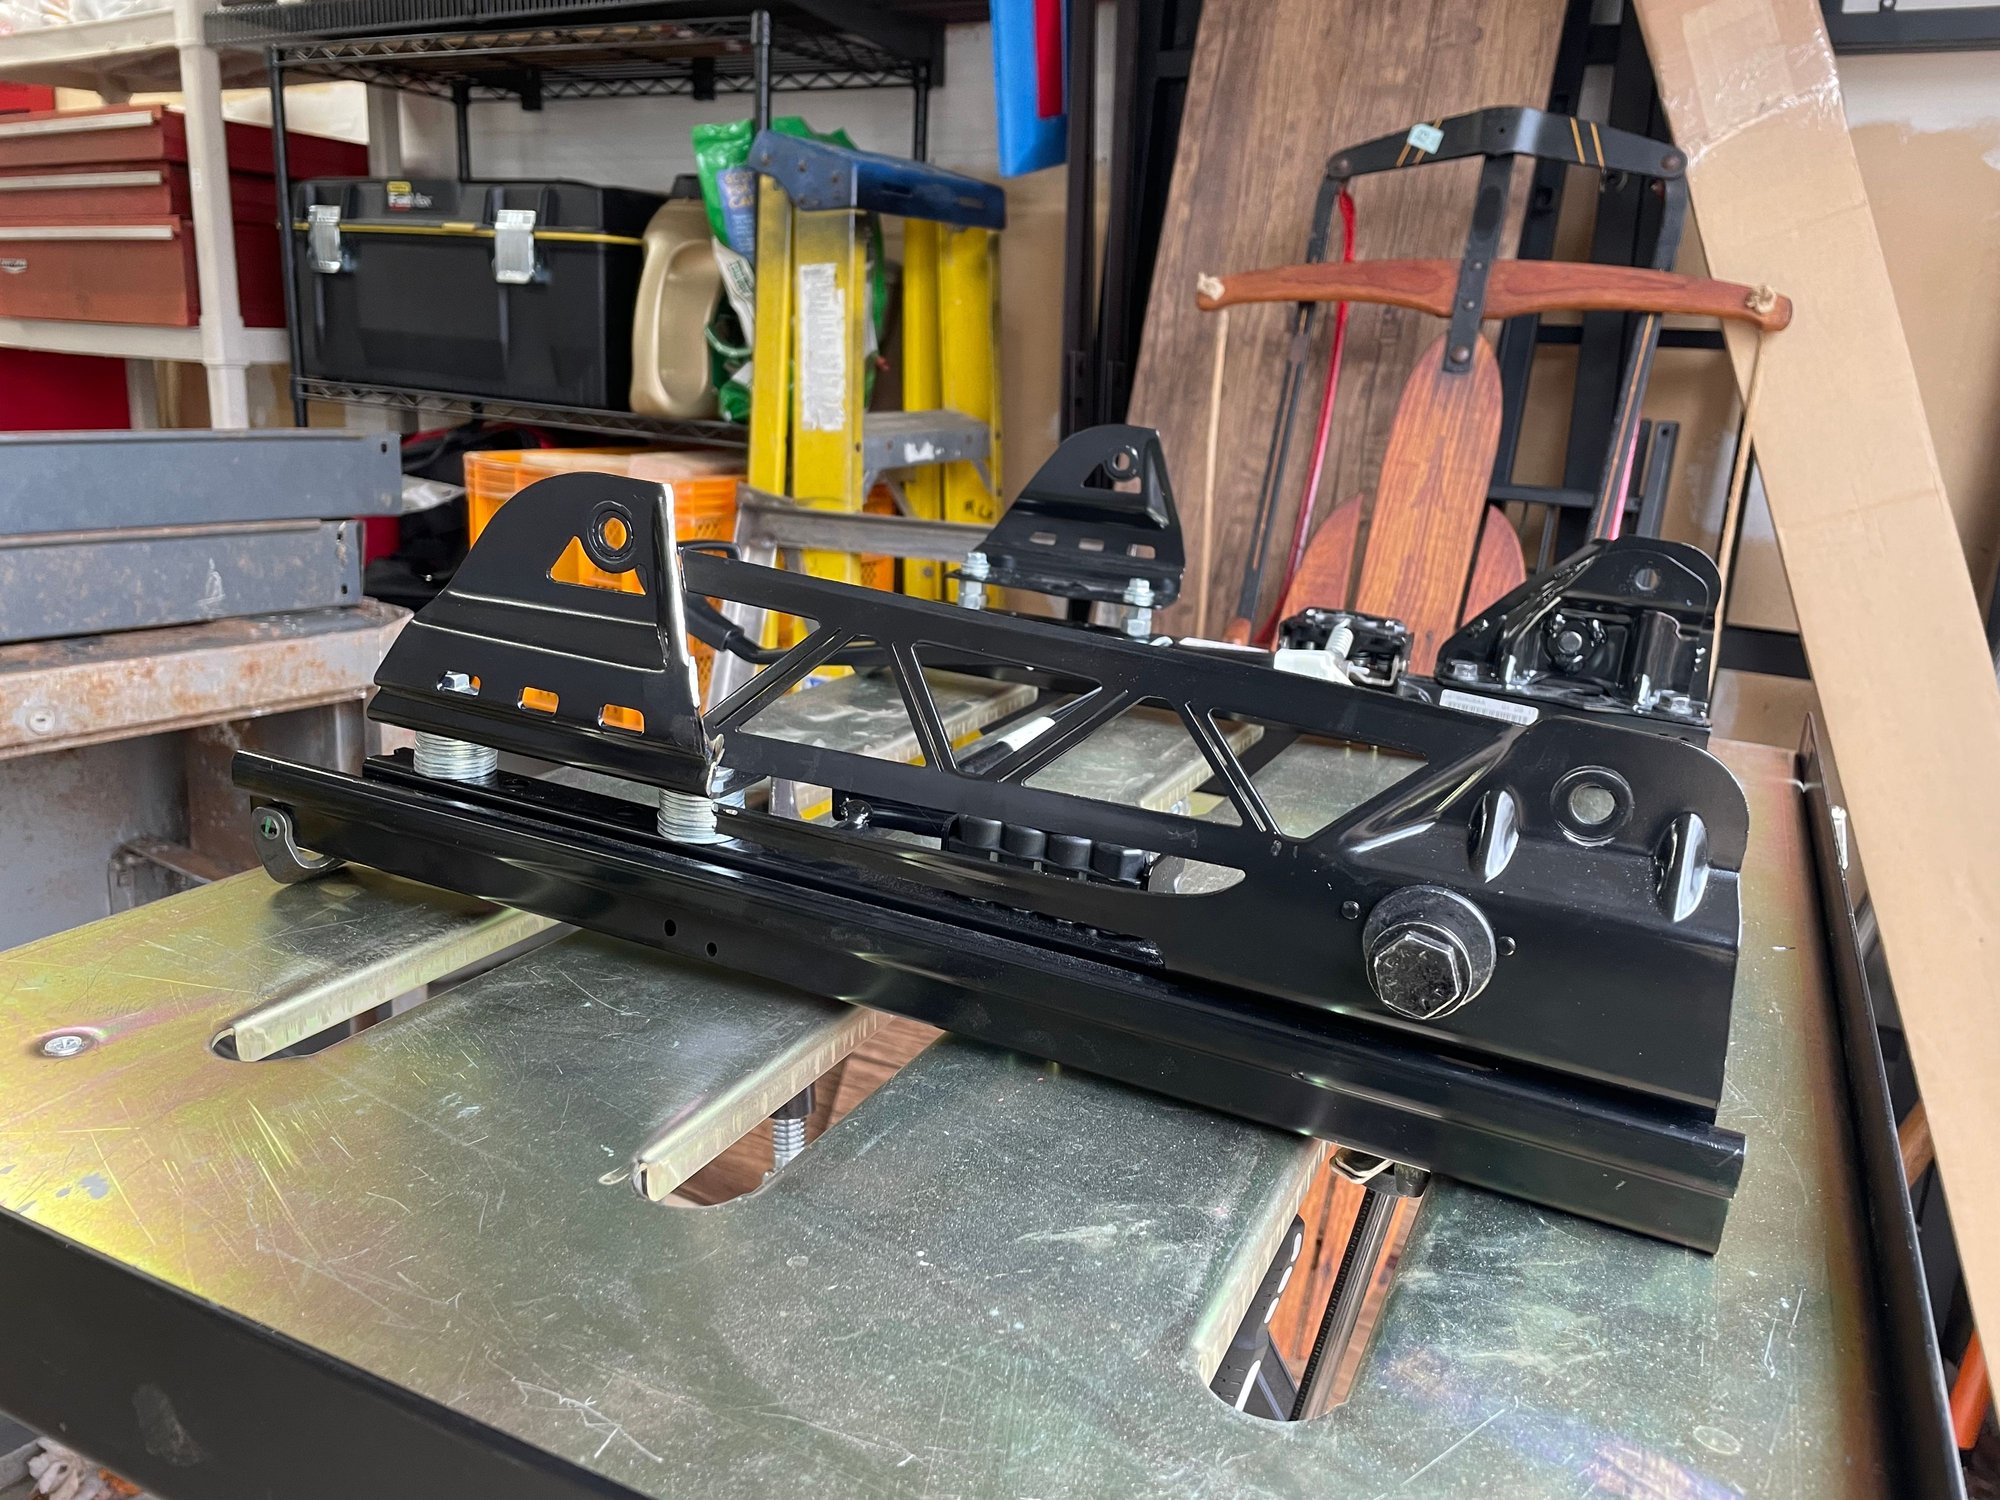
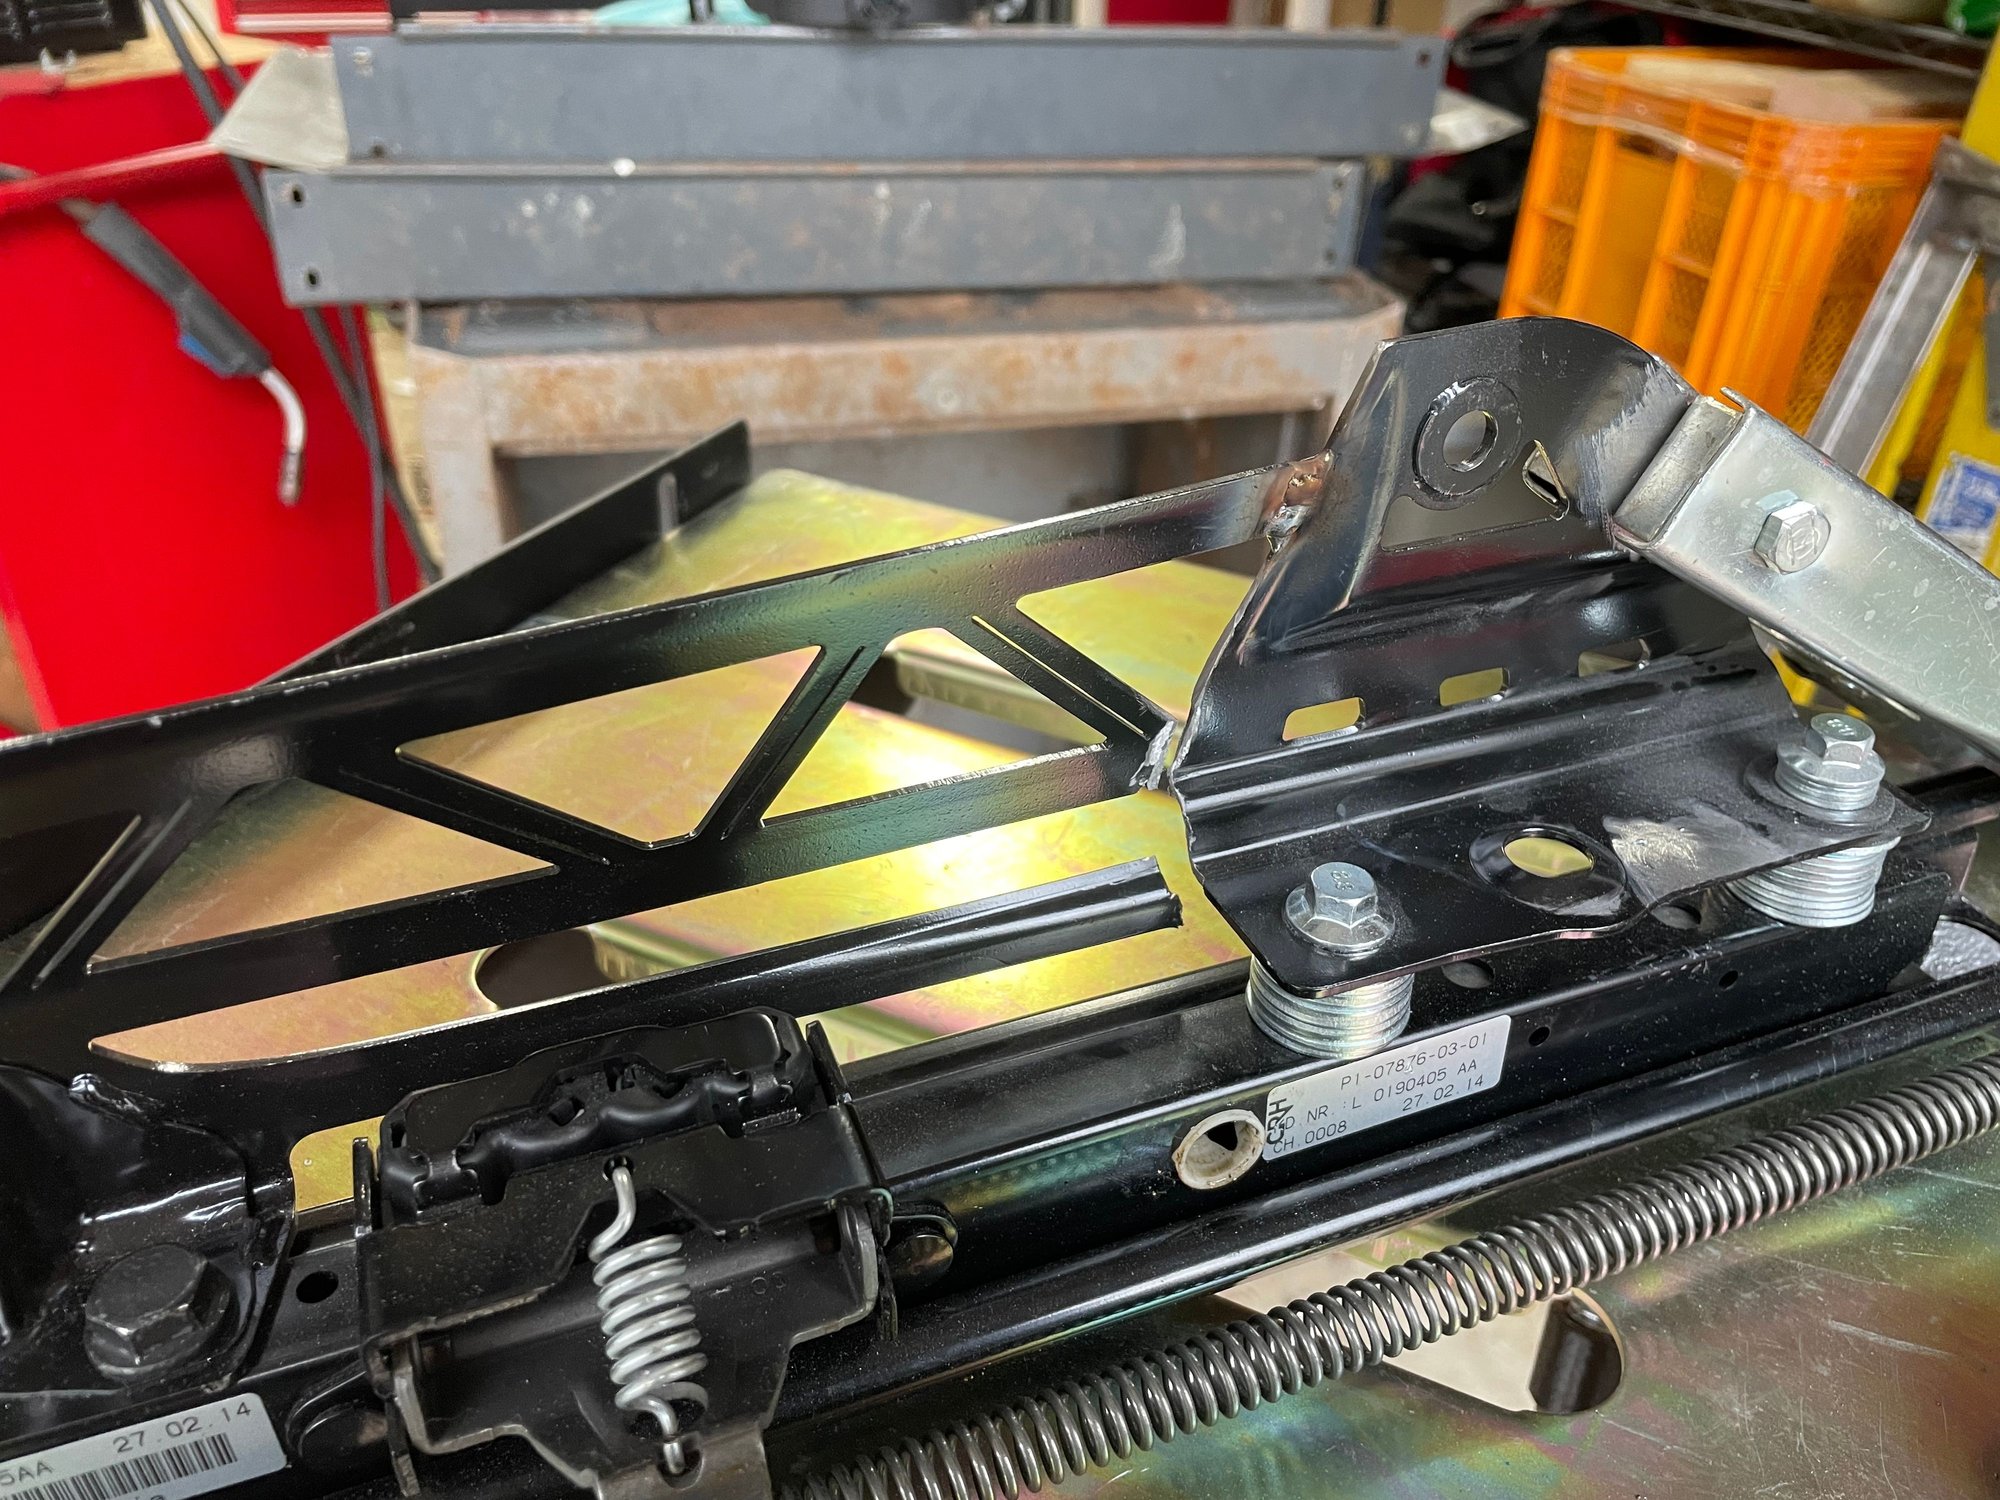
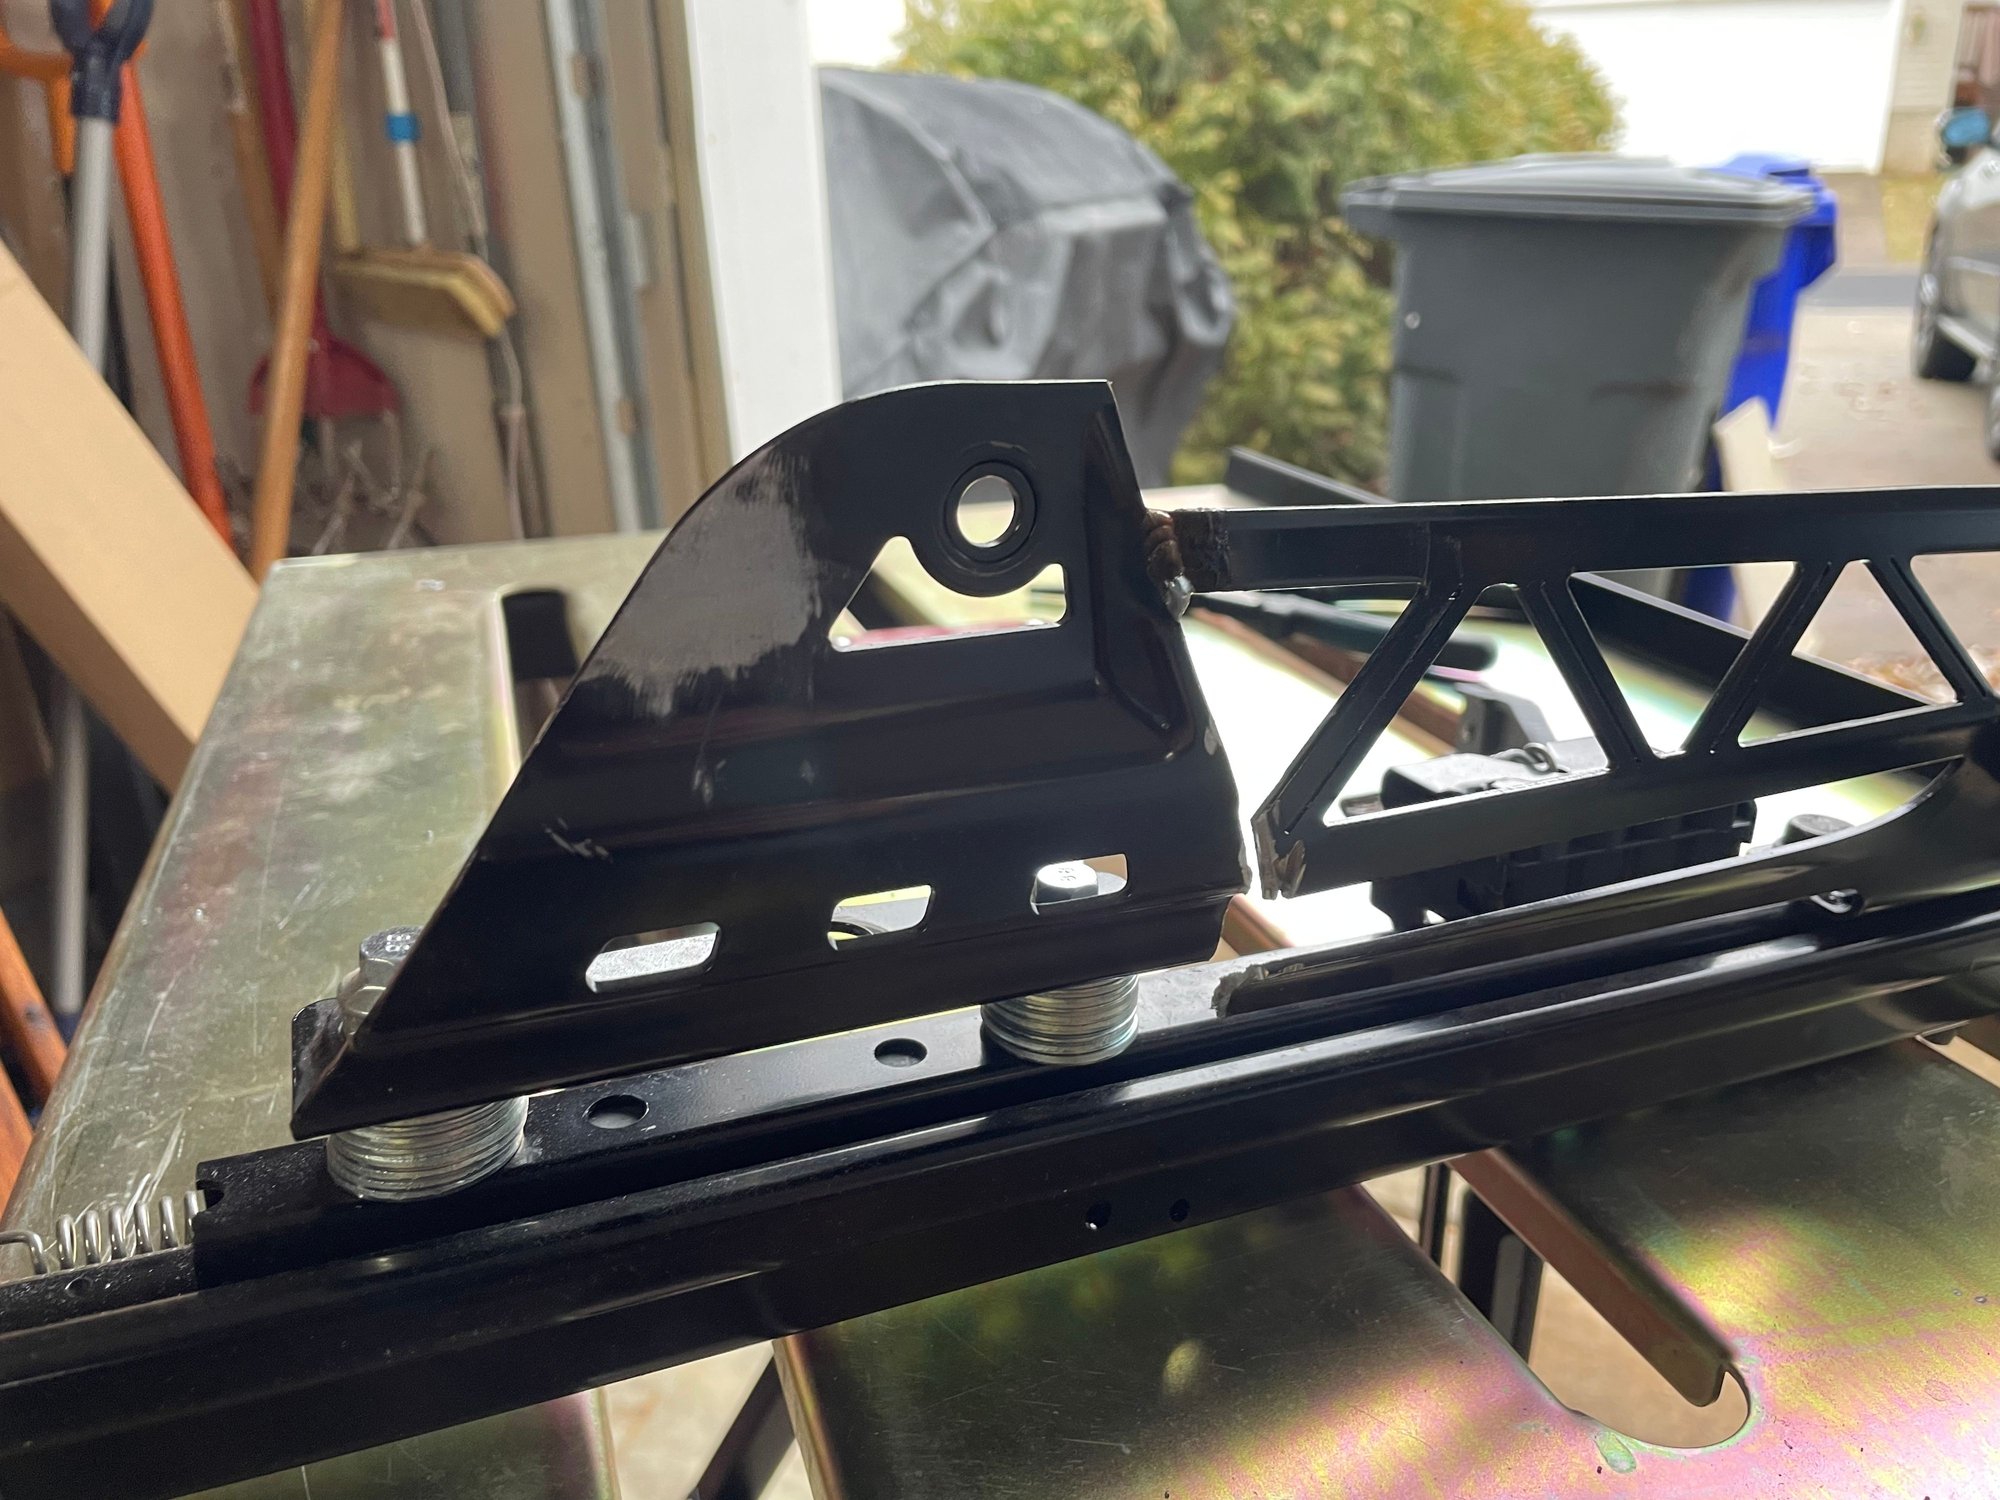
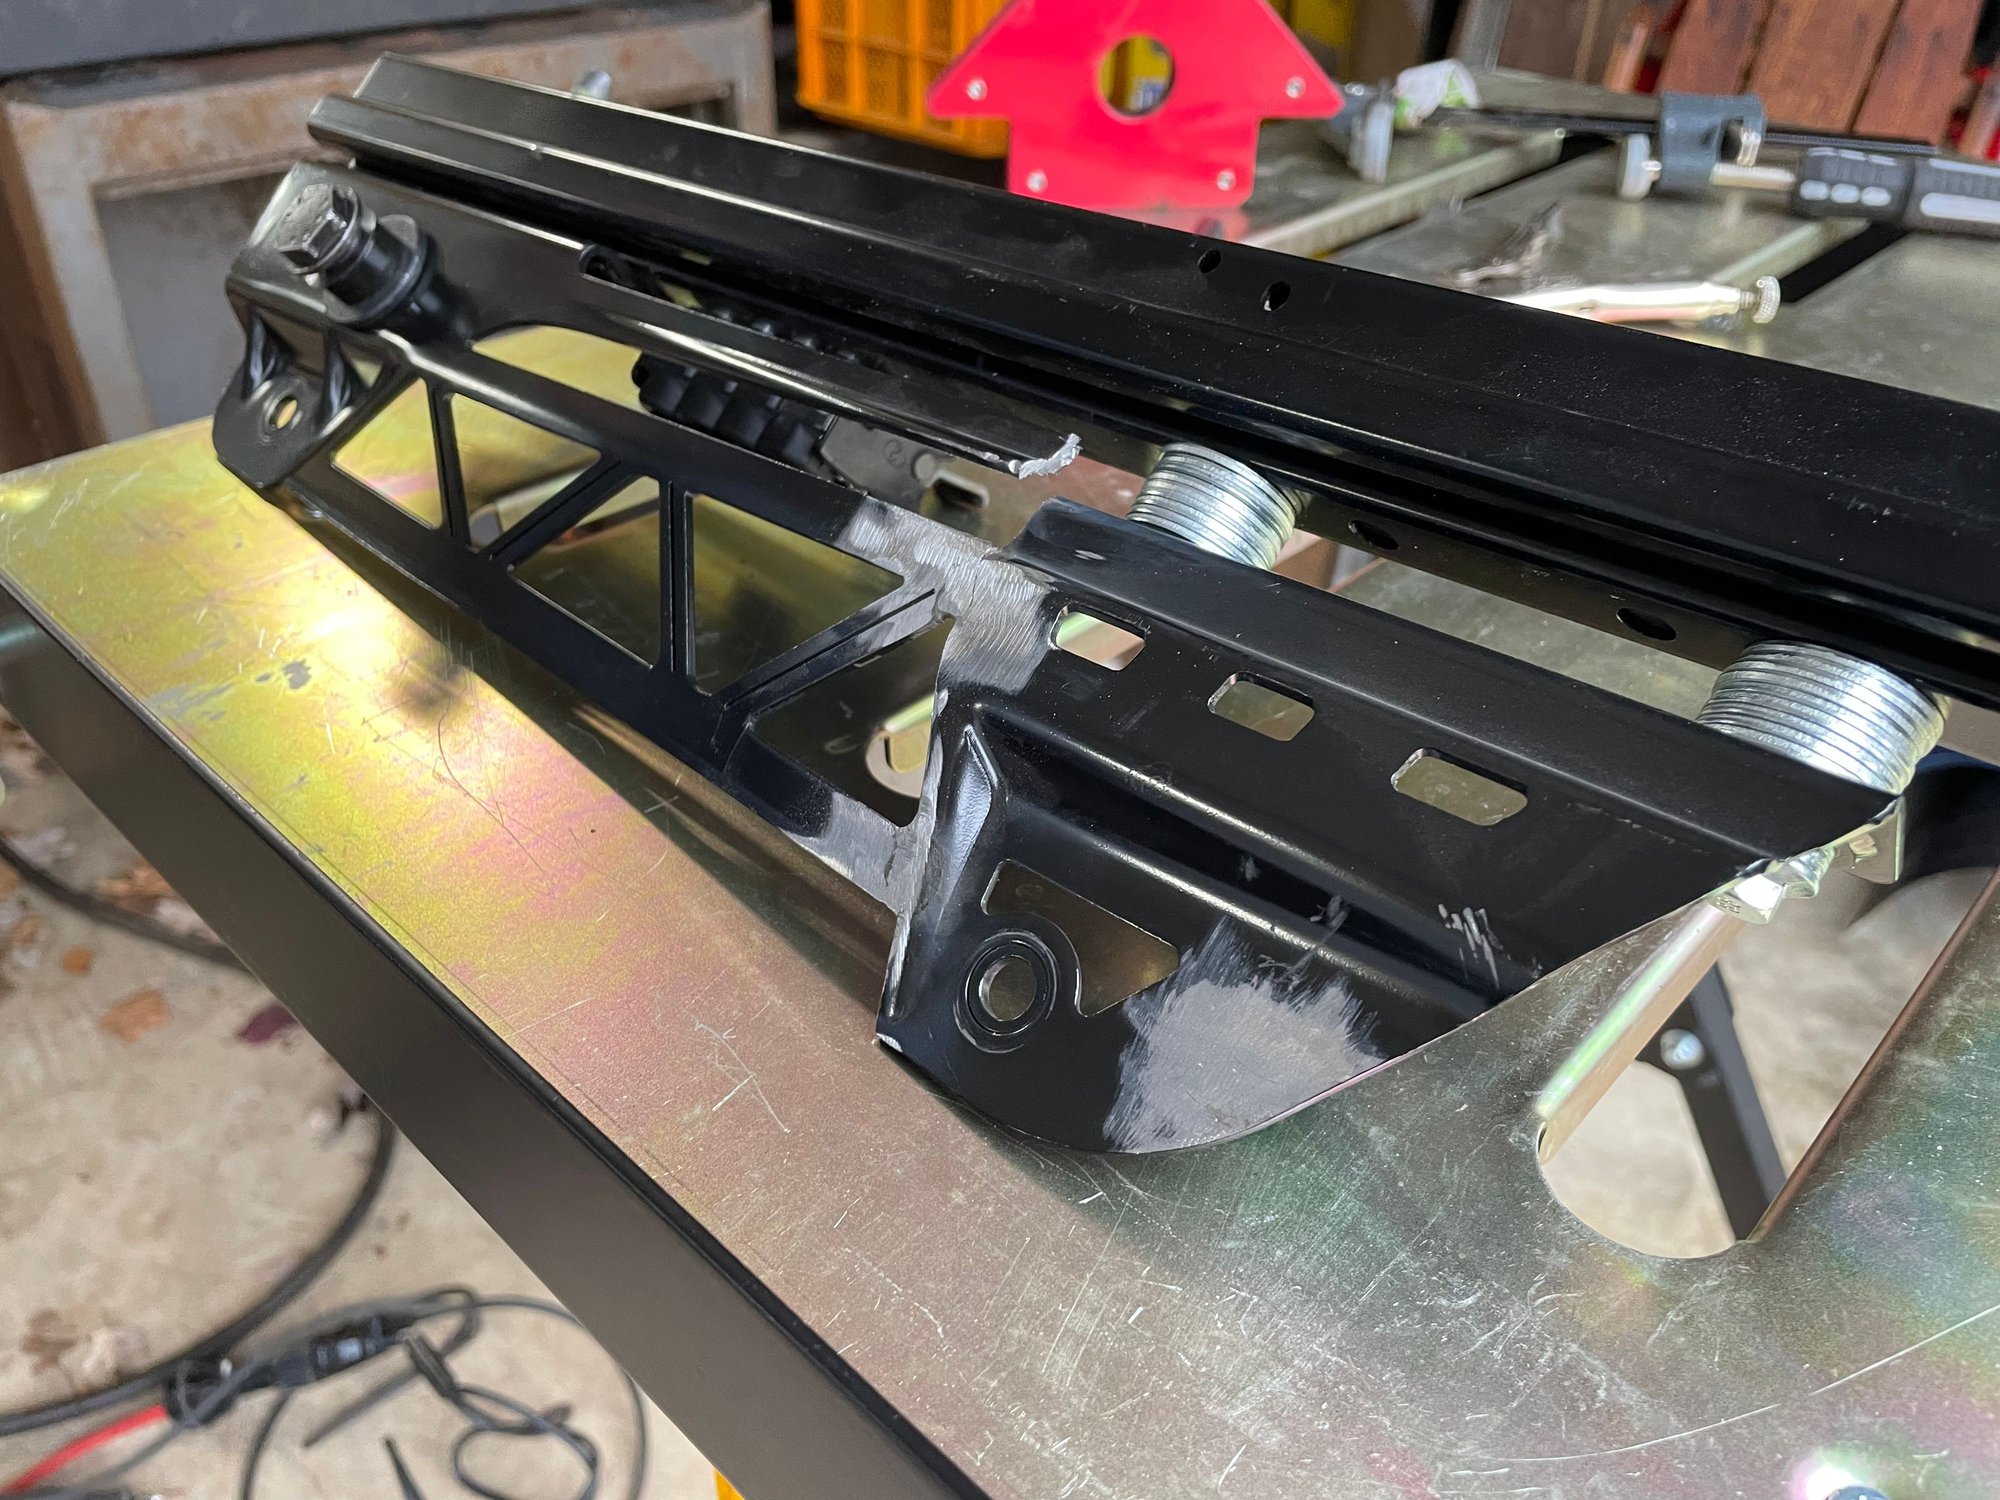
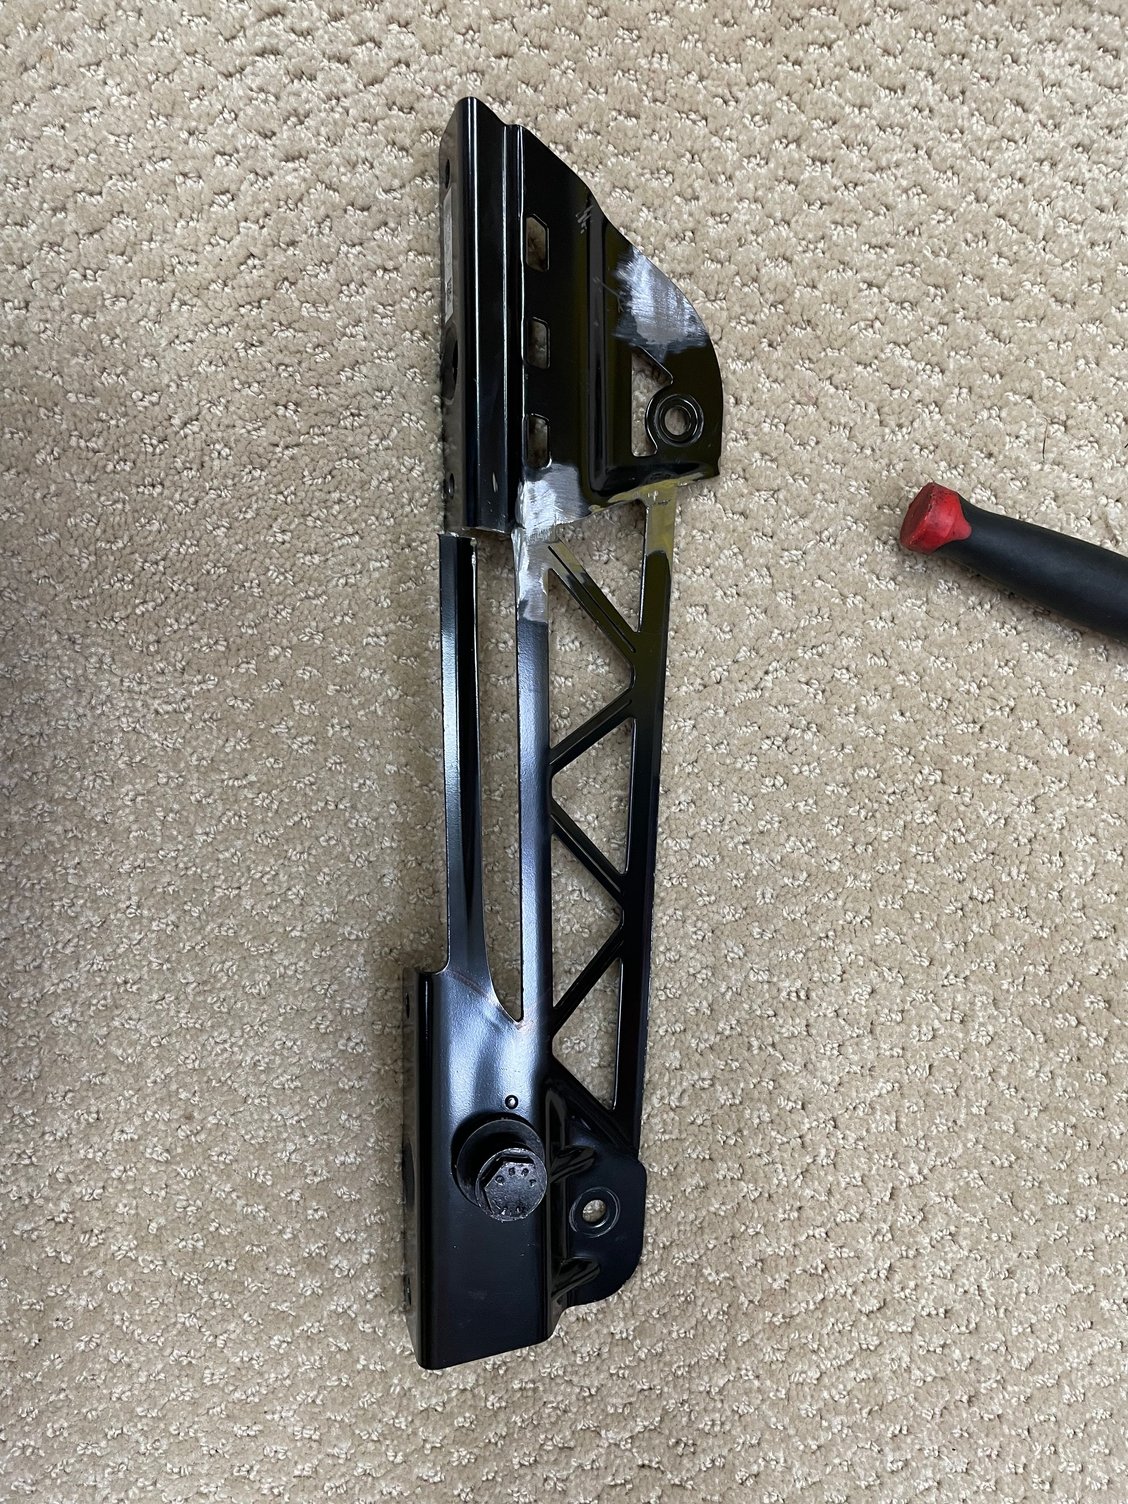
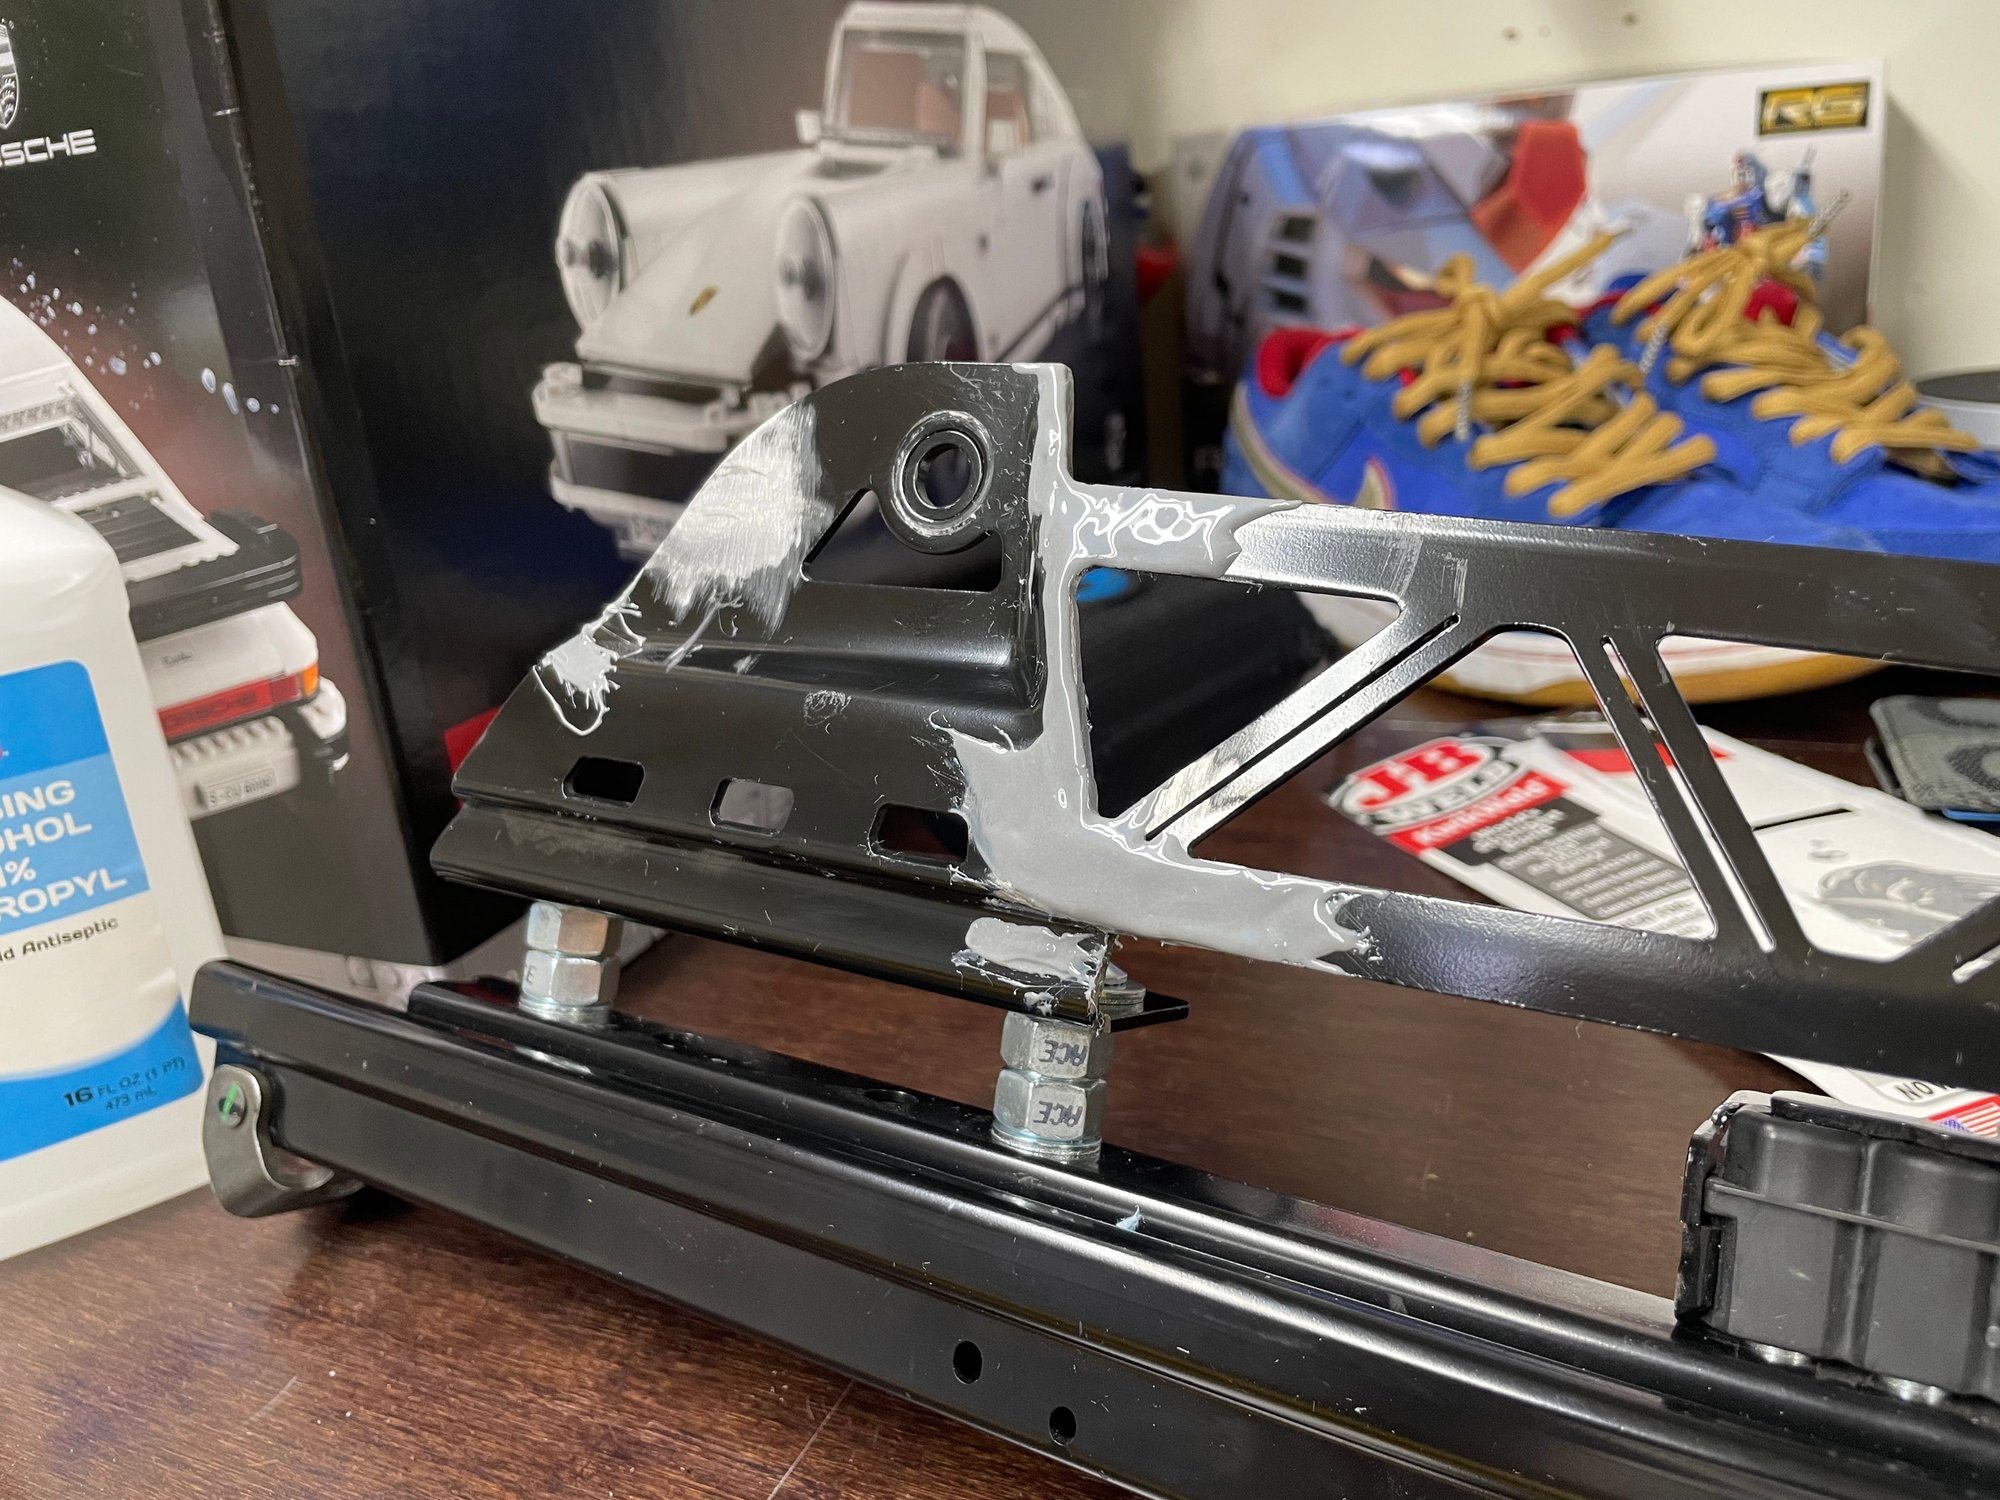
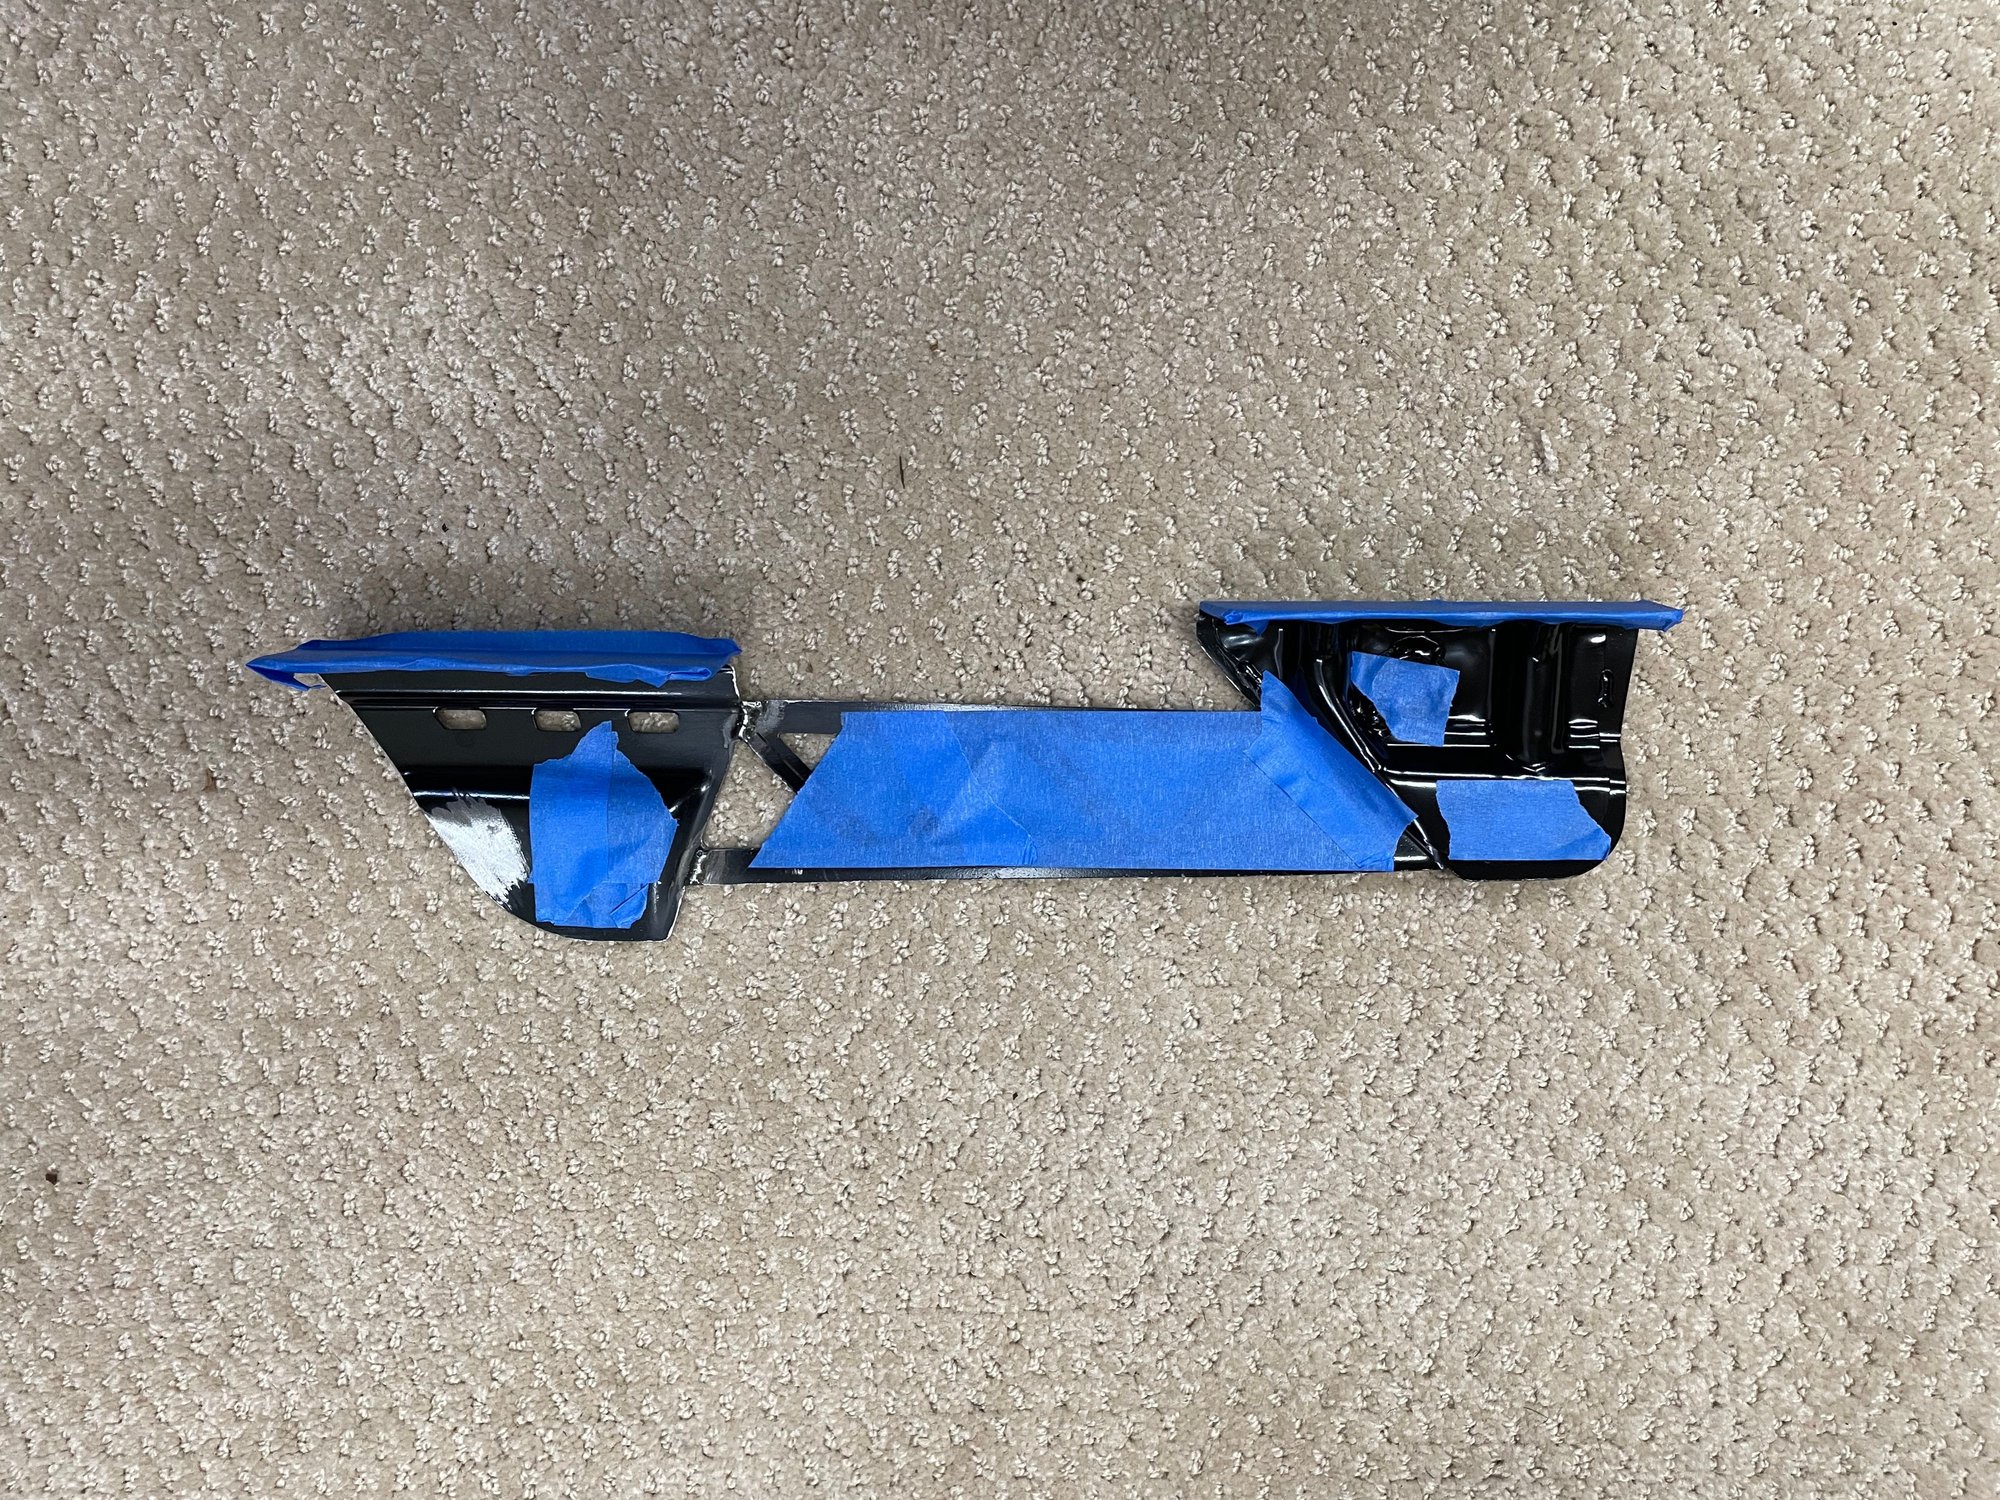
The only solution to this is to cut the side rail and �make it two pieces�. Easy enough, and nothing my angle grinder can�t do in a manner of seconds. I thought about the best way of going about this and at first, I was OK with just cutting it at the front and rear and deleting the center cross-bar stiffener.
However, looking at it more I realized that this detail of the seat was a very cool touch and I did not want to lose that.
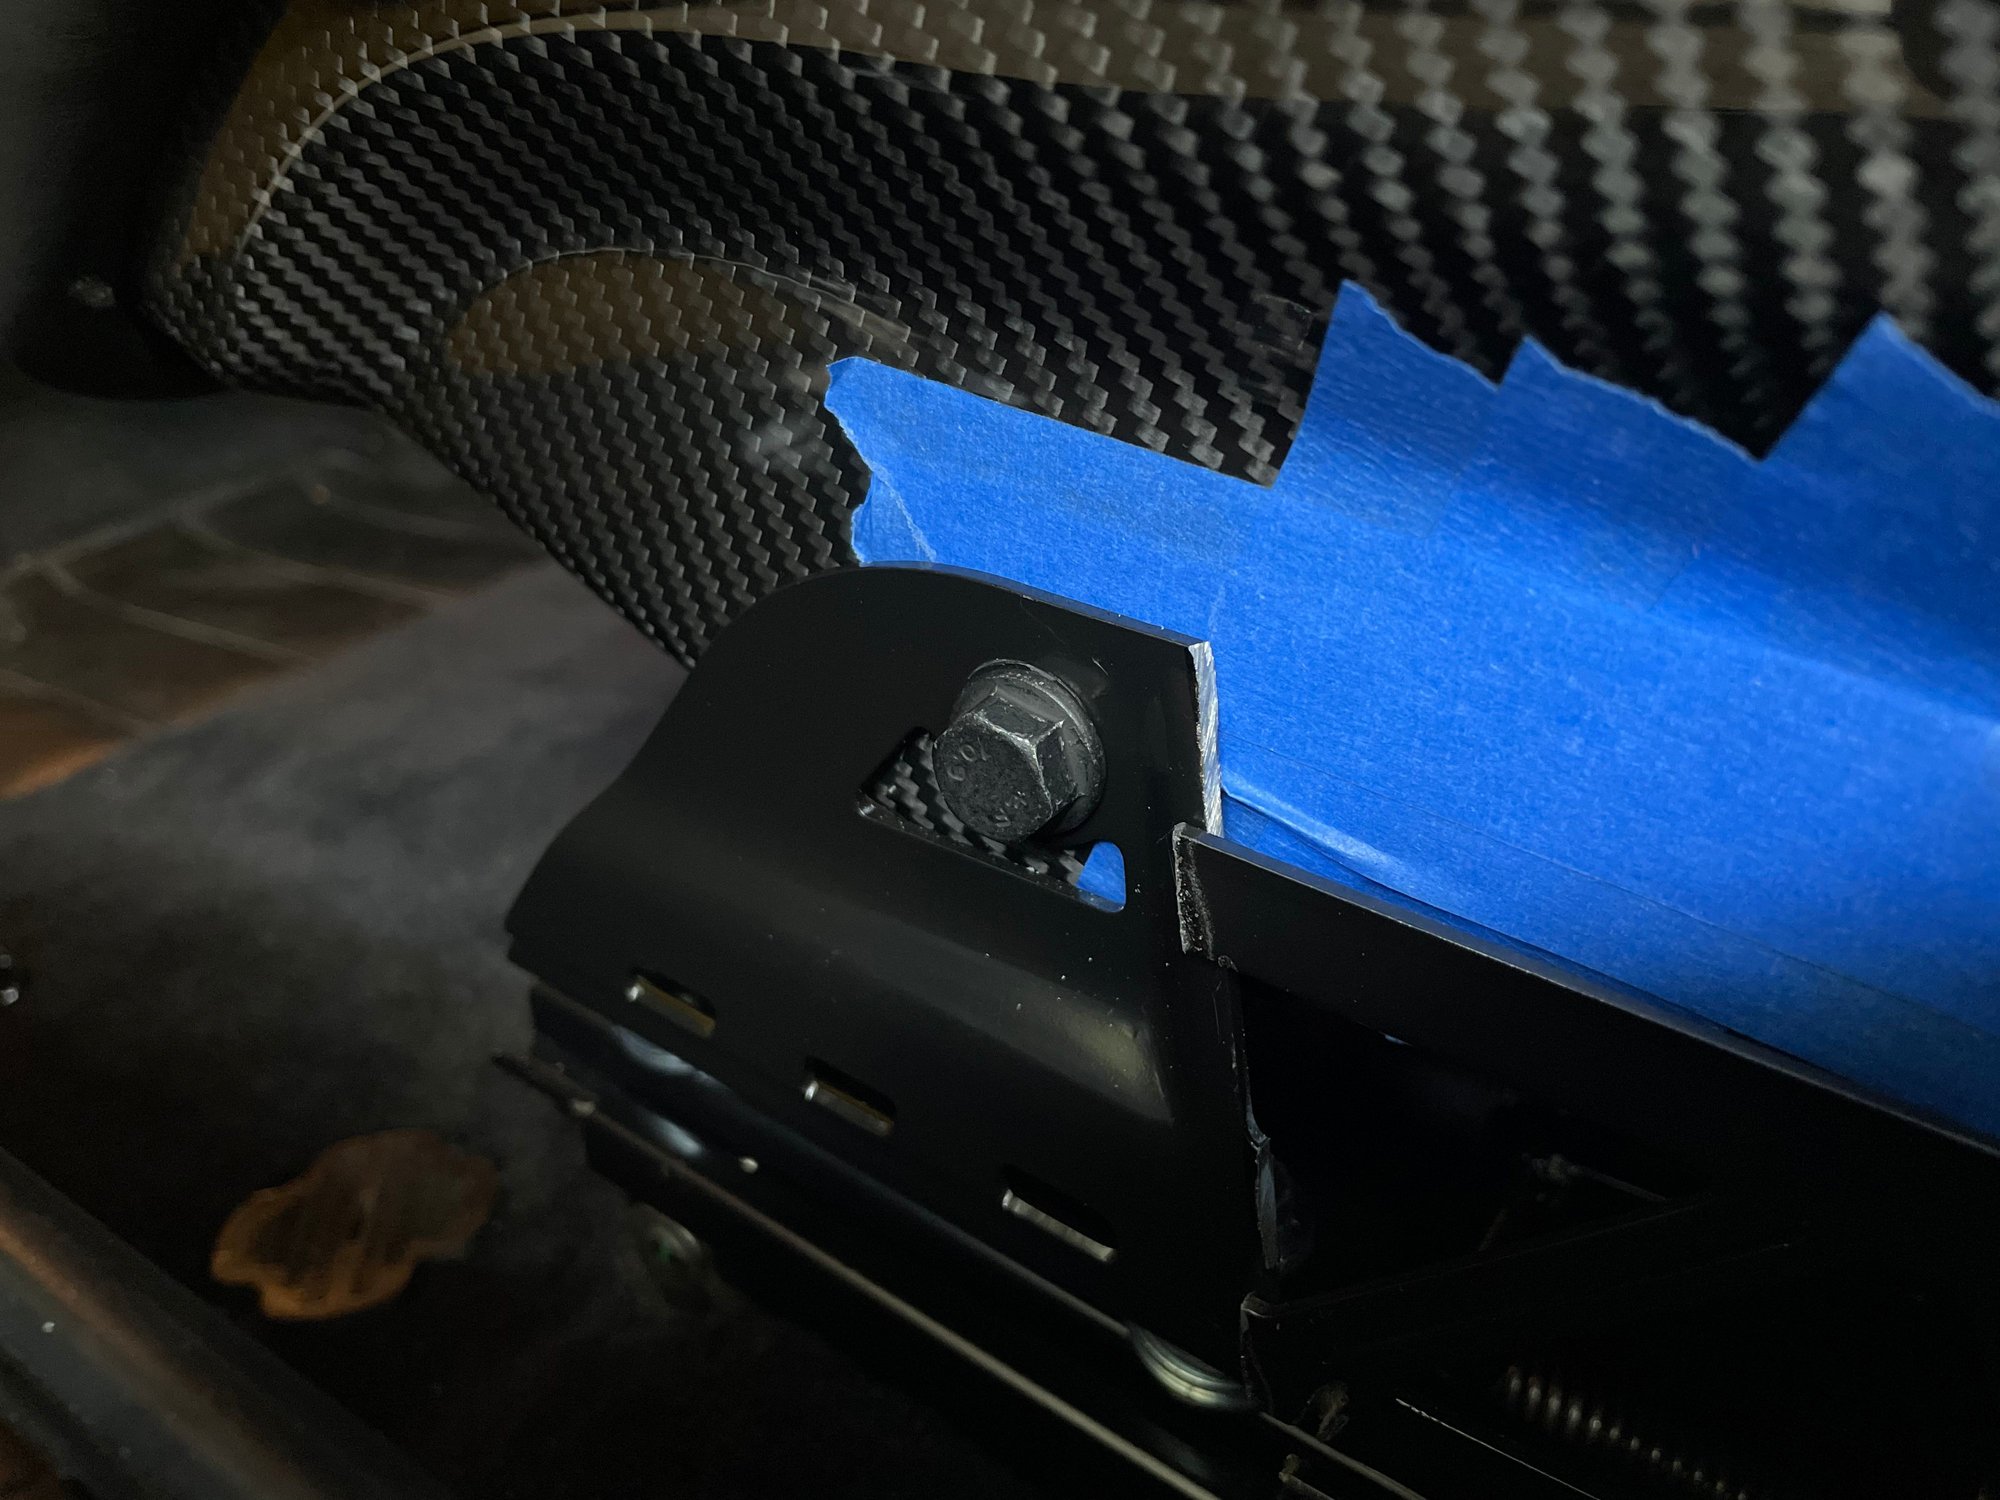
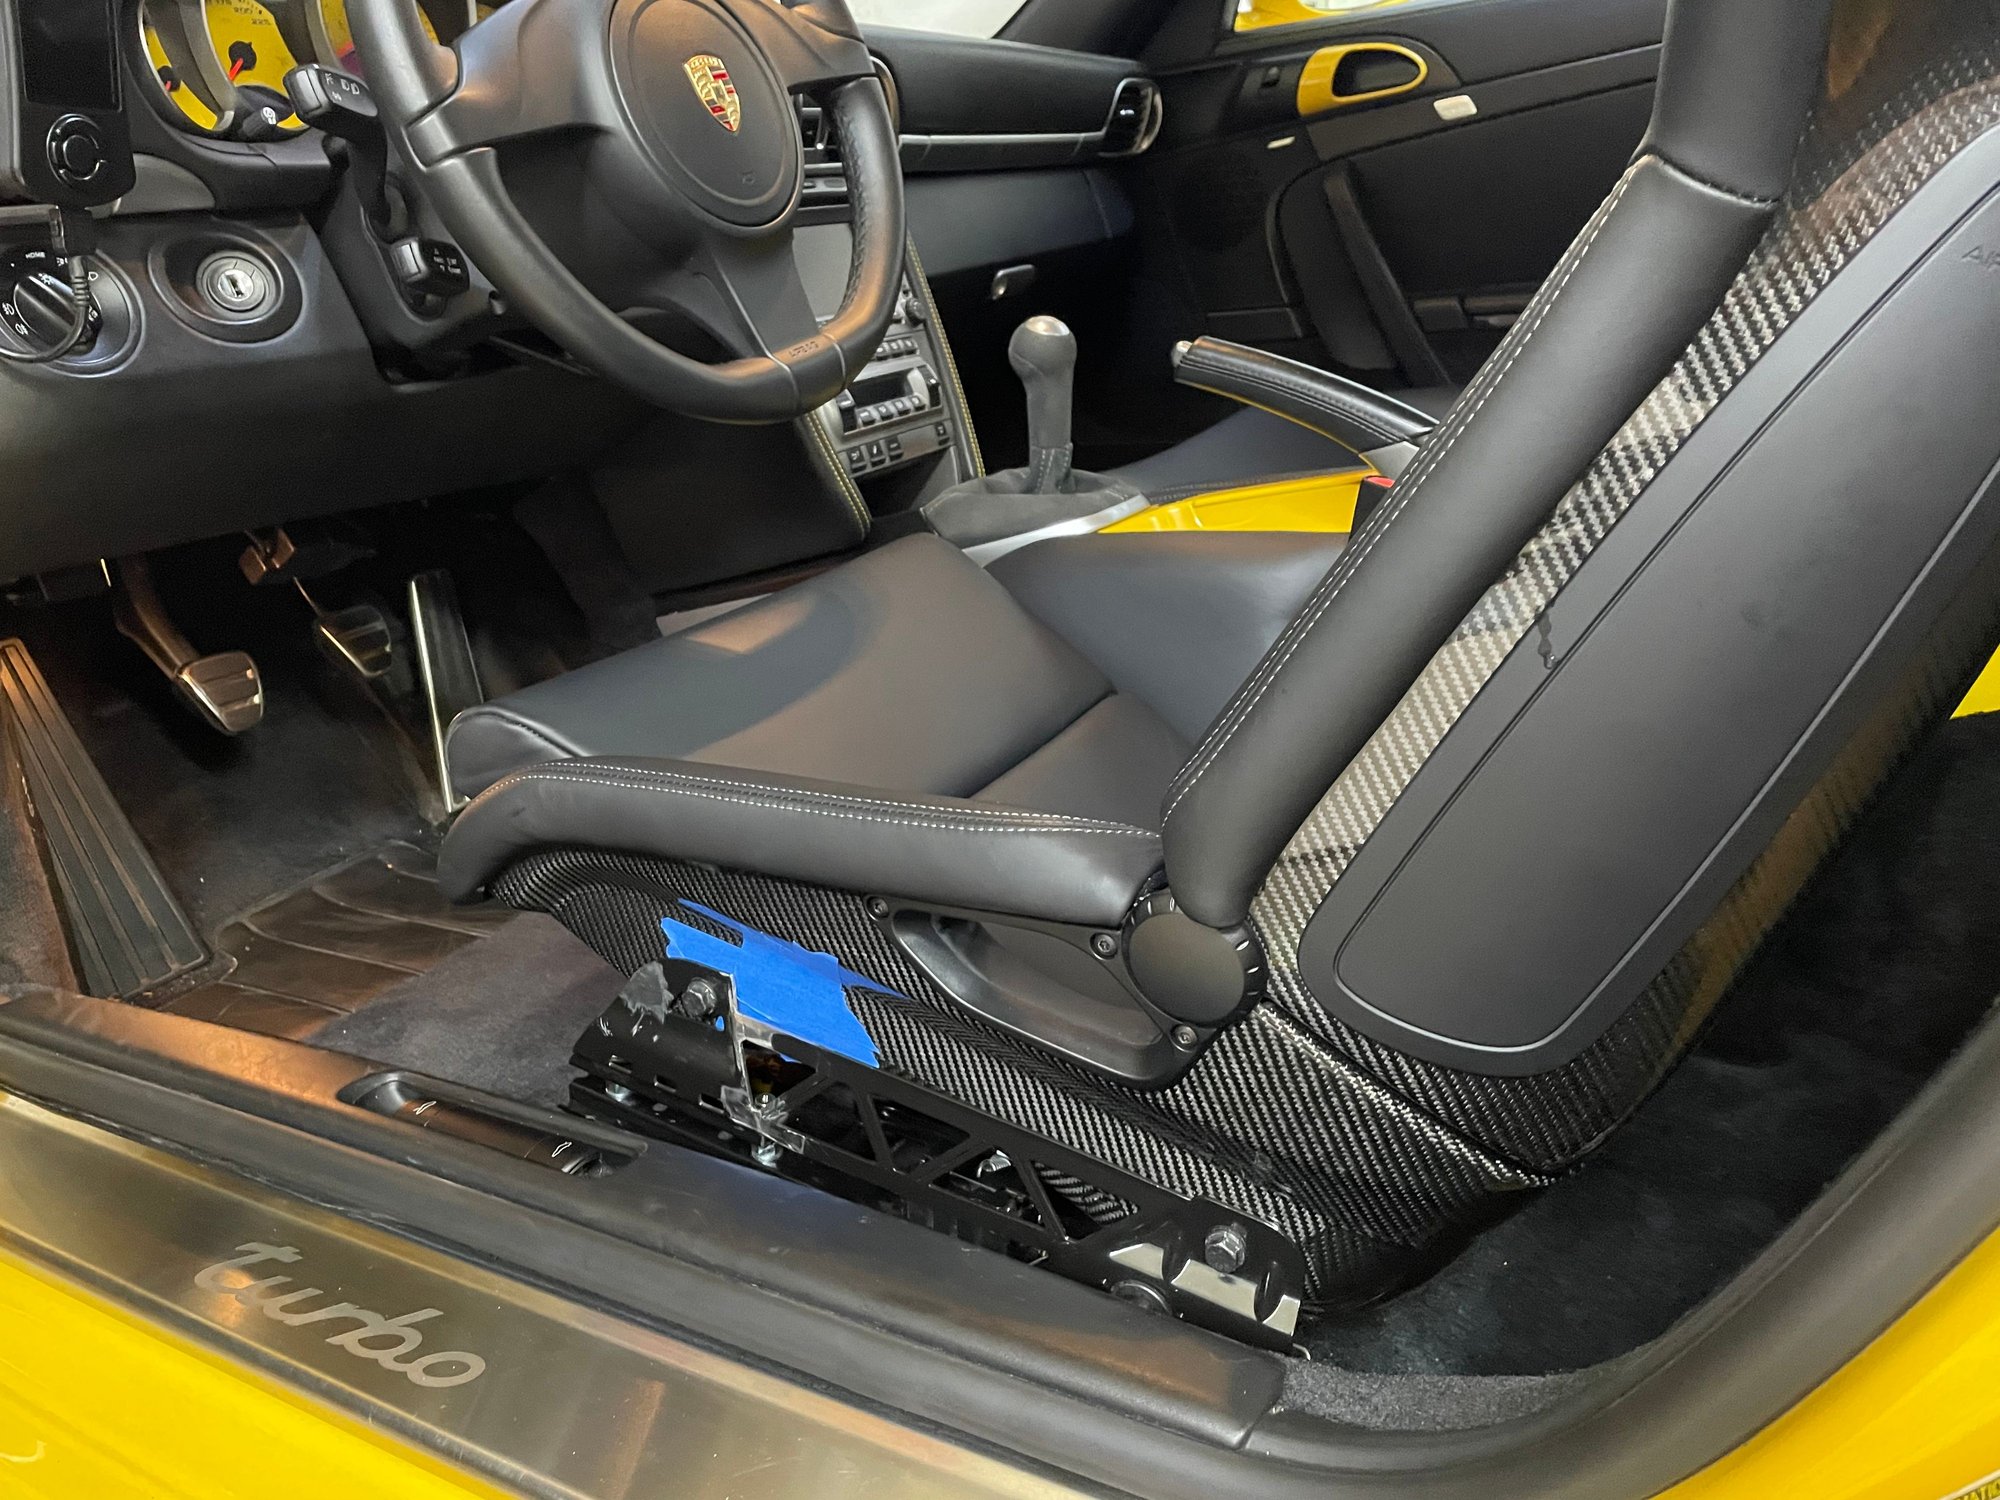
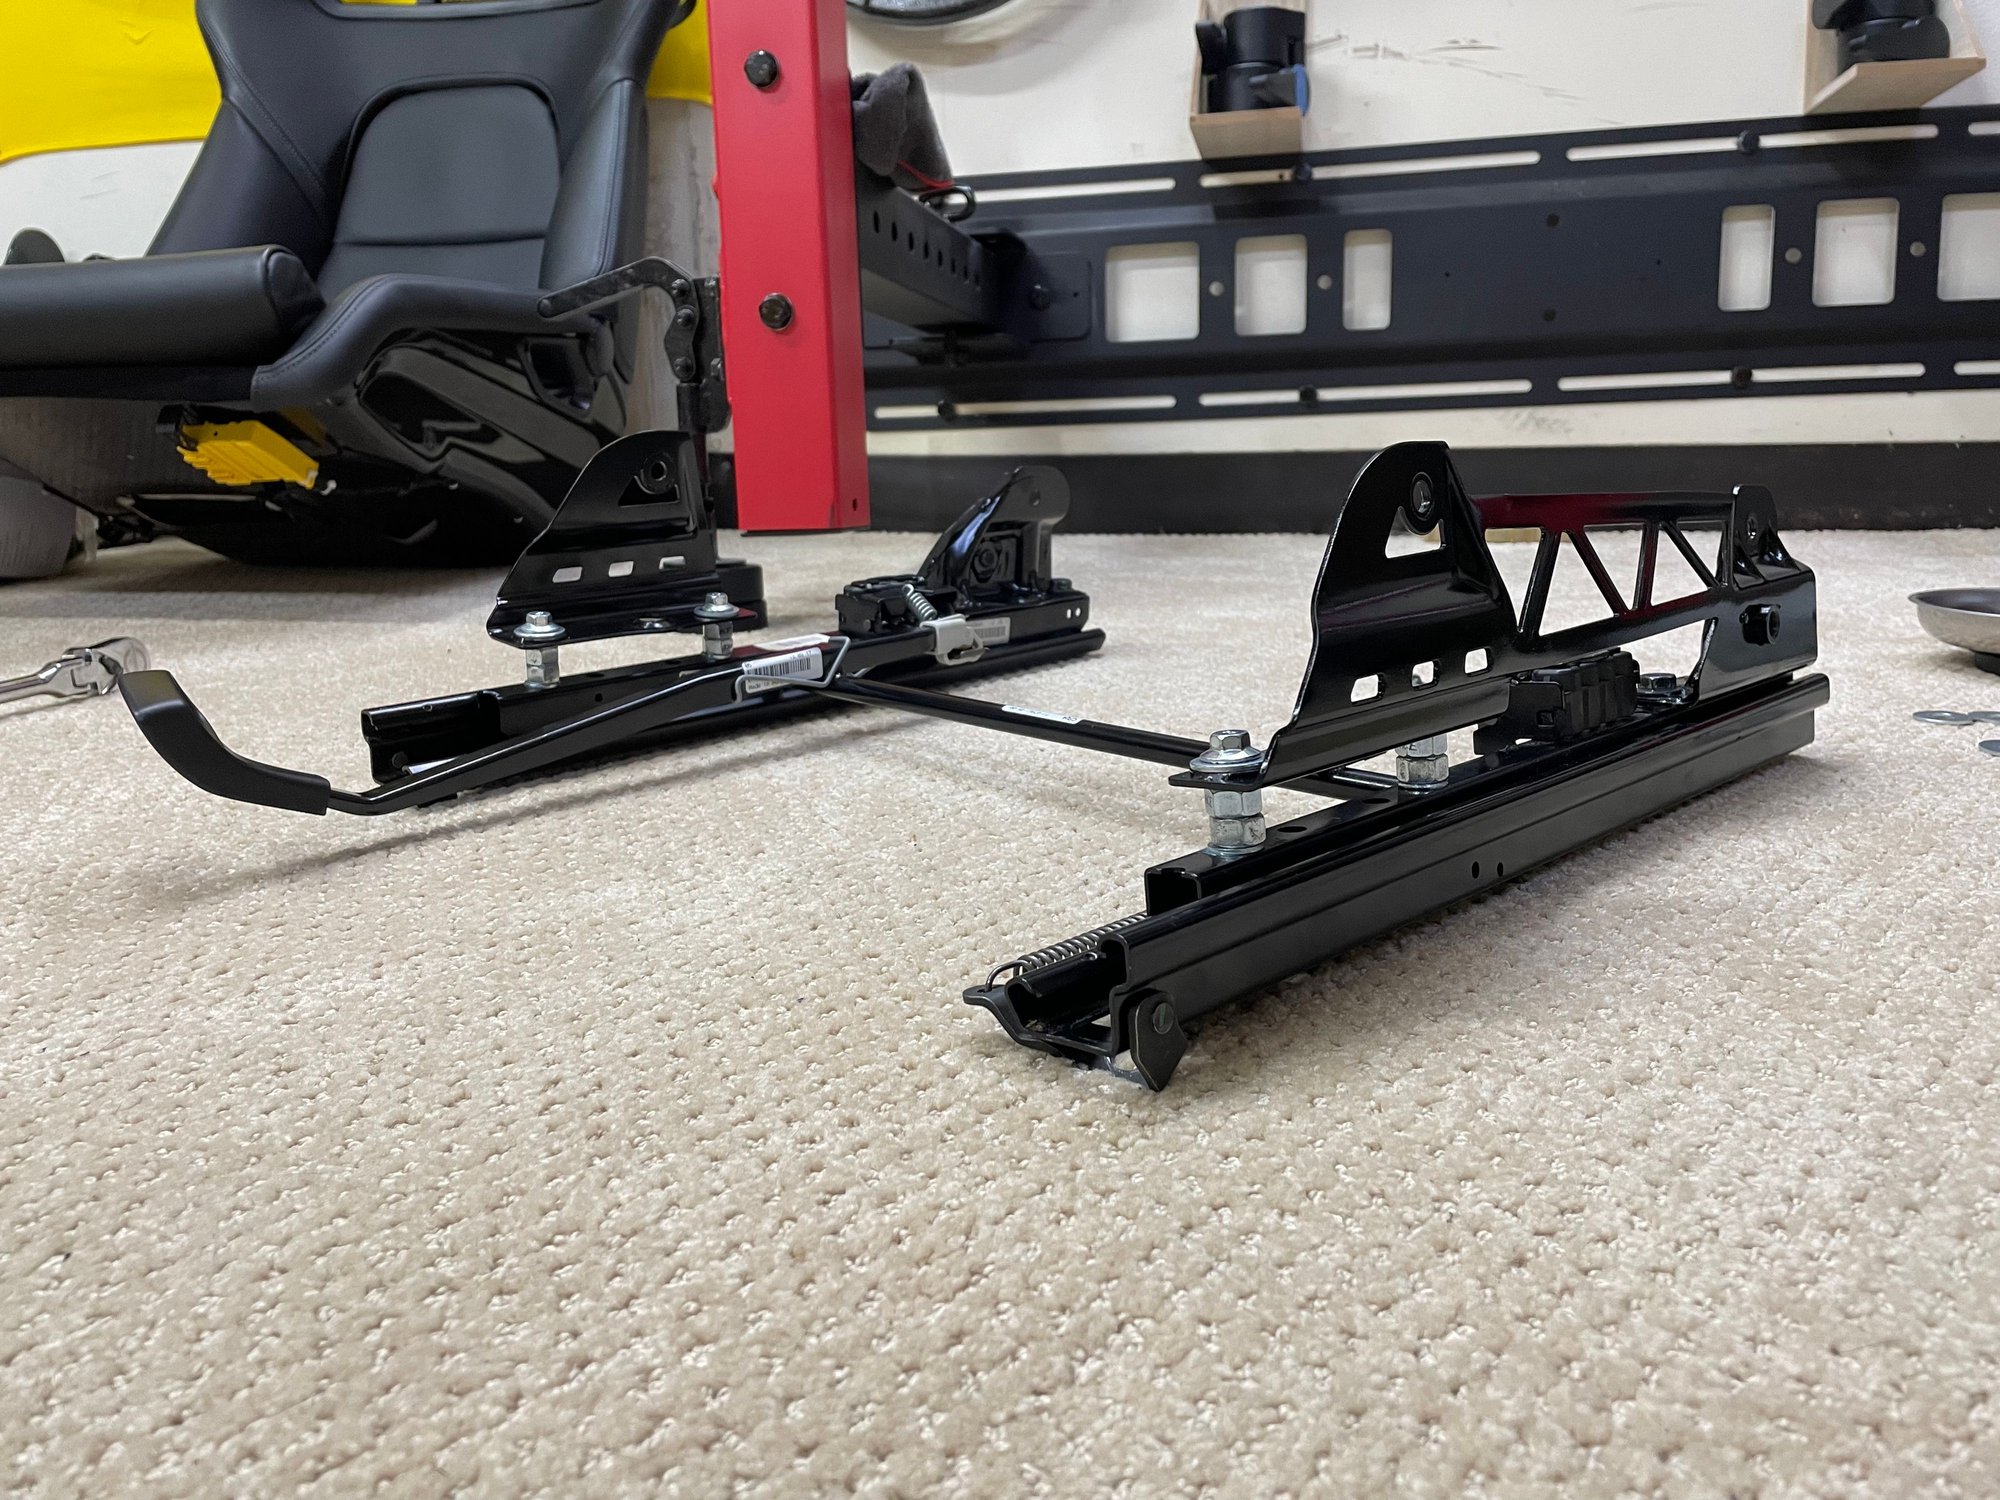
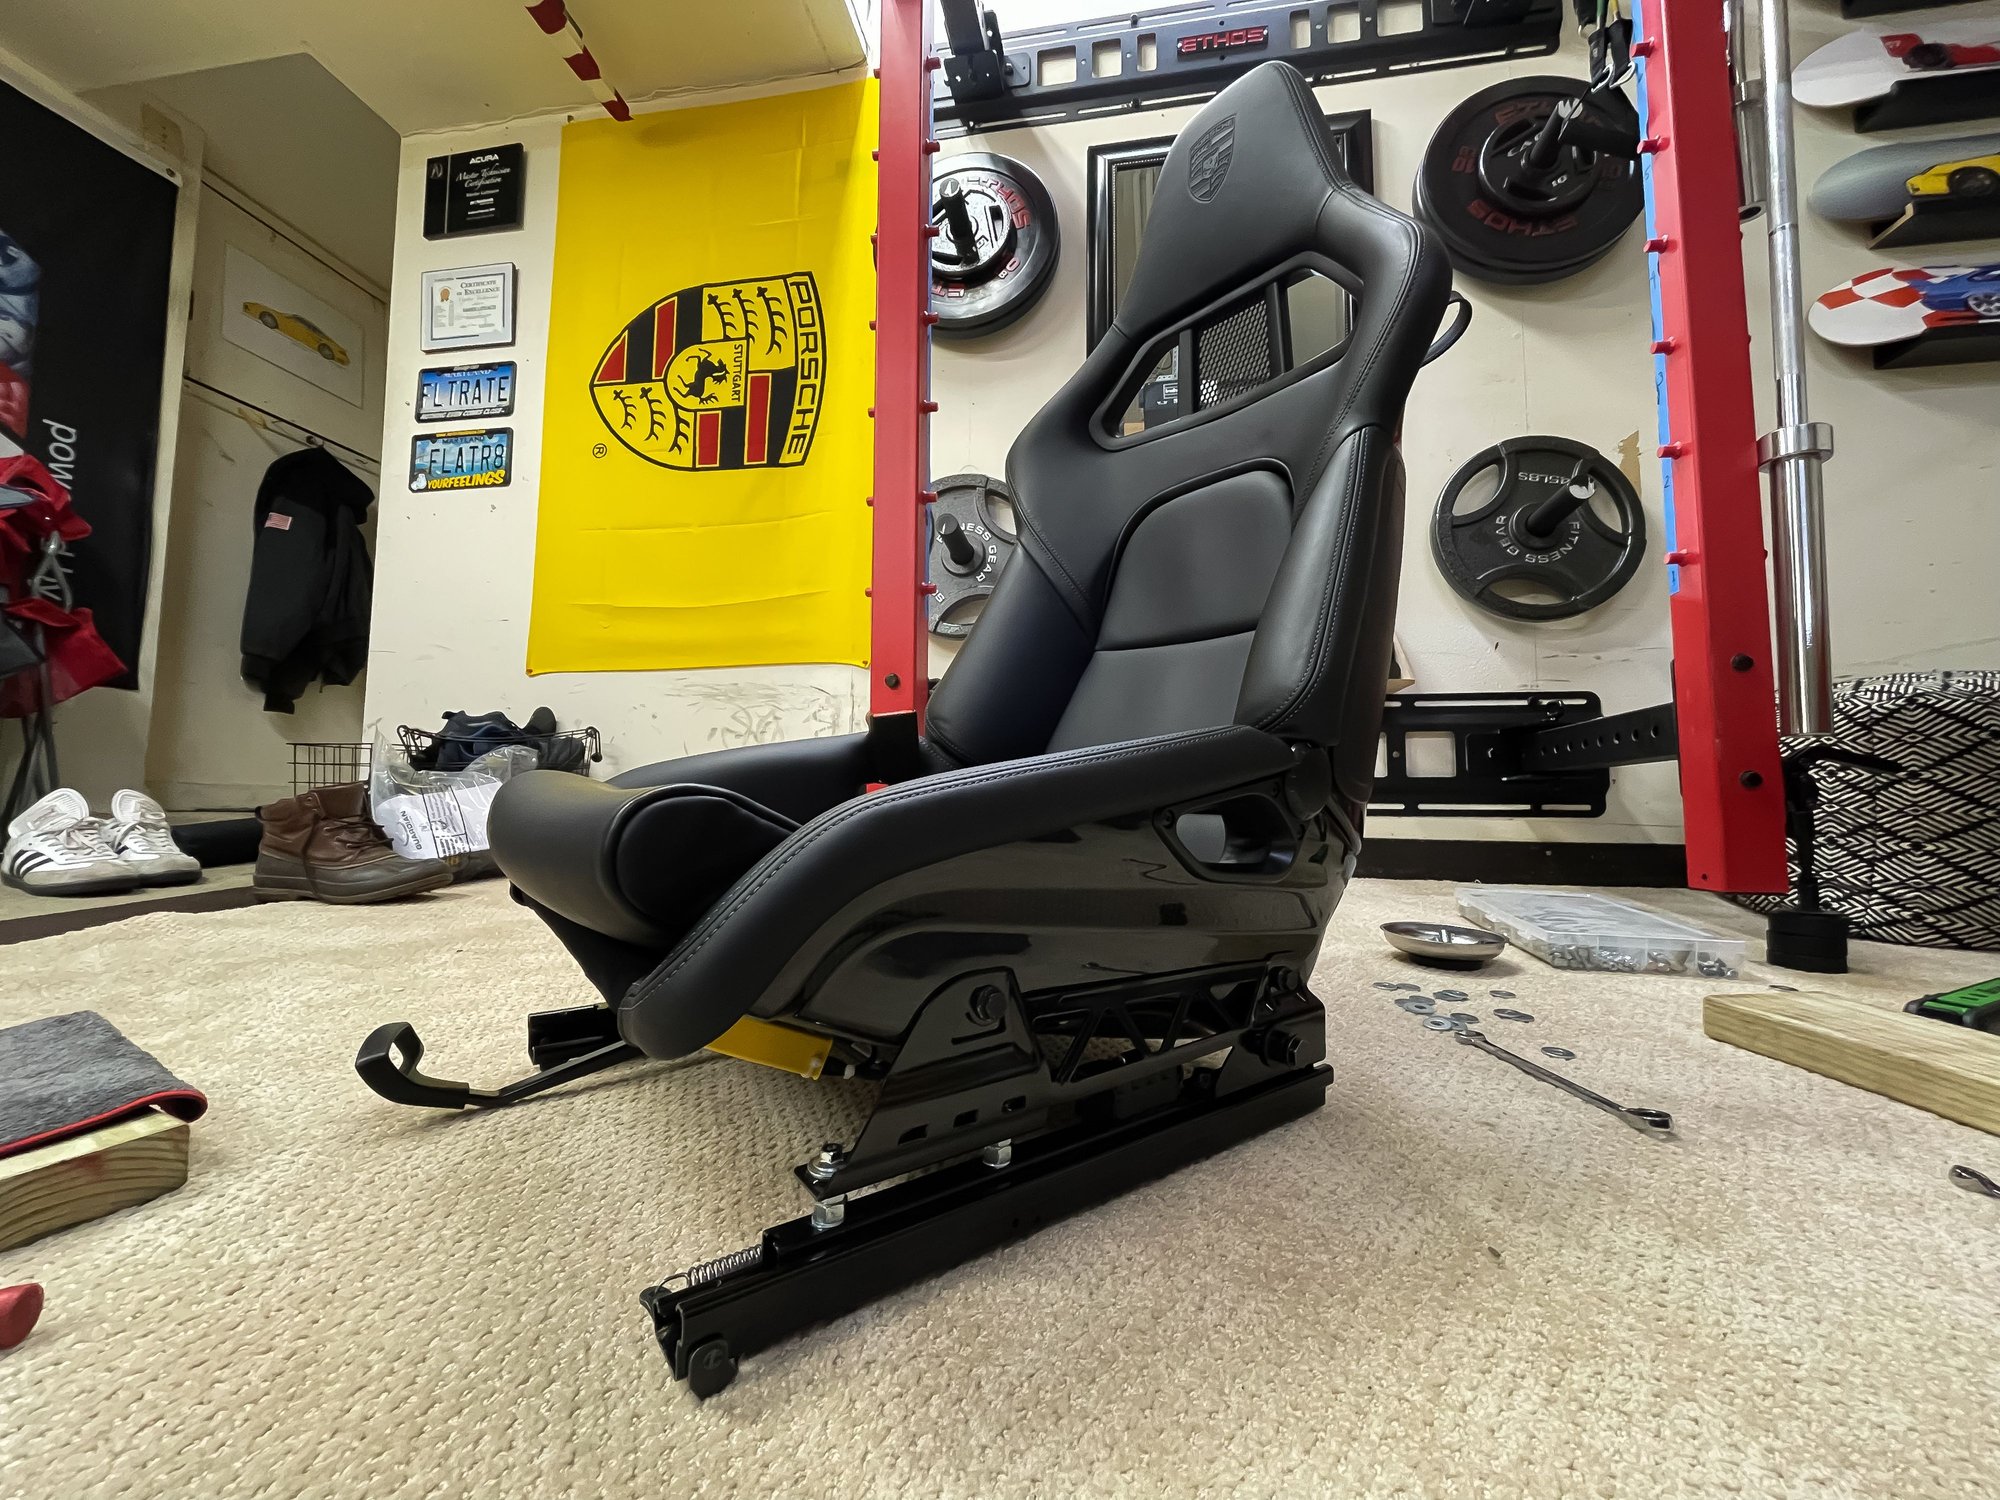
Ultimately, what I did was cut the front portion of the side bracket, bolted the modified side bracket to the rails with the spacers installed, had my buddy weld the center cross-bar stiffener in its new location on the front portion of the side bracket, sanded it down, primered it, beautied it up with gloss black paint and voila. A tilted and reclined GT2 bucket seat that looks factory.
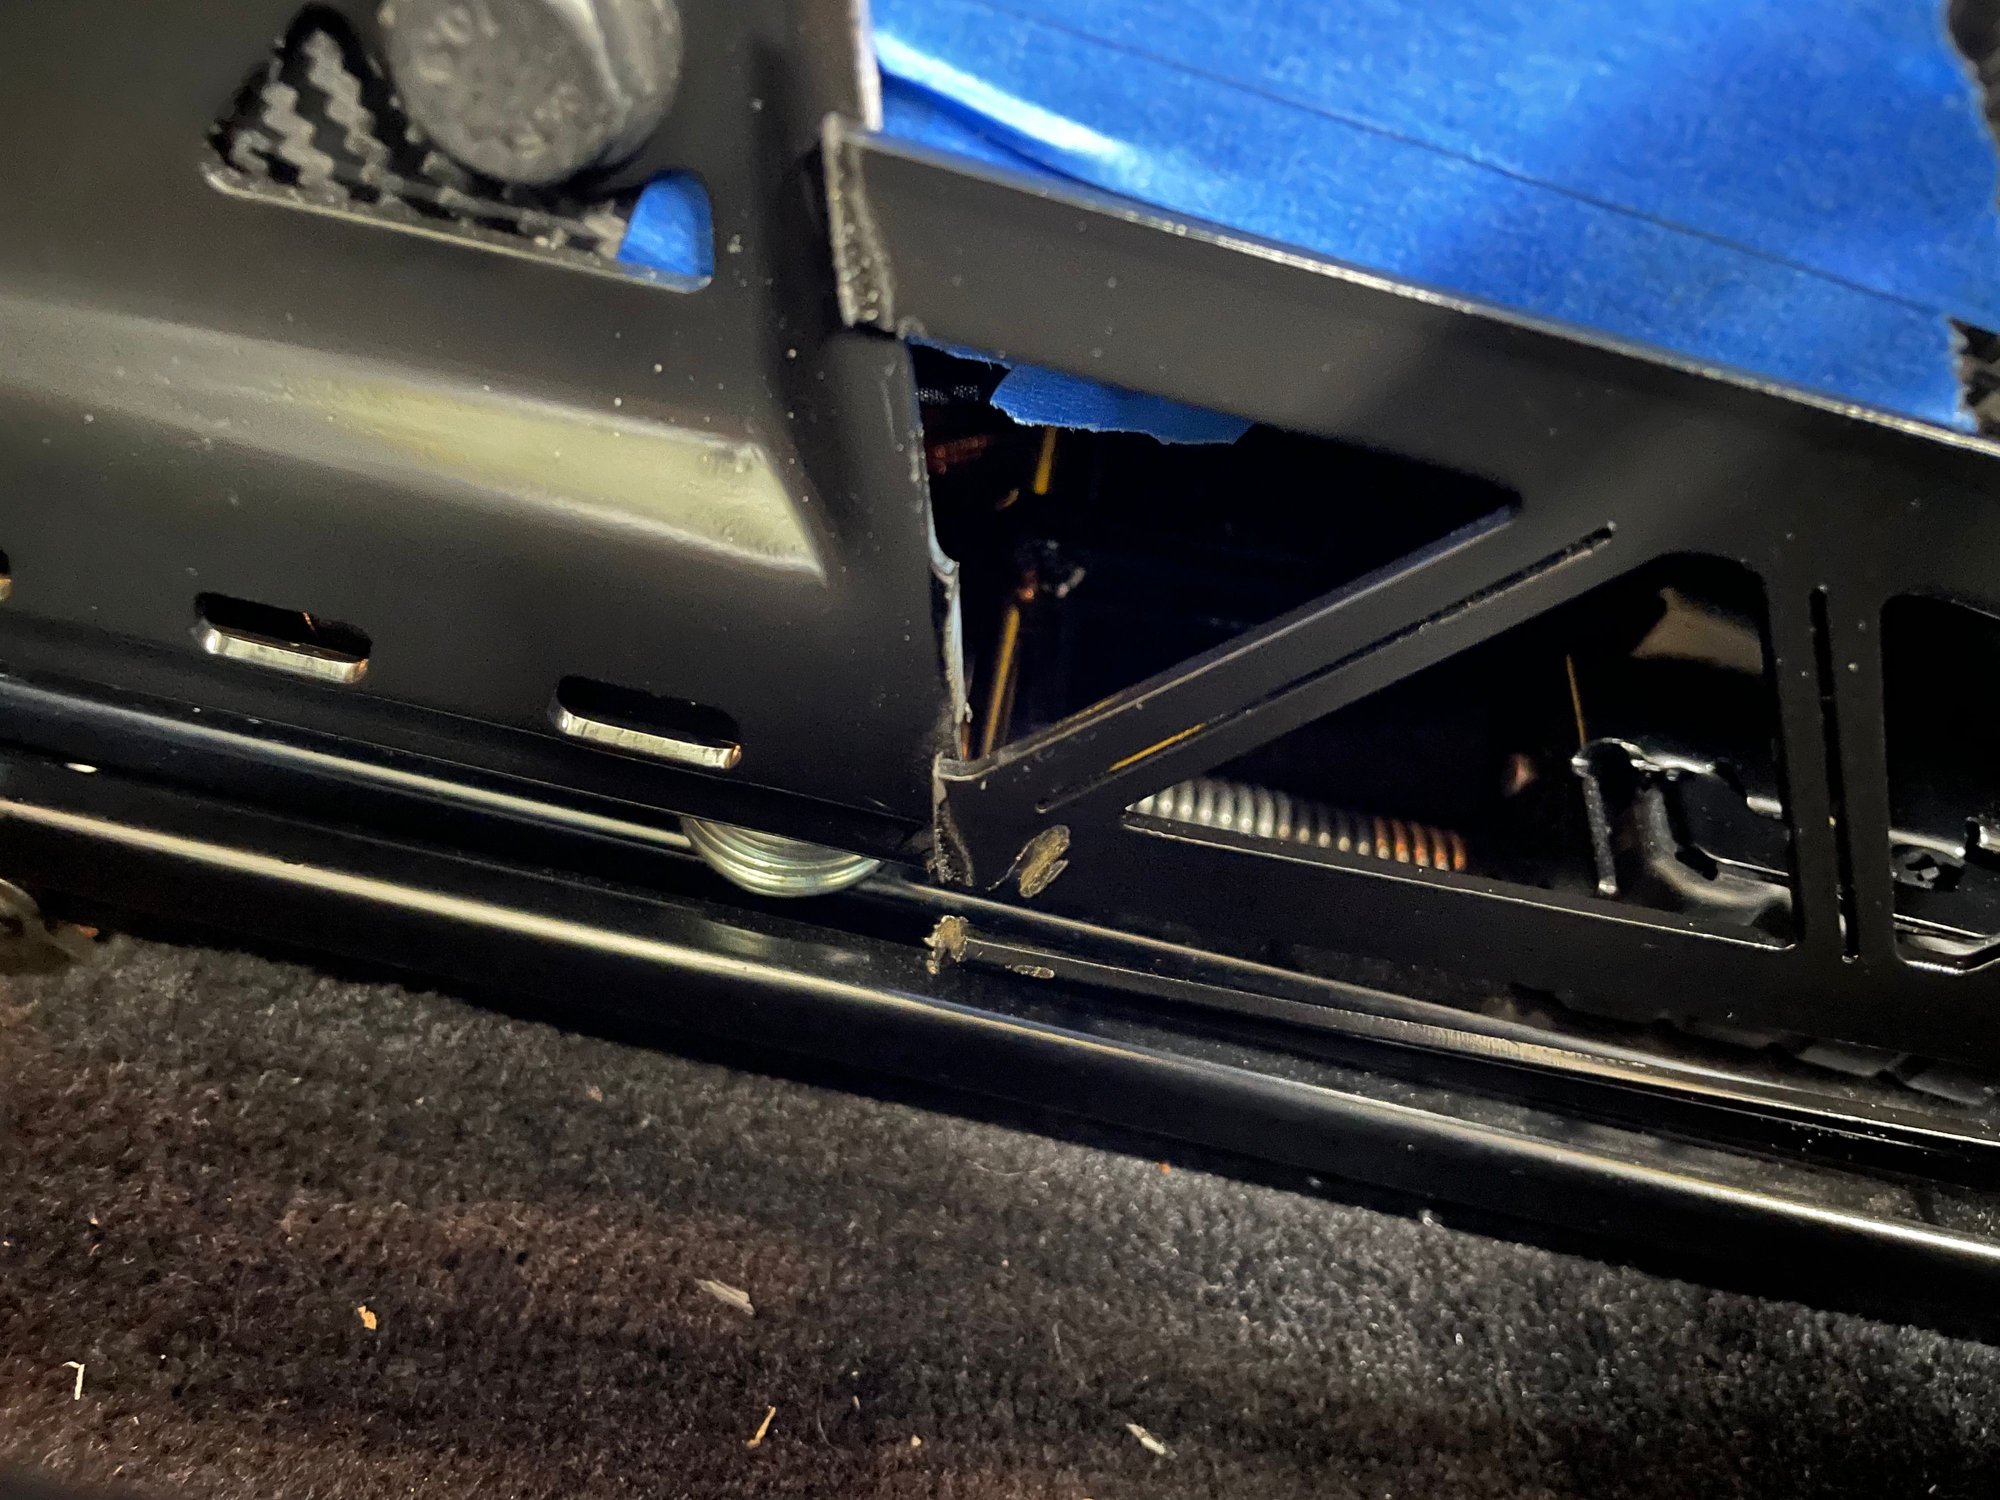
Casualty of war Had to delete the lower stiffener, as it was unable to be welded to the front bracket
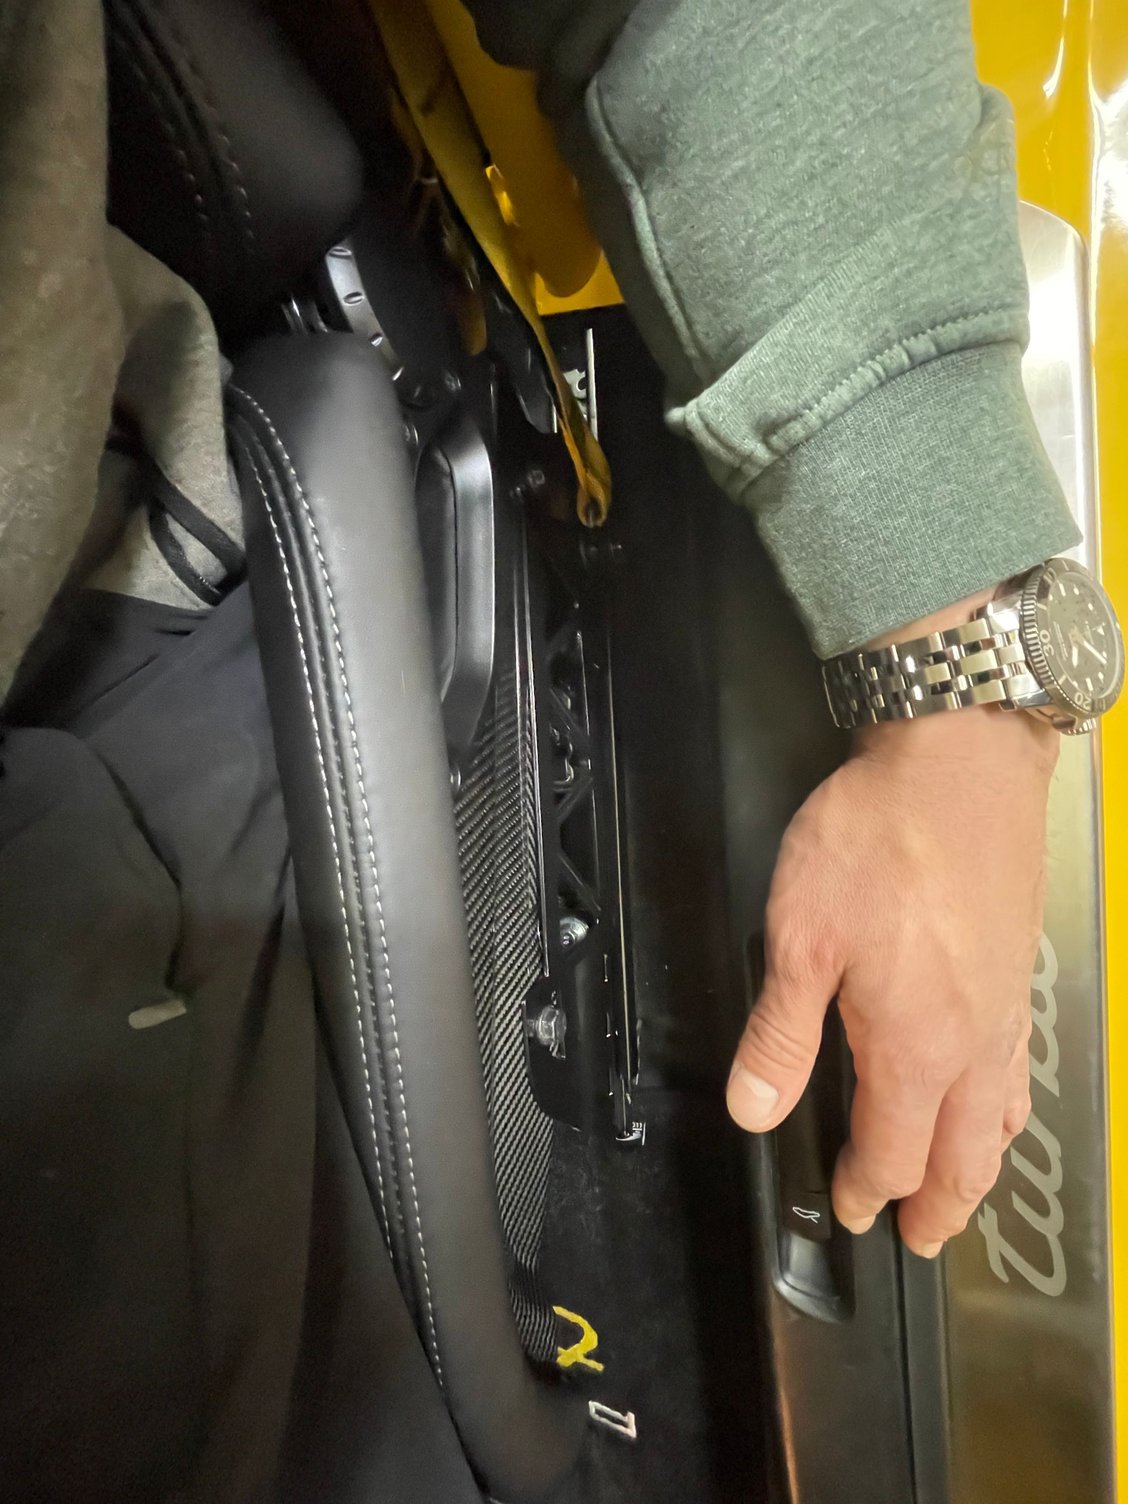
Tested out the new seat position and it is perfect. The total amount that the front was raised is approximately 1�, which doesn�t sound like much, but it does make a huge difference for comfort. My passengers seat is not modded (yet) and I used that as a reference point going back and forth between driver and passenger; I basically stopped adding spacers as soon as I felt a noticeable difference in seat position.
Hope this helps someone.. or was somewhat entertaining.
Cool project for sure!
Seeing that the inside brackets are two separate pieces probably would have given me the confidence to lop off the center support of the outer bracket and roll with it. Maybe that would make fine tuning the angle easier in the future?
But I like that you added it back for an OEM look. I personally love OEM+ mods, so well done.
Nice mod
Side impact would be risky with those spacers
would not track with this mod
you know I was thinking that same thing so I decided to replace the spacers with 1� steel square tubing cut down to size. Debating whether I want to weld those onto the side brackets permanently or just run them as spacers. I think they�ll be ok as just spacers.. But the idea is that it is a more solid platform for the side brackets to sit on compared to just four independent spacers. Will post photos once done and painted and looking OK.
Great work - always enjoy watching someone do this sort of custom work.
The GT2 bucket seats are great. My only issue is the height at which they sit at. The bottom cushion foam does seem thicker than it needs to be so that could likely be thinner and then they also make lowering brackets, but I have yet to buy a set of seats for myself (have only sat in friends GT2 buckets) as there is a $10k financial risk in doing so if it doesn't work out. Granted I could always sell but that can be a hassle on such a large item.
I typically sit more straight up than most other people. So I actually find the oem position fine. Sure it could use a slight recline, but for me, not necessary. And def not worth that amount of work hahahaha (at least not for me).
Concerned about structural integrity of mounting bracket..?
Thank you. I'm not sure of the exact degree of recline, but I basically raised the front of the seat by 1" while the back remained the same. So one could guestimate maybe 15-20*.
The overall structural integrity of the outboard side mounting bracket has indeed been weakened by lobbing off one of the lower stiffeners, but I'm not too concerned about it as the bracket isn't very strong to begin with. The center section of it does act as a joiner between the front and the rear, but I'm pretty sure its mostly for aesthetic purpose. It is very thin sheet metal that appears to have been cut by water jet. When I was handling the bracket when I first took it off the seat prior to modification, I could tell that you could easily bend the entire thing using your hands alone.
Hey Xavier! Did you run into any error codes after you swapped out from 18-way adaptive sport seats to your 997 GT2 buckets?
 12-15-2021, 08:45 PM