When you click on links to various merchants on this site and make a purchase, this can result in this site earning a commission. Affiliate programs and affiliations include, but are not limited to, the eBay Partner Network.
ladies/gents i just did this job and its easy. no pics though so sorry. i will try to explain as easy as possible. about a 30 min to 1 hour job
1) Remove airbox - this one is easy
2) you will see the tensioner assy on the left side if your facing the engine. it has the pulley.
3) remove the belt - very easy - use 30mm open wrench
4) loosen the 50 torx screw on the top of the tensioner lever
5) loosen remove the bottom 50 torx screw connecting the bottom of the tensioner to the engine.
6) remove the top screw and you can remove the tensioner assy from the engine!
you may now replace any of the defective parts: tensioner, pulley, or the lever. one thing i noticed with the lever is the part number is different. the new lever start with 9a2. the previous one starts with 9a1. i will show what i think is the difference in next post.
tensioner assy torque values:
1) pulley bolt 44 ft lbs
2) bolt tensioner to lever top - 17 ft lbs
3) bolt lever to coolant pump housing - 21 ft lbs
4) bolt tensioner to coolant pump housing bottom - 21 ft lbs
replacement is opposite of procedure above
this is an easy diy
notes: special tools required
i could not torque some of the bolts exactly but had done it by feel with the torque wrench before tightnening some of the bolts.
The original lever has a 9a1 prefix the new part is 9a2. Everything looks the same except that the old model the washer is the only one that rotates the new one seems to have a bushing that even the Barrell rotates with the bolt.
Thanx, I am about to order another belt..... I would hate to change the belt and find this tensioner bad...
What were the symptoms, and can I check it out before I place my order for parts?
Peace
Bruce in Philly
Bit of a rude awakening, after the dealer installed the belt I noticed my engine ticking. So I take it back to the dealer a day or so after, they get the car on the lift right away as I wait in the showroom. I'm 95% certain there's nothing wrong right ? as there was no ticking before I had the belt exchanged, well not that I noticed.................so they call me into the repair area and the mechanic starts the car and uses a long screwdriver to push the tensioner from underside and the ticking goes away.
The tensioner shows fluid and dirt on the outside as I think its a hydraulic pressure tensioner.
Maybe I just read too much on this forum as soon as I hear a "tick" my blood pressure rises......lol
2009 C2S 125K miles
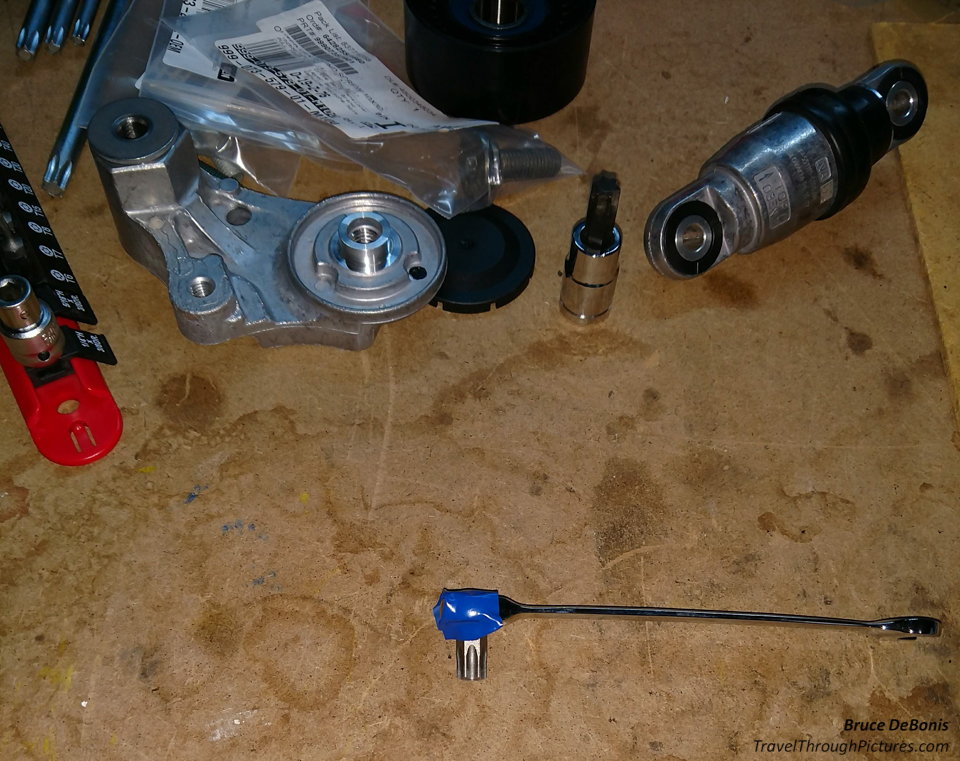
I just did this procedure.... took me 5 hours... sweat and some panic. This was not easy, you need some wacky-*** torx wrenches to get down in there. You need like baby hands to fit .. my hands are not big and I could not get my hand down there. It was a pain - the whole problem was access to the bolts! And I had to Dremel my way out of a bind... read on.
Parts: I went the alt route and purchase OEM substitutes from Pelican. You will save OVER A FEW HUNDRED $$$ !!!! After close examination of the markings with a magnifier, mfgr part numbers stamped in the metal etc.... They were all the exact same... yep. MFG date on one was different of course and another has a letter as a different suffix.. not surprising after 9 years. Save your money and buy OEM, I did. I did, however, buy the official Porsche-labeled lever as Pelican did not have a substitute. I had a hard time figuring out part numbers since Porsche updated them now I think a few times and the Katalog is confusing... so here you go:
Parts Notes:
1 - Bolts: You will need 4 bolts, I think you are fine re-using the original three but you will need a new bolt for the roller as there appears to be a part number difference (maybe, hard to tell so just order one.. $3.00 from Pelican). I ordered one wrong bolt... oops.. so I reused one. The bolts are pretty thick and torque values are really low so I wouldn't worry about it.
2 - Roller bolt cap... you don;t need to order this if you order the OEM one below... a new cap is in the roller box... so now I have two. Regardless, you can reuse the old one.. this is not a wear item.
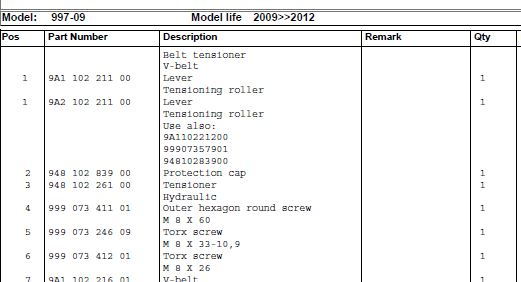
Parts list:
- 9A2-102-211-00 New Updated Lever: Porsche part $193.00
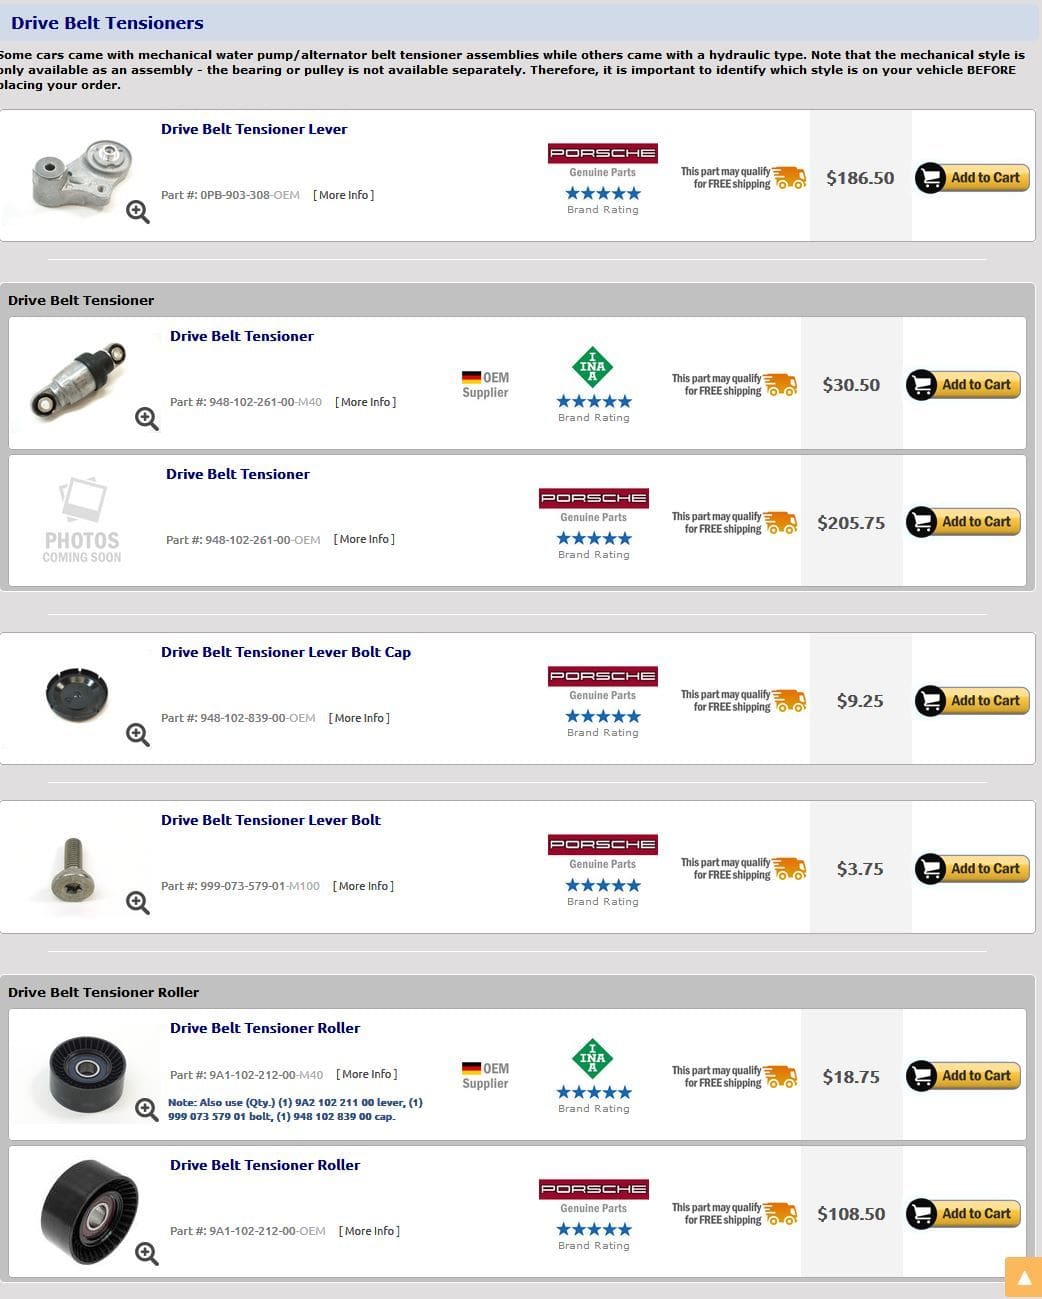
- 9A110221200 Roller Brand INA (Porsche part = $108.50) OEM $18.75 YES you read that correctly... it is the exact same part!!!!
- 94810226100 Tensioner INA (Porsche part = 205.75) OEM $30.50 YES you read that correctly... it is the exact same part!!!!
- 99907357901 Roller Bolt Porsche $3.75 (appears to be a new part number but I am not sure so go ahead an order it)
- 99907341101 Bolt Porsche $3.00 approx
- 99907324609 Bolt Porsche $3.00 approx
-99907341201 Bolt Porsche $3.00 approx
See Porsche Katalog below as of June 1 2018 (most recent Katalog pulled from Porsche website)
See Pelican's parts and prices below.
You do not have to remove the belt, just move it to the side off of the tension roller.
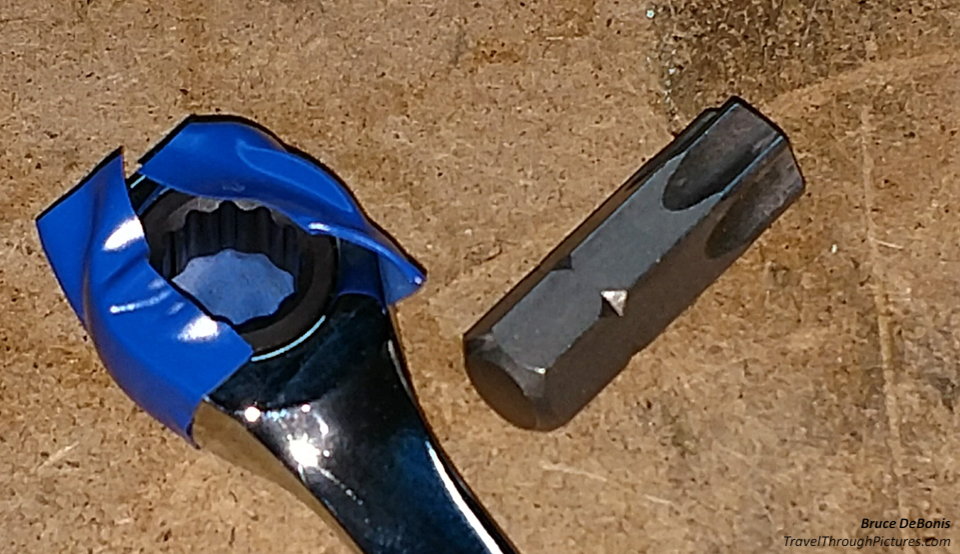
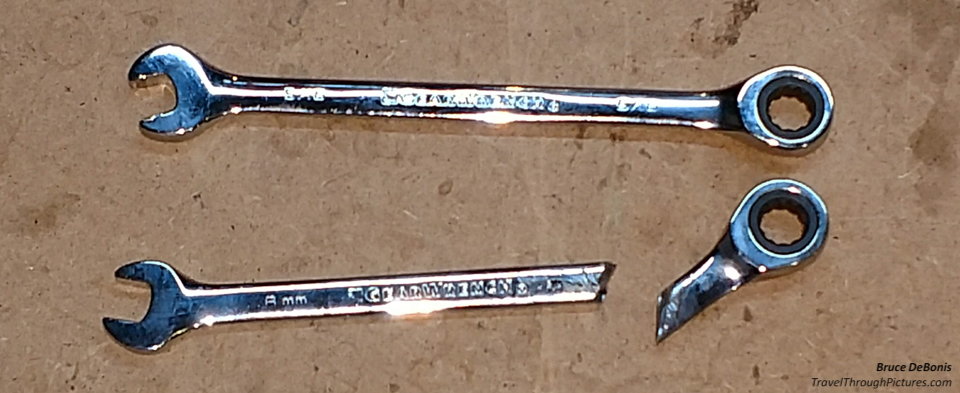
OK, now for the gory details.... why was this a pain? No fricken space between the bolt heads and the rear frame member. Someone had posted somehwere a set of Kobalt (I hate their tools.. handles come off) torx wrenches that were "L" shaped and said they worked... they didn't ... so I drove up to Autozone and got a torx kit that had a Torx 50 Bit and ratchet adapters..... and made my own tools. So, I have a set of cheap Harbor Freight ratcheting wrenches... so I slipped the bit into one, taped it in there with some blue electrical tape (I like blue)... and started removing the top bolt ZZT ZZT ZZZT. Well... I was really feeling smug that I fashioned my own tool.... until the tool binded up... wha? The bolt as it was coming out, jammed the back of the wrench/bit into the rear frame member. CHT. Now I can't remove the bit from the bolt cause it I screwed it into the back of the frame member. Flip the little switch on the wrench and back it back in? NO!!! The wrenches only ratchet one way. If you want to go the other way, you remove the wrench and flip it over... but I can;'t get the dmn thing out!!! I tried everything.. I used some really cool cuss words and even tried a few in other languages. .. no go. So I dremmeled the tool in half so I could now spin it back in. TIP: Just break the bolt free and back it out a bit. Then pull your torx out, and use an old fashioned pliers and grab the bolt head and work it out. This all takes forever because you can't move even a ratchet more than a few clicks. Plus, the bolt at the bottom was so far down there, I couldn't keep the torx in the bolt head. I tapped a piece of pipe to the little wrench to get down there... this was getting really stupid fast. So I fashioned a long piece of aluminum stock and used it to wedge in there to push the torx bit in behind my homemade wrench. This was impossible!!!!! It took forever. Then upon reassembly, I could not line up that lower bolt. My hand just could not squeeze down there to reach it. You also have to turn the tensioner with the other hand to raise it to hole-height.... this sucked. I am sorry, just when I think I am good at something...... well.....
Peace
Bruce in Philly
Last edited by Bruce In Philly; 06-02-2018 at 11:14 PM.
Thanks. This in on my to do list this summer. I'll set aside a whole weekend.
If it makes you feel any better, no matter how many DIY jobs I do the next one always has something go wrong that I did not plan and have not seen before. I'm just used to it. And I always keep my dremel handy.

 05-19-2017, 12:52 AM