When you click on links to various merchants on this site and make a purchase, this can result in this site earning a commission. Affiliate programs and affiliations include, but are not limited to, the eBay Partner Network.
997.1 - How to replace the engine mounts - Rennline semi-solid mounts
Folks,
I am actually done with the long list of things I wanted to do on my 2006 C4S, for her 70K miles anniversary. The last two things on my long list were the Engine mounts replacement (not that the original ones needed it - no sagging tailpipes) and the water pump as a preventive measure. Having been stranded recently twice in a row because of a stupid starter, I tend to be proactive rather than reactive.
There are a rather large choice of engine mounts available for the 997.1. They span from the Hydraulic genuine Porsche parts (rather expensive) to the completely solid mounts used for racing and dragsters (enough vibrations to remove your wisdom teeth). In between, some manufacturers offer what is called semi-solid mounts. A semi-solid mounts will always be firmer and transmit more vibrations than the hydraulic units sold by Porsche and others. The semi-solid mounts offer better and more precise shifting (for manual gearboxes) and better cornering abilities to the car, as they hold the engine tighter to the chassis.
My choice ended up with the Rennline semi-solid mounts, for multiple reasons: their price and the ability to customize their firmness.
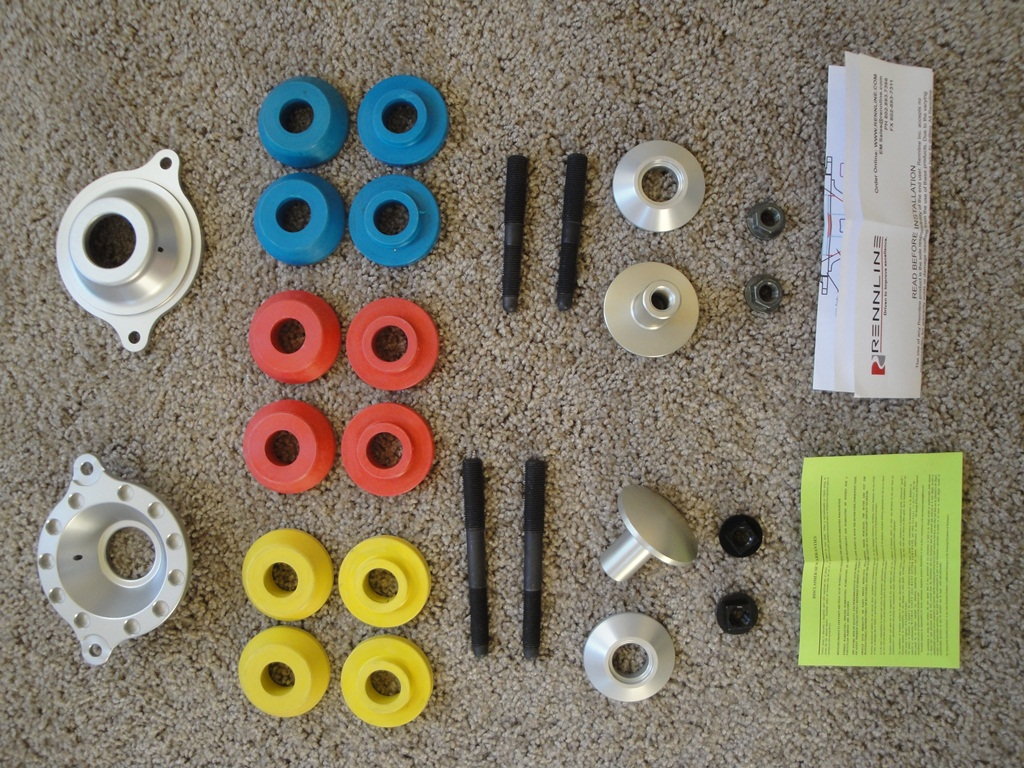
For $350 this is what you are getting:
The parts are very well machined and the variety of rubber parts is very nice. Rennline offers three stiffness: the Yellow for street usage, the Blue for Track and the Red for Racing. Their coefficient of hardness are respectively 75A, 85A and 95A. If you look at the numbers, they are not that different. But if you touch the rubber parts, you can immediately feel the differences. The red is hard like a piece of wood, whereas it is possible to squeeze lightly the yellow parts. For my use, since I do not race or track my car, the yellow pads are what I need.
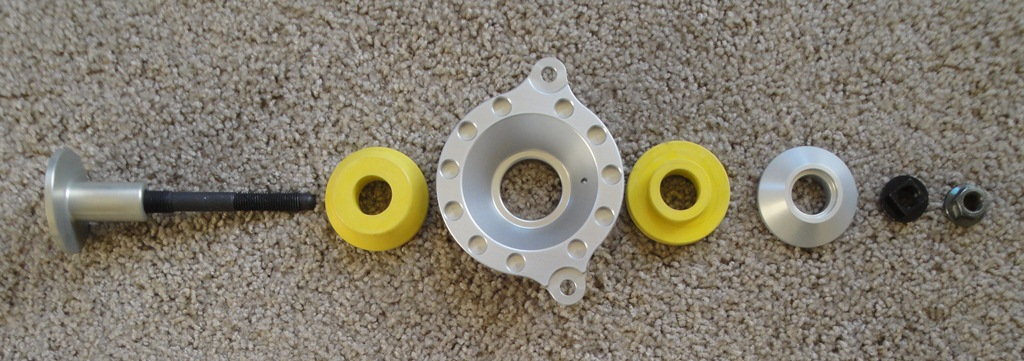
The parts assemble in this order and their fitment is perfect.
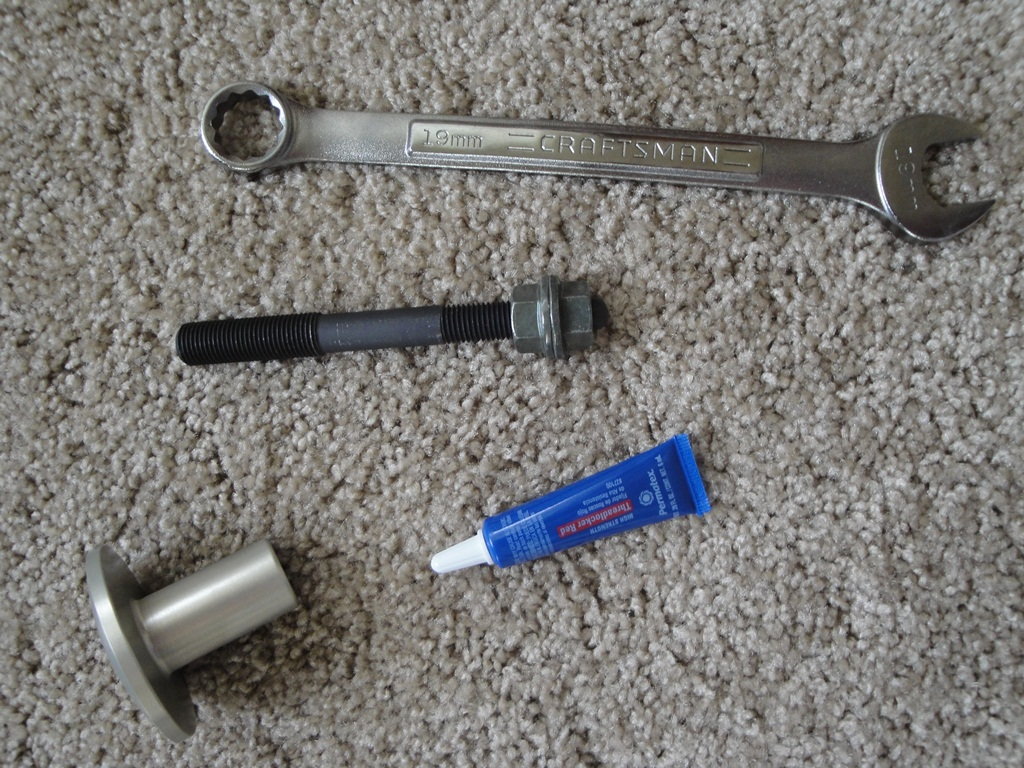
For the 997 or 996, you must use the longer studs. Rennline recommends to secure the studs into the hangers with red Loctite, which I did. The studs after receiving a long dab of red Loctite on their threads are inserted into the hangers with a wrench of 19 mm, using two opposing nuts.
Make sure you think twice about what you are doing: with the Red Loctite, there is no coming back.
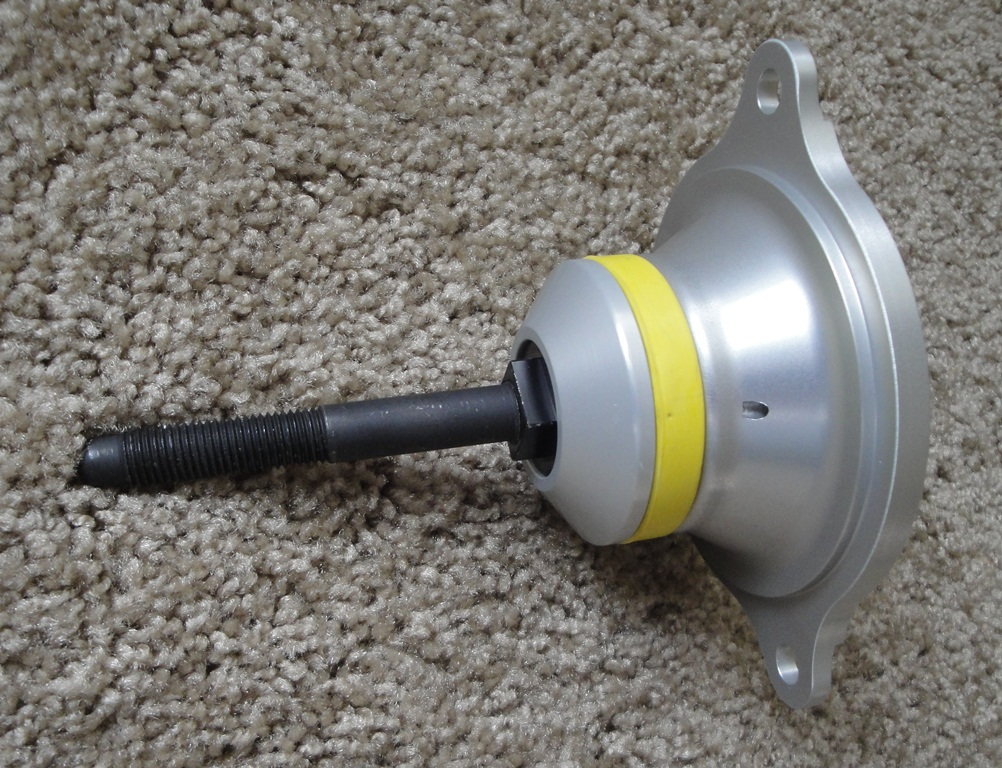
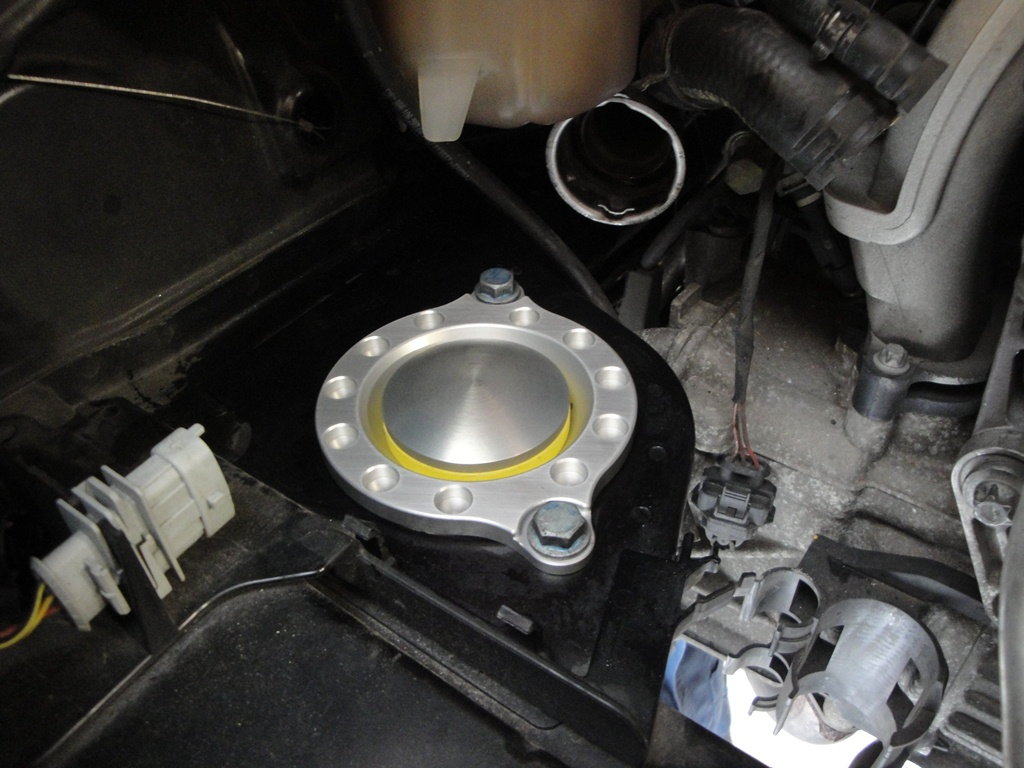
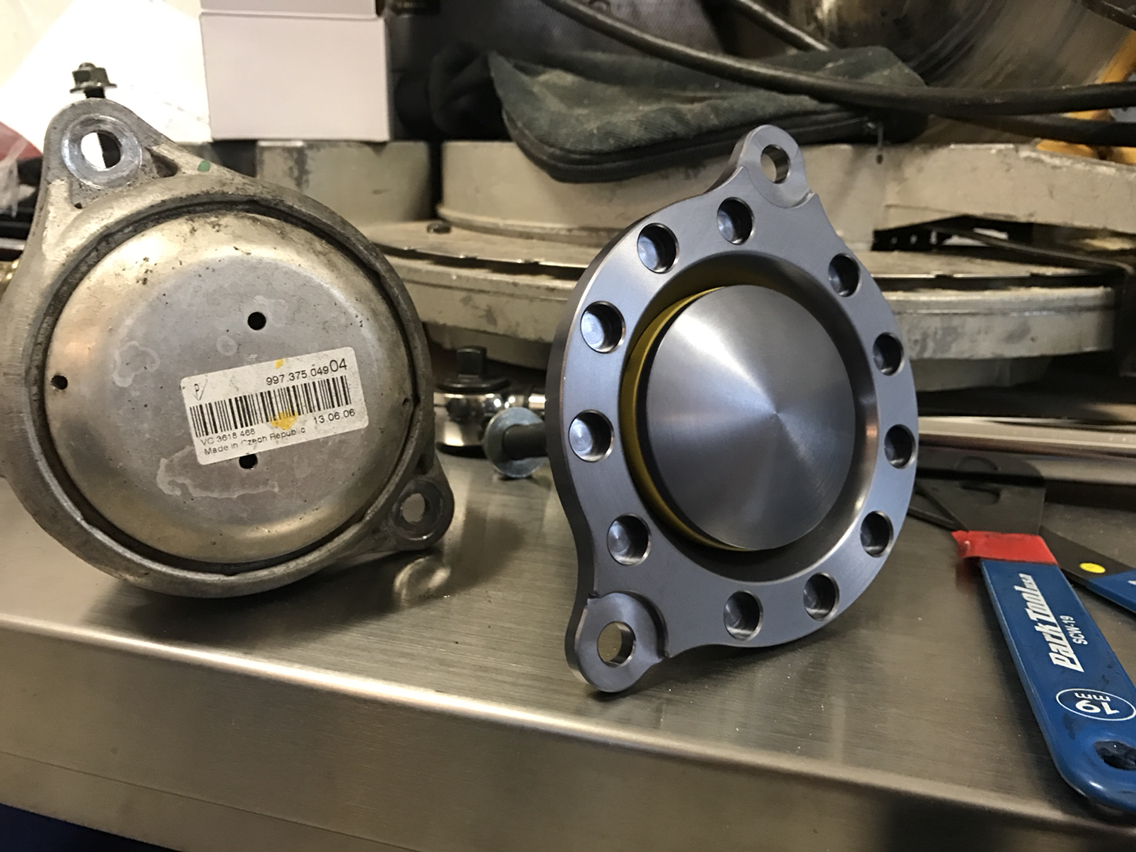
The engine mount fully assembled is a beautiful piece and it is a blessing that it can be admired when opening the engine lid (at least on the left side):
The square nut at the base will fit into the engine carrier, and will be adjusted later on with a 19mm opened wrench.
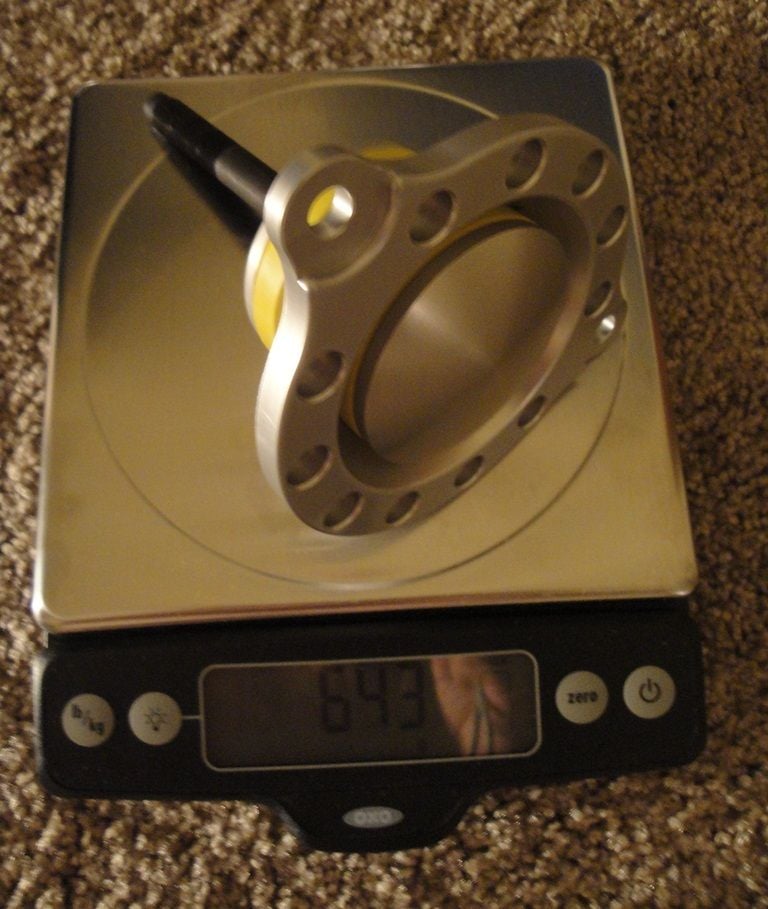
The Rennline engine mount weight about 643 grams as compared to the genuine Porsche part at 1043 grams. Okay, we are saving almost two pounds, way behind the rear wheels.
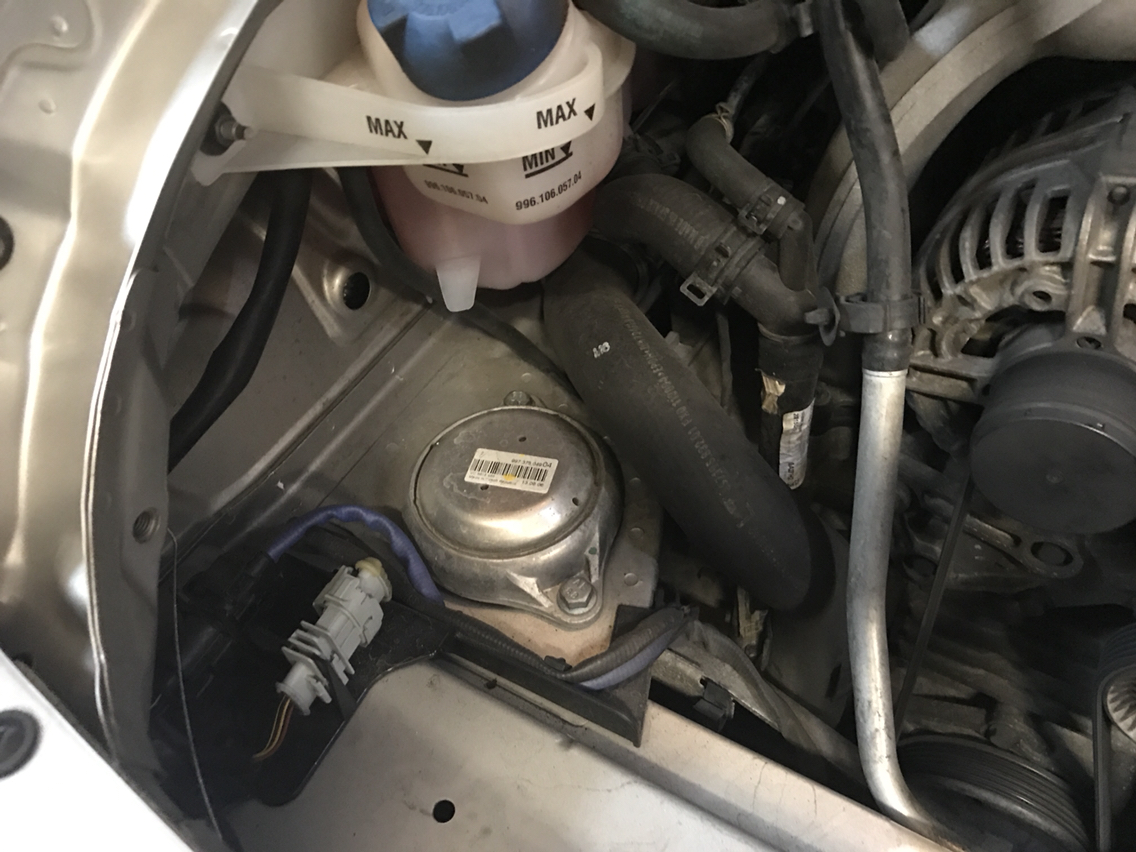
There are many techniques to install these mounts. As I mentioned at the beginning, I was also doing the water pump and thermostat and thus decided to replace the mounts at the same time, which is different from what a mechanic would do if he/she was to address only the mounts.
Typically, the engine is held by a jack on the protruding part, behind the oil pan. A piece of wood is used to isolate the engine from the jack or transmission jack and to prevent any slippage. The mounts are changed one at a time, and this is very important.
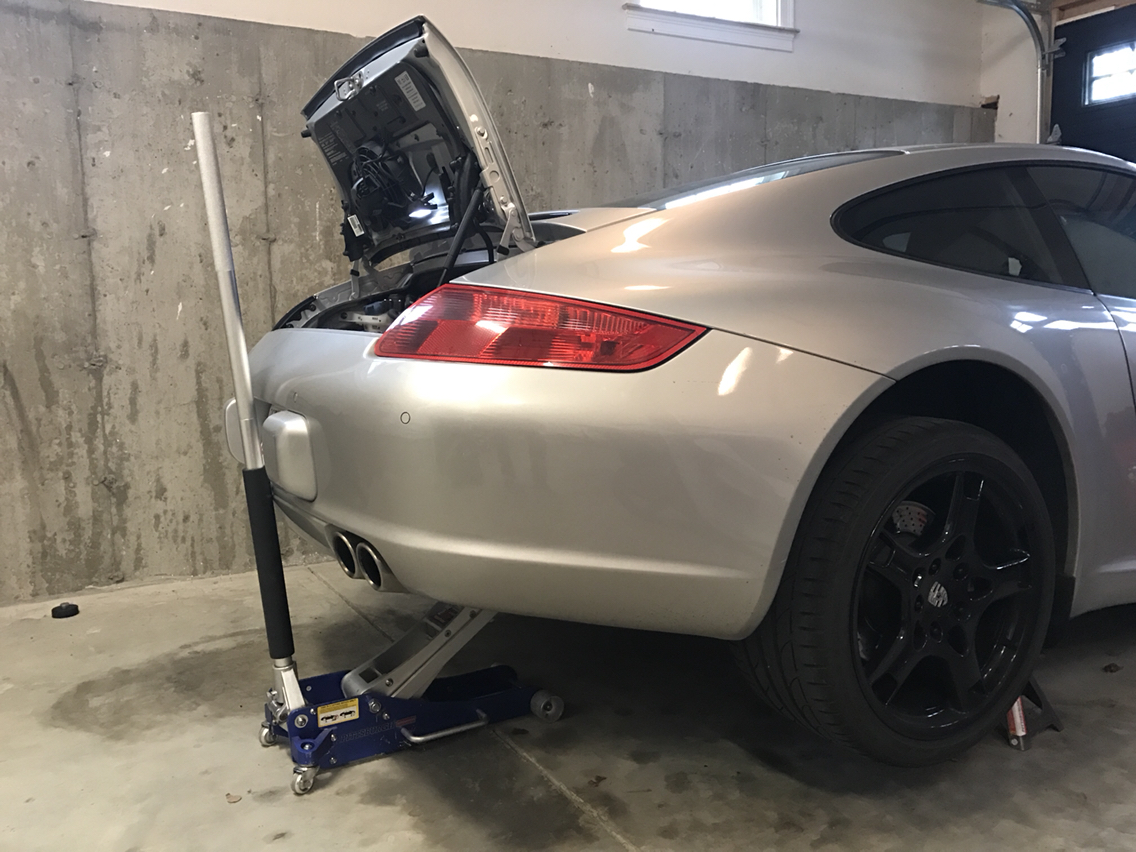
The car should sit on a lift or the rear wheels should be raised on plastic or metal ramps. This will give you some extra clearance and access to undo the 18 mm nuts located under the engine carrier.
The engine should be lifted until the body of the car starts moving up slightly. At this point, remove from under the car, the nut holding the engine carrier. You will need a deep 18mm socket to reach the nut and probably a breaking bar or a long socket handle.
The second operation is to remove the two 13mm bolt from the engine compartment. Of course, the air filter box will have been removed, prior to starting the work. Once the upper bolts have been removed, you can extract the engine mounts from the rear of the car, by pulling it vertically.
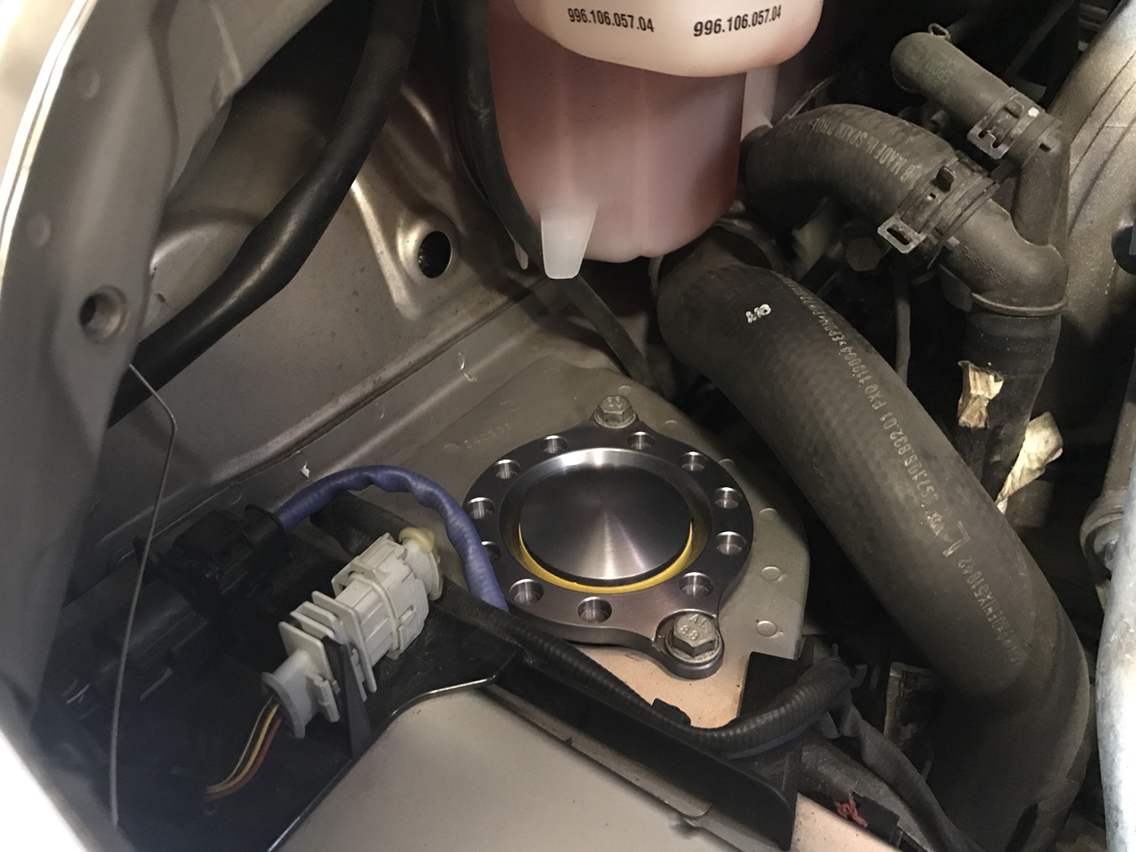
At this point, using your 19mm wrench, carefully align the square nut on the Rennline semi-solid stud to match as closely as possible the position of the Porsche mount that you just removed. This way of doing will guarantee that the new Rennline mount will fit and click in place very easily in the engine carrier. Make sure visually (from underneath) that the engine carrier is flush with the concave aluminum part of the Rennline mount. This is your guarantee that the square nut is inserted correctly into the engine carrier.
Install the two 13mm upper bolts but do not tighten them yet. It is necessary to have some play to make sure all parts dovetail nicely. Go under the car and install the 18 mm nut on the Rennline stud. Torque it at 60 ft/lbs. Go back to the top and torque the two 13mm bolts at 18-20 ft/lbs.
When satisfied, do the same on the other side.
Finally, lower carefully the engine and verify the position of your tailpipes. They should fit perfectly and rather high in the rear bumper openings.
When starting the engine, you can tell immediately that your cockpit/cabin will never be as silent as before. When the temperature is cold (morning or winter) the amount of vibration is increased due to the extra stiffness of the rubber mounts. I find that at the end of the day, when the car has baked in the sun, these engine mounts are more civilized and less prone to drone and vibrations. The obvious result of these mounts is the precise and direct shifting of the gearbox. The difference is blatant and a lot more pleasant than the rather vague feeling obtained with the hydraulic mounts. The second obvious quality is immediately felt when taking a sharp turn. The engine is now part of the chassis and not a heavy mass that is hanging in the rear. The same can be felt when accelerating, as the car feels more like a one piece assembly.
I noticed a certain drone vibration around 3,000 RPM but I suspect that this is acceptable on long trip and/or commute. Again, the behavior is dependent on the temperature and once the engine compartment is warm, I feel like these mounts will be more civilized for a daily driving usage.
The ideal system is what Porsche implemented on their new 991, where the viscosity of the mounts is dynamically modified on the fly, depending on the speed and lateral forces upon which the car is submitted.
I am not completely sold on these mounts but they are growing on me and with the summer and the scorching temperatures of 100 degrees plus, I feel like they will be perfect.
"I noticed a certain drone vibration around 3,000 RPM but I suspect that this is acceptable on long trip and/or commute. Again, the behavior is dependent on the temperature and once the engine compartment is warm, I feel like these mounts will be more civilized for a daily driving usage. "
I had RSS Tarmac mounts in my GTS and your comment about "drone/vibration @3k is quite accurate. Enough that my driver's window would buzz along with the rest of the cabin, made me remove the mounts and return to stock. Of course, if your D/D use allows you to run "under" 3k, then it's quite civilized. It's all in how sensitive you are to noise and vibration, track usage, and what you can "put up" with.
First off, this is a great write up and how-to on the install. Well done.
I had RSS Tarmack semi-solid installed a week ago and still developing first impressions, which are positive. This is on a 2009 C4S with PDK.
It is noticeable from the very first startup that things have changed. The engine "shake" during ignition and initial fire just feels different. Tighter. Like the car has been "toning its core".
I've only commuted with the car since the install, so as described, still developing impressions. I have not gone on a canyon run yet but I'm sure will be most happy with the change in this environment. Additional Noise, Vibration, and Harshness (NVH) during commuting is present but not irritating, nor am I wishing I had not made this change.
I'm not experiencing a drone at 3,000K. Could be the PDK. In my car with RSS I will agree there is an increased chassis "communication" between 3,000 and 3,800 RPM, but it is not a drone. Simply a buzzing from the engine through the chassis to the seat that does not manifest itself in actual components making a "buzzing" sound or a harmonic drone like an exhaust might. The car just feels more alive and communicative, as should be expected. Where I do have drone is at idle. There is a harmonic at that RPM. As I'm writing this, I realize I have not yet, but need to, see if a change of a 100 or 200 RPM in the idle setting will eliminate this.
Agreed, great write up, and I look forward to hearing your long-term impressions on the mounts after you've had them for a few months. I only do a few track days a year in my car, but feel these would be a sensible upgrade (even with the yellow pucks) to the stock mounts.
Thanks for taking the time to document your install and experiences!
Finally got around to the install. Thanks for the thorough write-up; made the installation a snap. Initial impressions are that everything feels tightened up with the yellow "street" inserts; there is a little more noise and vibration, though not unbearable. I'd say Porsche would market the feel as, "sporty."
Good instructions on this thread. Thanks! I put them in last night. The yellow/street version. Had to go up and down with the engine jack a few times to ensure that they were seated properly but they went in easily. I was skeptical and, granted, I've only driven a few miles, but I feel the difference. As an old time 911 owner, I've always thought the shifting in our cars is outstanding, especially compared to the older cars. I think it does feel more precise now. Note that I have the FF transmission mount insert, too. I think I feel a little more vibration. It's not intrusive and I like it. The car feels more connected and raw. Overall, I am pleased. Looking forward to getting on it more.
Old thread I know, but just received the Rennline mounts for 996. The 19 mm wrench is needed, but to fit the flats on the M18 hangers. The lower mounting nut on mine is 18 mm. The square nut bushings require a 16 mm wrench to turn. I installed the studs with red Loctite and torqued to 30 ft/lbs per directions.
Next to install in 2002 C4S.
Thanks

 03-21-2016, 11:34 PM