
My new console, and some thoughts on doing it
 03-24-2014, 06:44 PM
#1
Rennlist Member
Thread Starter
Join Date: Dec 2010
Location: Vancouver, British Columbia, Canada
Posts: 30
Likes: 0
Received 0 Likes
on
0 Posts
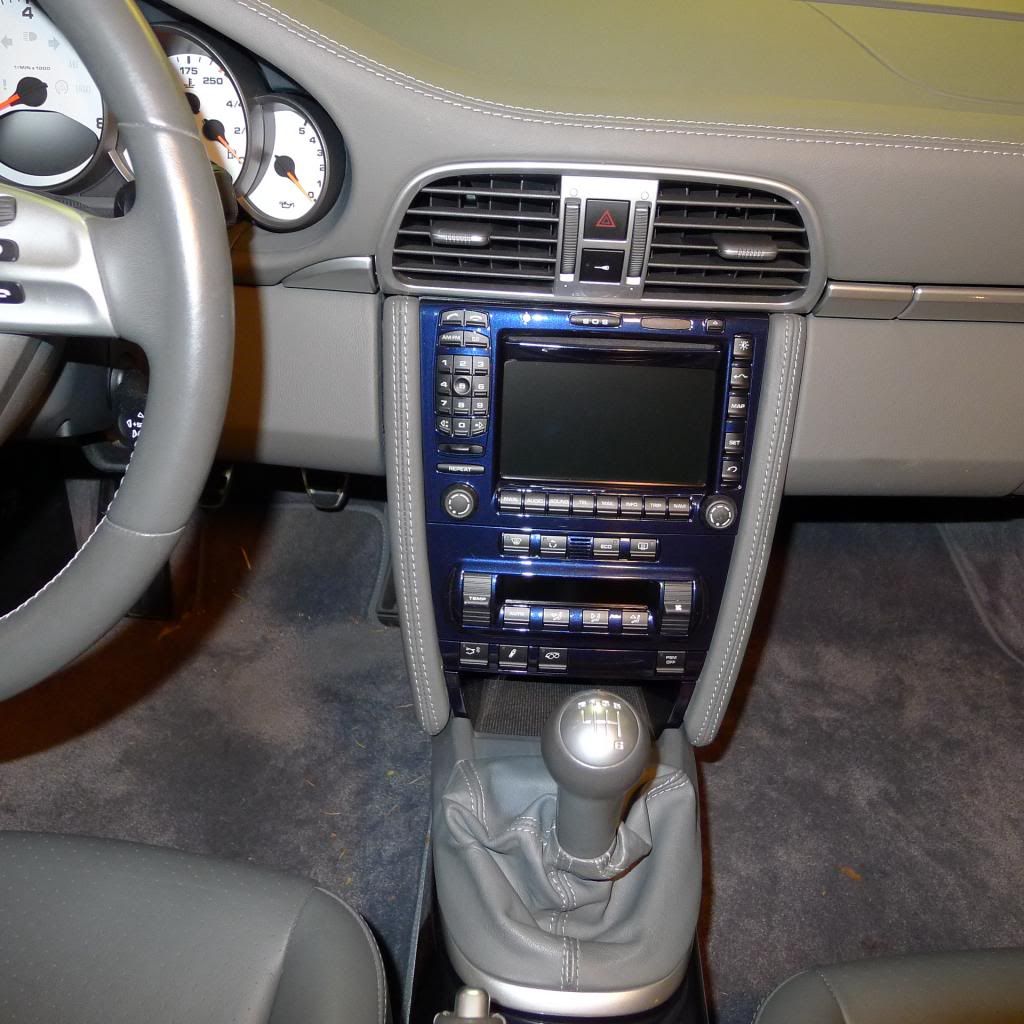
My 2005 Carrera 'S' has an all-grey full leather interior. Though I like it very much, the dash was a bit..... well.... austere. Thankfully I came across those of you who have modified your console to personalize them a bit--to warm them up. That eventually led me to Eric the Bumper Plug guy and a decision to have him paint my head-unit and console area body colour--especially since the centre console (the one between the seats) was already in the deep blue exterior colour of the car--a colour I just love.
It's all done now, back together, and looks gorgeous, if I may say so myself. Here's the thing: Eric warns people that the operation of dismantling the head unit, removing every button, doo-dad, screw, and other add-on is very delicate and should not be attempted if you don't have a good sense of manual dexterity, patience, and organization. The head unit, in particular, is not just removed: it is dismantled. The problem with this is that it was never meant to be dismantled (at least I assume not). The operation is very do-able, but very delicate, and there is no room for error. Break one of the myriad little plastic ***** that act as pivot-points for the plethora of buttons, and that button is shot. Nor are the buttons or the bezel replaceable. You'll have to buy a new head unit. Is this meant to discourage anyone contemplating the operation from proceeding? Not at all. All I'm saying is to assess your own capabilities, and go from there. ....Oh yes, and take many photos. You WILL forget where that weird-looking grommet belongs. The painting process takes several weeks, and without photos, you may end up with an awful lot of spare parts. Probably not a good thing.
Along the way I invented (?) a tool and method for removing the side panels (in my car's case, leather covered) on each side of the head unit. There are two screws and two press-fits for each side. The screws and the bottom press-fit are easy, but wiggling the panel to extract the tightly fitting top press-fit, without twisting it and putting undue strain on the whole is tough. Here's the solution: take a long-handled slim Allen key and grip the end of the long handle with a pair of vice grips. Now you can slide the other end between the panel and the side to which it is attached up near where you can feel that top press-fit is located. Once it is shoved as far in as it will go, give it a 1/4 turn and the Allen key will now rest at the back of the panel, just below the press-fit. Give the vice grip a good tug, and it will release the press fit without putting any sideways strain on it. Works great!
I must put in a pitch for Eric. His rules of engagement are straightforward and strict--and I can see why. He was great to work with and the panels came back absolutely stunning! Stunning! I had contemplated taking the panels to a body shop and have them painted for less, but you quickly realize that the complexity of the job is such that this would not be a good idea. A glob of paint at any button attachment-point, and there are dozens, would be disastrous. You get what you pay for. Here's a picture of the final result.
My only complaint? Now, when I turn on the stereo, instead of getting the colour 'Porsche' logo on the screen, I get a scratchy black-and-white image of some weird satellites and the word 'Trabant'. ......It's a joke!

 03-24-2014, 08:13 PM
#3
Rennlist Member
Looks fantastic. Really good.
I've thought about doing this several times myself, but I am put off by the disassembly. I would definitely use Eric for the painting. I have a couple of his pieces now, all very nicely done.
Wish there was a vendor locally who could handle the disassembly/reassembly process.
Congratulations!
I've thought about doing this several times myself, but I am put off by the disassembly. I would definitely use Eric for the painting. I have a couple of his pieces now, all very nicely done.
Wish there was a vendor locally who could handle the disassembly/reassembly process.
Congratulations!
03-24-2014, 08:18 PM
#5
Rennlist Member


Trending Topics
03-24-2014, 10:43 PM
#9
Rennlist Member
Thread Starter
Join Date: Dec 2010
Location: Vancouver, British Columbia, Canada
Posts: 30
Likes: 0
Received 0 Likes
on
0 Posts

 03-25-2014, 01:42 PM
#11
Rennlist Member

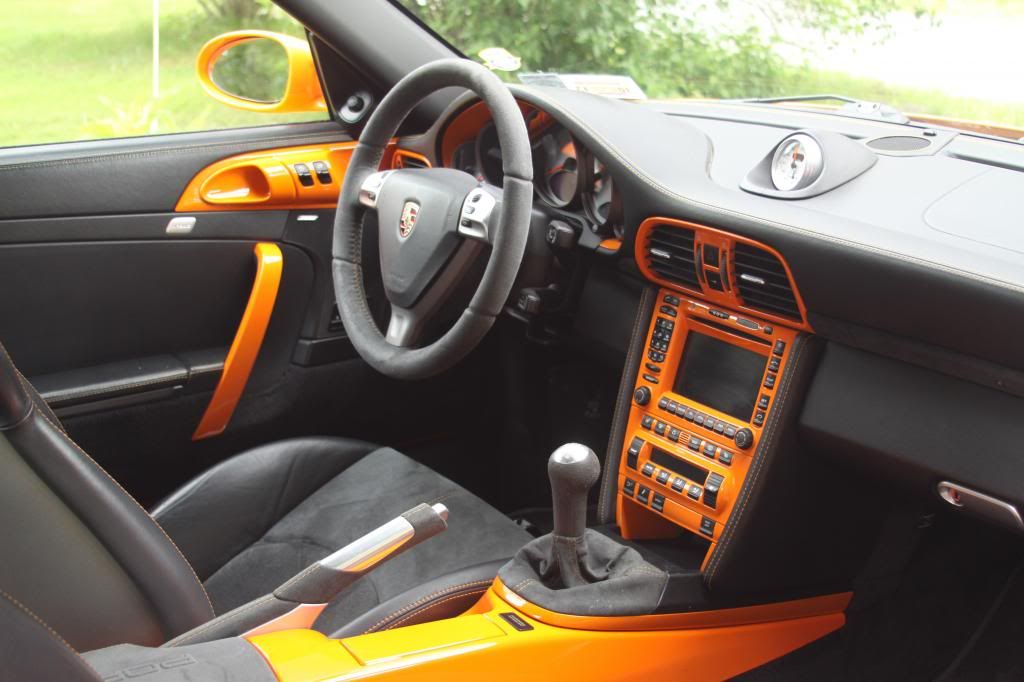
ilko -- I'm curious how they painted your door grab handles. Most I see are covered in leather. Did they just remove the leather and paint what was underneath?
Also, do you know if the fasteners holding the door "spear" panels surrounding the door latches have to be melted off to be removed? I remember reading that somewhere, and I'm wondernig how you reattached them after the repaint. Much appreciated.
BTW -- The orange accents look great.
Sean
Also, do you know if the fasteners holding the door "spear" panels surrounding the door latches have to be melted off to be removed? I remember reading that somewhere, and I'm wondernig how you reattached them after the repaint. Much appreciated.
BTW -- The orange accents look great.
Sean
03-25-2014, 02:28 PM
#13
Rennlist Member
For those interested in disassembling the parts and having them painted, it isnt as difficult as its made out to be, you just need to be patient and organized, and as mentioned take photos, or you can use mine as a reference. Eric does a great job painting these, and if you dont mind the long wait, i would recommend going with him. However I didnt use him as I wanted a faster turn around. I took my parts to my local auto painter that ive done work with.
Here is my DIY on how to remove and disassemble everything including the nav unit radio.
https://rennlist.com/forums/997-curr...e-removal.html
Here is my DIY on how to remove and disassemble everything including the nav unit radio.
https://rennlist.com/forums/997-curr...e-removal.html
03-25-2014, 09:21 PM
#14
Rennlist Member
bmwtye -- thanks for taking the time to write up that DIY. Very thorough.
Does anyone know if the standard leather-covered door handles and map case lids can be used to do something like ilko's interior? I am assuming it is just plastic underneath the leather. I'm wondering if the leather can be removed, the adhesive stripped, and the plastic sanded, primed and painted. The only painted door components I have seen are the OEM ones painted in silver and they are a good chunk of $$$$.
Sean
03-25-2014, 11:51 PM
#15
Newbies Hospitality Director
Lifetime Rennlist
Member
Lifetime Rennlist
Member
Join Date: Apr 2005
Location: Winston-Salem, NC
Posts: 18,085
Likes: 0
Received 32 Likes
on
32 Posts
ilko -- I'm curious how they painted your door grab handles. Most I see are covered in leather. Did they just remove the leather and paint what was underneath?
Also, do you know if the fasteners holding the door "spear" panels surrounding the door latches have to be melted off to be removed? I remember reading that somewhere, and I'm wondernig how you reattached them after the repaint. Much appreciated.
BTW -- The orange accents look great.
Sean
Also, do you know if the fasteners holding the door "spear" panels surrounding the door latches have to be melted off to be removed? I remember reading that somewhere, and I'm wondernig how you reattached them after the repaint. Much appreciated.
BTW -- The orange accents look great.
Sean