When you click on links to various merchants on this site and make a purchase, this can result in this site earning a commission. Affiliate programs and affiliations include, but are not limited to, the eBay Partner Network.
The fun thing was that I replaced the exhaust manifolds with Fabspeed headers!
Here are a few photos. Headers look like jewelry, and the plugs look ok to me...
Also including a diagram of cylinders, bc it was very difficult for me to find it!
Hello Jack! Happy to see the installation went smoothly and our headers have exceeded your expectations so far! Let me know your thoughts after you take it for a spin, I would love to hear your feedback
Quick note on accessing #4 which is by far the hardest. I've done this job twice in the last month. First time was to change plugs and packs. Second time was to perform leak down / compression check. I know, shoulda done it on the first go round.
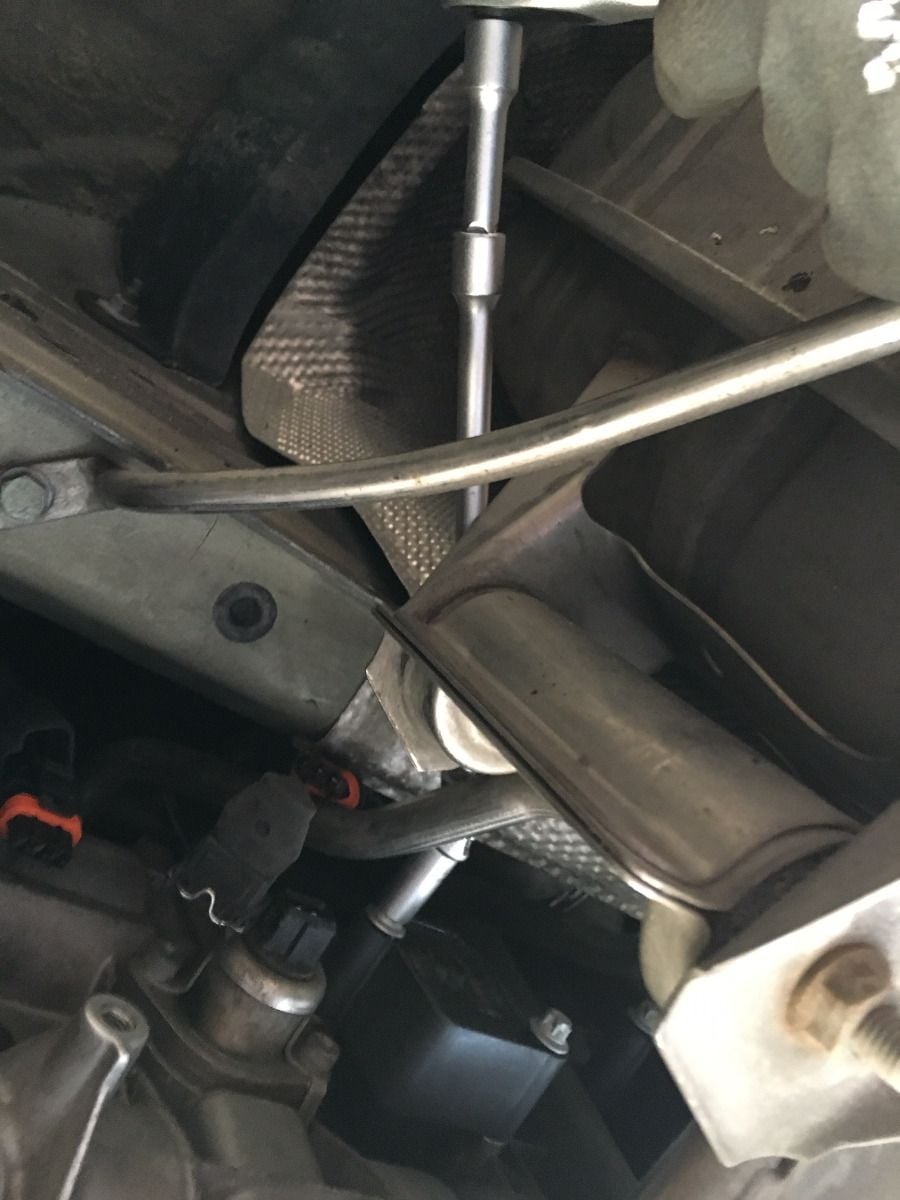
Second time around I really struggled with #4. Couldn't figure out why second time around was so much harder. Dawned on me that I had changed my motor mounts in between and the motor was now sitting much higher up in the chassis. This effectively blocks access to #4 by going above the muffler hanger with 1/4 drive extension.
Depending on the health of your motor mounts and how far your engine is hanging your access may be impinged. I did manage to get mine without lowering the engine but if doing it again I wouldn't hesitate to drop the engine by 1" or so which takes all of 2 minutes. Would save many minutes worth of painstaking effort and horrendous display of profanity...
May I add my experience and pictures.
Theoretically it is possible without removing the mufflers, only removing the wheels
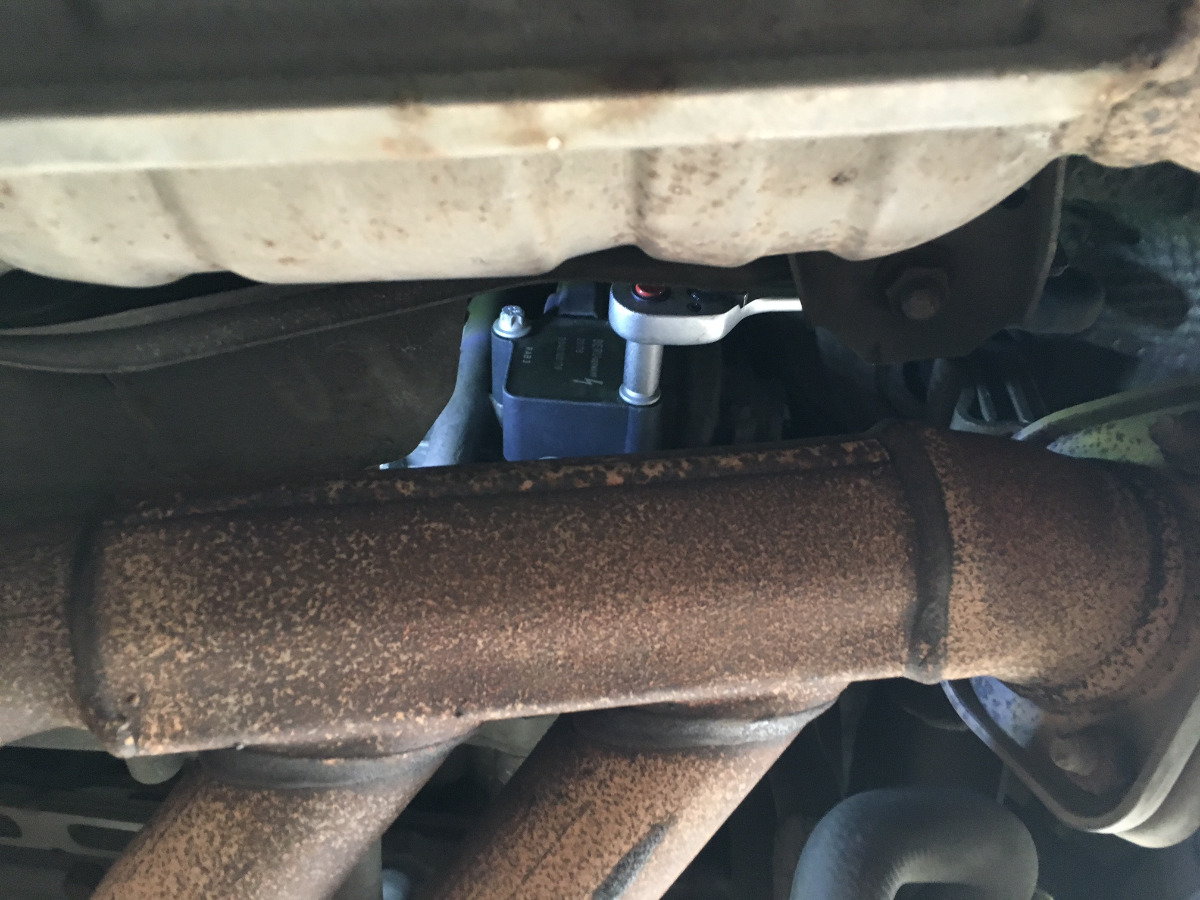
Picture 1 shows the wrench on cylinder 1, that is on the left bank the most difficult. But if you lie transversally to the body under the car, there is access for both arms reaching the coils.
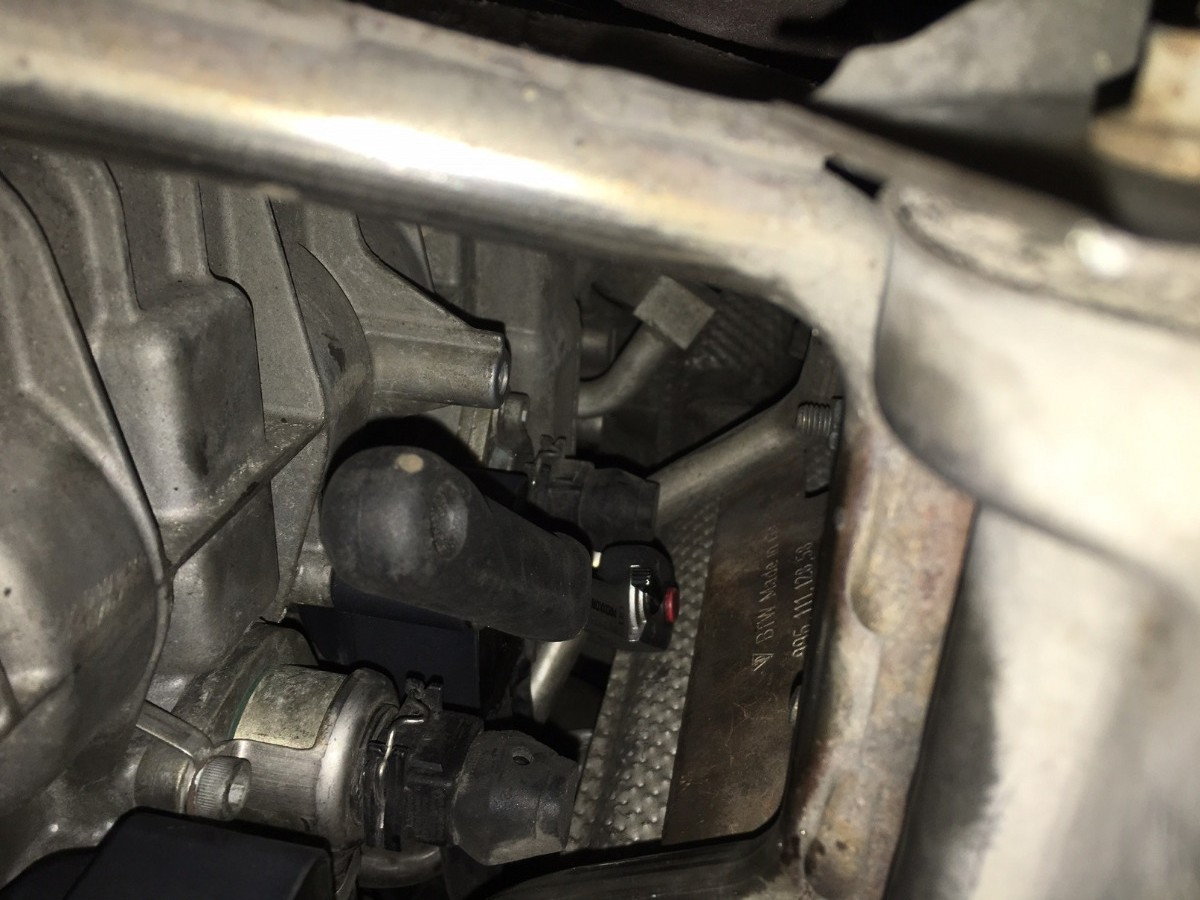
pictures 2 and 3 show one possibility for cylinder 2
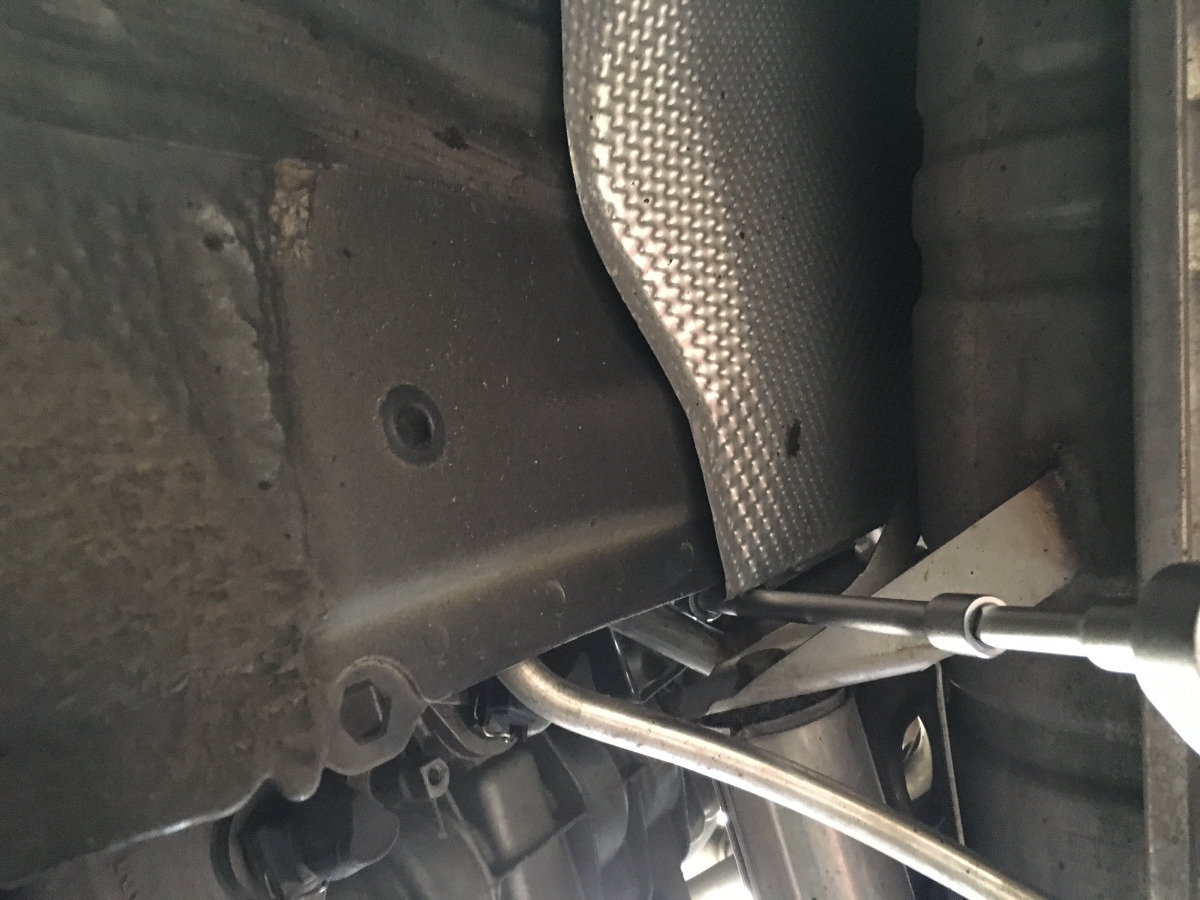
on the right bank cylinder 4 is most difficult by far. I had to shorten the socket, but it was possible. (picture is taken upside down)
A big problem are the plugs and their covers. It it possible with al long screwdriver or the bare hands without gloves. Taking off the tube from the coils and installing them seperately is no problem. Different extensions are helpful, with a flexible head for the socket, where the socket can flex or move a little bit. Right bank is only accessible by the wheel arch, not from behind.
The OP, Dave, noted in step 7, driver's side(left) heat shield wasn't removable. In regards to that, just bend the shield metal toward the rear and it will come out.
German 888, motor position due to motor mounts, great point! I can see how 1/2" can really help.
Your coil packs display a significant design advantage over the ones I have which were Beru. The "depth" or "thickness" of the mounting holes is much greater effectively raising the position of the torx head to a more reachable place. Mine were not as deep which puts them much closer the valve cover and far out of sight for #4. You technique although great for your car would never have worked on mine and I suspect many others...
Originally Posted by peterhorten
May I add my experience and pictures.
Theoretically it is possible without removing the mufflers, only removing the wheels
Picture 1 shows the wrench on cylinder 1, that is on the left bank the most difficult. But if you lie transversally to the body under the car, there is access for both arms reaching the coils.
pictures 2 and 3 show one possibility for cylinder 2
on the right bank cylinder 4 is most difficult by far. I had to shorten the socket, but it was possible. (picture is taken upside down)
A big problem are the plugs and their covers. It it possible with al long screwdriver or the bare hands without gloves. Taking off the tube from the coils and installing them seperately is no problem. Different extensions are helpful, with a flexible head for the socket, where the socket can flex or move a little bit. Right bank is only accessible by the wheel arch, not from behind.
I'm just about wrapped up with mine and #4 coil pack is by far the hardest due to the muffler bracket.
Remaining tips;
1. As mentioned by OP, tape spark plug socket to extension. What will also help is remove the rubber boot from the spark plug socket. It will make much easier to pull out. Since we have a flat six, the spark plug won't drop out of the socket during install.
2. For coil pack re-install, have different length T40 bits handy along with various extensions. I used a 1/4 socket to use on the hex bits.
Oh, I almost thought I had a disconnected vacuum line on the left side. If you see this, it's the coolant drain hose.
I have done my passenger side today, first time and it took about 2.5 hours for one side, going slowly.
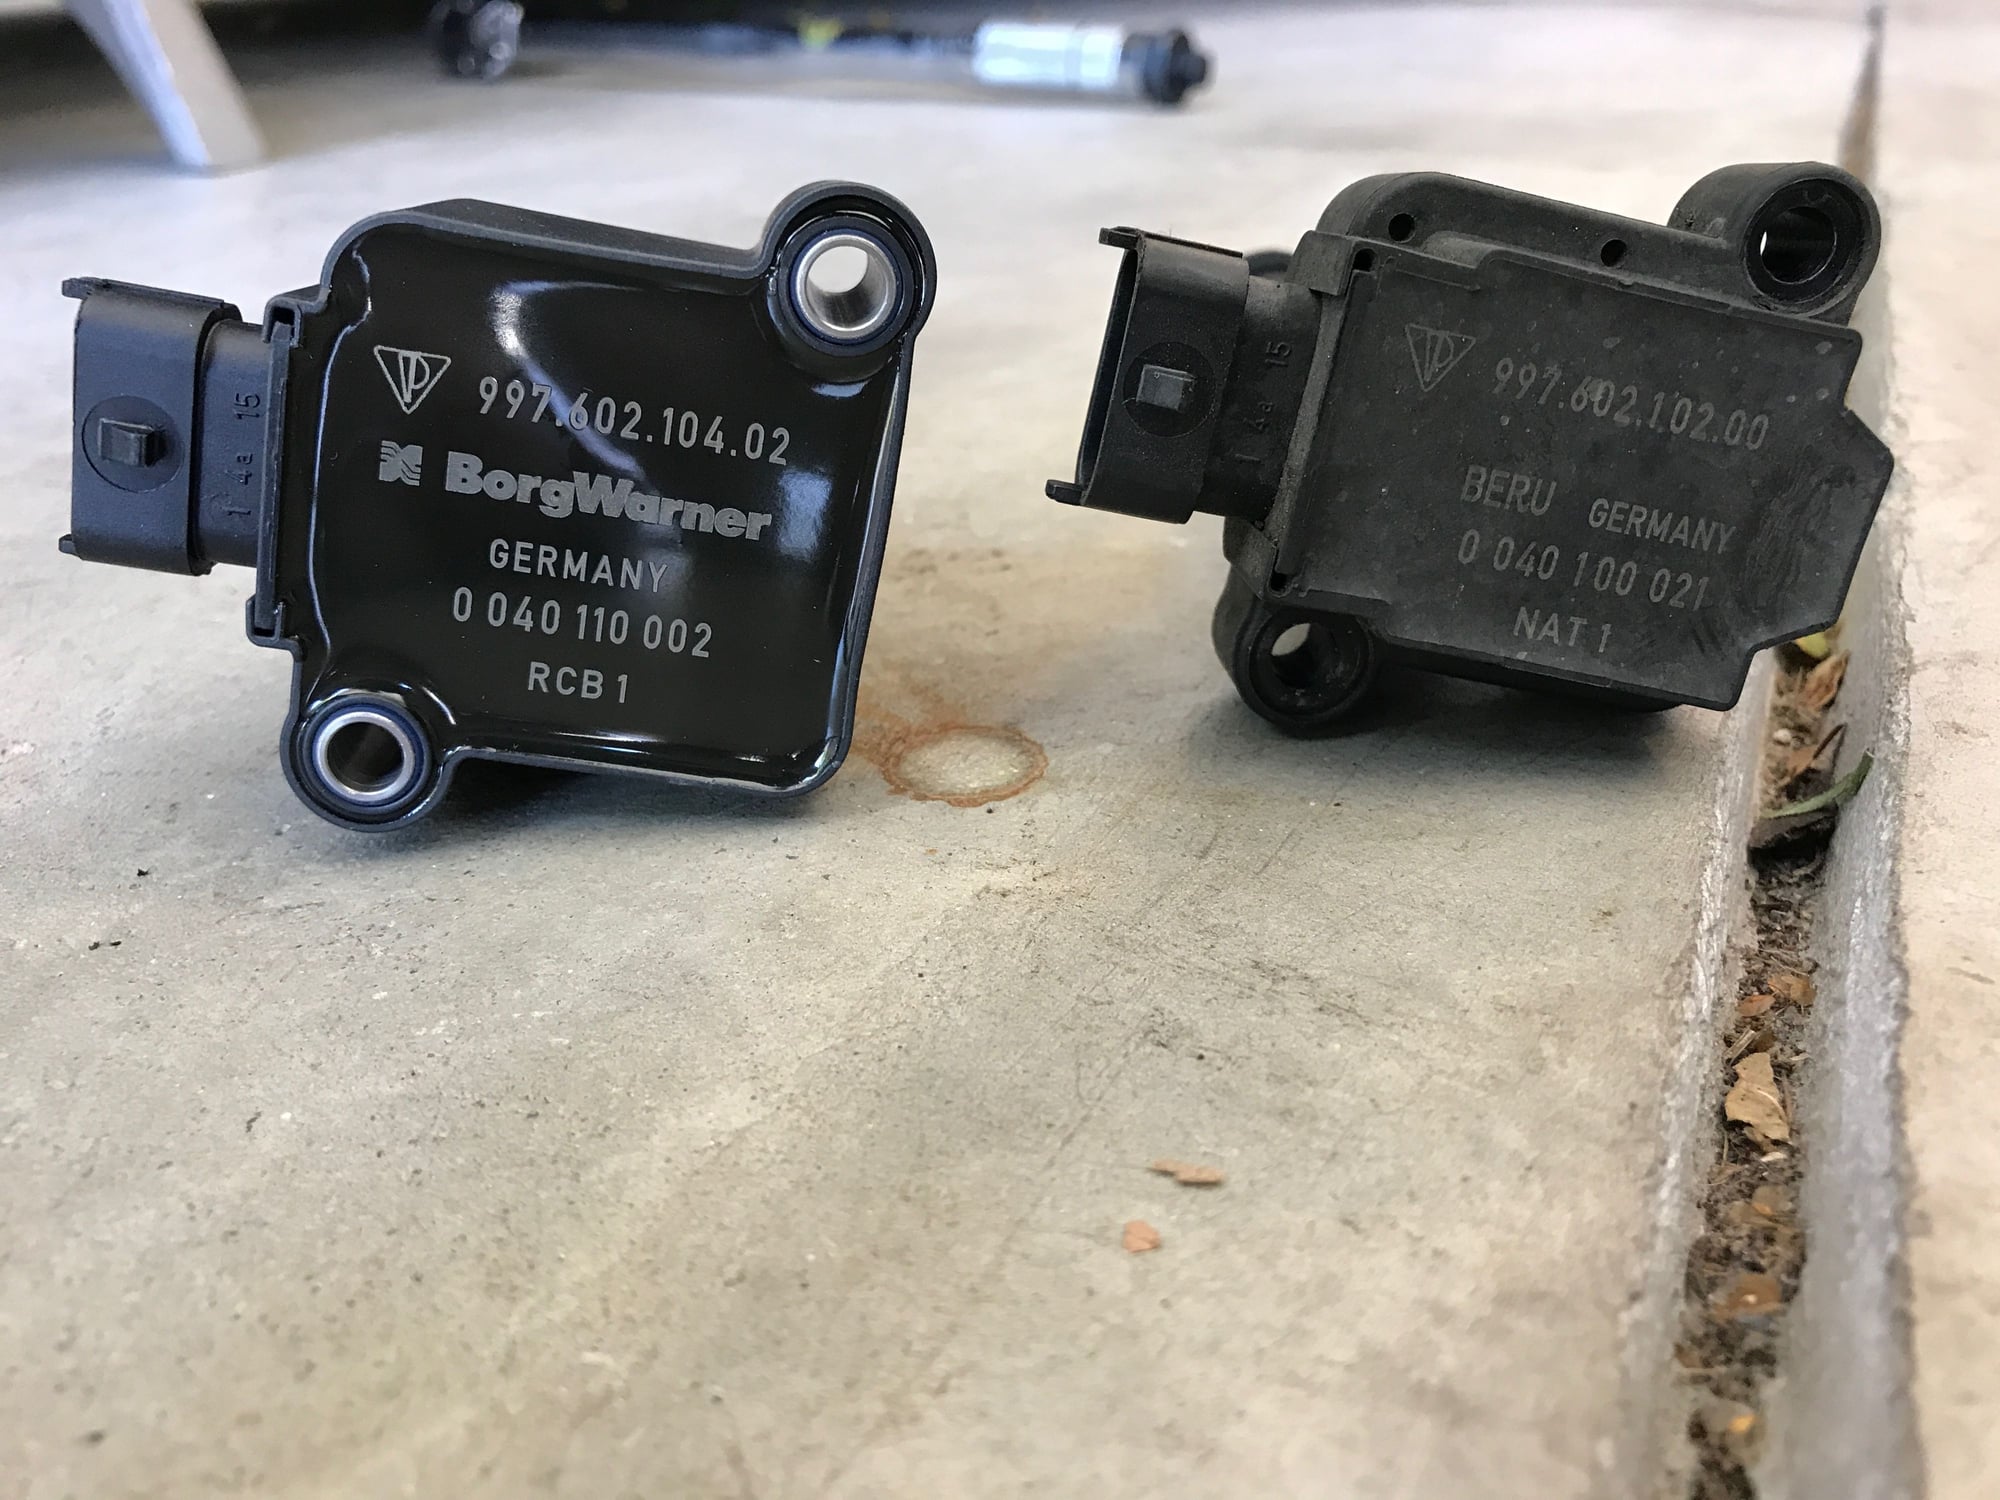
The coil packs that were on the car were the thinner Beru ones, the new ones from Suncoast are thicker Borg Warner units with a different part number. Also the Beru packs that I removed had female torx bolts, the new Borg Warner ones have male torx bolts that are much longer given the thicker pack body.
Left are the new ones
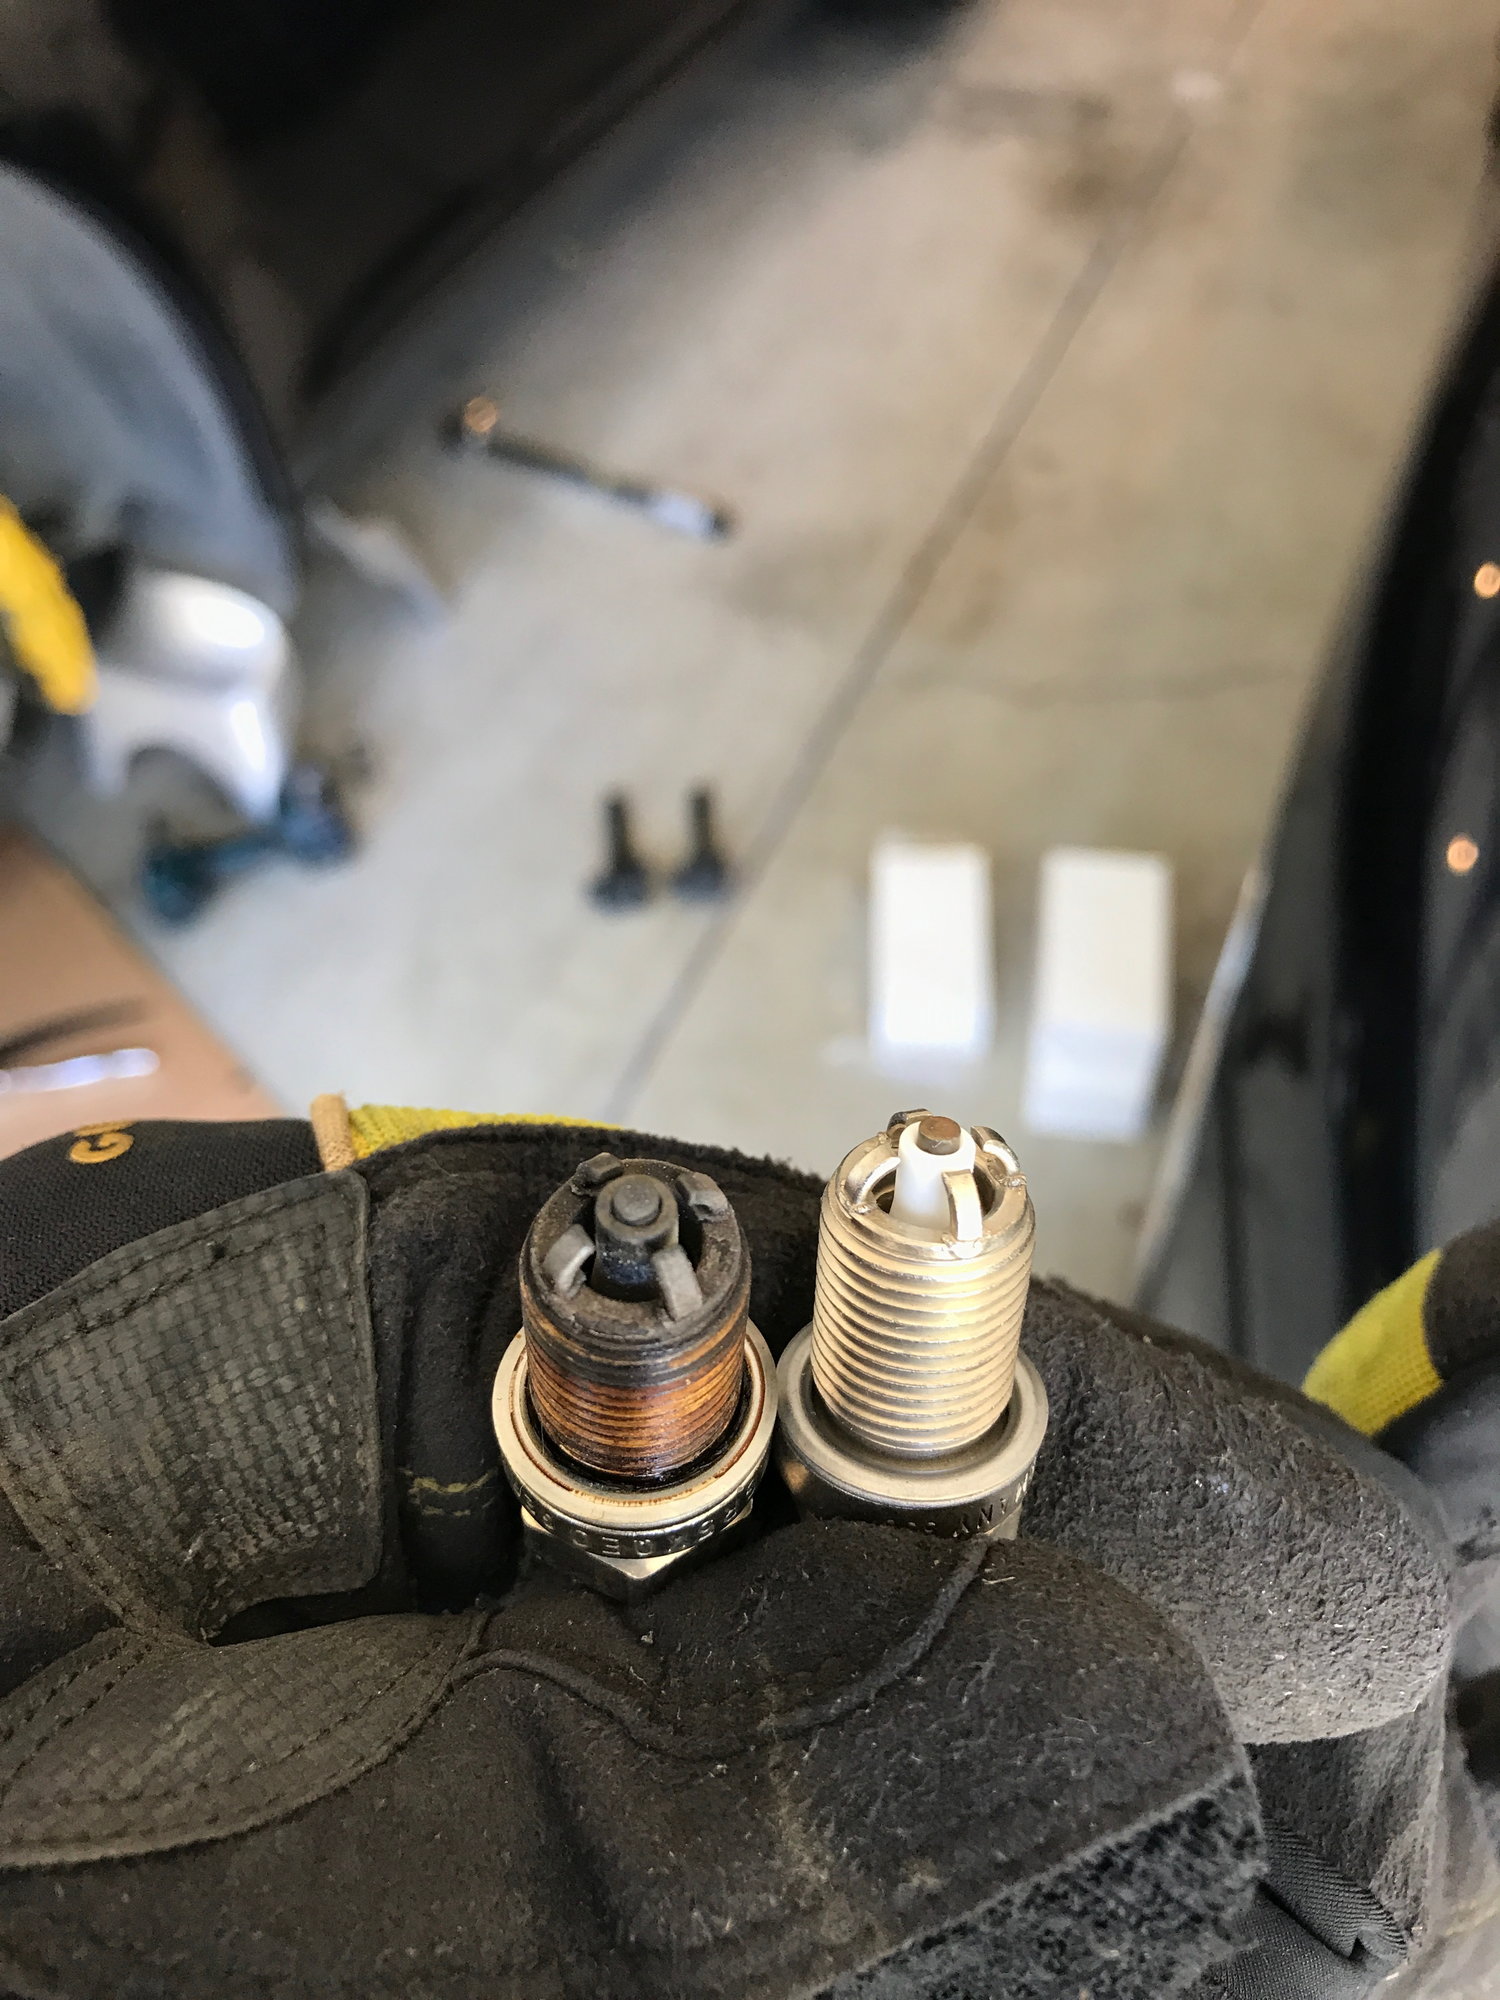
It's been decades since I replaced plugs, how do these ones look to folks who know this better?
Side note- anyone want the old coil packs? They look perfect to me, I could chuck them but if someone wants them LMK. They are the Beru ones, 39,800 miles.
Local Bay Area preferred, not looking to ship these. PM if interested otherwise into the landfill they go
Now that I have put on a few hundred miles since changing coils and plugs I am going to go out on a subjective limb and say that the car runs better. Revs smoother, seems to have more pep (meaning throttle response is more instant).
I recently changed all my filters as well so I guess even modern cars benefit quite a bit from a tune-up!
First time i have ever not completed a project! I gave my self 12 hours to change plugs and coils, and have up
I have Fabspeed headers and mufflers. I looked at all the write ups and videos, I have tons of extensions and flops, still could not get to the #4. Im going to give it one more try before taking it in.
The only way i can see doing this would be taking the entire exhaust system off, including the headers. Anything I should worry about other than gaskets?
Last edited by Monster231; 07-13-2017 at 12:12 AM.
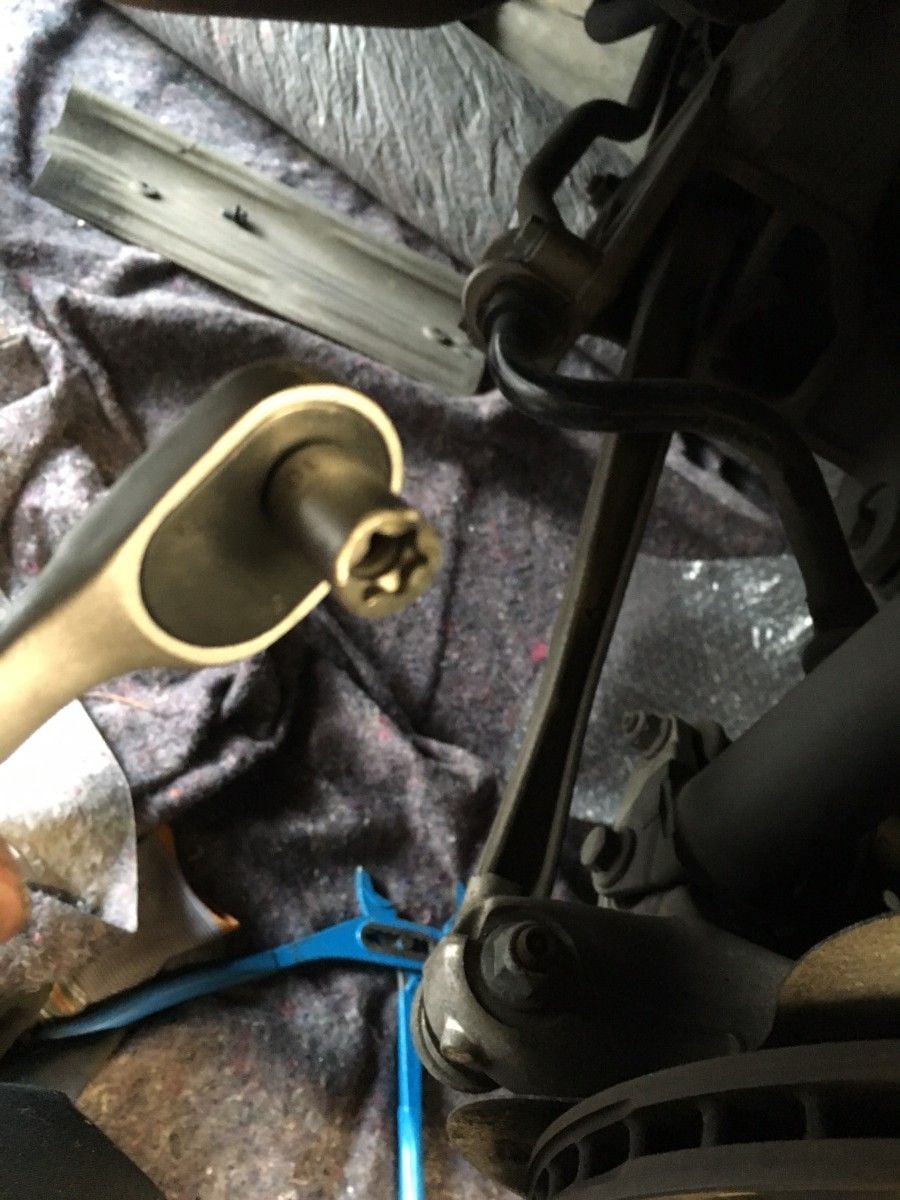
Because the bolts are single use I was willing to try some unorthodox methods, like jamming an allen key into the female torx head to get that bugger out
A better shade tree mechanic would have a more elegant answer, but it worked for me and that bolt was out!
I just did my plugs (no coils), and Air Cleaner, AND OH BOY... car feels new! Anyone's haven't done their plugs for a while, it's 100% worth it. Car is definitely smoother, as well as much smoother AND FASTER through the RPM! Highly recommended...

 01-10-2017, 07:00 AM