

Changing the 997.2 engine air filters
 04-11-2010, 08:32 PM
#1
Drifting
Thread Starter

Crossed the 15K mileage point on my 2009 Carrera this weekend and decides to change the oil as well as the pollen filter and engine air filters. I took a few photos to document the air filter change for those who may be interested.
Compared to the 997.1, changing the air filters in a 997.2 is a snap. You only need to remove the top cover of the air cleaner housing which is fully accessible. The diagram of the air cleaner assembly from the PET catalog is below:

The filter cover is held in place with eight Torx screws around the perimeter. Using a T25 driver and a pair of bent nose pliers or tweezers, remove the eight screws. These are not captive screws, so be careful not to drop one. The cover as removed and the eight screws are shown below.

The exposed air filters are below. Note that the MAF connector does not need to be removed.

Each filter is held at the end with a Torx screw which can be removed with a T20 driver


Once the screws have been removed, grab the filter at the end and gently wiggle it off of the mount.

The old filters were not particularly dirty, so I saved them as a backup set. Left is new, right is after 15K miles.

Installation is the reverse of removal. The rubber grommet at the open end of the filter is a tight fit with the bottom housing, so some wiggling is needed to get the filter seated and the retaining screw installed. I checked with www.renntech.org, and there is no particular torque requirement for the screws, just reasonably tight into the plastic, with care not to strip the mounting points in the bottom housing. Overall process just under thirty minutes with lots of time for photos included.

Compared to the 997.1, changing the air filters in a 997.2 is a snap. You only need to remove the top cover of the air cleaner housing which is fully accessible. The diagram of the air cleaner assembly from the PET catalog is below:
The filter cover is held in place with eight Torx screws around the perimeter. Using a T25 driver and a pair of bent nose pliers or tweezers, remove the eight screws. These are not captive screws, so be careful not to drop one. The cover as removed and the eight screws are shown below.
The exposed air filters are below. Note that the MAF connector does not need to be removed.
Each filter is held at the end with a Torx screw which can be removed with a T20 driver
Once the screws have been removed, grab the filter at the end and gently wiggle it off of the mount.
The old filters were not particularly dirty, so I saved them as a backup set. Left is new, right is after 15K miles.
Installation is the reverse of removal. The rubber grommet at the open end of the filter is a tight fit with the bottom housing, so some wiggling is needed to get the filter seated and the retaining screw installed. I checked with www.renntech.org, and there is no particular torque requirement for the screws, just reasonably tight into the plastic, with care not to strip the mounting points in the bottom housing. Overall process just under thirty minutes with lots of time for photos included.

The following users liked this post:
SpectreH (06-14-2023)

The following users liked this post:
AustinDeste (04-23-2023)
04-12-2010, 12:01 AM
#3
Cruisin'

Join Date: Feb 2010
Location: Surrey, BC...Canada
Posts: 9
Likes: 0
Received 0 Likes
on
0 Posts
Have you replaced the pollen filter yet...I also have a 997.2 and am interested in how to replace that piece.
Do you mind if I ask how much you paid for the parts? I'm not looking for exact pricing (not sure if you can respond with exact pricing or not), just a ballpark as I was also thinking of replacing both air filters and the pollen filter.
Thank you!
Do you mind if I ask how much you paid for the parts? I'm not looking for exact pricing (not sure if you can respond with exact pricing or not), just a ballpark as I was also thinking of replacing both air filters and the pollen filter.
Thank you!
04-12-2010, 09:08 AM
#4
Drifting
Thread Starter
Yes, I replaced it at the same time. The process is simple, but takes some wiggling of the filter to remove it. A diagram can be found here:
https://rennlist.com/forums/997-foru...bin+air+filter
From the diagram, remove the battery cover (item 4) then the black cover on the passenger side (item 10) which should just pop out. You will see a grey foam sheet under this cover which you lift out of the way. Underneath will be a bracket retained by four Torx bolts. Using a T30 driver, remove the bolts, then the bracket. The filter will pop out out of its tray (item 1) with a bit of gentle prying. Once loose and slightly forward to clear the tray bracket, remove by pulling towards the battery. Installation of the new filter is the reverse.
Suncoast Motorsports has the parts in stock Their website lists the OEM pollen filter for ~$60 and the set of two OEM engine air filters for ~$59 per set.
Thanks! Just doing my part.
04-12-2010, 10:31 AM
#5
Race Director
great DIY.
I assume its the same for a 3.8L.
Whats does "captive" screws mean?
Any consideration on aftermkt air filters? After all, the advertisments claim 100+hp gains!
tks
I assume its the same for a 3.8L.
Whats does "captive" screws mean?
Any consideration on aftermkt air filters? After all, the advertisments claim 100+hp gains!
tks
04-12-2010, 10:56 AM
#6
Newbies Hospitality Director
Lifetime Rennlist
Member
Lifetime Rennlist
Member
Join Date: Apr 2005
Location: Winston-Salem, NC
Posts: 18,084
Likes: 0
Received 34 Likes
on
33 Posts
"Captive" screws refers to some situations where the screws are held in place on the cover, and can not be easily removed from the cover. The screws can be rotated to tighten or loosen them, but they remain "connected" to the cover, so you can't lose them. The best example I can think of is a screw clamp. You can tighten or loosen the clamp by turning the screw, but the screw is attached to the clamp in such a way that it will not fall out of the clamp.
The OP was stating they the screws are NOT "captive" so you need to be careful when removing them, because they could fall into the engine compartment.
The OP was stating they the screws are NOT "captive" so you need to be careful when removing them, because they could fall into the engine compartment.
04-12-2010, 03:00 PM
#7
Drifting
Thread Starter
I highly recommend a large set of curved tip pliers when removing the 997.2 air filter cover. Bent nose pliers work, but the spacing is tight even for curved tip needle nose pliers, particularly in the space between the air cover and the rear bumper. My fat fingers needed help there!

Trending Topics
05-26-2012, 03:17 AM
#10
Nordschleife Master
Yes, I replaced it at the same time. The process is simple, but takes some wiggling of the filter to remove it. A diagram can be found here:
https://rennlist.com/forums/997-foru...bin+air+filter
From the diagram, remove the battery cover (item 4) then the black cover on the passenger side (item 10) which should just pop out. You will see a grey foam sheet under this cover which you lift out of the way. Underneath will be a bracket retained by four Torx bolts. Using a T30 driver, remove the bolts, then the bracket. The filter will pop out out of its tray (item 1) with a bit of gentle prying. Once loose and slightly forward to clear the tray bracket, remove by pulling towards the battery. Installation of the new filter is the reverse.
Suncoast Motorsports has the parts in stock Their website lists the OEM pollen filter for ~$60 and the set of two OEM engine air filters for ~$59 per set.
Thanks! Just doing my part.
https://rennlist.com/forums/997-foru...bin+air+filter
From the diagram, remove the battery cover (item 4) then the black cover on the passenger side (item 10) which should just pop out. You will see a grey foam sheet under this cover which you lift out of the way. Underneath will be a bracket retained by four Torx bolts. Using a T30 driver, remove the bolts, then the bracket. The filter will pop out out of its tray (item 1) with a bit of gentle prying. Once loose and slightly forward to clear the tray bracket, remove by pulling towards the battery. Installation of the new filter is the reverse.
Suncoast Motorsports has the parts in stock Their website lists the OEM pollen filter for ~$60 and the set of two OEM engine air filters for ~$59 per set.
Thanks! Just doing my part.
 05-26-2012, 09:46 PM
#11
Racer
Aftermarket air filters don't seem to be popular for the Porsche community. I wonder if it is because the OEM air filter has equal or better quality then the aftermarket ones. For the last 12 years, I always have K&N air filters in my cars (about 8 of them) and had never had problem with them. I wasn't looking for any performance improvement on those aftermarket air filters. I guess it was just some little thing I like to do for fun.
Big THANK YOU to the OP for this great DIY write-up. It will be very useful.
Big THANK YOU to the OP for this great DIY write-up. It will be very useful.
05-27-2012, 09:42 AM
#12

I'd stay away from K&N because using the oil can easily damage your MAF sensor and I don't know how effective they are if you use them without the oil spray. For those who like them I think that is great - I find it easier to replace the filter than spending the time cleaning one.
07-05-2012, 05:18 PM
#14
Instructor
Great write-up and, based on what I read, this is a lot easier than the 997.1. There are some subtle differences between the C2 and the C2S, mainly on the right side of the airbox. There is a vacuum and electrical connector there that needs to be disconnected prior to removing the airbox top. Two vacuum lines and one electrical connector. Remove the lower vacuum hose first and this will allow you access to the electrical connector. Pull the silver retaining clip towards you and then remove the clip. Remove the remaining vacuum hose.
The first photo shows the item that needs disconnected and the remaining pictures show the connector and vacuum hoses.

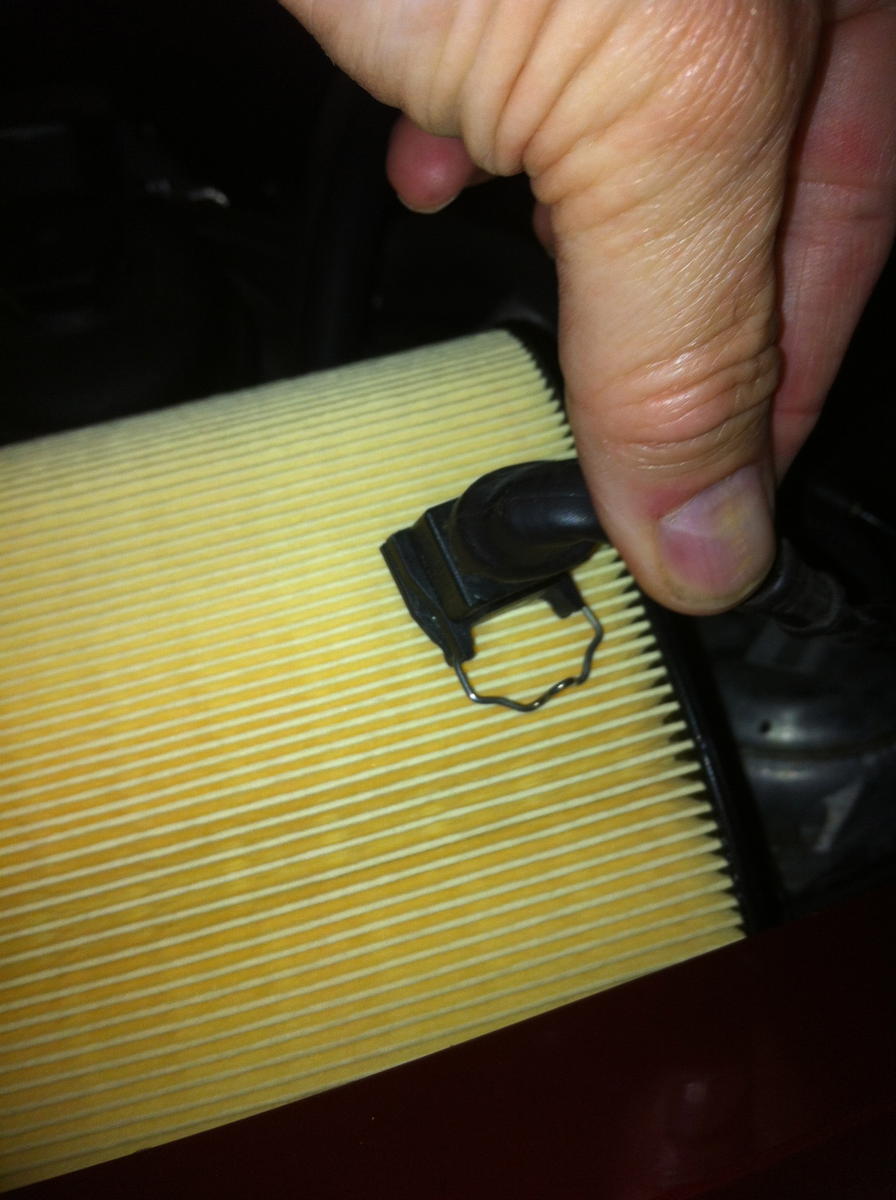
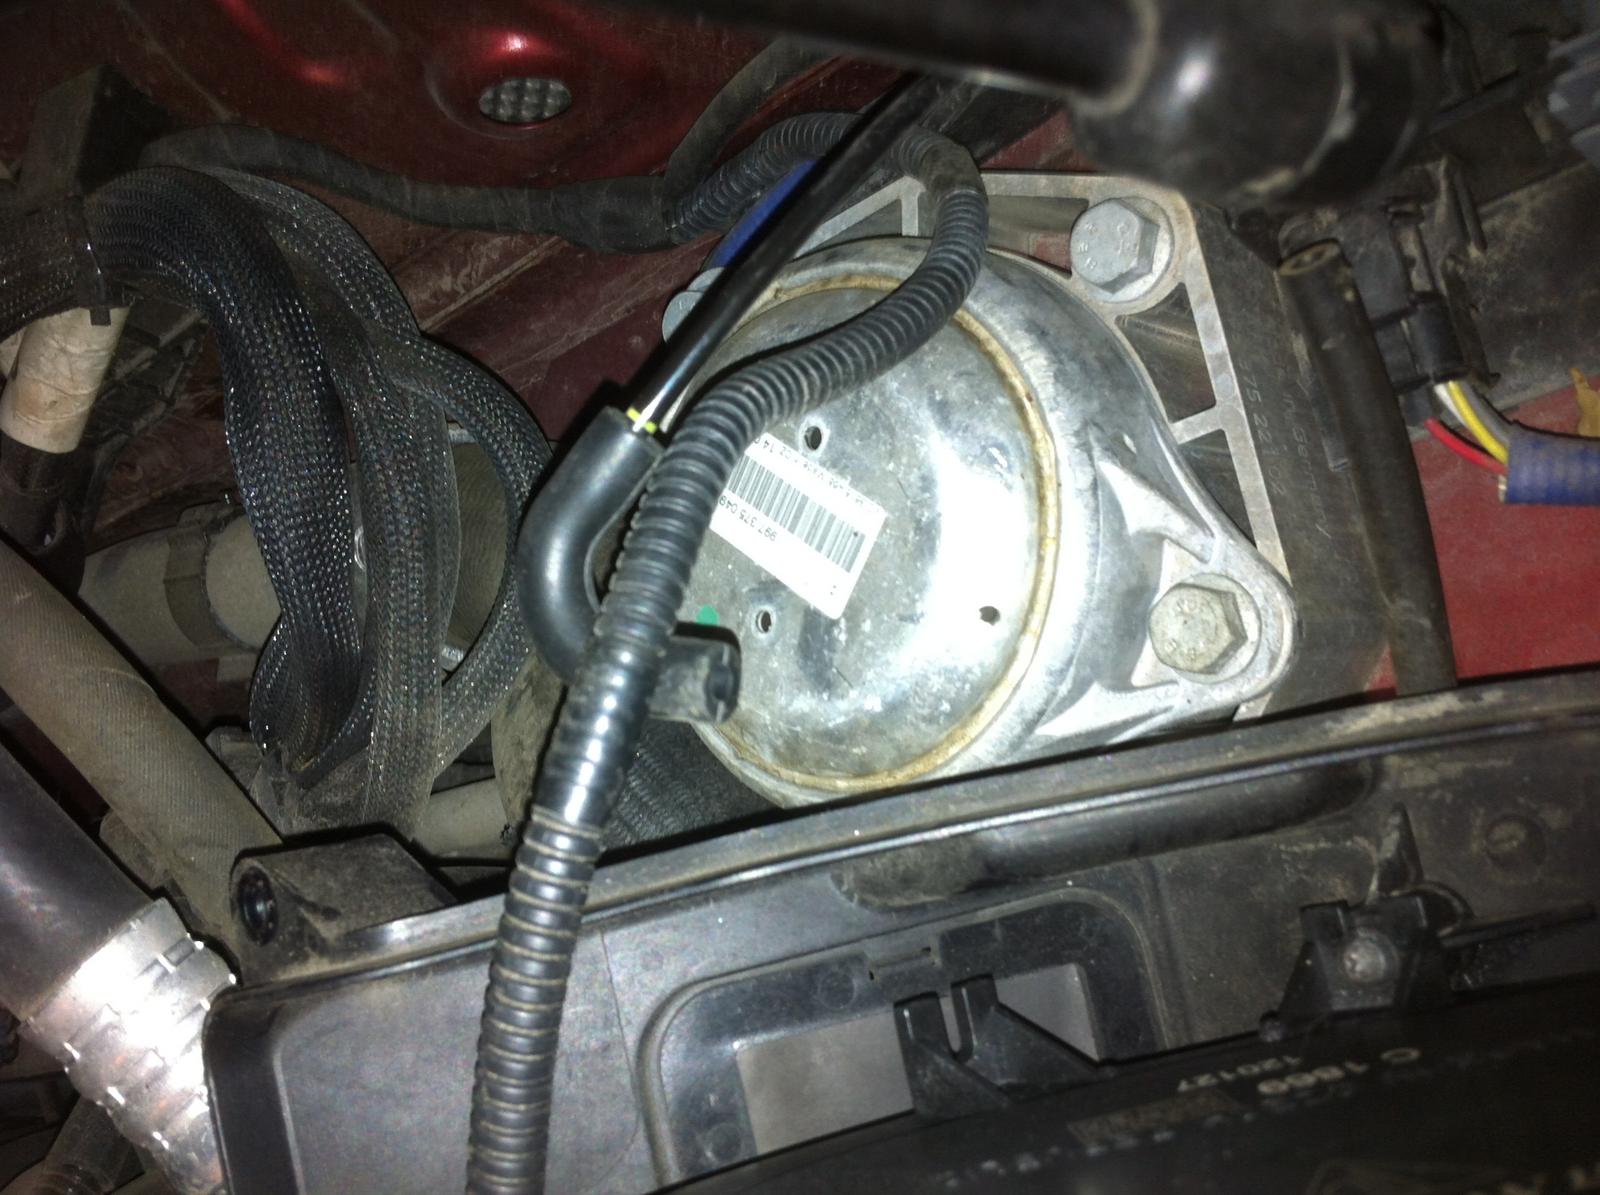
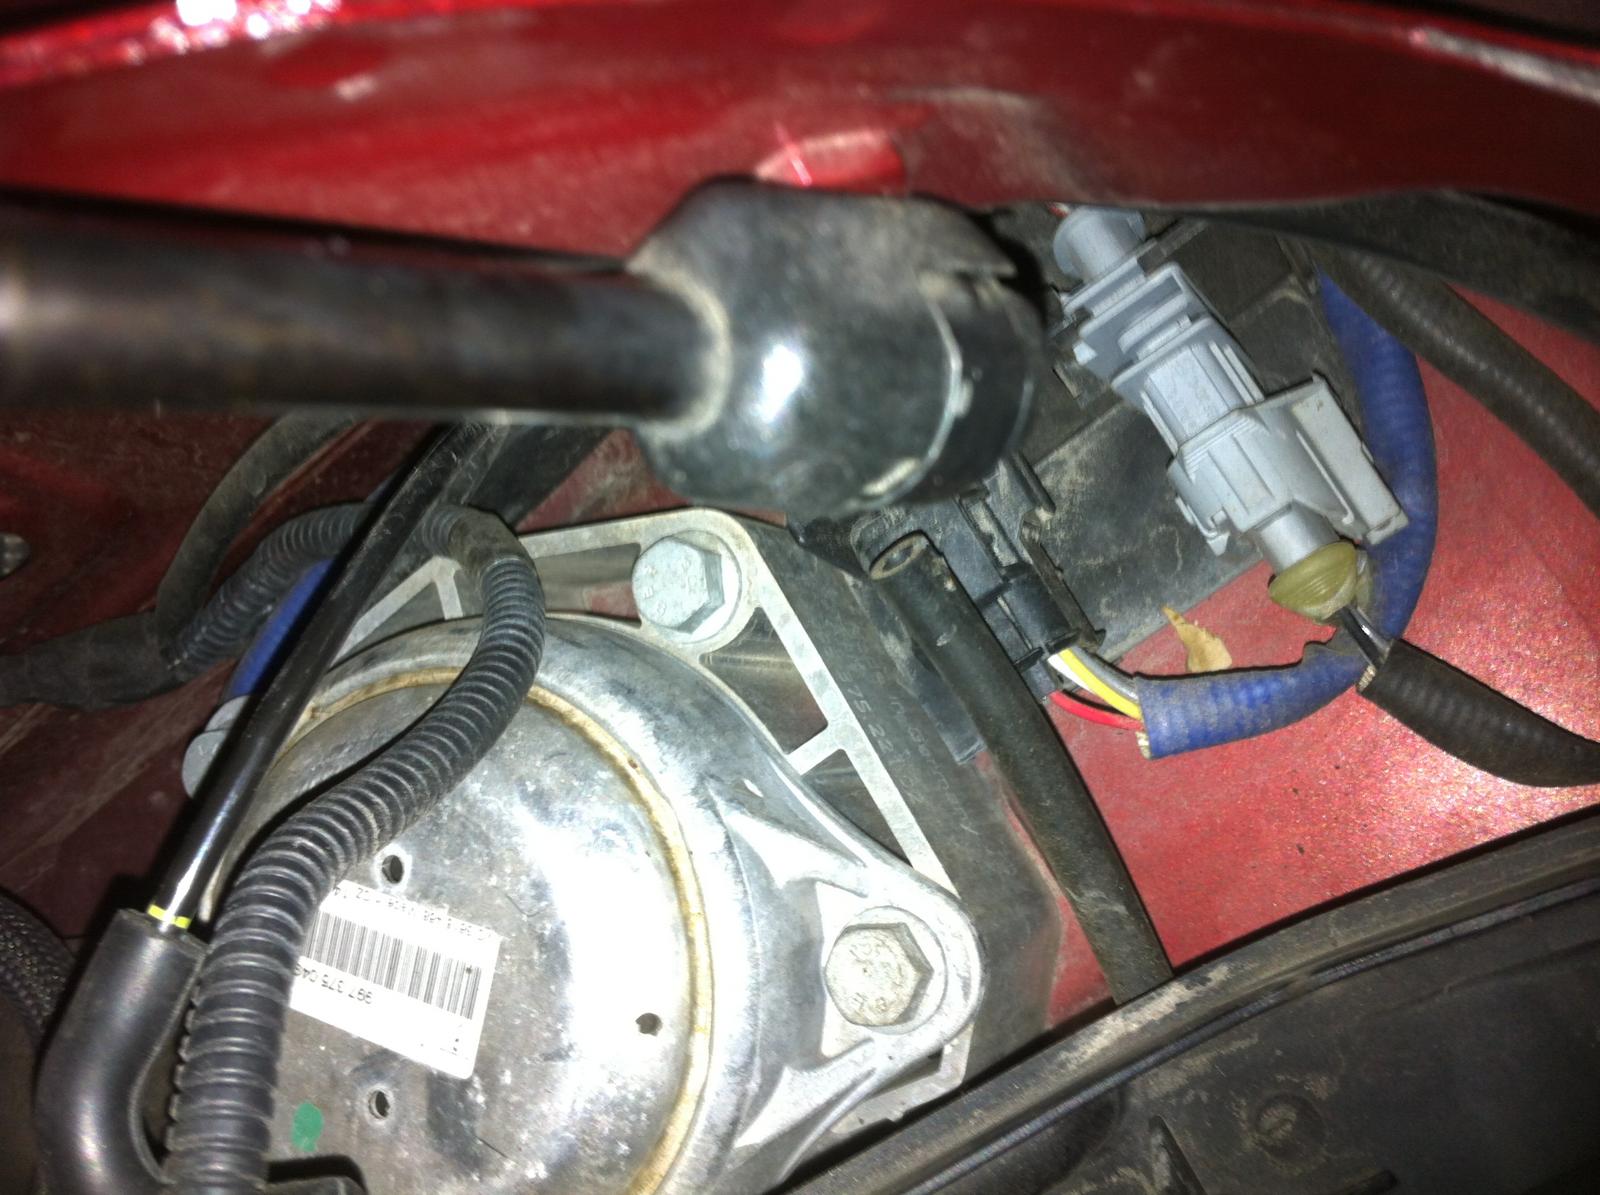
The first photo shows the item that needs disconnected and the remaining pictures show the connector and vacuum hoses.
10-28-2012, 08:47 PM
#15
Thanks wwiliams88, I just replaced my air filters with K&N set. Your photo instructions were made it so easy. I had looked at another web site supposedly giving authoritative advice, they were so wrong. Appreciate your help.