When you click on links to various merchants on this site and make a purchase, this can result in this site earning a commission. Affiliate programs and affiliations include, but are not limited to, the eBay Partner Network.
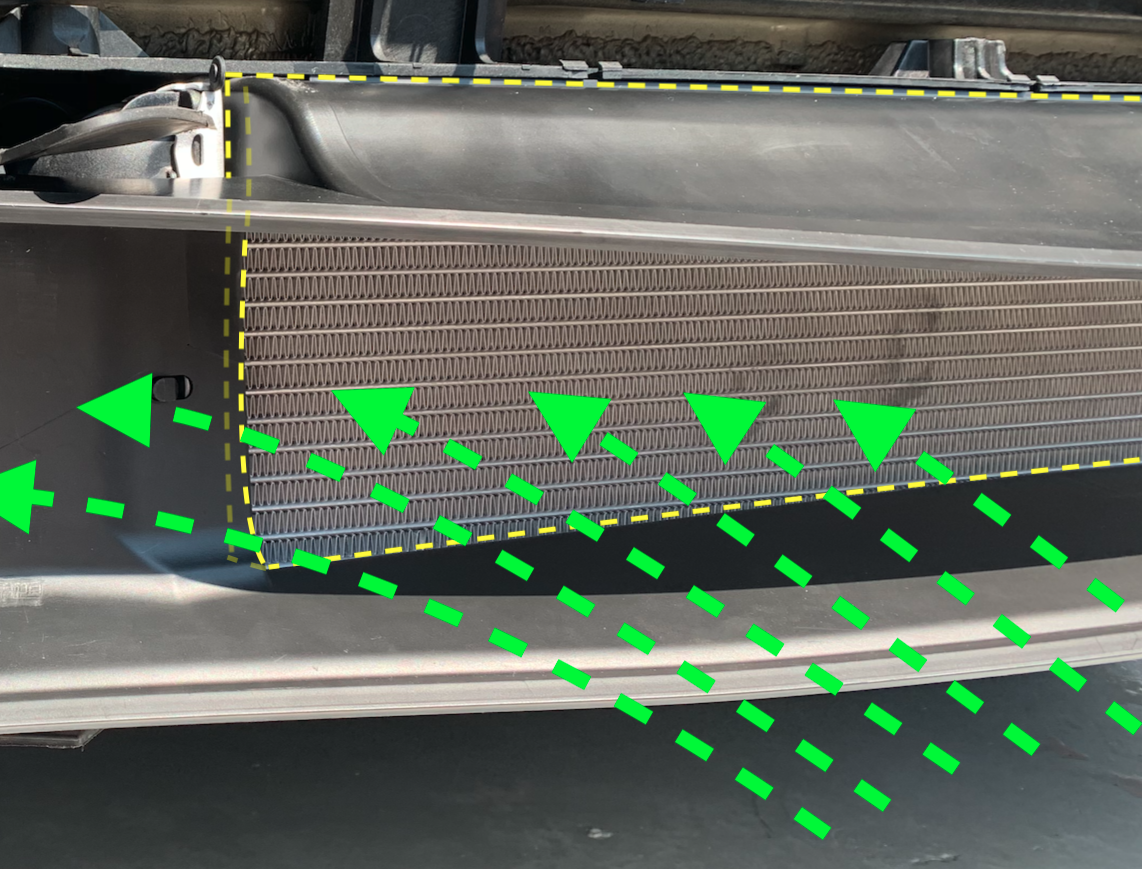
@CAVU it's difficult to see from the pics but the center cowl forms a seal around the front of the 3rd radiator (the sealing point is shown by the yellow dotted lines below. Additionally the radiator mounting box seals around the rear of the radiator and directs the air down to the exit vents.
Even when using our adapters this implementation is unchanged (i.e. exactly as done by the factory original design, so there is no hot air path or leak to the side ducts).
Our duct adapters simply ensure that the cold air flowing to the side ducts, travels along a smooth continuous surface rather than one that would be stepped and have a gap(hole) between the cowl and original side ducts if the adapters were not used.
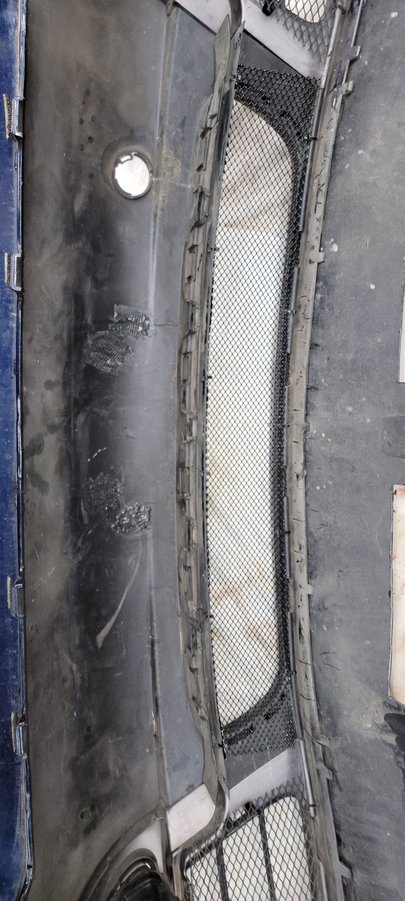
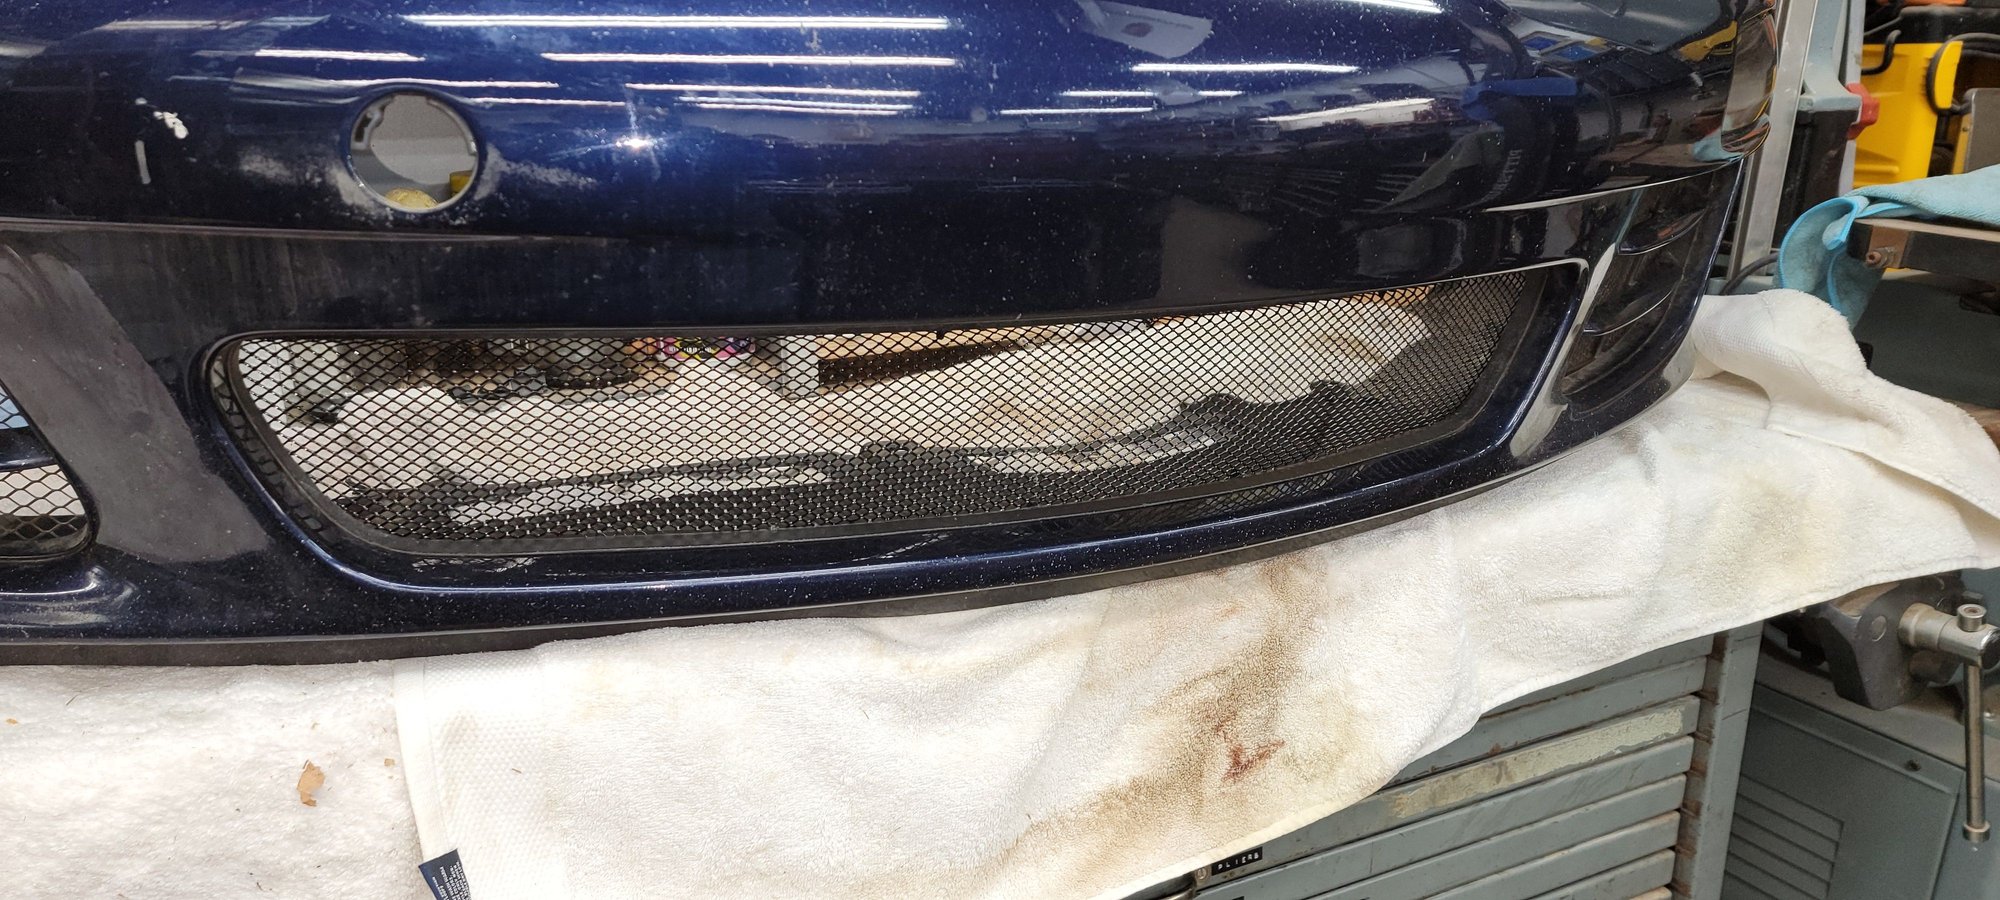
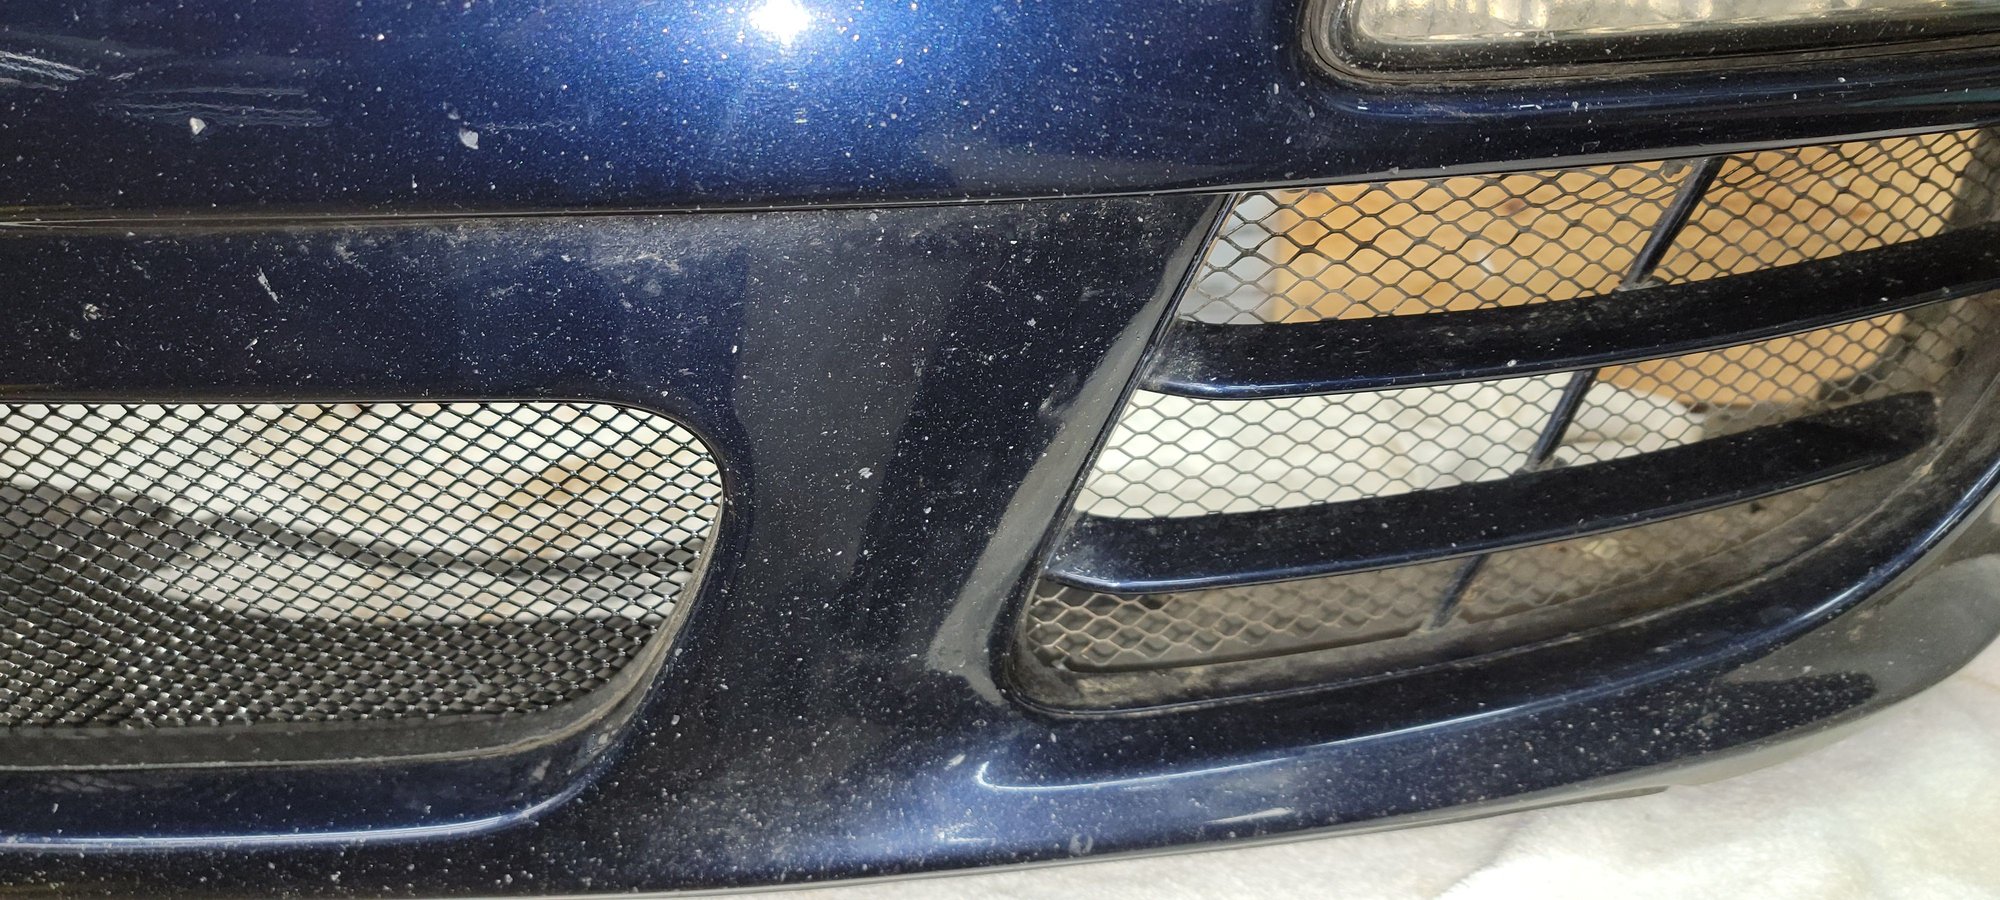
Just a final thing ... I needed a center radiator screen guard. As the photos below show, I drive on a lot of dirty roads full of construction. That's not dirt on the front bumper. That's road induced patina.
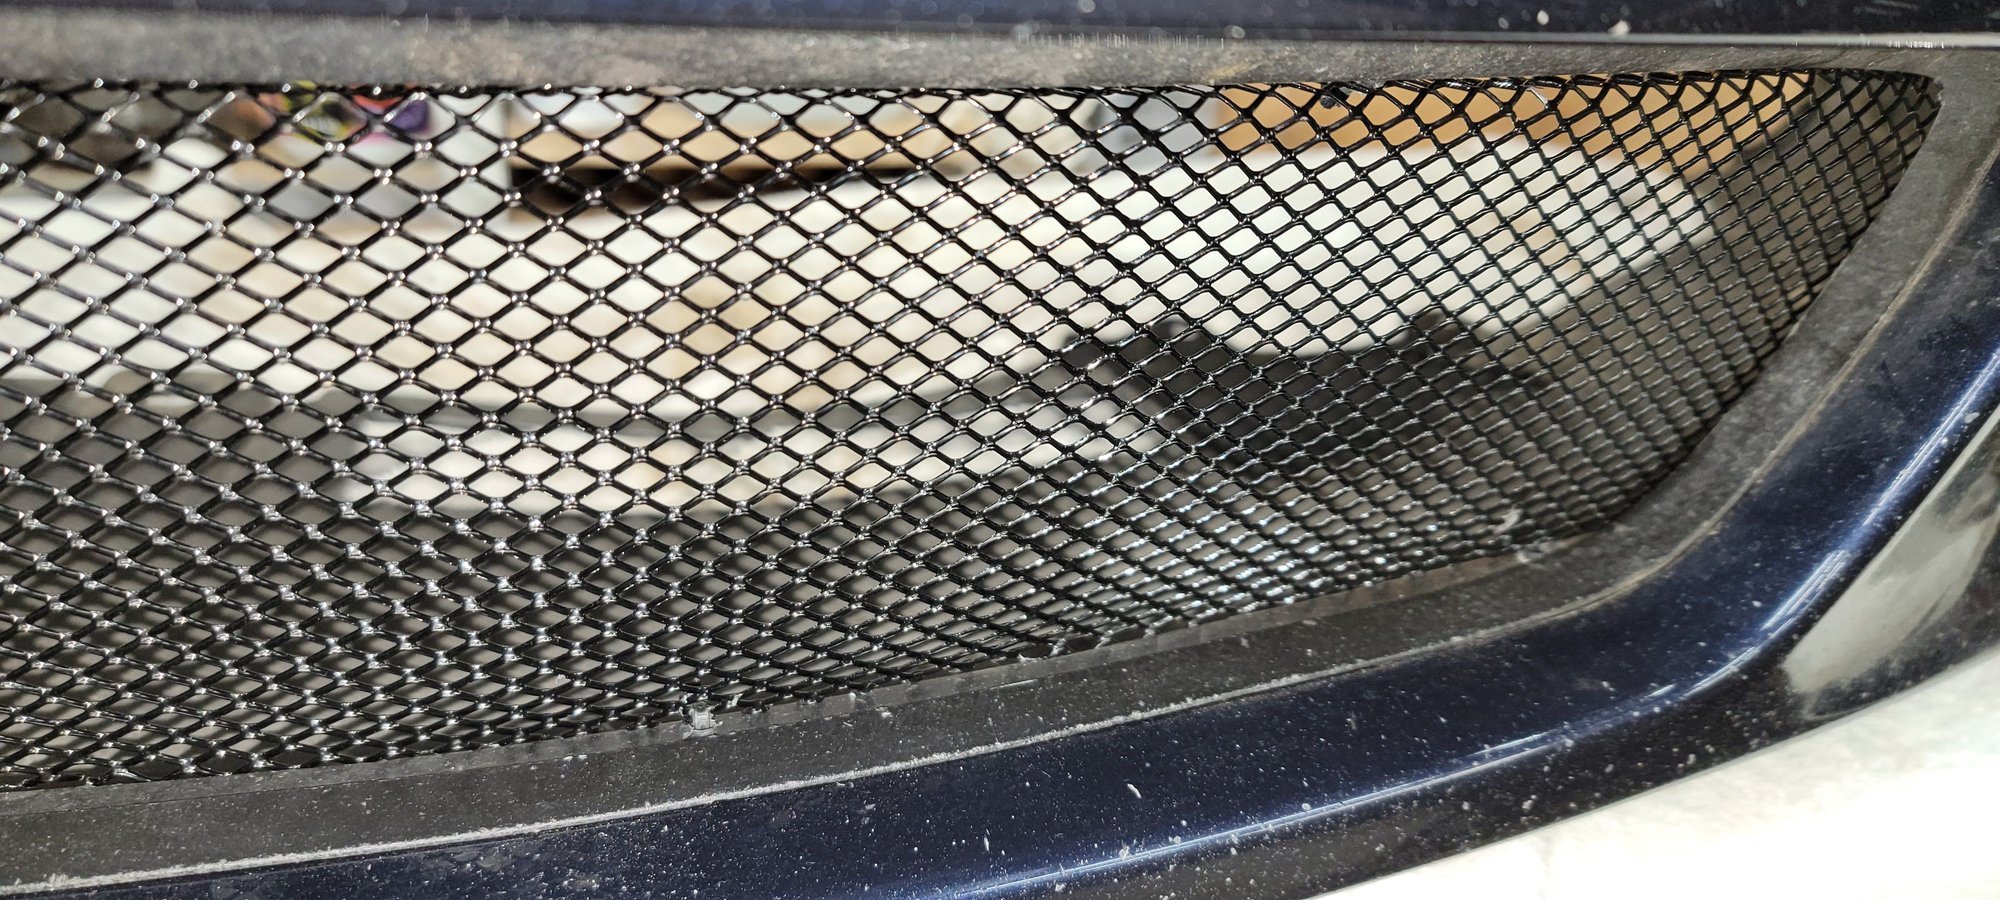
Home Depot doesn't stock the same metal gutter guards now as they did six years ago when I made my first side screens. So the sides will be replaced as well. But the center screen shown below gives the basic idea of form and function ... Seen from the inside. Small holes drilled into the snap on flange piece allow tie straps to secure the screen. I have a right angle bend at the top for rigidity. On the bottom I cut tabs to fit into the flange. This screen was then encouraged into a three dimensional bend to follow the bumper skin contour. Outside view showing the major road rash from years of a 50 mile daily commute on a highway that was under constant construction. Close up of the fit. More road patina. Difference in the gutter guard screening. The sides will be replaced next. Since these don't require the three dimensional bend that the center screen has these are very easy to do.


 01-11-2022, 01:30 PM