When you click on links to various merchants on this site and make a purchase, this can result in this site earning a commission. Affiliate programs and affiliations include, but are not limited to, the eBay Partner Network.
Inspired by Bruce and Wayne, I just completed this mod on my 997.1 with a short length of red 8 AWG wire I had in my collection of odds and ends from previous projects. This is a must do mod and provides peace of mind knowing there's one less catastrophe waiting to happen.
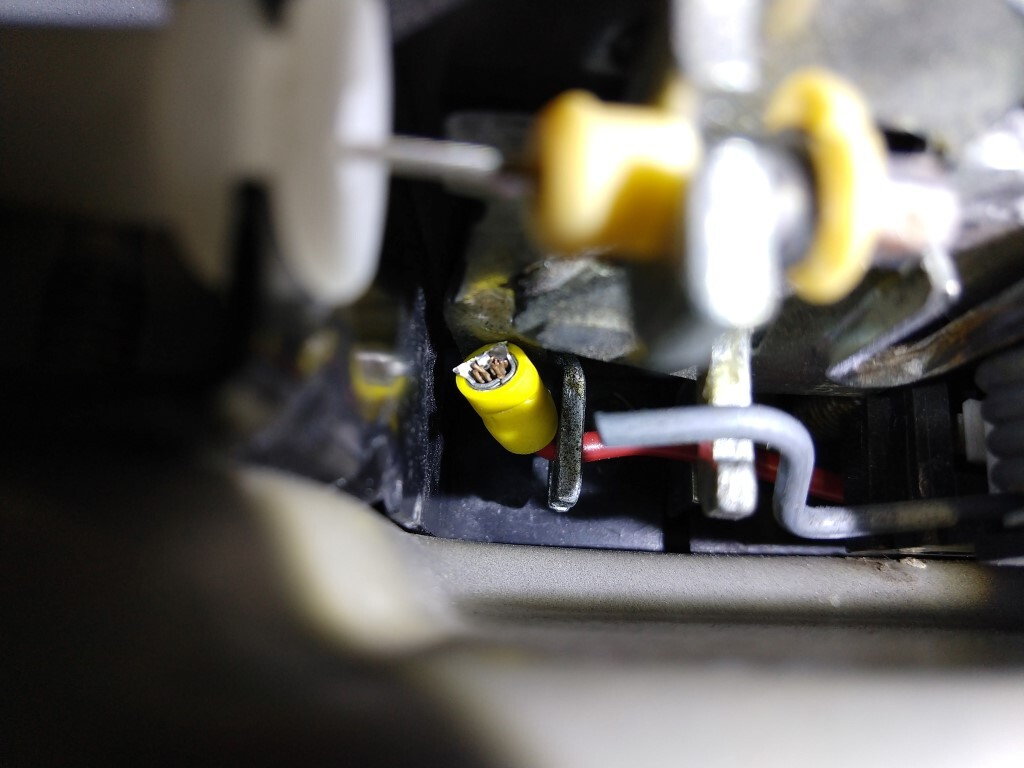
Instead of soldering a ball onto the wire end that connects to the hood latch I snipped off the end of a spade connector and crimped it onto the wire. Here is the wire end fitted into slot at base of release lever:
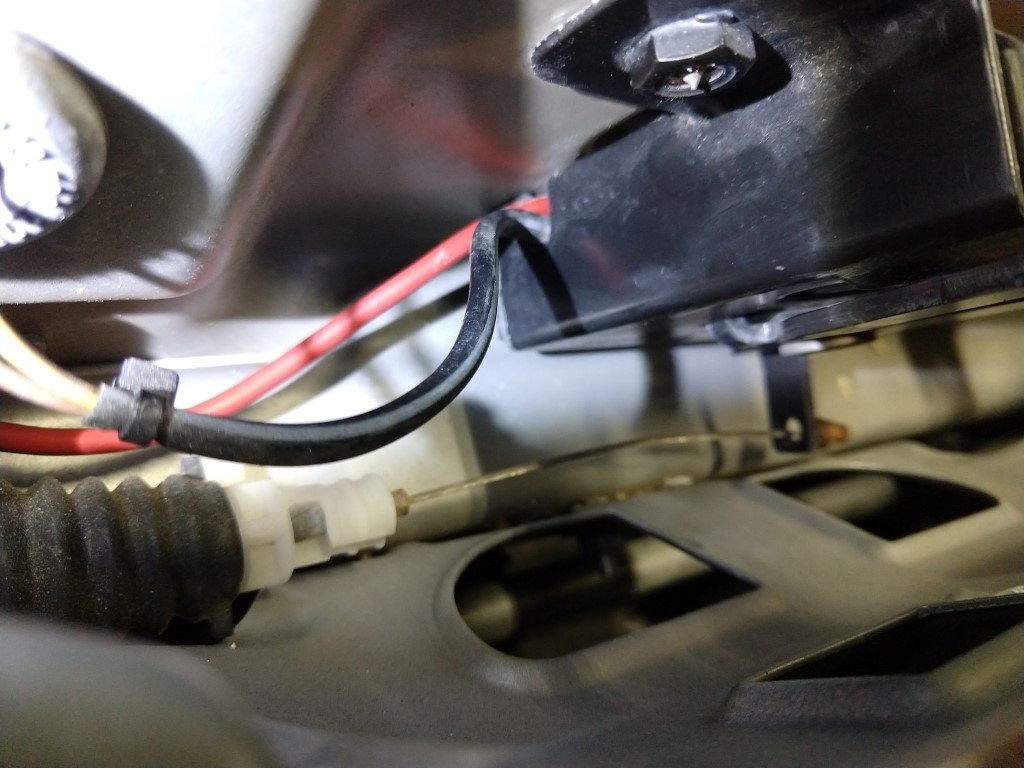
From there it was simple to route the wire to the passenger side parking/fog light opening.
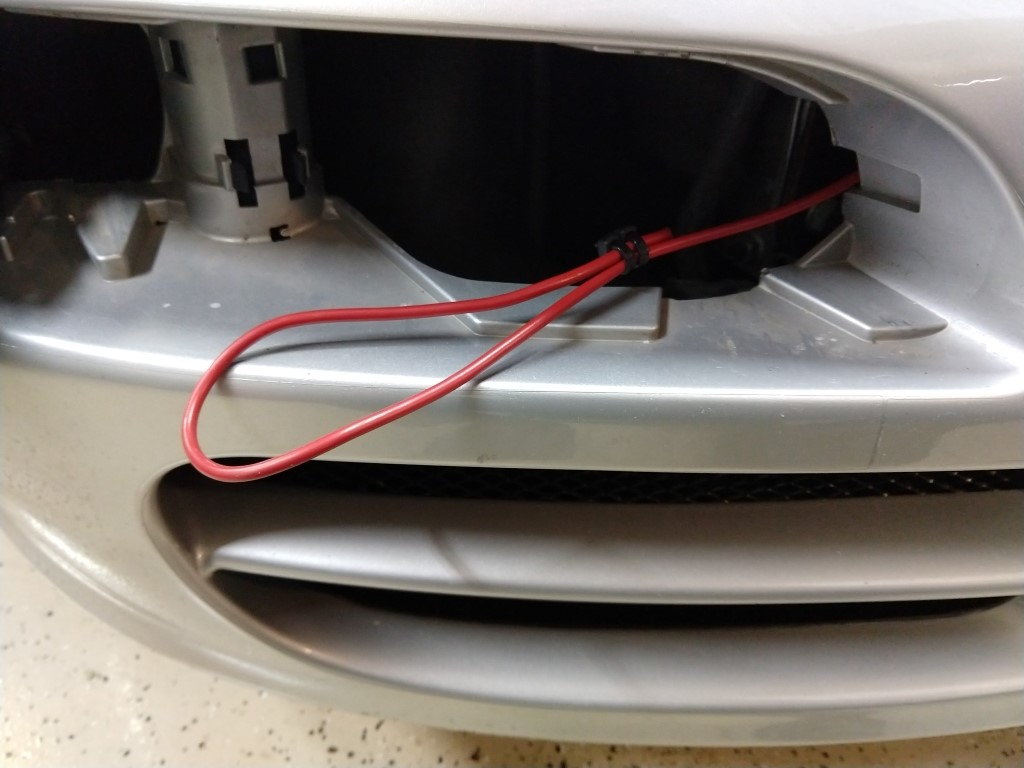
After the wire was routed I added a loop to make it easier to grab. Takes only a slight tug to release the hood latch.
Interesting going to the fog light rather than the side light. Good to see options. And this may actually be more direct.
What's involved with pulling the fog light? The side marker is good because it requires minimal or no tools really for removal. If access through the fog light is just as easy, great. The point of this exercise to me is to keep it simple.
The fog lights can be removed by inserting a credit card or hotel room card (anything similar will work) into the inside edge next to the center grille. This will release the clip holding the light assembly in place and then pull from the bottom corner to remove. Snaps back into place very easily.
Another scenario of .1 versus .2 cars. There are no fog lights on .2 cars. The LED daytime lights do not come out. Why? Because the led's don't need access to change bulbs.
If find my left side marker comes out easy..... and I seem to go through bulbs on that one... I wonder if moisture is getting into the socket. The right side is a royal pain to pop out and the manual is incomprehensible with that screwdriver-through-little-hole description. Anywho... it comes off and is great place to put the pull string.
The side marker lights are the same for both .1 and .2 cars. Why?, 'cause they fit into the body structure/fender that is common to the 997 series. The fog lights (or Daytime Driving Lights) are a different story 'cause they are part of the bumper and those things change with every model. So anyone interested in the frunk cable release project (you should be) then just go with the side marker lights. the instructions work on ALL 997's.
Burning out bulbs are a sure sign of low voltage. Usually corrosion /poor contact on the ground side (earth side for ROW.)
Did this today, pretty simple. I took a plastic anchor from drywall screws and snipped the end off. I ran the wire through that and similarly crimped a wire loop on the other end, so it would stay seated in the �opening�. Then just ran the wire over to the passenger side. Sorry didn�t take pics, but it seated pretty well. I gave it a few test pulls and it worked well. Thanks to all that contributed.


 04-23-2021, 12:08 AM