When you click on links to various merchants on this site and make a purchase, this can result in this site earning a commission. Affiliate programs and affiliations include, but are not limited to, the eBay Partner Network.
Hi
just wondering if anyone on here has changed the front coolant pipes on there 997.2
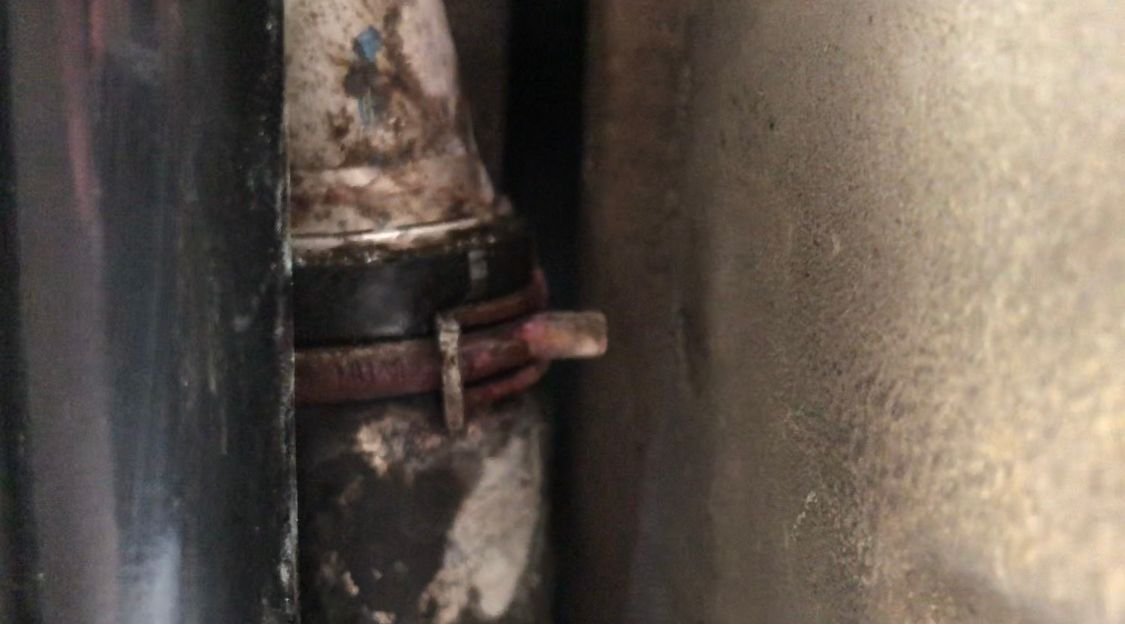
I have a slight leak on the rubber to metal elbow with spring clips l/h side viewed from underneath you can see it between the subframe, can�t seem to get access to it though.
Subframe have to be lowered? Removed?
I have floor jacks and a couple of ramps and don�t mind a challenge, but not sure this can be done on a driveway?
any information much appreciated
many thanks
Mike
[QUOTE=Alfie1973;17035863]Hi
just wondering if anyone on here has changed the front coolant pipes on there 997.2
I have a slight leak on the rubber to metal elbow with spring clips l/h side viewed from underneath you can see it between the subframe, can�t seem to get access to it though.
Subframe have to be lowered? Removed?
I have floor jacks and a couple of ramps and don�t mind a challenge, but not sure this can be done on a driveway?
any information much appreciated
many thanks
Mike
I have a video of this I could pm by e-mail, can�t seem to upload on here
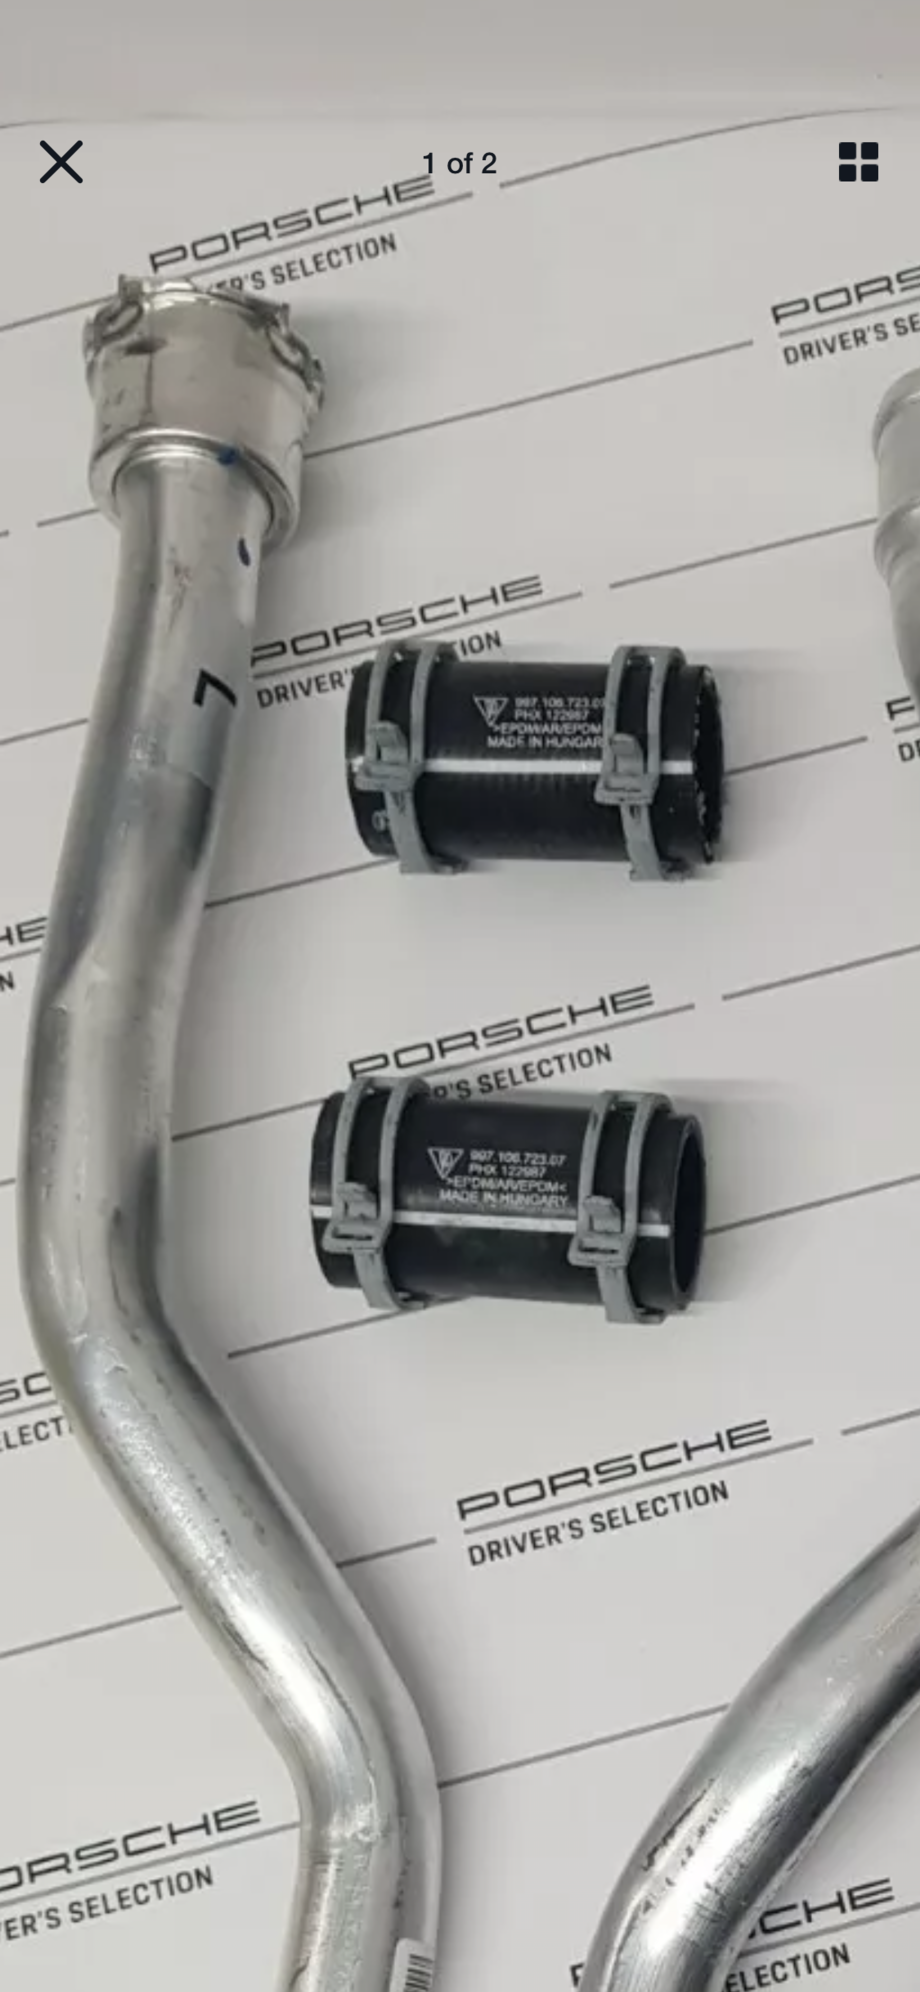
These are the hoses
Last edited by Alfie1973; Nov 19, 2020 at 06:09 AM.
Hard to see where those are. Can you take a picture from further away so I can see exactly where that leaky pipe is? I will say that there are a couple kinds of pipe joints where the rubber connects to the aluminum pipe. There is one type where one or both ends of the rubber uses spring clamps (like shown in your pic), and another type where the rubber pipe is actually fused to an aluminum sleeve on one or both ends, and that sleeve has a replaceable rubber o-ring on it, and that the sleeve with O-ring fits INSIDE the larger aluminum pipe that you are showing in your Porsche Parts photo (see how the end of the pipe expands out in diameter? that's where the sleeved hose fits in and there are slots in the expanded pipe where a little clip slides in to lock the hose in place). SOME of these pipes can be changed by only removing the plastic belly-pan, while others might require lowering the subframe. I'd need to see a better pic to advise you properly. Either way, it's not that difficult of a job.
OK, now you have me worried about mine. I love this place.
Coupla questions:
1 - Are you noticing a coolant leak or smell? A lowering in the reserve tank?
2 - Did you check the blue cap on the reserve tank for the same crustyness? They usually will start leaking over time
3 - How did you find this?
I assume you have one of these... $11. I purchased this one to flush my coolant system.. did it from the rear of the car and this had no issue with small clamps and even did the clamps on the biggest hoses to my engine. Don't try this with regular pliers. These hose pliers will lock... unbelievably important for saving your knuckles, and the ears of anyone who will not have to hear what comes out of your mouth.
The job does not look hard unless there is poor access. I suspect you can slip the clamps back over the pipe, or into the center of the rubber hose, then slide the hose more onto one pipe then pull it out.
Hard to see where those are. Can you take a picture from further away so I can see exactly where that leaky pipe is? I will say that there are a couple kinds of pipe joints where the rubber connects to the aluminum pipe. There is one type where one or both ends of the rubber uses spring clamps (like shown in your pic), and another type where the rubber pipe is actually fused to an aluminum sleeve on one or both ends, and that sleeve has a replaceable rubber o-ring on it, and that the sleeve with O-ring fits INSIDE the larger aluminum pipe that you are showing in your Porsche Parts photo (see how the end of the pipe expands out in diameter? that's where the sleeved hose fits in and there are slots in the expanded pipe where a little clip slides in to lock the hose in place). SOME of these pipes can be changed by only removing the plastic belly-pan, while others might require lowering the subframe. I'd need to see a better pic to advise you properly. Either way, it's not that difficult of a job.
It�s the small black rubber hose with spring clips, can�t get to it at all just a 1 1/2� gap.
can touch the clip but unable to get my hand in there.
OK, now you have me worried about mine. I love this place.
Coupla questions:
1 - Are you noticing a coolant leak or smell? A lowering in the reserve tank?
2 - Did you check the blue cap on the reserve tank for the same crustyness? They usually will start leaking over time
3 - How did you find this?
I assume you have one of these... $11. I purchased this one to flush my coolant system.. did it from the rear of the car and this had no issue with small clamps and even did the clamps on the biggest hoses to my engine. Don't try this with regular pliers. These hose pliers will lock... unbelievably important for saving your knuckles, and the ears of anyone who will not have to hear what comes out of your mouth.
The job does not look hard unless there is poor access. I suspect you can slip the clamps back over the pipe, or into the center of the rubber hose, then slide the hose more onto one pipe then pull it out.
yes looks easy until you get under the car and realise it�s like working through a letter box.
no noticeable loss of coolant, had undertray off and noticed staining, then found the culprit above the stain, only losing about 100ml over 3000 miles , but still needs to be done to satisfy my OCD 🤣
just a straight bit of rubber pipe and two spring clamps, but reckon subframe needs to be lowered to get to it. My Indy says just leave it if it�s not losing too much, but if it�s not too much hassle I�ll have a go 👍
In the pic above, it shows the underside with all belly trays removed. You can see the black hoses where they attach to the aluminum ones. Then you can see where they go around the fuel tank and vanish off the left edge of the photo. I assume that the joint you are talking about is the one that is off the left side of the picture and can't be seen in this photo yes? If so, then yes you will need to drop the subframe.
It isn't that bad of a job, though it can be intimidating. The cool thing about the suspension on these is that it's all bolted to the subframe and not the unibody. The only place it bolts to the body is the top of the struts, each having three bolts.
Put the car up on jack stands, then follow the instructions in the sway bar installation write-up, but making sure that you unbolt the steering rack at both points, and that you loosen the tank strap bolts (the sway bar writeups I followed did not say to do these steps). Per the instructions, you'll need to unbolt the brake caliper from the hub and support it properly. And of course, per instructions you'll need to remove the three nuts at the top of each strut that hold them to the unibody. Then you can use a jack to lower the subframe down (after you remove the subframe bolts). With the subframe lowered, you will have access to those pipes.
When you put it back together, try to get the subframe to line up as close as possible to it's previous position. The best way to do this is to use the clean vs dirty marks on the subframe where the shoulder bolts previously sat. You'll need to re-align the car after this job.
If I went back and did this job in my garage with hand tools, it would take me the better part of a day. Guessing 4-6 hours. First time doing it, probably 6-8 hours taking my time and taking lots of pics.
Last edited by Hindsight2010; Nov 19, 2020 at 11:28 AM.