When you click on links to various merchants on this site and make a purchase, this can result in this site earning a commission. Affiliate programs and affiliations include, but are not limited to, the eBay Partner Network.
Amazon Gift Card To Whomever Figures This Out (Emergency Hand Brake Reinstall Issue)
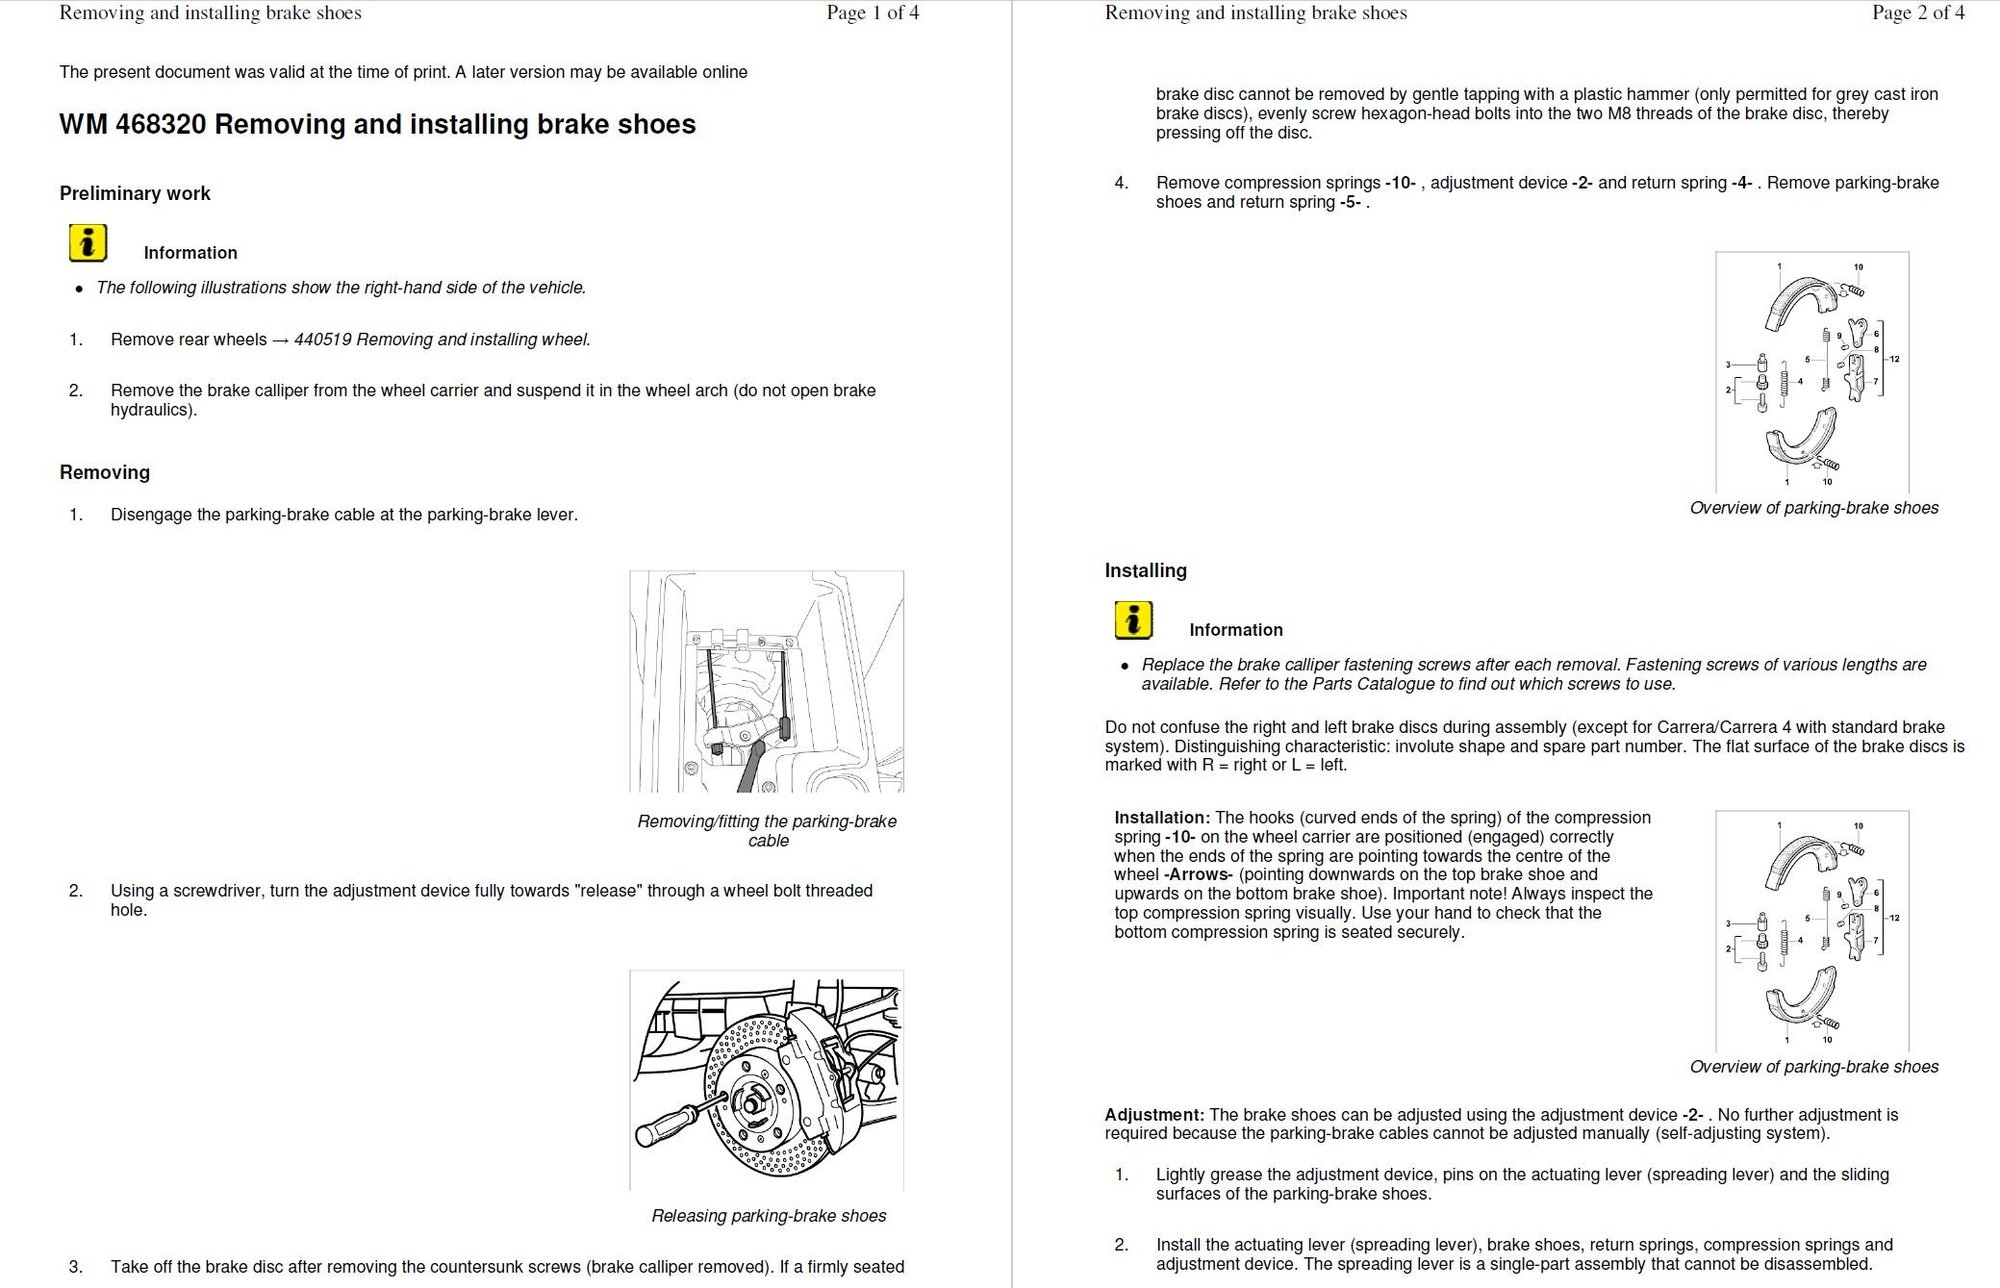
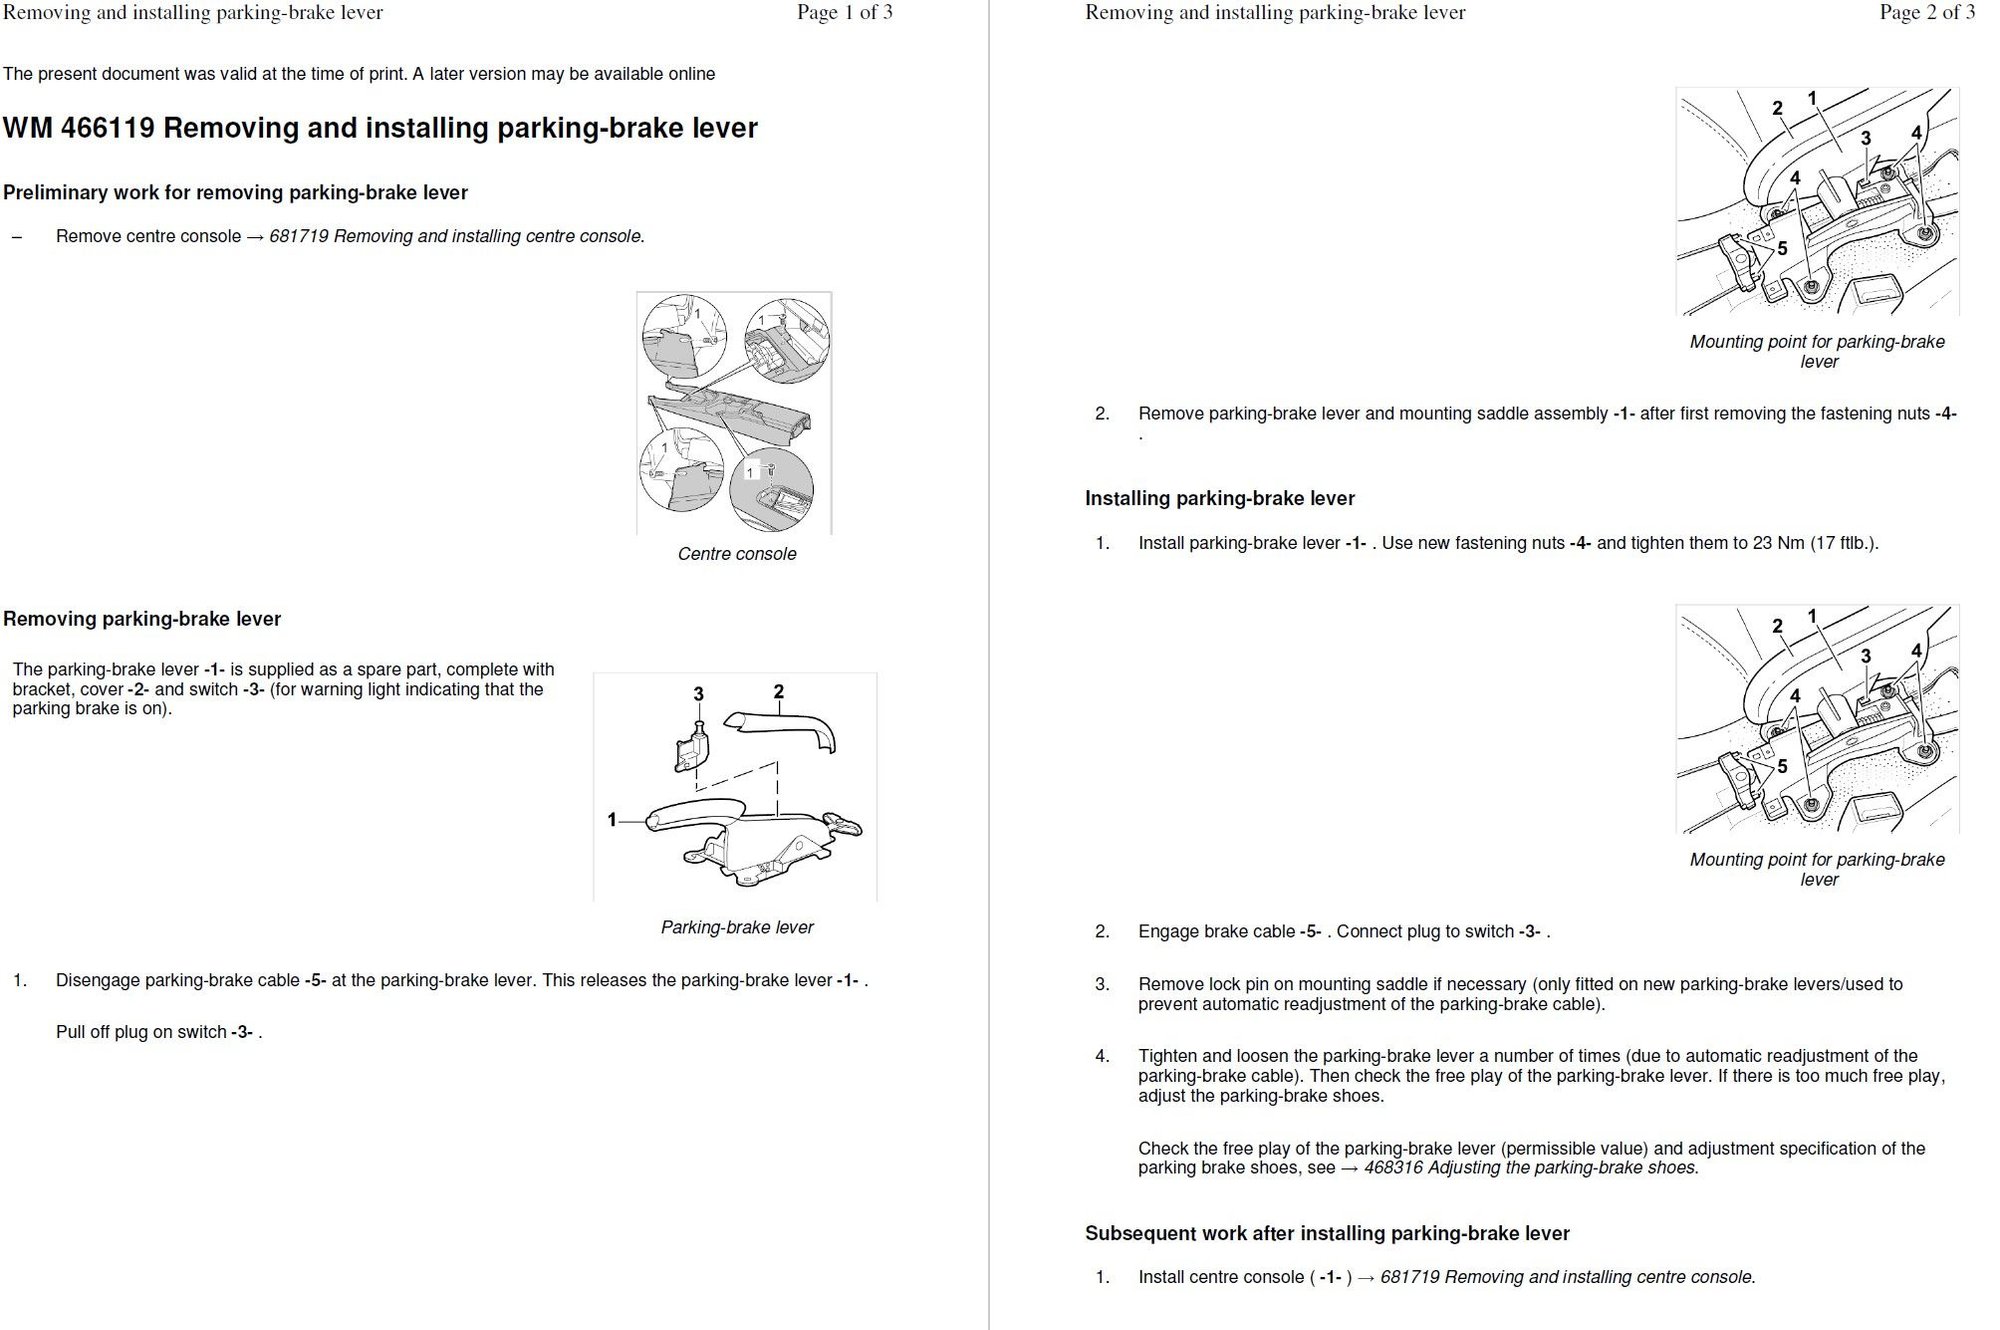
I replaced the shifter cables in my 2008 C2S a couple of days ago. It was actually a fairly straightforward task, just a lot of disassembly. Everything went very smoothly except when I went to reattach the handbrake lever in the center console. For some reason the two adjustment cables will not stretch enough to let me reinstall the handbrake onto the 4 nuts. I can get pretty close by pulling really hard but this engages the drums and does not allow the wheels to spin. If I were to tighten the brake in this position, the car will not move since the ebrake is fully engaged (and this is with the handbrake lever all the way down).
There is no adjustment nut on the 997 cables where they attach in the center console. It's supposedly a self-adjusting cable, not sure what that means. I'm aware of the tension adjustment screw at each rear drums and I have played with those endlessly in both directions to no avail. I also removed the rotors to get a look at the parking brake assembly and didn't notice anything obviously out of place. While the rotors are off the hub, I can get enough slack to reinstall the handbrake, but when I go to put the rotors on, I cannot get them on the hub due to the brake drums being fully engaged.
Simply put, I cannot get enough slack in the cables to get both of them on the little bracket without them fully engaging the drums. It would be so much easier if the cable had simple adjusting nuts!! Before I take it to the dealer and have them gouge me for what is likely a simple fix, I thought I would see if anyone here has any ideas.
As title states, if you can figure this out and save me a trip to the dealer, I will make good on my word and send you an Amazon gift card!
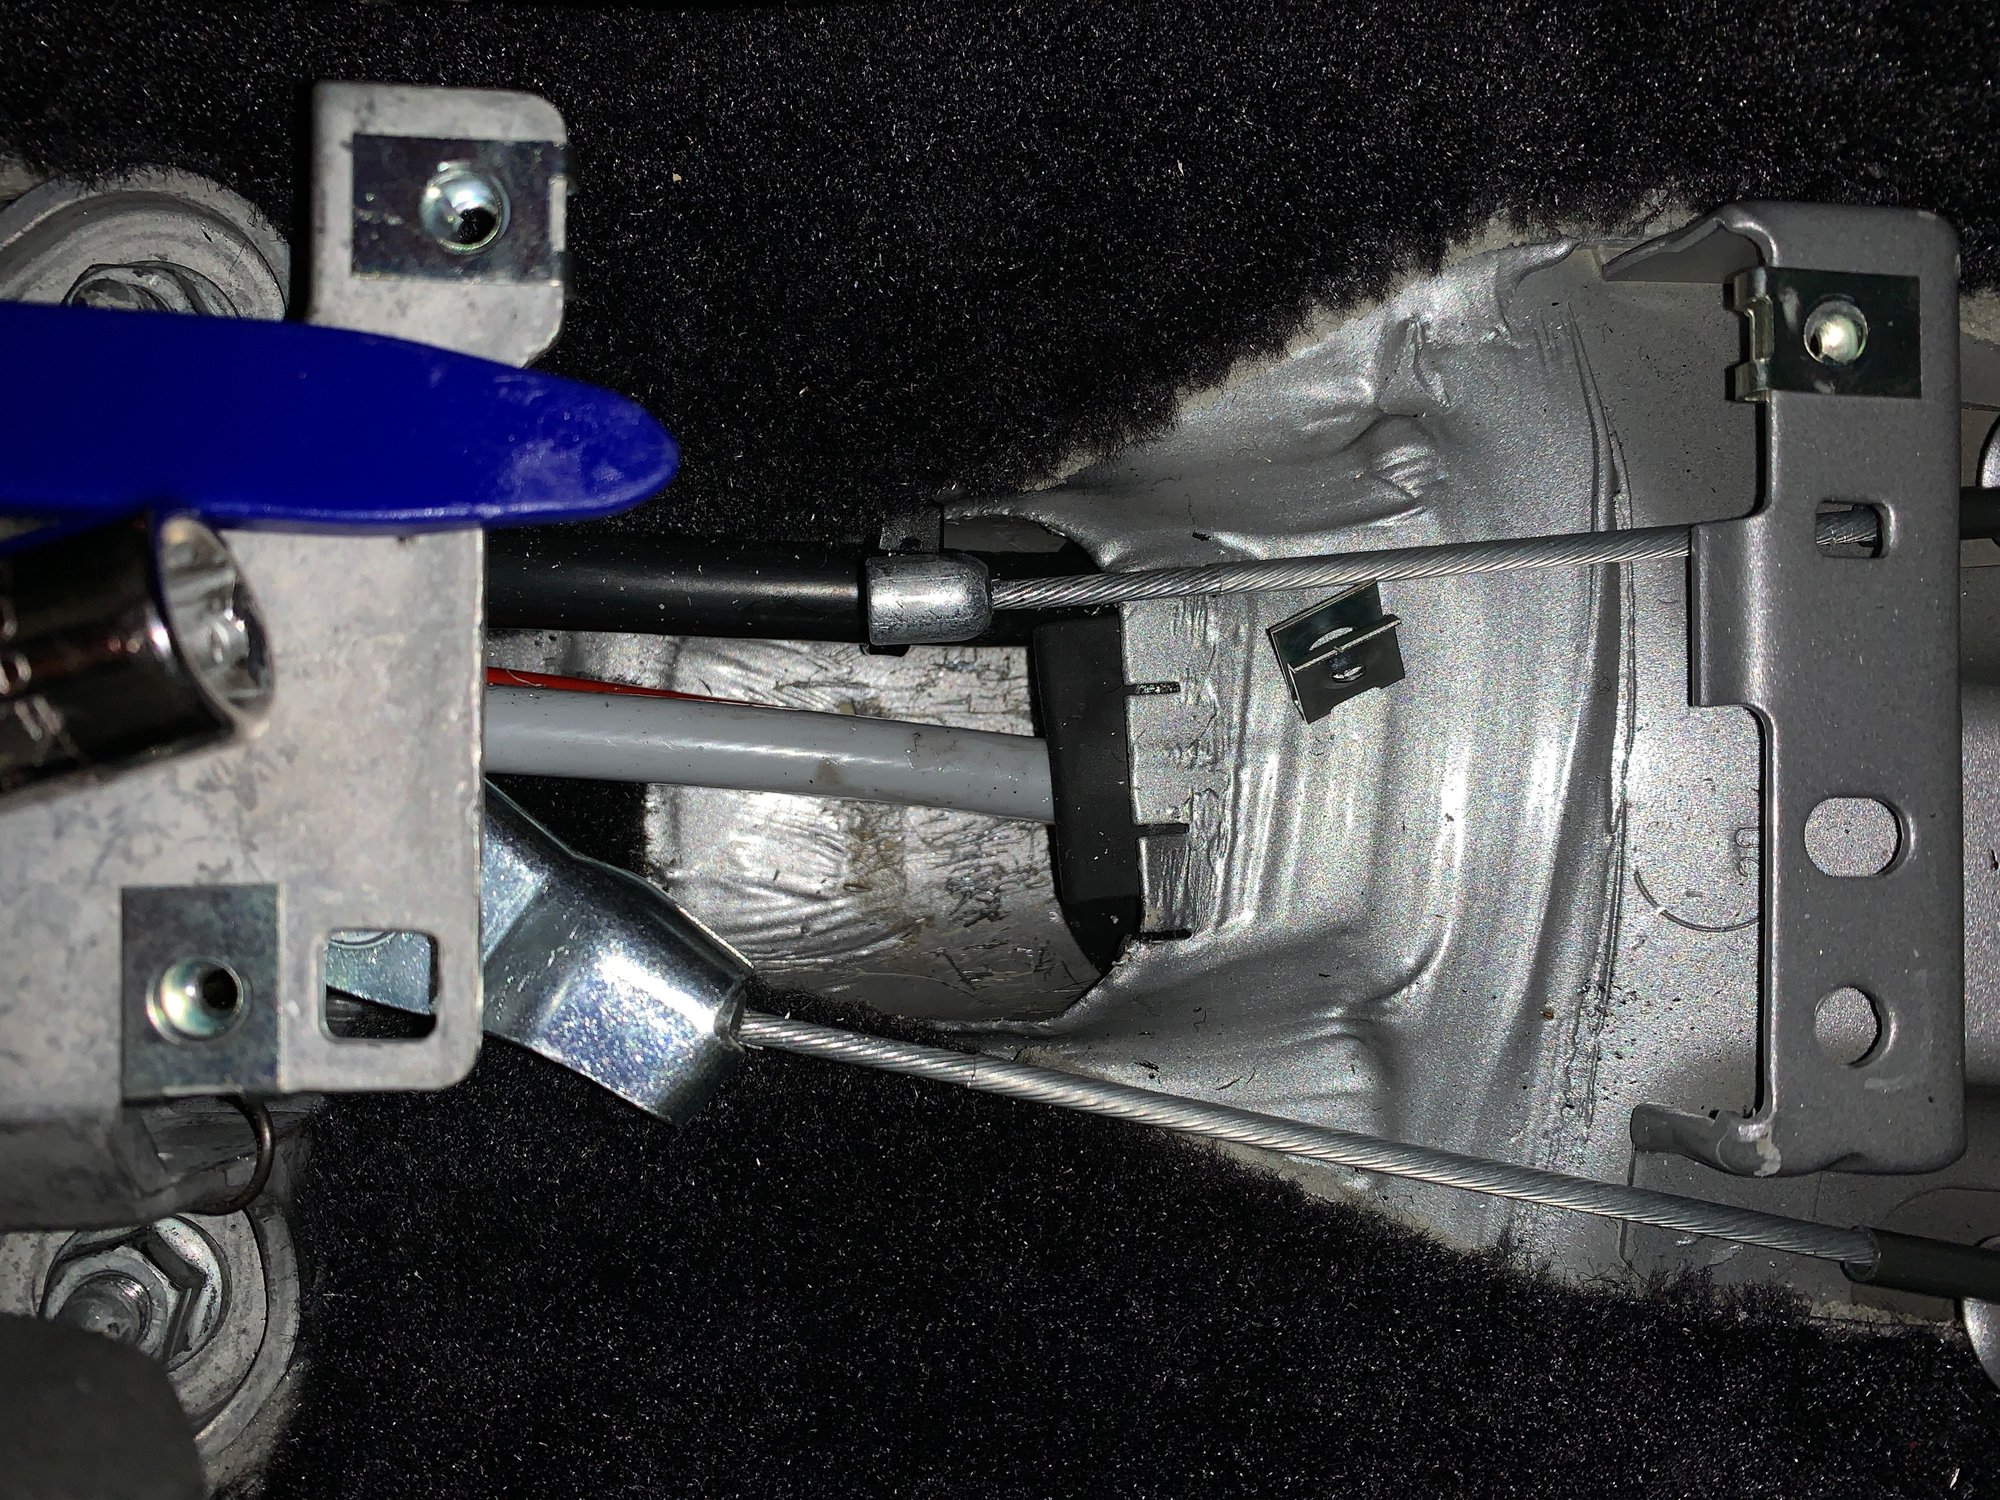
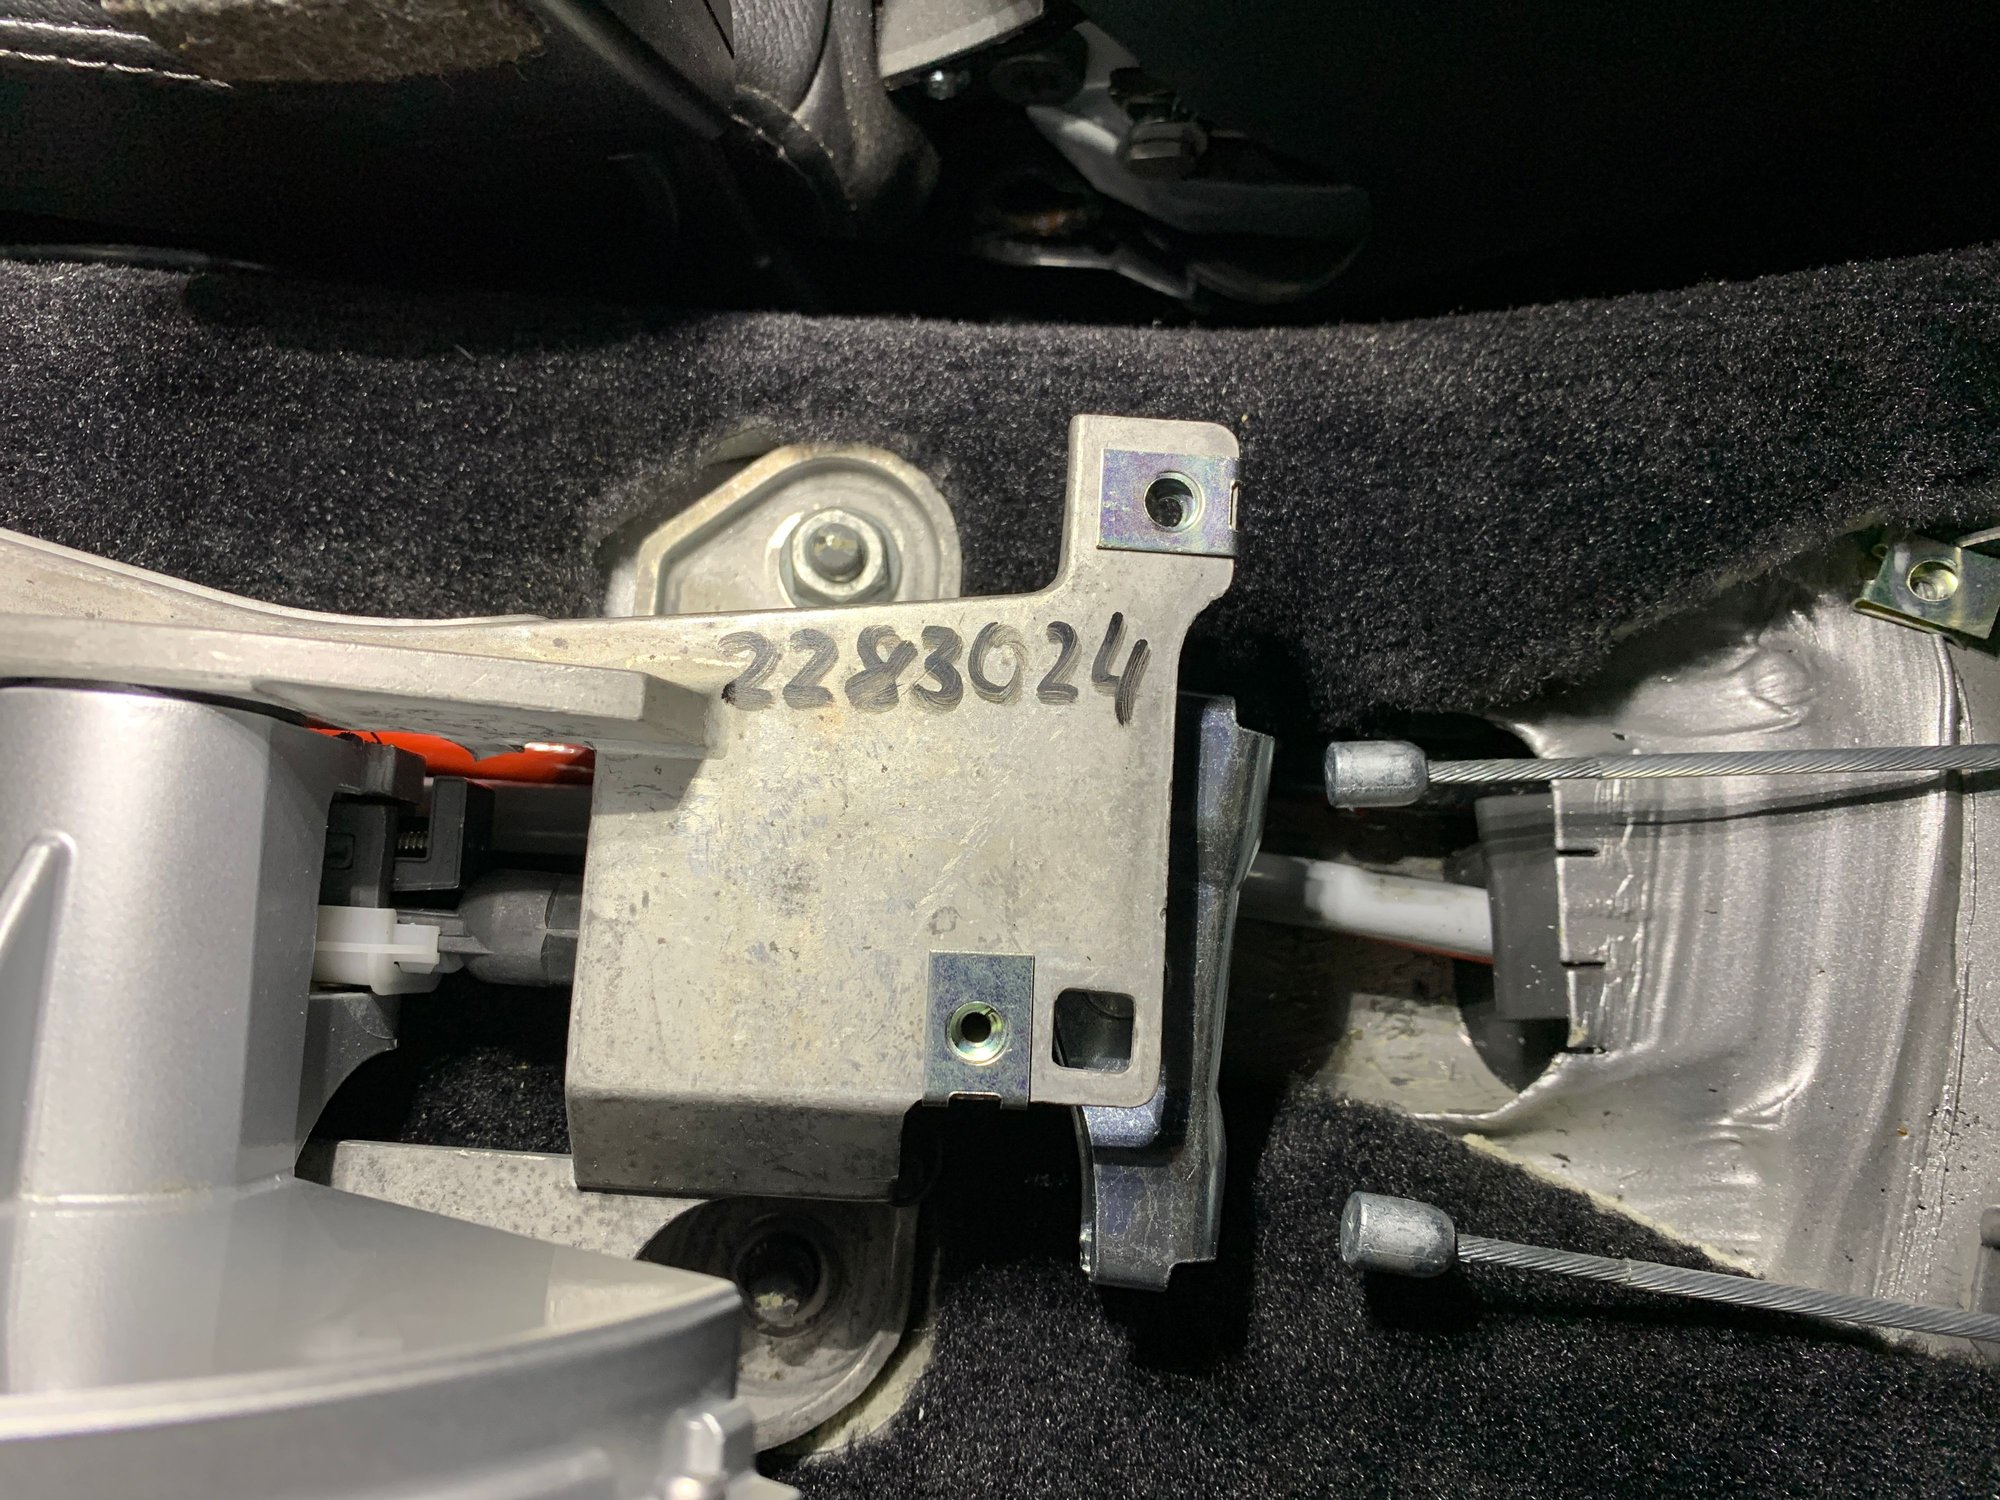
In the pic below, I can only get one side on the bracket but not both.
I had the same issue when I replaced my wheel carriers (knuckles). I could not figure out how to get them on.... then I realized, the lever was up a click. Check it out.... be prepared to be embarrassed.
If that is not it, check behind the wheel carrier to see if the little tube popped out of the carrier... the tube that the cable goes through as it enters the wheel carrier. On mine, it was pretty fused but who knows... then lastly, ensure the tube to cable joint is properly mated. Again, on mine, the cable was pinch-welded so there was not chance of any problem here, but you should check as my parts Katalog diagram shows them as separate parts.
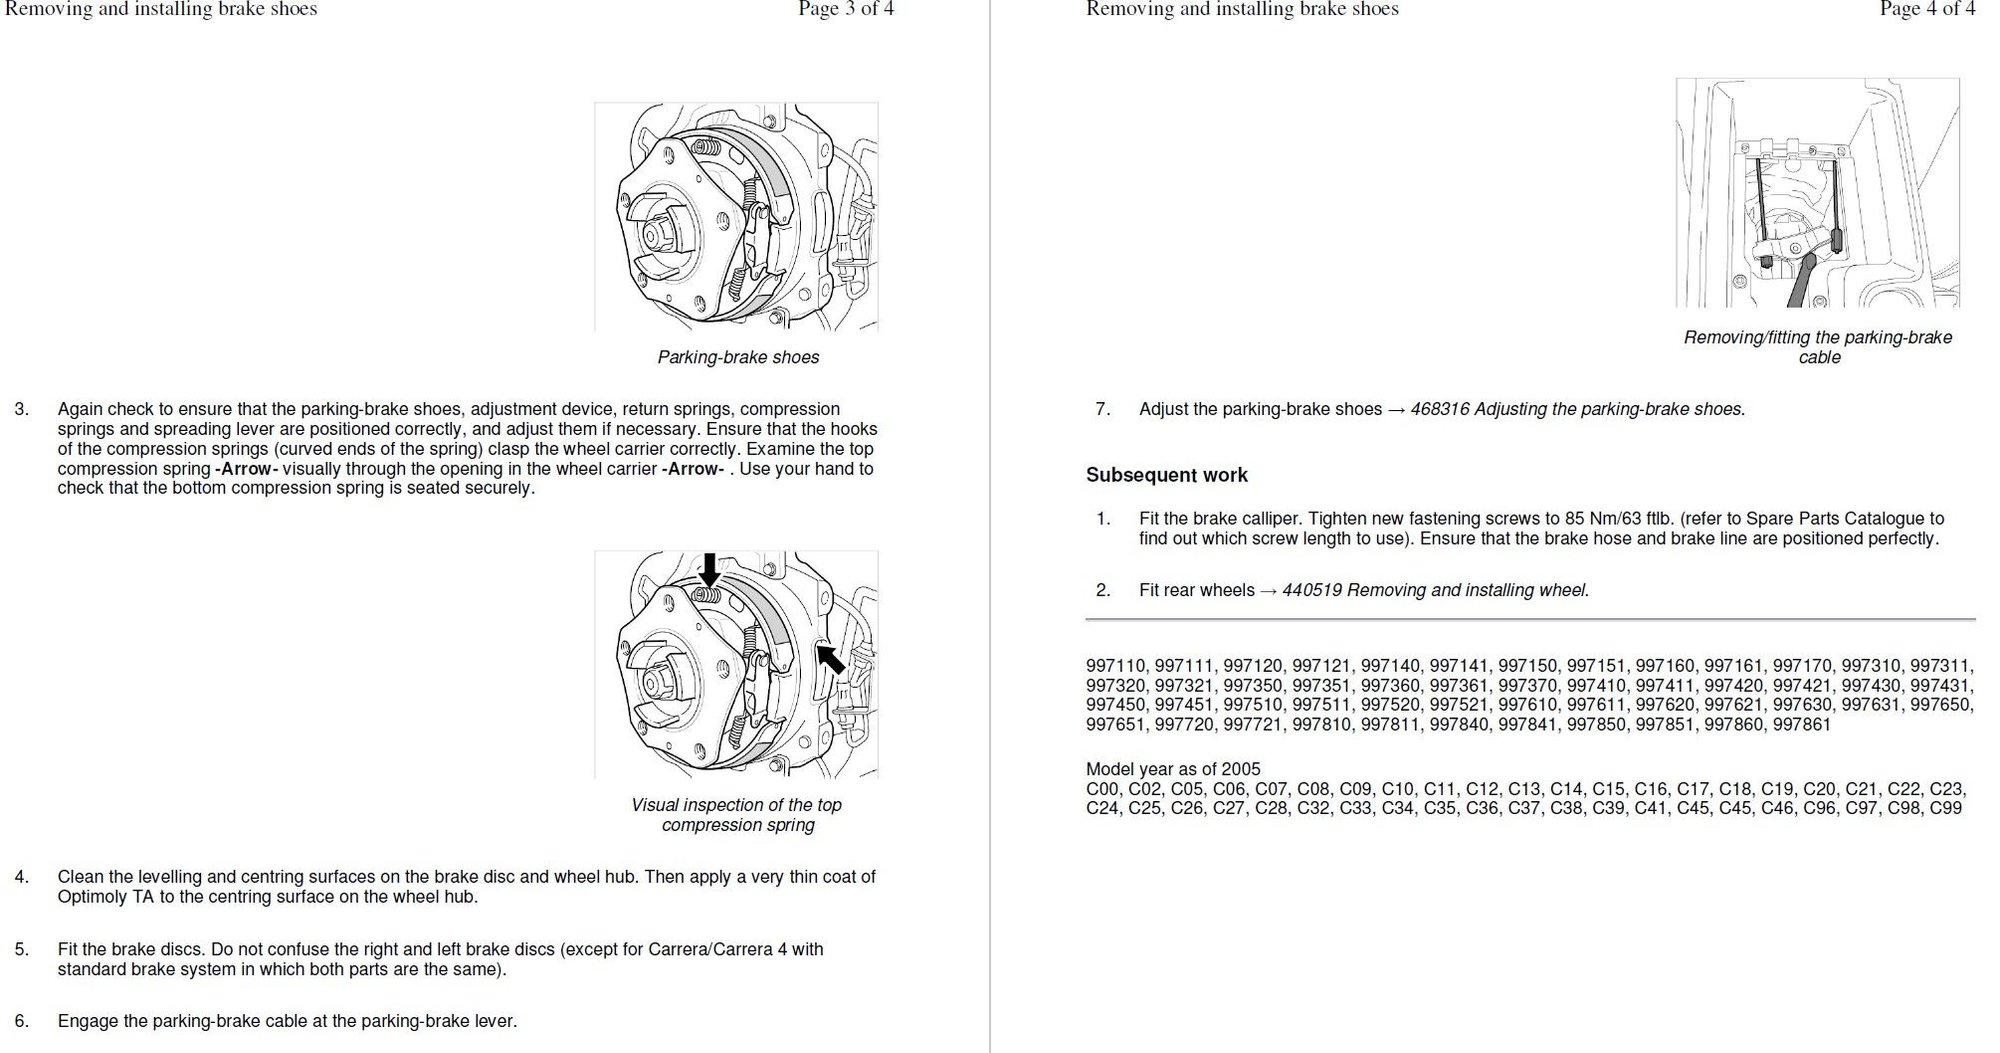
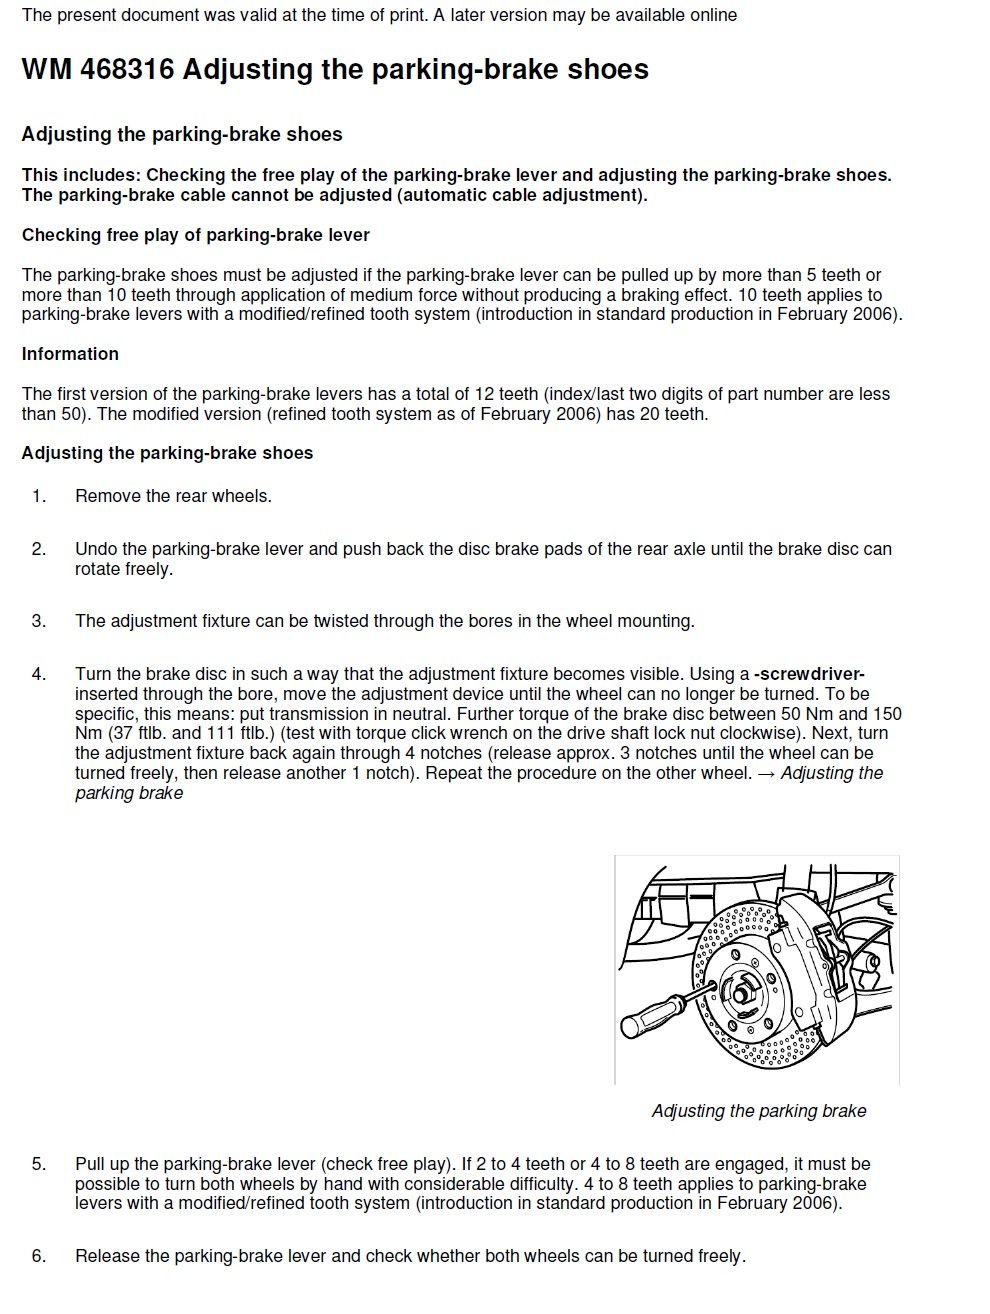
Lastly, unscrew the adjustment thingy in each of the parking brakes to put slack into the lines..... go all the way slack. Then, once all assembled with the rotor on, you put a screw driver through the rotor hole (lug hole) to adjust the thingy back tight... do each side equally. The repair manual denotes the trick to ensuring the proper length. I can post if you need it, or you can just do it by feeling the tension/number of clicks in the hand lever.
Lastly, ensure you assembled the brake properly... I hope you took a picture of it before it exploded into a handful of parts.
Peace
Bruce in Philly
Last edited by Bruce In Philly; 10-11-2020 at 12:02 PM.
I had the same issue when I replaced my wheel carriers (knuckles). I could not figure out how to get them on.... then I realized, the lever was up a click. Check it out.... be prepared to be embarrassed.
If that is not it, check behind the wheel carrier to see if the little tube popped out of the carrier... the tube that the cable goes through as it enters the wheel carrier. On mine, it was pretty fused but who knows... then lastly, ensure the tube to cable joint is properly mated. Again, on mine, the cable was pinch-welded so there was not chance of any problem here, but you should check as my parts Katalog diagram shows them as separate parts.
Lastly, ensure you assembled the brake properly... I hope you took a picture of it before it exploded into a handful of parts.
Peace
Bruce in Philly
Thanks, Bruce. The lever appears bottomed out where the base meets the rubber stops so it cannot go down any further. I looked all around the hubs but cannot see much without a complete disassembly. I did not actually take apart the parking brake assembly. I only removed the rotors to get a look. I recall once poking around my BMWs parking brake assembly and the aforementioned "explosion" so made sure that didn't happen again.
Do you happen to have a link to the parts diagram for this?
OK thanks for the diagram. I tried to reset the lever multiple times like you stated and nothing. The bracket simply will not come back any further. That seems to be the issue as the instructions indicate that the cable can be taken off/put back on with minimal force.
There is mention a locking pin in the saddle but not sure where that is. Do you know what locking pin refers to?
Also, I have both adjustments screws at the drums backed off all the way to “slack”.
If you have the adjustment all the way to slack, you should feel the brake grabbing the wheel as you turn it.
I don't know what that pin is.
Now you still need to pull the cables... although with the adjustment all the way, they should not move if at all.
I am beyond the limits of my knowledge sorry....
How about this... grab the cable end, and jerk it in and out.... only do this with the children inside.... maybe they got hung up on the other end.... but I doubt it as both cable ends appear to be equal lengths... meaning both would have to be screwed up the same way and I doubt that. This points to the lever.
Other than that, I would disassemble the lever and ensure the cable and associated assembly are all lined up properly. Sorry... I ain't got anything else.
Peace
Bruce in Philly
Last edited by Bruce In Philly; 10-11-2020 at 01:23 PM.
When I changed my cables out I did the same thing as Bruce. Once I figured that out I then figured out if I did pull the cable up slightly and pulled hard then released the cable and quickly tried to get it on I could get the back two screws in the holes. Then after a few tries doing the same I got the front screws in the holes. Try that.
Never needed to do anything to the adjusters in the back.
One thing you have done that I did not. I did not take the cables out as you show in your most recent picture in post #5. I removed the part that has these numbers on it. 2283024. Remove that and put the cable back into the bracket. It will give you more to pull on to get everything back in where it should be.
Well, called my dealer and they wanted a $185 "diagnostic" fee just to look at it, so I drove out to the indy shop that did my plugs and coils recently. The guy looked at it and fiddled with it for about 10 seconds before he pressed a little black tab on the brake assembly while pulling back the cable bracket. Then he effortlessly put on both cables. He charged me $0. Indies rock!
To my credit, I was able to successfully install new shifter cables so there's that!


 10-11-2020, 11:48 AM

 Before I take it to the dealer and have them gouge me for what is likely a simple fix, I thought I would see if anyone here has any ideas.