When you click on links to various merchants on this site and make a purchase, this can result in this site earning a commission. Affiliate programs and affiliations include, but are not limited to, the eBay Partner Network.
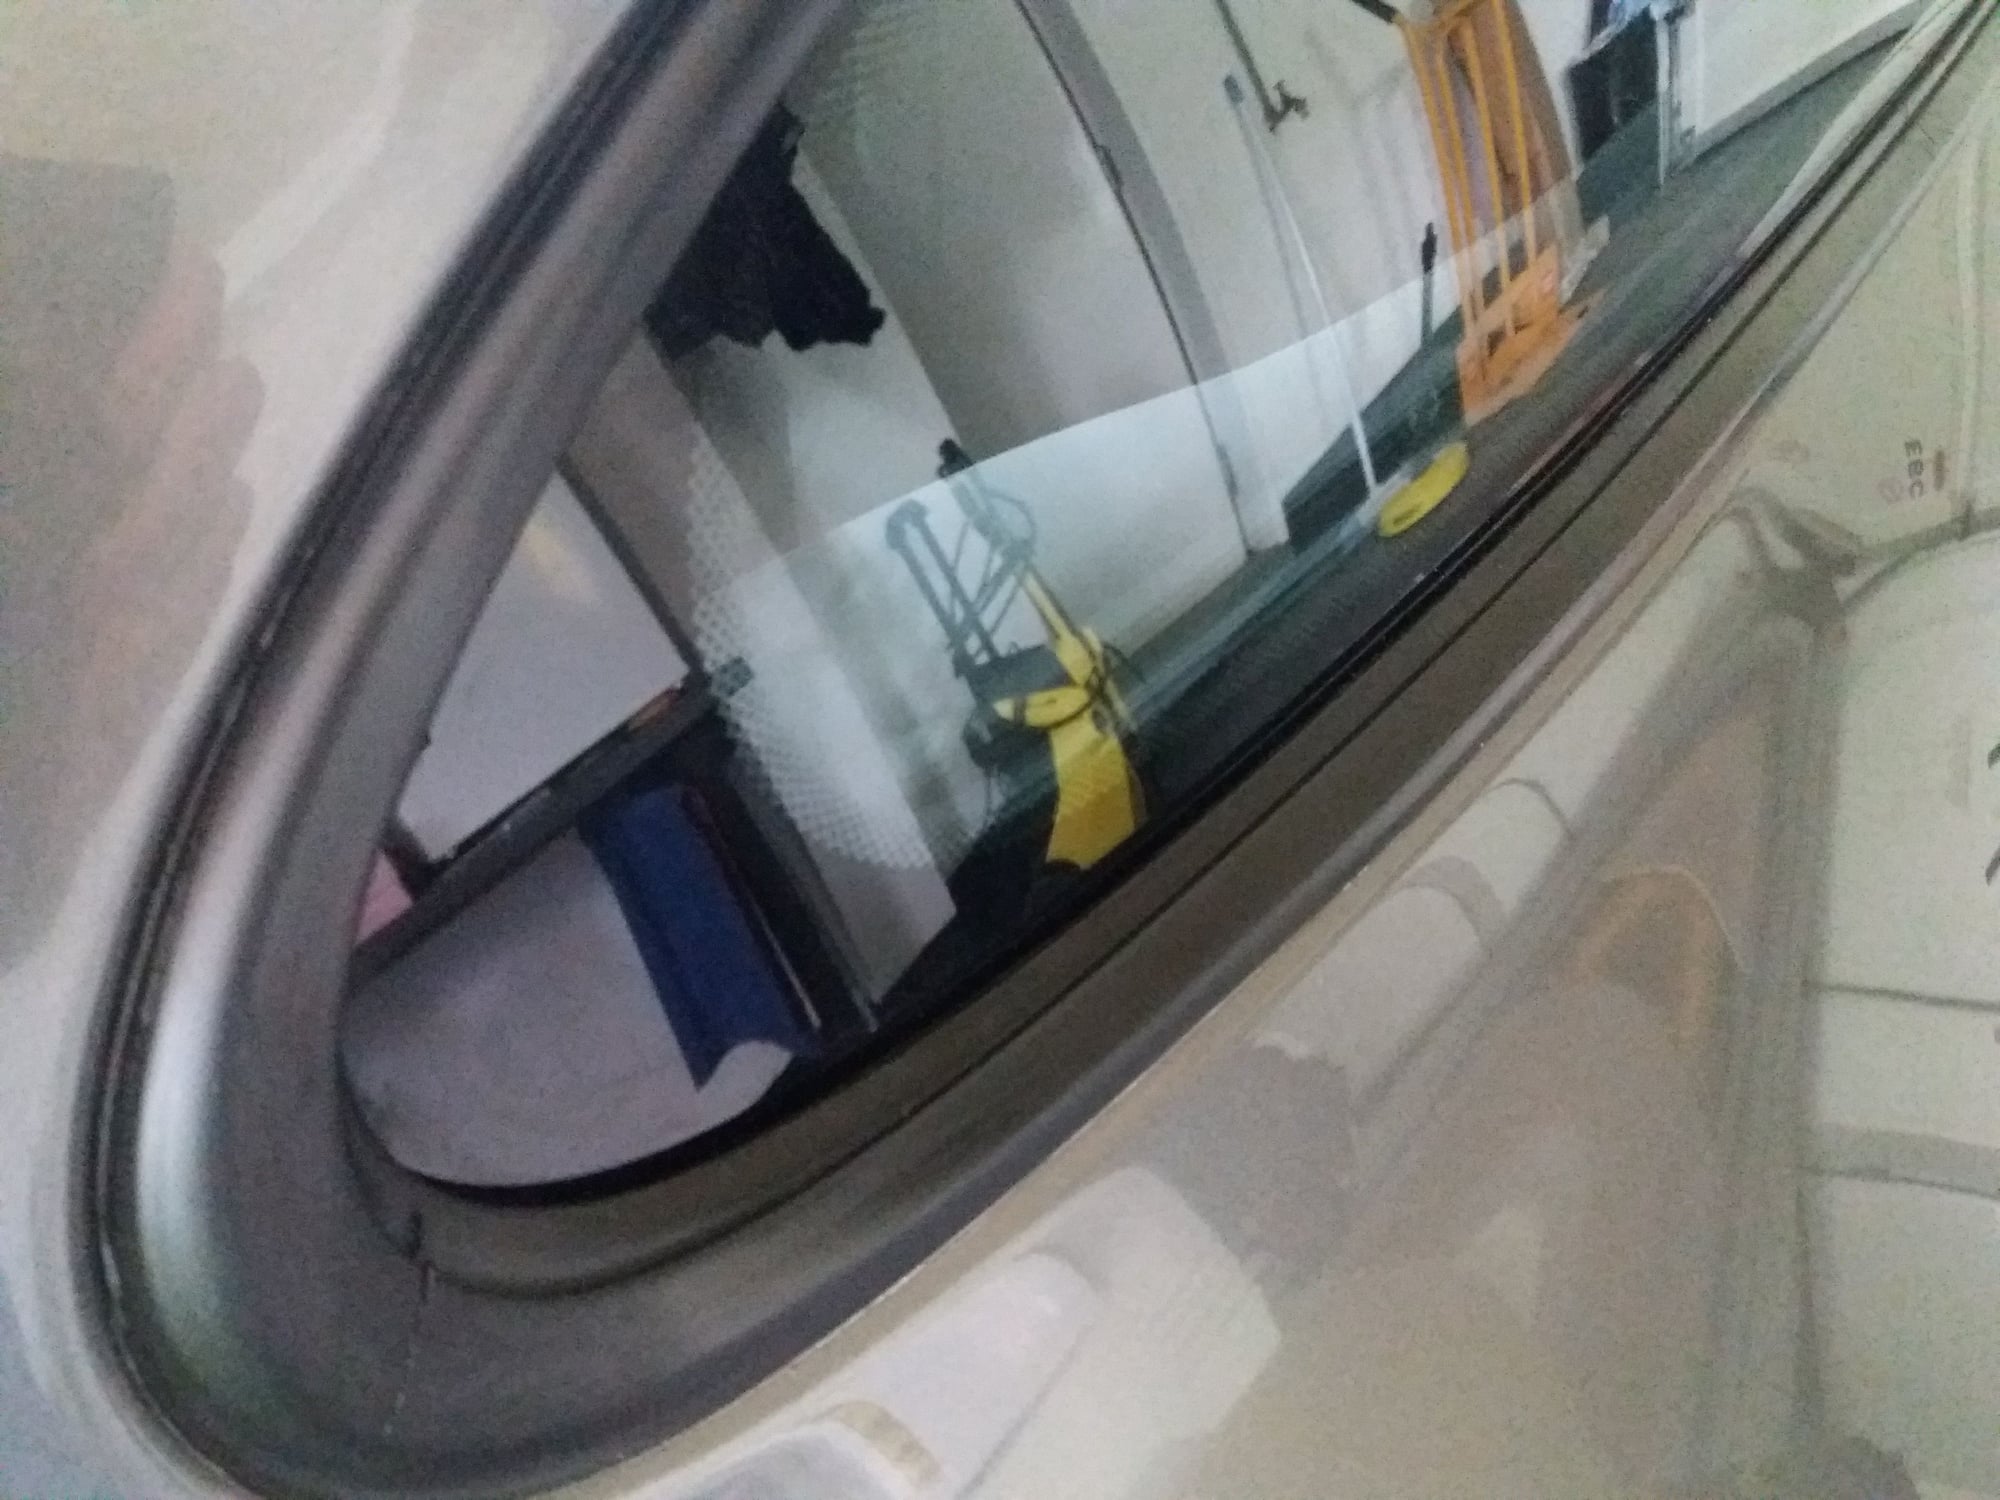
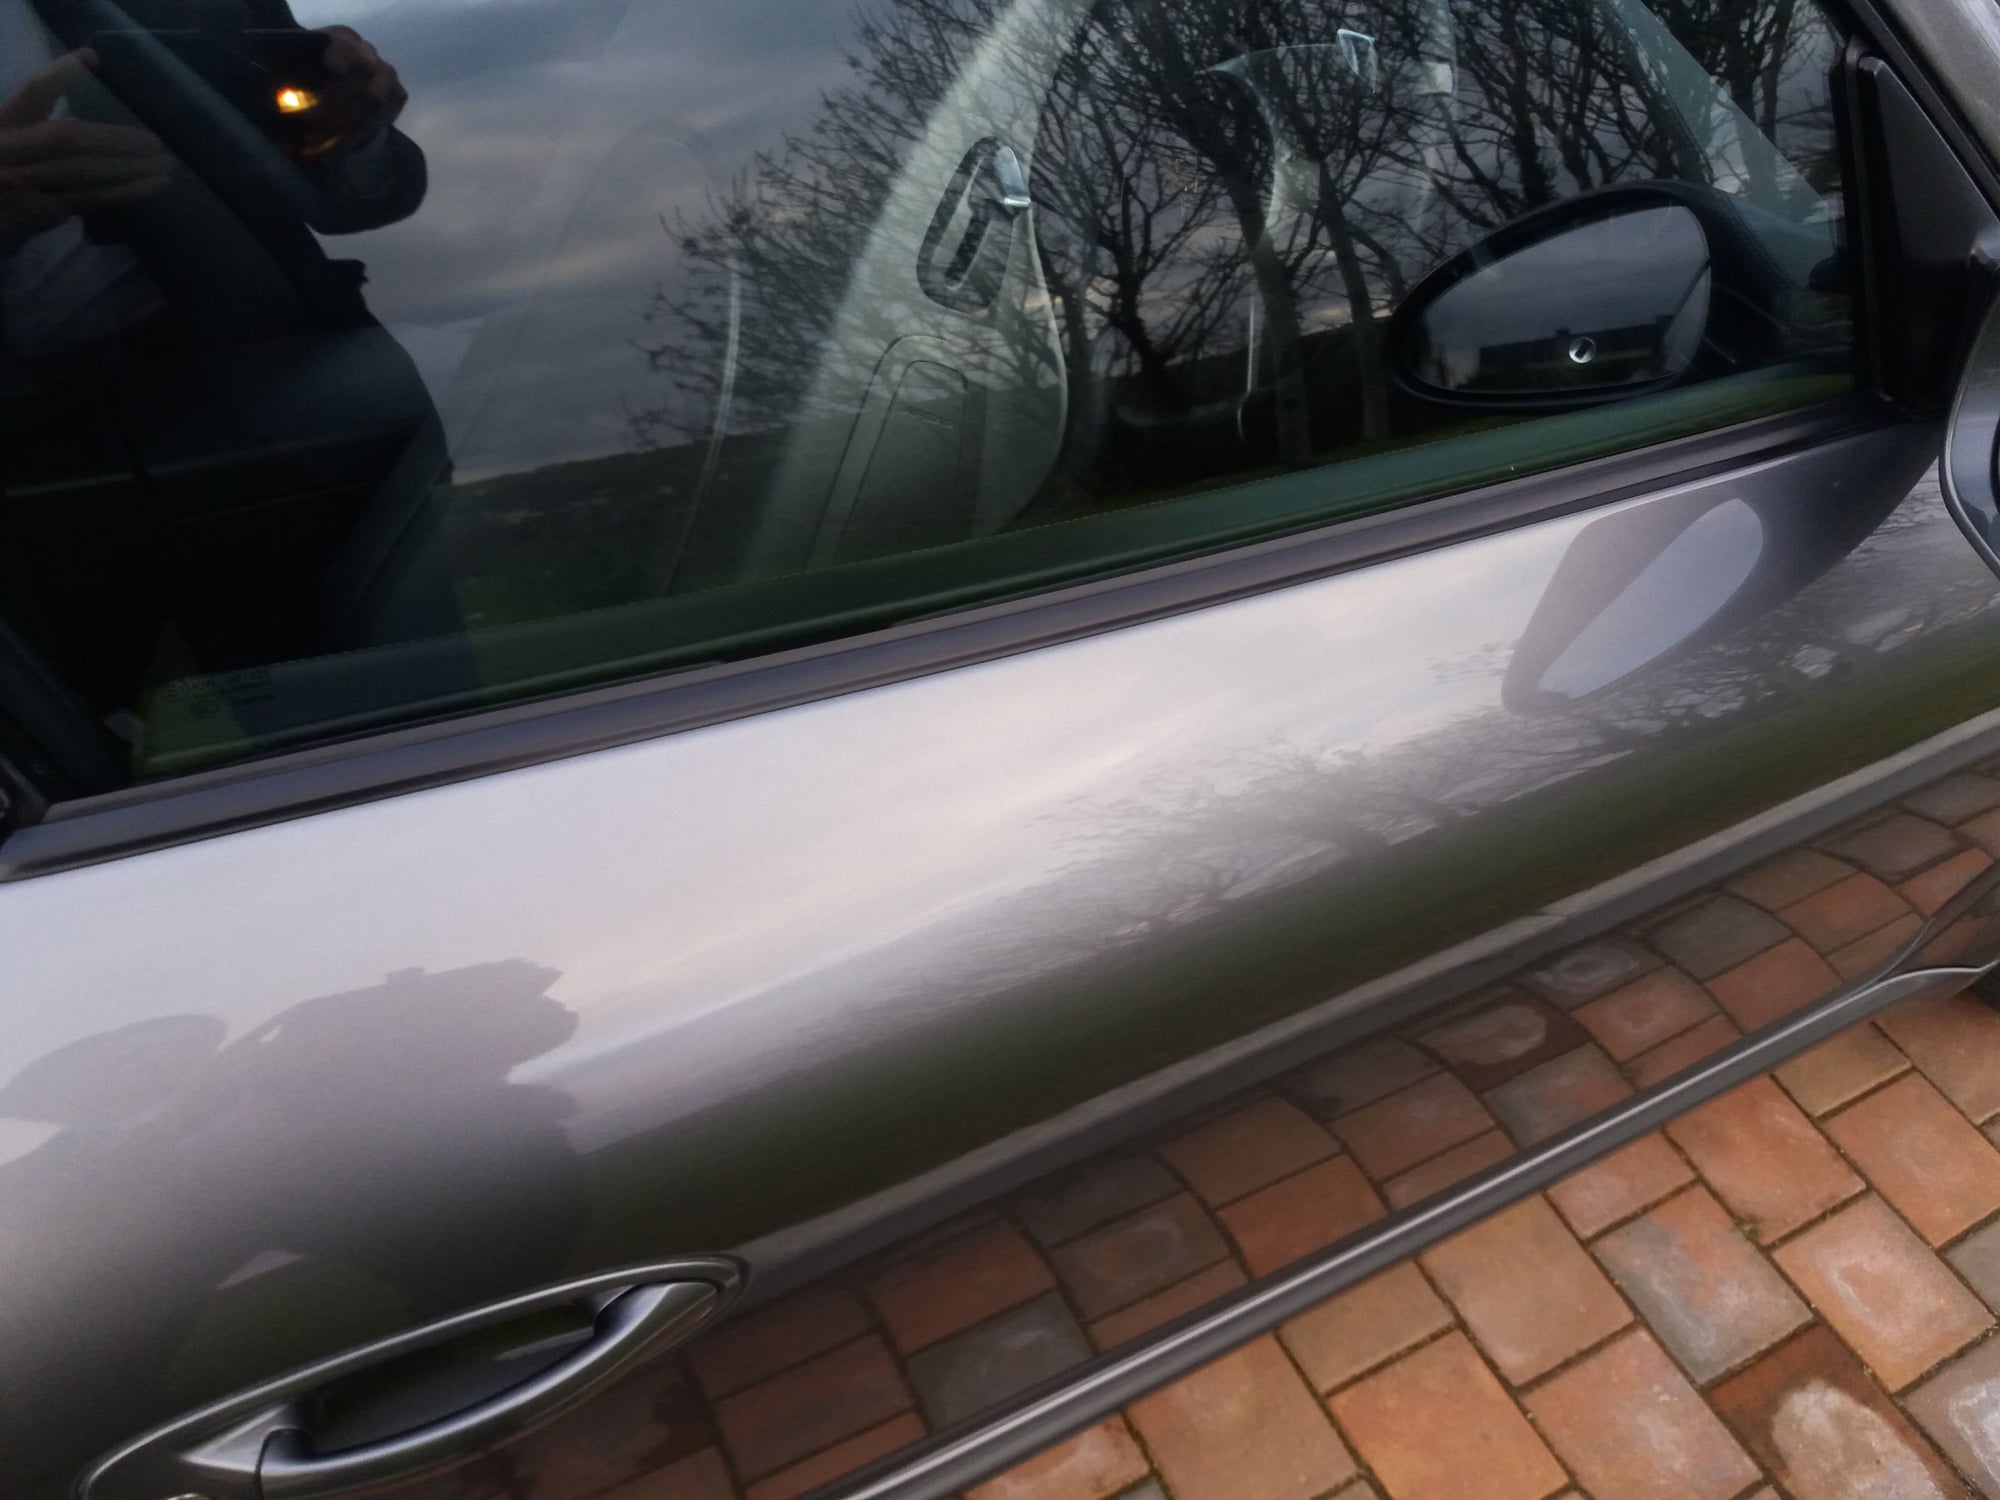
Has anyone tackled popping out the seals in these pictures on a 997. Its the one that runs across the top of the door, and the one that runs from the door and surrounds the rear quarterlight. I need to get them off to finish some paint correction. My bodyshop says they are prone to looking 'refitted' once removed.
I don't need to get all of the back one off, just as far as the C pillar curve. The item actually goes right round back to the A pillar, and is �300 to replace so I'd rather get it right.
All hint. tips and tool recommendations gratefully received.
These are riveted in place. If you do end up removing them make sure you have a competent body shop that can remove the head they drill out too. If not, it will fall into the quarter panel and wedge itself into the crease above the wheel well. it will then slowly push your rear quarter panel out like a little pimple. I've seen this on many 997s and it's the first sign i look for to see if the car has had body work.
So only do this if you absolutely have to.
Also, your body shop has no clue what they're talking about if they say 'they look refitted once removed'. Since they are riveted it's impossible to screw up when riveting.... unless they dont know how to rivet.
The rivet heads are the problem. When drilled out, they fall toward the front and down the A pillar where they live without harm. The ones toward the back fall to the rear and land in the panel crease above the rear wheel wheel as discussed above. They must be removed with a magnet, a hook, a boroscope or all three by looking in from the tail light hole or the wheel well liner. A Porsche certified body shop is well aware of this and they fish them out with a magnet. A shop not familiar with this problem is not the place to go because you will never know if they did it or not.
All. I am so glad I ran across this. I have those dimples in my rear (passenger)1/4 panel. Started out as pin size and grew with each track day. Needs repainting. I have asked a million body shops what this is. Everyone is stumped. I think this is it. I was just about to start my prep for paint and discovery when I saw this post. Can someone please give me some steps (or contact me?) on how to thoroughly clean this out before I start the correction process? Thanks in advance.
All. I am so glad I ran across this. I have those dimples in my rear (passenger)1/4 panel. Started out as pin size and grew with each track day. Needs repainting. I have asked a million body shops what this is. Everyone is stumped. I think this is it. I was just about to start my prep for paint and discovery when I saw this post. Can someone please give me some steps (or contact me?) on how to thoroughly clean this out before I start the correction process? Thanks in advance.
There doesn't seem to be a definite route to take to get to the rivet heads by someone who has actually done this. Most of what you will find is either talk, "I heard..." or notes from a service manual. Since you are getting ready for paint, I am sure you have the rear bumper off and the taillights out. Check to see if you can get in there from the taillight area with a boroscope with a magnet. You can also see in the cavity with a boroscope from the B pillar when you remove the triangle block on the latch post. I do not really know if you can get the proper access from the interior panels. Lot of talk but no real evidence.
The dimple thing is real. If the window seal is replaced without catching the rivet heads, therre is about a 100 % the problem will show up over time.
Even though I am a complete DIY guy , on body and mechanical work, I chickened out on this project as I had advice from many that the re-fitting perfectly of the new seal requires some skill and experience. I bought the window surround seal myself from a friendly dealer (50% off list) and took it to the local Porsche certified bodyshop. They know all about the rivet head problem. Cost was two hours of labor. They removed the seat, interior panels and rear side glass, drilled out the rivets and installed the new part along with a new door rubber seal that I provided and fish out the rivet heads. They handed me the retrieved rivet heads and washed the car. The new window surround fits absolutely perfect. Those rivet heads have to come out!
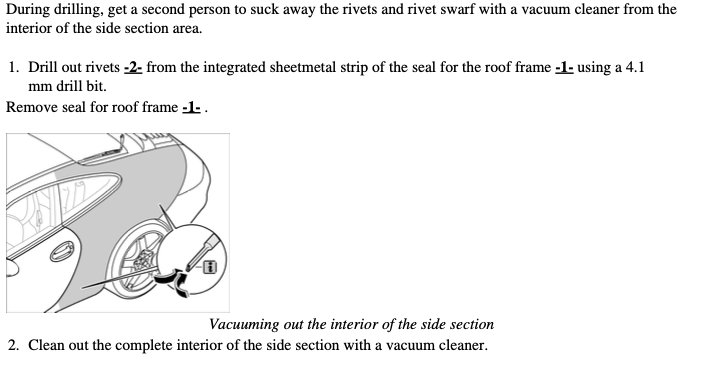
First - Thank to those that responded. I was afraid that I would have to take off the rear bumper. I did find these details in the shop manual, but not much more than what was presented previously.
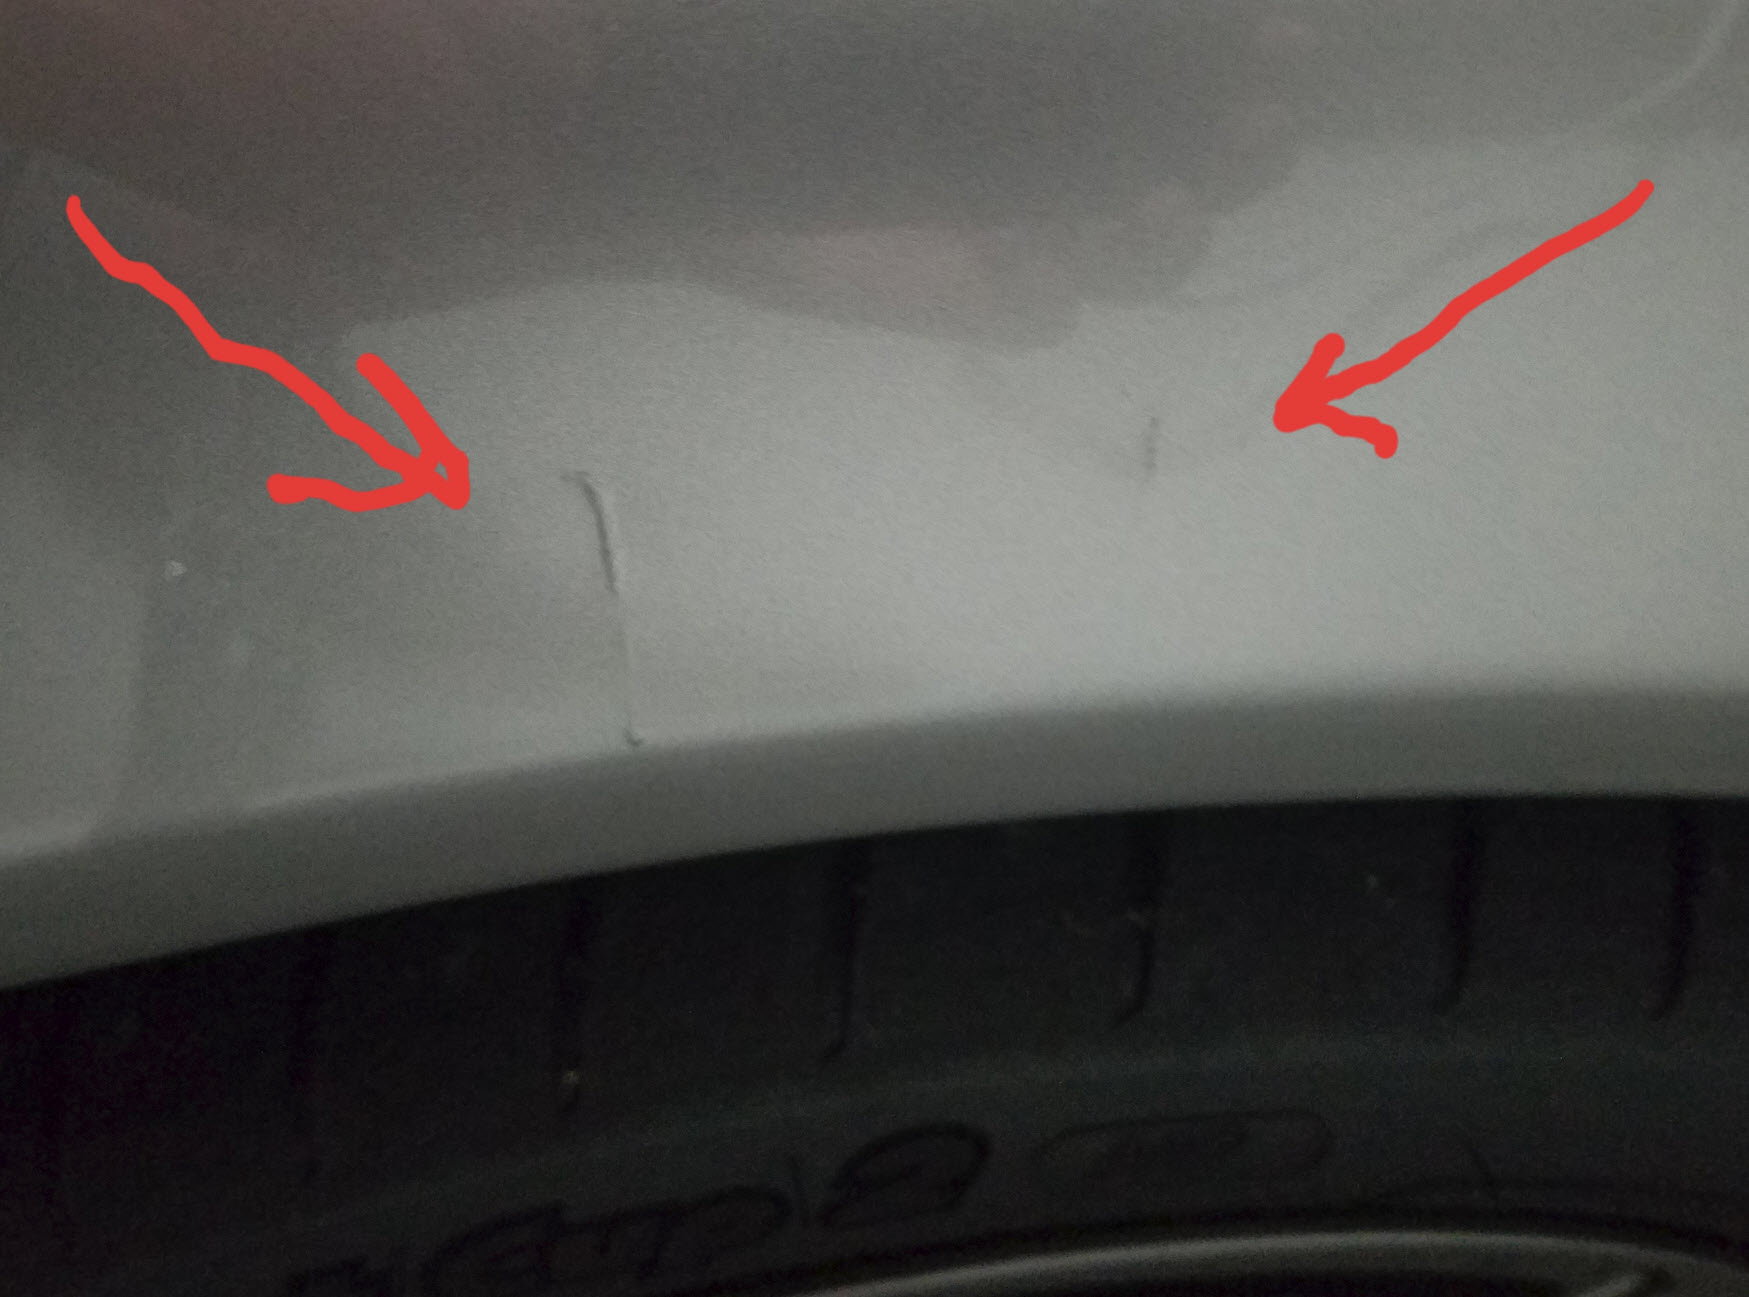
Again, no one could figure this out (not saying this is 100% confirmed, but seems within spec). Here is an image. Please keep in mind that 6 yrs. ago when I bought this from Intersport Performance in McLean, Virginia (cough) it was 1 tiny bump the size of a nail tip at the top of the what you see on the left. I was told that it was a rock hit from the inside and then over time realized that it was not possible from the wheel-well. Kinda mind blowing that I have found this level of detail as I was just about to dig in. I would have never figured this out. Thank you all.


 04-16-2019 | 02:27 PM