When you click on links to various merchants on this site and make a purchase, this can result in this site earning a commission. Affiliate programs and affiliations include, but are not limited to, the eBay Partner Network.
How to replace your starter/alternator cable to cure slow starts on the 997.1
I replaced my alternator/start cable over the weekend with the help of new RL member @JeffBlak. He has an epic garage and checking out the '64 vette he restored and '63 split window he’s currently restoring was the highlight of the project.
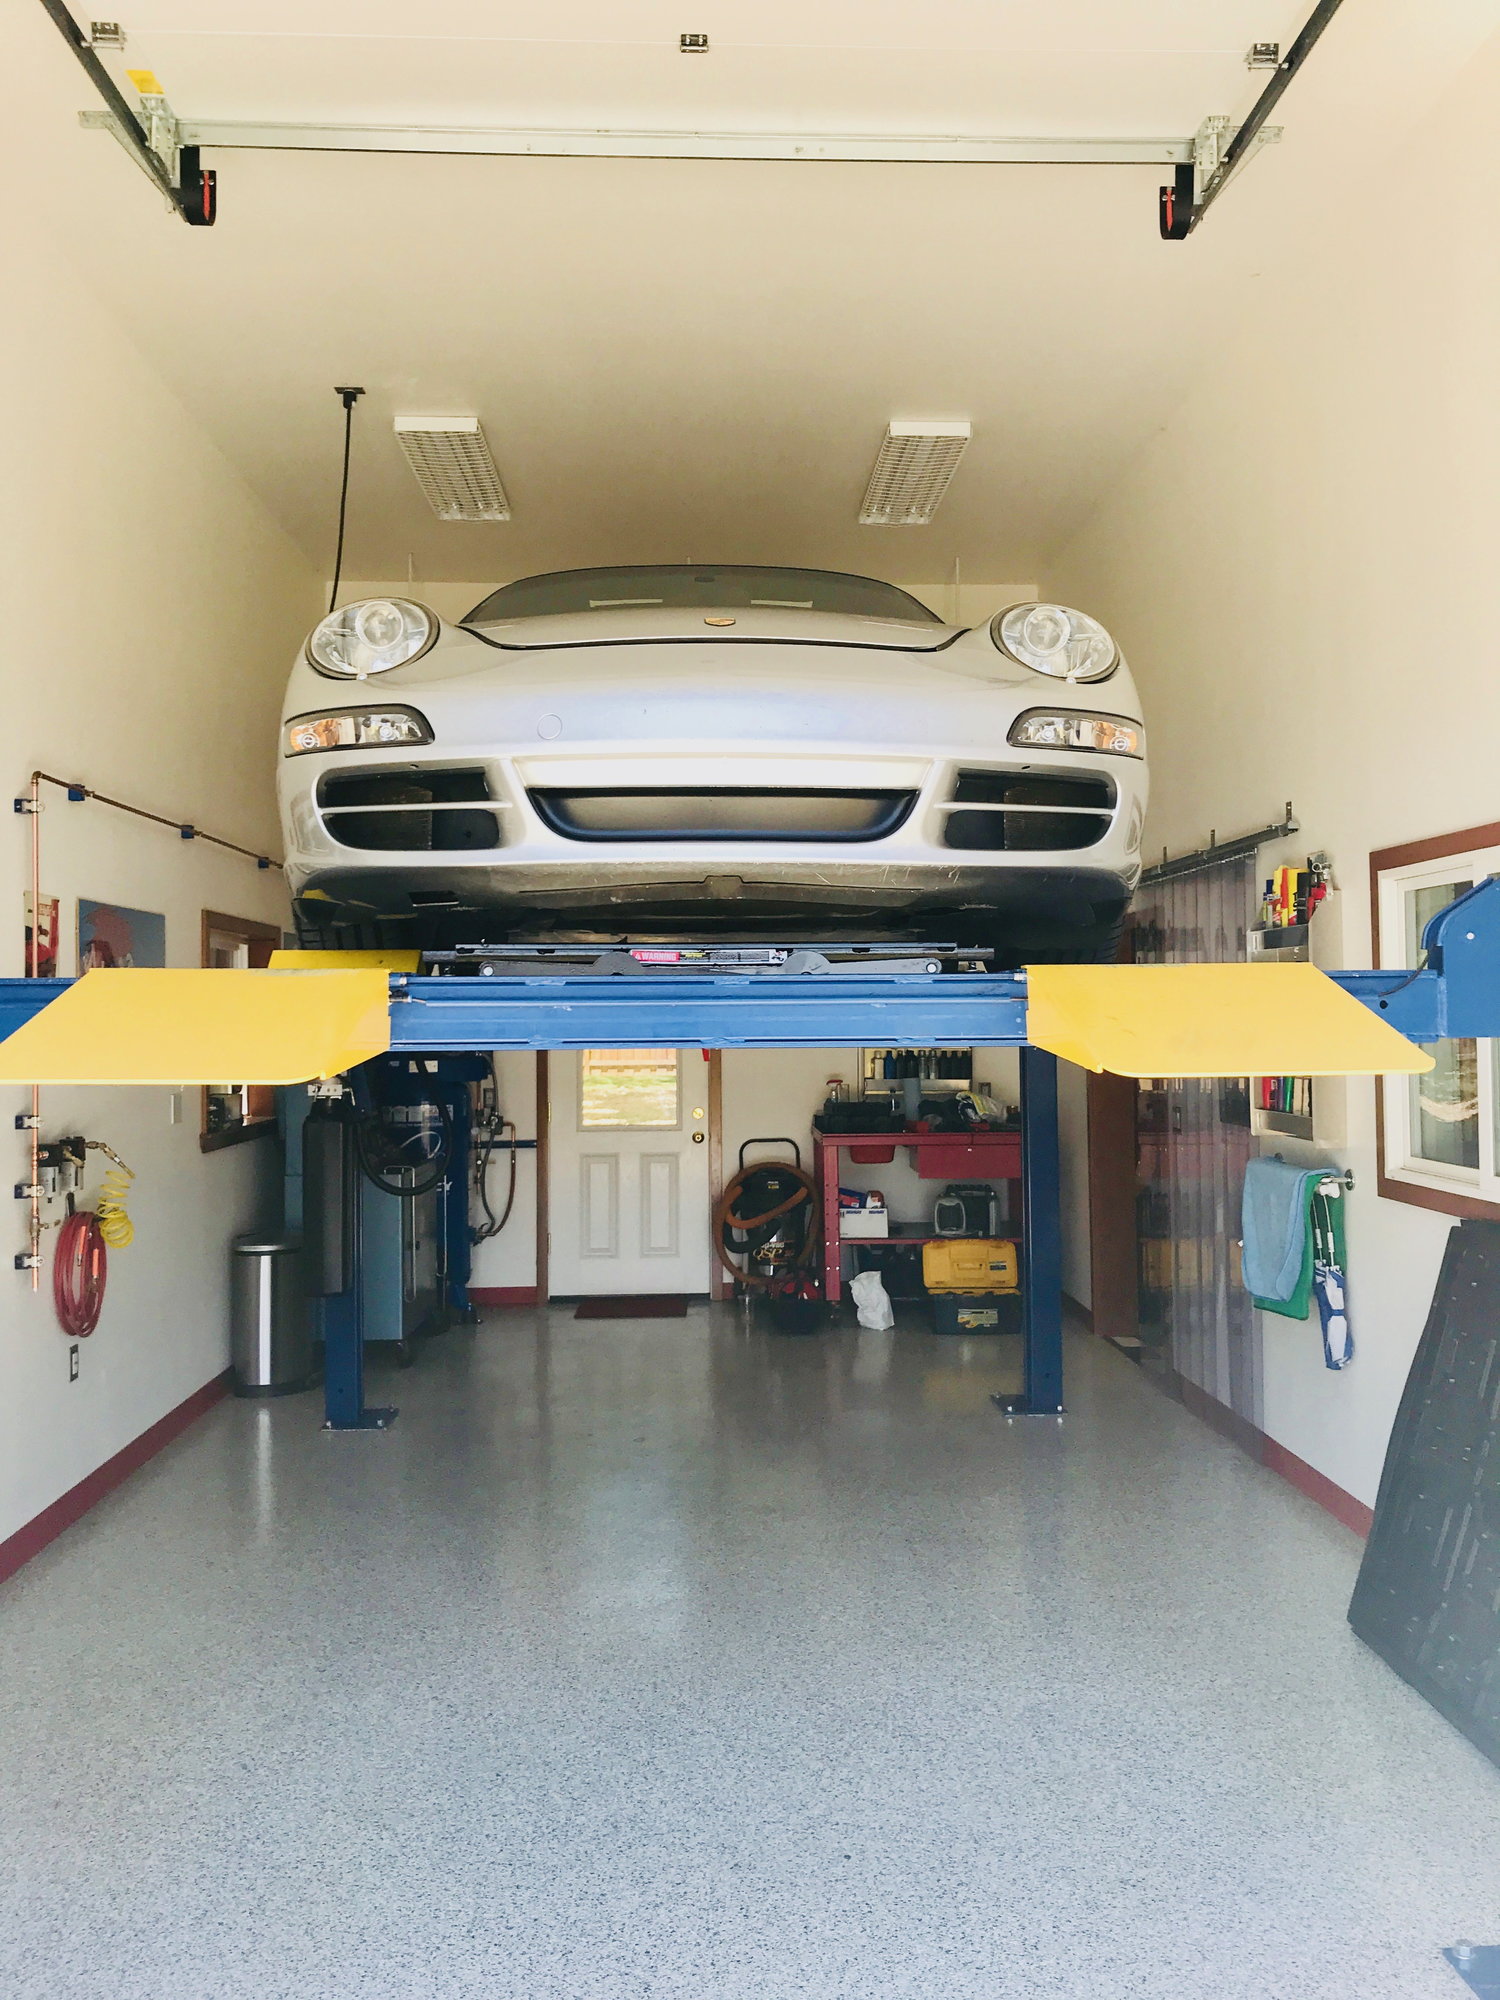
I did want to provide some tips as this project can seem daunting (especially with Doug_B's 100 pg writeup...). I will say that anyone can do it in ~5hrs as long as they have access to a lift, or can safely jack their car up high enough in their garage. There are also 2 parts of the project where have an extra set of hands makes a world of difference.
The problem
997.1s can suffer from a slow crank issue when the engine is hot. I believe the issue was fixed in the 2007 or 2008 MY but 2005 and 2006's will probability run into this at some point in their life. When it gets bad enough the car wont turn over until its cooled down, which can result in a bad day.
The issue is related to a bad crimp in the starter/alternator cable that causes resistance to build up and both effect alternator output and starter efficiency. Its a double whammy as your battery will only be at 50-60% charge.
The diagnosis
This can be misdiagnosed as a bad battery, bad starter, or corroded distributor pin and people throw parts and time at until they bite the bullet and replace the cable. I too was hoping my issue was related to one of these as a simpler fix. I would also put my battery on a charger, which would reduce the symptoms for a few days, but within a week my battery would be back down to 60% charge.
Here are the steps to test:
Distributor pin - there are a number of posts on this but it is likely not the issue. Yes, it can get some corrosion if your windshield cowling isn't seated properly and water runs down into your battery box. Mine had some and its easy to pull the B+ cable off the pin and clean it off. However my observation and the advice of my indy was the effect was immaterial. In his words "95% of the time its the cable".
Battery - take it to your indy or an auto parts store and get a cold crank test. Or, if its slow to start on a cold morning but fine after you drive for a bit, its likely the battery.
Start/Alternator Cable - simple test is to check the voltage at the alternator and at the battery. If you see more than a ~.5 drop its the cable. End of story. You can also take the throttle body and plenum off and shine a flashlight on the cable where it bolts to the starter. My indy said you can many times see the rubber boot has melted, which is a dead giveaway. Mine had melted.
Starter - if you have already replaced your alternator cable, or have a 997.2, its a safe bet your starter is the root of the problem. Also, if your battery is fully charged and your starter is sluggish on hot and cold starts it likely could be the starter. I would recommend tackling this last. I debated throwing in a new starter when I replaced the cable, or just replacing the starter first. Both would have been a waste of time and money.
Parts and supplies
- New alternator/starter cable - $85
The steps
Disconnect battery
Get the car on a lift or ensure you can safely jack it up high enough to crawl under.
Remove the two rear underpanels.
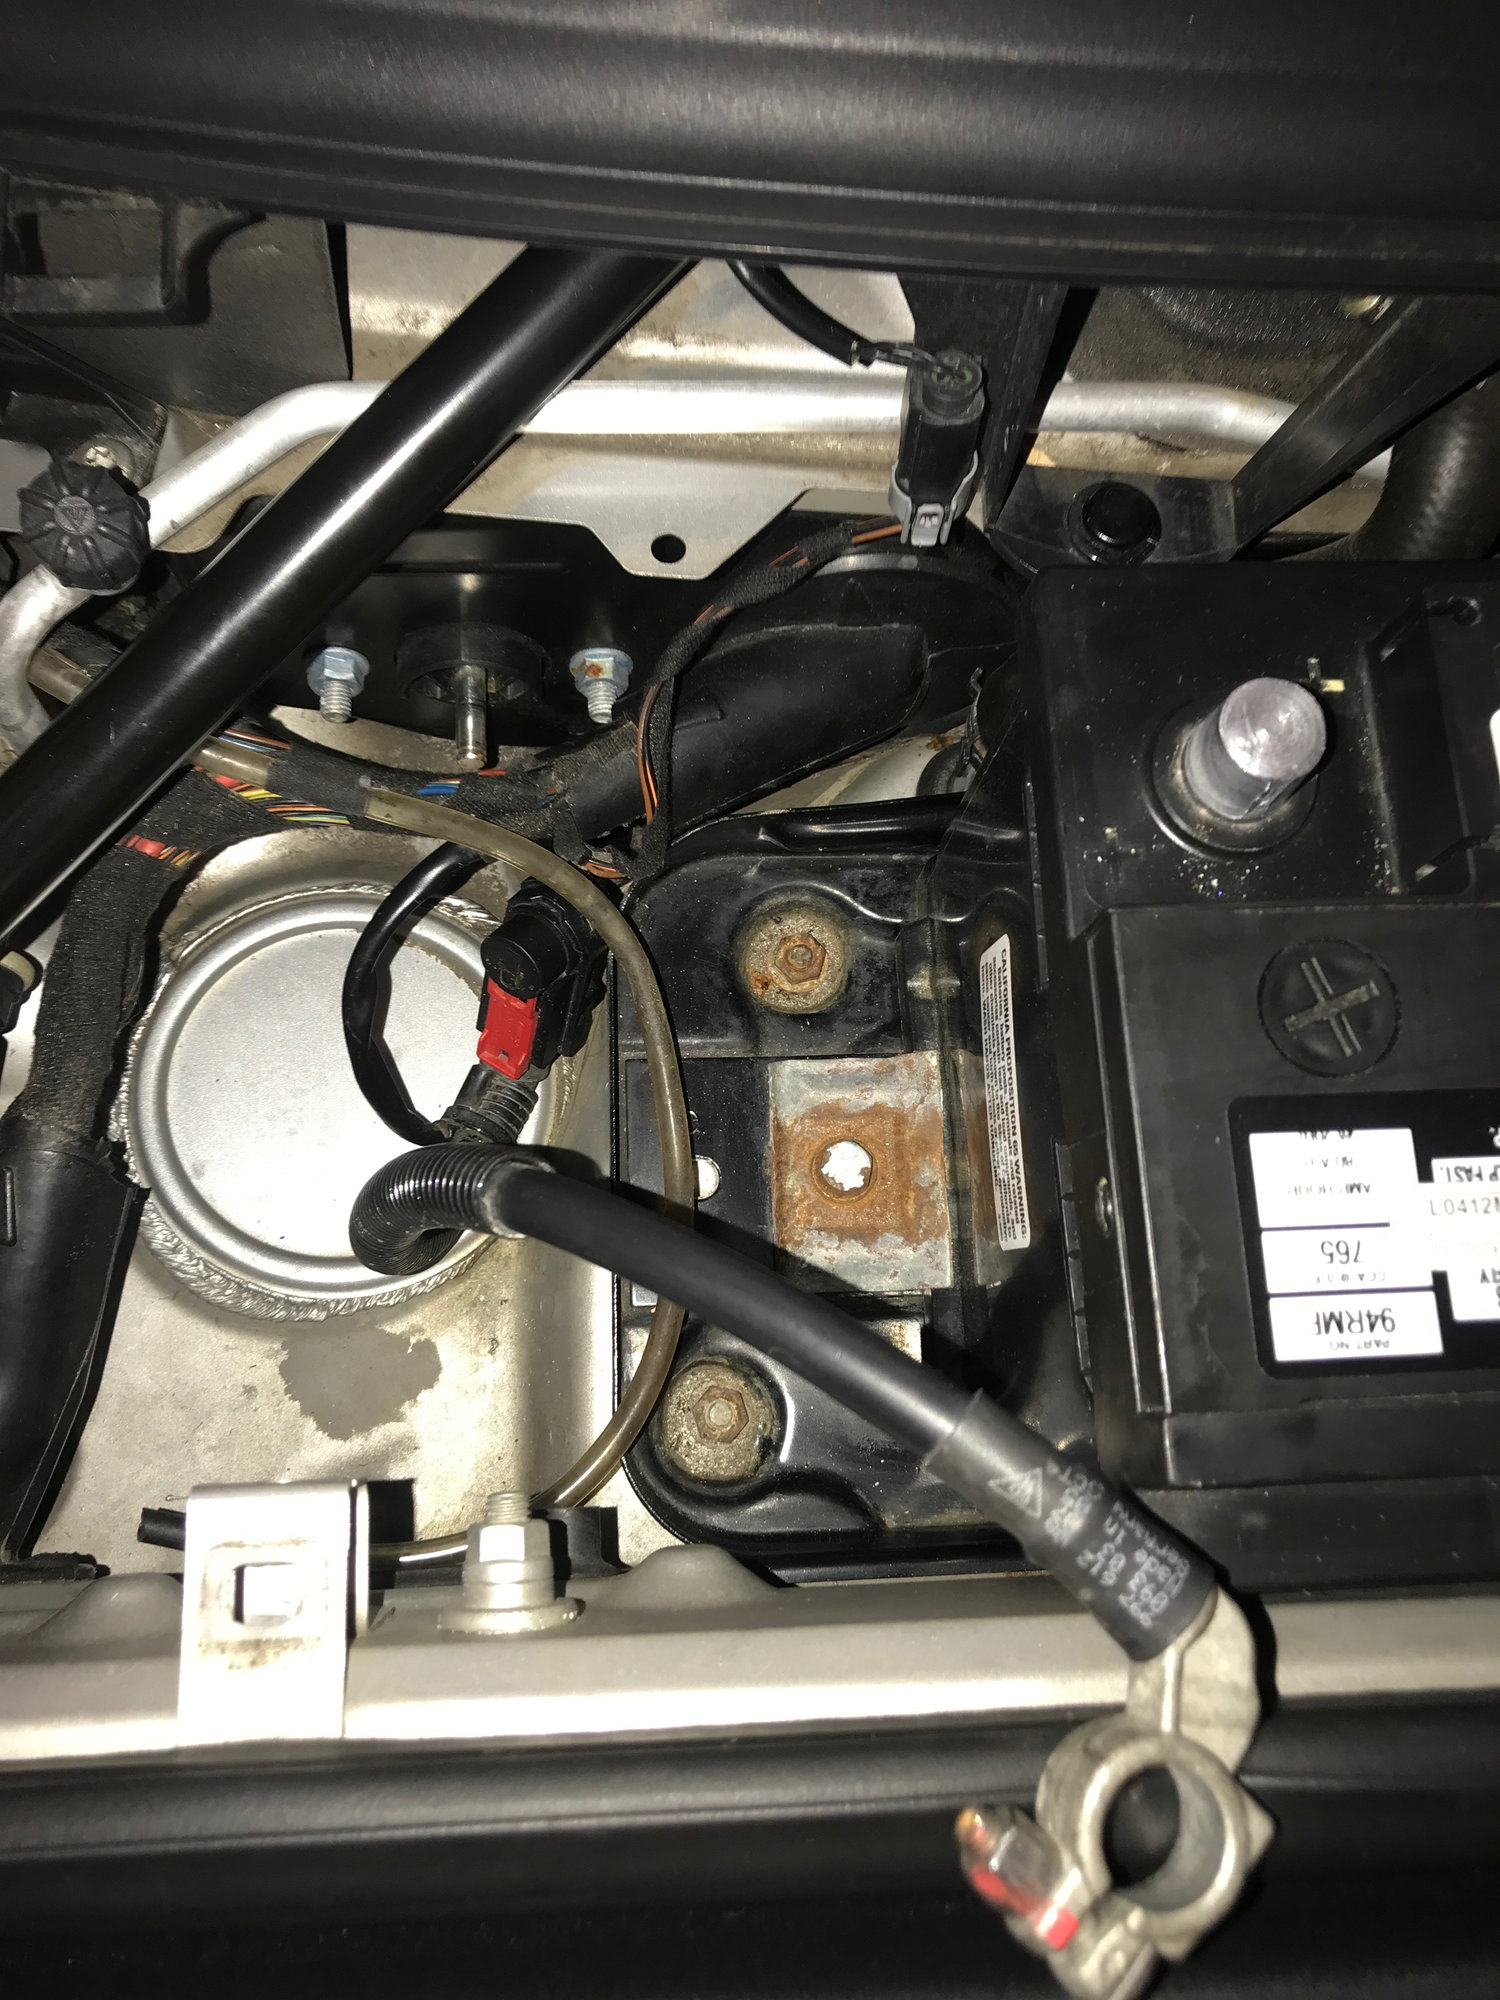
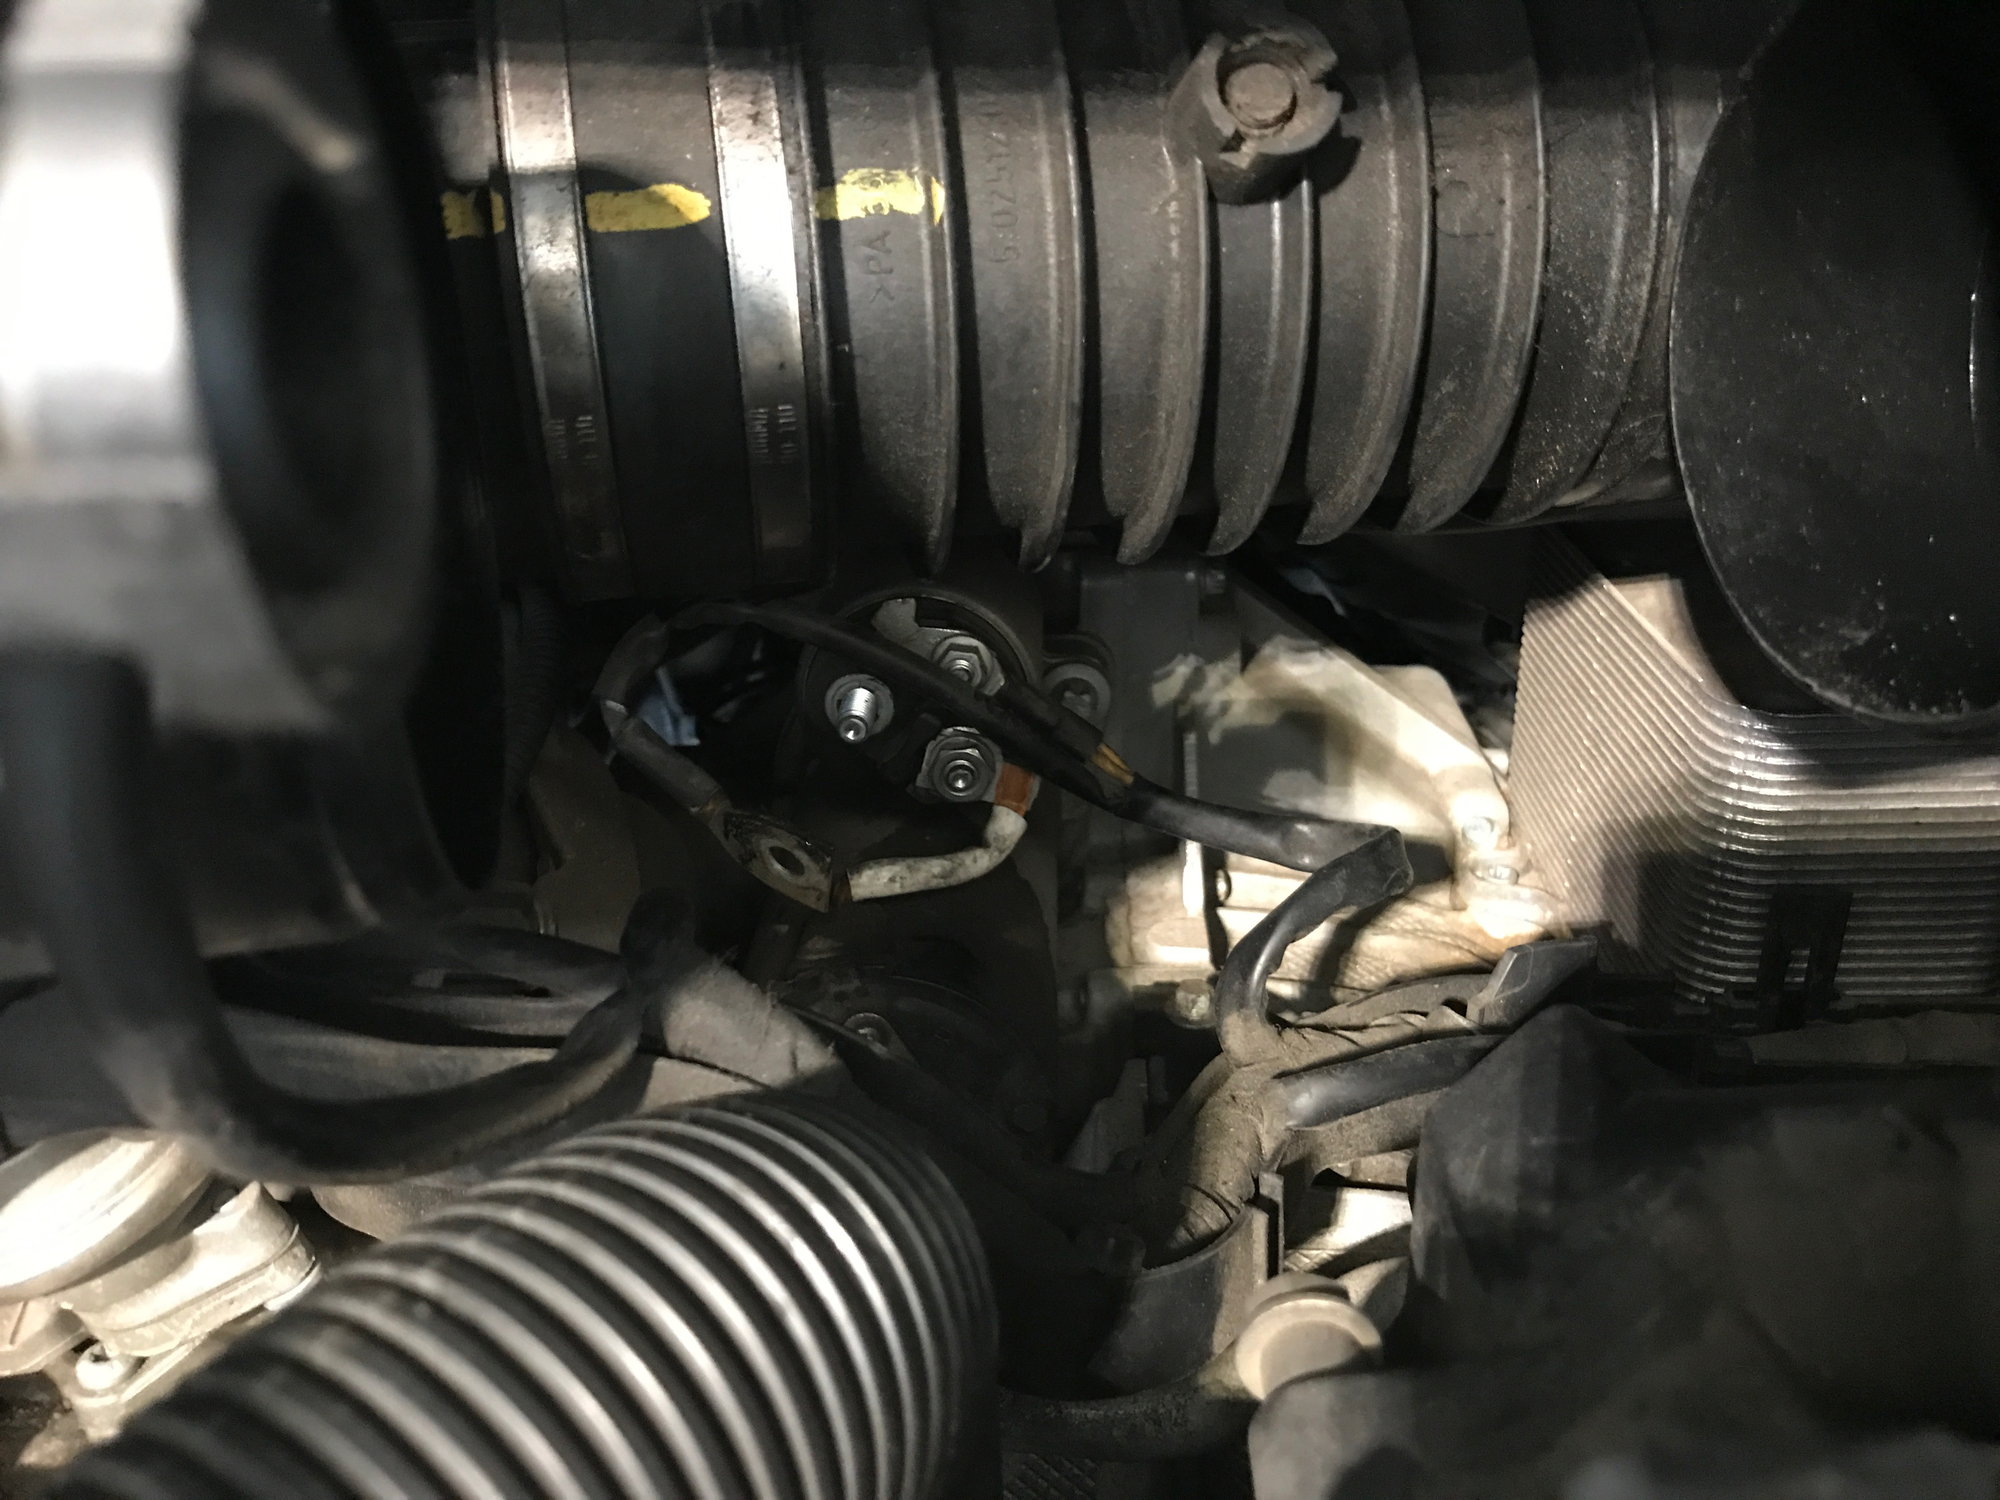
Locate the cable terminal on the transmission near the gear oil fill plug. Its a black box you can pop open with a screw driver. Shine a flashlight and follow the cable up the transmission around the oil cooler so you have your bearings.
Remove airbox.
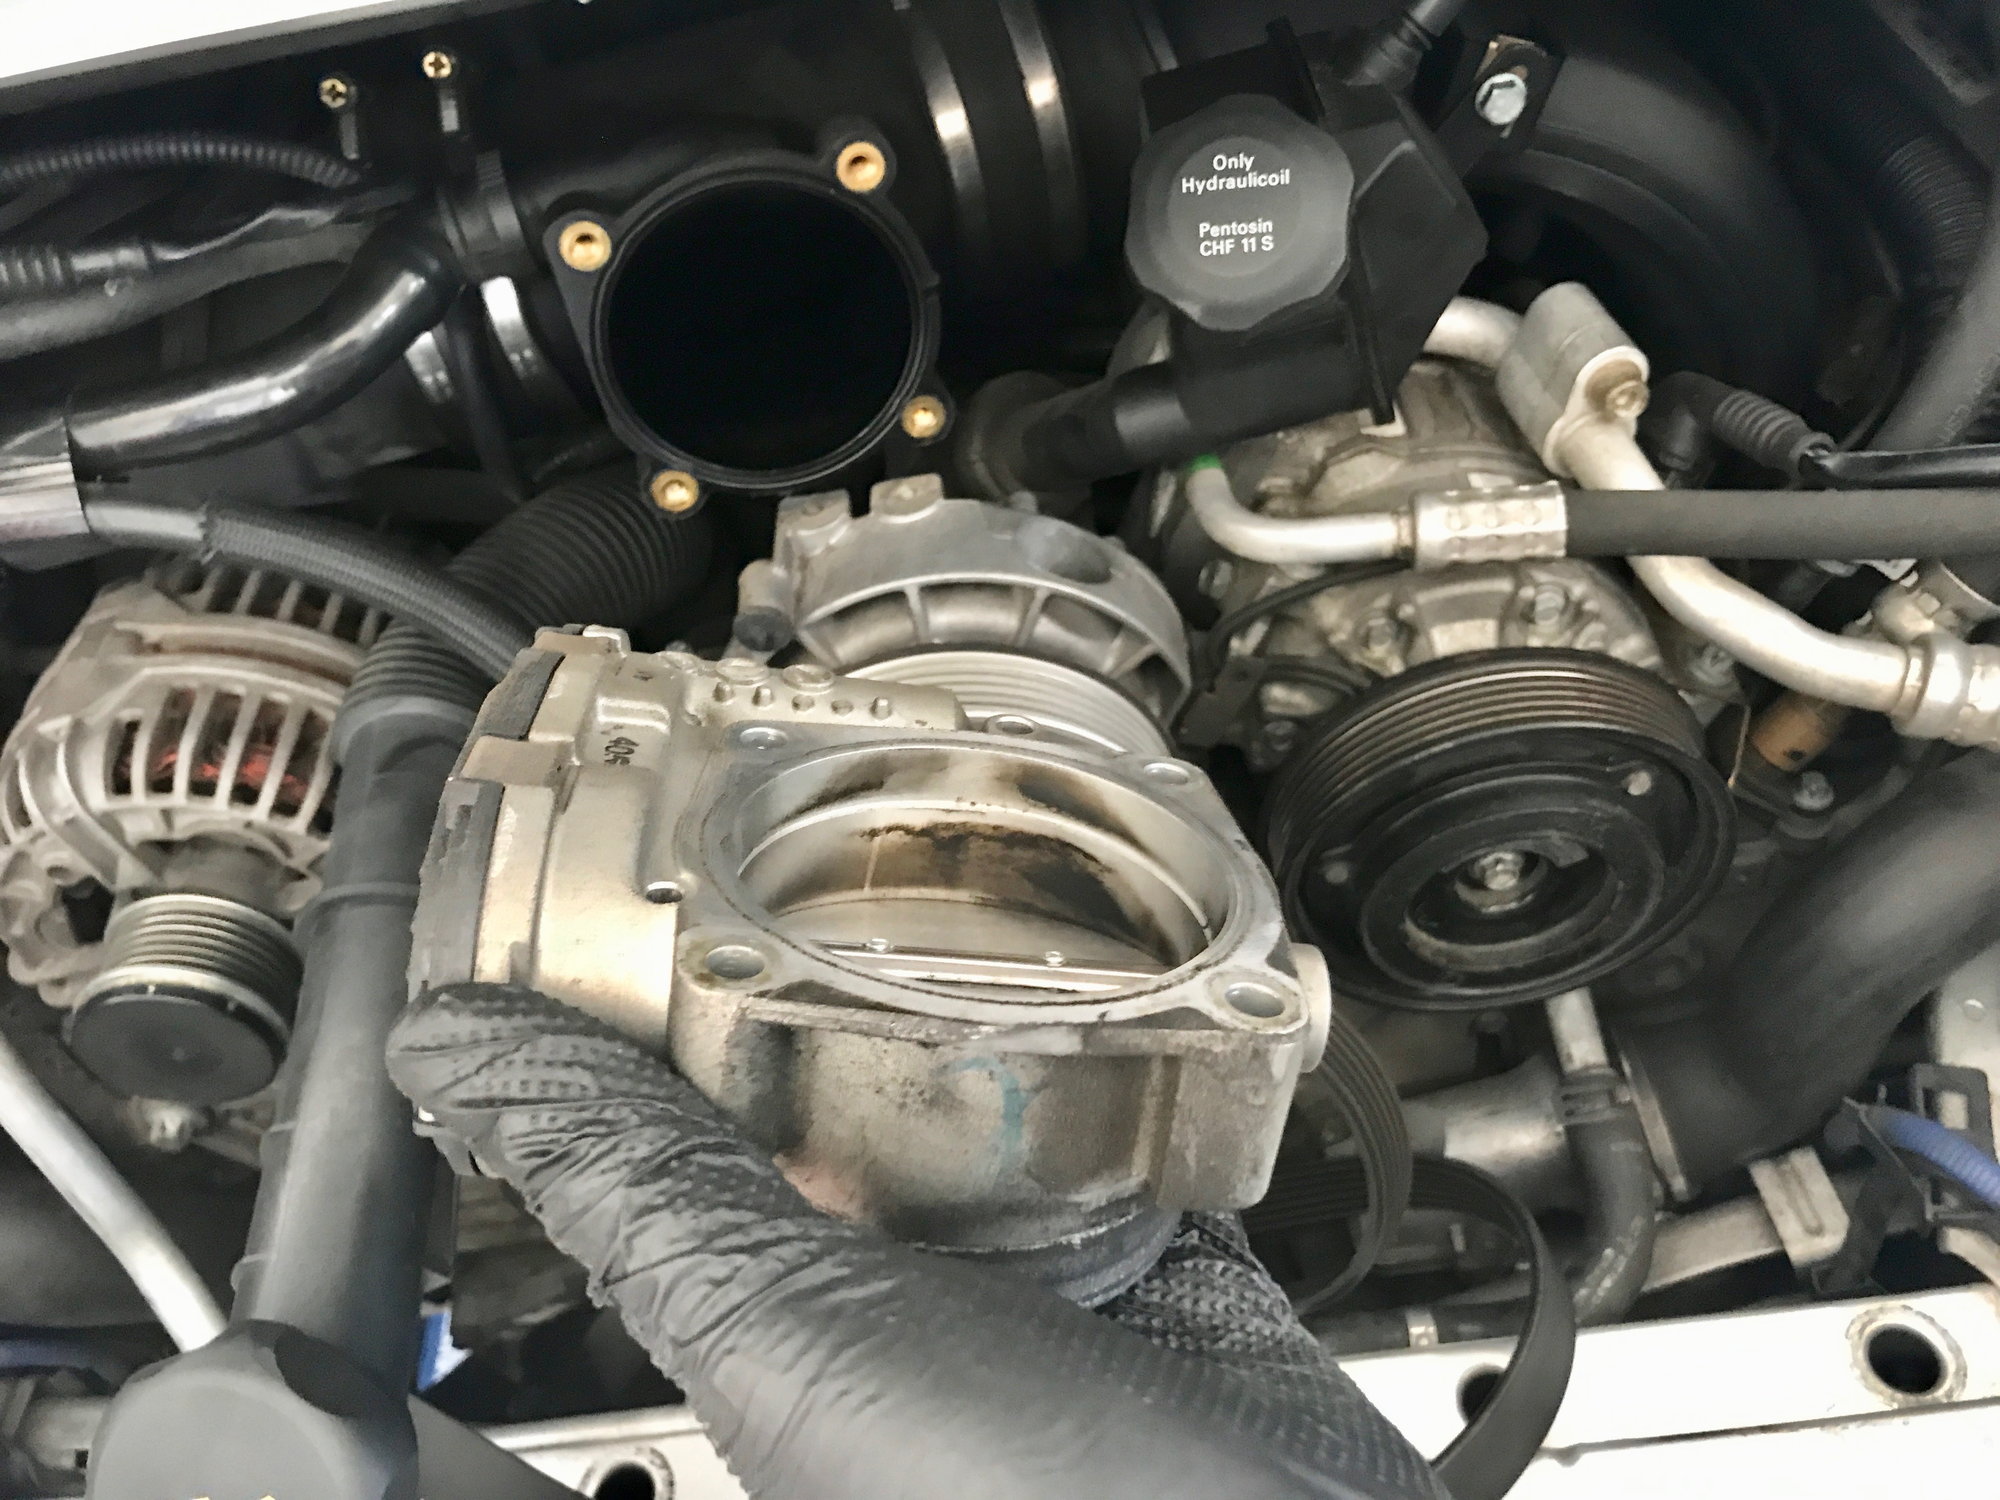
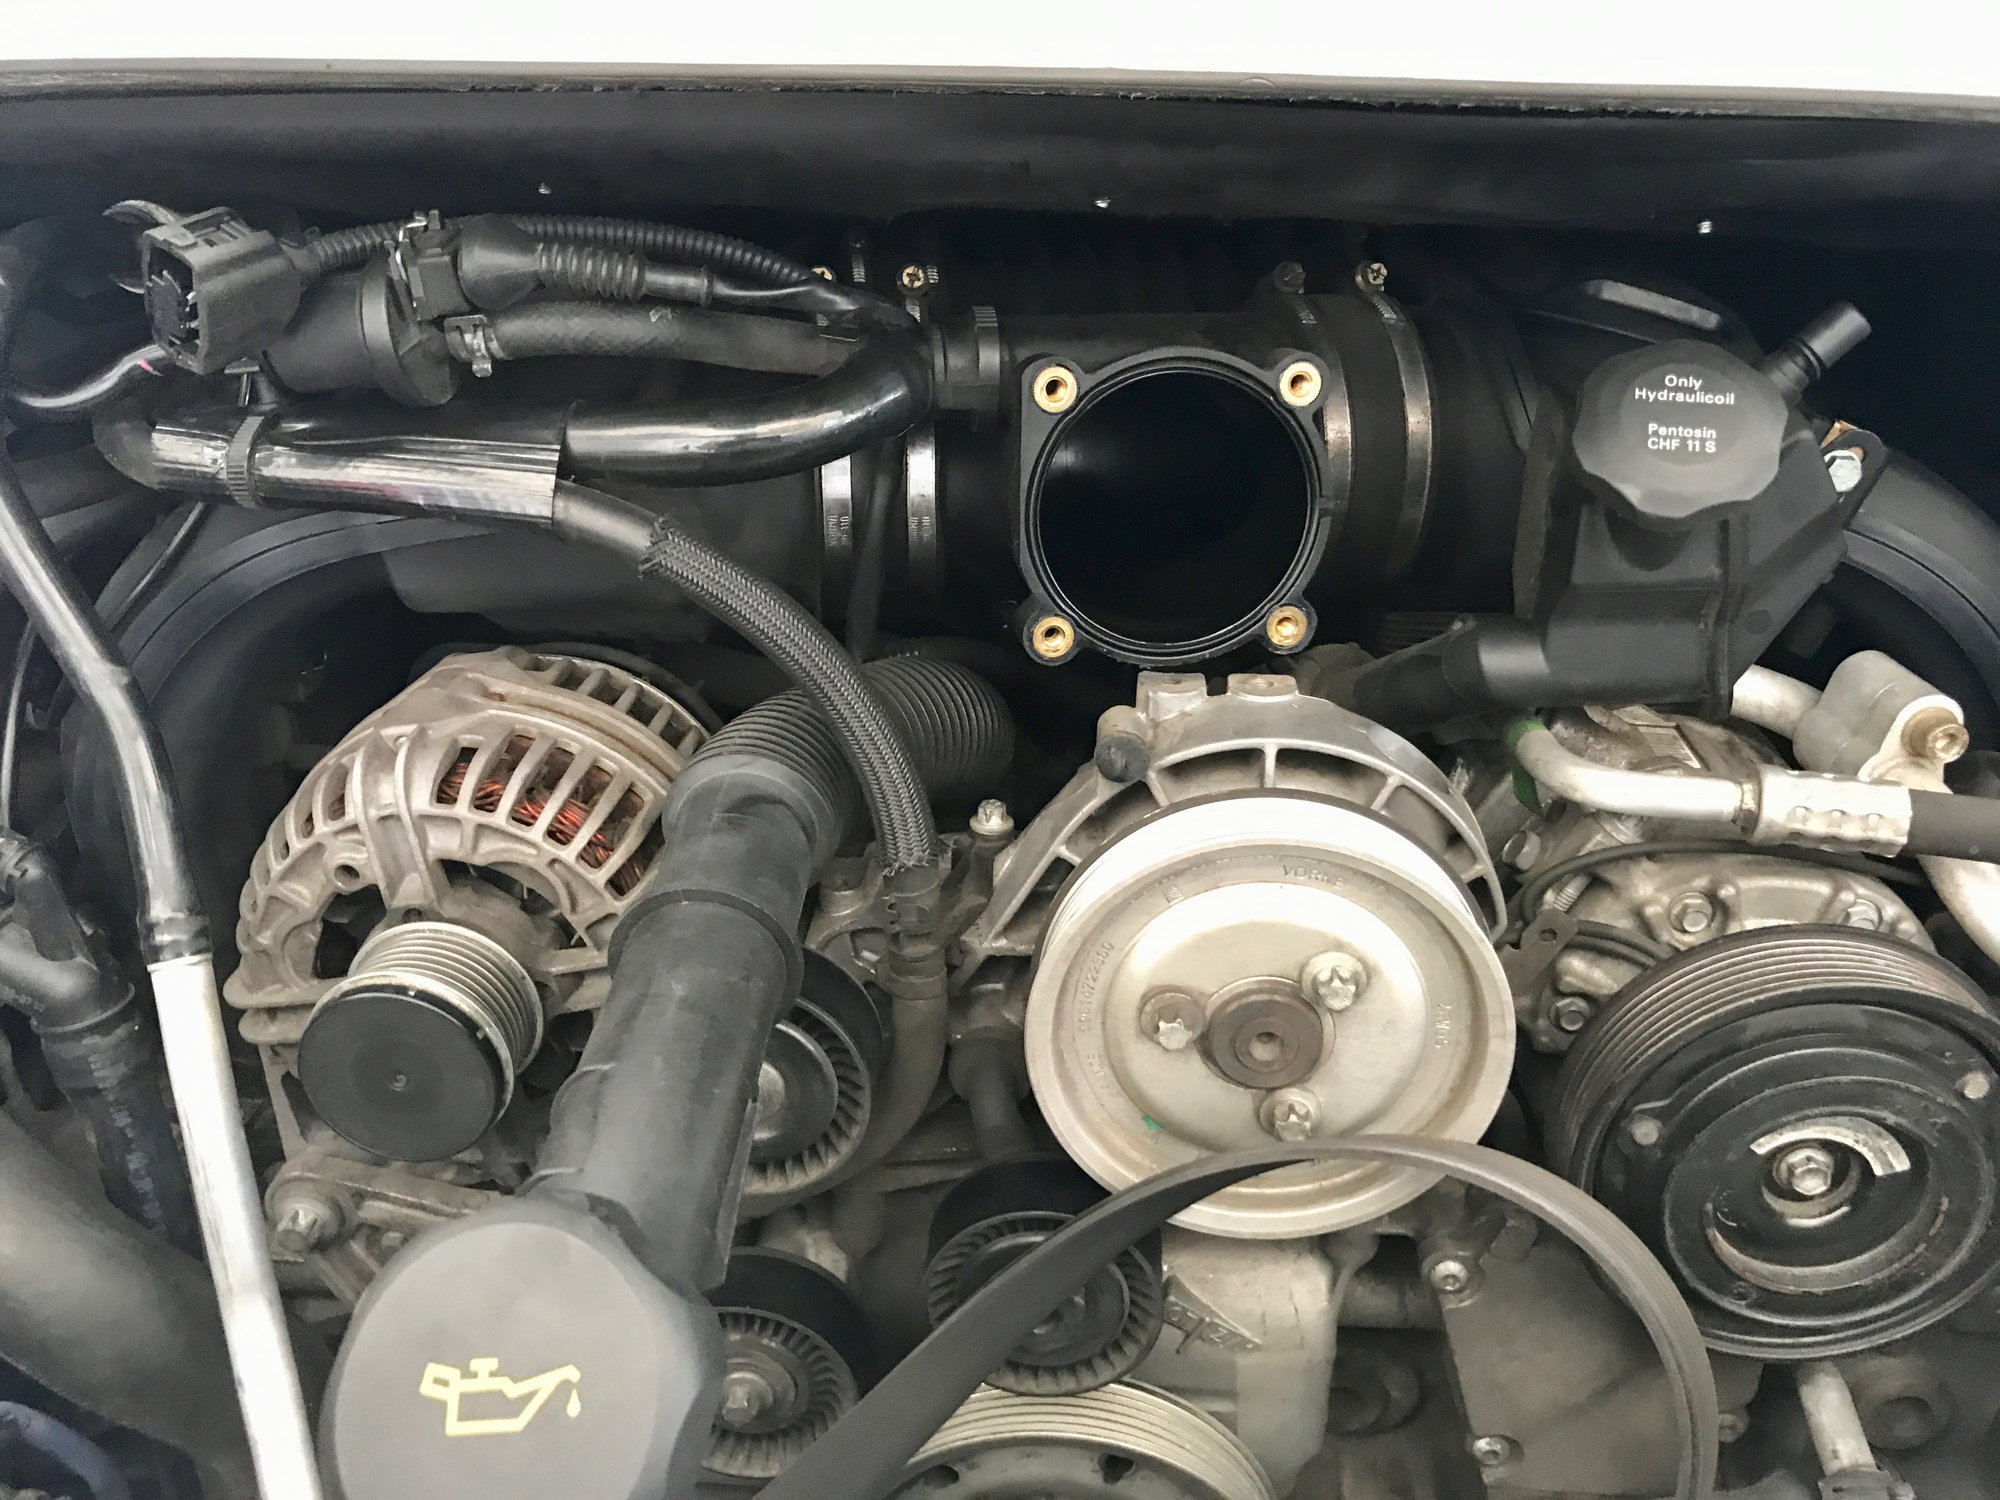
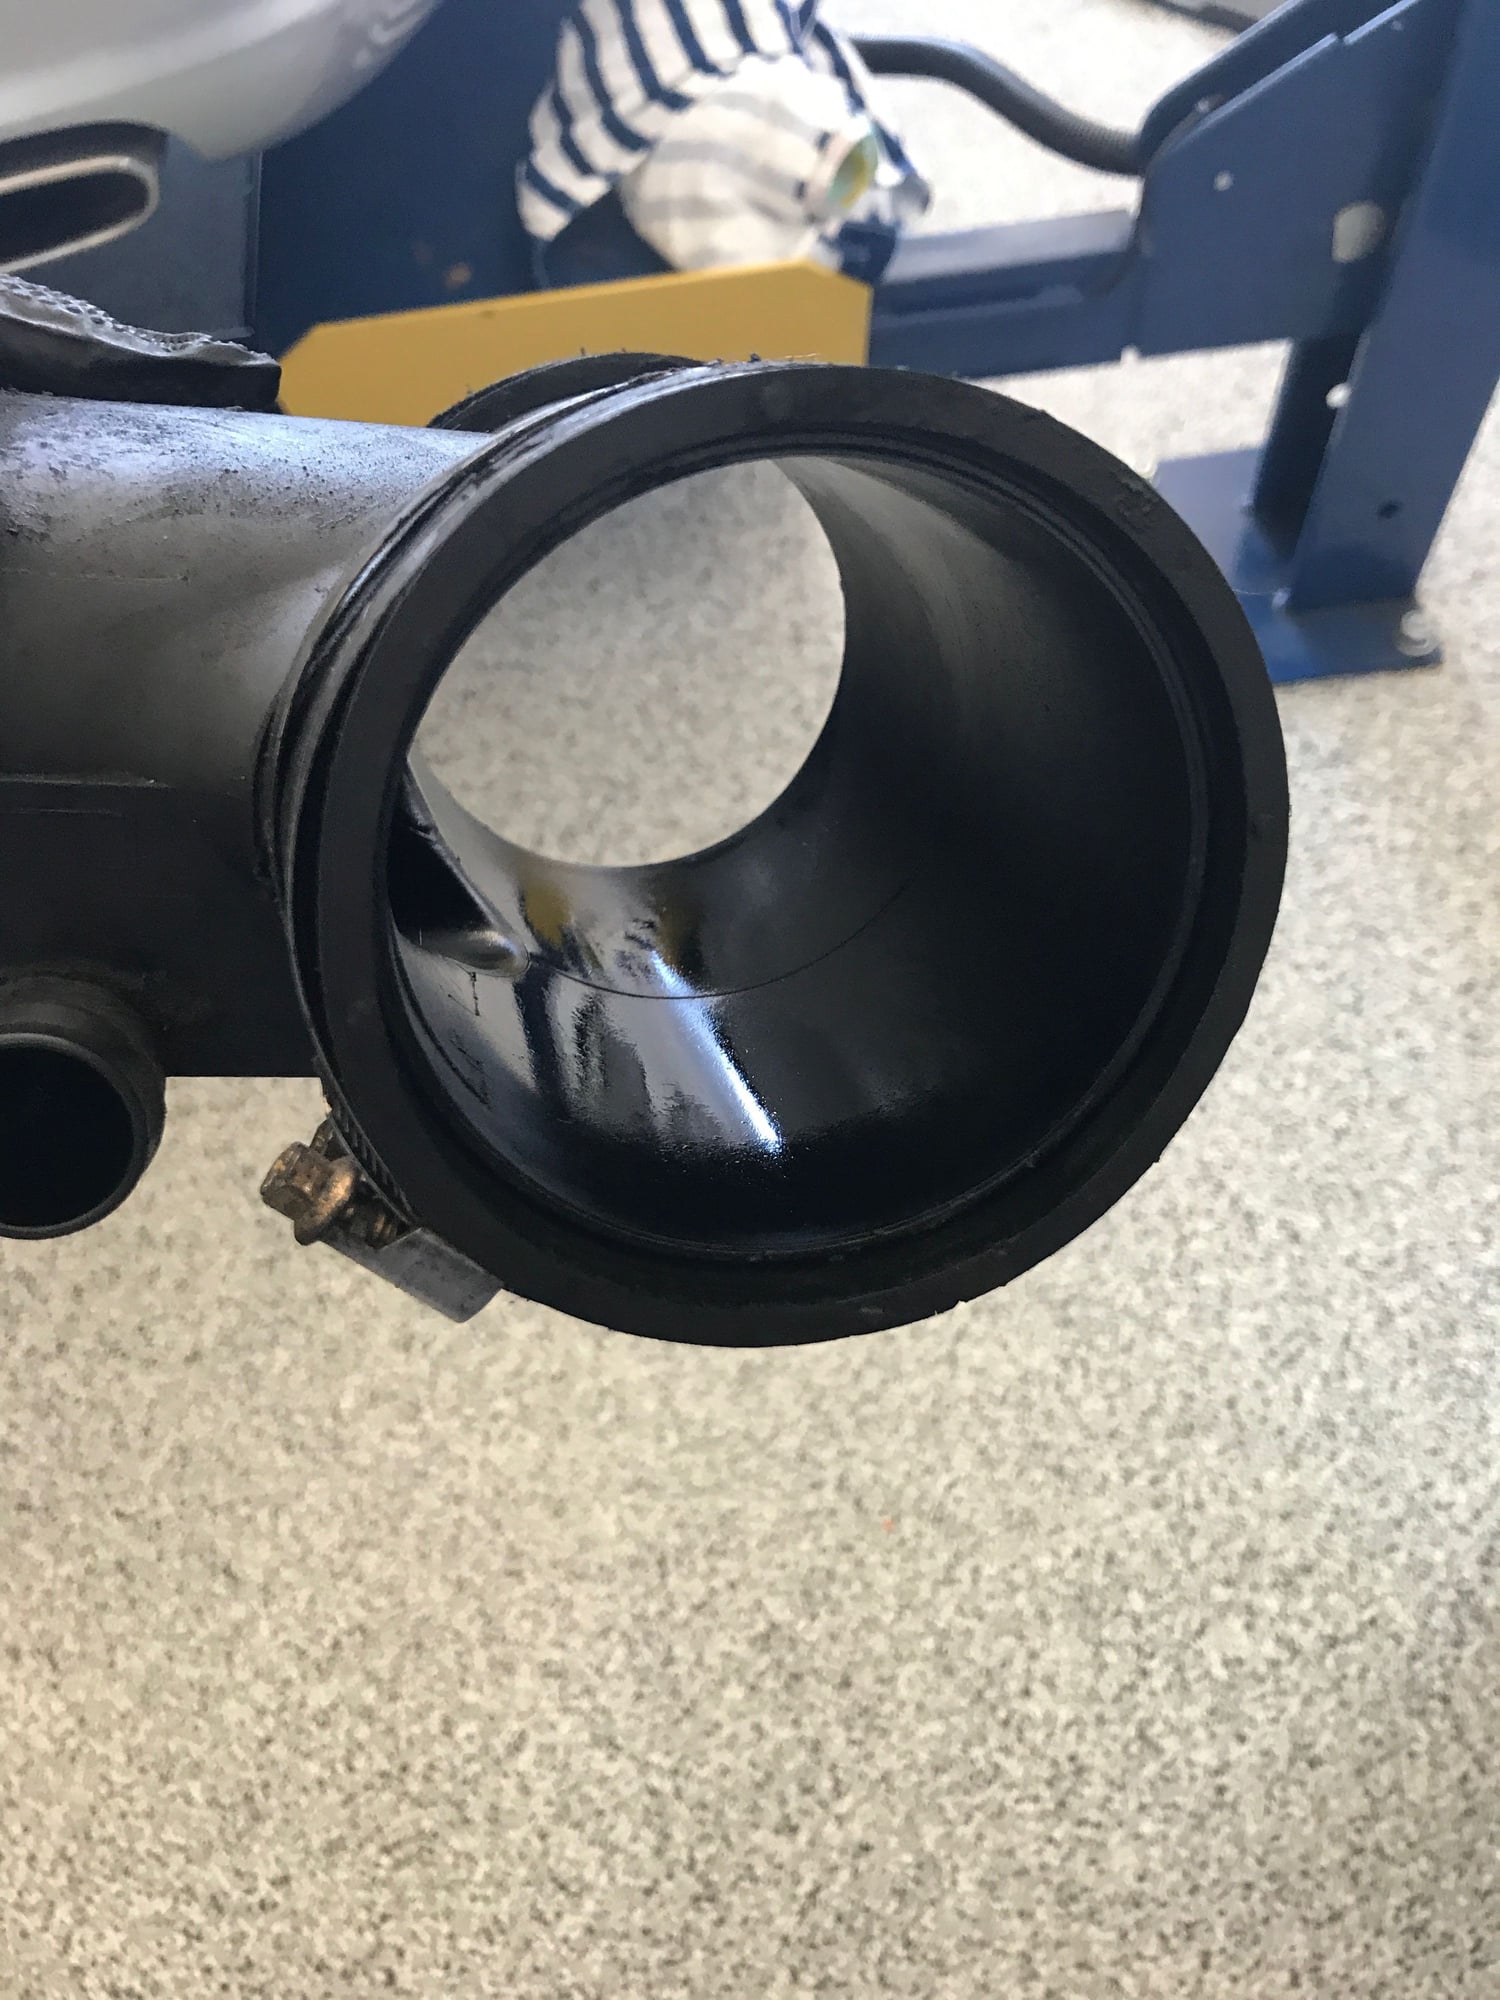
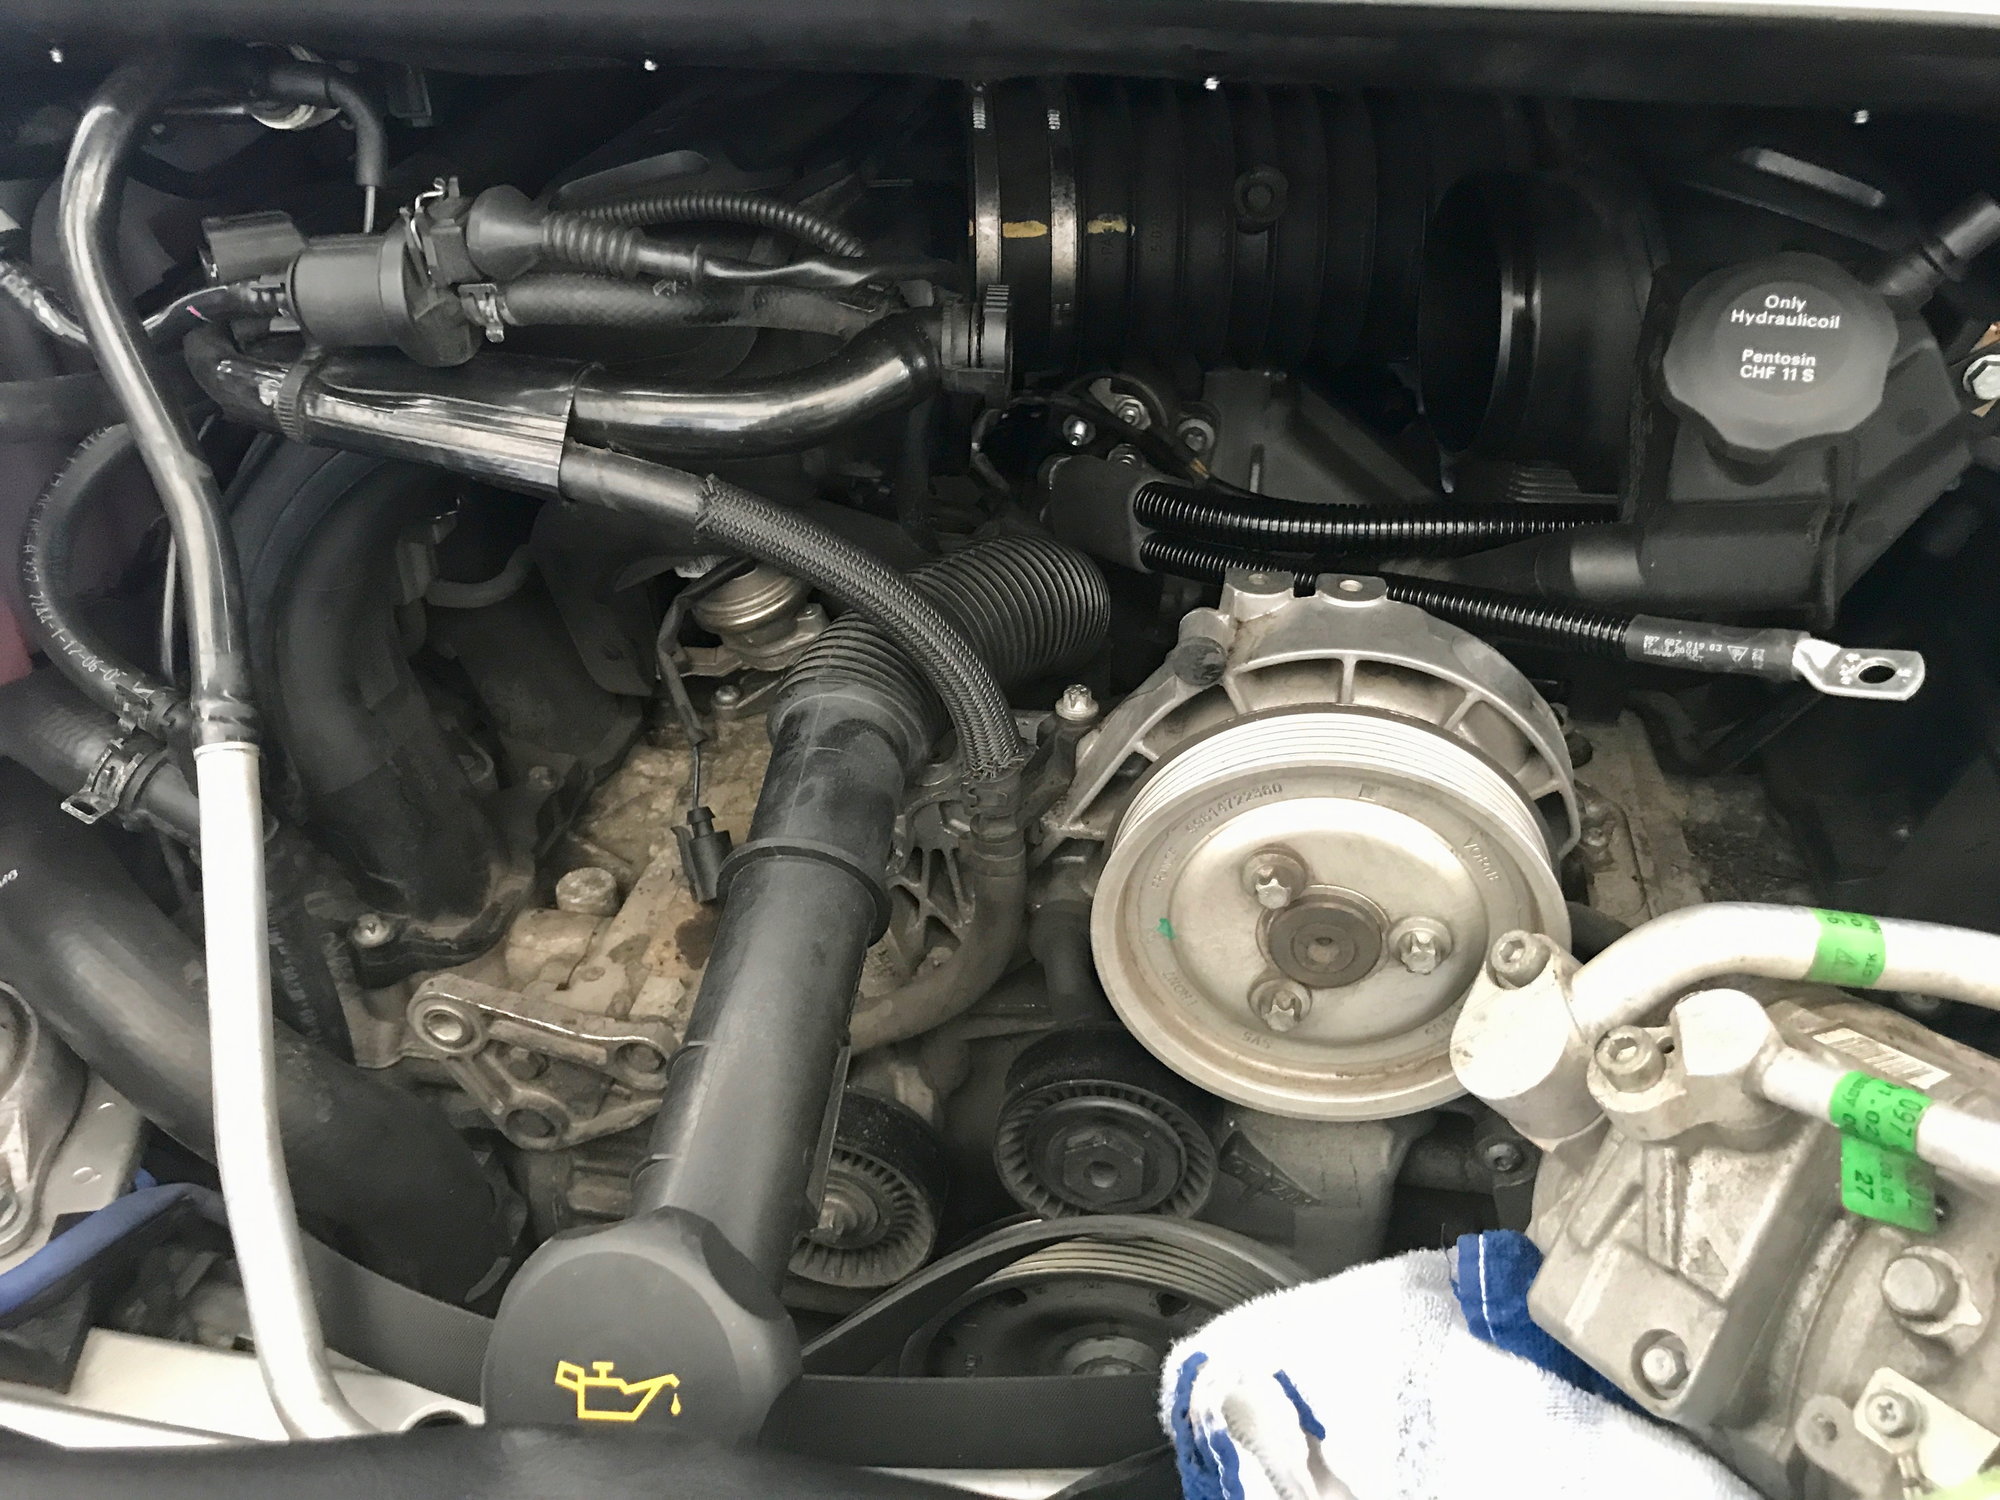
Remove throttle body. Take the opportunity to clean it. The backside of mine was a little dirty and there was some buildup between the housing and valve.
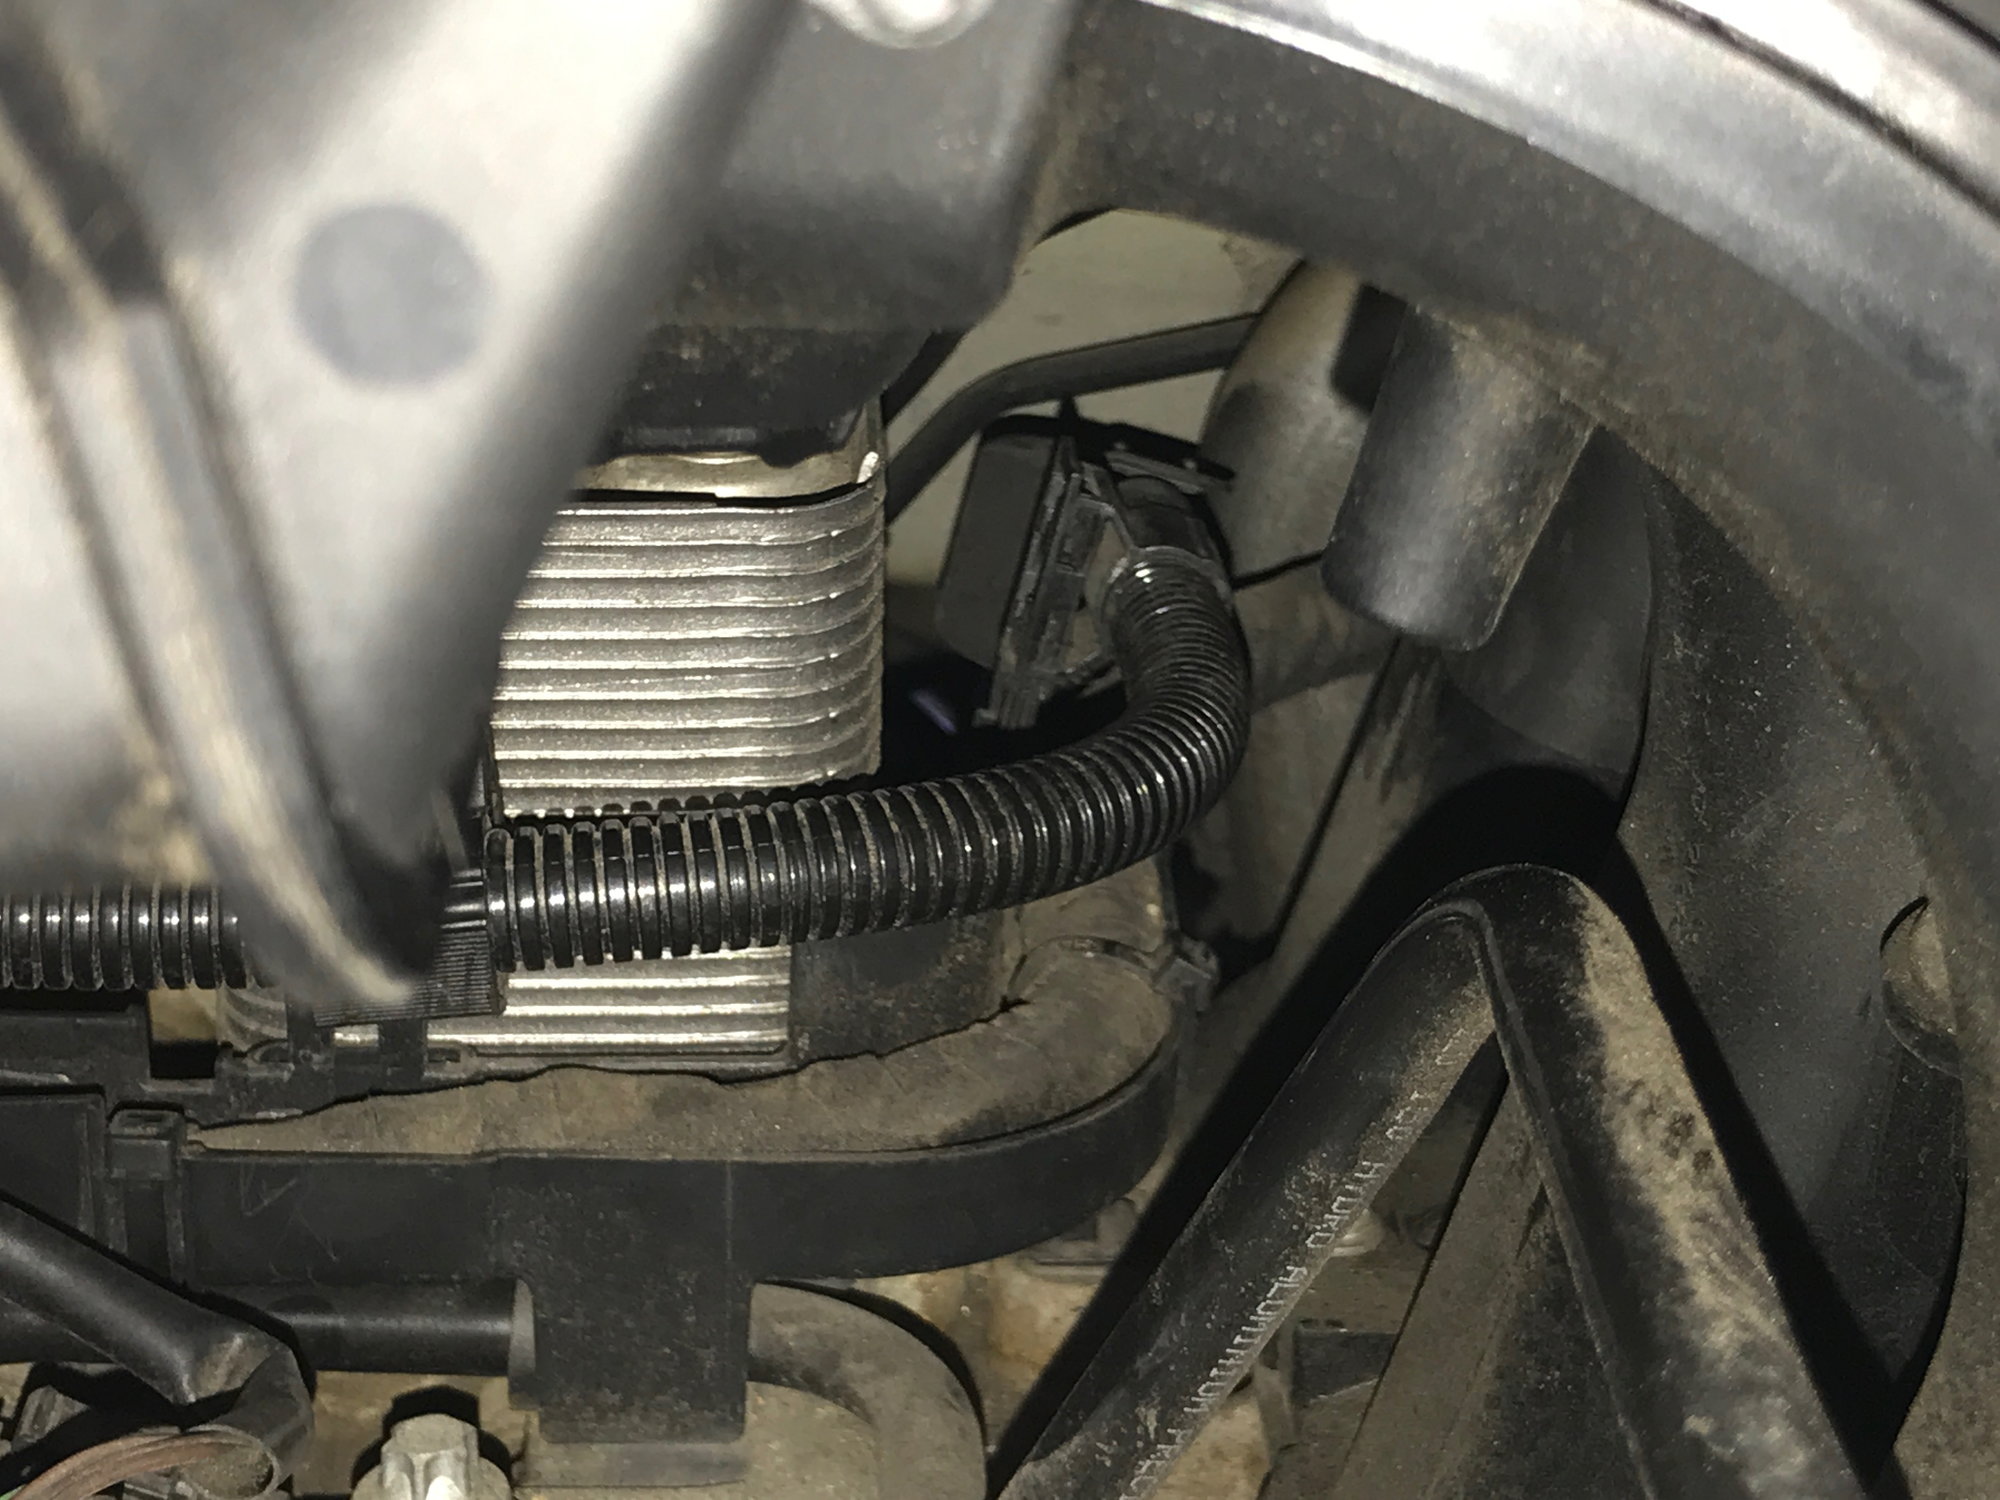
Remove plenum. Once you loosen the screws push the rubber boots in to get clearance to pull it out. I found a light sheen of oil in mine which I cleaned out. Im not sure if this is normal or early signs the AOS needs to be replaced. Once this is removed you can get a good look at the cable leading to the starter.
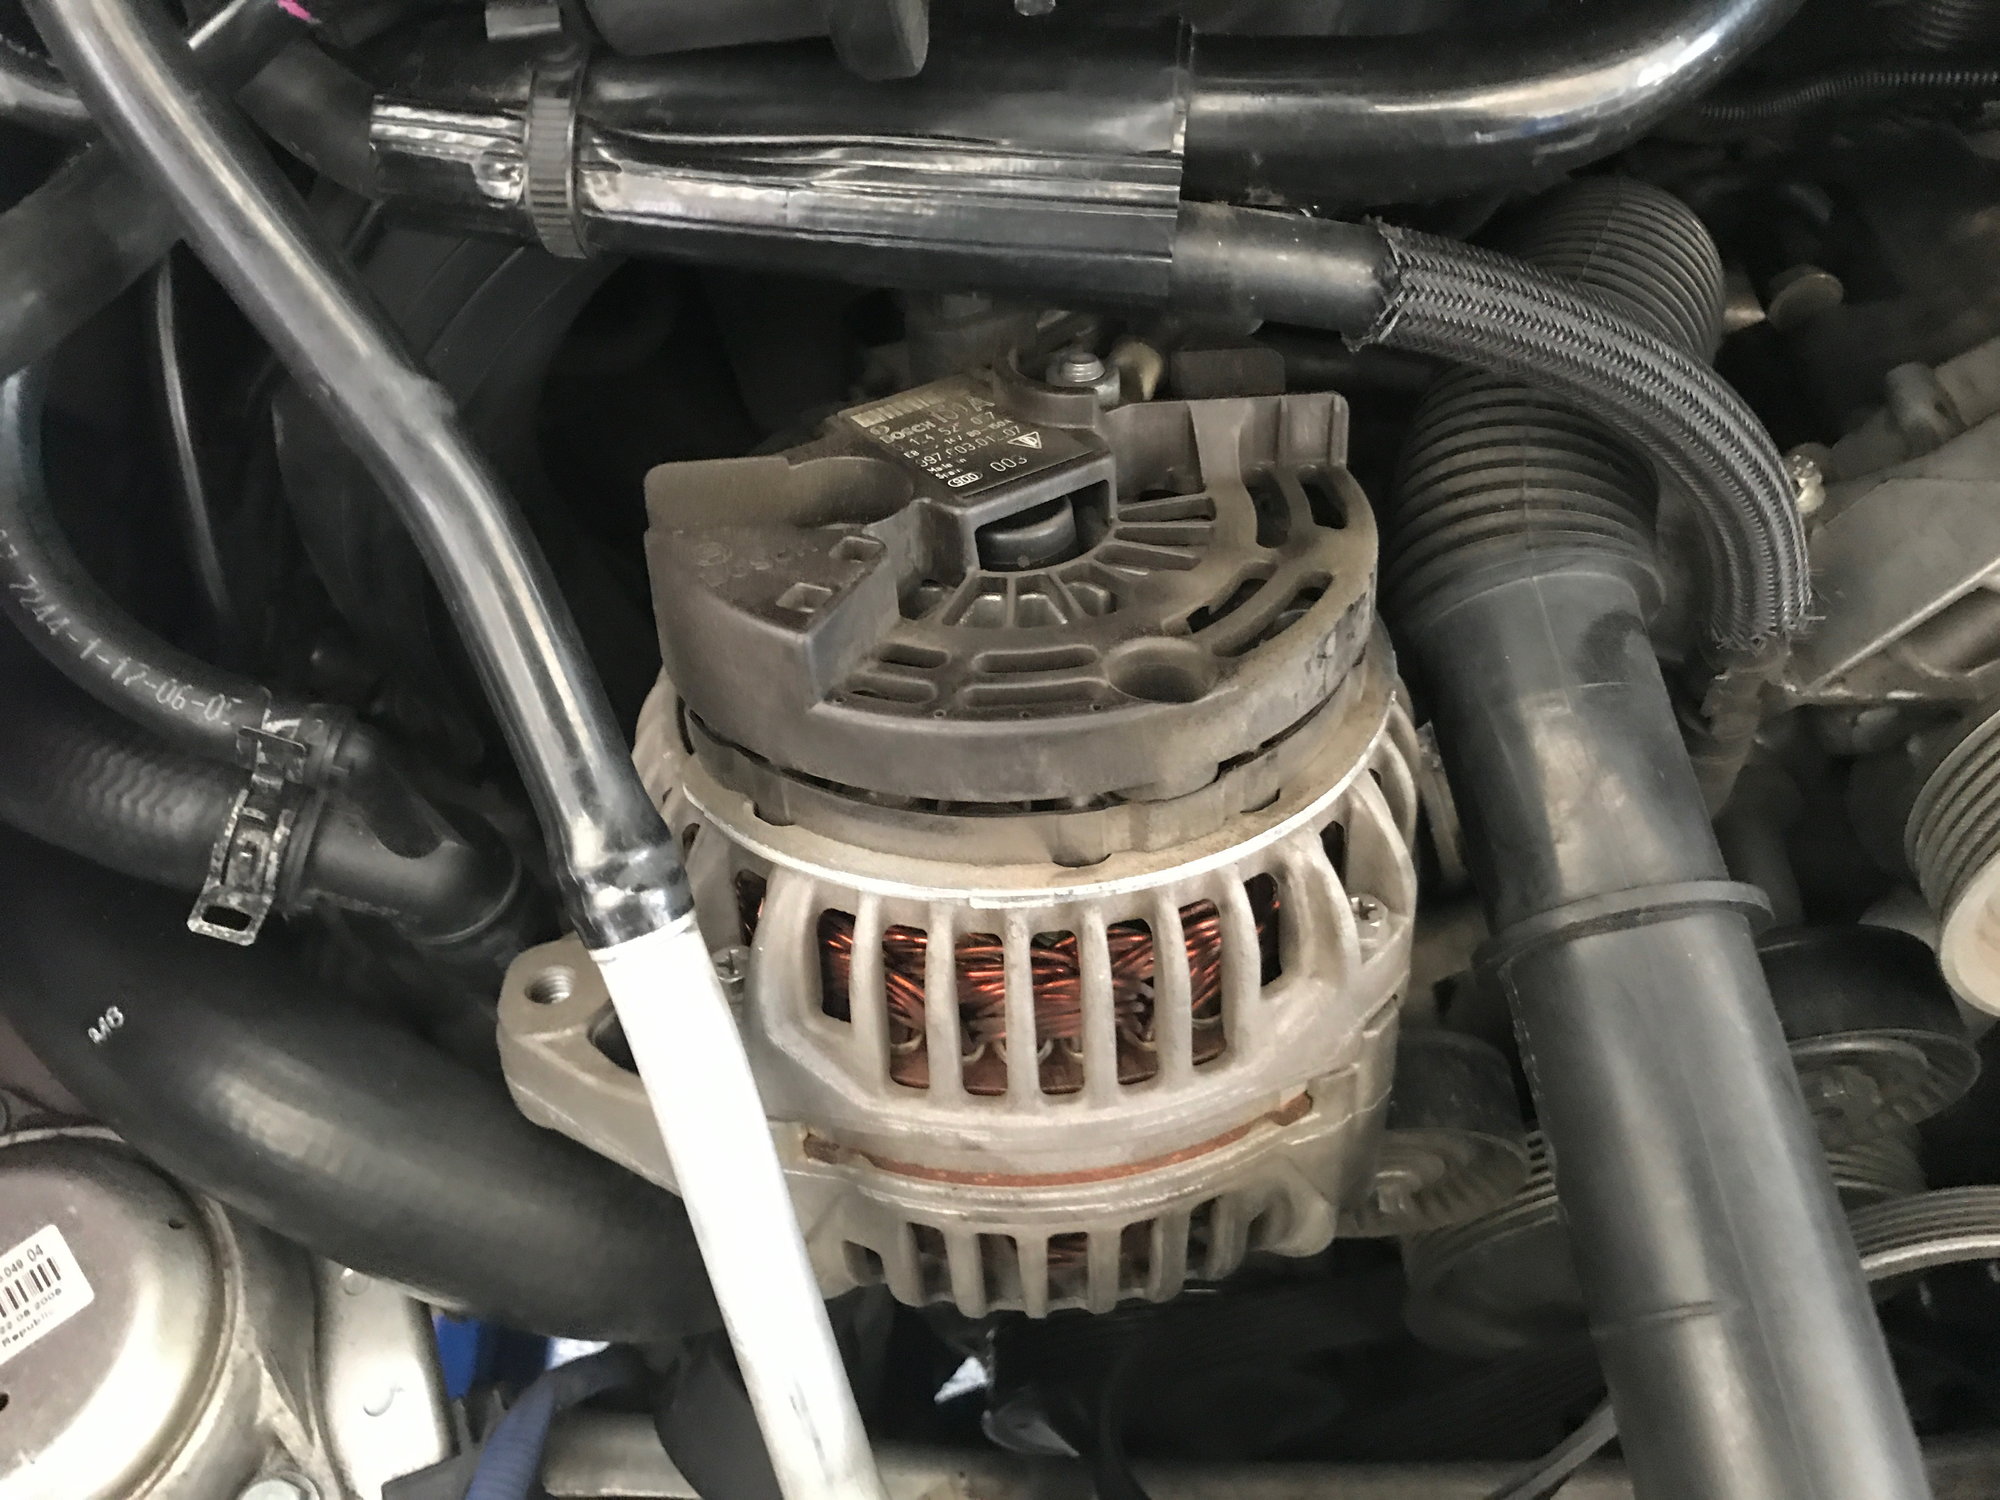
Remove alternator. To assist with removal spray some wd40 on the rear bushing and remove while the engine is still warm. We had no problems following these tips. Remove the pulley, rethread the bolt and a few taps on the bolt will push the bushing back enough to get clearance. Then use a pry bar to gently pry up the rear of the alternator to clean the mount. Unplug the plastic connector and unbolt the cable. 1 down, 2 to go.
Power steering reservoir. The guides I read said you needed to remove this. You don’t. I asked my indy and he said the same. It doesn’t get in the way when running the cable and you can squeeze the ac compressor out with it in place.
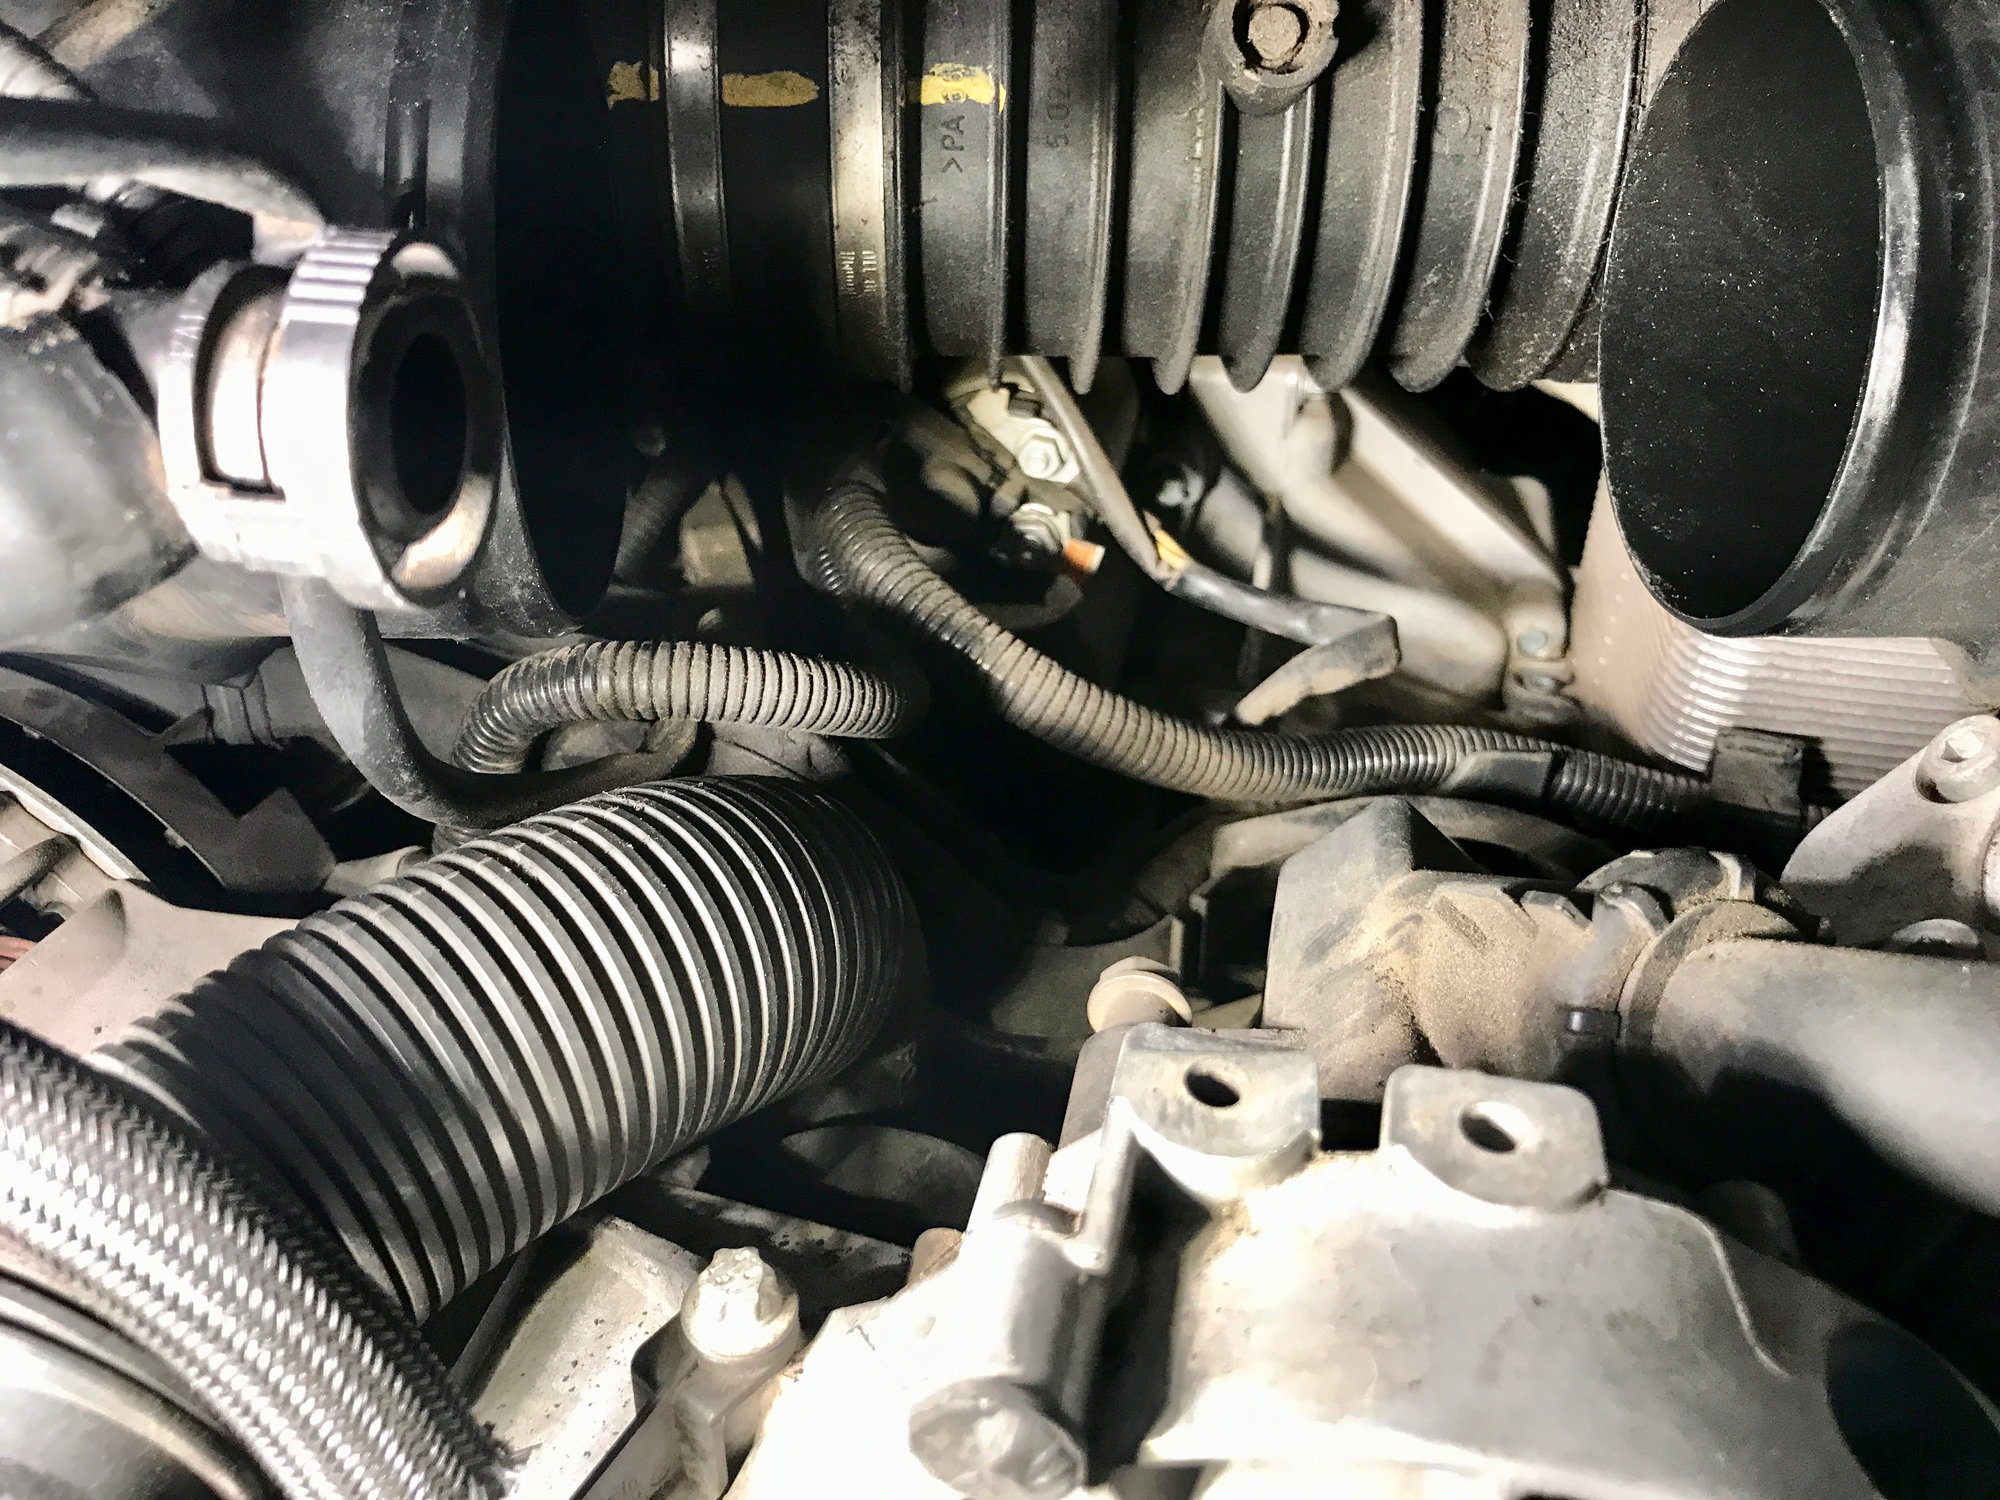
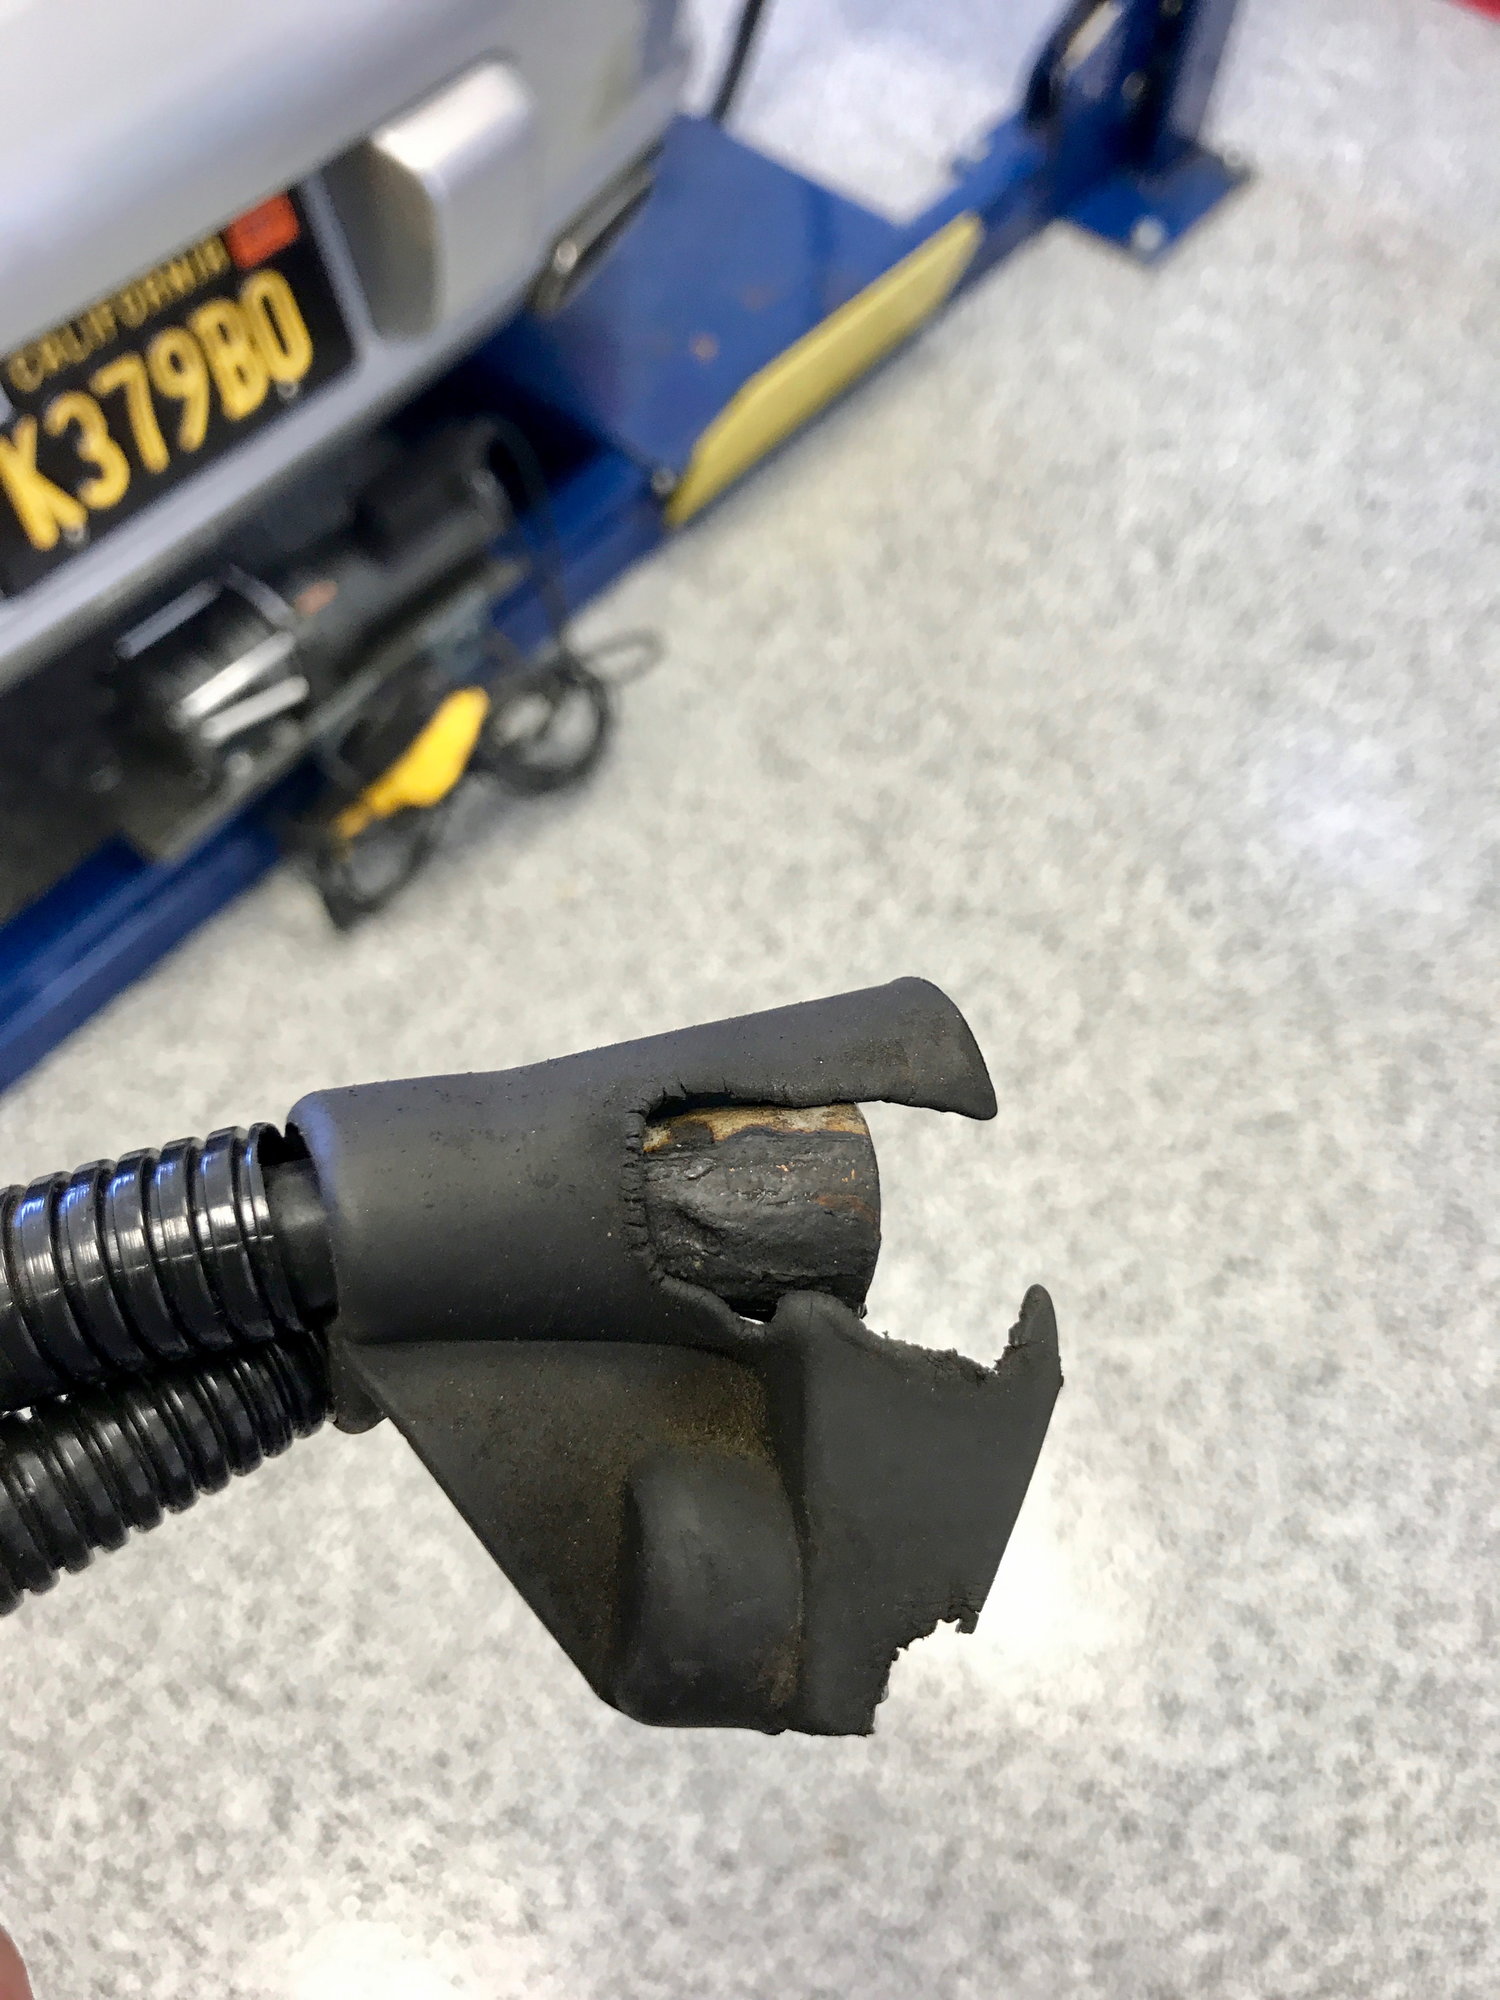
Unbolt cable from starter. Pull back the rubber boot coming from the cable to the starter and unbolt the cable. We were immediately able to see the cable had melted the rubber boot so knew we were on the right track. 2 down, 1 to go.
Remove AC Compressor. We thought we could get around this step as a 3.6 base Carrera doesn’t have the AOS behind the AC compressor. However after 20 minutes of trying to get the rear cable clip off the tang we threw in the towel and removed the compressor to give ourselves more room. It’s simple to remove and gives you the ability to clean some crud out in the process. It only takes 10 minutes to remove and you dont need to undue the compressor lines so it will save you time in the long run. There are three bolts holding it in. The 3rd is behind the compressor and you have to feel for it. To get at it you will will need to feed the ratchet extension between the first intake runner. Once loose just pull it out toward you and lie it on a towel in the engine bay. Be careful not to stress the cable leading to it.
Remove 2 Cable Clips. This is tricky. There are two clips on the cable that slide vertically into tangs to hold the cable in place as it wraps around the oil cooler. The front one is easy to access but the one in the rear along the passenger side of the oil cooler is harder to reach. The tangs are mounted on a plastic cable tray so they flop around making it hard to get pressure on them. The trick that Jeff found was to use a very thin screwdriver and insert it in the side of the of the clip to release the locking mechanism and then pull up to slide it off the tang. Having an extra set of hands to hold the flashlight here helps, particularly for the rear clip.
Do some spring cleaning. We found a bunch of dead leaves and dirt under the ac compressor. We vacuumed that out and did a little bit of cleaning.
Remove the cable from the transmission. Go back under the car and remove the cable from the terminal on the transmission. There is 1 13m bolt for the cable, 2 10mm bolts holding the cable box and 2 10mm bolts holding a cable to the transmission. There is also a little black cable (to what I dont know) that is is clipped into the cable. Remove it from the clip so you dont stress it when removing the cable.
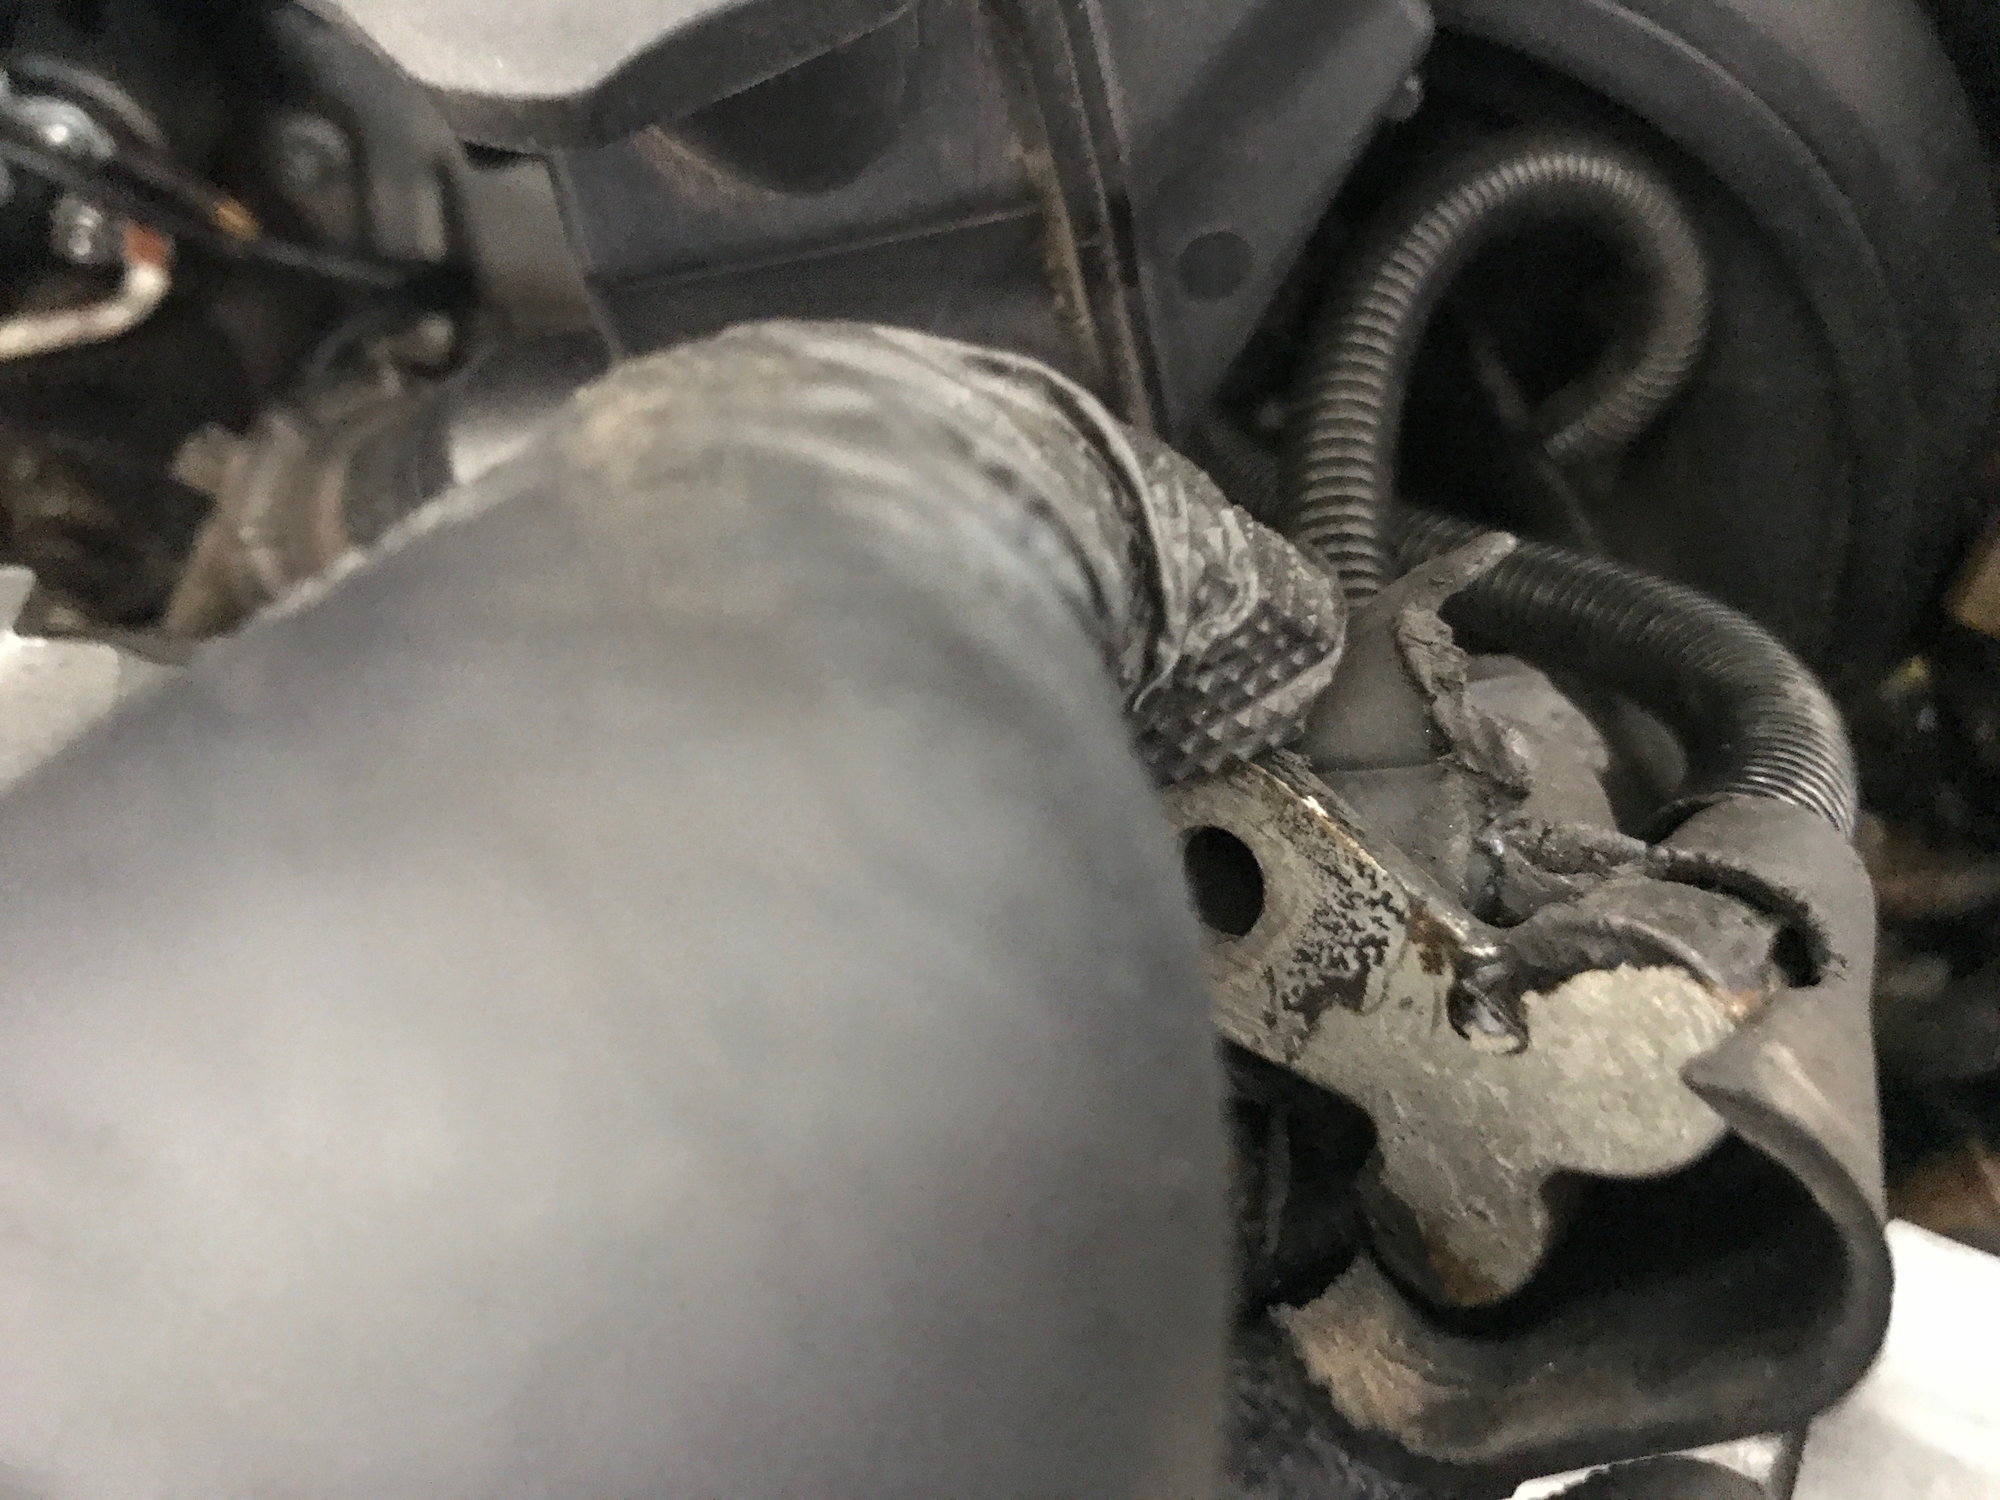
Pull out the cable. Get a partner to guide the cable around the oil cooler as you pull from below. You can see the melted boot in the photo below.
Feed the new cable back in the same way. Push the engine of the cable back up to the gap next to the oil cooler so your partner can grab it from there. The cable fits in a little track next to the oil cooler than has a plastic lip to keep it in place. Make sure its seated in that properly and line up up along the transmission to make sure its positioned correct. We waited until the end to bolt it back on the transmission just to be save, but likely didnt need to.
Insert cable in the 2 clips.
Bolt cable to starter.
Bolt cable to alternator and reattach plug.
Reinstall alternator.
Reinstall AC compressor. Again make sure you dont stress the cable on top of the compressor. We found mine had been misrouted in a previous repair. It was laying on top of the compressor and looked like it could get caught in the pulley. After checking the guides we realized it should be run through the first intake runner to make sure it cant slide down into the pulley.
Reinstall Throttle Body and Plenum. It was a little tricky to get the boots back in the right position on the plenum. Jeff added a little lube to them to make it easier to slide in and out and that did the trick.
Reinstall airbox
Bolt cable to transmission. Bolt the cable box back in place and make sure to clip the little black cable back in its guide.
Reinstall underpanels.
Reattach battery
Start'er up! Mine cranked over instantly with more force than it had since I bought it. It was great to have immediate gratification. I tested it further and can confirm this 100% solves the problem. I took it out on the backroads and got it really hot and started up perfectly. I came out the next morning the battery was full charged (it had been 60% the day before) and started strong. No need to replace the battery or starter.
Go for a rip! Thanks again to Jeff and his C4S doppelganger.
So you only did the one cable? I thought it was actually two cables, the one you did and the other one that goes from the battery to the that one, joined at the bottom of the car.
So you only did the one cable? I thought it was actually two cables, the one you did and the other one that goes from the battery to the that one, joined at the bottom of the car.
Yes there is another cable that goes from the battery to the terminal on the transmission but you dont need to replace that one. Its fine. Its only the crimp on the cable from the transmission to the starter and alternator that has the issue.
I believe you can also follow these same steps to replace the AOS as once the compressor comes out, you can access the AOS under the passenger side intake runner.
Had slow start and leaking battery charge...just did the cable and oreilly 143 starter...starts perfectly.
I am seeing some weird battery quirks though...2 strange events
1. My fin came up upon my first start. It rectified after a restart.
2. My parking lights would not shut off after I removed key. Again a restart fixed the problem.
any ideas?
both likely from your battery being disconnected. It can freak out the ecu and mess with your window controls, heated seat, etc
if it doesn�t sorta itself out take it to your Indy and have them reset the Ecu into delivery mode. Takes 2 seconds and clears any gremlins.
I replaced this cable on my C2S Coupe Tiptronic without the need to drop/remove the engine. There is a spot where the cable attaches to the Tiptronic case on the underside that was a bit difficult but managed to complete.
And you were able to install the plastic tube with the 2 clips back to secure correct? I don’t see how you can get those back in place with the limited amount of space.
Hey guys hoping for some help. Did all of the above however once everything is assembled and I connect the battery I immediately hear something spinning inside the engine compartment. I checked if I missed a cable but everything seems to be back in place. Any suggestions?
Also the starter doesn�t crank over at all�.yikes!


 05-21-2018, 03:22 PM