

Shift Light Wiring in 997.2
 05-01-2018, 02:11 PM
#1
Rennlist Member
Thread Starter
There's a thread for wiring a shift light in the 997.1 Carreras but not the 997.2 Carreras. So thought I'd spread the knowledge after doing this myself on my 997.2 GTS.
You need to tap the ECU wiring which is very different between the two versions of the 997 controlling the M97 and the 9A1 respectively.
You'll need the following:
- 22awg-18awg wire - 30 ft
- Wire tap like this http://a.co/c5B9bXr (you can solder if you're brave but I didn't feel like cutting a coil wire coming from my ECU)
- Precision Picks and Hooks (http://a.co/gyoG6b6)
- Trim tools (http://a.co/4Kh2pbR)
- Common tools (pliers, torx set, screw drivers, sledge hammer, etc)
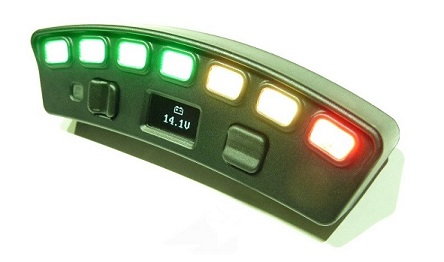
- Your shift light (https://ecliptech.com.au/shift-p2/)
Firstly, get to the ECU.
Though this is for a 997.1 the process is the same for a 997.2 and is described well here:
http://sharkwerks.com/porsche/techni...s-gt2-gt3.html

Here is where you have access to the ECU. No need to unscrew it from the mounting panel.

Disconnect the LARGEST plug. This is the one we'll be working with. The reason running a wire to the 997.2 coil wire is more difficult than on the 997.1 or GT3 is because there are no exposed wires on the 997.2. They are wrapped or covered. So exposing them and identifying them is tricky.

Once the plug is disconnected from the ECU you'll see it's actually in two pieces. One part I didn't get a picture of is a white slider that sits in between the two pieces locking them together via a french cleat. Just use a pick to pull at it and it slides out very easily. Then you'll see tabs holding these two black pieces together as seen on the edge of the plastic harness cover here. There are two to each side. One in the front and one in the back on each side. Four total.

There are very small but you can see the tabs here. Simply insert a pick or small screwdriver into each one to spread them and then the top section slides off. This will take some skill to keep all four tabs separated simultaneously. Use your super skills of patience.

Here is what the harness plug looks like with the cover off. You'd better choose the right wire, but which one?!

Using the WDS Porsche Wire Diagram Program I used the ECU schematic to color code every wire based on the description. This just made it much easier to visualize and work with in the car. While matching the lead number to the wire would be fine I also wanted to be certain the coloring was correct. And SOME of the coil leads had copycat coloring with other functions. It would be bad to mix those up!

I used the lead from PIN 78 which is the coil pulse for Cylinder 4. It had the easiest access and most space for a tap to sit. I doublebacked the wire as a safety means in case it was pulled on for whatever reason. Then I taped it at the base, reinstalled the cover and reinserted the plug to the ECU

I missed a photo here but previous to this I inserted this RPM wire into a sleeve for protection and ran it under the aluminum ECU cover from the passenger side of the car to the driver's side. As you see here I then ran it between the carpet and rear plastic trim. It sits nice and snug in a very convenient channel.

From there, I moved forward and then down the weather stripping until it reached the door sill. You can see the wire just aft of the door sill here.

After removing the inner door sill cover, I ran it under the weather stripping toward the front of the car.

After the door sill, I ran it under the weather stripping again and into the area behind the fuse panel.
Once you've done all this just run the RPM wire to wherever you've mounted your shift light. Mine is on my steering wheel and that's a whole different thread for getting the wire there.
Hope this helps any intrepid DIYers.
Last edited by nwGTS; 05-01-2018 at 02:34 PM.
 05-01-2018, 02:38 PM
#2
Three Wheelin'
Nice write up/documentation! There was so much of that gray woolish insulation. I pulled all of it out and bagged it up in my garage. The rear seat carpet is pretty darn heavy too, for what it is.
05-01-2018, 02:51 PM
#3
Rennlist Member
Thread Starter
That 'woolish' material is not for sound insulation but to protect the PASM wires and harnesses from abrasion on the shock towers, the tub and the Bose sub mounting bracket. I kept that in place since it protects the wiring and also prevents any buzzing or rattling of wires back there.
05-02-2018, 07:08 PM
#4
Yes, it was pretty dense foam. I was hoping I could trim some of the insulation. It would be like debreading a sub sandwich though. I bet using a GT3 rear carpet piece would be lighter.
That 'woolish' material is not for sound insulation but to protect the PASM wires and harnesses from abrasion on the shock towers, the tub and the Bose sub mounting bracket. I kept that in place since it protects the wiring and also prevents any buzzing or rattling of wires back there.
That 'woolish' material is not for sound insulation but to protect the PASM wires and harnesses from abrasion on the shock towers, the tub and the Bose sub mounting bracket. I kept that in place since it protects the wiring and also prevents any buzzing or rattling of wires back there.
