When you click on links to various merchants on this site and make a purchase, this can result in this site earning a commission. Affiliate programs and affiliations include, but are not limited to, the eBay Partner Network.
A red light came up on my dash indicating I should check worn brake pads. A quick look at the front pads and rotors was verification enough. The pads were about a quarter inch thick, and so was the lip that developed on the outer rim of the rotors. The rear pads were thick and the lip there was hardly noticeable. My 2012 997.2 GTS has 65K miles and so I figure it was due for front brakes. Having never done any mechanical work on the car,
I called my local Porsche dealer in Cary, NC and got an estimate. They wanted $2000 total which included pads, rotors, sensors, dampers, bolts, brake flush, labor, and tax. I thought that was a bit high, so I got a few estimates from local mechanics and the best price I got back was $1600. The kicker was that none of the independent shops had the required torque wrench for my center locks. I quickly found out (from looking at suncoastparts.com that I could get the parts for about $1000 and the torque wrench for about $400. Hmm, I thought. I could save around $600 if I bought the torque wrench and did it myself.
After a few helpful youtube videos (some of which were created by members of these forums), I realized it didn't seem so hard, so I decided to do it! The following report summarizes the steps and stumbling blocks I encountered along the way. I learned a lot. Since some of the problems I encountered were not showed in the videos, I figured I'd share this with the community.
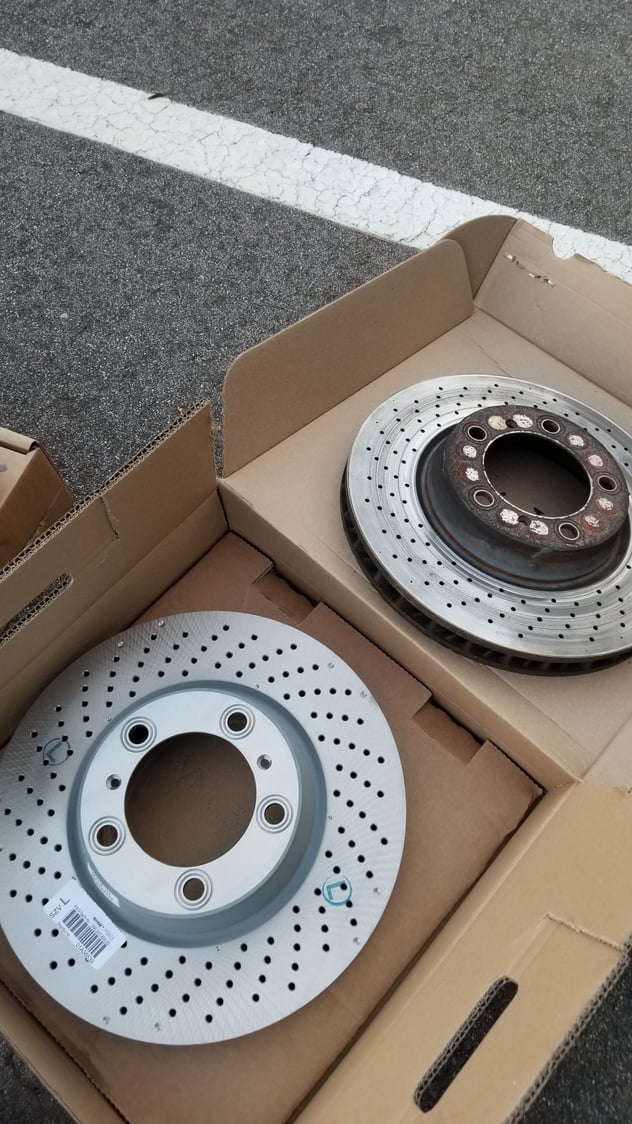
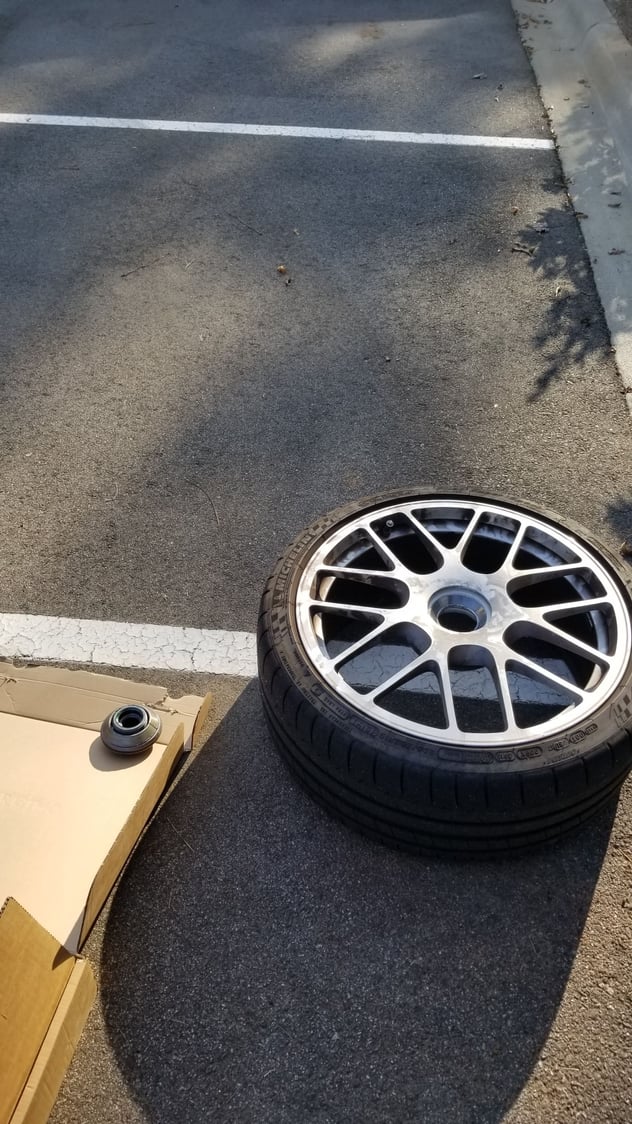
Parts Summary: $650 included: front pads, rotors, caliper bolts, and brake fluid
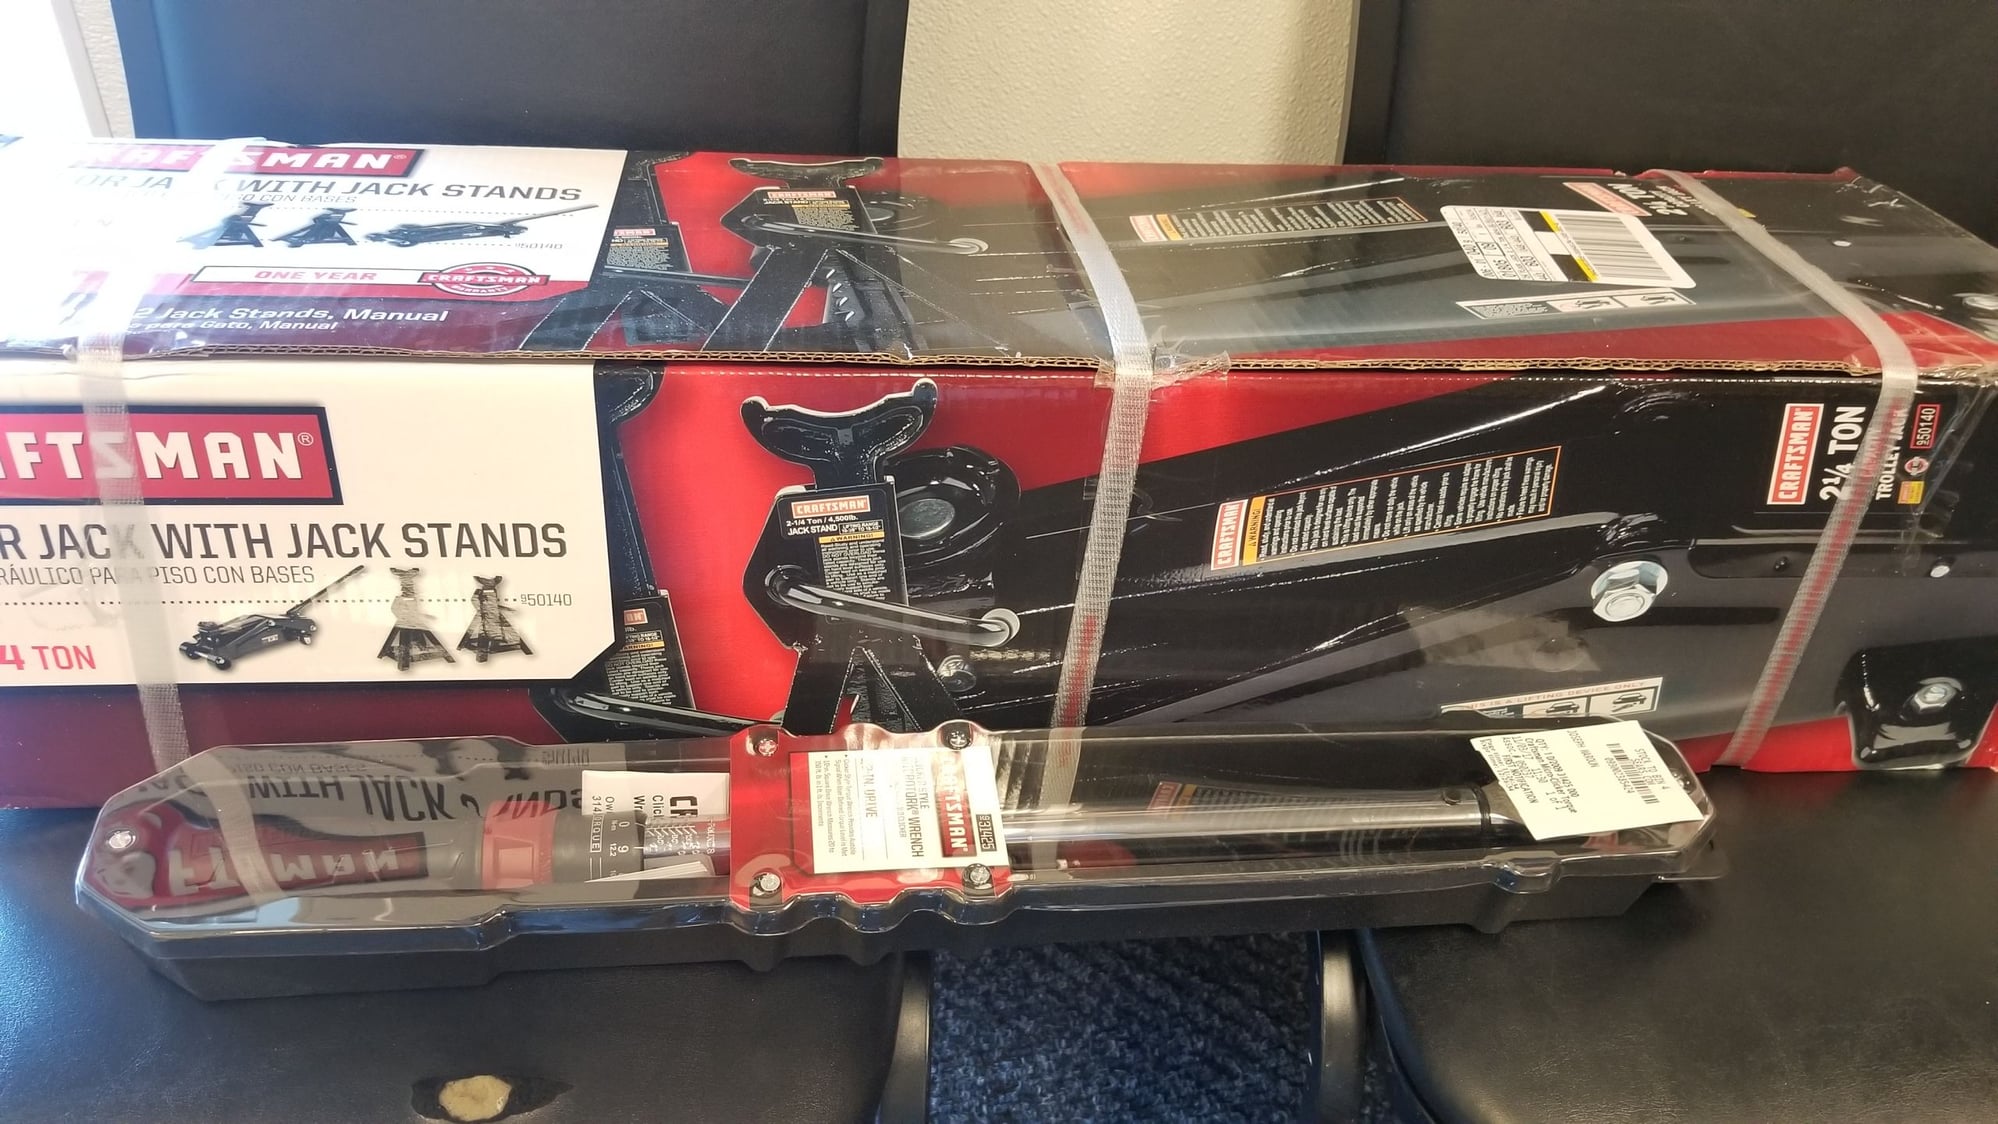
Additional Tool Summary: $500 included: a large torque wrench (capable of 450ft-lbs) for center locks, medium torque wrench (capable of 63ft-lbs) for caliper bolts, C-Clamp, hydraulic lift, 3/8 to 1/2 adaptor.
Total Dollar Cost: $1150, so I saved about $850 and got a $380 torque wrench for the center-locks so the next job will be that much cheaper.
Hope this helps you guys. At very least, might be an interesting read.
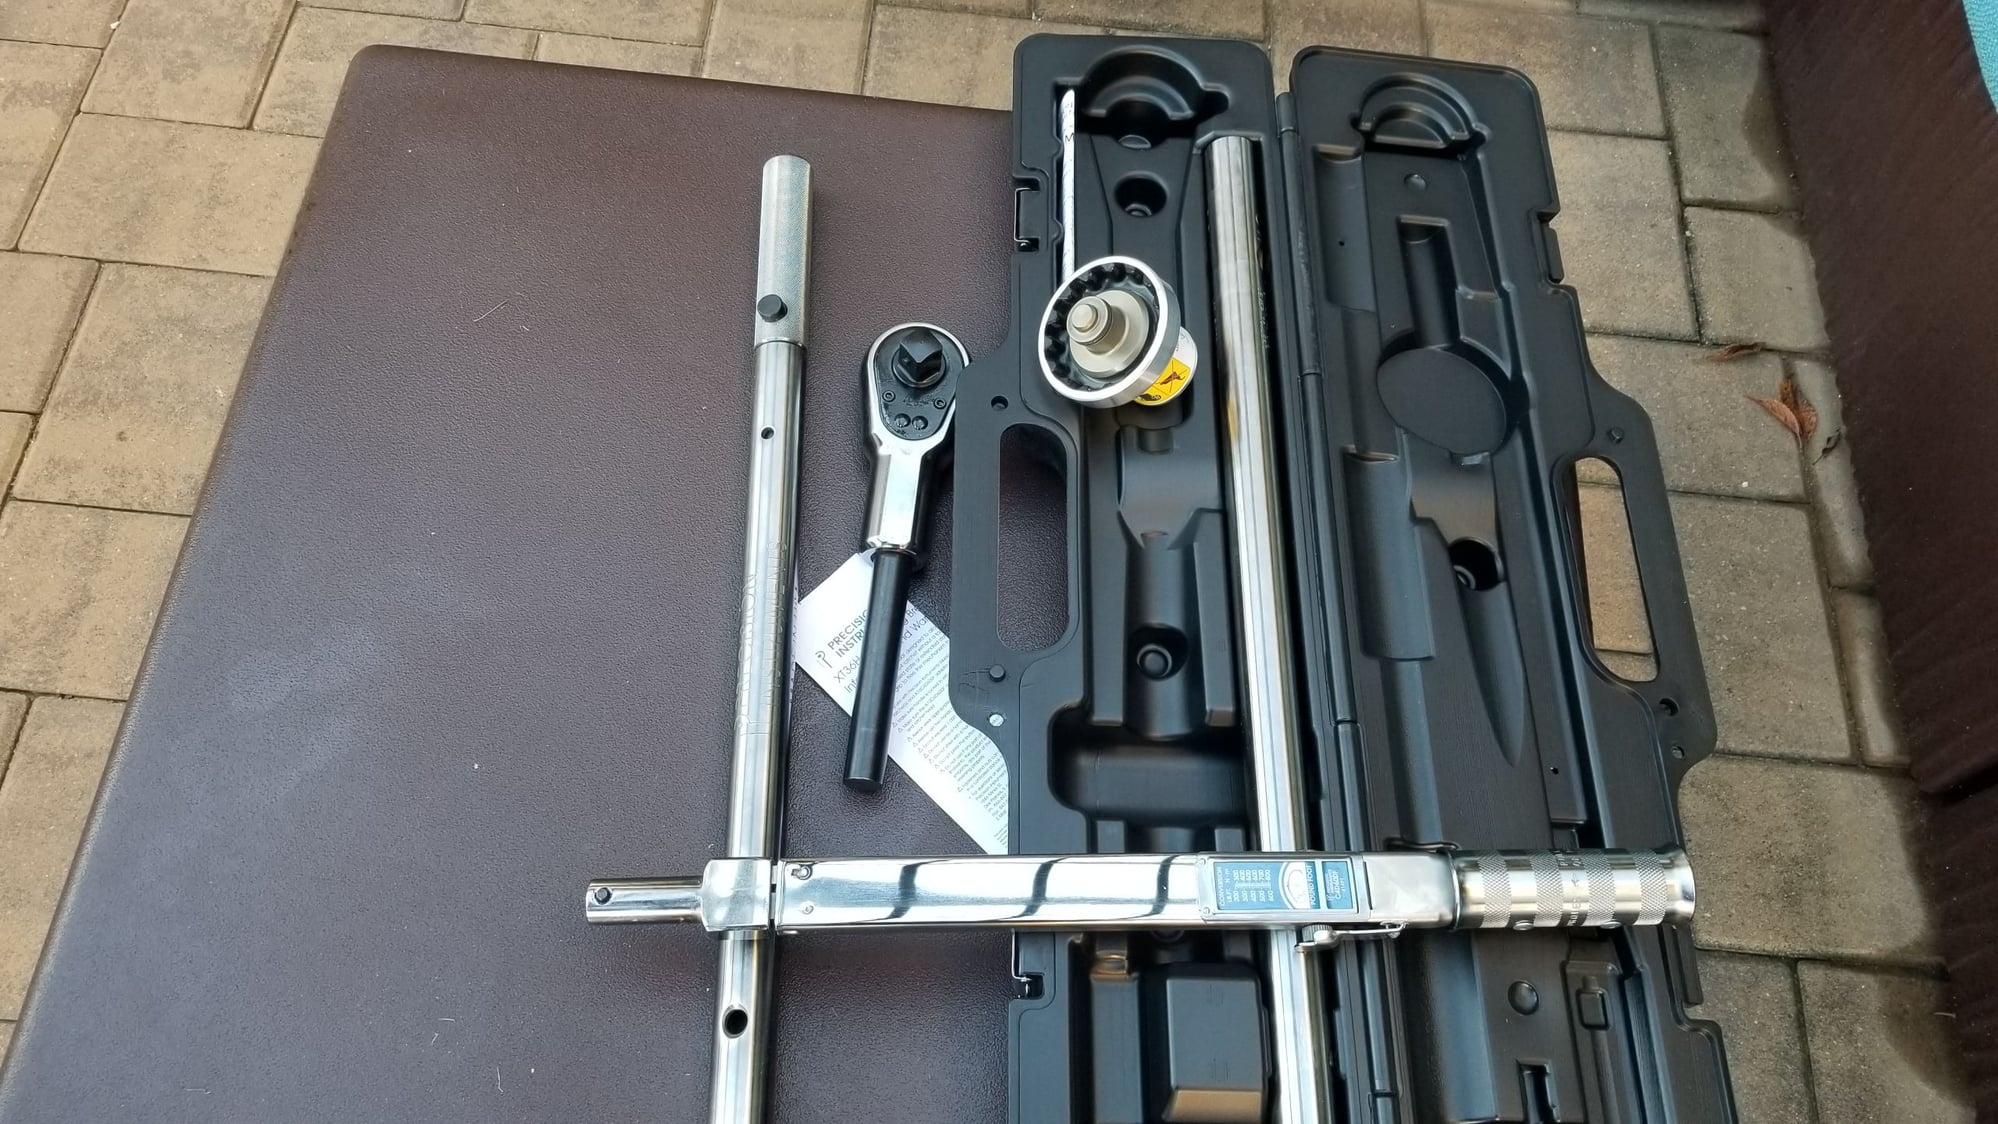
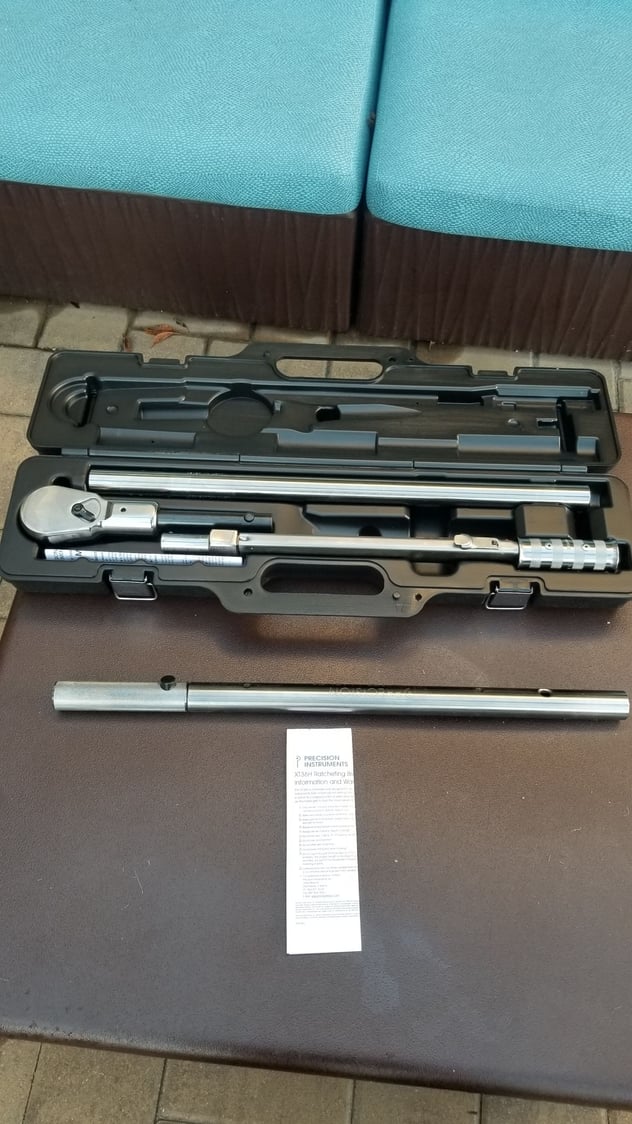
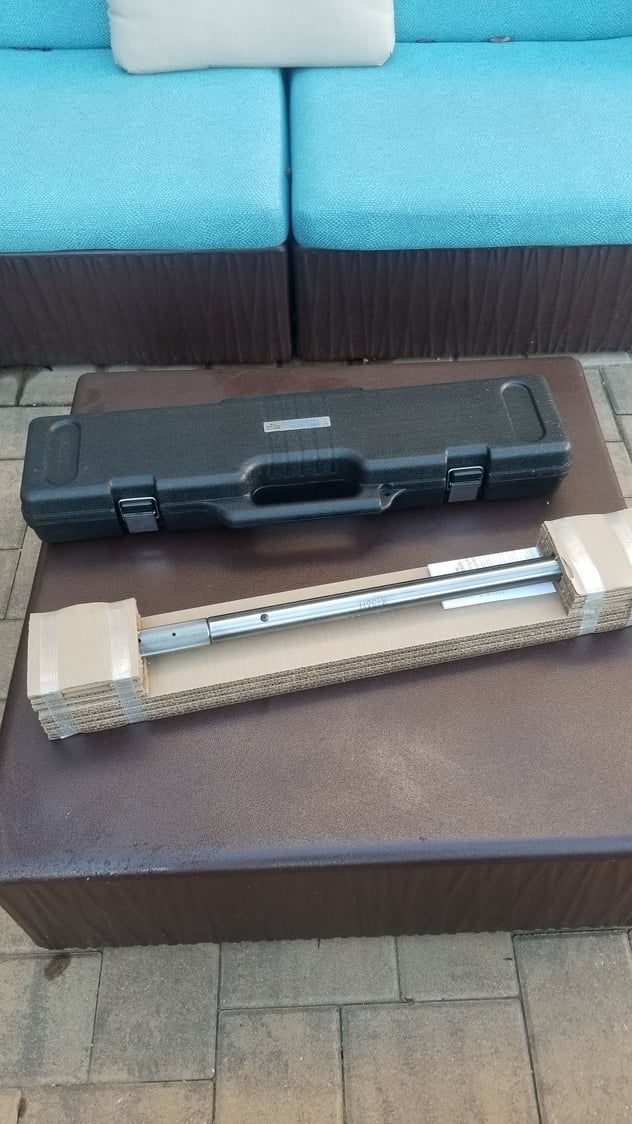
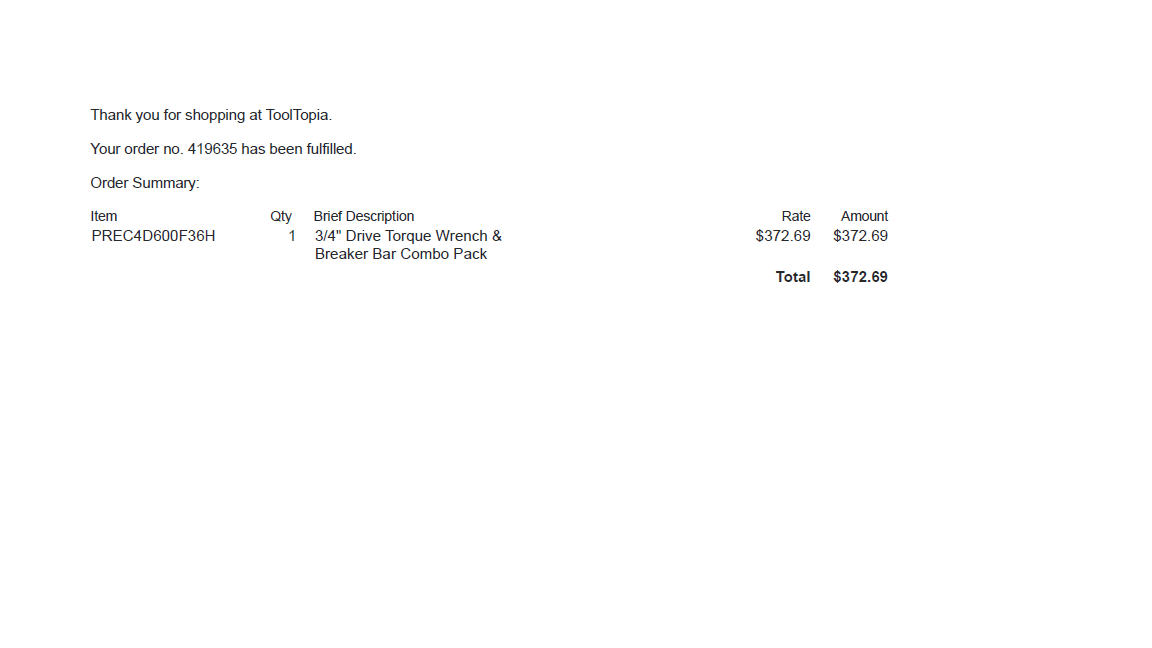
I got this torque wrench from ToolTopia.com. Was shipped in 5 days or so. Nice high quality package.
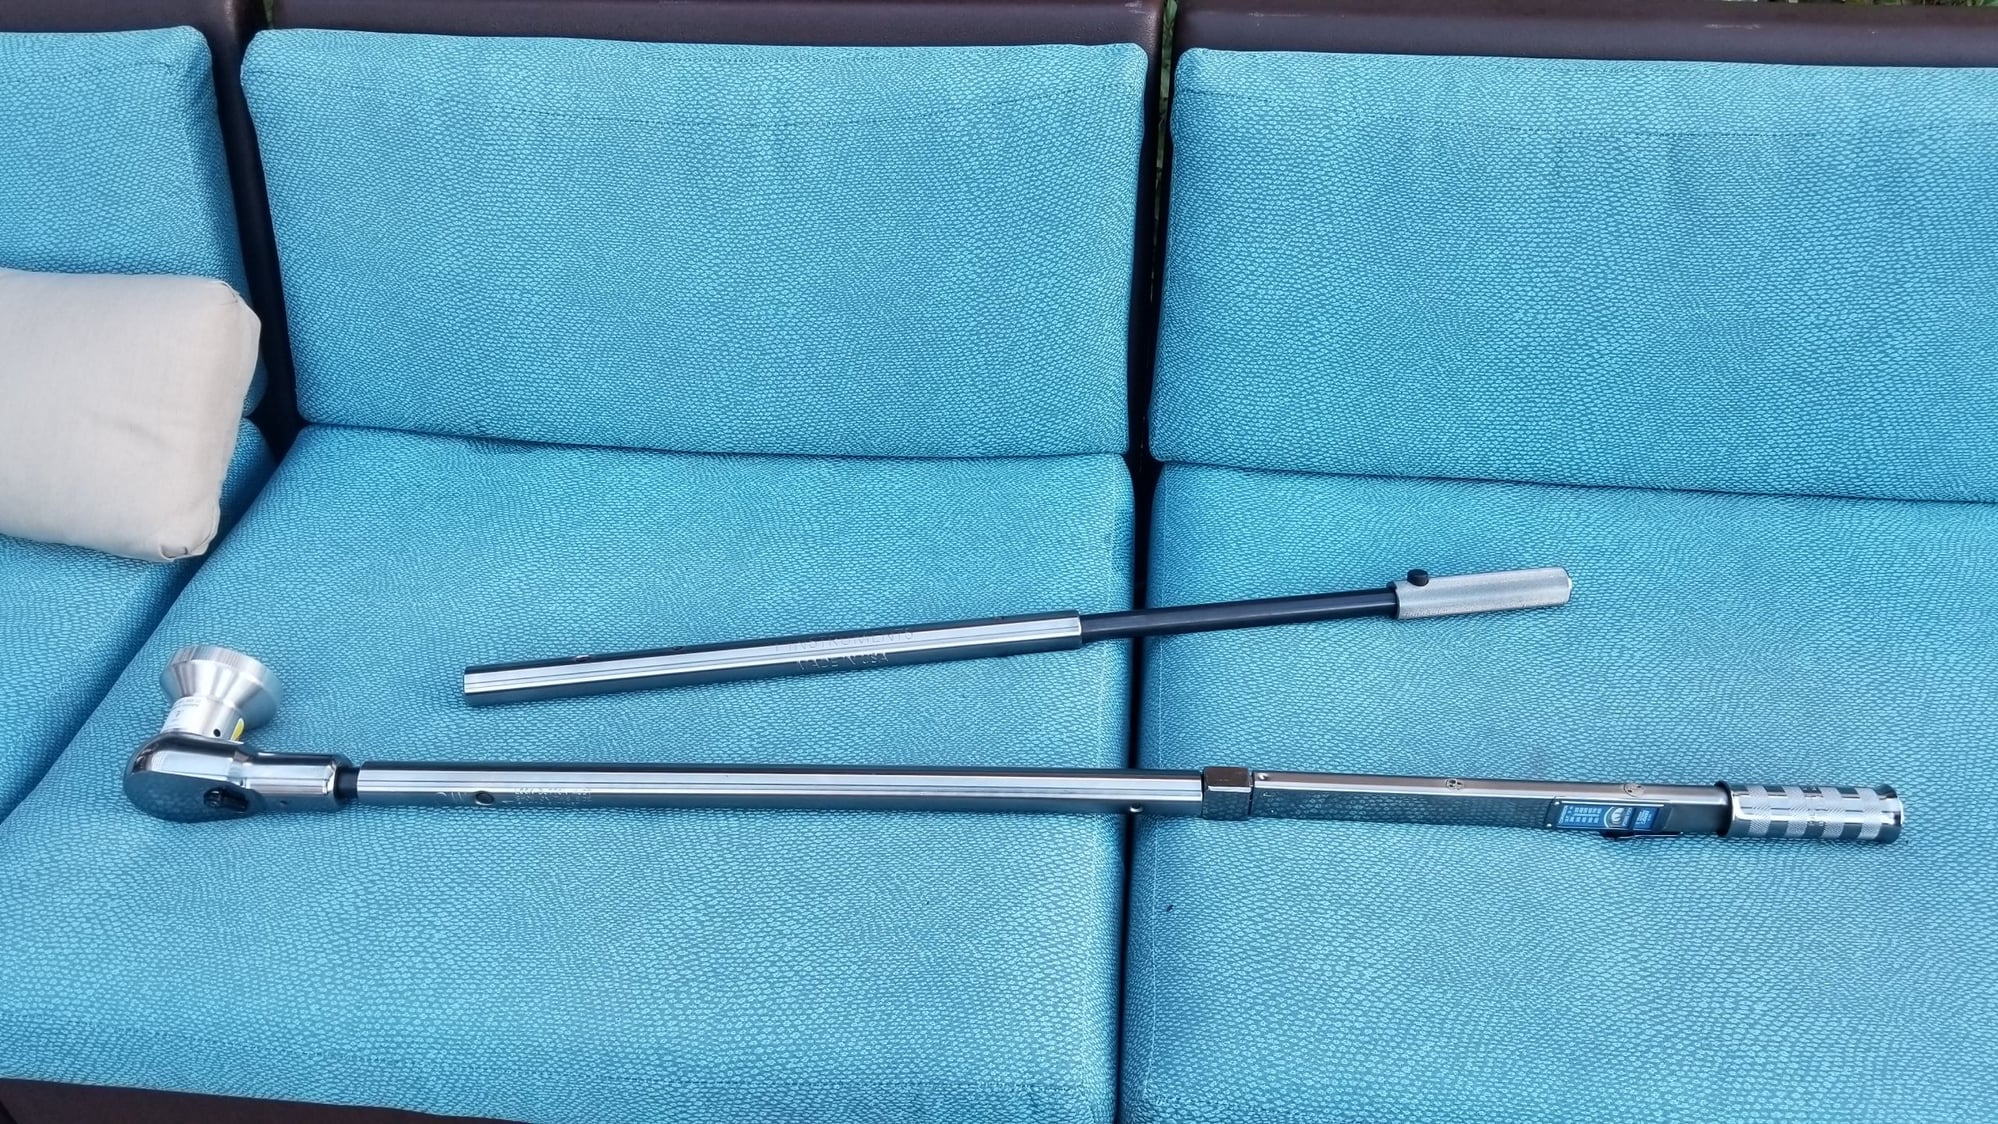
Here you see the breaker bar as well as the torque wrench meter.
It came with a nice case. I just wish the case could also house the breaker bar as well. The breaker bar needs a home too.
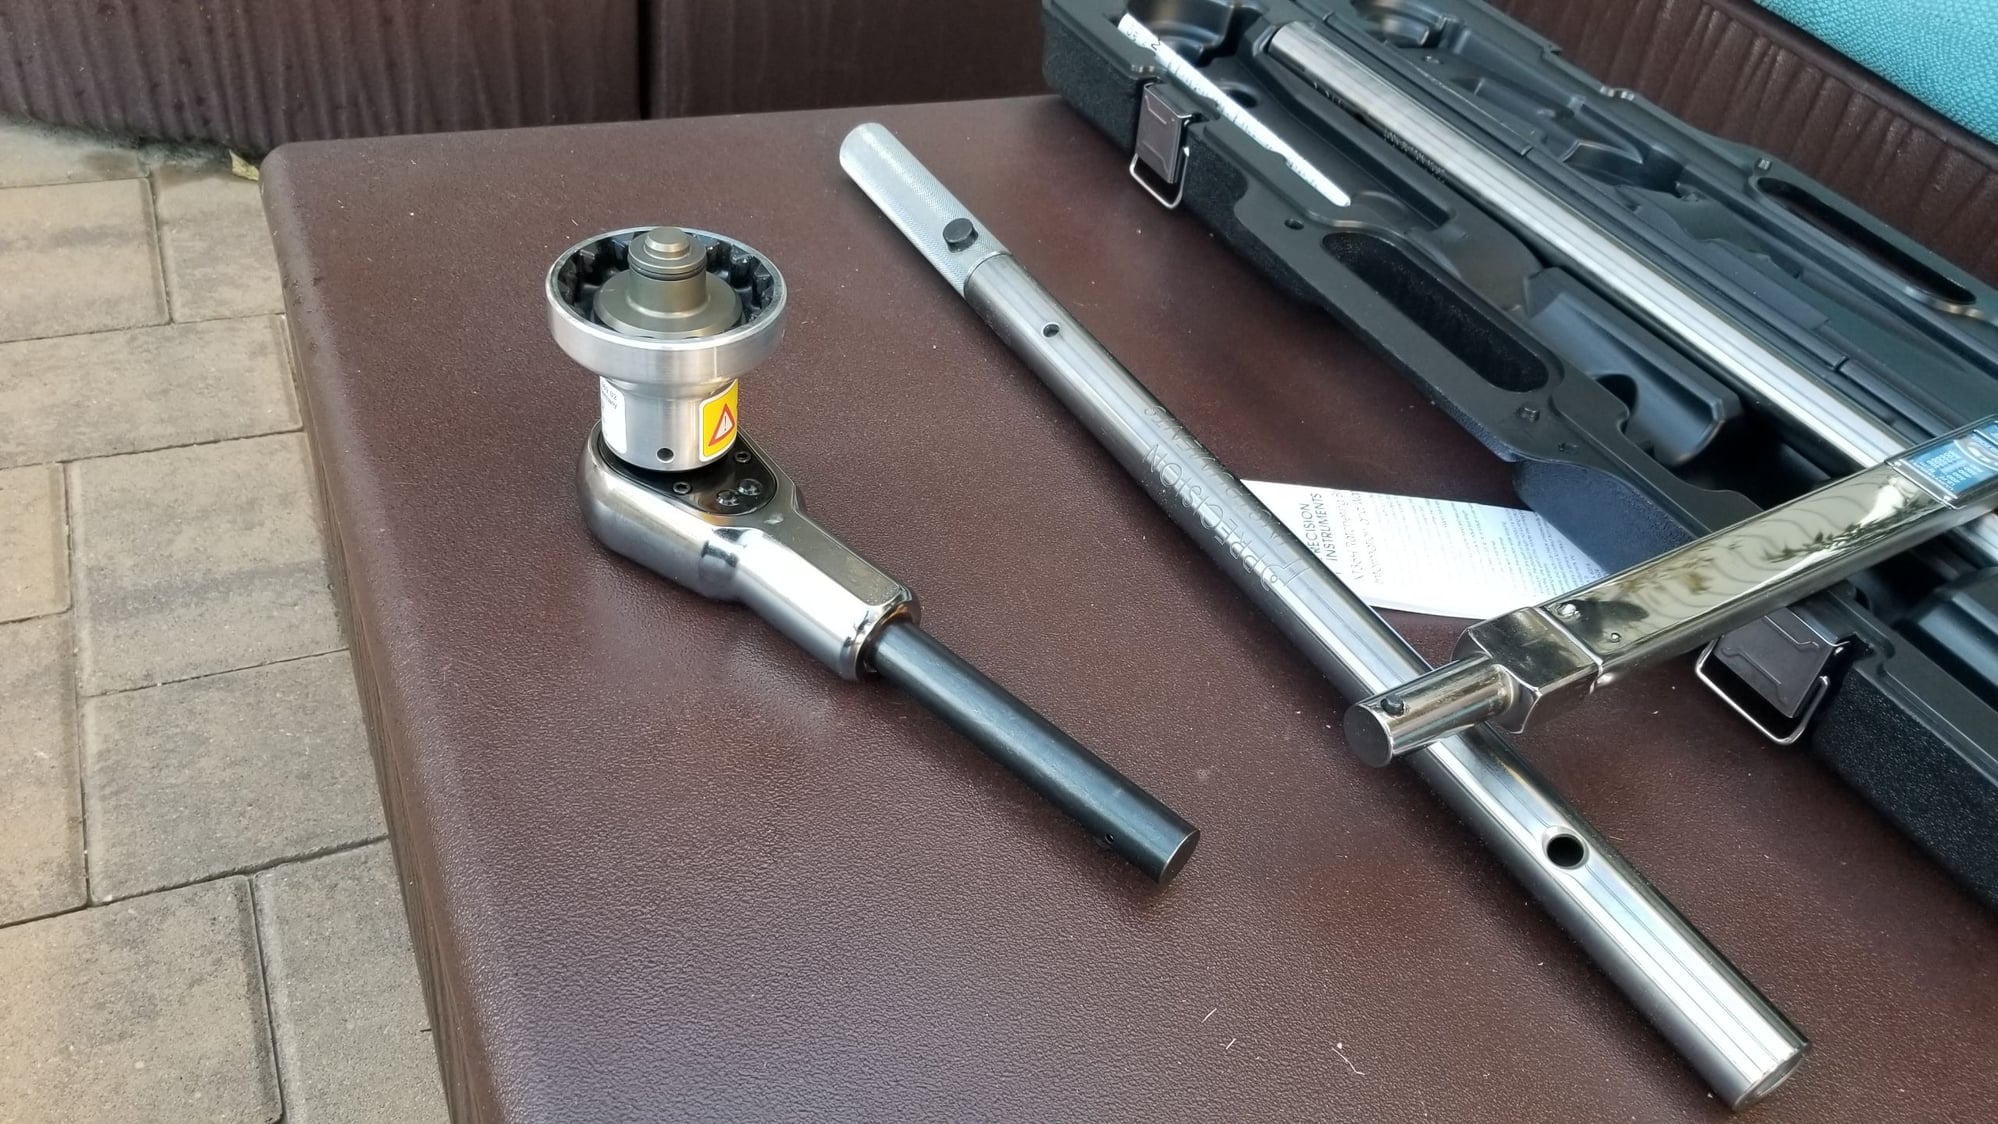
Here you can see the center lock socket which thankfully came with the car. The socket is sold at southcoastparts.com for about $270. A note I'd like to add which wasn't obvious to me is, the small hole on the socket is used to unlock it from the torque wrench head. Just insert a small screw driver in the hole and gently depress the pin which will release the socket from the wrench head.
Here you can see the wrench in all its glory. Wow.
ToolTopia.com had this part shipped to me in about 5 or 6 days. The price was the lowest and the part was new and high quality.
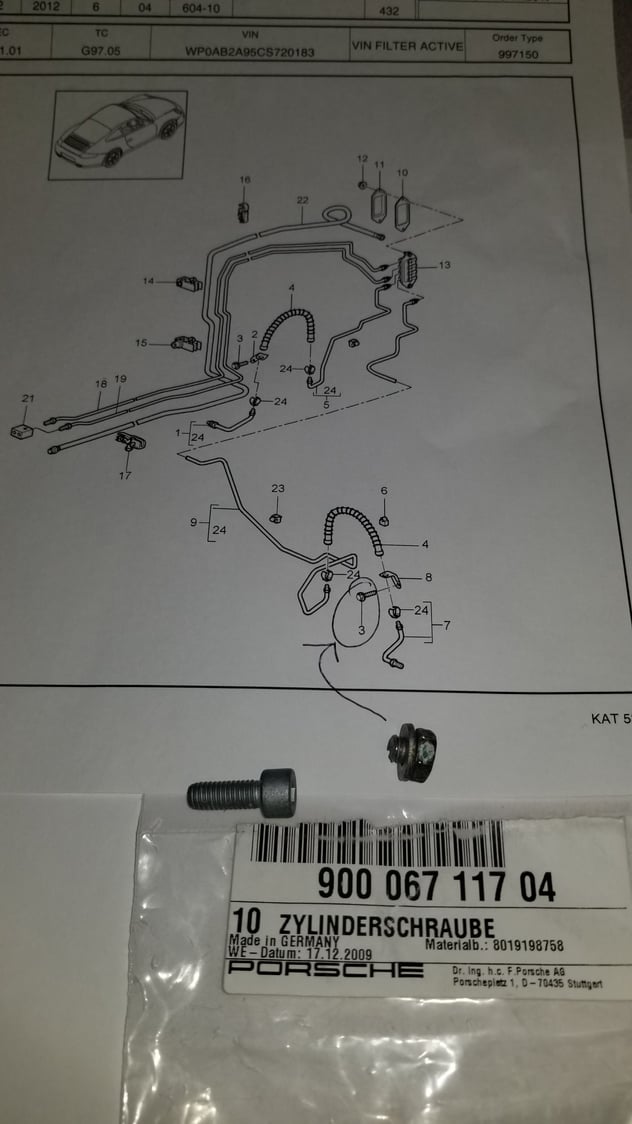
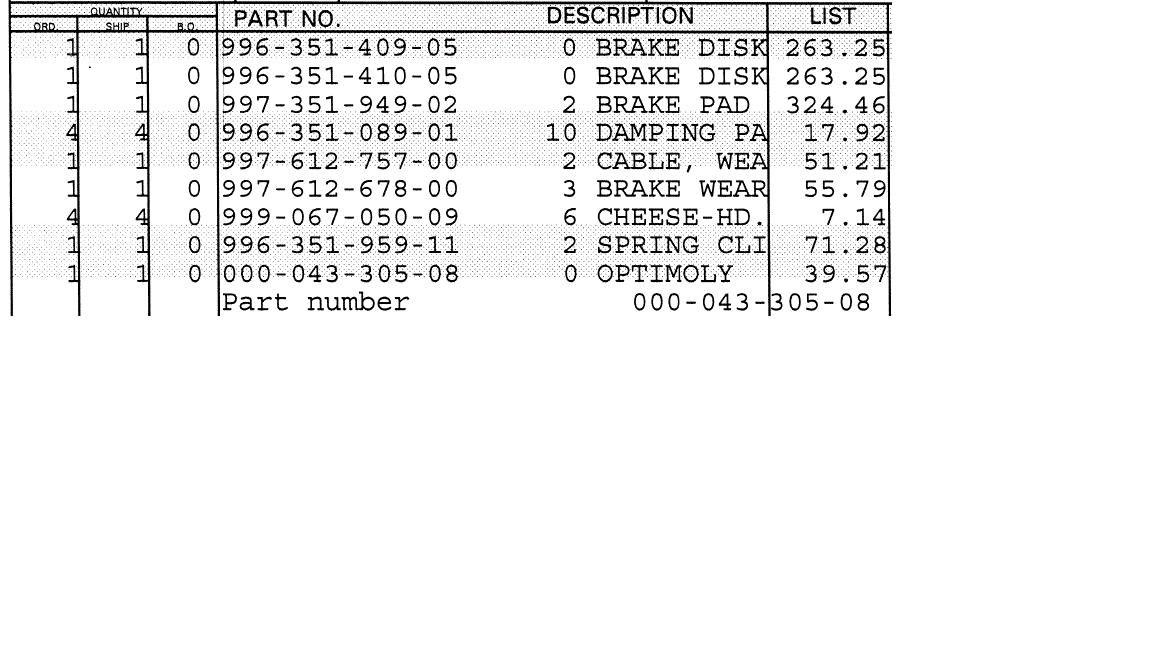
The above parts list I got from my local Porsche dealer. Note: The brake sensors are wrong in the above list. I ended up returning the sensors and the pad dampers. You'll see why I returned the dampers in subsequent slides.
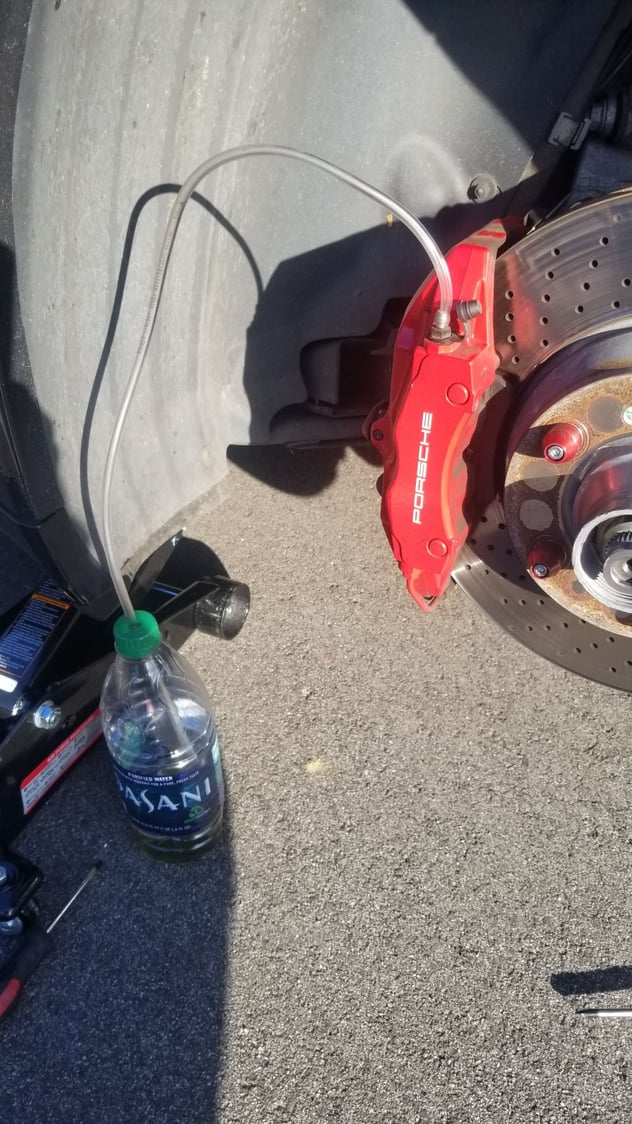
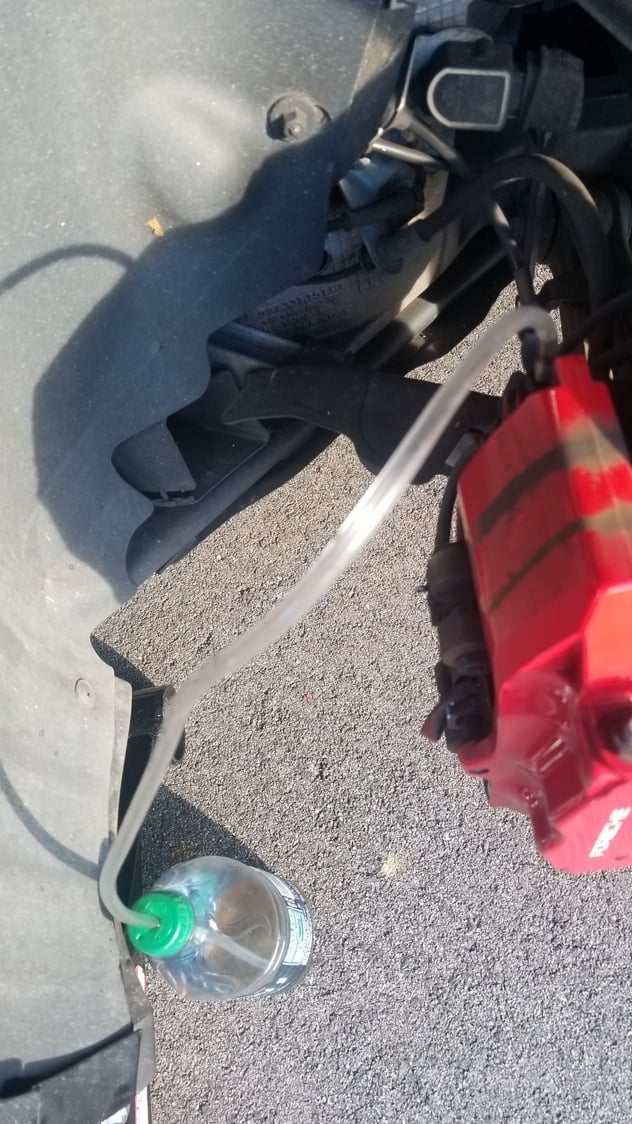
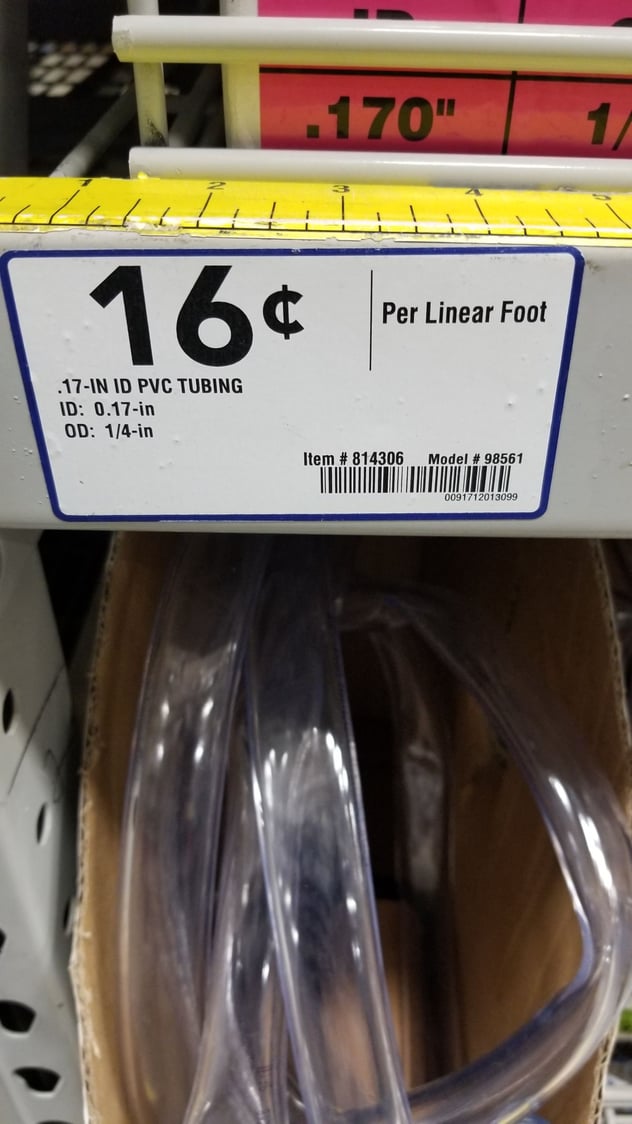
This terrible picture is the hosing I got to bleed the brakes. I believe this was from Lowes. I got about 2 feet at 16 cents a foot for a whopping 32 cents plus tax!
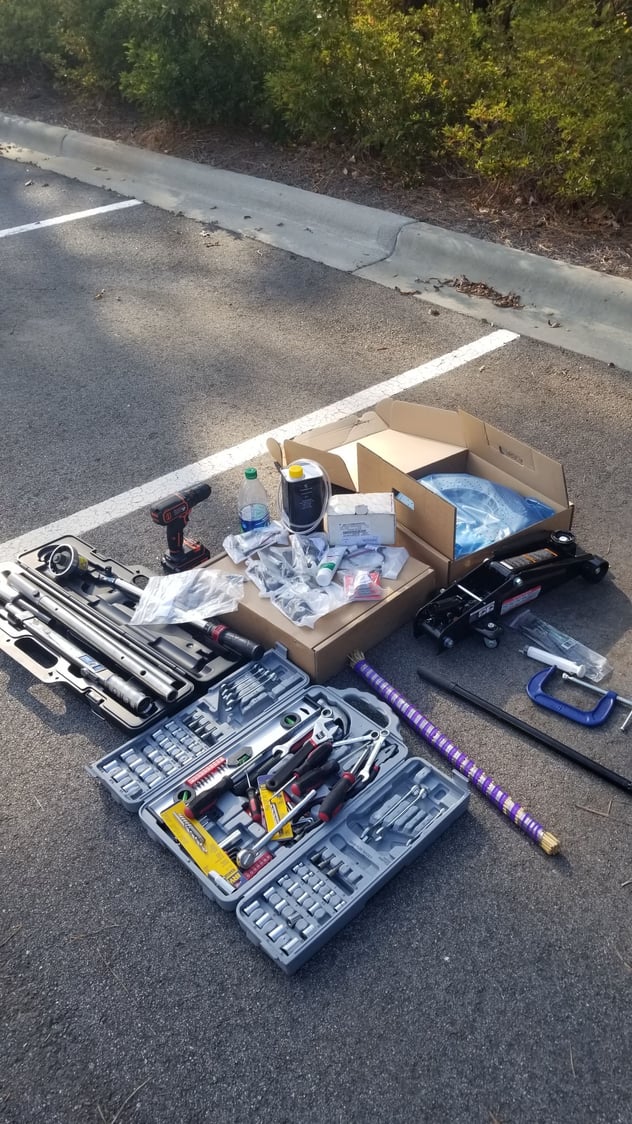
Here you see the assembled tools and parts for the job. Note the second (smaller) torque wrench next to the larger torque wrench. The smaller torque wrench was needed to torque the caliper bolts to the 63ft-lbs spec. I wouldn't skip on this as if the calipers get loose, your safety and others, will be in danger.
Here's the hydraulic jack kit and "smaller" torque wrench I got from Sears for about $50 and $40 respectively.
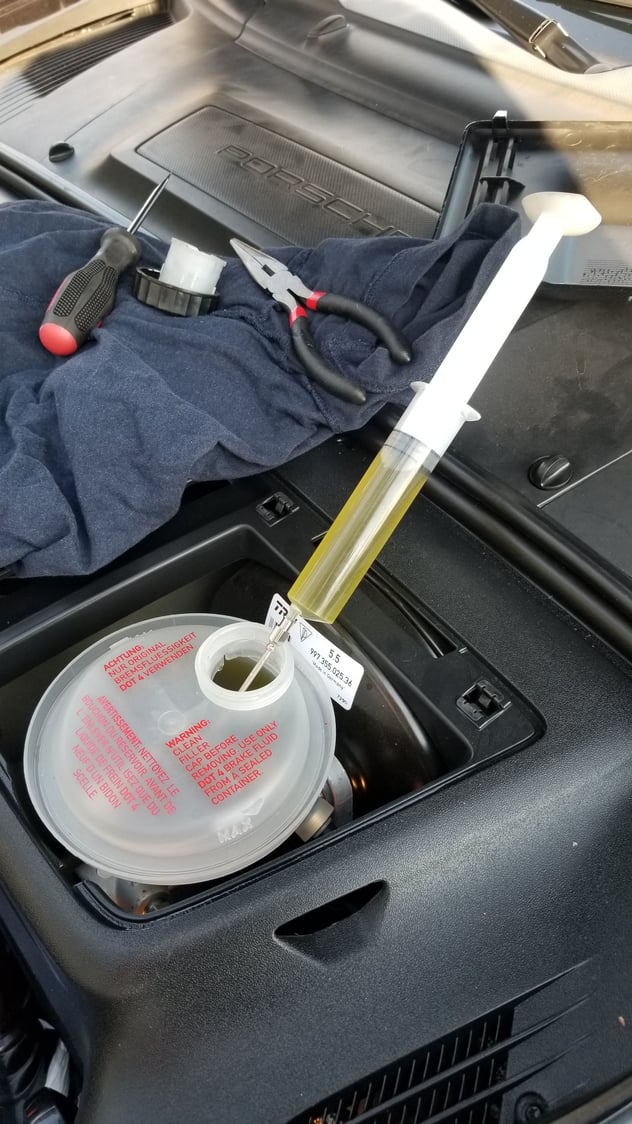
Ok, so the first step is to take some brake fluid out of the brake fluid master cylinder reservoir. This is to avoid slippage when calipers pistons are depressed during pad change steps.
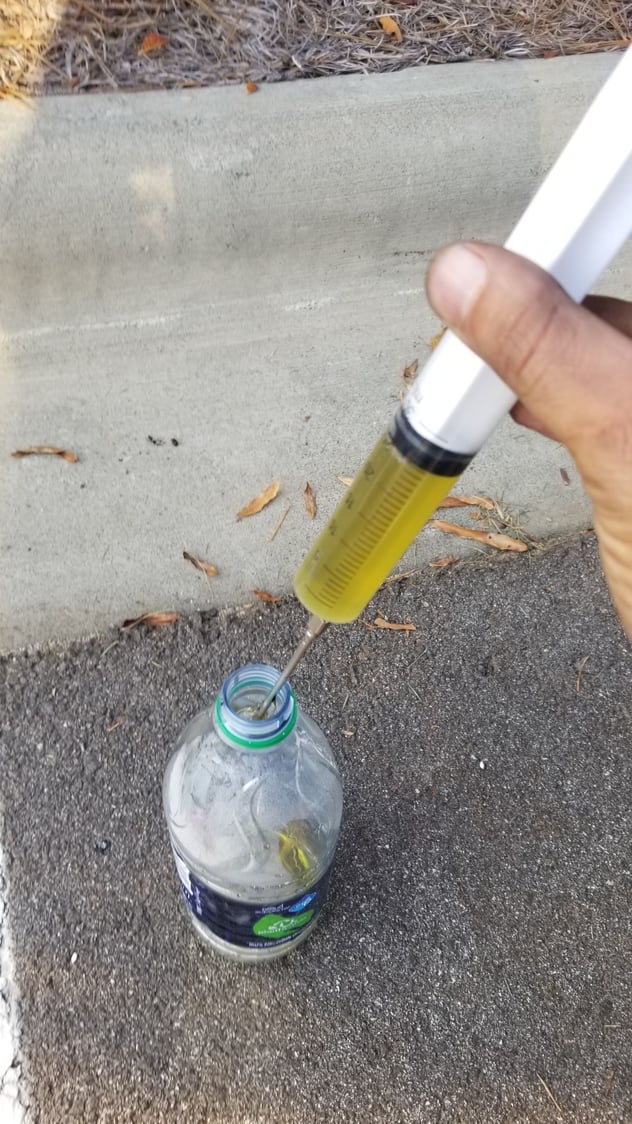
I put old brake fluid into a water bottle. This will be used later when I'm bleeding the brake fluid.
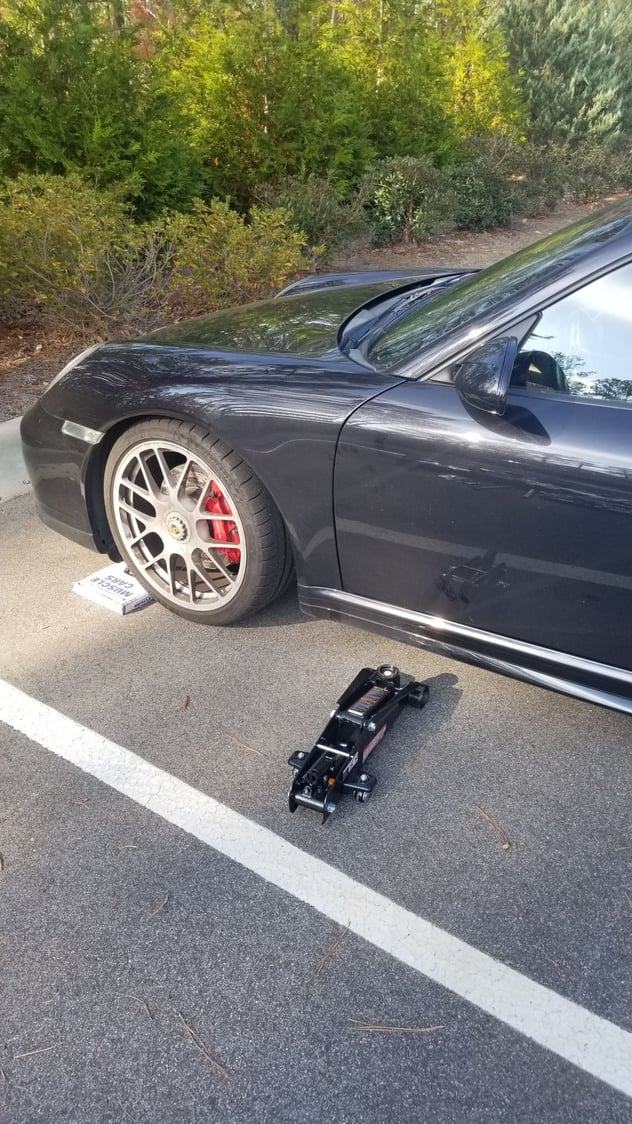
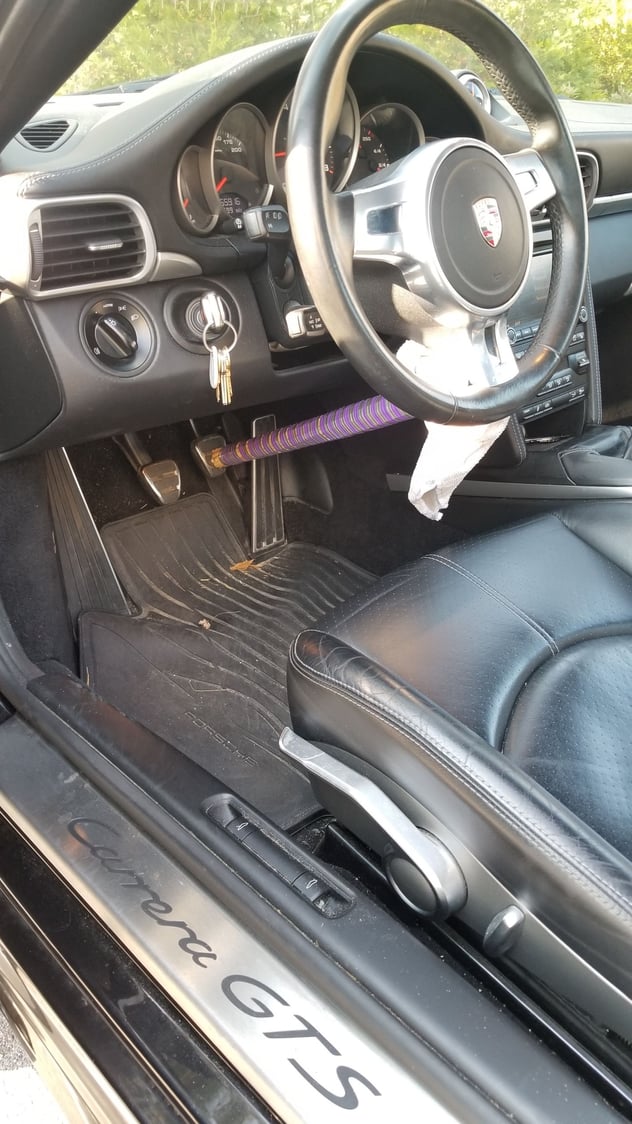
First problem I encountered was.. hydraulic jack wouldn't fit under the car. In the spur of the moment I got a thick book that seemed it could serve as a step.
Above is my car's build sheet. Option P17 combined with 640 lowers the car considerably.
Had to sacrifice a thick Muscle Car book. It was a gift. Oh well, it was put to good use.
Problem #2. Trying to break the center lock was not possible without asserting the brakes. The wheels would just slip and I wasn't getting no where with getting the wheel lock loose. I suppose I could have loosened the wheel lock while it was on the concrete first..Then drove over the slippery book to lift the wheel. I didn't think of that at the time, and since I was alone, I jerry rigged a brake pedal depressor. See next picture.
I had to sacrifice a bamboo broom. While car was on, to get power assisted brakes, and while wheel in the air using hydraulic jack; I had the broom stick "securely" jammed between steering wheel and brake pedal. I wouldn't recommend this. A helper to step on the brakes is best to be honest. Or.. you could purchase/build a real brake pedal depressor. There is a cool youtube video series showing how to make one. No local stores had a brake pedal depressor and I was not willing to wait to build one or to get it shipped. While this does work for breaking the center lock loose and tightening it..it does Not work to get sufficient torque (450 ft-lb) on the center lock when putting the wheel on because the wheel moves and the stick falls out of place. In the meantime, I torqued as much as possible in air..then a bit more while on the ground. I got the wheels torqued to spec the very next day with the help of a friend at work.
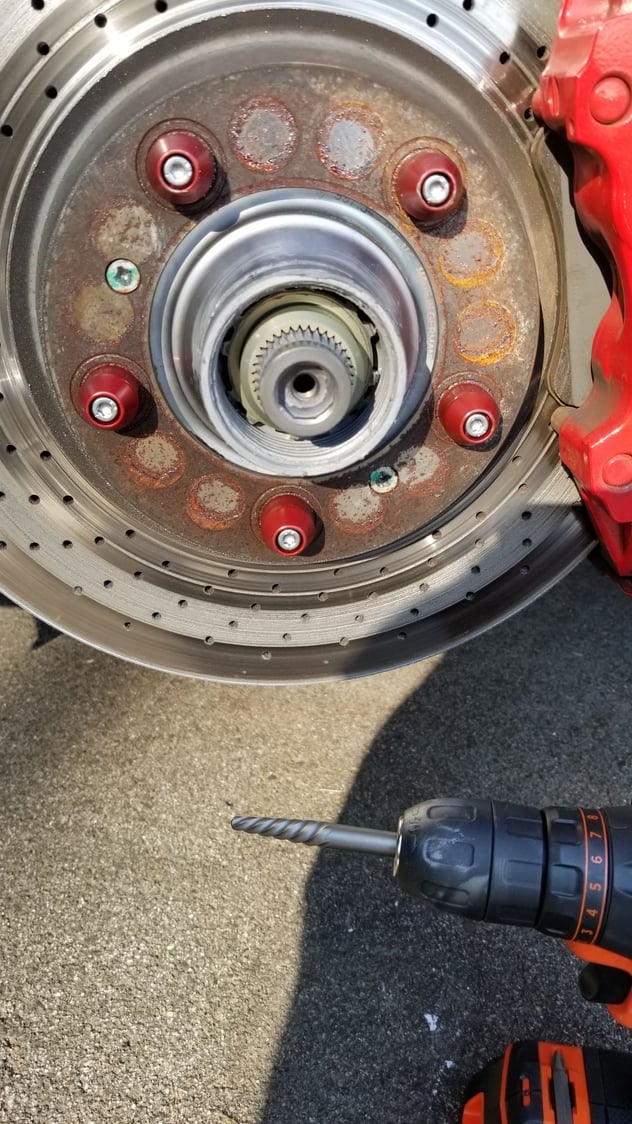
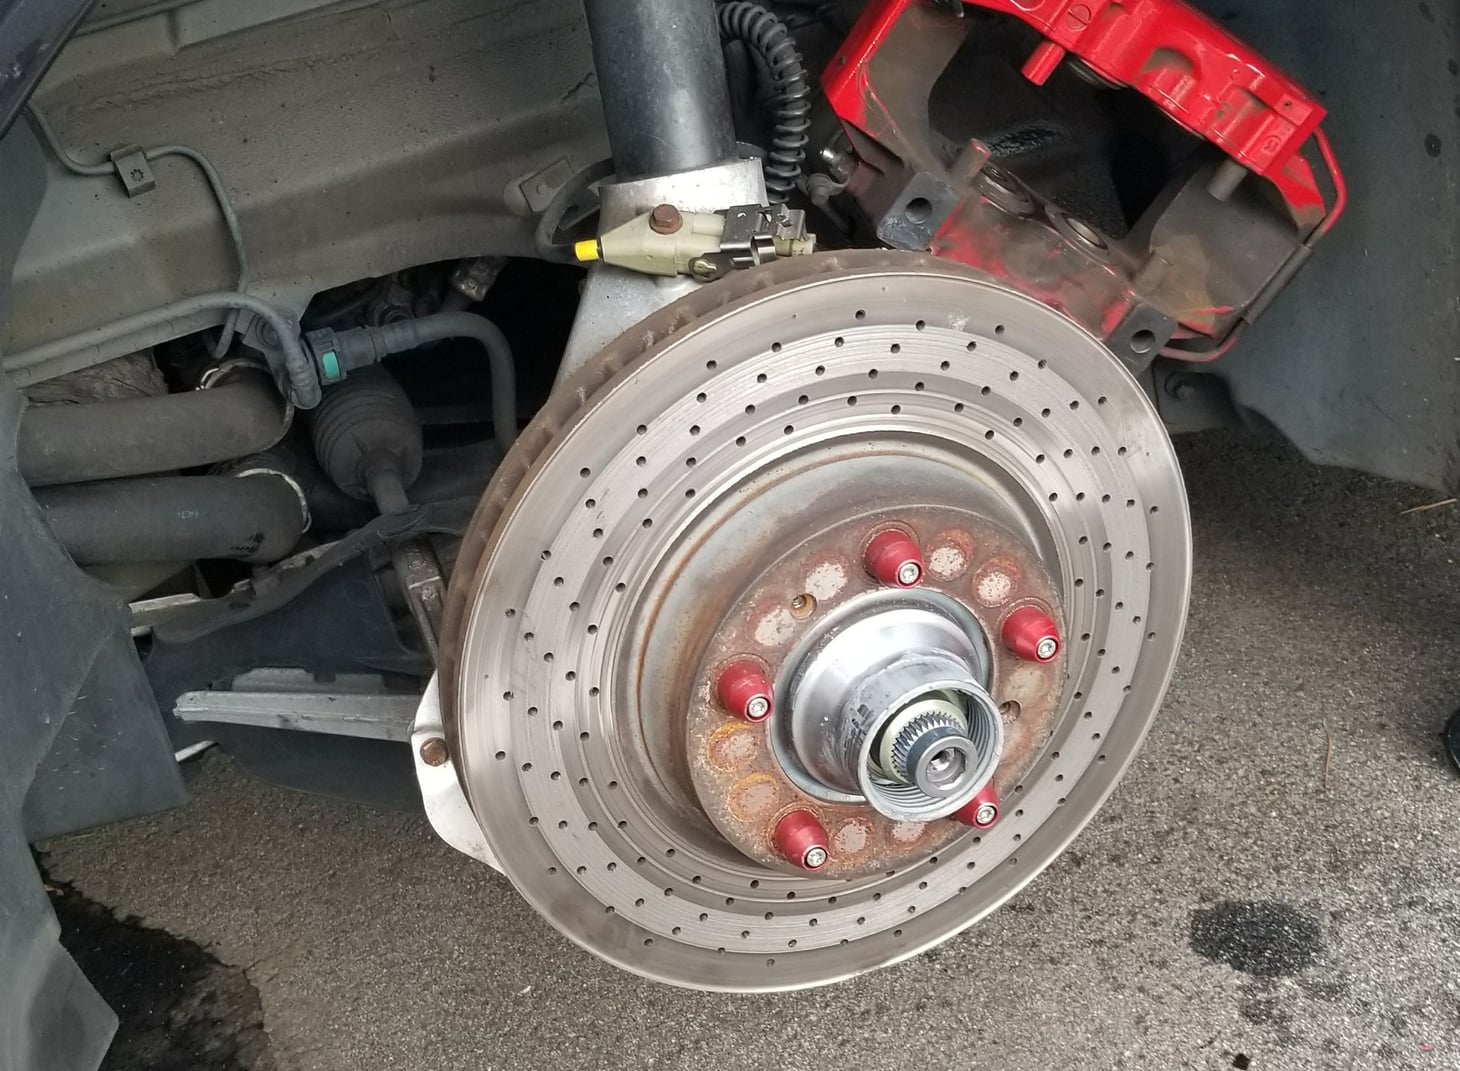
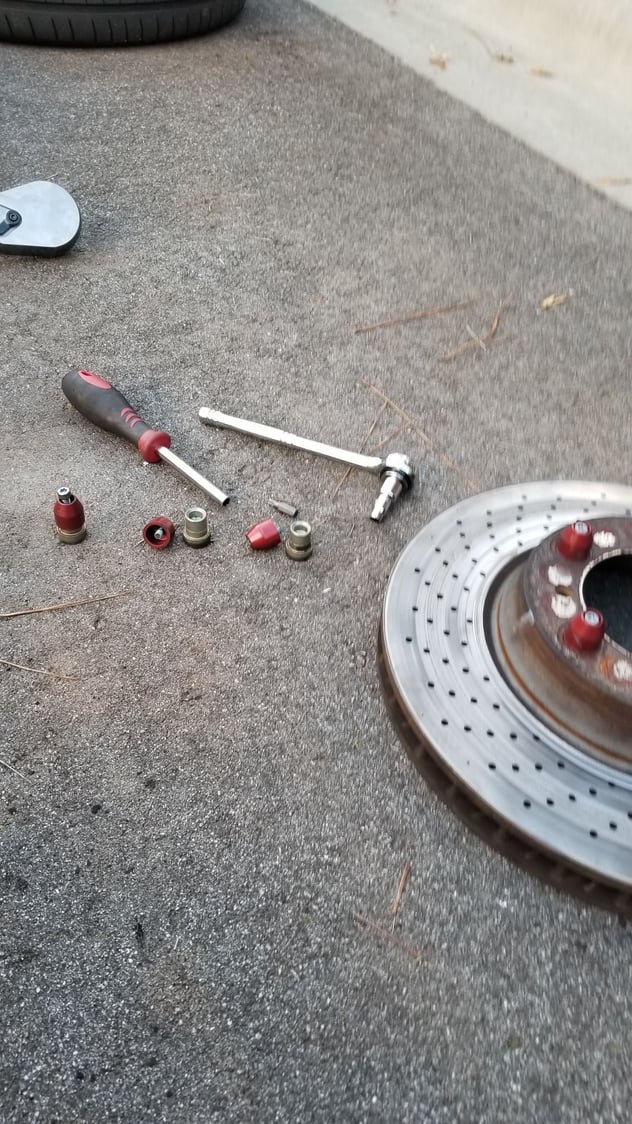
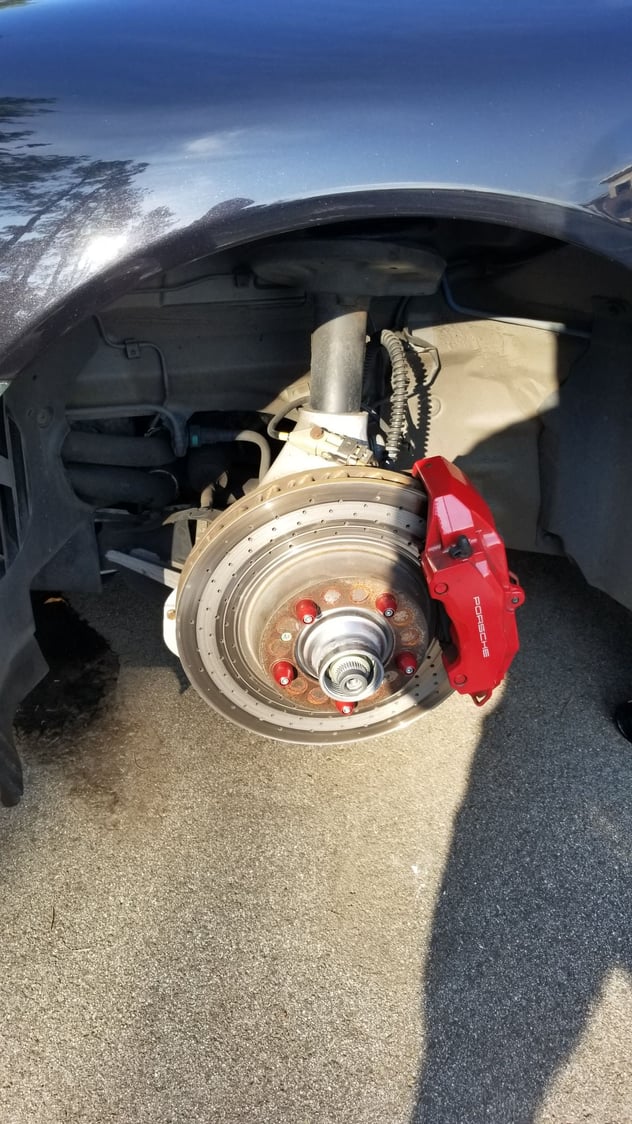
So, with the wheel off. Here how it looked. First thing I noticed was the rust and then wondered how much trouble those two screws on the rotor will be to take off. It turned out, they'd be a lot of trouble actually.
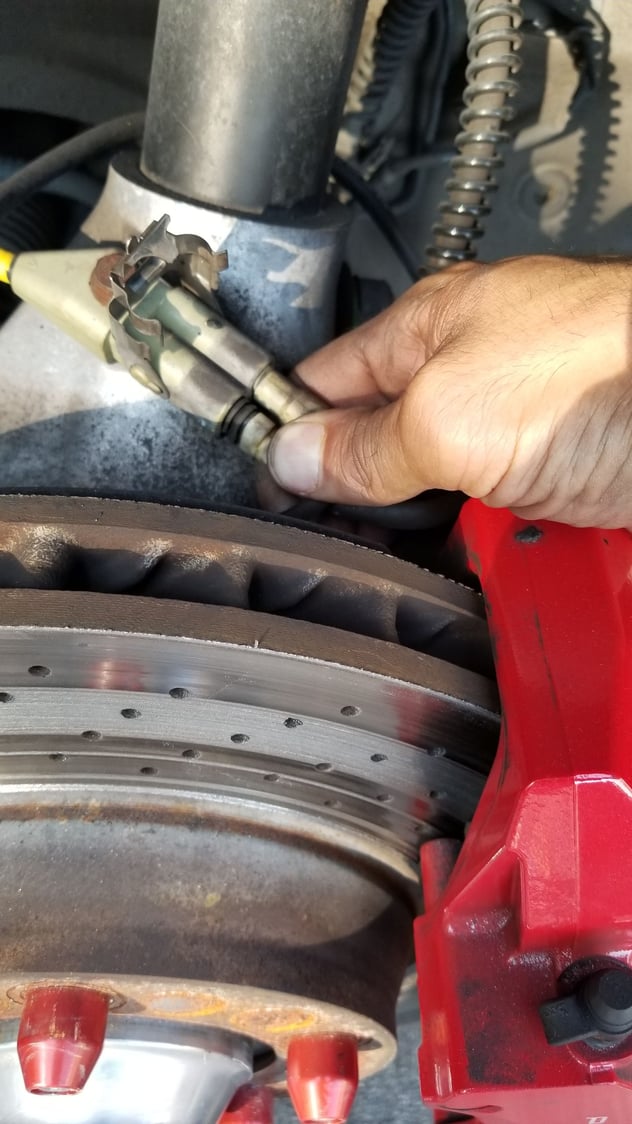
Disconnected the brake sensor cable. Sorry for this blurry picture.
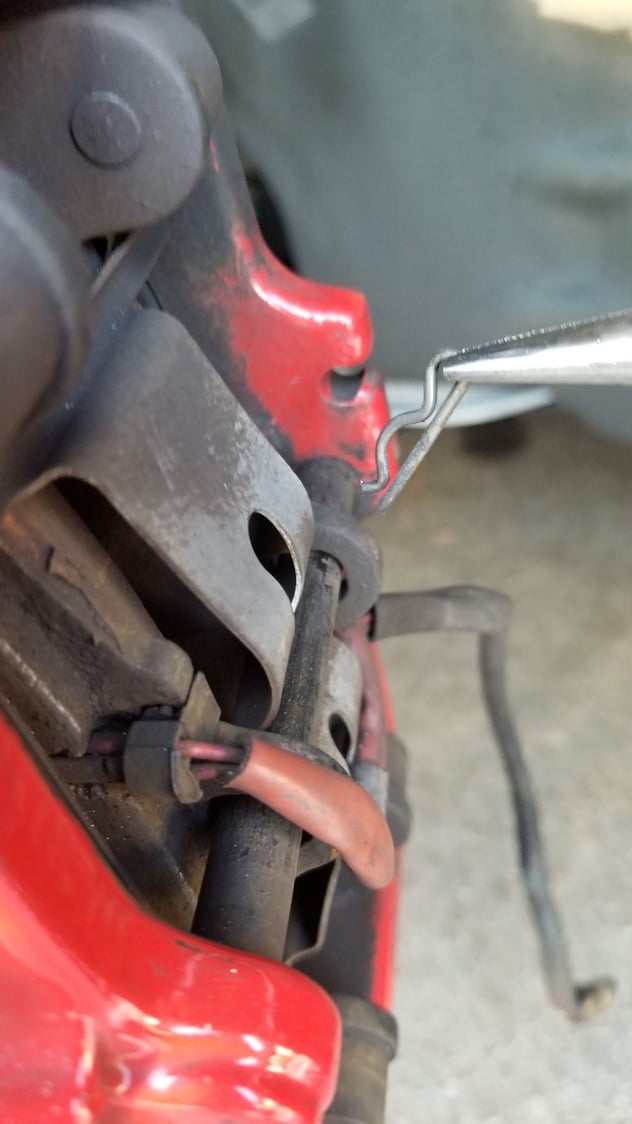
Used needle nose plier to pull out Cotter pin. I think that's what its called.
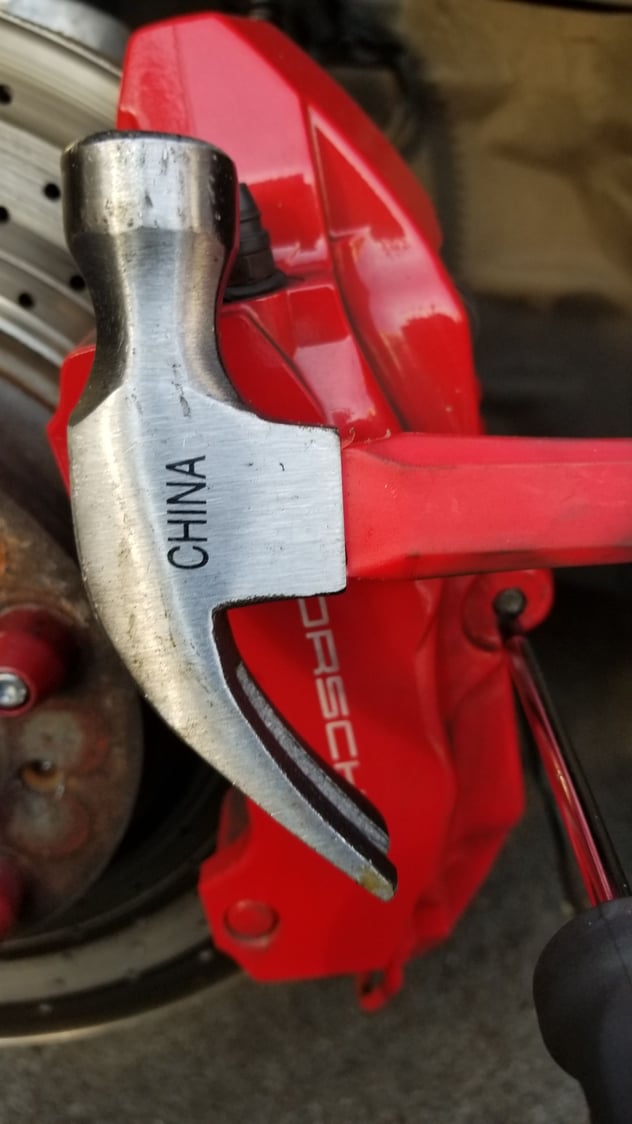
Next, used a hammer and screw driver to punch out the pin/bolt used to hold the pad springs in place.
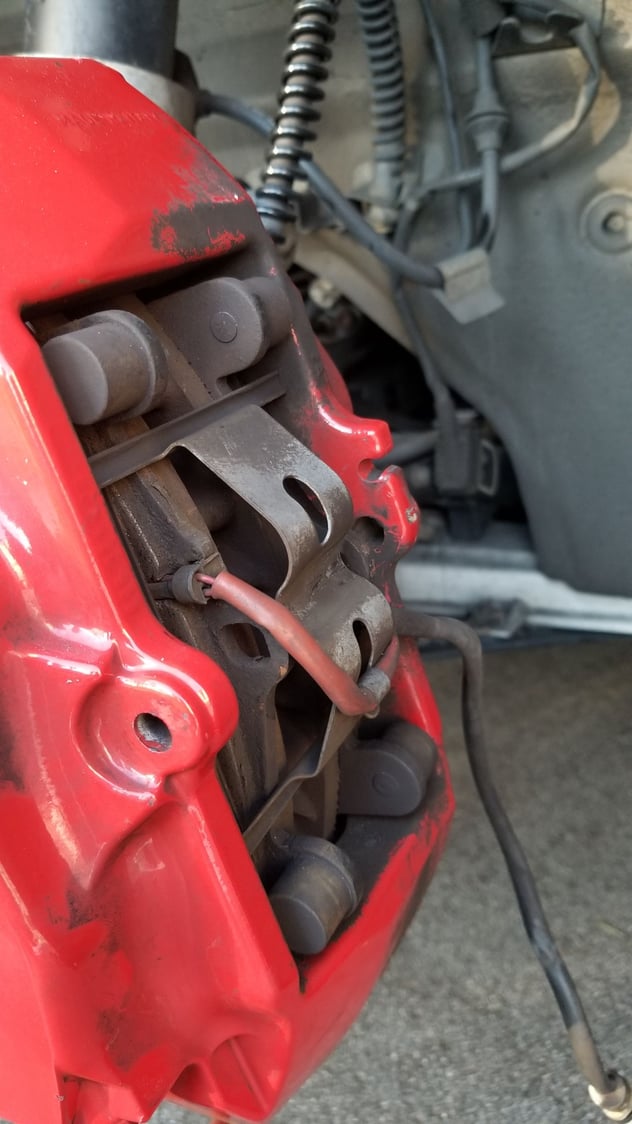
With that bolt out of the way, the spring can be removed. Careful not to damage the brake sensors. It turned out mine worked fine. I decided to tie back the sensors though as I didn't enjoy the red light message I had to live with for a couple weeks as I researched how to change my brakes. Since the sensors were not damaged, all I had to do was plug them back in (after rotors and pads were in) and zip tie them back. Had the sensors been damaged, then I would have just cut them and soldered the wire together, covered in shrink wrap/electrical tape and zip tied back. I believe that so long as the circuit is not broken or shorted to ground, the sensor will not trigger a message.
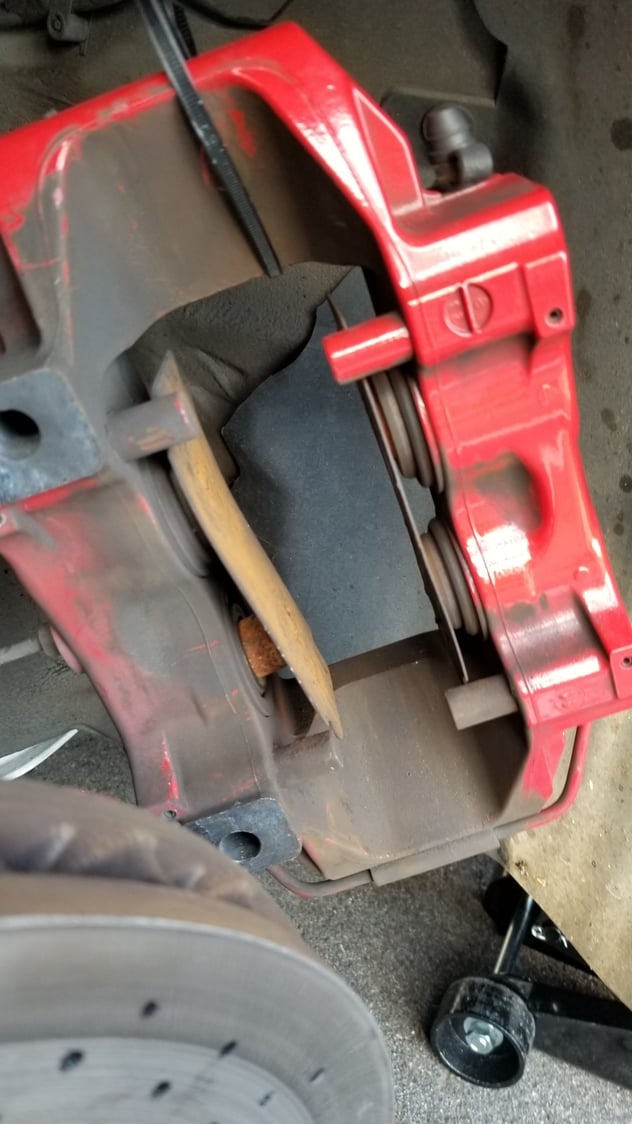
So, the next step would be to pull out the pads. I used a C-Clamp (sorry no pictures of this) to press the pads, and thereby the caliper pistons, all the way back to the calipers. This is needed to get the pads out as well as to ensure there is sufficient clearance to put in the new thick pads.
With pads out, the next step is supposed to be easy. Pull out the brake dampers. In all the videos I've seen, they just come right out. Mine were stuck due to rust. It was quite a task trying to get them out. I used screw drivers to leverage as well as needle nose pliers. It wasn't fun.
A close up showing how rusted the dampers were. One both sides, the dampers were rusted and just stuck in the caliper pistons.
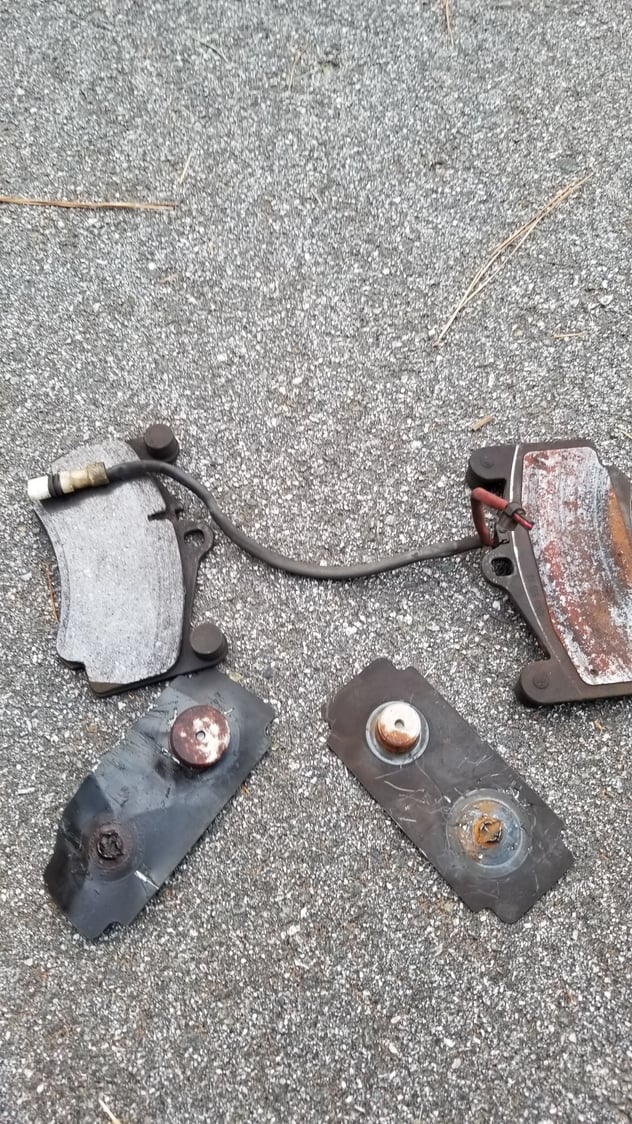
Unfortunately, with the rust and corrosion.. the bad damper sheet separated from the puck leaving the puck still in the piston. Great. Since the puck was stuck flush into the piston, I decided to leave them in there and therefore not use the new dampers which I returned. I'll come back for these some day when I gather the will. I figure I may need to take pistons out (by pressing on brakes gently and collecting brake fluid in pan)..then I'll deal with the puck while I have the space to do so. Another guy on a forum did this so I might have to as well. In the mean time...I leave the old pucks (one on each side of calipers for each front wheel got stuck) in there. They have no where to go and do not seem to hinder the brake operation.
Here you can see how one of the pucks tore away. Nice
Here you can see the old pads, sensors, and what was left from the old pucks. The sensors were re-used (just plugged back in and zip tied away as mentioned above).
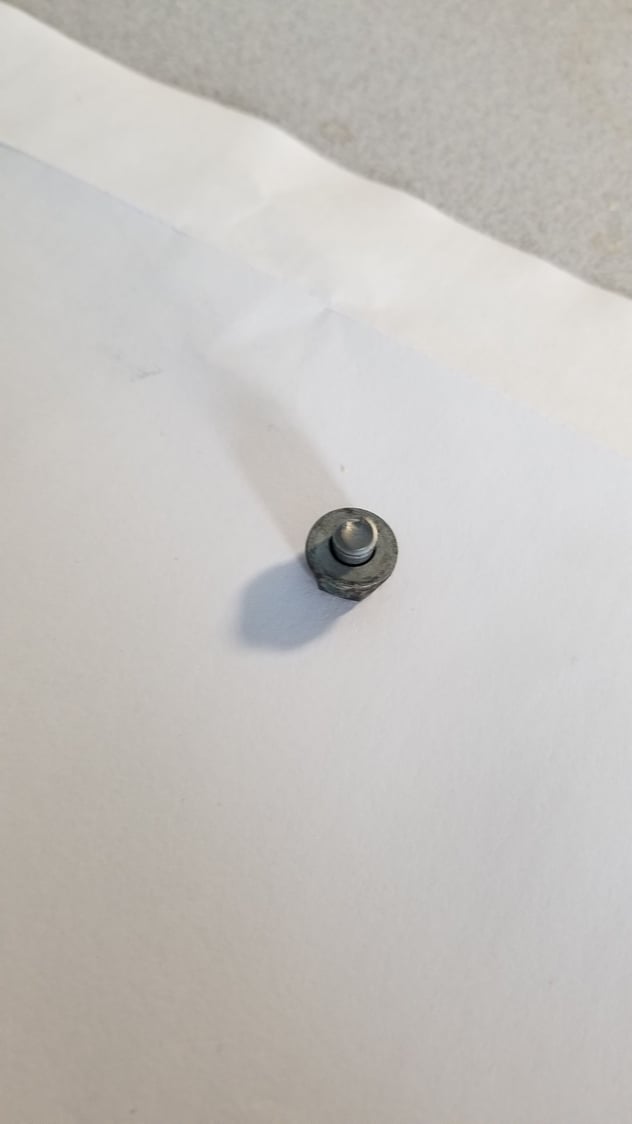
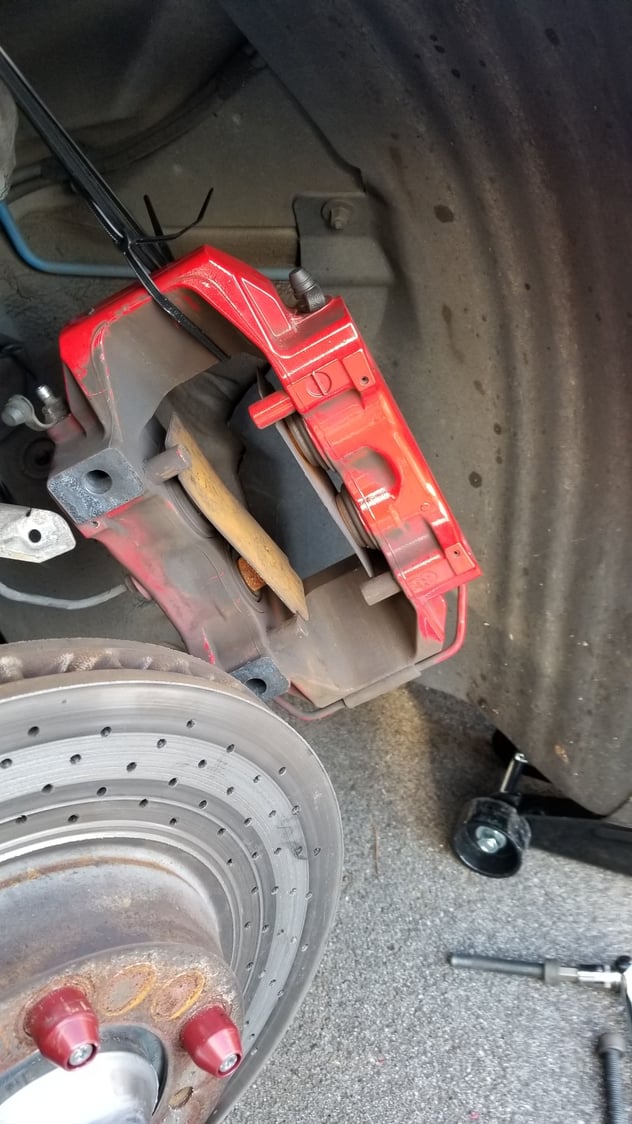
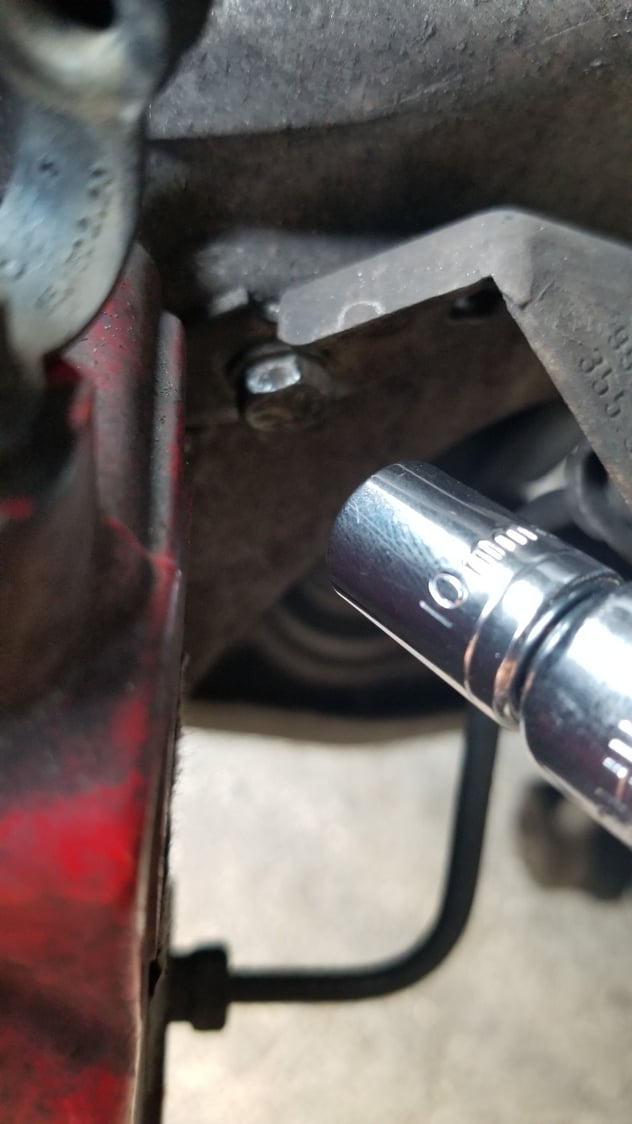
Next step is to remove the calipers. Before doing this you need to unbolt the brake line bracket so that you'll have leeway to holster the heavy caliper onto the shock springs using zip-ties. This small bolt comes off real easy. When putting back on..I hadn't had it lined up quite right and ended up sheering off its head. see next pictures..
I ordered new parts from Porsche. They said the part changed to an allen type rather then hex. $1.79 + tax. Cha-Ching
I knew, even before taking off the calipers that I had a problem. Take a look at those philip screws. They wouldn't budge. I tried nearly everything. I sprayed with PB blast and waited 15 minutes. I tapped on them with hammer. I used a hammer driven driver not shown here but that didn't work.
I had no choice but to drill them out. Luckily, they came out in the following way. First I drilled a skinny drill bit into the center of the screw about 1/4 inches deep. Then I used thicker extractor bit in reverse. That worked. The screws came out.
Here you can see the screws drilled out. Luckily they came out and did not require me to re-thread. I had to buy these screws from the dealer later. Wish I would have gotten them earlier. Tip..be sure to buy these in advance as they're good to have.
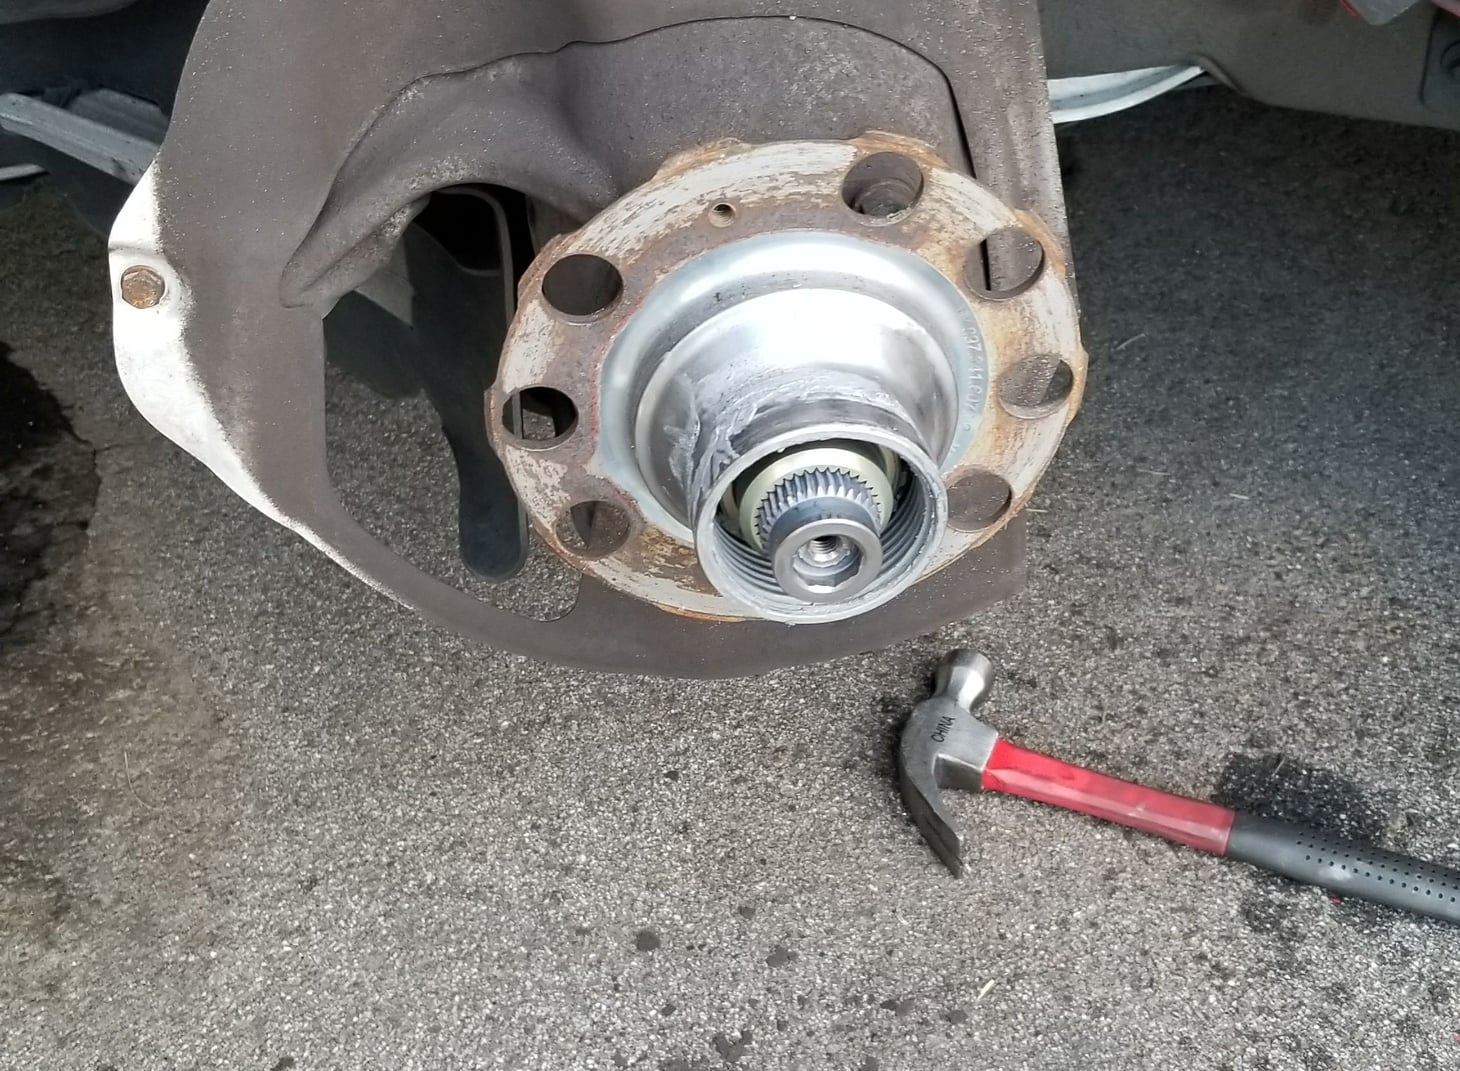
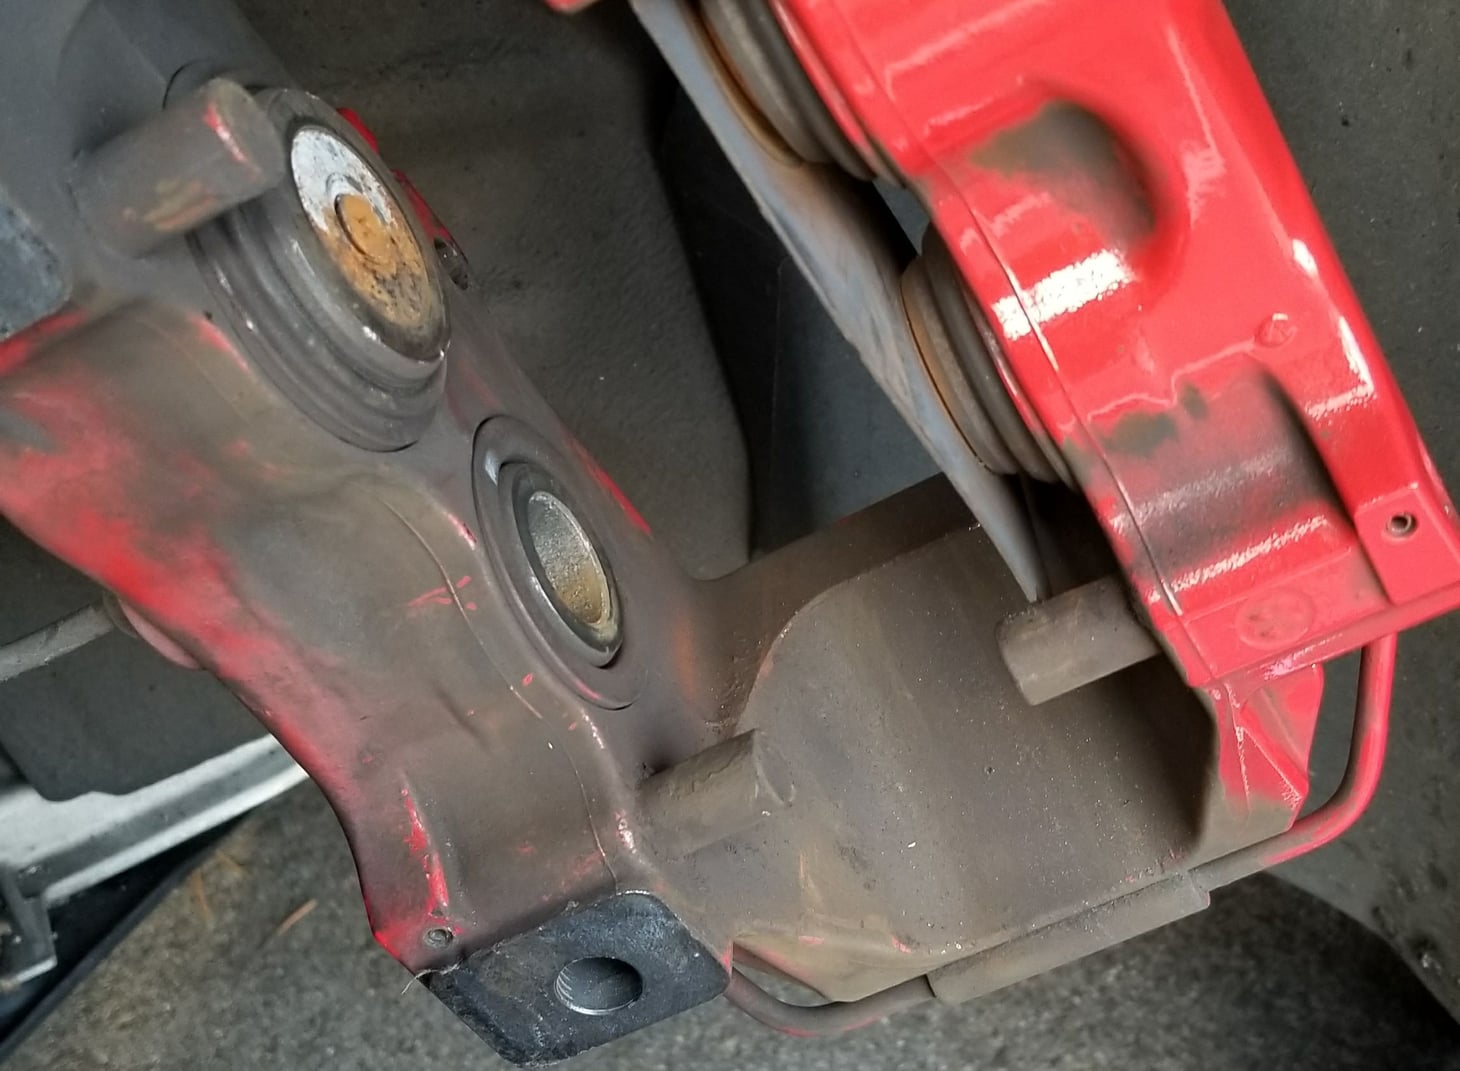
Ok, next step is to get this rotor off. Yes, it was stuck. I had to knock it around with a hammer quite a bit. I found pressing on right and left side with hands with alot of force in addition to hitting with a hammer was effective in dislodging it from the hub.
I'd recommend a heafier hammer than this. Perhaps a block of wood as well would have been better. I did with what I had at the time.
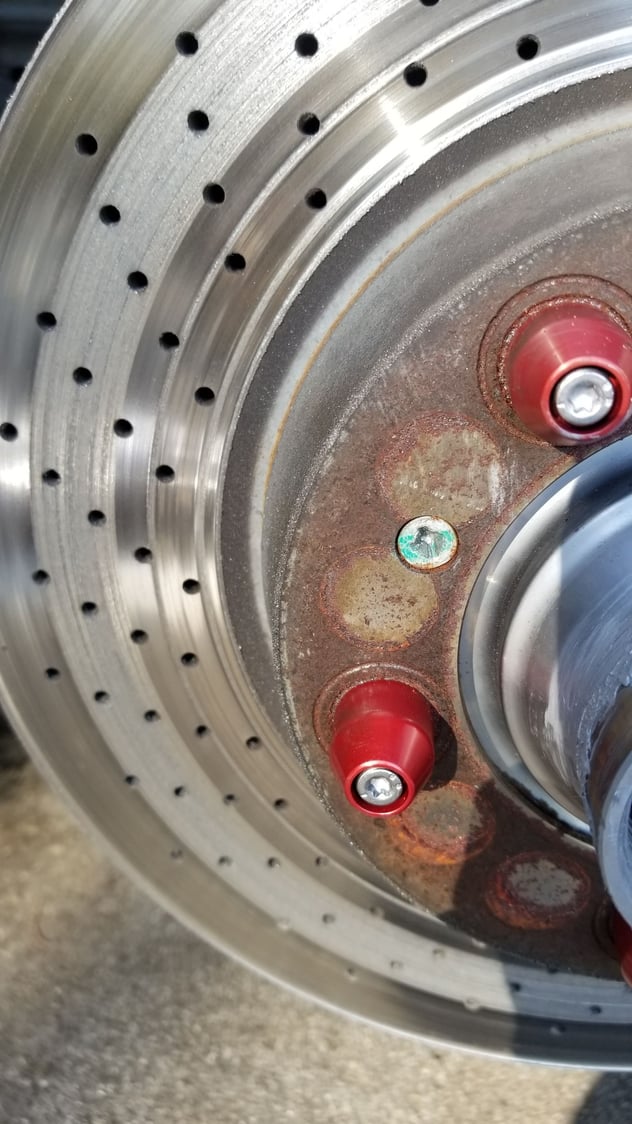
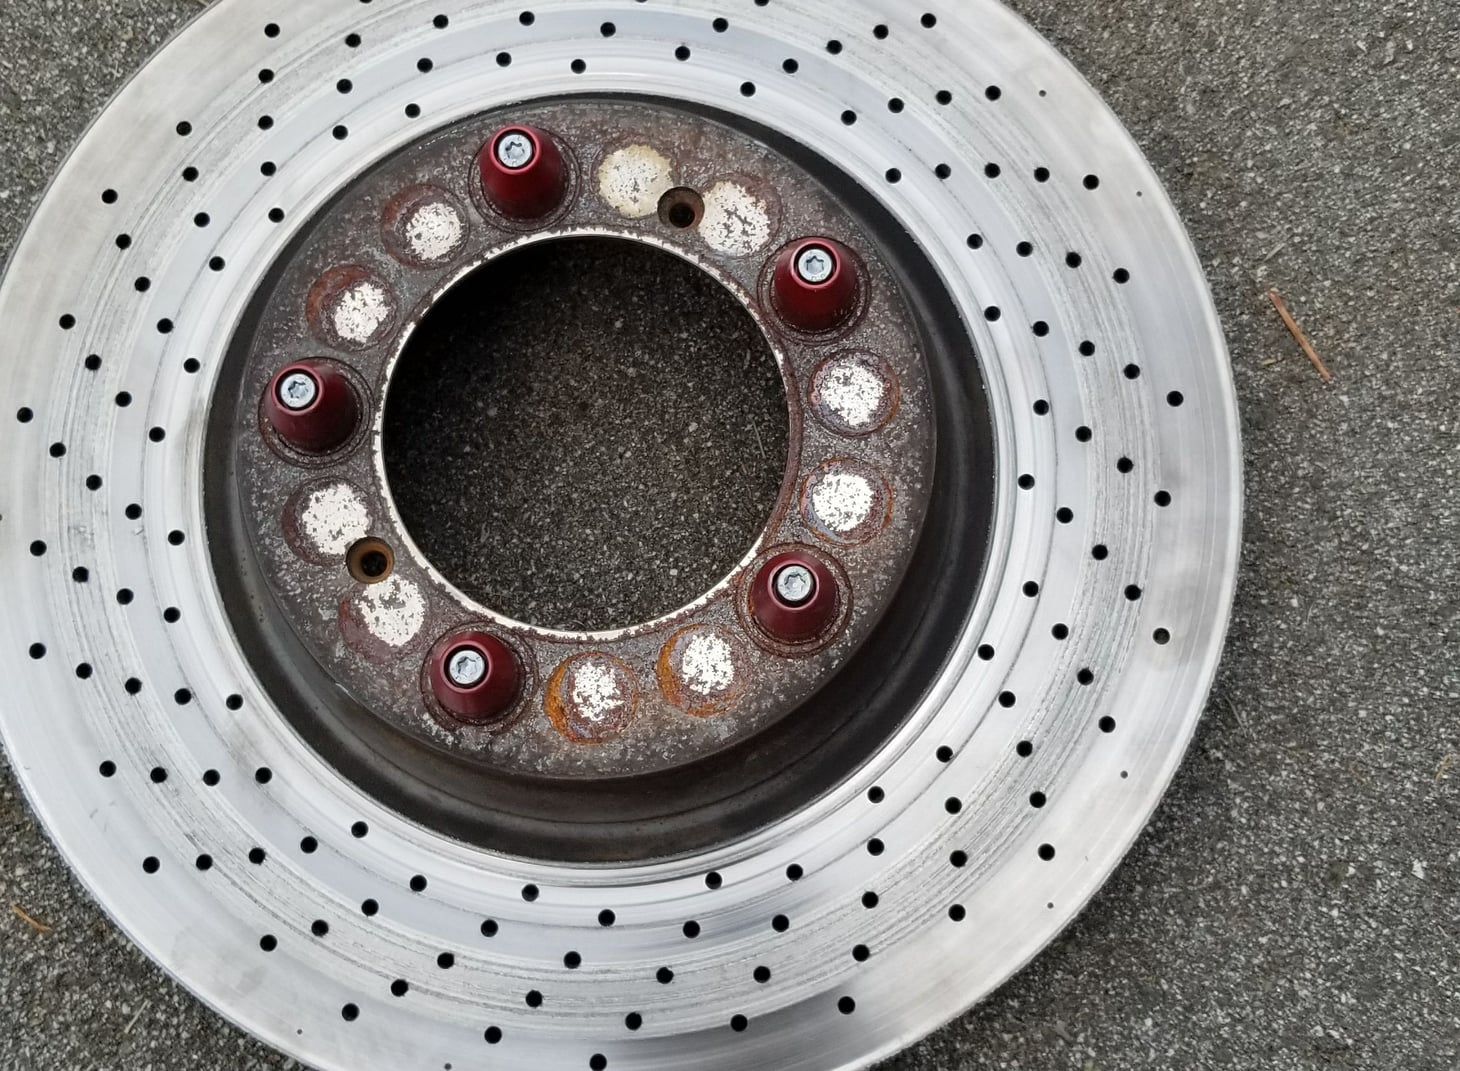
So the rotor came off. Next step was to remove these red covered protruding bolt things. I believe they serve as place holders for the normal place where 5 lugs typically go into a rim. They were easy to come off luckily but cumbersome. Purchasing new would run around $175 per wheel from suncoast. Geez
You need to use a wrench to hold the other side in order to get the small bolts off otherwise they'll just spin. Not hard, just a pain. Notice the hammer marks on the rotor that I inflicted in order to get the rotor off the hub.
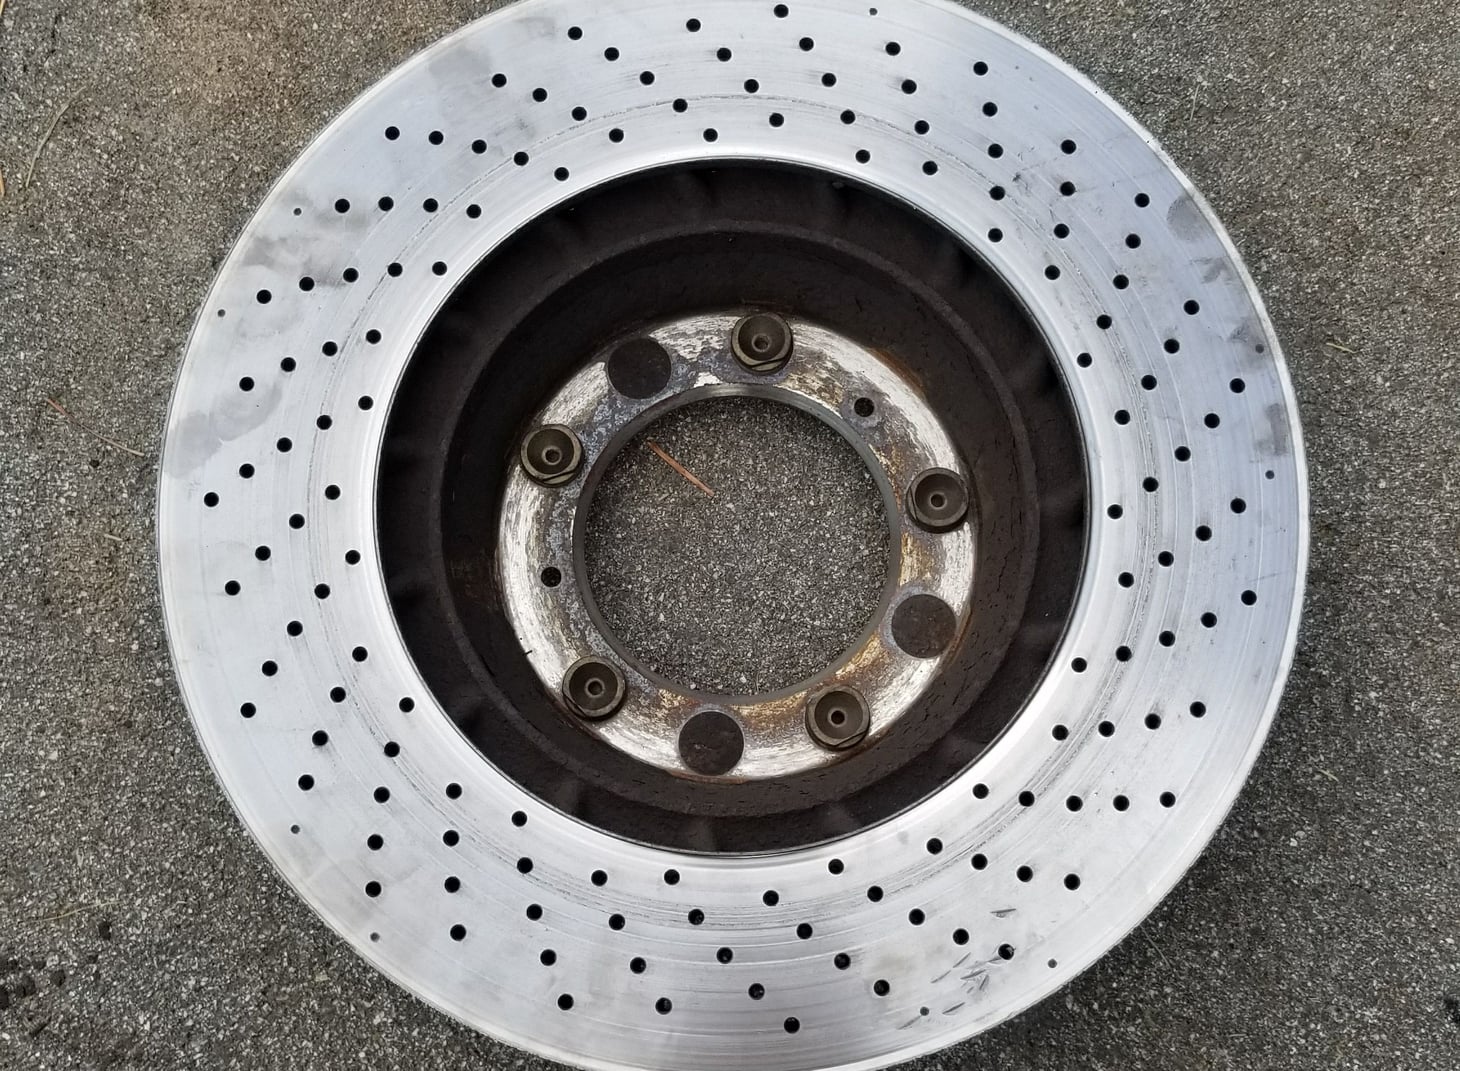
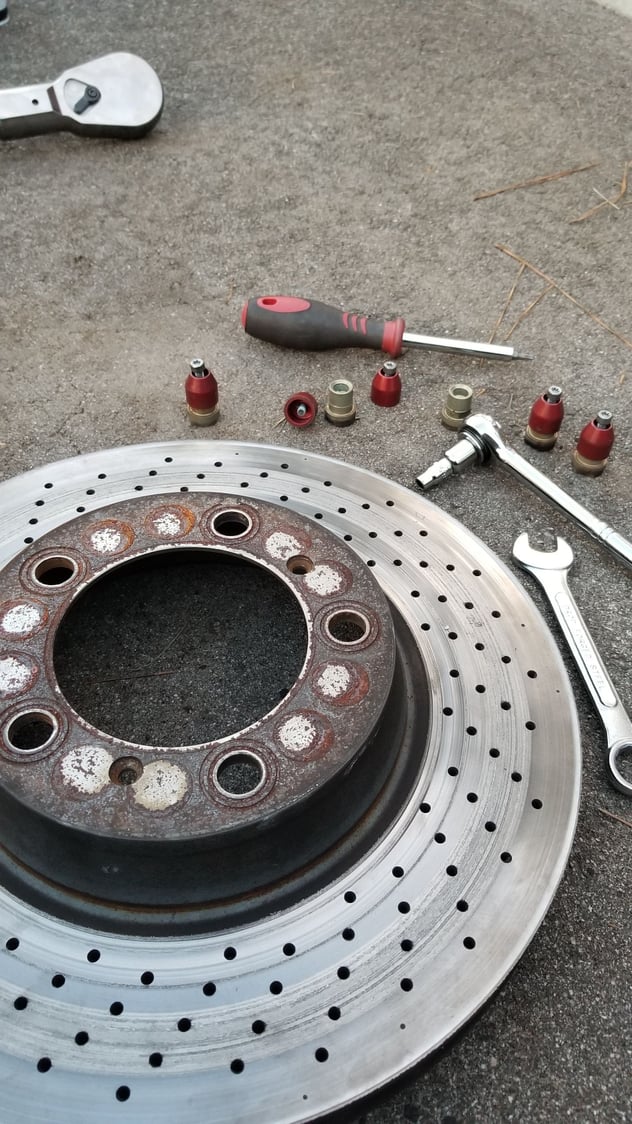
Ok! Got those off. Now for the new rotors!
Out with the old, in with the new.
Last step was to flush the brake fluid. This was simple. I did it by myself as follows: I used a water bottle with a two holes I punched in using a screw driver. One large hole for a plastic tube used to drain the brake fluid. This tube should go all the way to the bottom of the bottle and sit under the old brake fluid that I removed at the beginning from the master brake cylinder reservoir. A smaller hole in the green water bottle cap was for allowing air bubbles to exit the bottle without pressure build up. This prevents air from going back into the brake line system. Next I filled up the master cylinder with new brake fluid. Starting from the rear driver side wheel outer caliper nozzle, I inserted the other end of the tubing. Then I loosened the bleed nozzle nut. Next I slowly pressed down on the brakes nearly all the way down. I didn't want to go all the way down as I didn't want to damage the master cylinder since during this procedure the cylinder may go further than intended/designed for normal use. I allowed the brake to spring back up, and pressed down again repeating a total of 9 or ten times. At this point clean brake fluid was starting to exit into water bottle and there were no bubbles. I tightened up the brake nozzle and filled up the master cylinder with new brake fluid. I repeated for the inner nozzle. Then preceded to repeat this process around the car. The rear passenger, then front passenger, and last the front driver side. The front wheels only needed about 6 or 7 brake pumps per nozzle instead of the 9 t 10 needed for the rear wheels. After done, I still had about an eighth of brake fluid left which I'm keeping for a week in case I need it due to a leak or something.
I apologise for the poor picture quality and angles. I should have taken better pictures. Some of these pictures were actually truncated while downloading onto this site for some reason.
As a last note, after torquing the wheels to spec if you have center locks, be sure that the locking mechanism is all the way out. You can press it in with your finger and see that it can move in and out. Some time (most times!)..the darn thing won't come all the way out flush with outer rim. It is important that it does because only then are you sure that the wheel is locked! The way that I found works is to use needle nose or a thicker / shorter wire noise cutter plier that is small enough to fit inside. If you put the tips of plier inside and open up (separate the the two ends) you can achieve some grip enough to twist the socket mechanism. After a few twists, it thankfully comes all the way out.
I hope this write up is helpful to someone. Have fun.
Last edited by love2drive; 11-22-2017 at 12:47 PM.
Reason: more pics and subtitles
Hi I'm looking to change pad on my c2s - just curious about the damper plate - couldn't you just keep the old one and save the trouble of getting them out?
Nice work and nice write up. It is also a good example of how even the most routine of jobs almost always throws a curve ball! Adaptability is key, and satisfaction is immense once you work through the unexpected issue and fix it.
The Philips bolts that hold the calipers in never ever come out using a normal screw driver. I have never had a problem taking them out with an impact driver.
There is a 3 or 4 inch long plastic Porsche tool that has a metal hook on one end to remove the hubcap and a larger hex on the other end to twist the locking mechanism so that it pops out. $9. But be ready for your parts counter man to be confused ... Supplied with 991 and later cars but not shown for 997.

 11-21-2017, 08:05 PM


 see next pictures..