Yellow faded headlights be gone!
 08-14-2016, 03:43 PM
#1
Advanced
Thread Starter
Join Date: Jul 2009
Location: NJ
Posts: 58
Likes: 0
Received 0 Likes
on
0 Posts
How many cars on the road do you see with yellowing faded headlights.
Man I hated seeing my car like this, disgusted in fact. I've been putting it off for a while now. I like doing things on my own, but with so many projects and work, time kept slipping away. So finally got around to tackling this project.
I waited for a good stretch of weather (no rain) that wasn't too hot and fairly low humidity (under 50%-ish).
Took the headlights off the car and gave them a quick clean with soap and water.
I started out with 400 grit wet sandpaper (I pre soak the paper for a few mins) to quickly tackle the messed up UV coating (I use a small foam 3m sanding pad 05526). Quickly enough the yellowing was gone from the lights. Next was 800 grit (I sanded diagonally between each change of grit). You could stop there or finish up with 1000-1500. I used a small bucket half filled with water constantly cleaning and wetting the paper (change water when dirty). You can also use a spray bottle with water. Also continue rinsing the lights as you want to remove all the contaminants that you're sanding off.
Give them a good clean with soap and water to remove all residue from lights. Don't go to crazy with the hose as they are not 100% water tight.
Blow them off with an air hose (if you have a compressor) or dry them down with microfibre cloth.
Next is to prep where you will be clear coating them. You'll need a near dust free environment or best as you can find (could be done outside on a calm day). I have a shed that I put up plastic around the walls and floor. Al la Dexter! ;-)
Tape up the lights as best you can. First go around the lights with tape. I taped on the black rubber seal, just under the plastic housing. Then cover the housing with newspaper, any kind will do.
Place them where you will be spraying them. Then I cleaned the plastic lens with SEM 38353 Plastic & Leather prep. Best is to use a lint free towel. I used Scott Shop Towels, they are the best I had on hand.
Once I wiped them down, I gave them a quick blast of compressed air (Some use tack cloth to go over to remove any lint).
Make sure you wear a respirator when spraying!
Next was to use SEM 39863 Plastic Adhesion Promoter. Follow the instructions on can.
Then I used Eastwood 2 part 2k clear in a can. I have a compressor and spray gun, but didn't want to go too crazy with that setup for these. Also, follow the instructions on can. I gave them a light first coat, then waited 15-20 mins for the next. You should be able to get 3-4 wet coats with the can. The can has a nice spray pattern and flows well.
Let them dry at least 24-48hrs before wet wanding and polishing them. Don't wait too long, as the clear will harden and be more difficult to sand.
Remove all the masking.
I started out with 800 grit wet. Start with clean water and pre wetting the sandpaper. Wet the lights and start sanding. Use a small foam 3m sanding pad. But be careful, you don't want to sand through the clear coat after all the work you just went through. Be cautious of the lens. The center oval is ok, but there is a slight ridge towards the outside of the lens. Run your finger over it so you know it there (Some also put tape as a guide). Work the whole light to get the orange peel out. Rinsing the white milky residue as you go. Move up to 1500 and finish with 2500. Clean off the lens in between coats and use clean water.
Finally clean lens with soap and water. Dry and inspect and hopefully you haven't sanded through the clear coat!
Final stages will be polishing them up. You could attempt to polish them by hand, but that's a lot of elbow grease. I have a Flex rotary polisher I used with 4" pad.
You can use cutting compound of your choice. People swear by Meguiar's M105 and M205. I used what I had on-hand. Sonax nano polish with orange pad, followed up with 3m Lens & Hard cleaner polish with black pad.
Just with sanding, please be cautious when polishing, as you can also burn through the clear coat the same. I went max 1500RPM.
I will wait a couple of weeks for the clear to fully cure / harden, the I will put Xpel film on the headlights to further protect from the sun's UV rays and rock chips.
 08-14-2016, 08:29 PM
#3
Rennlist Member
Nice job and nice write-up. I did some of this this on my E39 a while back but did not re-coat the plastic. Your results look excellent. Very happy that my 996TT is a garage queen and the lights are perfect (and Expel covered).
08-15-2016, 11:58 AM
#4
Three Wheelin'
Did this earlier this summer on mine. Made a massive difference. Wrote about it in the "what did you do to your 996 thread". We used a nearly identical process
08-16-2016, 02:09 PM
#6
Burning Brakes
Very nice job!! I am too scared to do this... sandpaper to headlights... scares me. lol
Trending Topics
07-27-2017, 04:21 PM
#11
07-28-2017, 02:12 PM
#13
Rennlist Member
Nice job, especially on properly sealing them. Thanks for sharing! 
Most of the DIY's you see out there don't seal them at the end, in which case, they'll be yellow again soon!
Most of the DIY's you see out there don't seal them at the end, in which case, they'll be yellow again soon!
 08-14-2017, 11:49 PM
#15
Advanced
Thread Starter
Join Date: Jul 2009
Location: NJ
Posts: 58
Likes: 0
Received 0 Likes
on
0 Posts
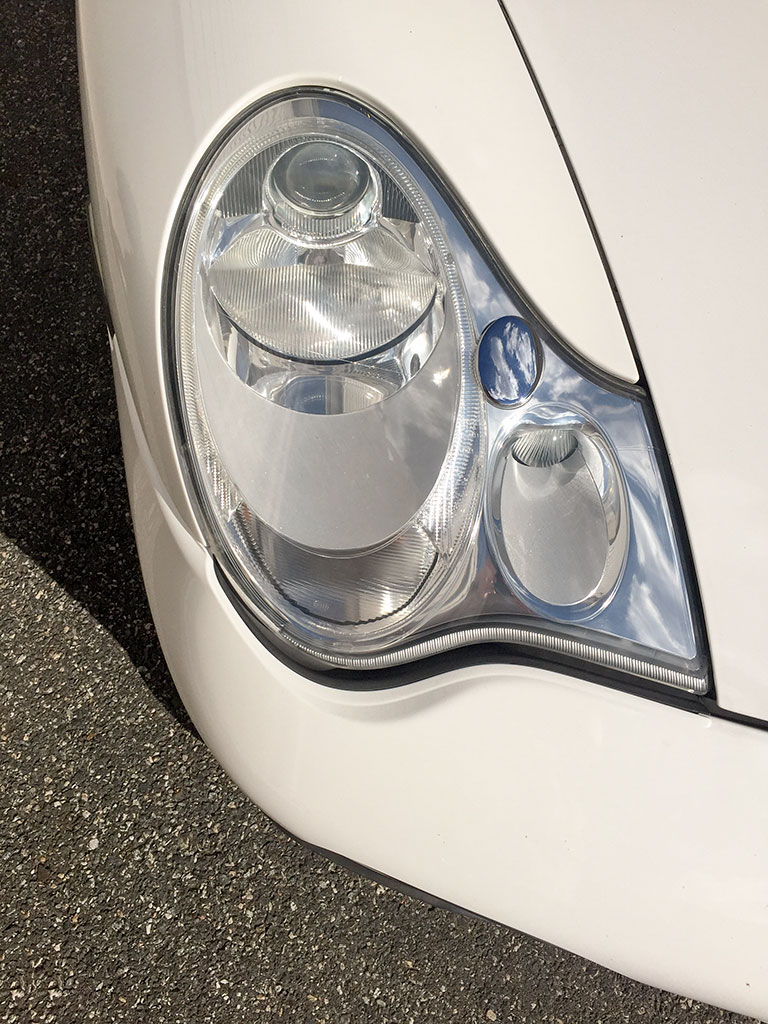
Hi, sorry for the lack of response. Here's a year update. I installed Xpel clear film on the headlights. I wanted some more rock and UV protection they give. I waited a few days to a week so the clear had time to cure.
Here's a photo. Headlight / Xpel.

Now I'm no longer embarrassed that my light were soo messed up when driving to C&C
Here's a photo. Headlight / Xpel.
Now I'm no longer embarrassed that my light were soo messed up when driving to C&C