When you click on links to various merchants on this site and make a purchase, this can result in this site earning a commission. Affiliate programs and affiliations include, but are not limited to, the eBay Partner Network.
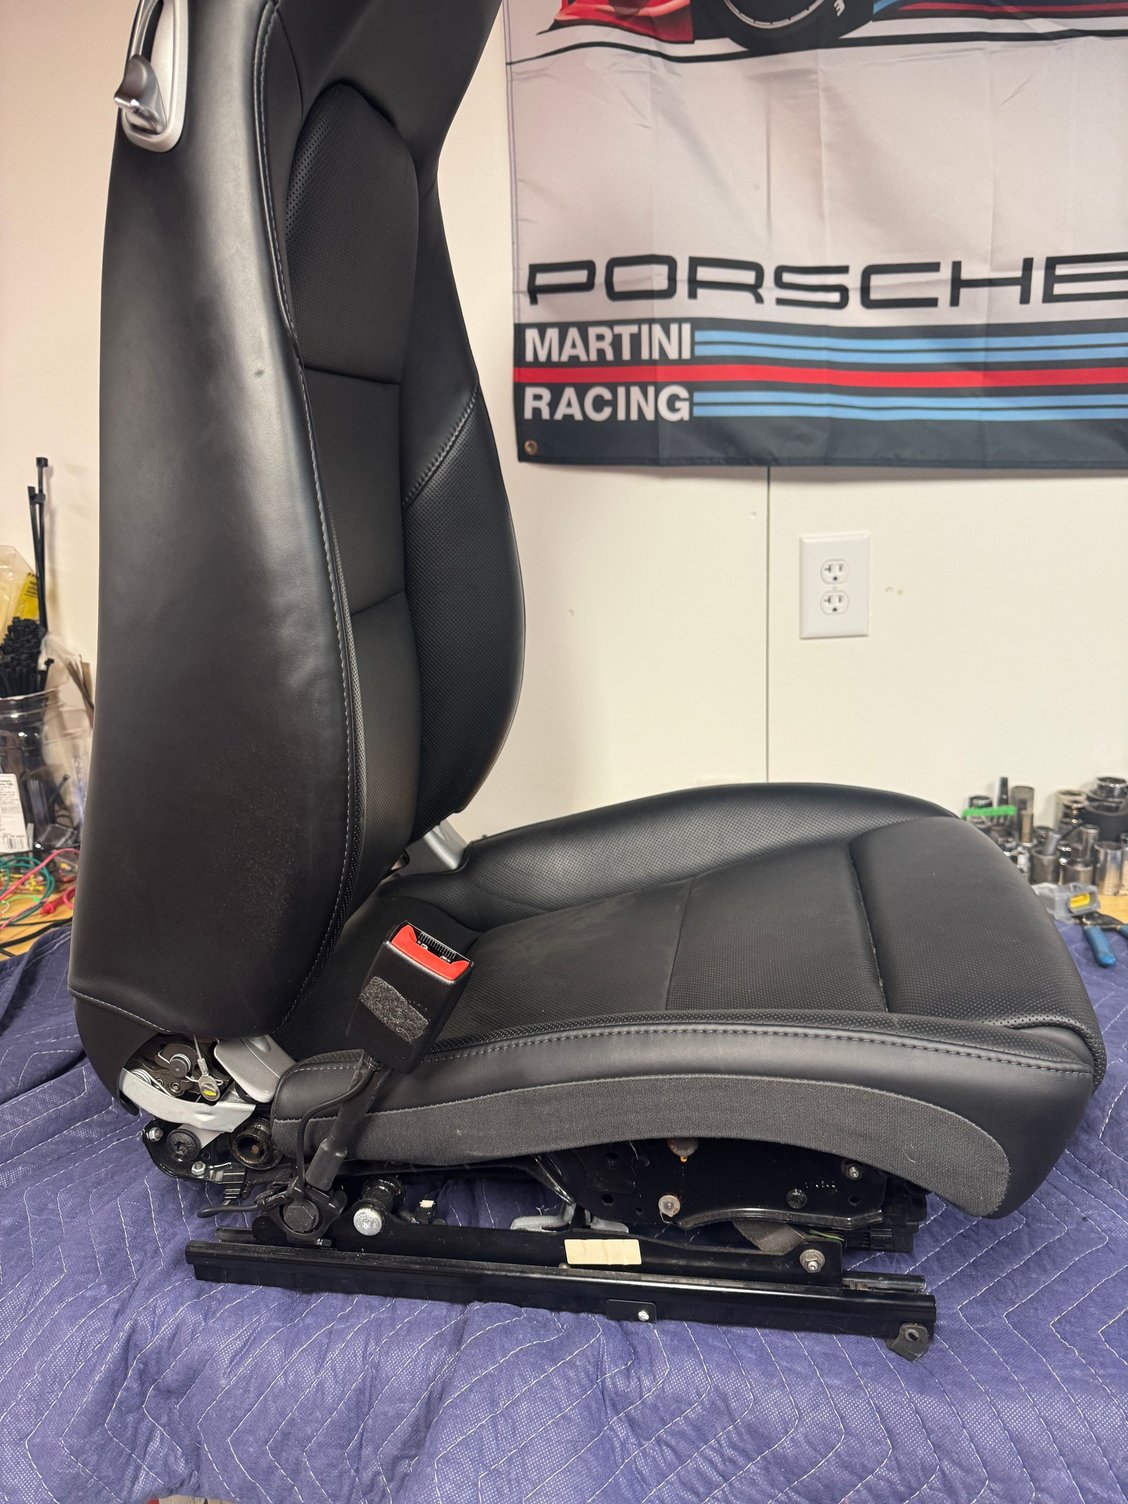
It's been a journey to get here. As most know, the 991 seats bolt in.
But what has been the Achilles heel was not getting heat and ventilation to work. The 991 seats are controlled via Can-bus, and a seat module, and the 996 doesn't talk well with those.
So I engineered a solution. At the end of the day, we are only talking some heating pads, and a couple fans. Armed with that knowledge and a lot of determination, I disassembled the passenger seat as a test-bed, and in conjunction with a friends 718 spider (which uses very similar tech and wiring to the 991), was able to get this functional.
NOW. Full disclaimer. This is not simple or easy, and this is a workaround. I'm sure someone with more time and expertise could do this "properly". But this works.
Ventilation was my main concern (triple black car in the south). A quick pull of the seat on the 718 with it running revealed that although the fans are PWM controlled, on high, they get the full boat of power available, no cycling. Cool. So hard wire those to a switch that's either on or off.
The heat looked a lot more challenging, as folks kept indicating that full 12V could potentially burn up the elements. Unsure, and unlike with the ventilation, it was much more difficult to test. So I found a small PWM generator online for $40, ordered one, and took more apart on the passenger seat.
Found the direct wires to the heating pads, and connected the PWM generator out to those, and then to a 12V bench, and viola. I had heated seats.
This is an oversimplification; but in the end, that's what I did.
Sweet. Now I have heat and cool. Question is, how do I turn them on (and off). I wanted to use factory switches for the 996. As I have the coupe, it was easy to use the batwing for heated, And the cabriolet rear window switch blanks for the ventilation.
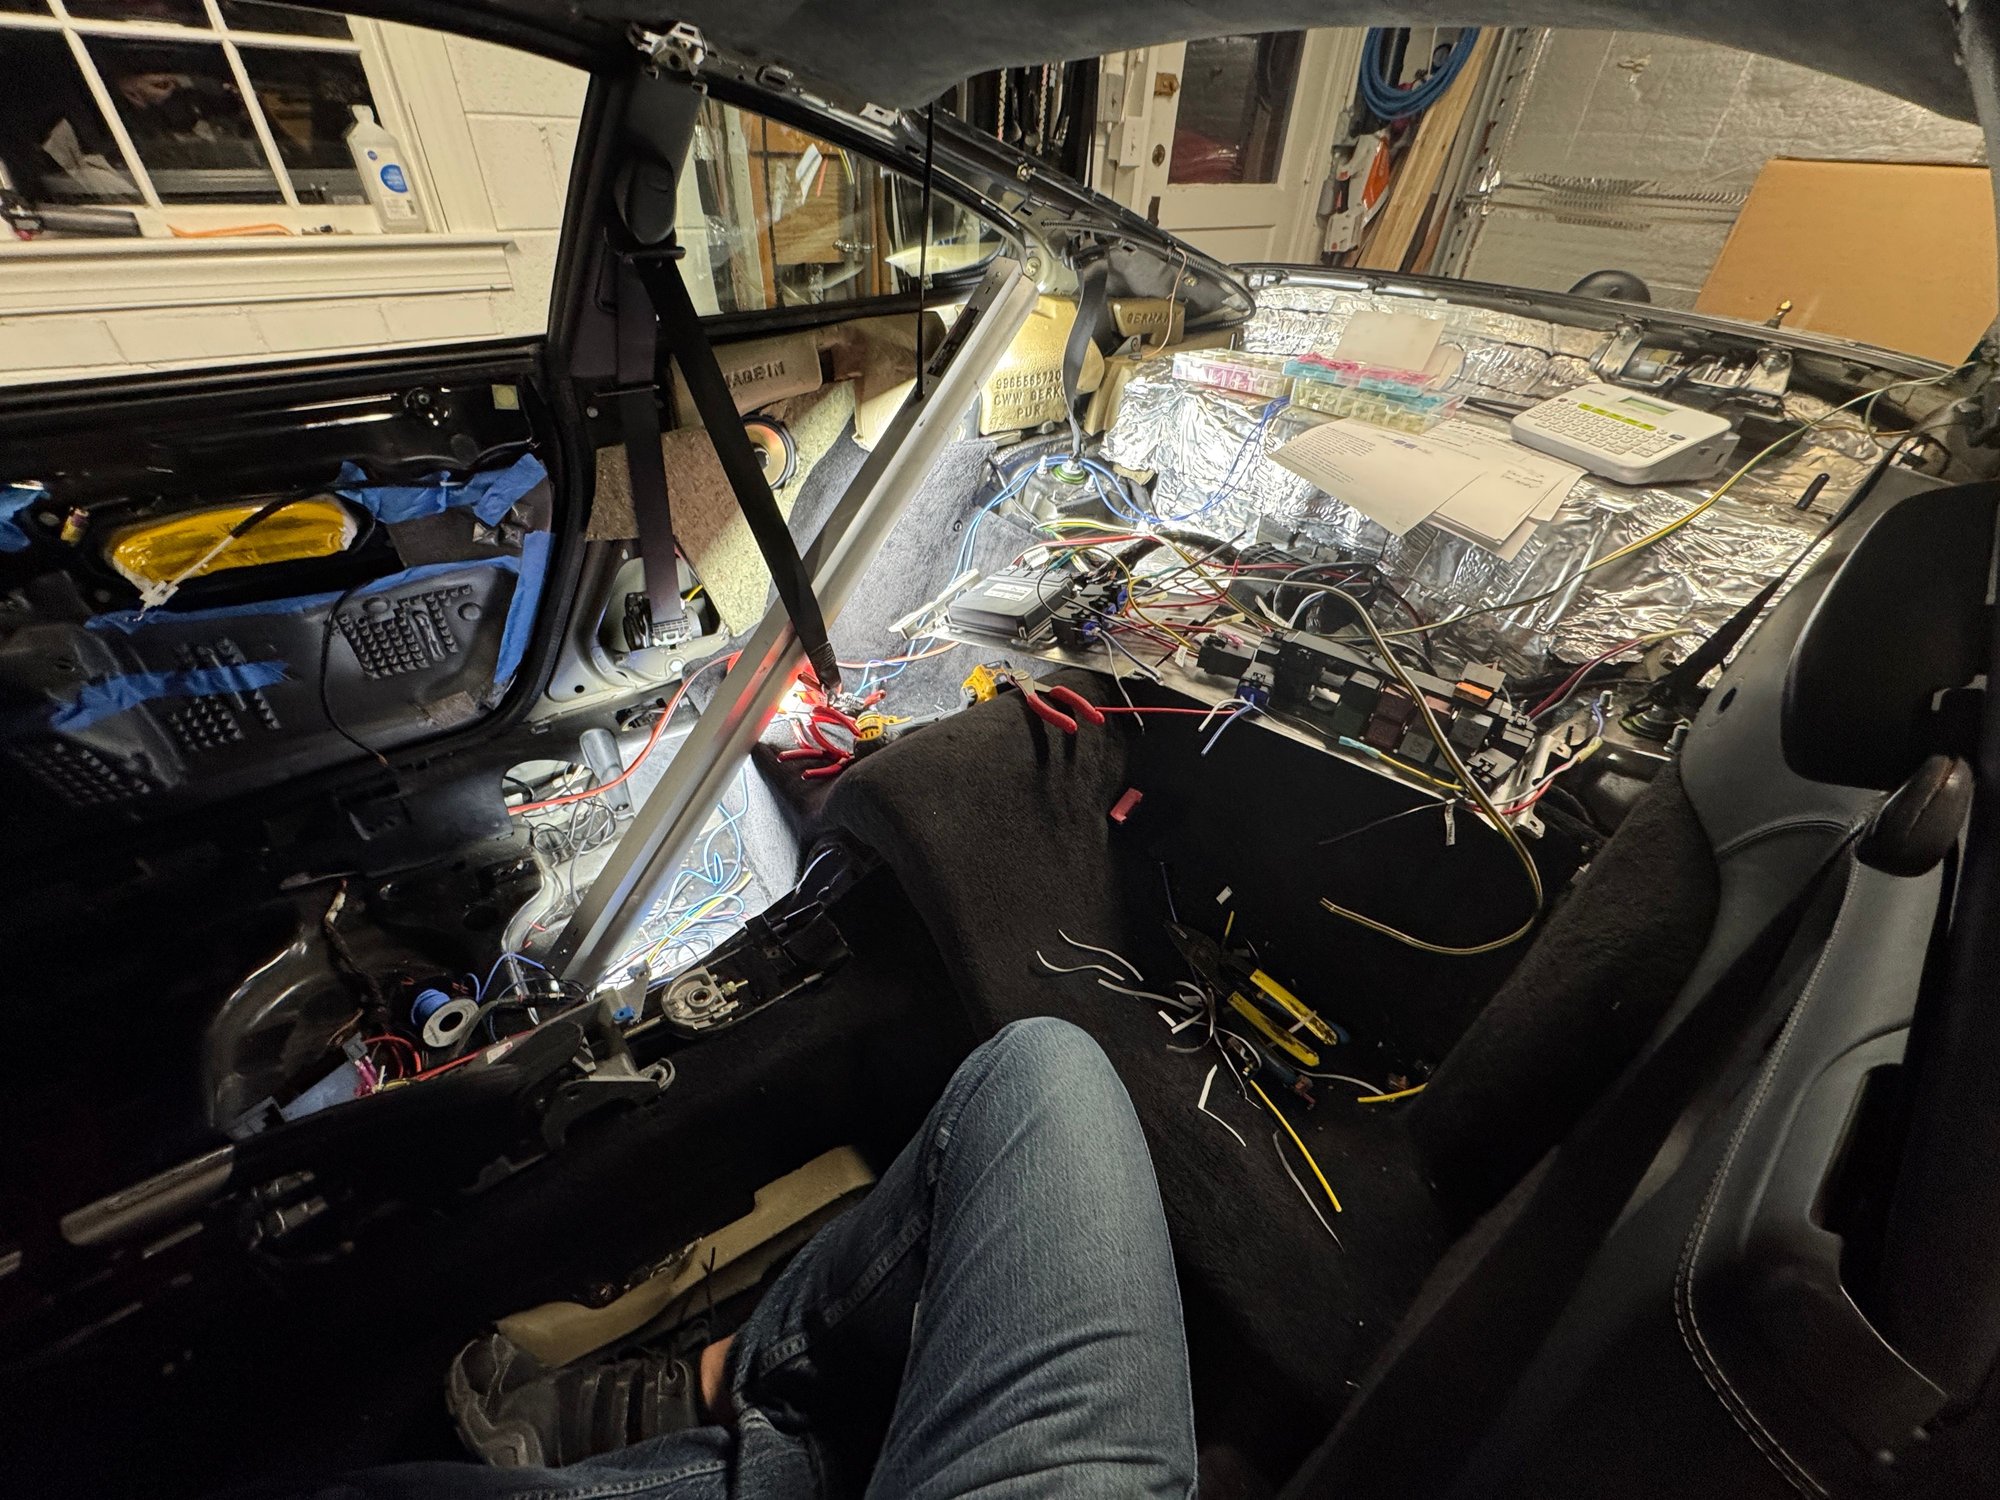
Then. wiring. Oh boy. The factory porsche switches are momentary, and so I needed a way to create a latching relay for turning things on, and turning them off. Luckily there was a diagram online on how to do this, and some 9 relays later, I had functionality.
They have been bench tested; but have not been installed in the car as of yet. That's tomorrow's project.
At any rate, it was quite an operation to figure all this out, and I hope that this thread helps someone else.
Here's how I wired up everything on the Drivers Seat.
First, flip the seat on its side. Mmm. nice newer comfy seat. Out of a 2017 911 with 60k miles
Remove these screws.
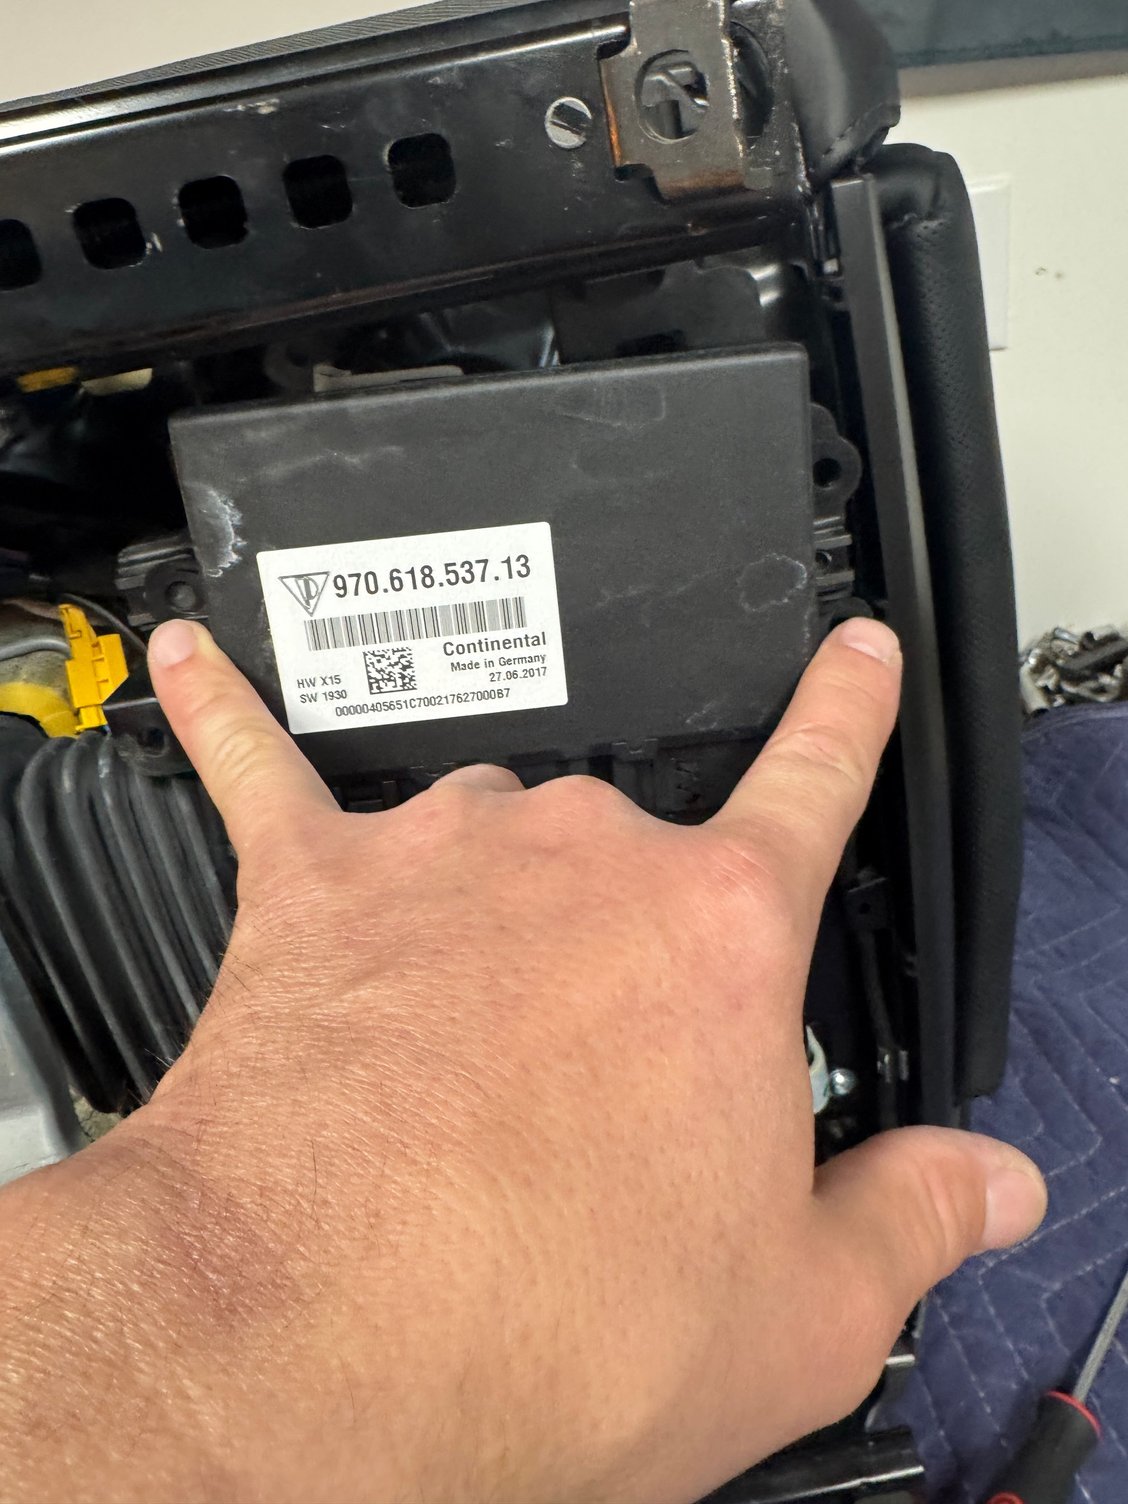
Remove the yellow main connector and let it dangle
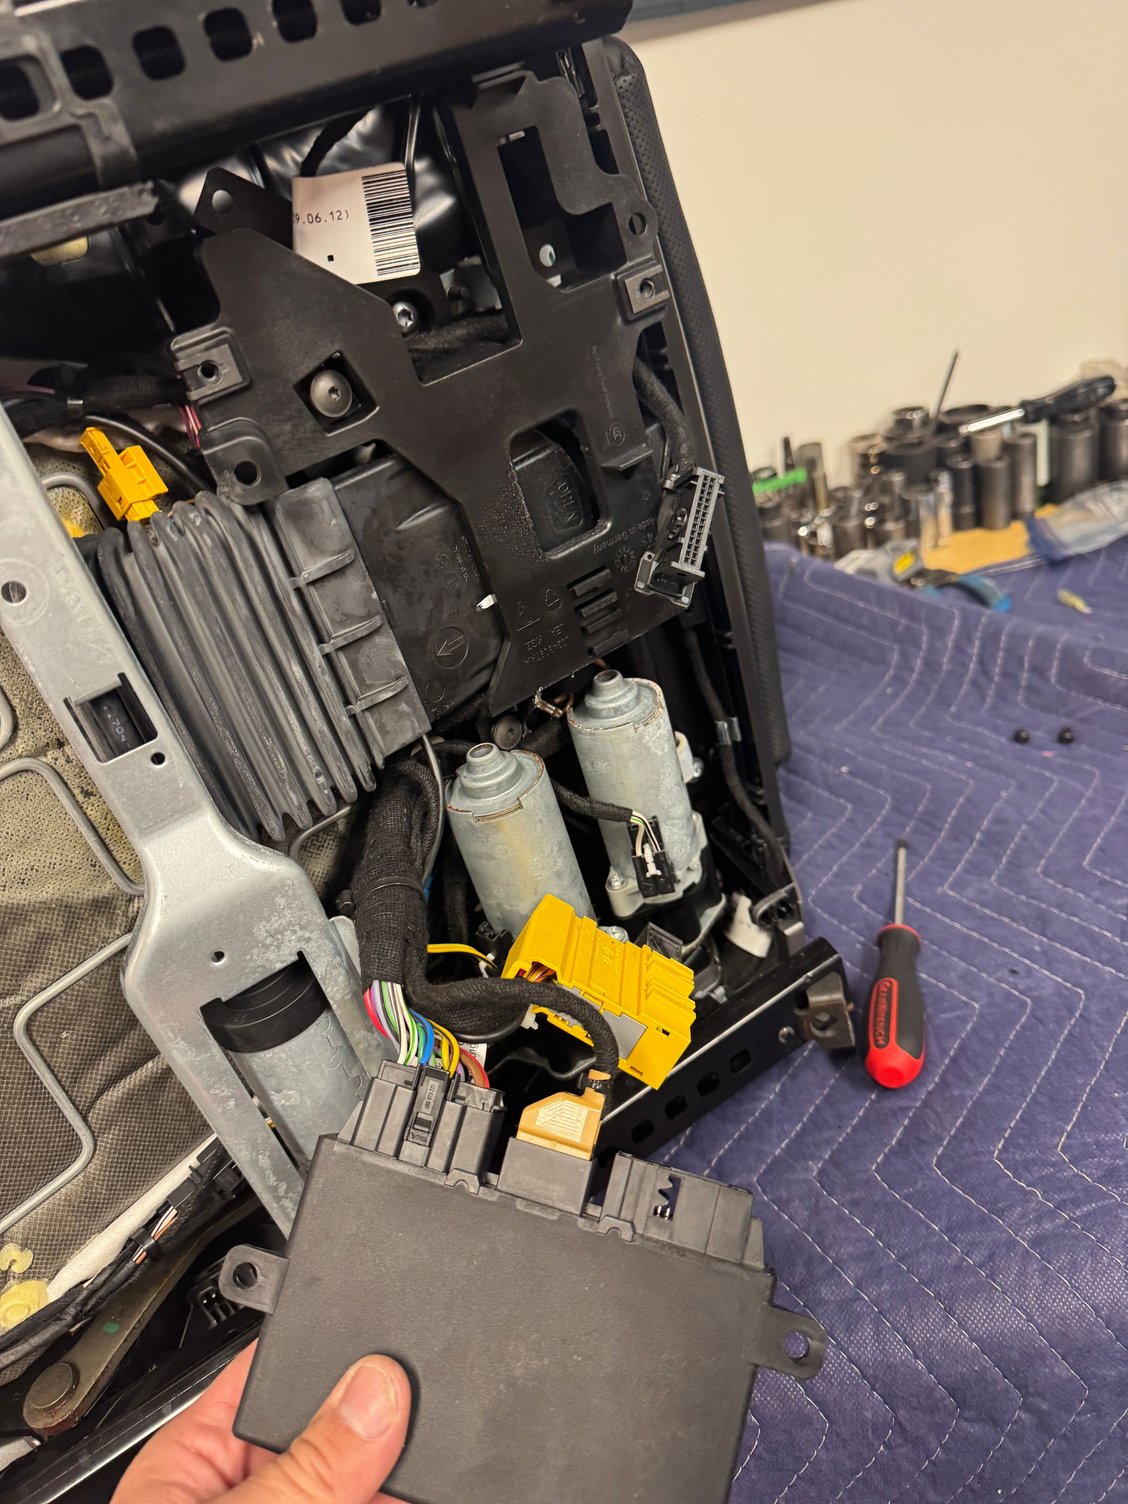
Remove the 3 screws holding the fan in place
On the bottom side, remove the 2 10mm grounds, and then 10mm stud beneath it.
Then remove these two screws, and there is one wiring connector attached to this plastic assembly not connected to anything that you'll want to remove.
This is about as much disassembly you'll need to do. The plastic carrier is on the RHS next to the seat.
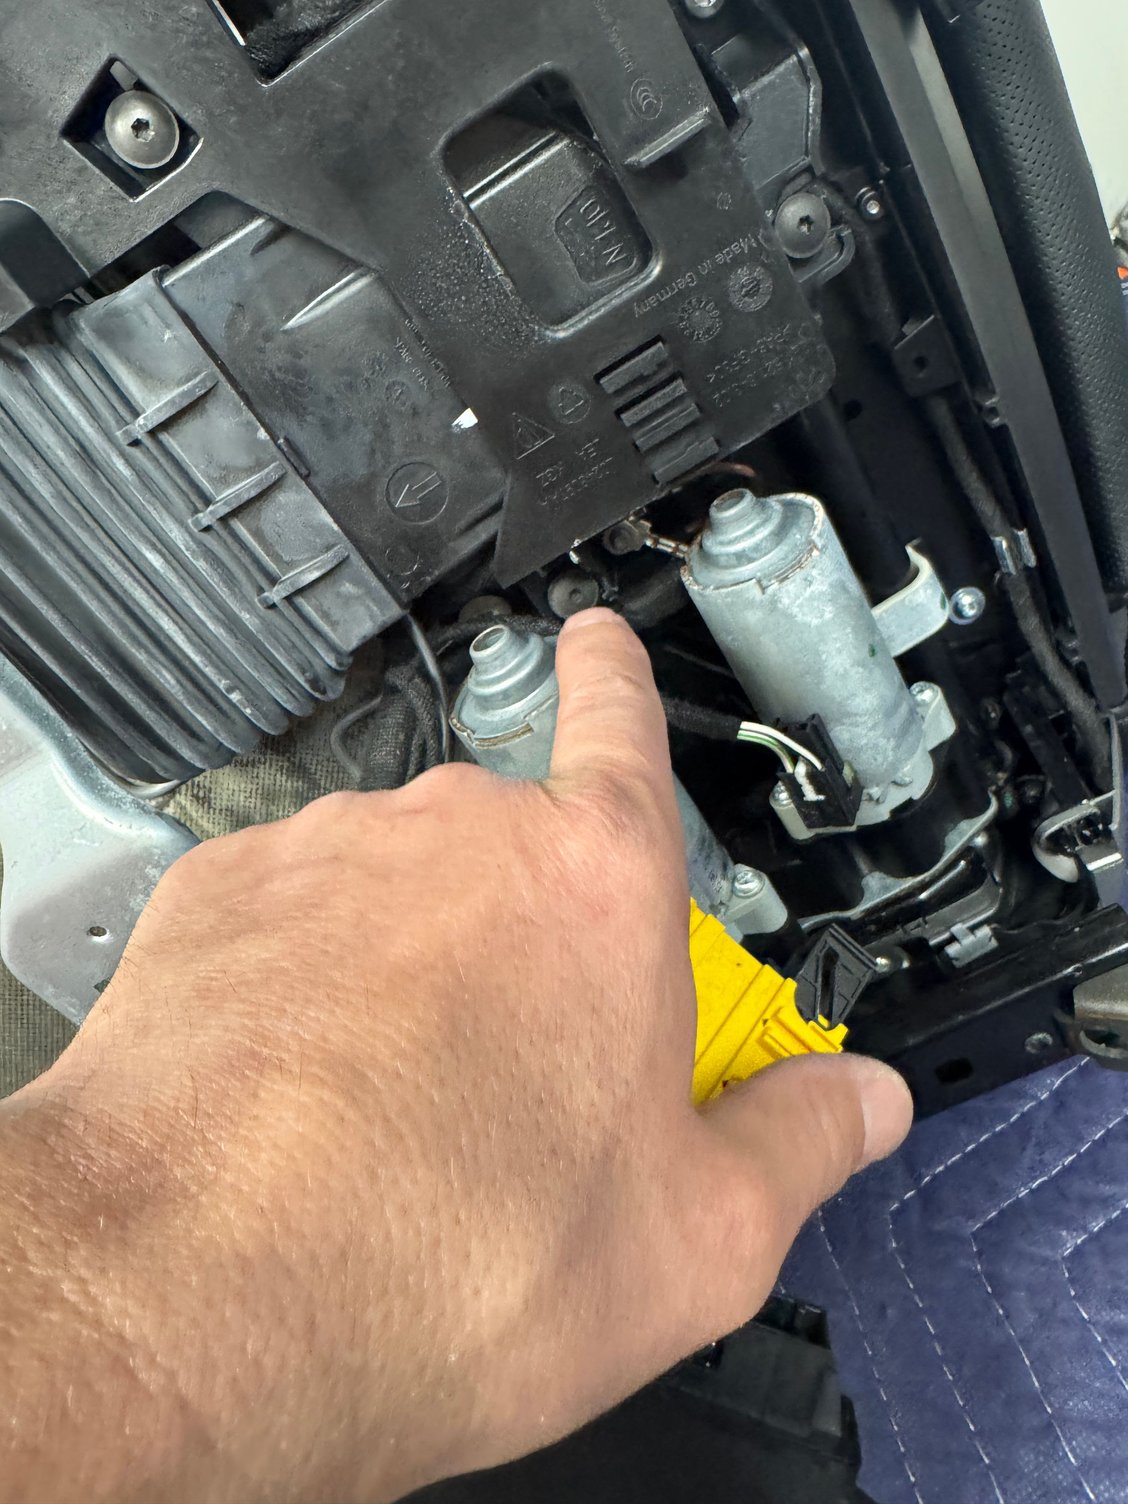
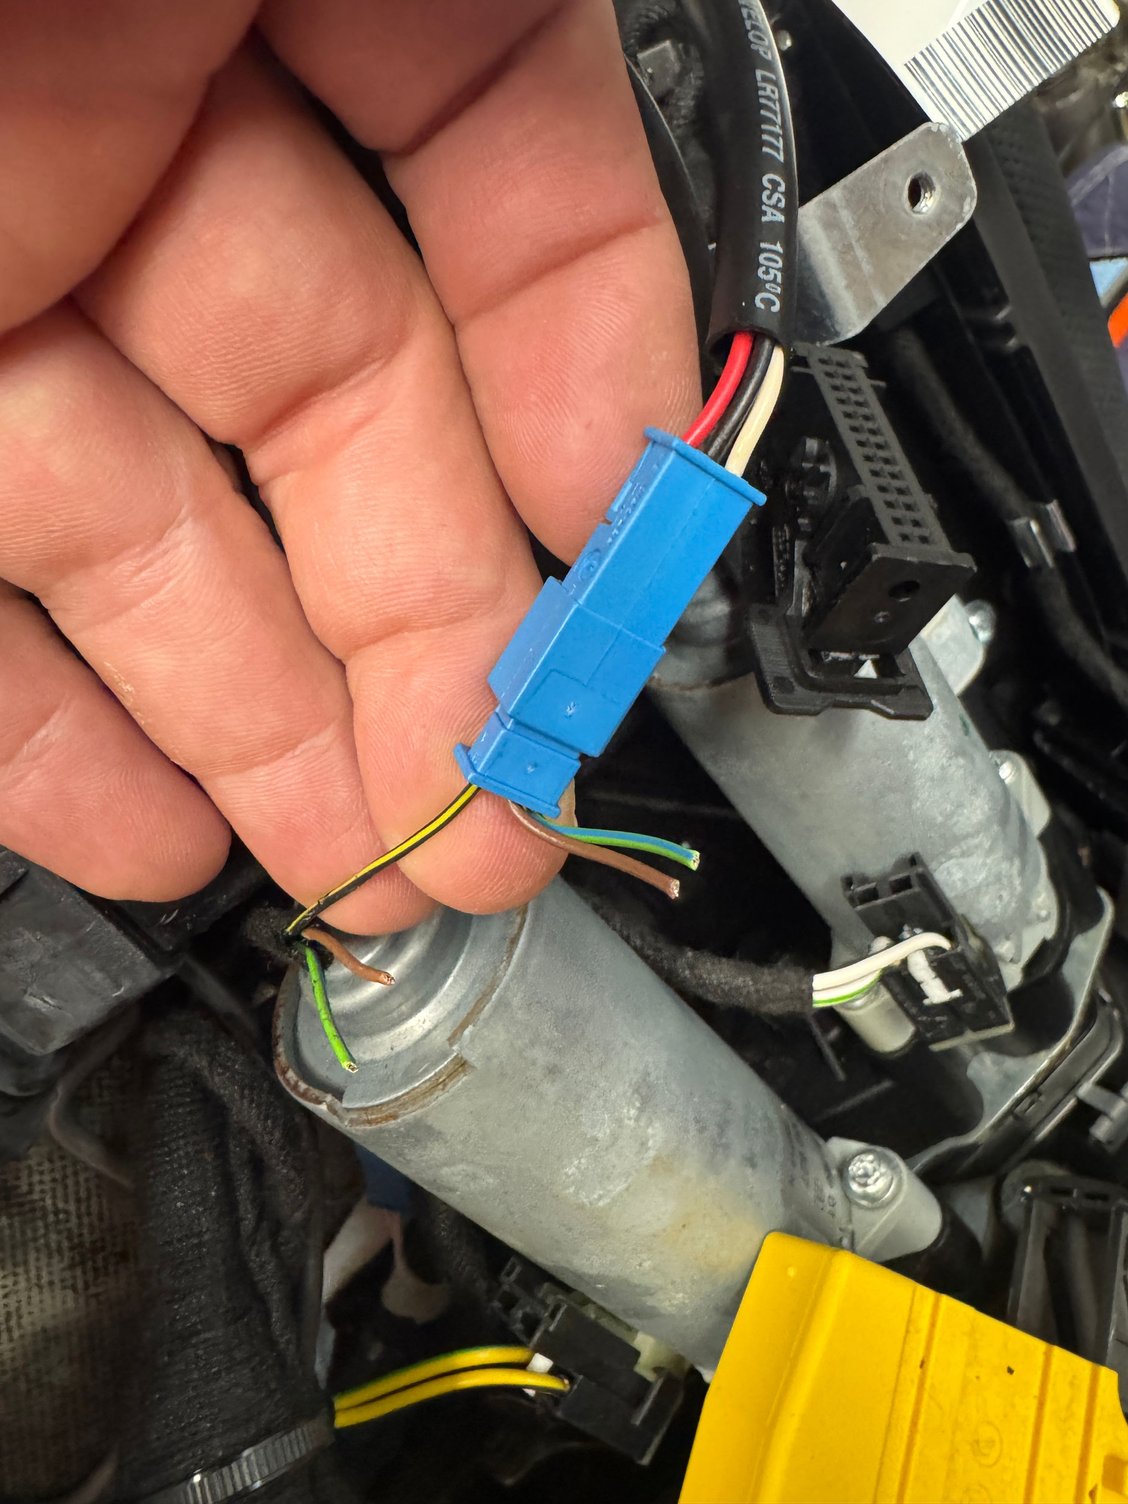
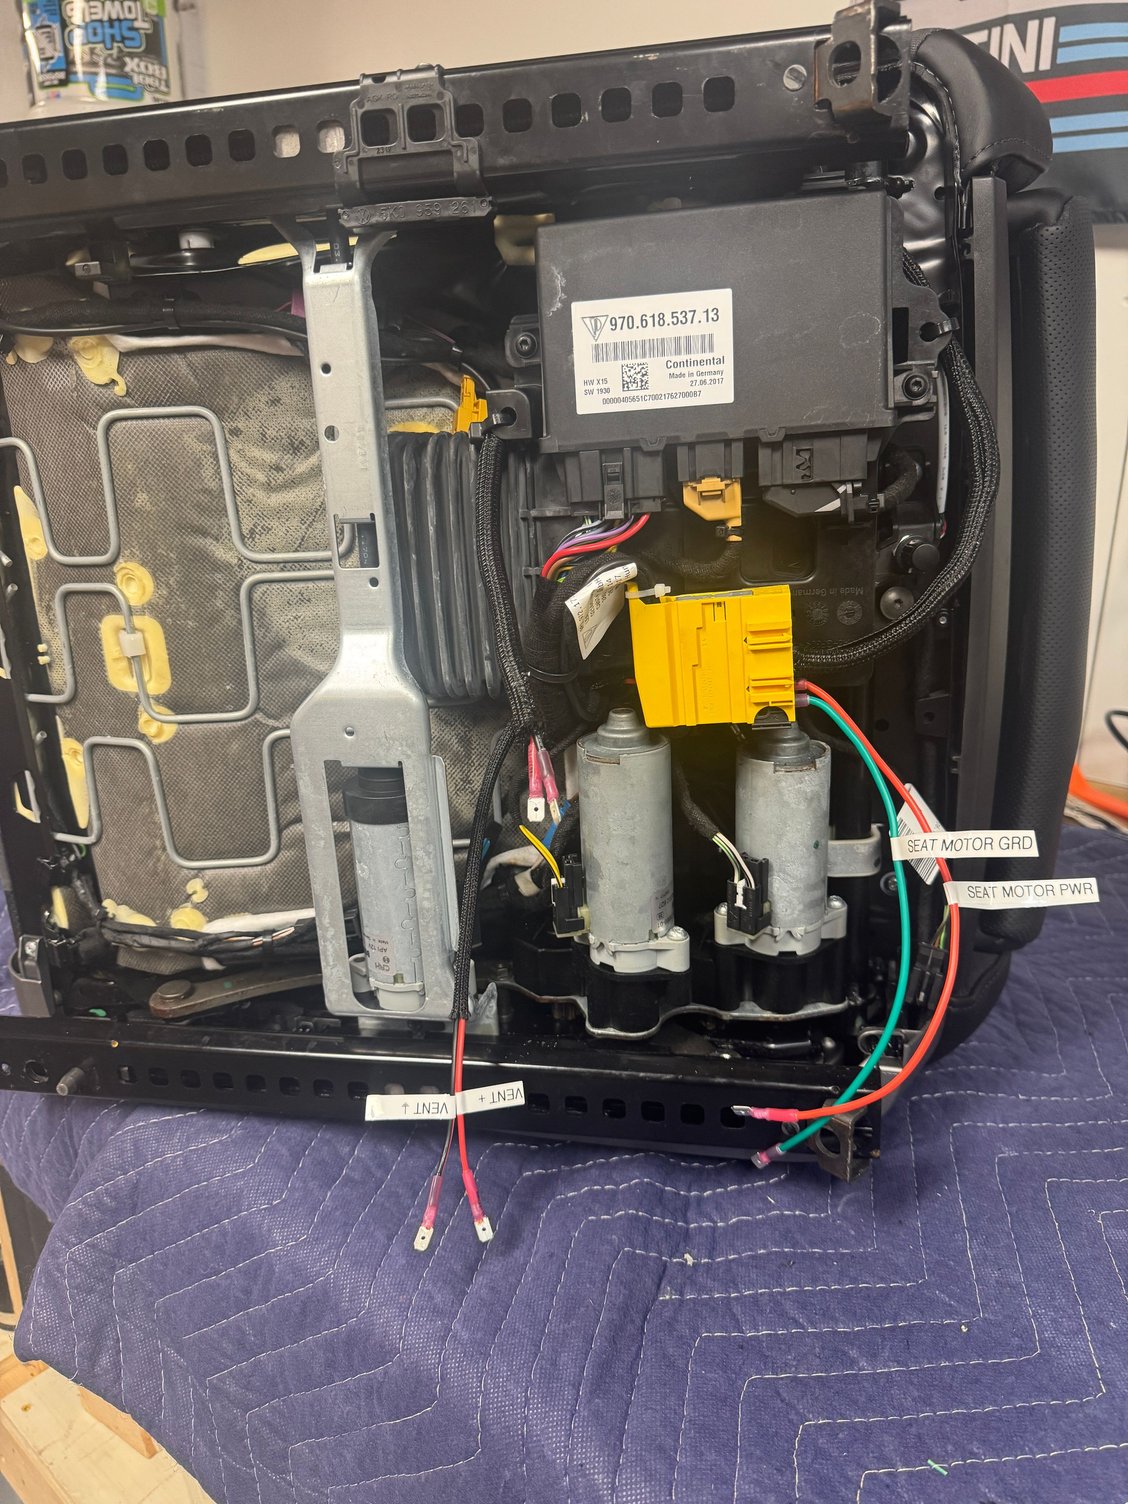
On the ventilation fan, find the connector. Make note of the ground (black wire) power (red wire) and the PWM wire (white).
The PWM pulses ground; so what we need to do is ground that PWM wire with the ground, and then it will be on and off on full blast.
I cut these on the harness side, stripped them back, added a NEW power and ground wire, and then soldered those leads all together, and shrink wrapped them.
Note wire color; Fan side is the easiest reference (solid red = power). The other two are connected together.
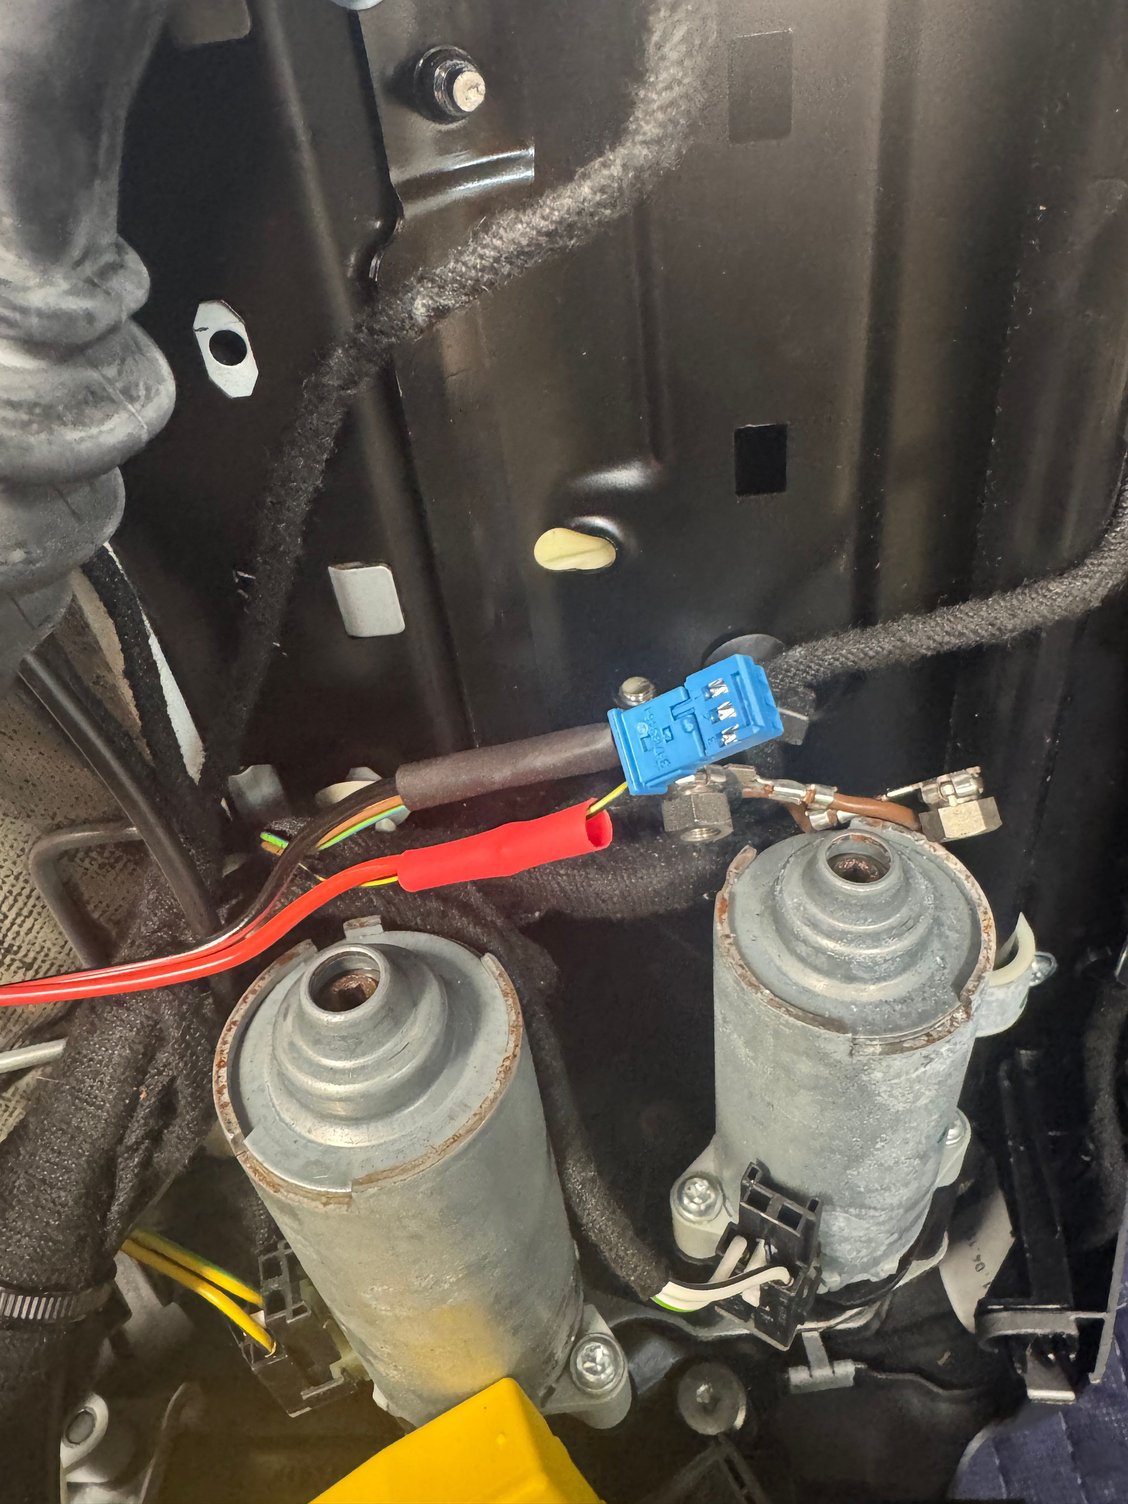
The new power and ground wires are about 15" long.
Soldered and ready to be heat shrunk.
That portion complete, it's time to move onto the heated seats.
I ordered this little controller from MakerMotor for $40. It has a pretty decent on/off pushbutton rheostat, and an indicator for when it has power. I decided to mount this on that plastic carrier, in a location that you can access while in the car, but very unobtrusively.
Here you can see where I drilled and cut a bit of this frame away of the carrier to allow it to fit.
Profile view.
With the nut tightened (gently) I used two zip ties to connect it to the carrier.
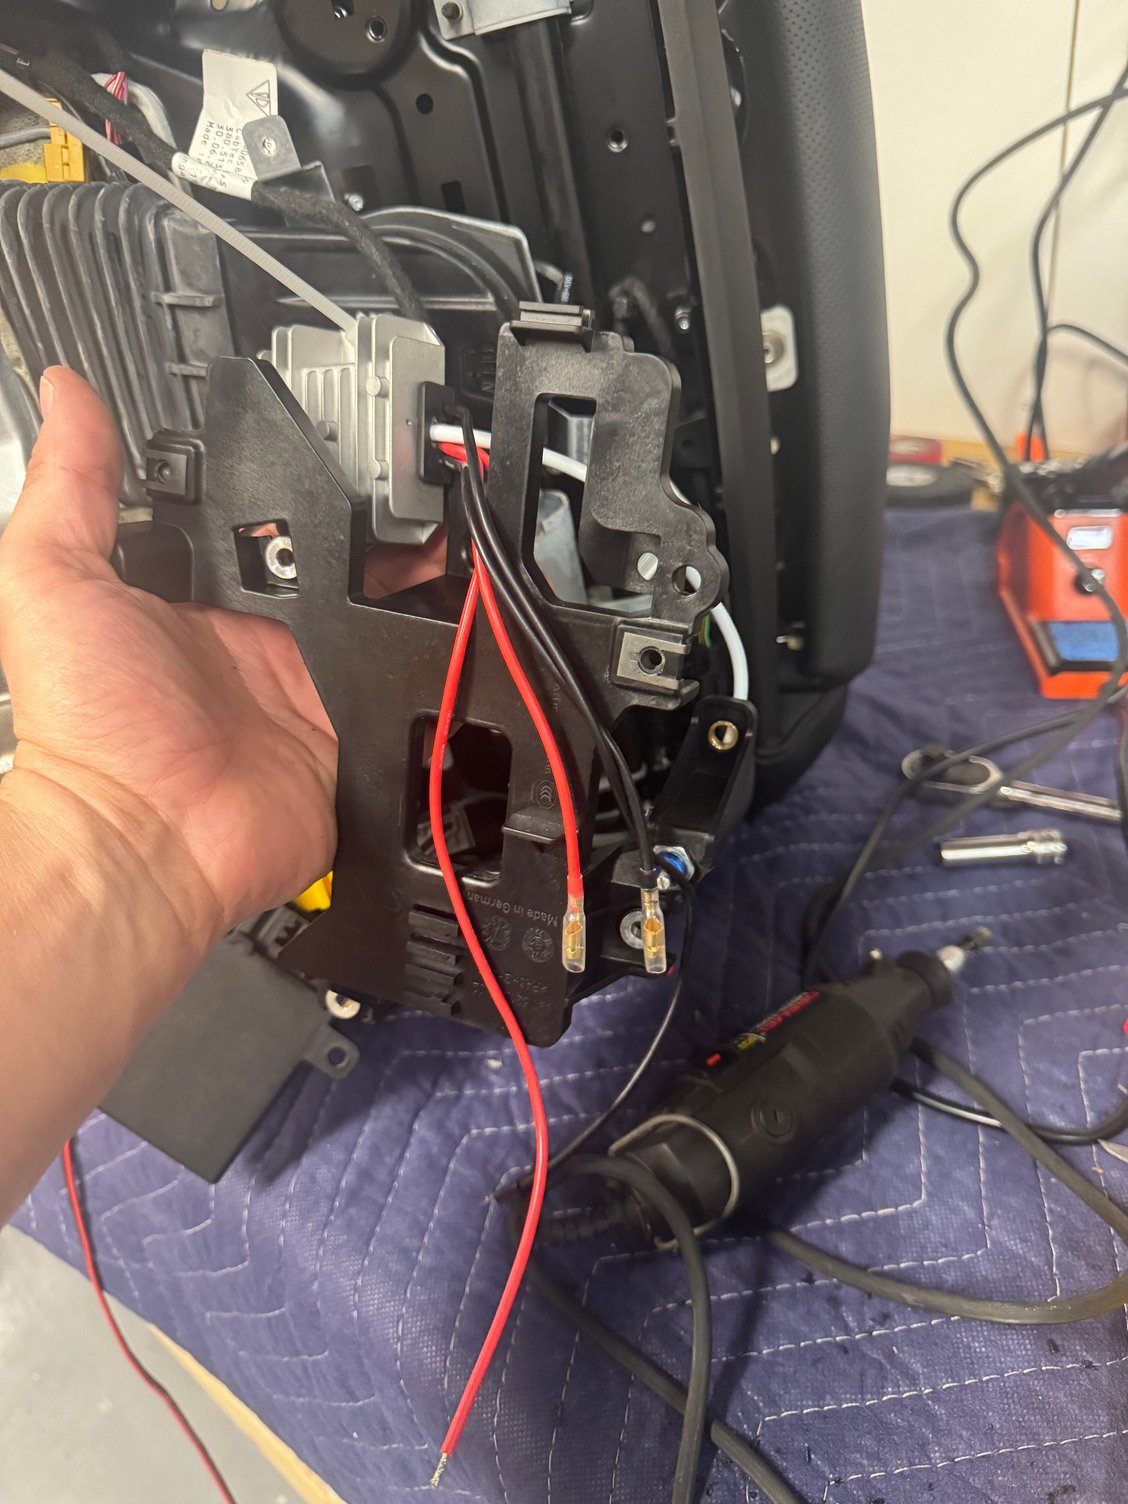
Below, the bullet connectors go to the yellow connector on the seat, and the longer red and black wires are power from the circuit.
Here's where I mounted the PWM.
Here's the carrier and fan reassembled.
details of the yellow main seat connector.
You need to extend the wires on the PWM; both the ones to the yellow connector, and the power feed lines from the circuit.
This is what it looks like all buttoned up and ready for install.
The two heated seat wires are in the black loom; their labels are inside the loom.
Second seat, knowing the plan and what all was involved, took about 90 minutes to do start to finish. We won't discuss how long it took to do the first seat.
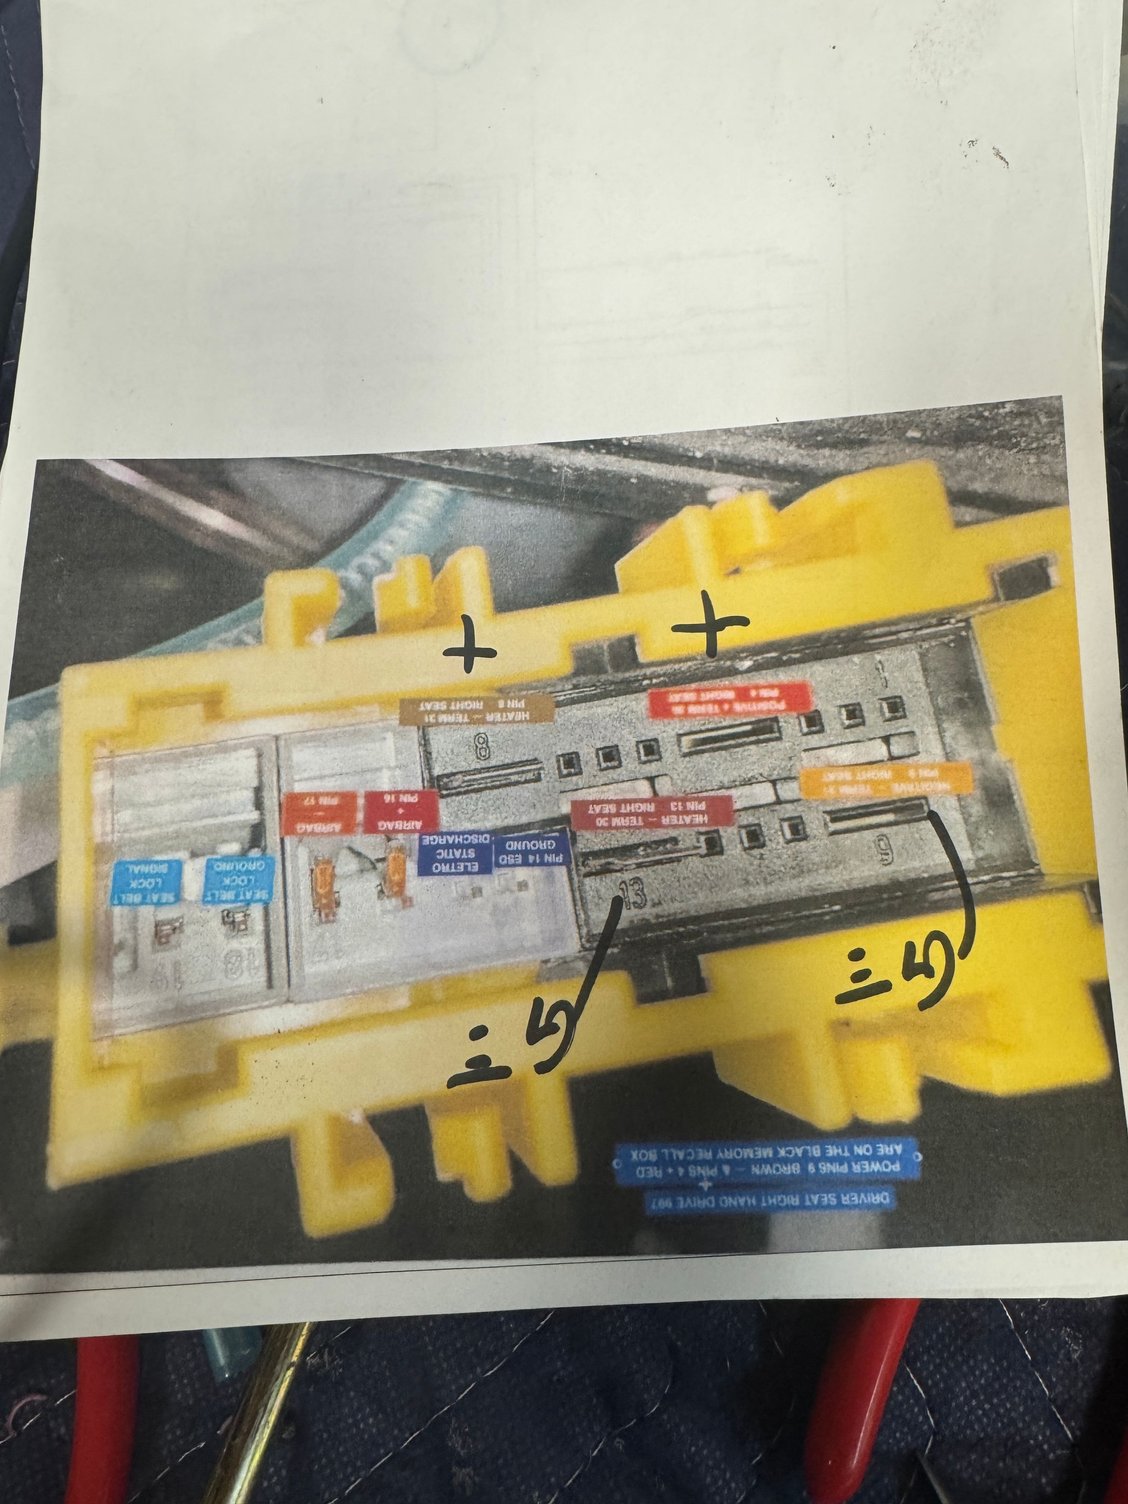
On the yellow connector, the inboard large spade terminals are for the heated seats, and then outboard ones are for the seat motors.
On the 14 way seats, all 14 seat functions work if you just supply power and ground to those seat connections. Obviously memory function doesn't work, but that doesn't bother me.
Last edited by 17ram2500; Nov 9, 2025 at 12:34 AM.
Yes, I could, but this is a royal pain, at least wiring it the way I did. There are now 8 new relays on the back ECU panel, one under the dash, and tons of wire everywhere. I would want a cleaner solution. And I still have a bug to figure out, and that is the illumination on the switches themselves. You'd think that power and ground would be sufficient, but it doesn't work that way - there's some other coding or type needed for the illumination and "power on" switch to work. Maybe at some point I"ll figure out the microswitch board in each switch, but for now, illumination will not work, and you'll have to use your butt-o-meter to determine if heat or cooling is on.
Which sounds like a lot of fun to me to mess with a passenger and make them think they've wet their pants due to the driving dynamics.
But I would never play such shenanigans on anyone.
A couple of wiring details, just for me for later, and anyone else. The main shut off relay I placed behind the dash. That sends power to the other 8 relays, and those are mounted on the ECU decklid.
Basically you have to take two relays to make each momentary switch work. I really wish I'd spent more time and made this "pretty", but, no one will ever see it except me, and... it's all labeled. So.
Oh the joys. My back is glad I"m finally back to having it all together and functional.