Complete Suspension and Brake Upgrade (lots of pictures)
 10-07-2017, 07:12 PM
#1
Advanced
Thread Starter

I’ve just finished a complete upgrade and overhaul of the suspension and brakes on my 2003 996TT. I’ve included a parts list for all of the suspension components used.
Hubs were replaced with 997. Of course, replacing the hubs required new wheel bearings as well. Before putting in the new hubs and bearings I bead-blasted the uprights and painted them.
Coilovers are Ohlins Road & Track units. Front upper strut mounts are from JRZ, and rear upper shock mounts are from Rennline. I had custom upper spring perches machined for both front and rear. Rennline includes integrated nut/bushings for the rear upper mounts in M12x1.0 and M12x1.5, but unfortunately the Ohlins are M12x1.25 so these had to be reworked for my application.
Front and rear lower control arms are Porsche Motorsports 997 components. These have forged aluminum bodies, solid thrust bushings with caster adjustment, use shims for adjusting camber, and monoball inner bearings. Fronts are the style with the OEM outer ball joints, while the rears have the upgraded re-buildable outer ball joint and high-strength pin as used on the RSR.
Rear upper control arms I put together myself with threaded aluminum tubes from AFCO, NMB aerospace rod-ends, and custom-made 17-4 stainless bushings.
Rear toe-control arms are made by Pro-Series Fabrication and are pinch-bolt style machined from 7075-T6 aluminum. NMB rod-ends are used again, and the outer pin is from Porsche Motorsports. Bump-steer can be adjusted by using spacers. All of the rod-ends received dust boots.
New Porsche hardware was used for all connections, and eccentric lock-out plates were used for the rear toe-control arms and lower control arms. While I was at it I modified the front radiator brackets for tire clearance.
Brakes are Brembo 2-piece 72-vane 997TT disc assemblies in 350x34mm front and 350x28mm rear sizes. Calipers are 991 PCCB units, 6-piston front and 4-piston rear with Pagid pads. Brake lines were custom made to my specs by Goodridge. Air guides (not shown) are from the 997 GT3.

 10-07-2017, 08:16 PM
#6
Advanced
Thread Starter
More modern caliper design, and taking off the caliper to change pads isn't much of a hardship, since I'm typically changing discs at the same time.
10-08-2017, 01:01 AM
#7
Advanced
Trending Topics
10-08-2017, 02:34 AM
#9
Rennlist Member
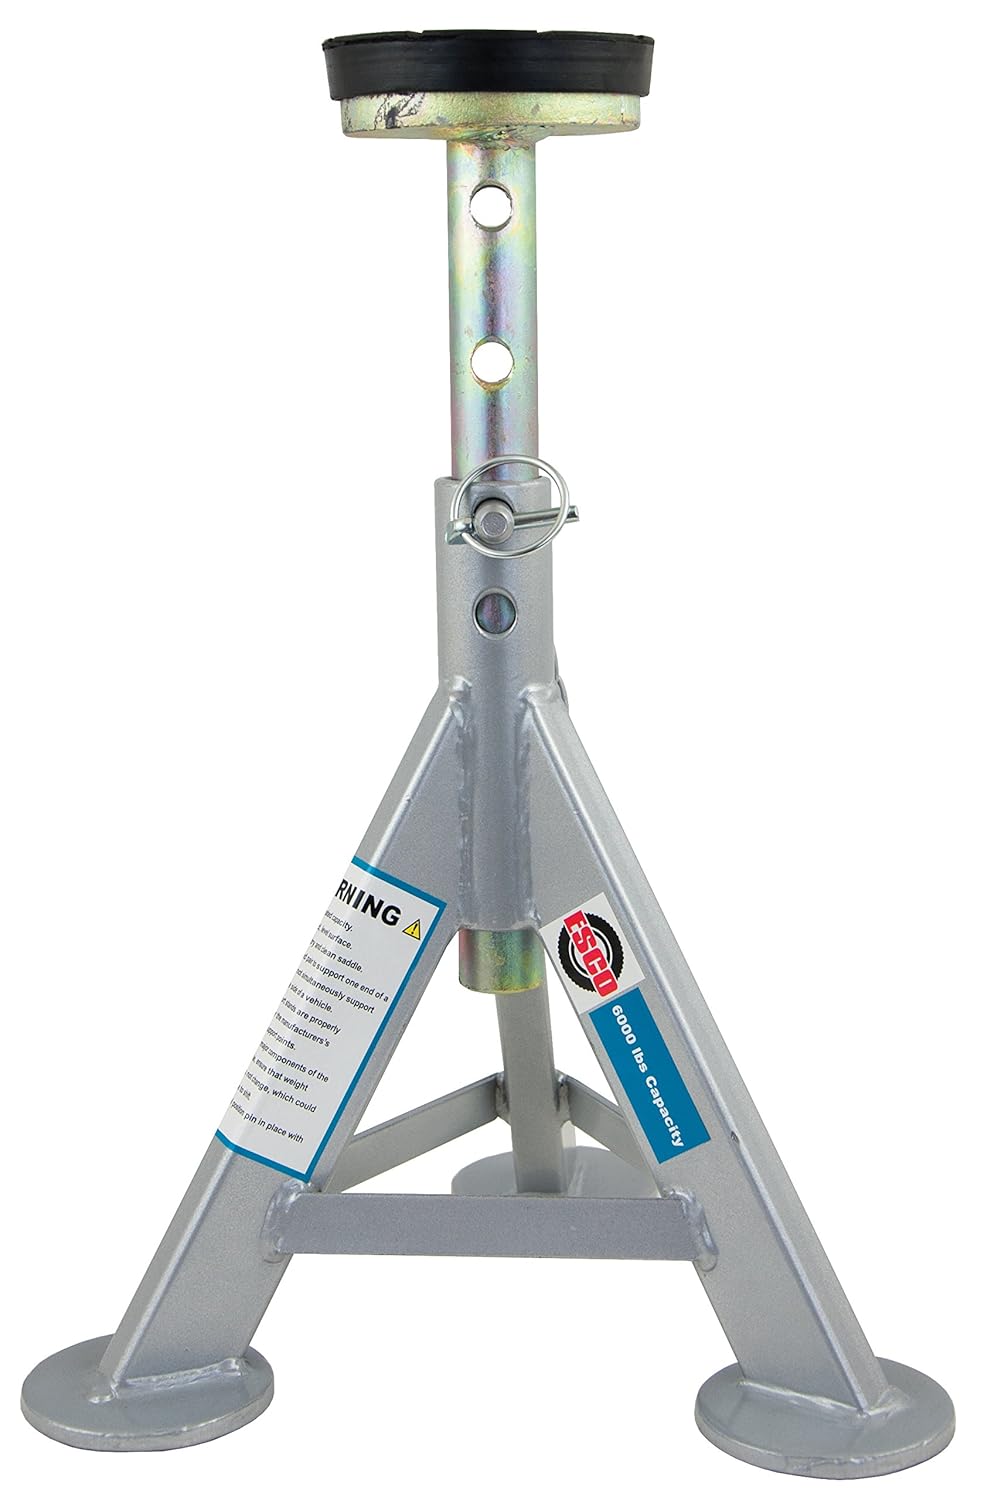
Gorgeous suspension and brake components...
But I cringe every time I see a car on those narrow base Torin-style jack stands... Do you get under the car when it's on those? Just looks flat out dangerous to me.
With all the $$$$$ into the other components, how about treating youself a set of Esco jack stands? Incredibly stable, flat top, tons of height adjustment, worthy of trusting your life to.
 10-08-2017, 11:01 AM
#11
Advanced
Thread Starter
No LSD yet, I am still AWD. One day when the engine and gearbox come out it will get one and probably 2WD conversion.
 10-08-2017, 11:42 AM
#13

Good lord that's gorgeous! Almost too pretty to hide it away by putting it on the car.
Almost.
Is it time for an official "suspension ****" thread?
Oh, and I also share the concern about your jacks' footprints & therfore the stability. Since we're talking suspension, it's all about contact patch.
Did you by chance put it up with a mid-rise scissor lift, then remove that for the beauty shots? That's the only thing I can imagine doing, if I were to do it myself.
10-09-2017, 03:41 PM
#15
Rennlist Member
The LSD works great with the AWD too, if you're tracking I'd recommend doing it just for the trail braking stability you gain.