
Home LSD rebuild
 02-12-2012, 12:02 PM
#1
Racer
Thread Starter
I had been reading different posts regarding LSD longevity on our loved GT3s... My car has currently 45K and has only been tracked by us for about 1.5 yrs. WHile I had the car on jack stands, I test the diff by spinning one wheel in one direction. The other wheel, turned ion the opposite direction just like an open diff. I then decided to go in and rebuild it with Guard Transmission internals.
I documented my work just in case some of you might be thinking about taking the plunge. The hardest part will be removing he diff from the transaxle and probably loosening up the ring gear bolts.
I jacked up the car and placed it on jack stands and had two back up hydraulic jacks under it. One under the engine and another by the front jacking point. One cannot be too safe.
Drain trans. Loosen CV joint at trans (both sides), remove side cover. I tied up the half shaft towards the back of the car for clearance. I also loosened up the two hoses that go over the shaft and placed on top of the holding bracket. Furthermore, I tied the hose towards the outside of the car.
You need to remove the flanges on both sided. Once that is done, the diff can come out. It was a tight fit, but I was able to do it by passing one hand through suspension assembly to maneuver it out.
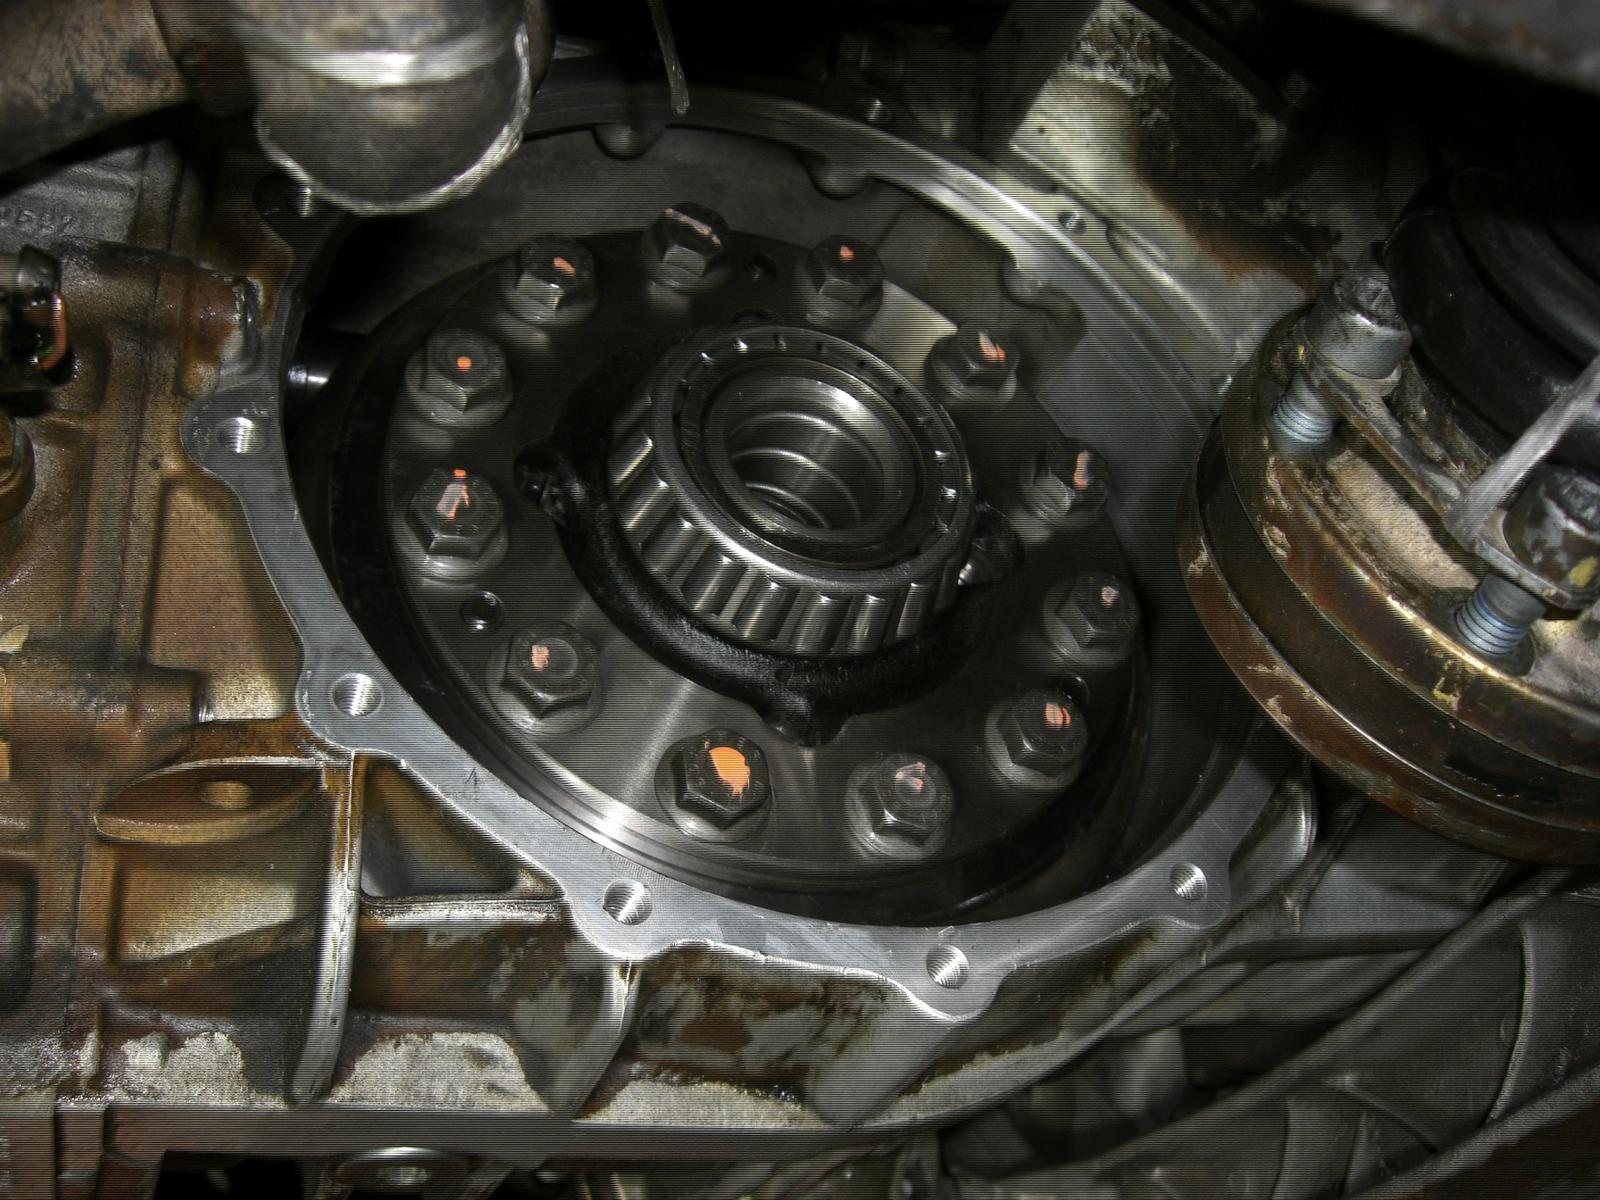
Once on the bench, I used my air ratchet to loosen up the bolts around the ring gear after marking its original position. They are torqued to 148#. I could not undo 3 of them so I got help from a local gas station.
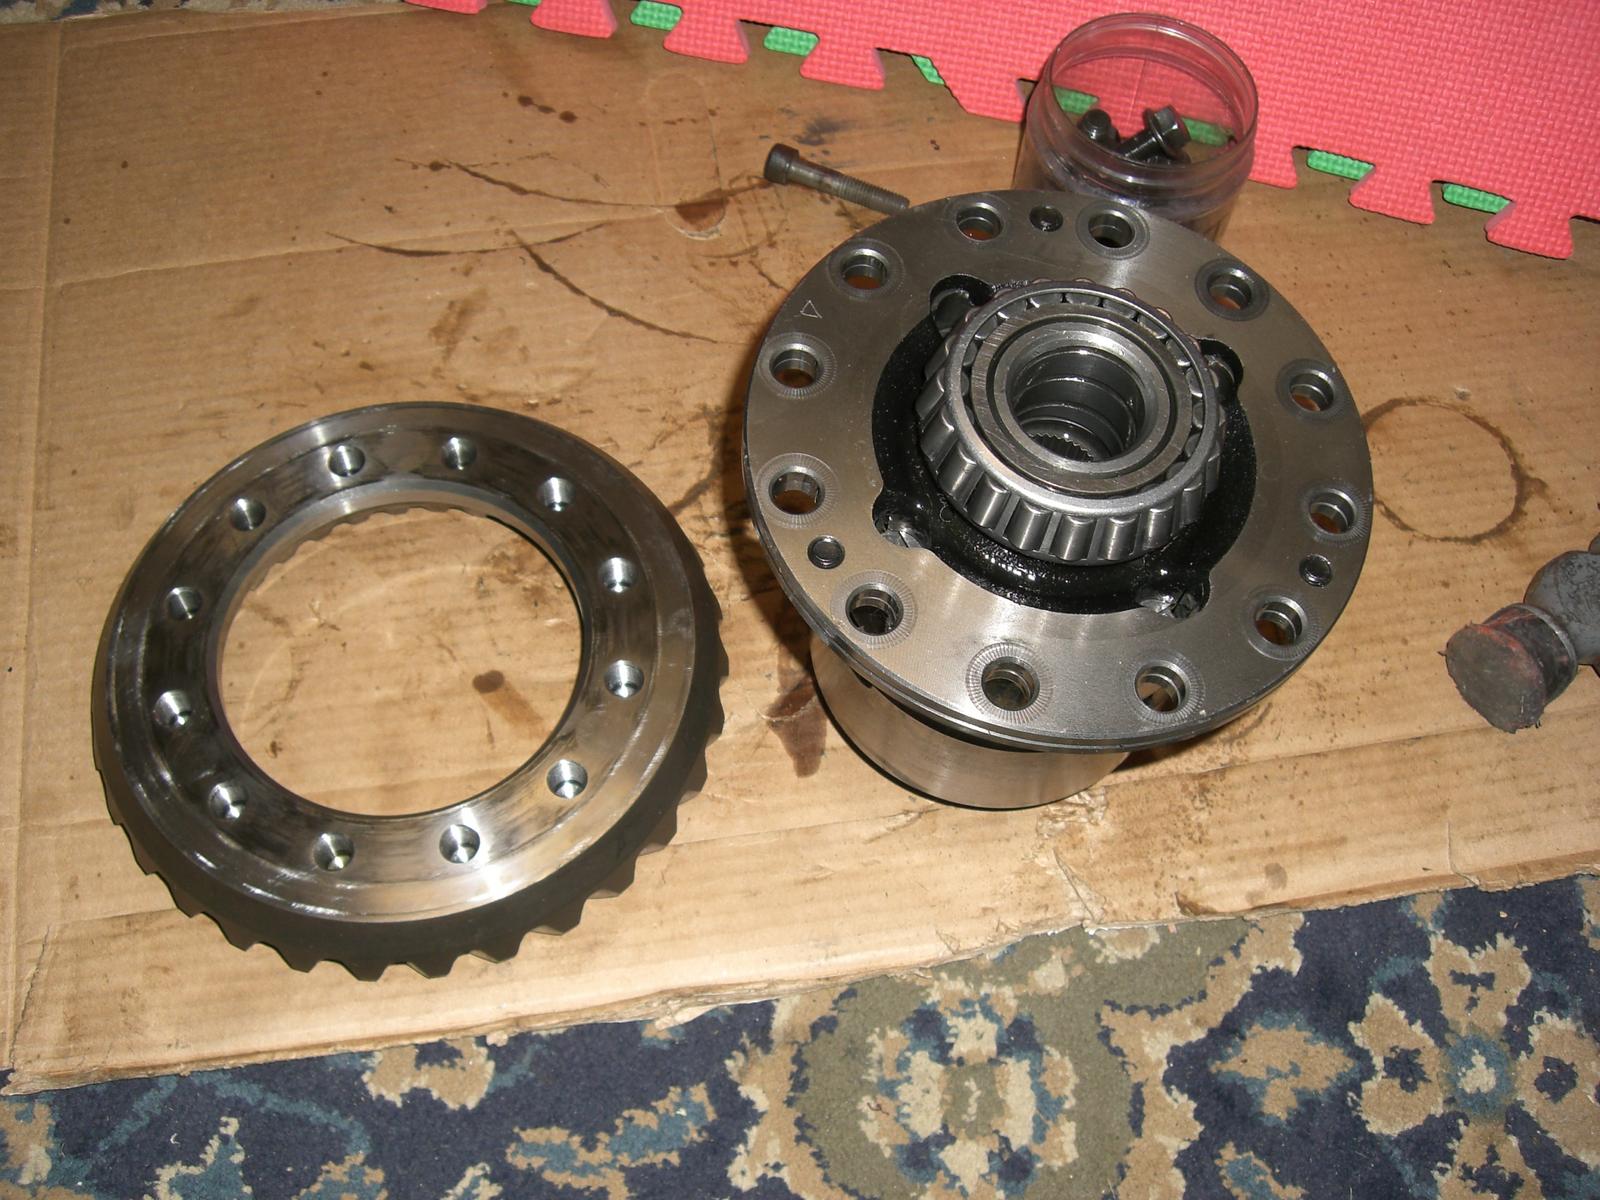
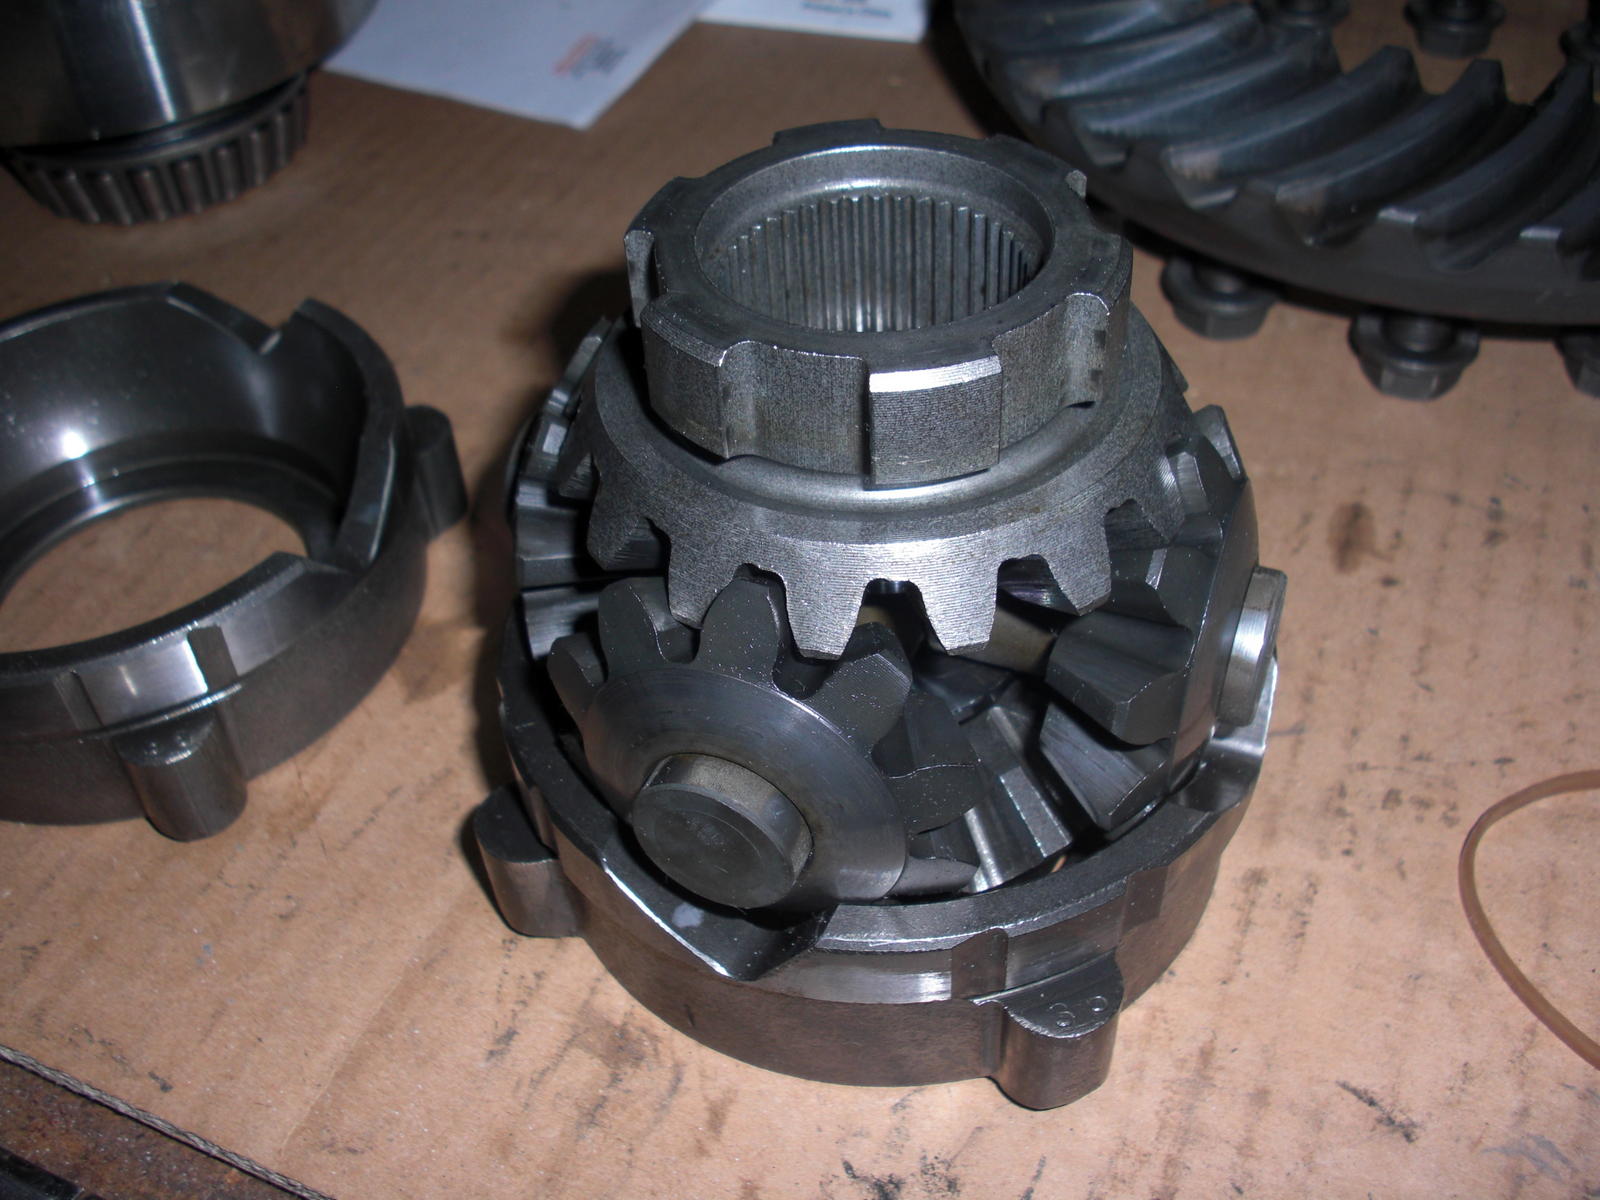
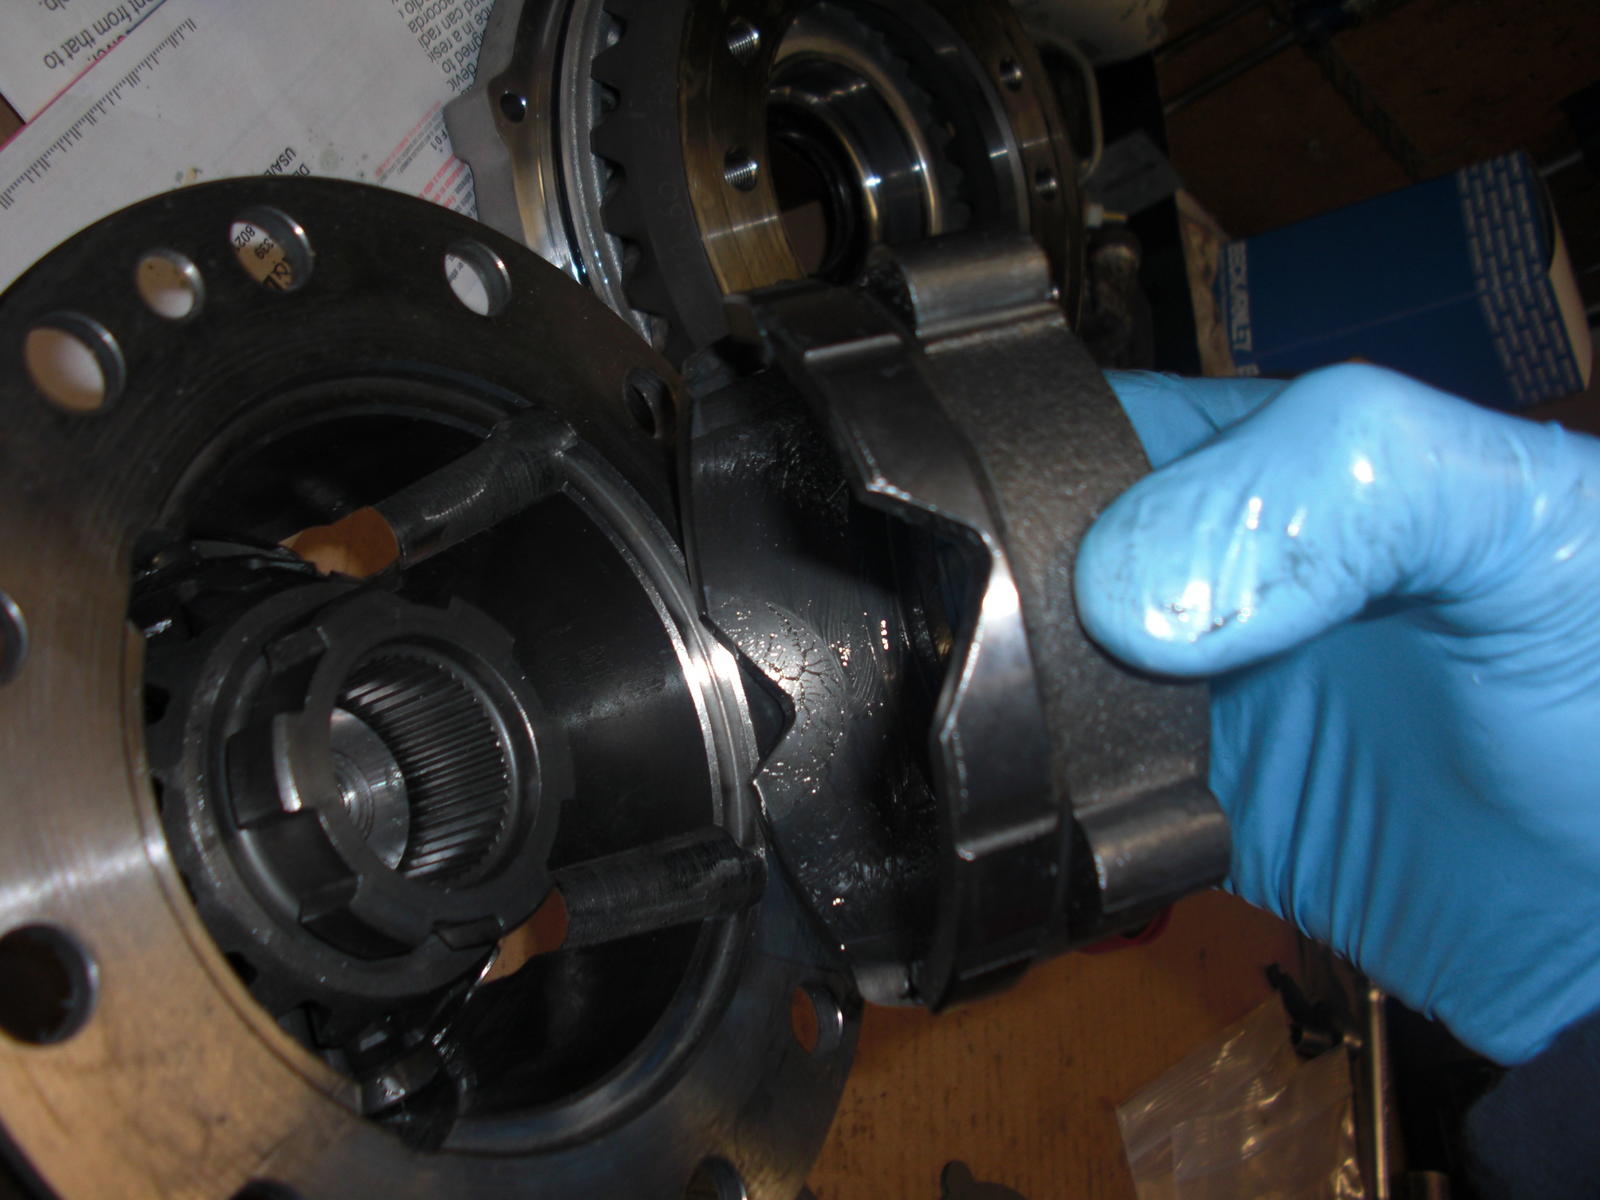
The lid then comes off (3 screws, mark position) revealing the washers, plates, frictional surfaces and the carrier that holds the planetary gears. Notice position of the ramps as the carrier needs to be reassembled in the same way. The ramps provide the locking action while accelerating or braking.
I then spoke to Matt at Guard Transmissions and sent him the external dimensions of the carrier . He uses that to prepare a custom shim pack for your diff to provide the correct pre-load. Porsche just sells a "one size fits all" pack. Problem is that there could be almost a 3mm variation (as per Matt), so you could have a very loose diff if your cage happens to be in the small end of the spectrum.
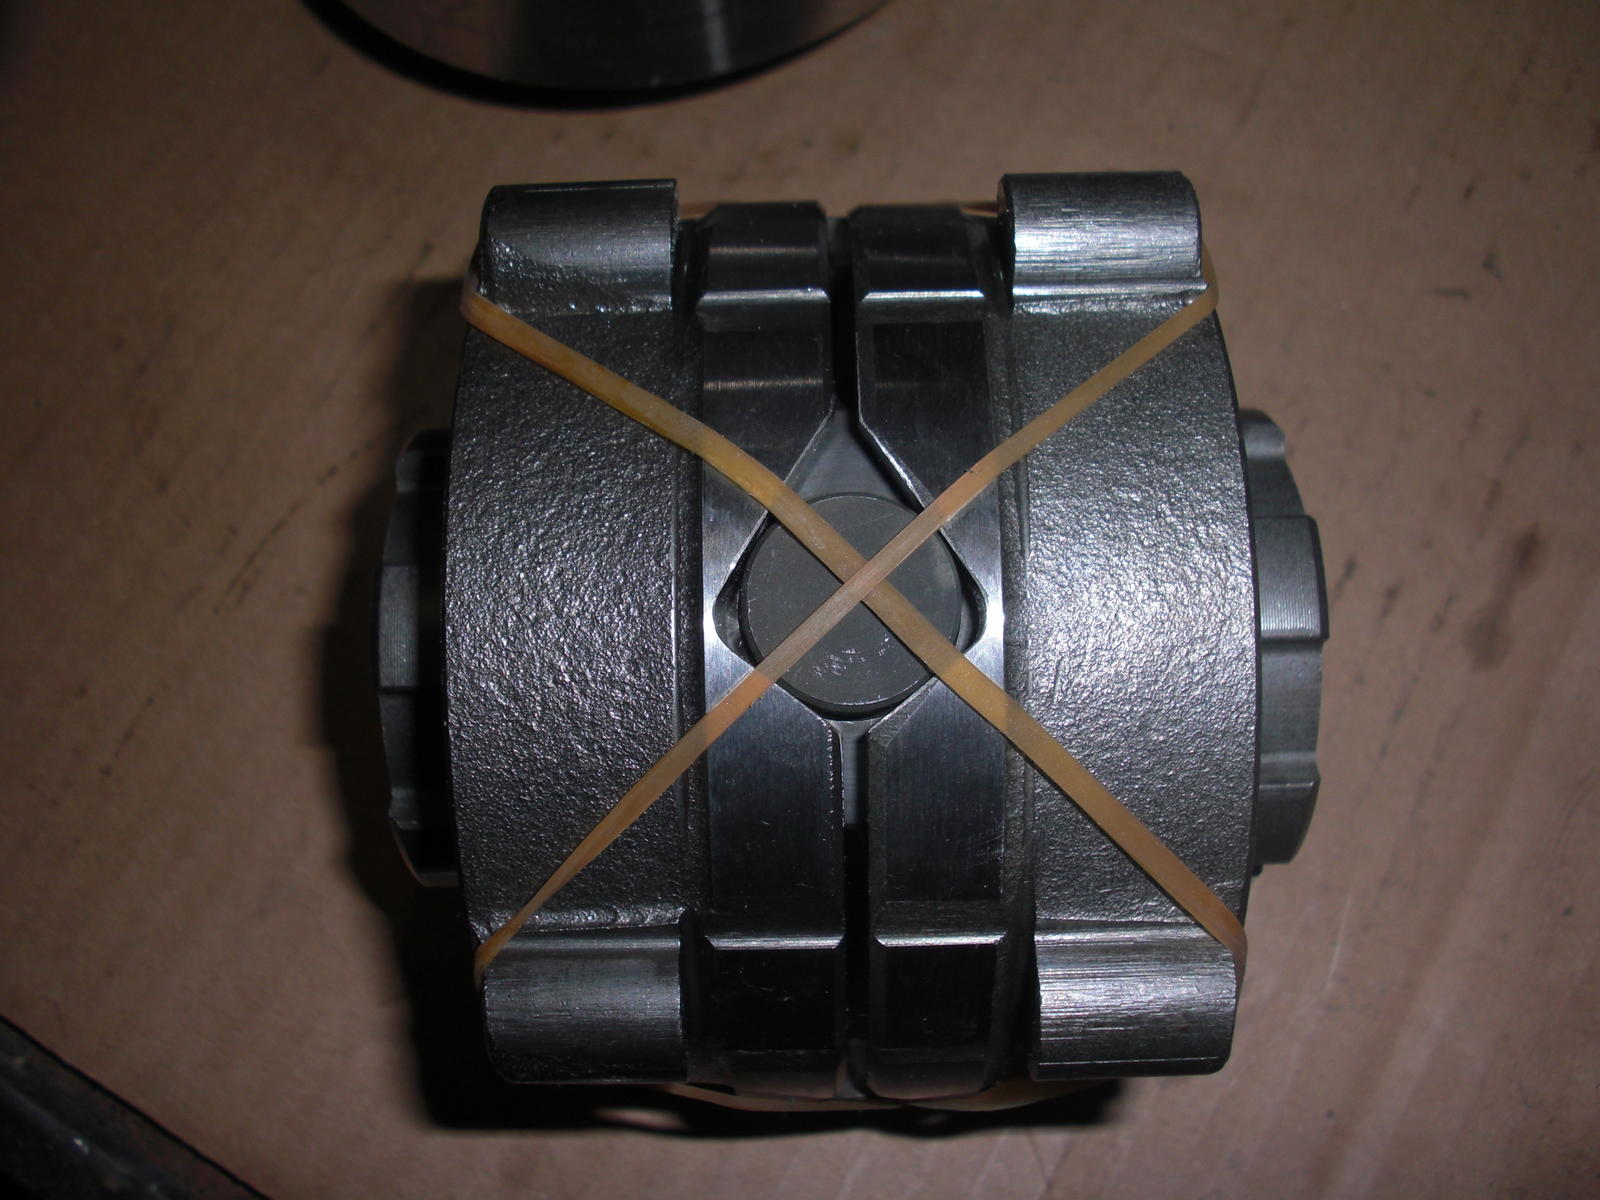
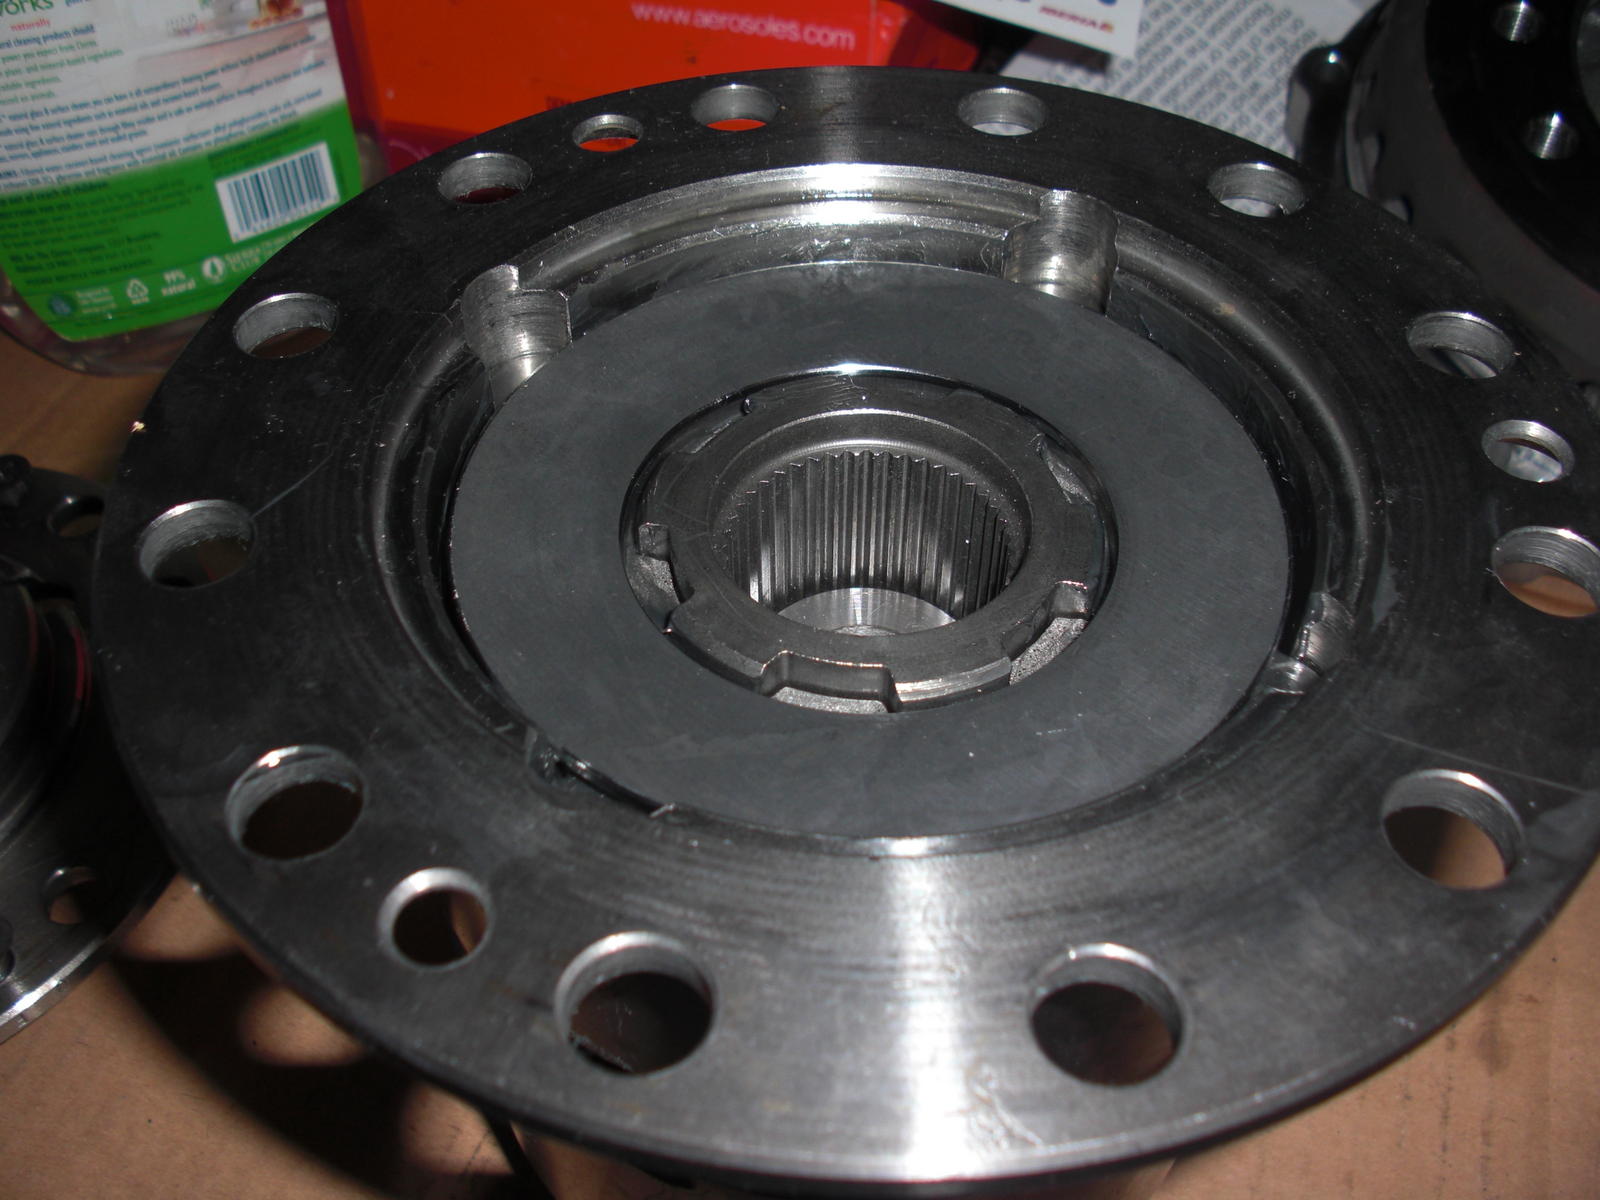
Planetary gears shown in picture (after opening carrier) showing large splines that connect to internal plates and friction plates. The small internal splines that connect to the output flanges.
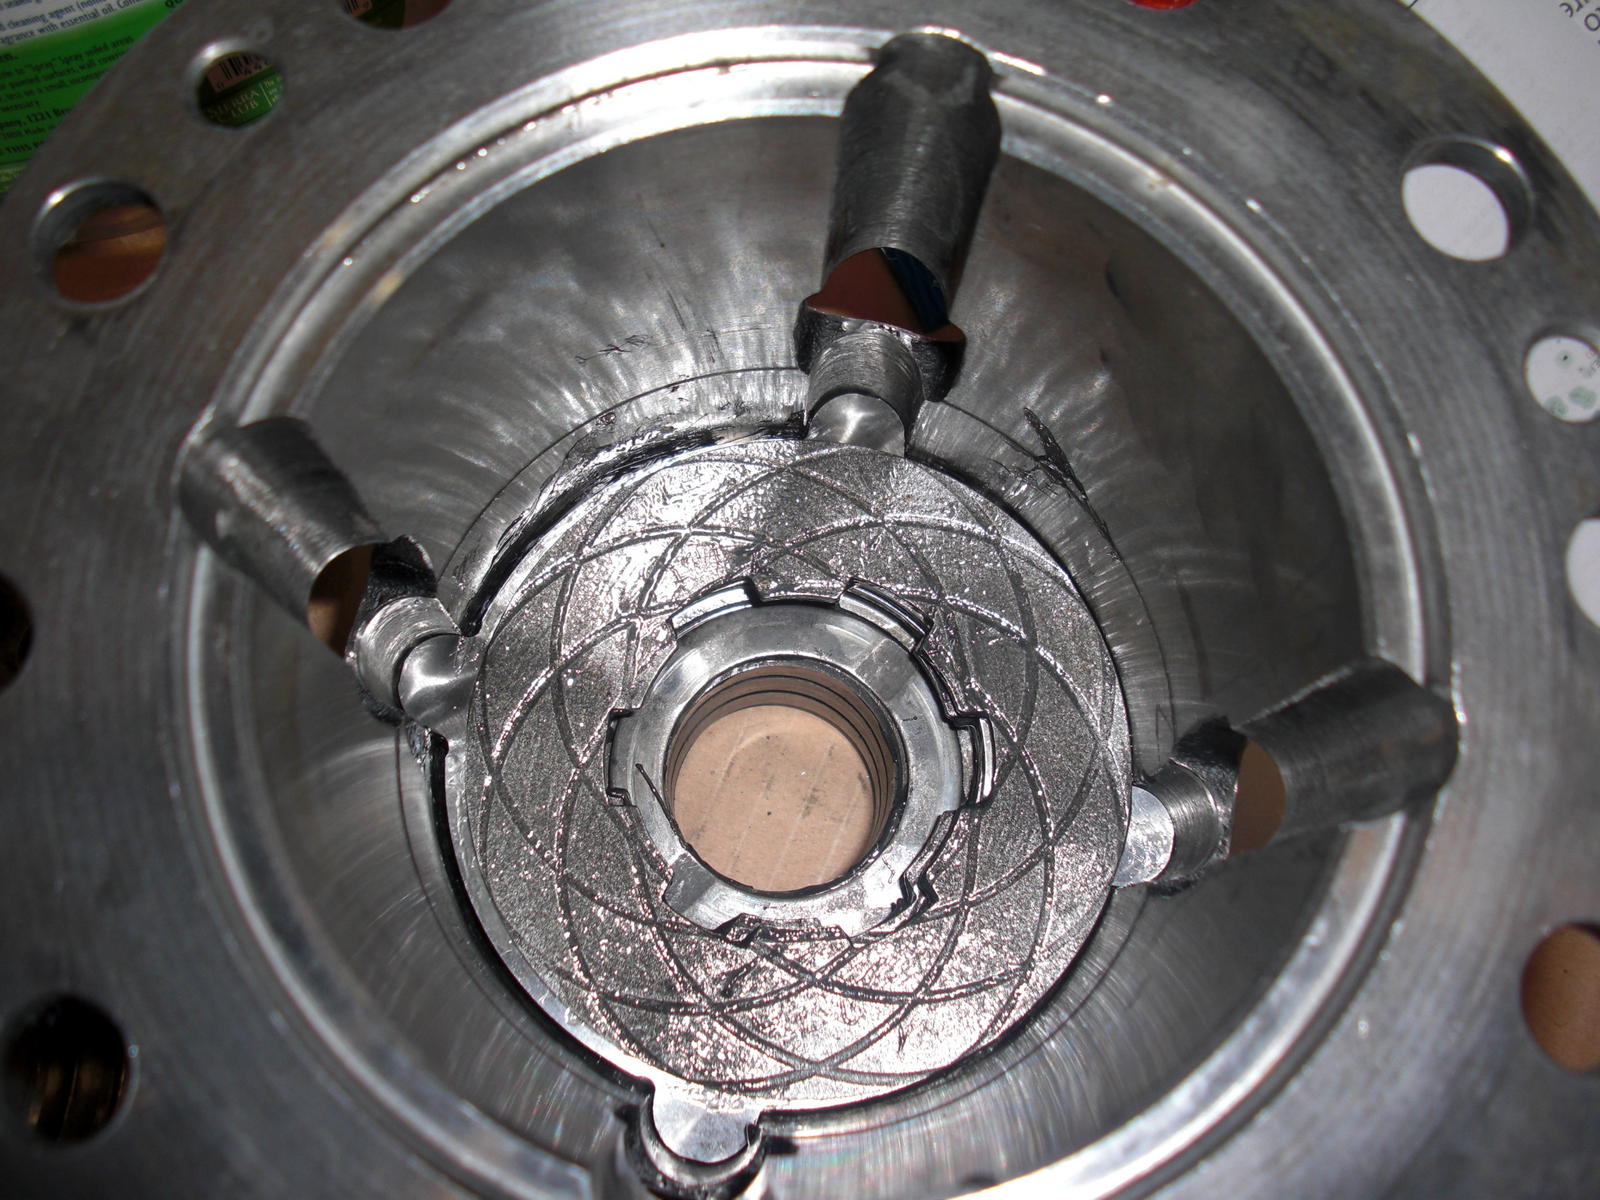
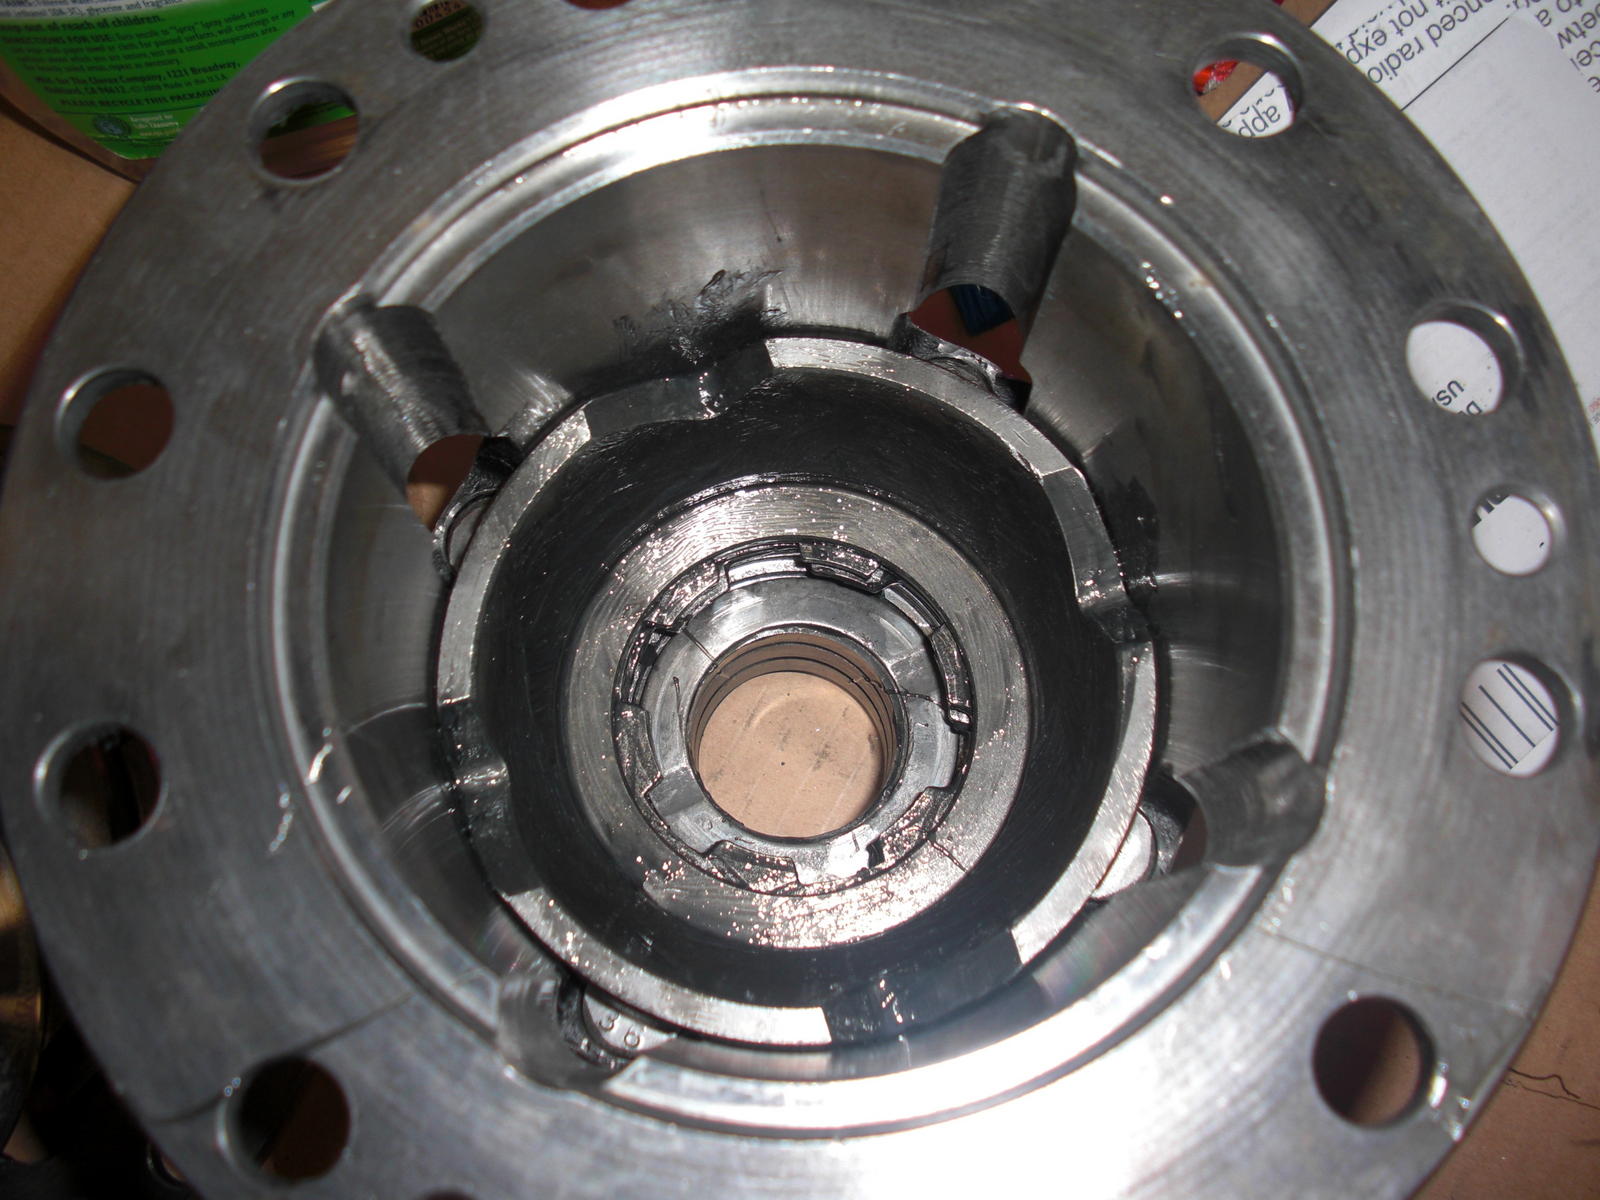
After disassembling the clutch pack, you can see how only the outer surfaces of the friction plates were barely making contact with the spacers. Notice that the marks left in the machining process are still there on the smooth plates showing the the friction plates were never making full contact.

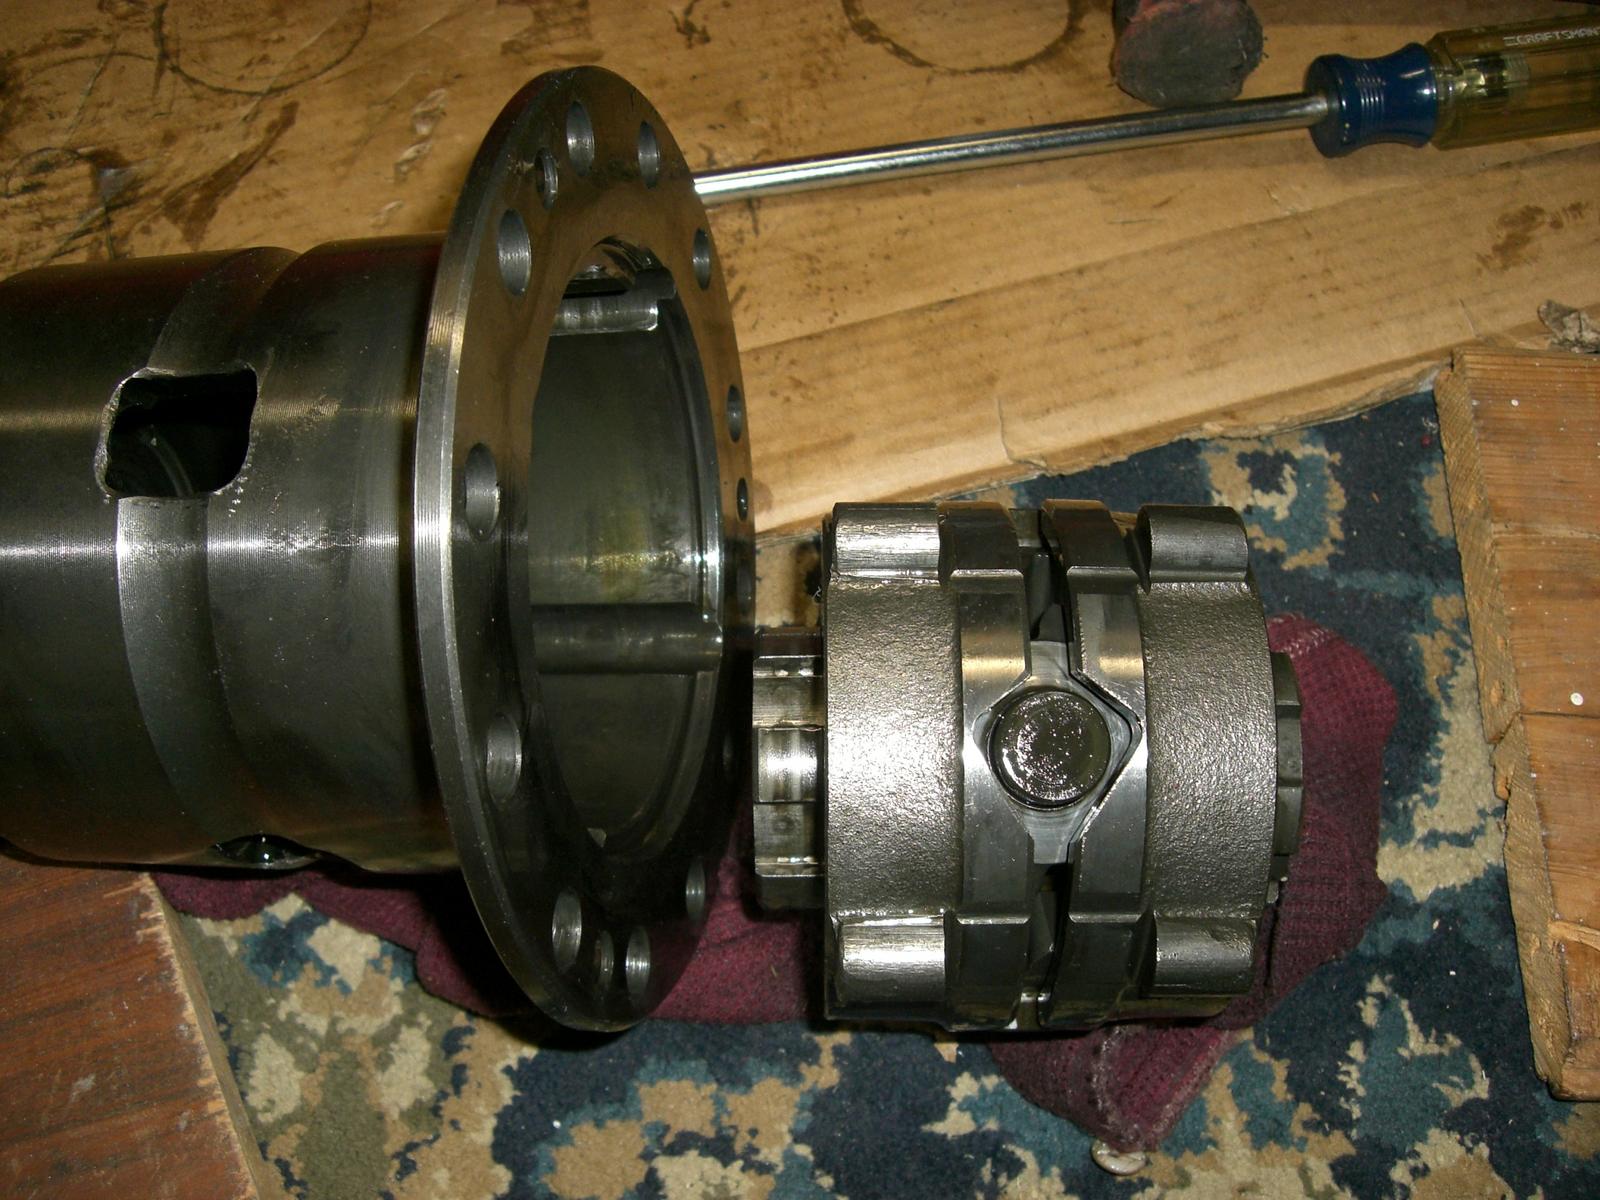
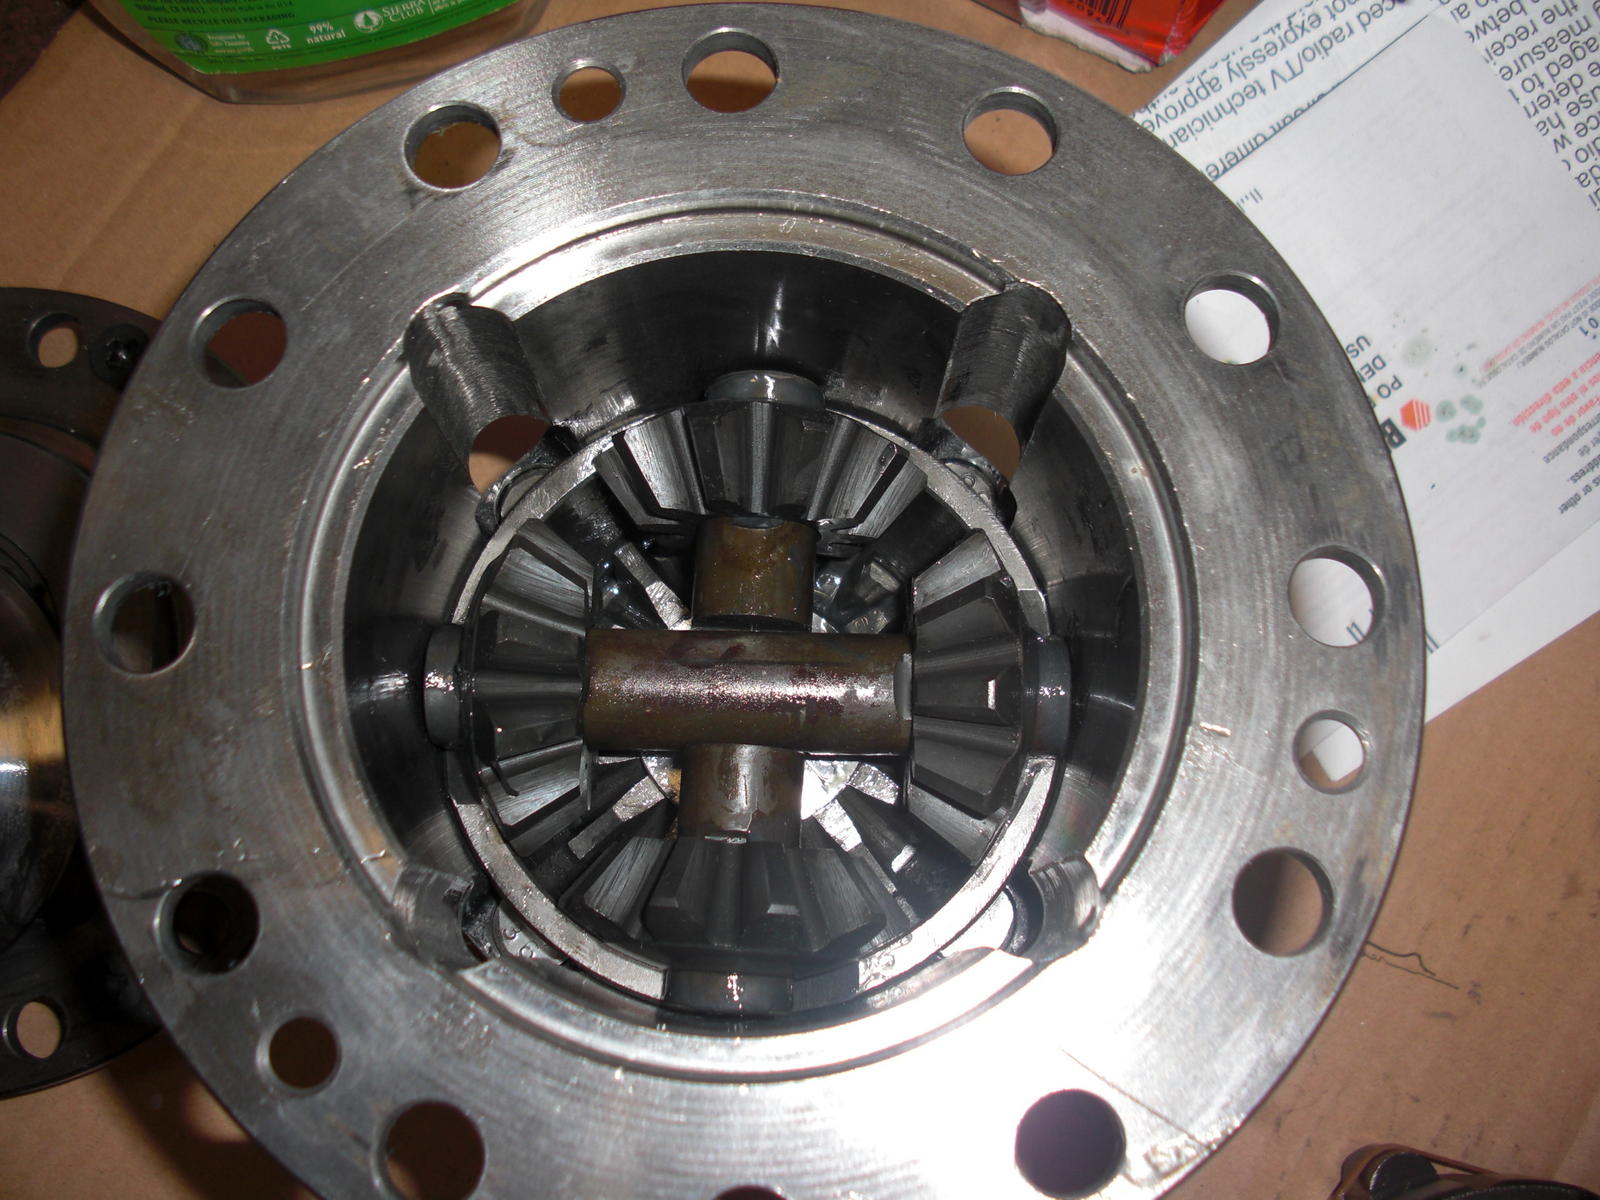
After I received the new parts, it was time to put it back together. Make sure the large spring washer has the large surface pointing towards the outside of the diff. Alternate the smooth plates with friction surface. Pay attention if you received different size smooth plates to make sure they are evenly divided on both sides of the carrier for equal pre-load. I lubricated the plates and planetary gears. Also lubricate the bearings on the outside of the diff just before installing in the case.
Make sure splined short shafts extending from carrier fit int the mating parts of the smooth and friction plates while putting everything together. Make one final check that ramps are pointing the right way...
Ready to be closed... Noticed position of large washer.
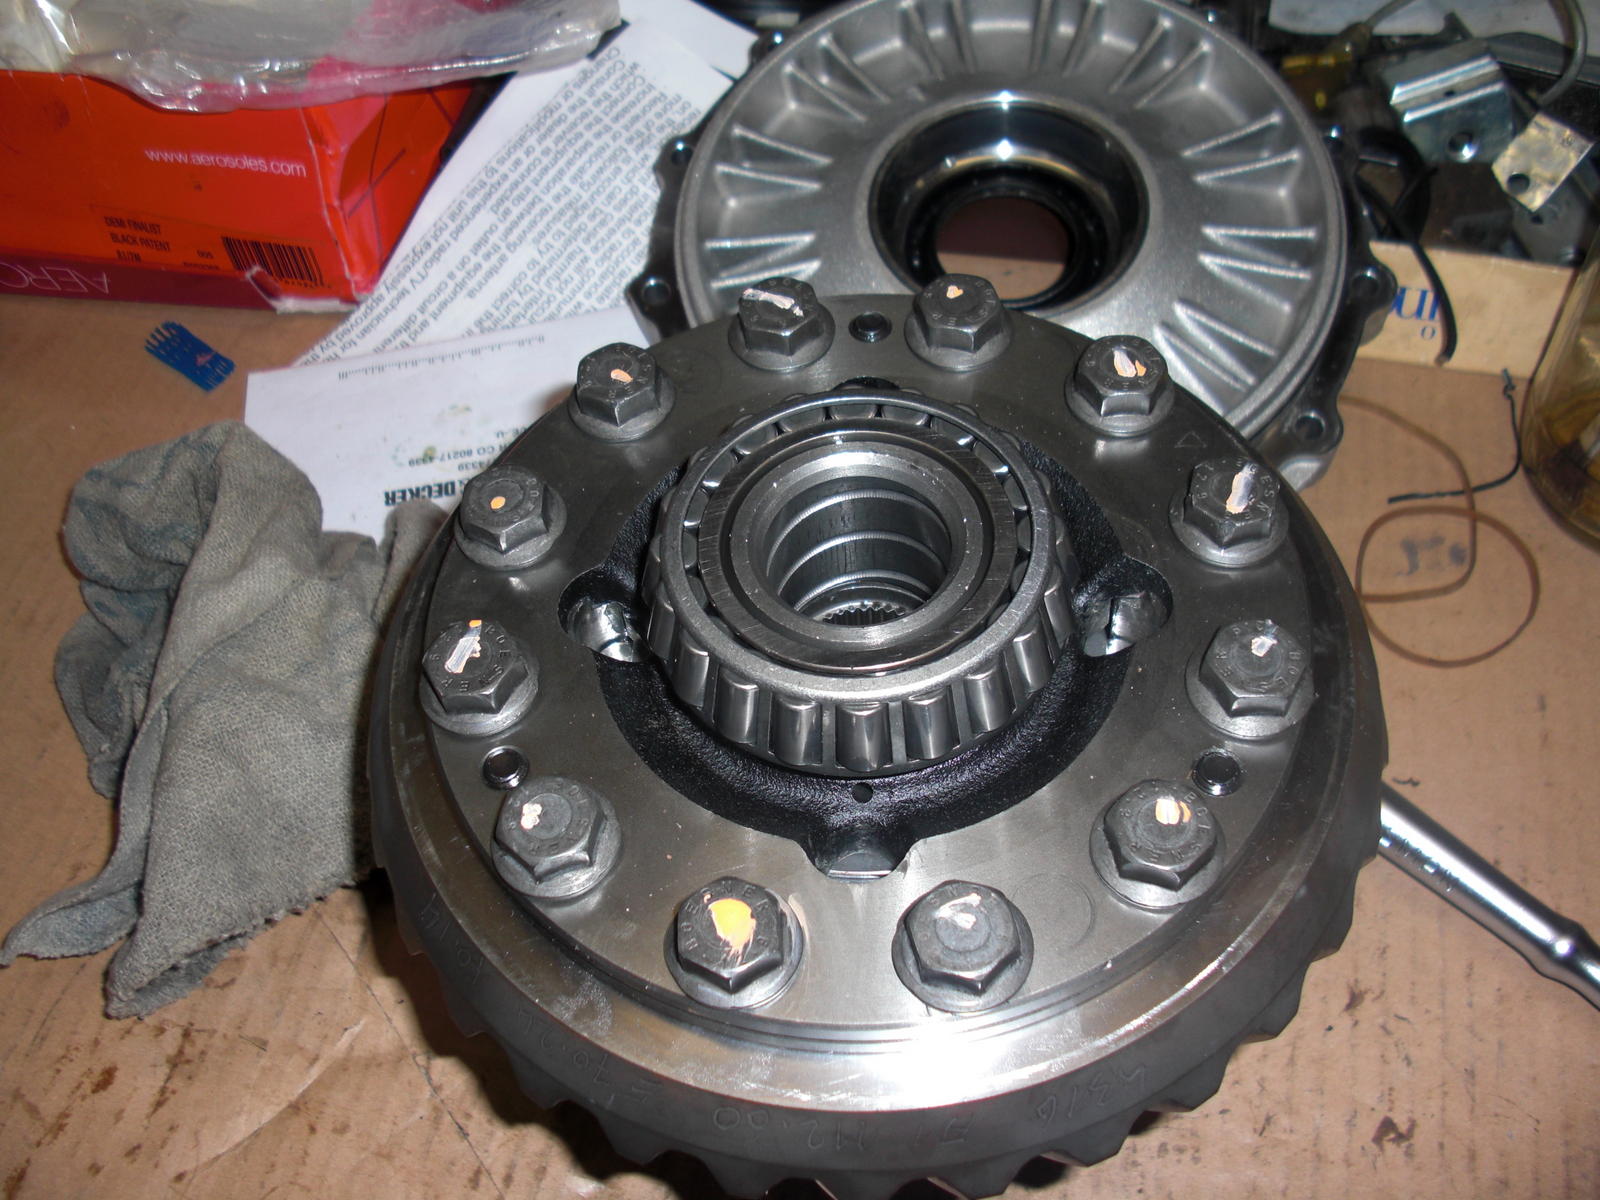
Once lid was in place, I had my son help out with the torquing of the ring gear. I did a pre-torque using my air wrench. Then I used the input flange and a couple of spare bolts to clamp the diff on a vise. I used the other flange and two spare bolts to secure the diff and prevent it from turning. He held the upper flange while I tightened the ring bolts in a crosswise pattern to 148#. Painting as we torqued them.
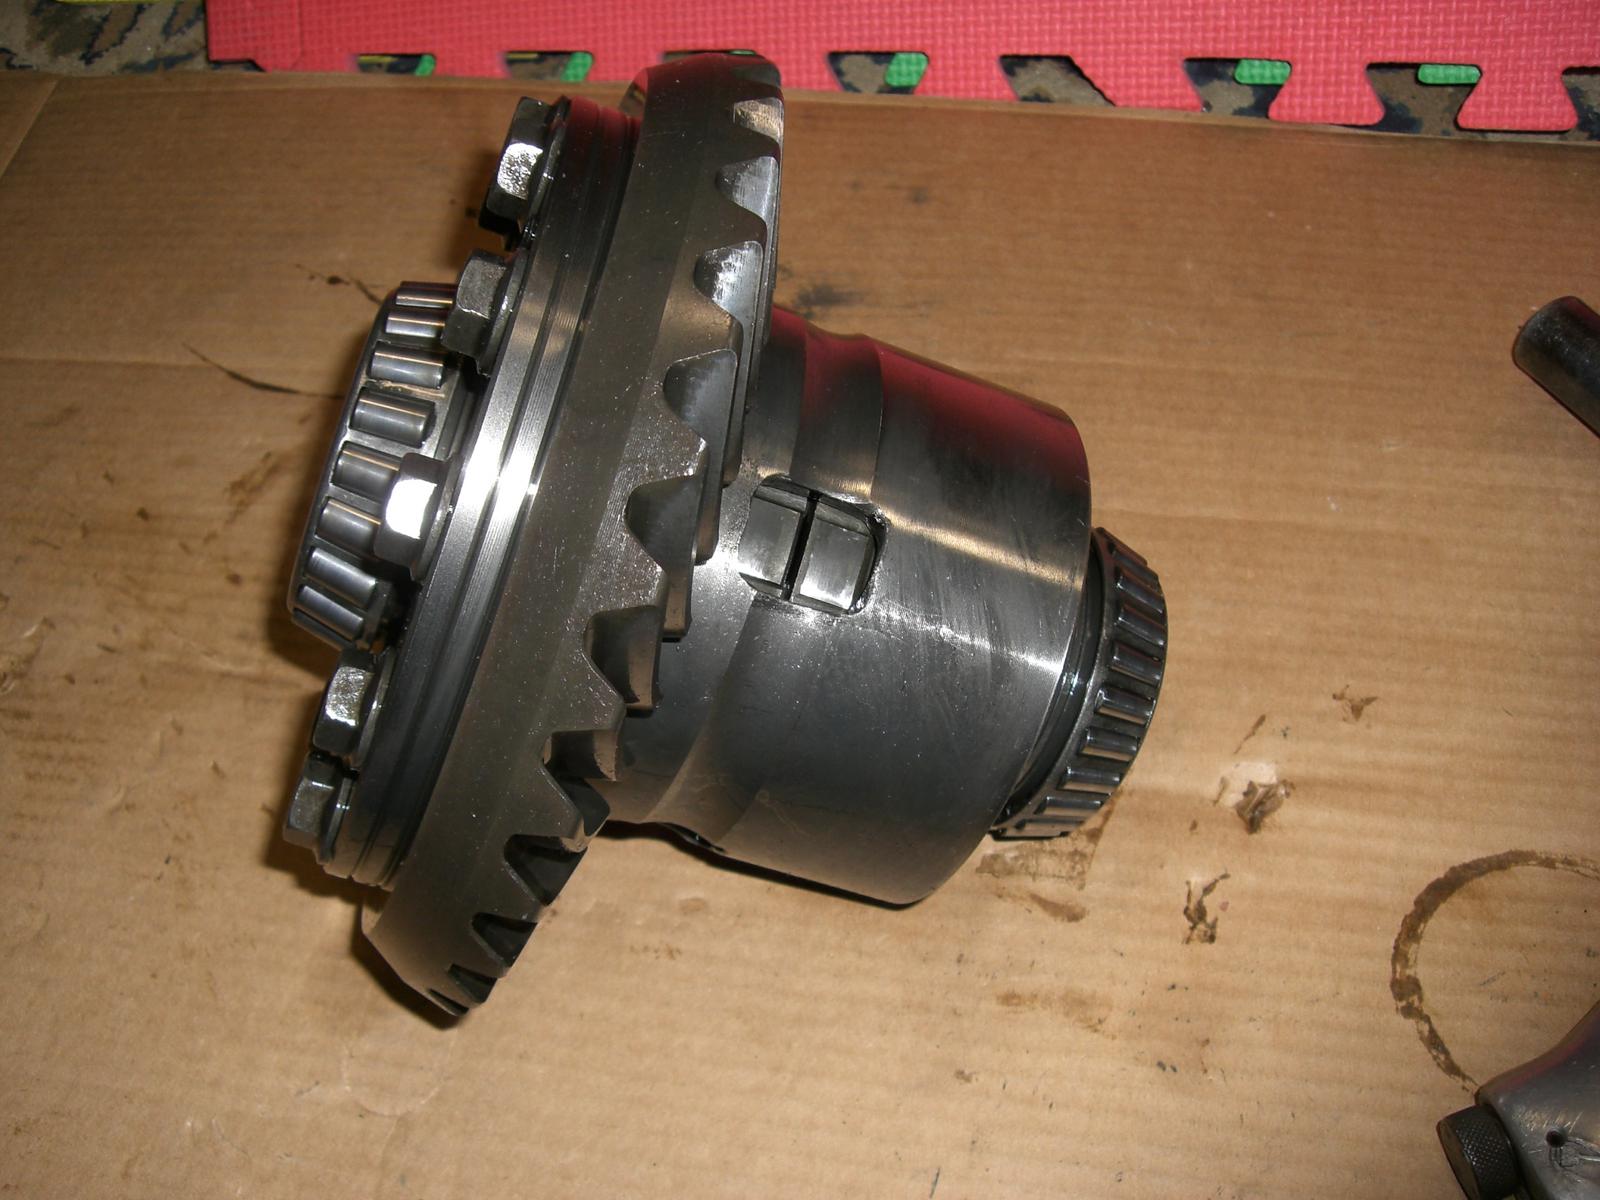
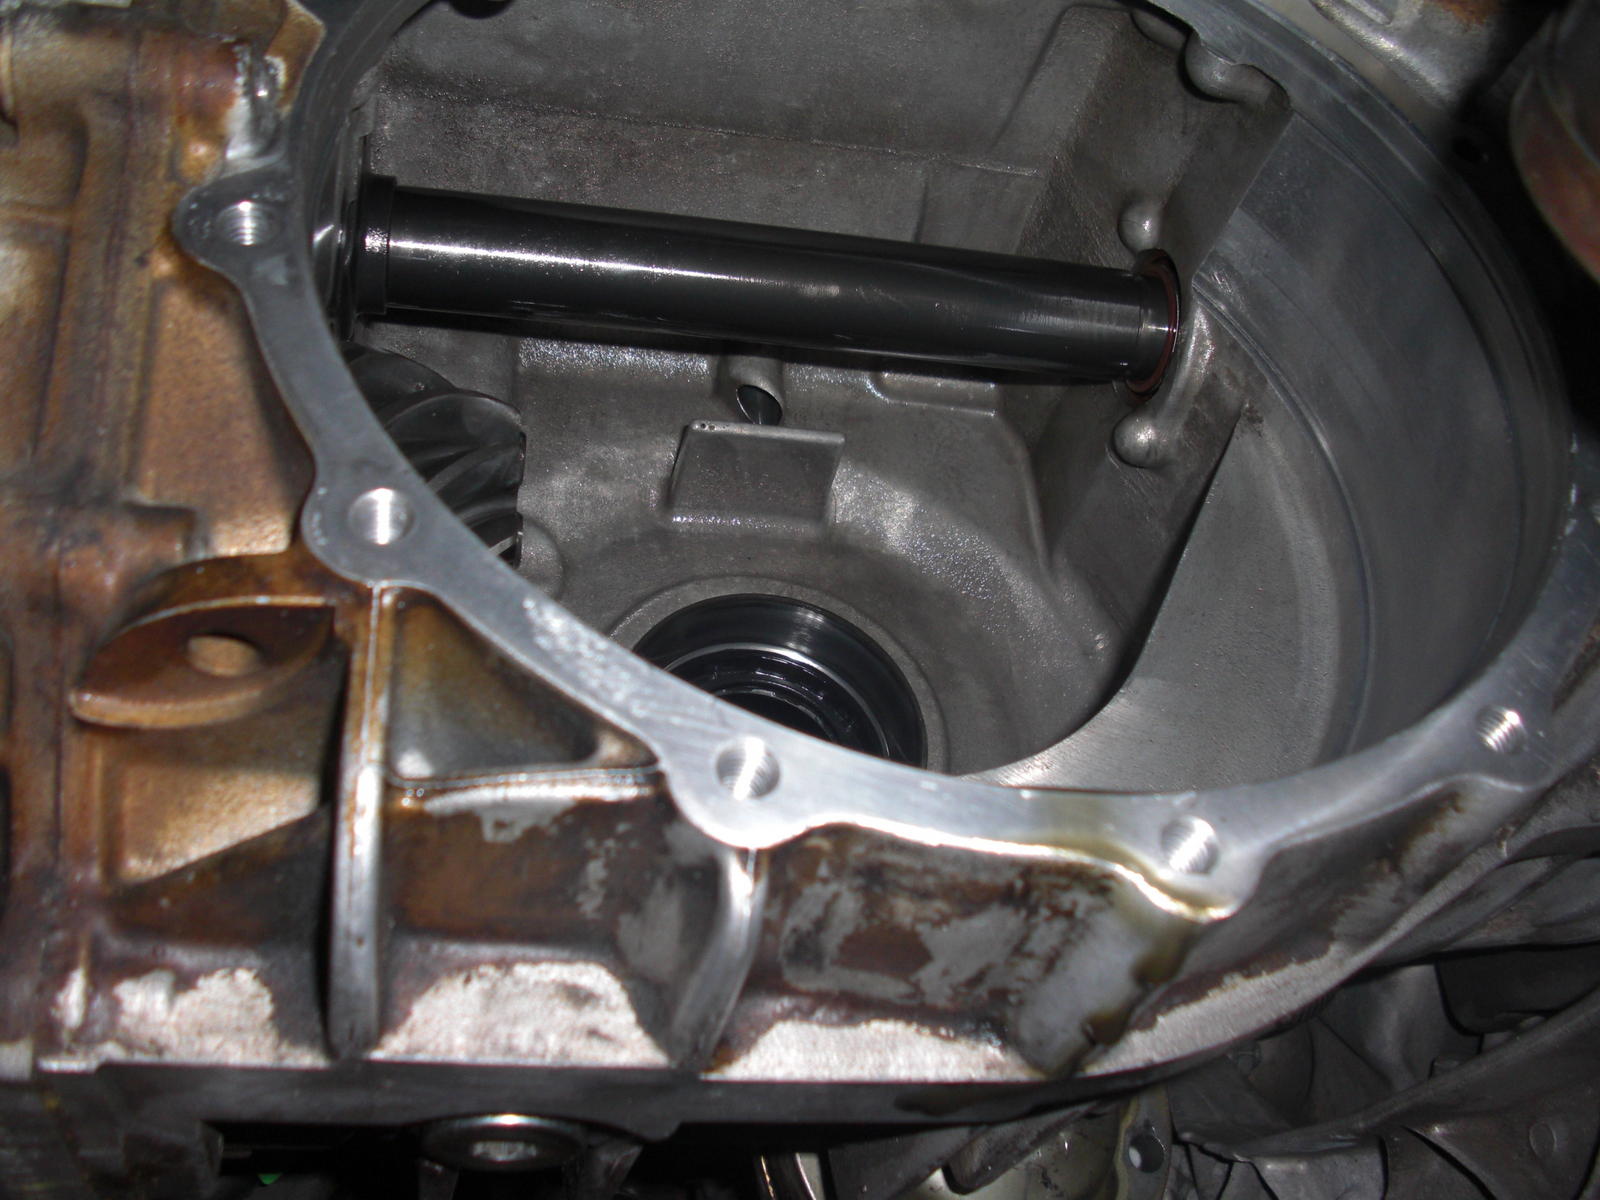
As you know, the GT3 trans have a separate oil pump to circulate and cool internal parts. Pay attention to the little square plate protruding from the case. Notice that oil nozzle pointing towards it? As the oil gushes from the nozzle, it will hit the plate and splash the working surface of the ring gear helping to cool it. Clever!
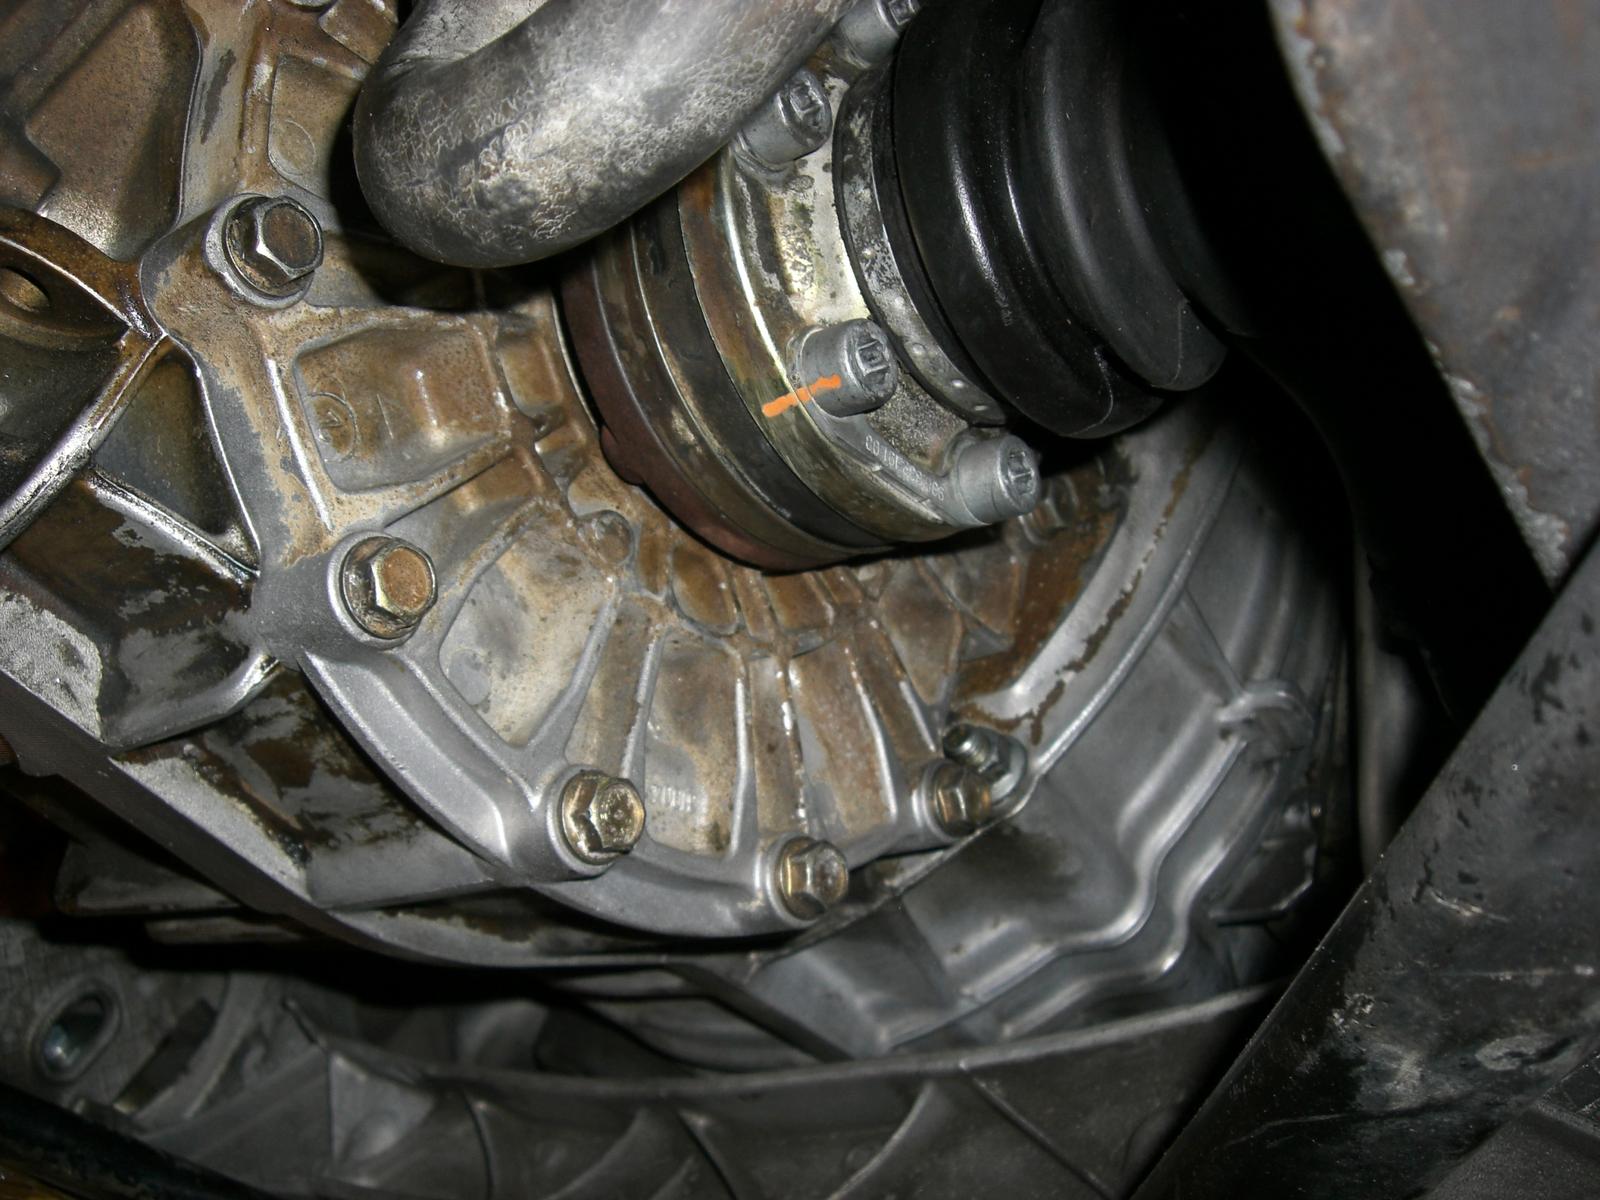
Finally, the diff is installed back in the trans and all is put back together. Reroute hoses to their original position and make sure they are secured since they run close to the half shaft. Fill the trans and you are ready to go. I ran the engine while still on jack stands to make sure there were no weird noises and to lubricate all internal parts while the car is not under load. I will change my fluid after my first track event.
Hope this helps... Lou
I documented my work just in case some of you might be thinking about taking the plunge. The hardest part will be removing he diff from the transaxle and probably loosening up the ring gear bolts.
I jacked up the car and placed it on jack stands and had two back up hydraulic jacks under it. One under the engine and another by the front jacking point. One cannot be too safe.
Drain trans. Loosen CV joint at trans (both sides), remove side cover. I tied up the half shaft towards the back of the car for clearance. I also loosened up the two hoses that go over the shaft and placed on top of the holding bracket. Furthermore, I tied the hose towards the outside of the car.
You need to remove the flanges on both sided. Once that is done, the diff can come out. It was a tight fit, but I was able to do it by passing one hand through suspension assembly to maneuver it out.
Once on the bench, I used my air ratchet to loosen up the bolts around the ring gear after marking its original position. They are torqued to 148#. I could not undo 3 of them so I got help from a local gas station.
The lid then comes off (3 screws, mark position) revealing the washers, plates, frictional surfaces and the carrier that holds the planetary gears. Notice position of the ramps as the carrier needs to be reassembled in the same way. The ramps provide the locking action while accelerating or braking.
I then spoke to Matt at Guard Transmissions and sent him the external dimensions of the carrier . He uses that to prepare a custom shim pack for your diff to provide the correct pre-load. Porsche just sells a "one size fits all" pack. Problem is that there could be almost a 3mm variation (as per Matt), so you could have a very loose diff if your cage happens to be in the small end of the spectrum.
Planetary gears shown in picture (after opening carrier) showing large splines that connect to internal plates and friction plates. The small internal splines that connect to the output flanges.
After disassembling the clutch pack, you can see how only the outer surfaces of the friction plates were barely making contact with the spacers. Notice that the marks left in the machining process are still there on the smooth plates showing the the friction plates were never making full contact.
After I received the new parts, it was time to put it back together. Make sure the large spring washer has the large surface pointing towards the outside of the diff. Alternate the smooth plates with friction surface. Pay attention if you received different size smooth plates to make sure they are evenly divided on both sides of the carrier for equal pre-load. I lubricated the plates and planetary gears. Also lubricate the bearings on the outside of the diff just before installing in the case.
Make sure splined short shafts extending from carrier fit int the mating parts of the smooth and friction plates while putting everything together. Make one final check that ramps are pointing the right way...
Ready to be closed... Noticed position of large washer.
Once lid was in place, I had my son help out with the torquing of the ring gear. I did a pre-torque using my air wrench. Then I used the input flange and a couple of spare bolts to clamp the diff on a vise. I used the other flange and two spare bolts to secure the diff and prevent it from turning. He held the upper flange while I tightened the ring bolts in a crosswise pattern to 148#. Painting as we torqued them.
As you know, the GT3 trans have a separate oil pump to circulate and cool internal parts. Pay attention to the little square plate protruding from the case. Notice that oil nozzle pointing towards it? As the oil gushes from the nozzle, it will hit the plate and splash the working surface of the ring gear helping to cool it. Clever!
Finally, the diff is installed back in the trans and all is put back together. Reroute hoses to their original position and make sure they are secured since they run close to the half shaft. Fill the trans and you are ready to go. I ran the engine while still on jack stands to make sure there were no weird noises and to lubricate all internal parts while the car is not under load. I will change my fluid after my first track event.
Hope this helps... Lou
 02-12-2012, 01:19 PM
#4
Rennlist Member
Thanks for sharing the information and great photographs.
The purpose of the different thickness adjusting rings (996.332.266.50 - 76) you can get from Porsche AG are to adjust the fit of the differential in the housing, correct?
The purpose of the different thickness adjusting rings (996.332.266.50 - 76) you can get from Porsche AG are to adjust the fit of the differential in the housing, correct?
02-12-2012, 01:44 PM
#7
Racer
Thread Starter
Just did a quick look up on that part number and saw exploded parts. Seems that you are correct. Spacer is used to adjust diff in the housing. Left to real trans pros it takes specialized tools to measure and set those clearances.
Trending Topics
02-12-2012, 08:05 PM
#8
Rennlist Member
Great job, THX for the pics and write up. I did this two years ago but sent the big heavy lump out to Guard for the rebuild.
02-13-2012, 05:04 PM
#9
Nordschleife Master
The only real thing to pay attention to is that the carrier bearings are delicate taper roller bearings. One slip on the bench and you can bend the cage and suddenly you have rollers all over the place. When that happens, or when you have a high mile unit that you are replacing the carrier bearings on because of age, you've just got to be sure that you don't mix up shim locations and put them back on the diff body wrong.
Same holds true for the pressure ring ramps. Put the ramps in backwards and you won't make a 65/45 LSD. What will happen is you'll make an LSD with one wheel permanently locked and one wheel permanently open with no drive...
07-13-2016, 11:52 AM
#11
Rennlist Member
Old, but very informative thread.
Thanks for posting.
Can anyone confirm that this R&R can be done with engine and trans still installed?
It seems the answer is yes.
Thank you.
Craig
Thanks for posting.
Can anyone confirm that this R&R can be done with engine and trans still installed?
It seems the answer is yes.
Thank you.
Craig
07-13-2016, 07:27 PM
#12
Thanks to cgfen for bumping this one to the top. Mine needs a rebuild and I've been thinking about tackling myself with Guard interntals (provided Matt will sell them to me).
Holding out until winter
Holding out until winter
07-13-2016, 07:50 PM
#13
Three Wheelin'
07-14-2016, 01:56 PM
#14
Nordschleife Master
 07-14-2016, 03:48 PM
#15
Rennlist Member
Is the distinction that your authorized installers will only sell to a professional mechanic, or that only authorized installers have access to the parts and can do the work?
thank you
Craig
AND
Can anyone confirm that this R&R can be done with engine and trans still installed?
It seems the answer is yes.