When you click on links to various merchants on this site and make a purchase, this can result in this site earning a commission. Affiliate programs and affiliations include, but are not limited to, the eBay Partner Network.
Amazing journal of work done... sorry you have to go through all this for legacy reasons, but completely agree with the "do it right or do it twice" approach. Would've done the whole village myself.
Turns out assembling the GT3 block is pretty much the same as the run-of-the-mill air cooled motor except a 'little bit' more difficult. Important to note here that the cleaner you can keep things the better - true for any motor you work on!
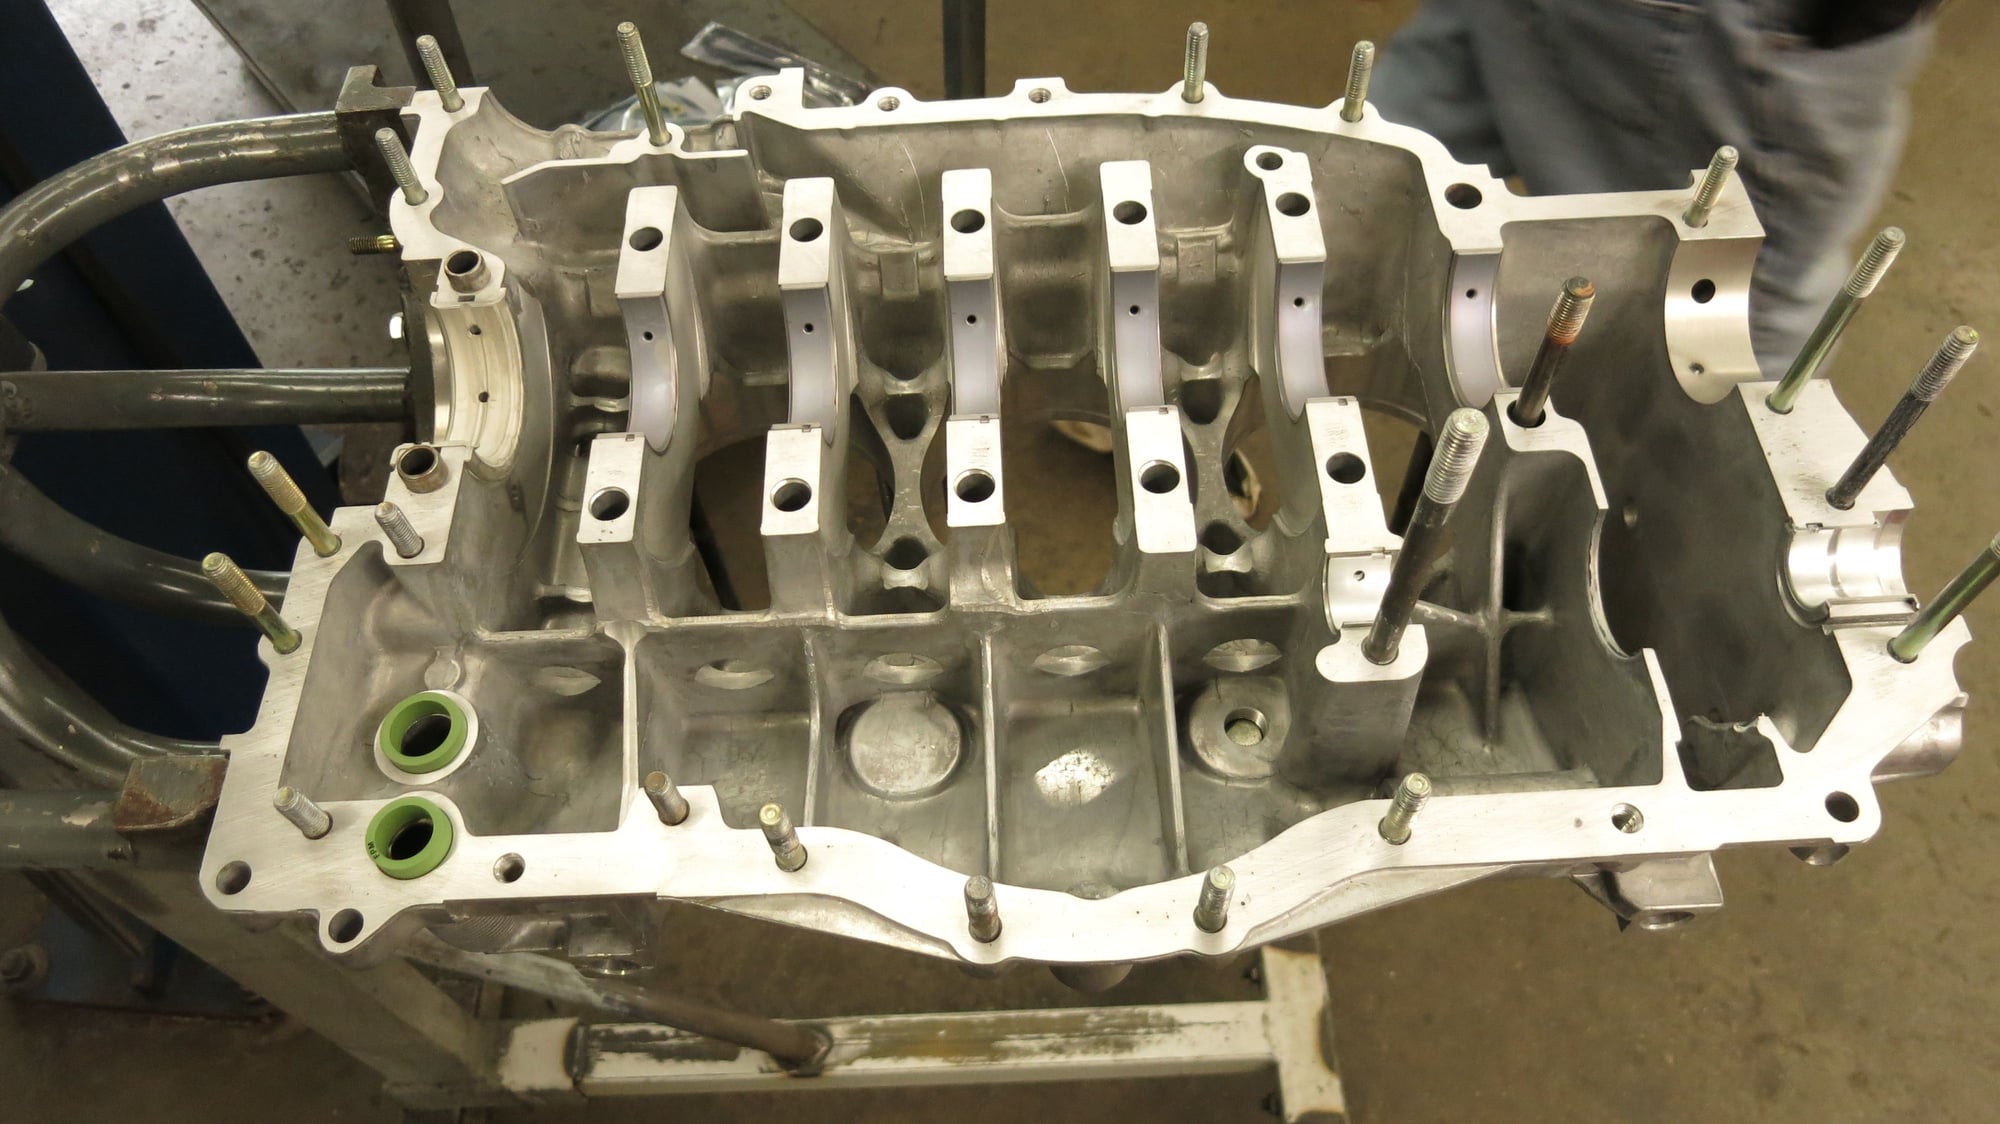
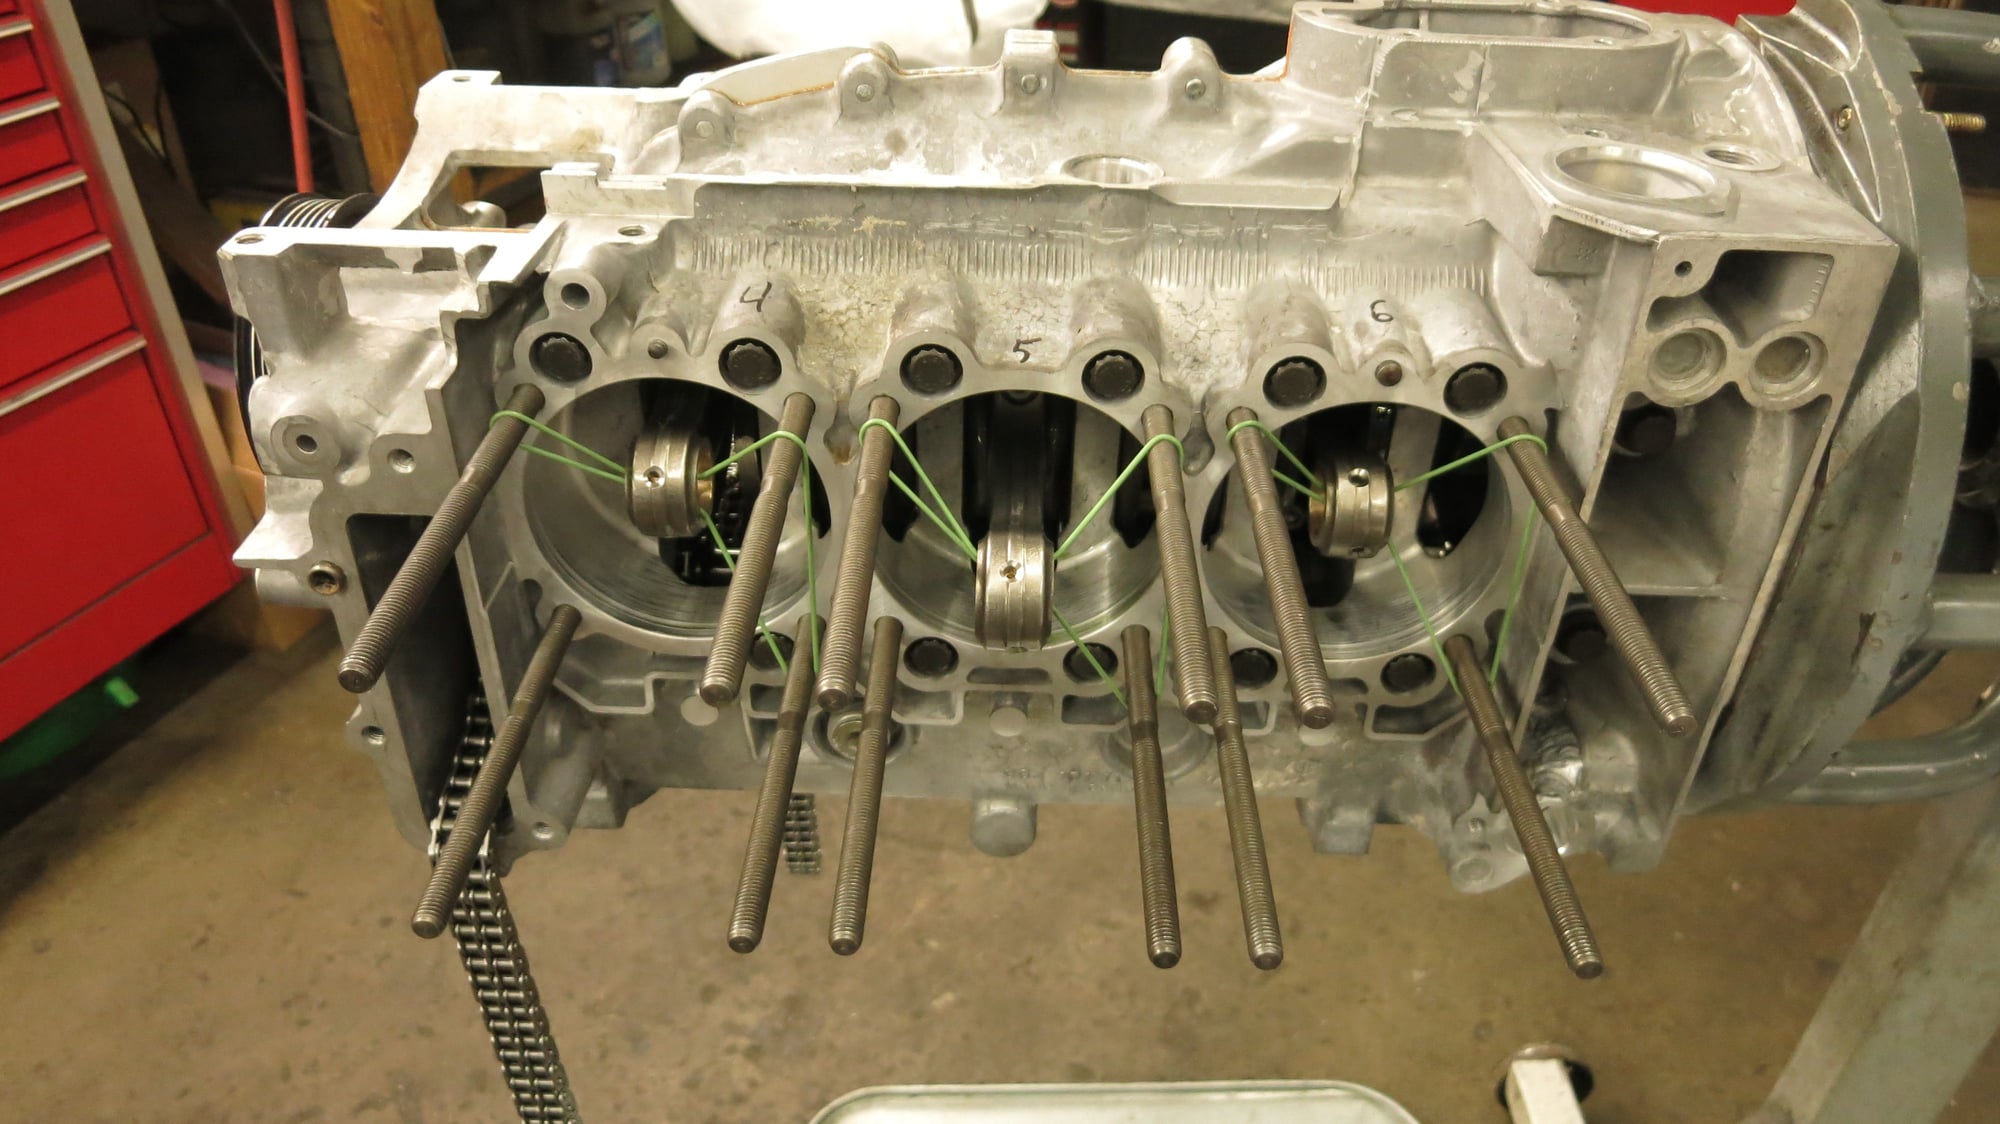
When you start assembling things, it's really good to have taken notes and pictures BEFORE you started disassembling things in the 1st place. Case in point the block. Gotta remember where all those different studs went AND the insertion height.
Lots of different length studs there!
'Look ma - no head bolts'. Time to do those. The insertion height for those happened to be 150mm in my case. I built a small angle al piece to make this go fast!
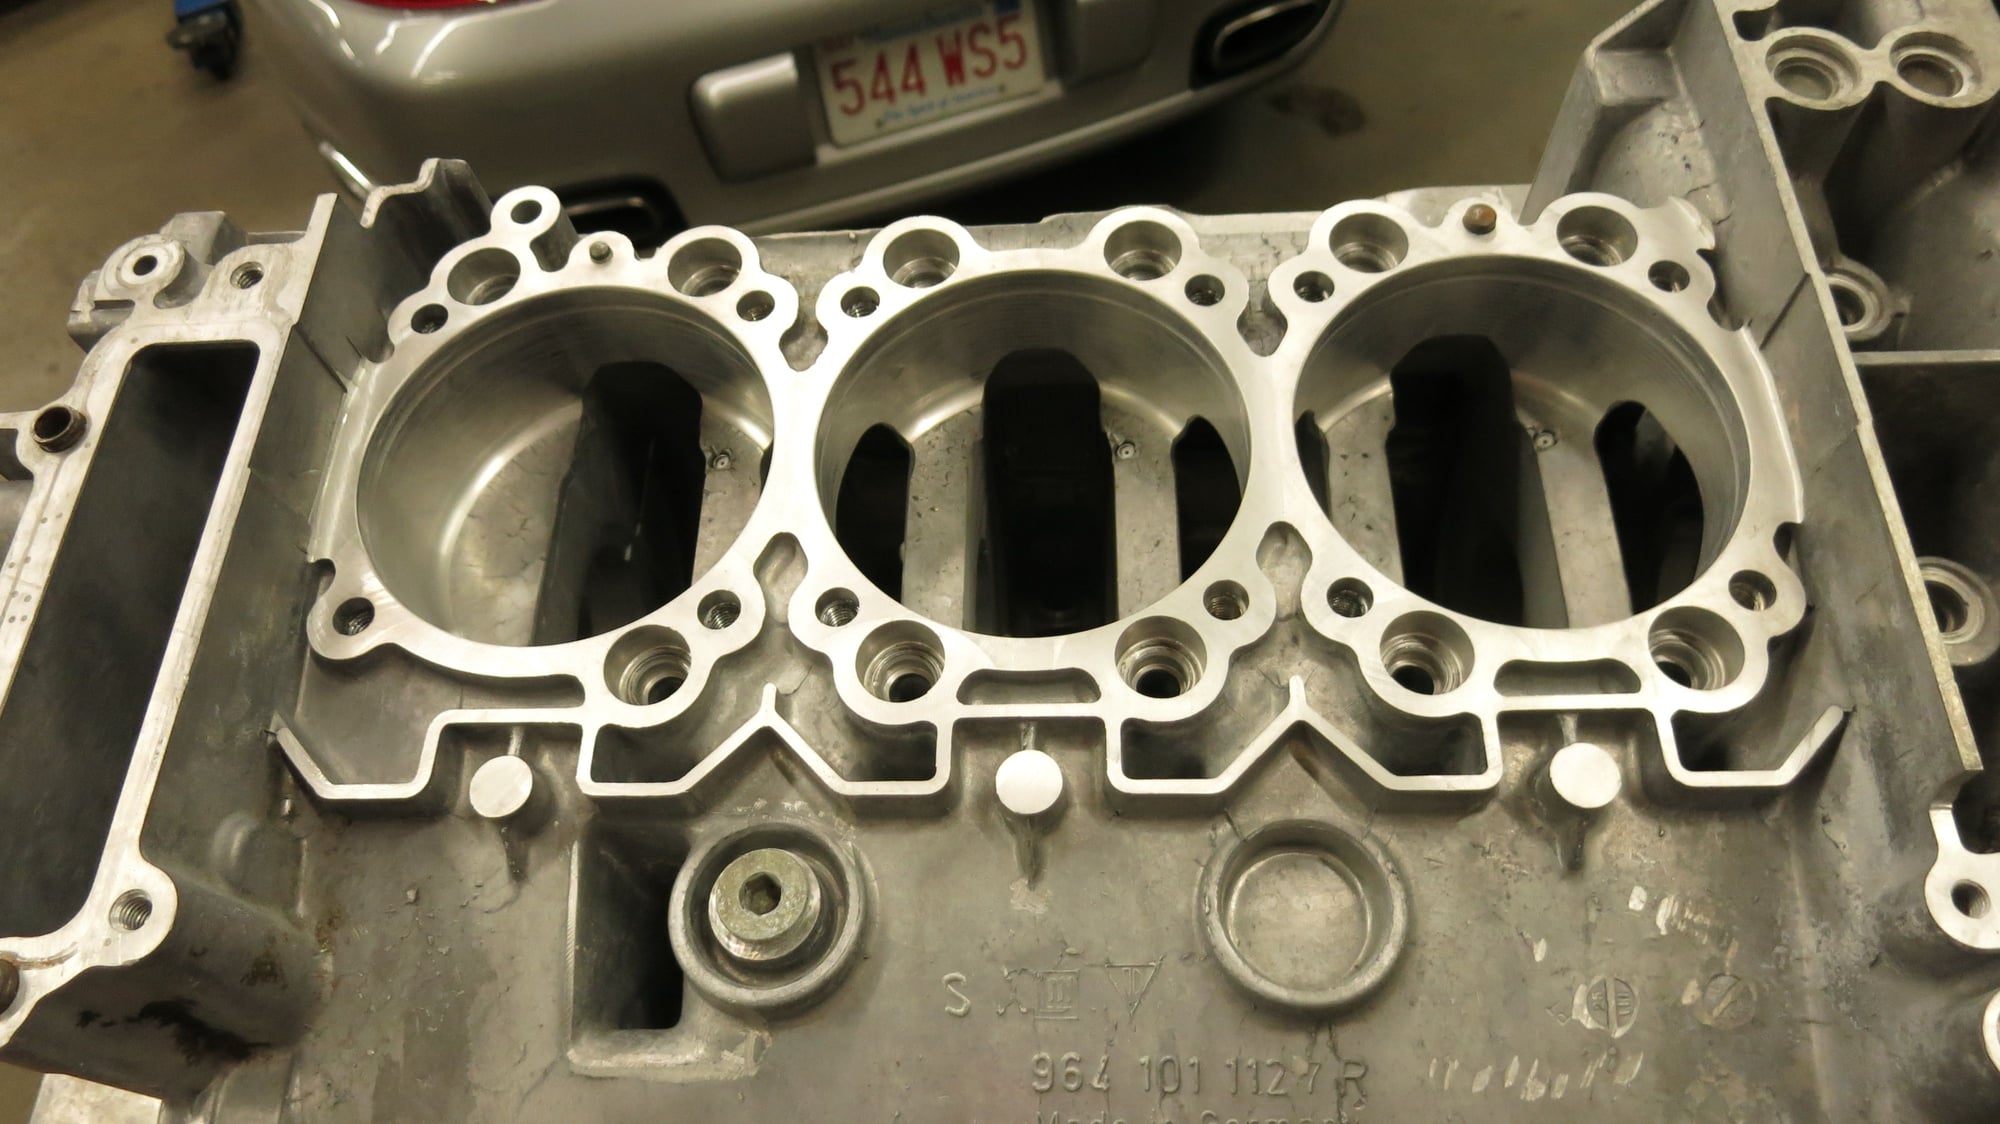
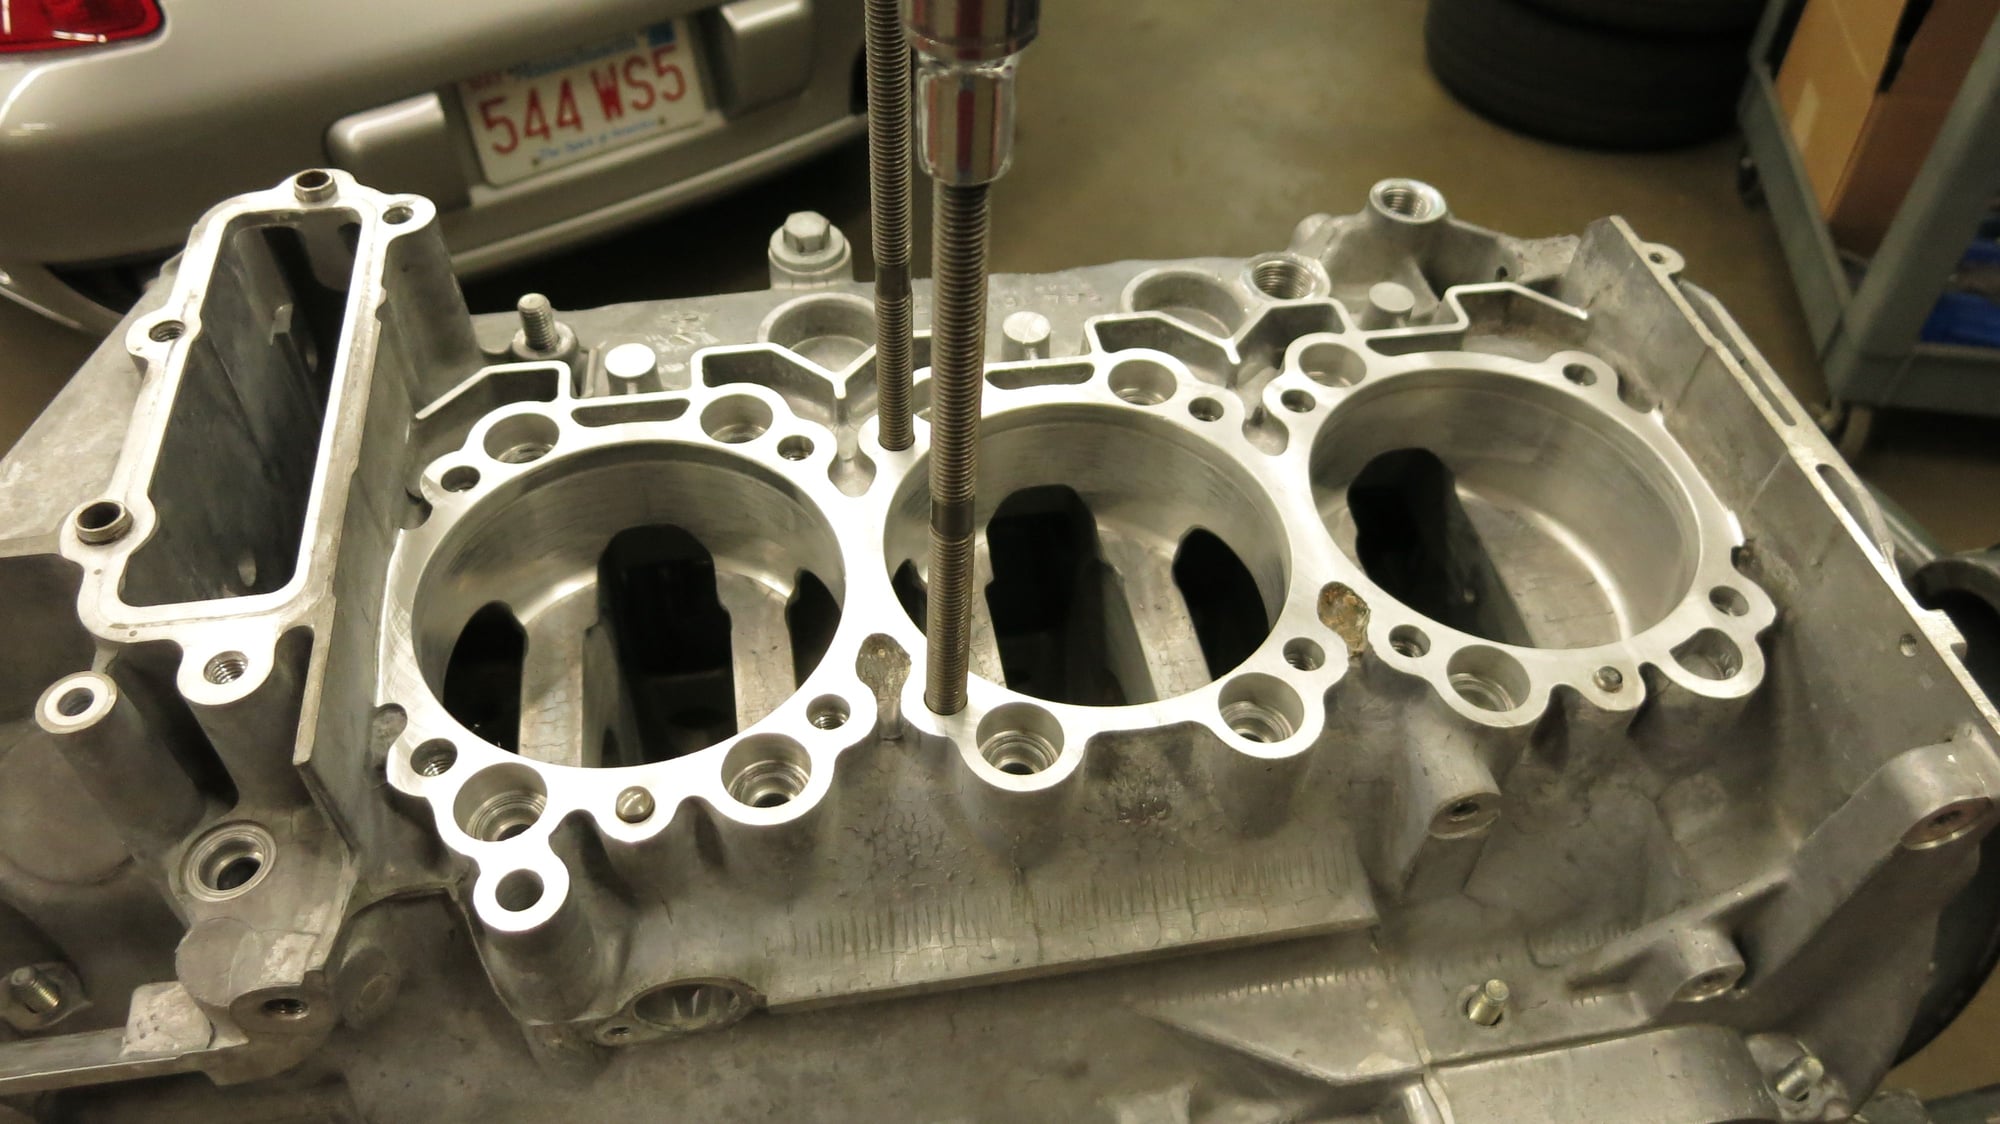
In addition to not being able to be to clean, you can't be to organized! Note the green sealing rings at the top of the bolts, and the ones on the paper towel - really important as you will see in the next picture
Note the somewhat assembled case half here - on the 4 bolts in the center, you can see the above-mentioned green sealing rings
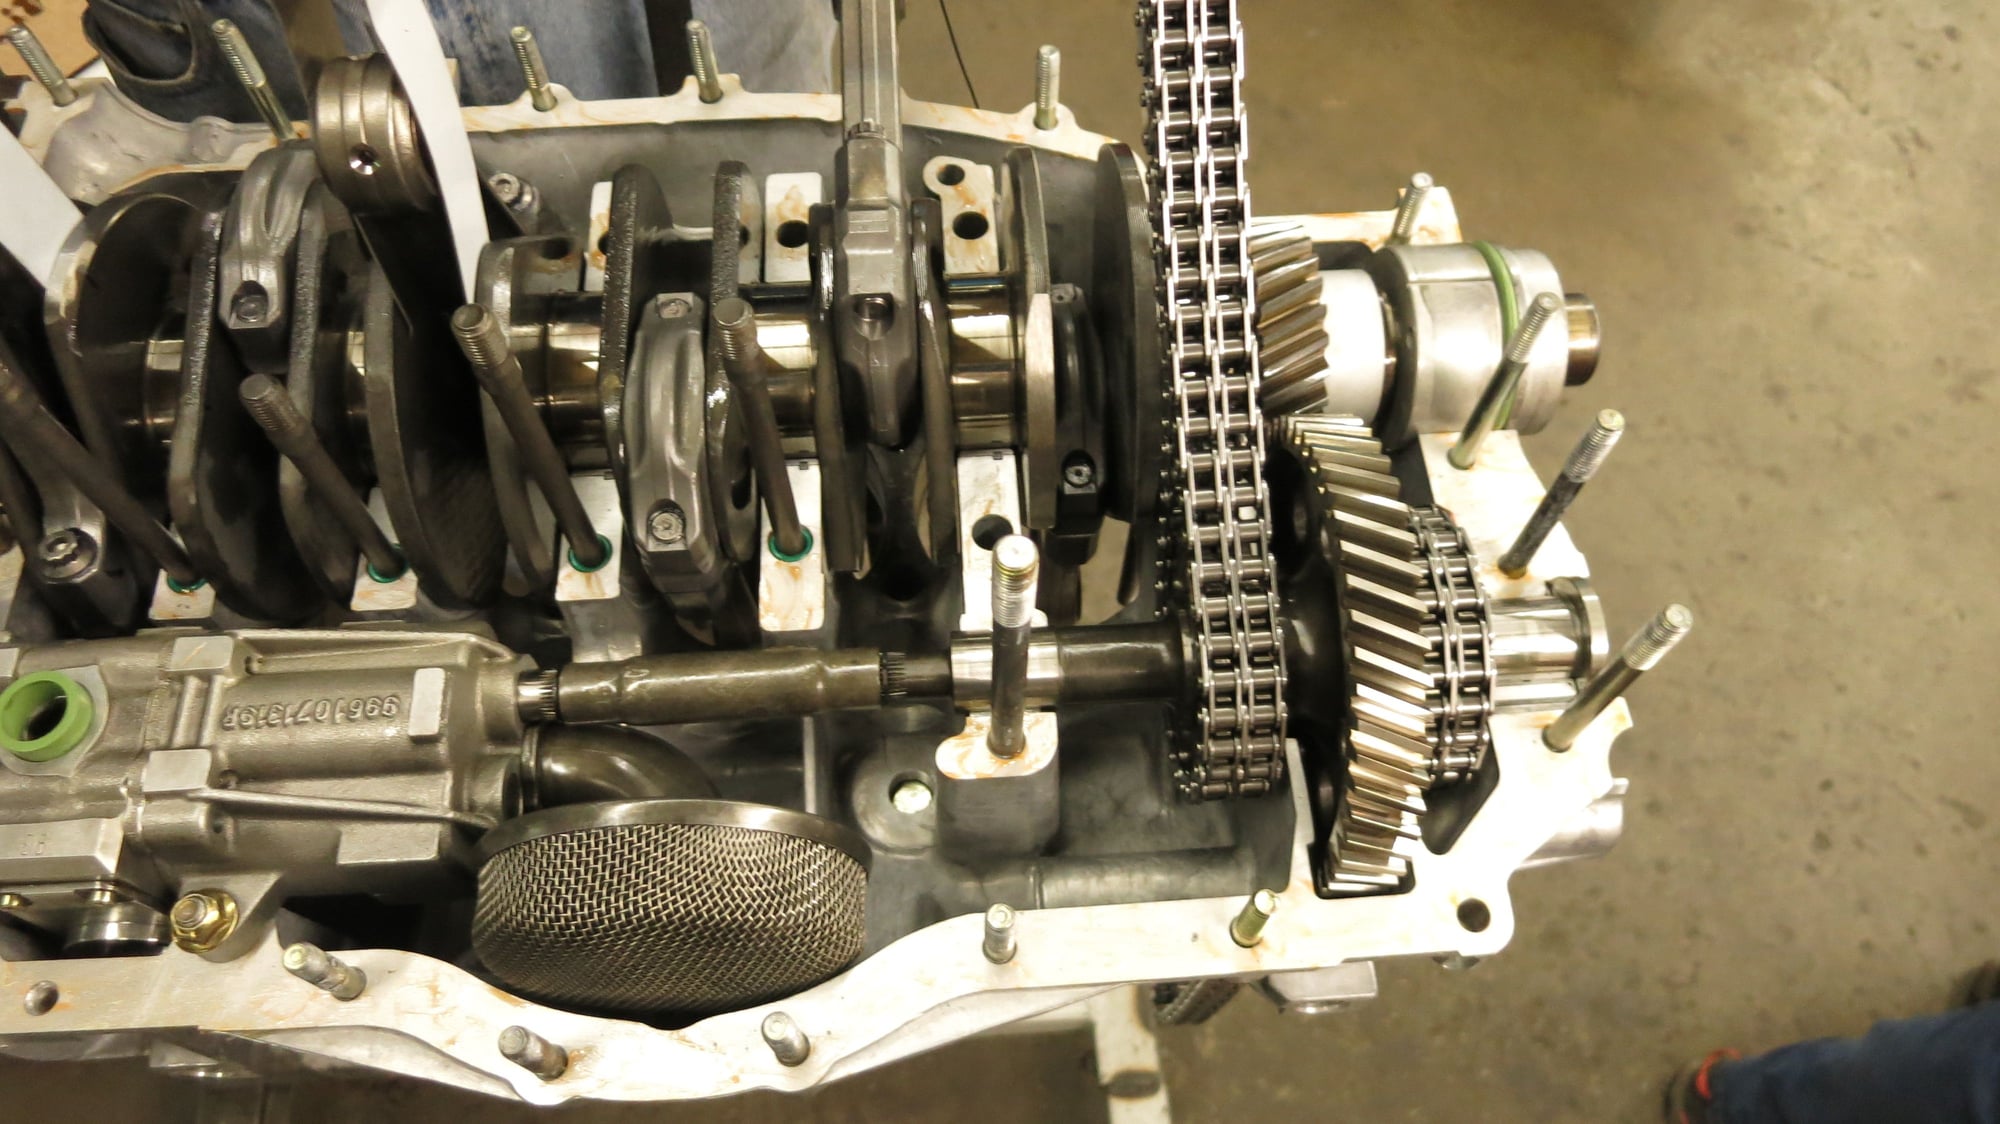
After some fiddling you end up with this. Getting the case halves should really be a 2 person job. The con rods want to be standing proud, the case halves really need to line up - lots of moving parts!
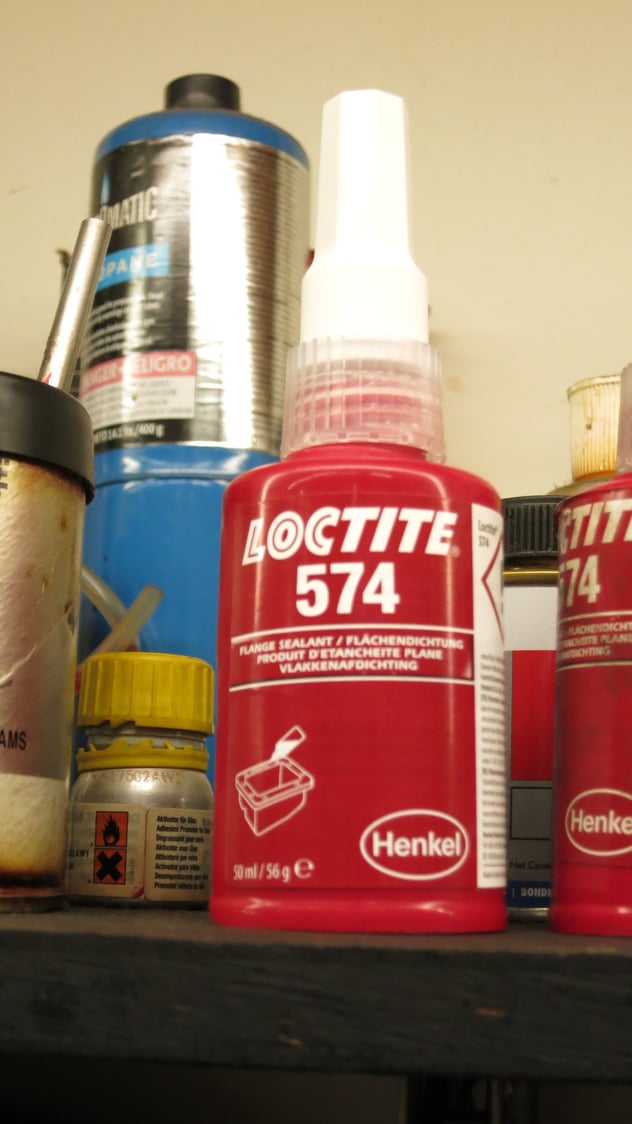
AND you need to have used the Porsche secret sauce - very little actually!
what head studs are you using? a tip for you would be to use a sharpie marker cap. cut the pocket clip off and use it to cover the threads of the studs as you roll the orings over the threads. they are sharp enough to cut the orings and cause leaks after assembly
I used the OEM head studs - actually didn't replace them - no real need to. There is also a Porsche special tool that fits over the stud that is tapered / conical for doing this, not as cheap as a Sharpie, but works well. I didn't get pictures of it in use...
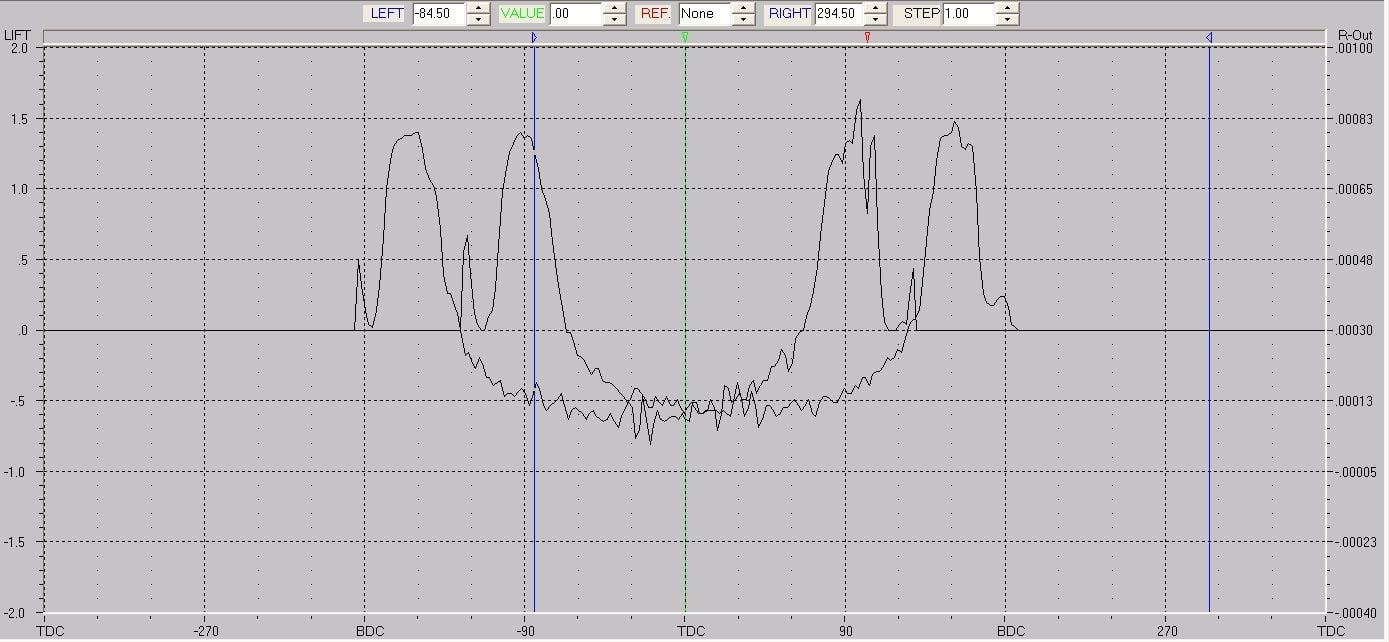
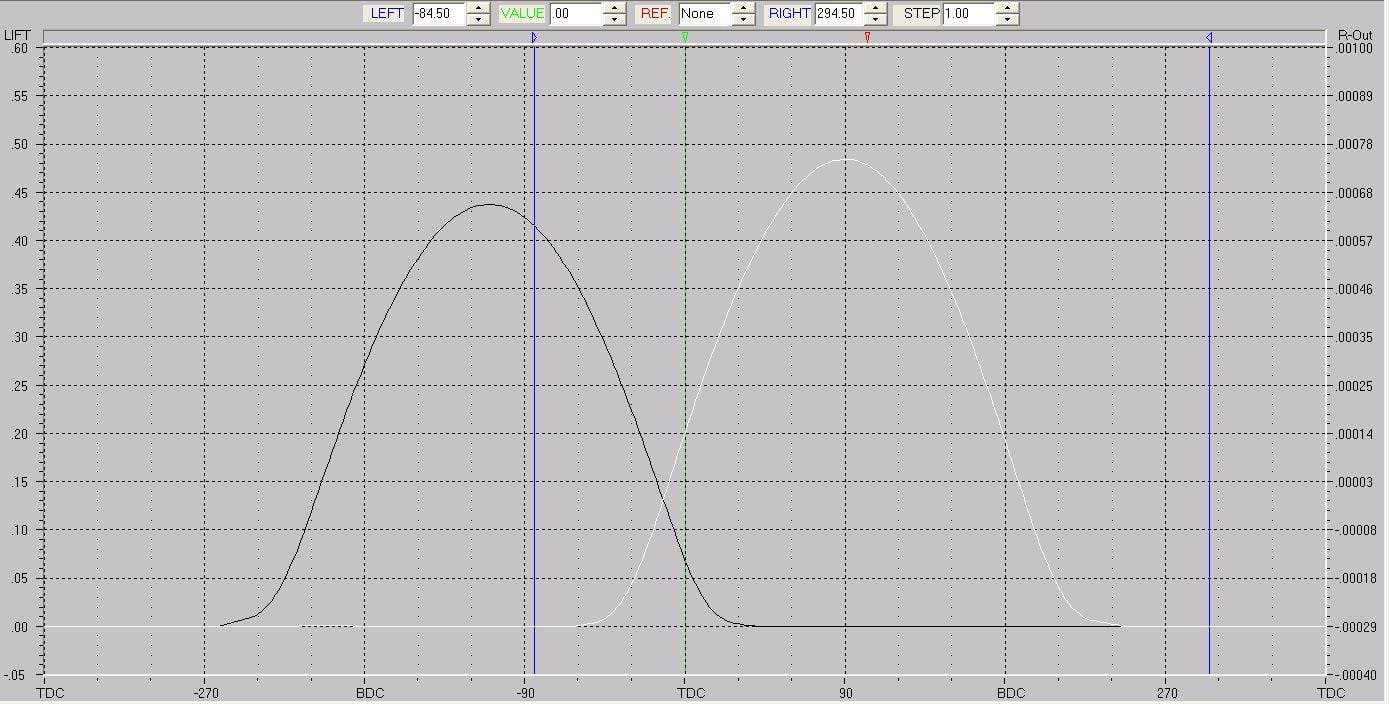
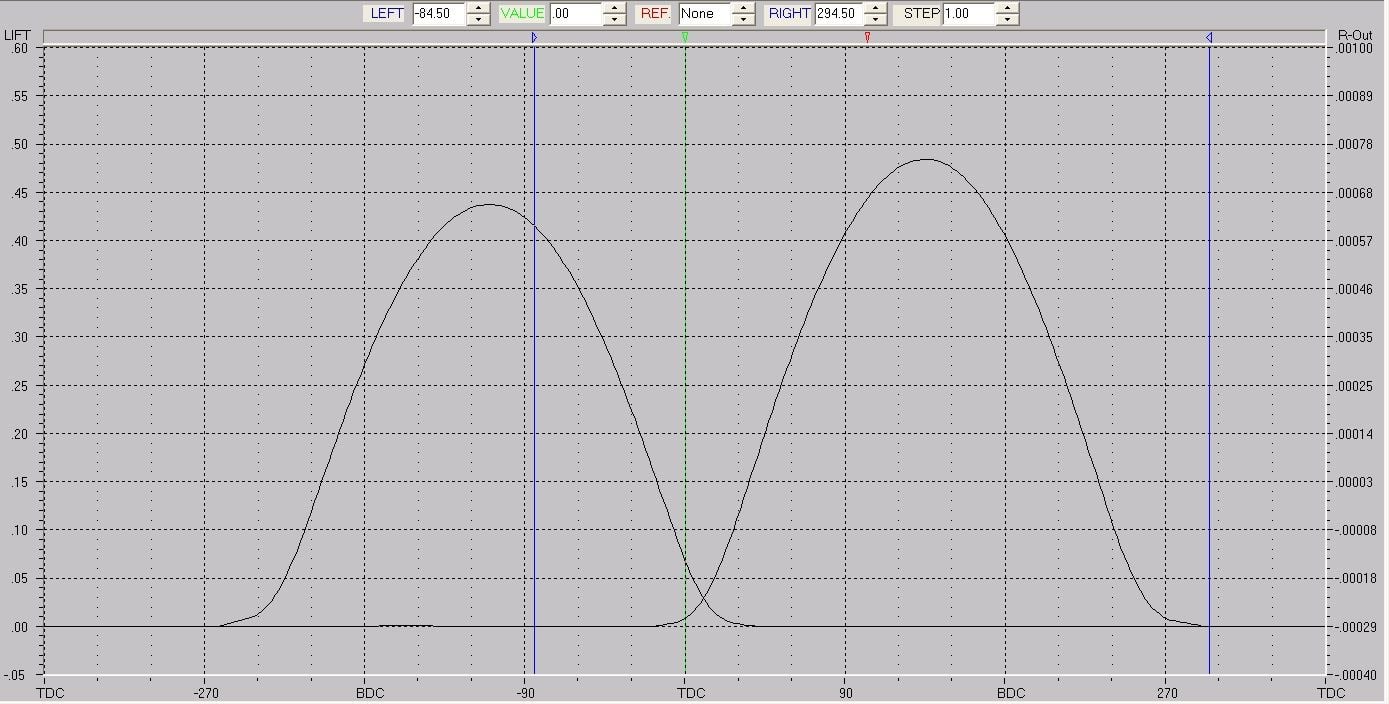
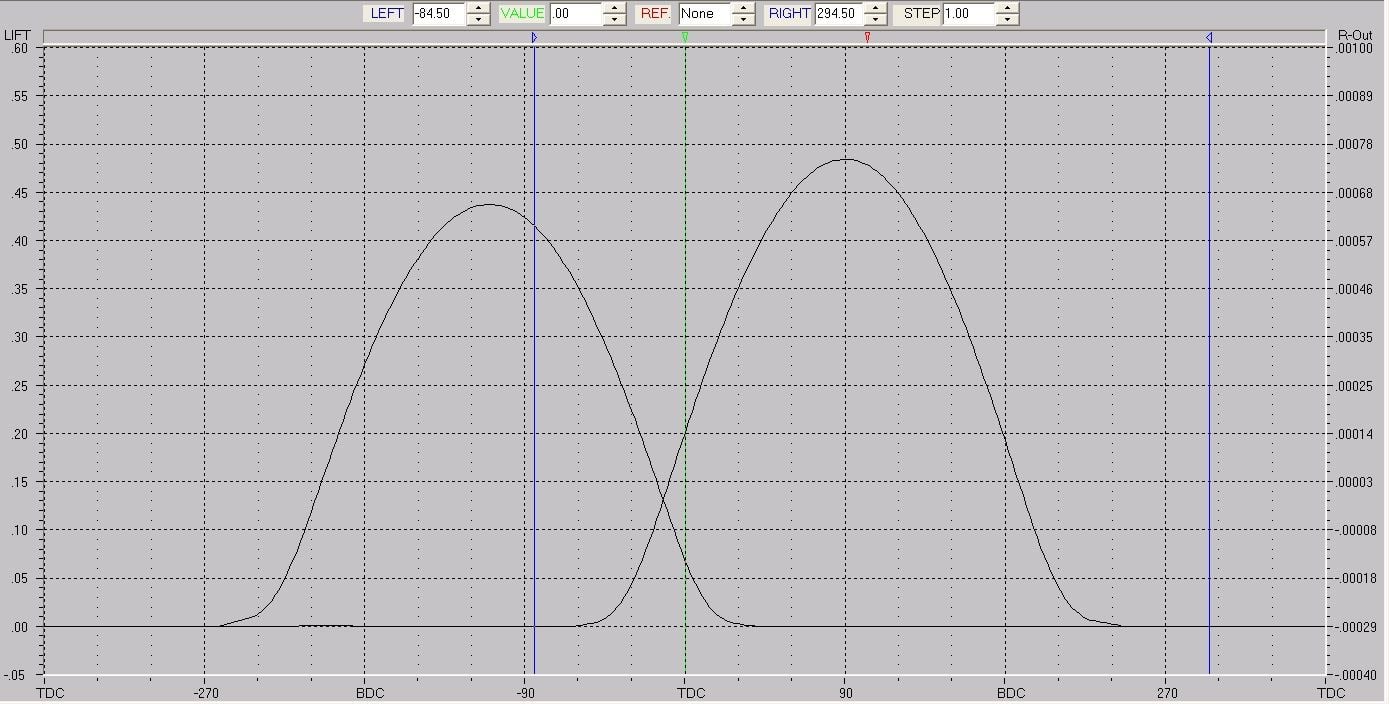
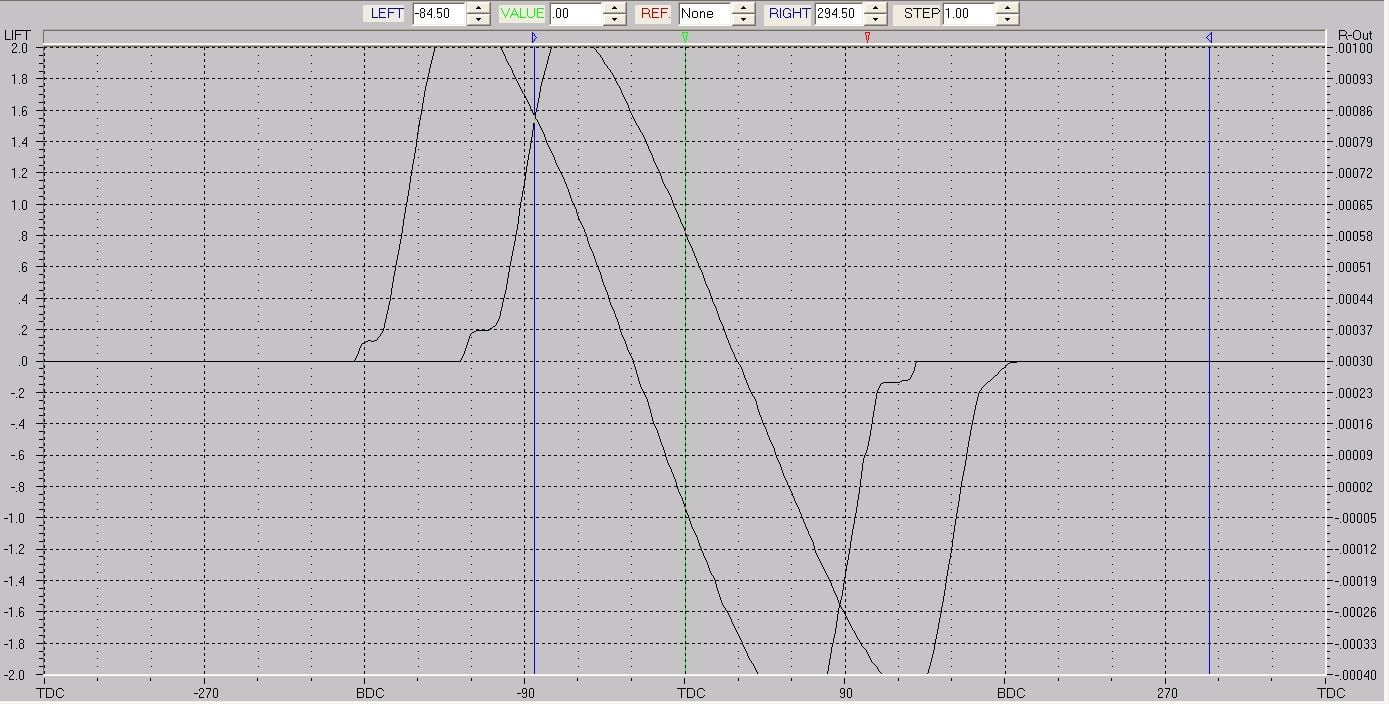
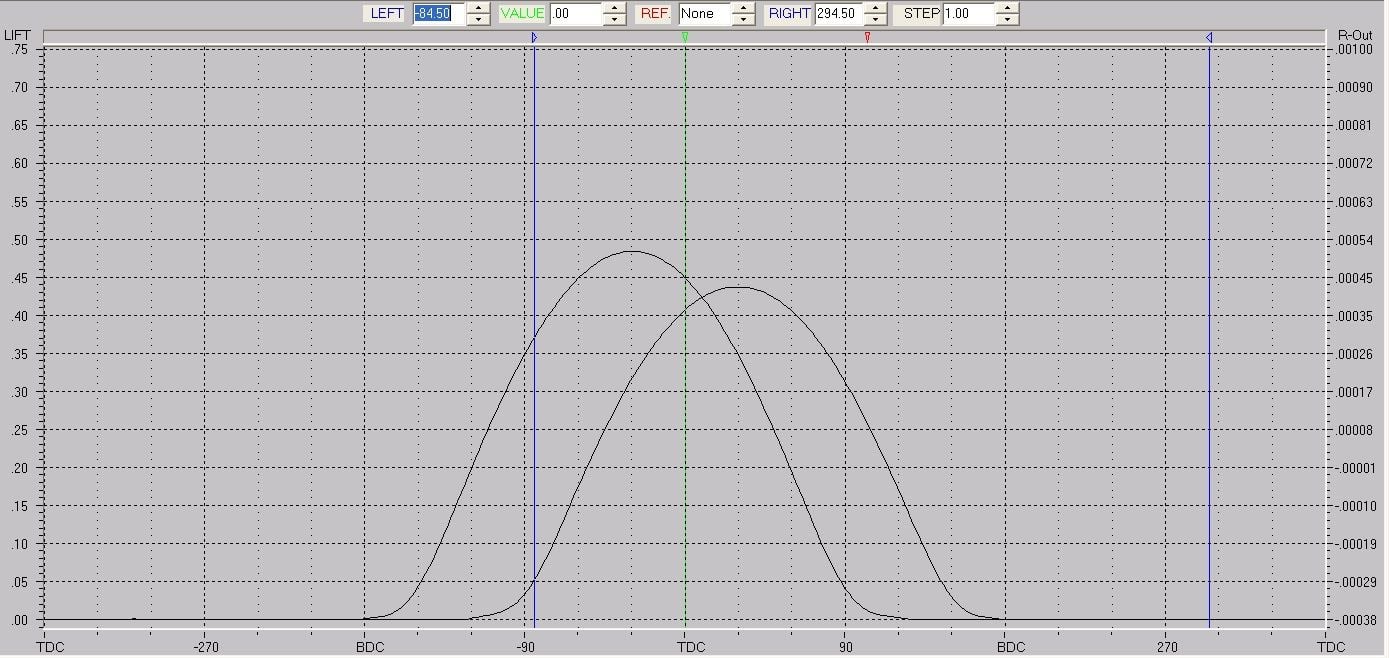
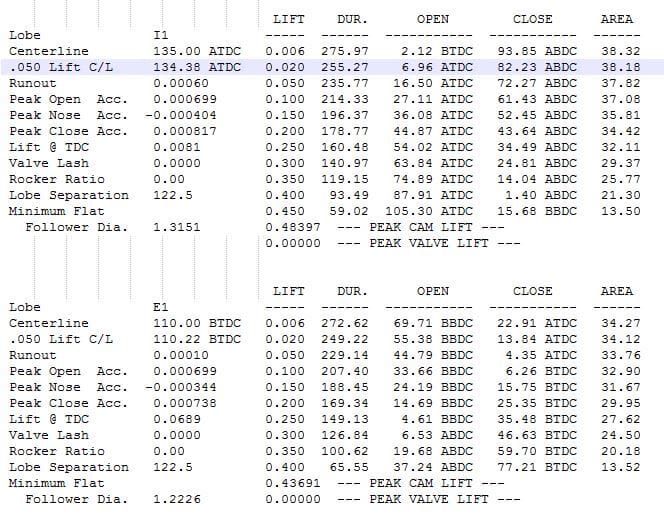
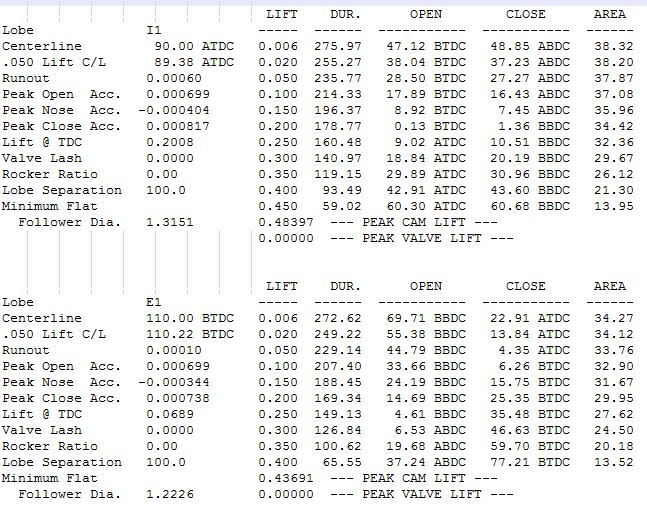
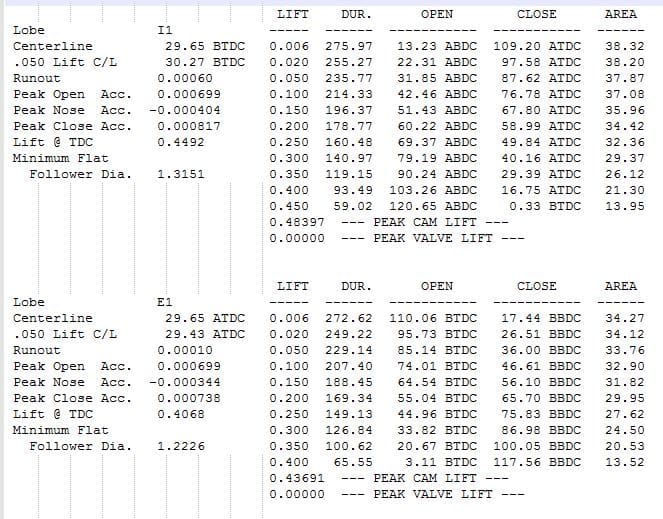
Like many others, I have been following Tom's build thread 'Shaping up a new-to-me 07 GT3(that turned into a build thread)' over on the 997 side of the world. Recent discussions have been around camshafts. I had access to some good tools so one thing I did when building this motor was to put the intake and exhaust cams on the Cam Analyzer software and stands from http://performancetrends.com/cam_test_stand.htm (which a buddy happened to have).
To make this work I needed to build a holder for a valve follower since the complex curve on the surface has a pretty dramatic effect when driven by the camshaft.
Here is what I found: intake advanced intake_exhaust_acc intake retarded intake_exhaust intake_exhaust_intake advanced intake_exhaust_velocity

 10-15-2018 | 10:55 PM