When you click on links to various merchants on this site and make a purchase, this can result in this site earning a commission. Affiliate programs and affiliations include, but are not limited to, the eBay Partner Network.
One more update...I used a dime instead of a quarter. I found it easier to grab and its thinner, so the dime easily slides under the clip tang. Under the dime, I rolled up a six inch piece of painters tape, set the dime on it and aligned the dime to the last tang. The process took all of about fifteen seconds and I didn't have to perform the acrobatics. Sure, there's likely a tool out there, but look at the creative fun we'd all be missing out on.
I'm glad to hear that I'm not the only one that found the bands/straps to be too short. Based on some of the comments on my video it made me feel like I was totally missing something obvious.
*** If you are doing the outside front boots you have to remove the inside boots as the outside set up does not come apart easily. The inside boots grease could be very old, thin and messy. BE PREPARED FOR A WATERY GREASY MESS!!
I used all 3 of your videos about 300 times! I had to keep coming back for reference so thank you so much for the detail.
-my 2 cents...
1. Do not attempt this without 2 full rolls of paper towel and a box of gloves right beside you. Make sure you are wearing clothes you dont care about and make sure you have a trash bin within arms reach because there is gonna be ALOT of greasy mess.
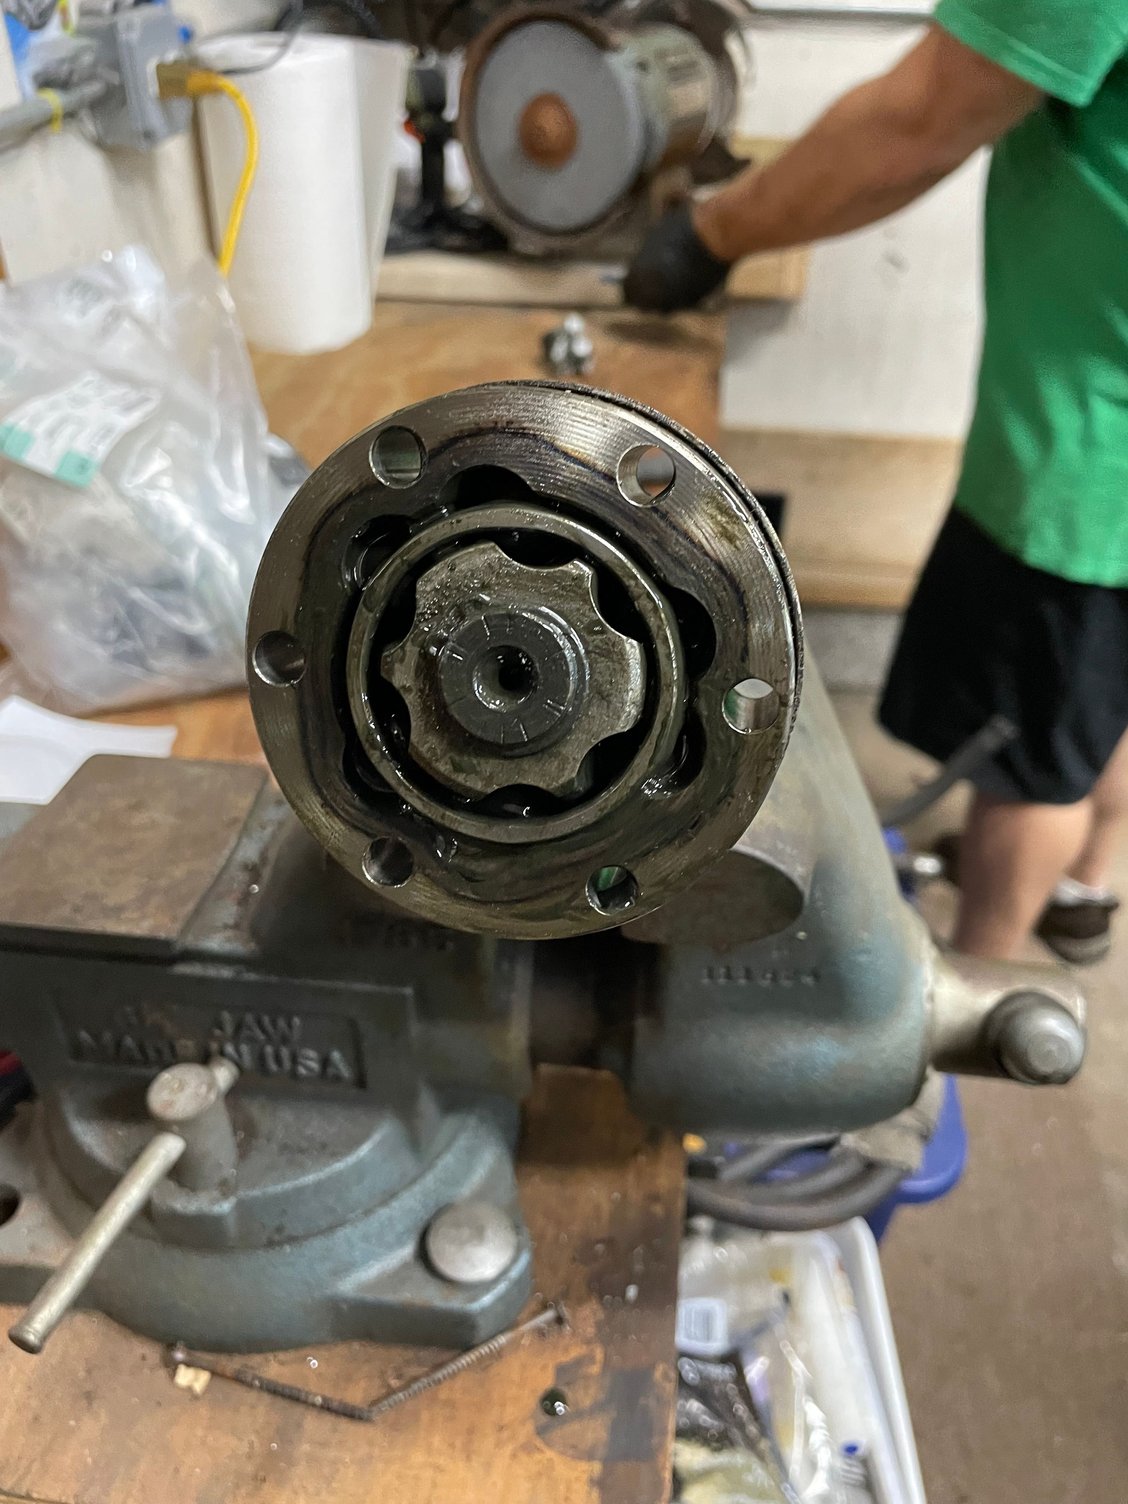
2. Everything went smoothly but I also had problems getting the inner race separated from the little spindle on the inside end that the ***** sit in. I did not have a puller so I taped some washers (smaller then the diameter of the inner race) on the end of a punch, sprayed some moovit in the splines on the spindle and pulled off the circ clip. I then stuck the axel in a vice vertically and loosely so that it was just resting on top with the outside end hanging below and the spindle and top of the race on top. I stuck some foam pads for the outside end to fall on so it would not hit the ground. I then heated it up with my tiger torch just a bit then stuck some wood under the spindles edges and carefully hammered the top of the race axel down with the punch and stack of washers taped together. Took a few hits and reapplication of lube and heat but it finally cracked and I was in buisness.
3. "Watch those *****.....uh huh...huh huh" we share the same humor! I ended up putting a little grease on the ball bearings before attempting to put them in. I kept dropping them out and then having to stop everything to clean the debris off and start again. I reccomend putting a clean towel under your work space and making a little bowl out of it to catch the ***** as they fall out accidentally.
Again great videos and I think it's safe to say you saved me a ton of cash so thank you once again. After doing this I definitely understand why someone would want to just buy a whole new CV axel and swap it out. However if you're a porsche owner on a budget and dont mind getting a little messy it was good fun and I would say give it a shot.
Does anyone have the torque specs for the bolts in all the arms and stuff removed in "Video 1" I also wanted to put this video in here for some more reference. Not as well done and his little spindle popped right off but still helpful info for those of you about to attempt this yourself.
The torque specs are all over the place on the front suspension, from pretty low (34 ft lbs) to pretty high (like 85 ft lbs). If in doubt look them up! "Good 'n tight" will work, but I like to follow the engineer's recommendations...
Great write up and videos...thanks. I followed all the advice and it made me join the forum!
Whilst removing my torn outer boot, I noticed a circlip holding the CV joint onto the spline and was able to open it up/out after about 30 minutes of trying and the outer slipped off.
This saves removing the inner CV if it looks to be in good condition...they have an easier life on the inside.
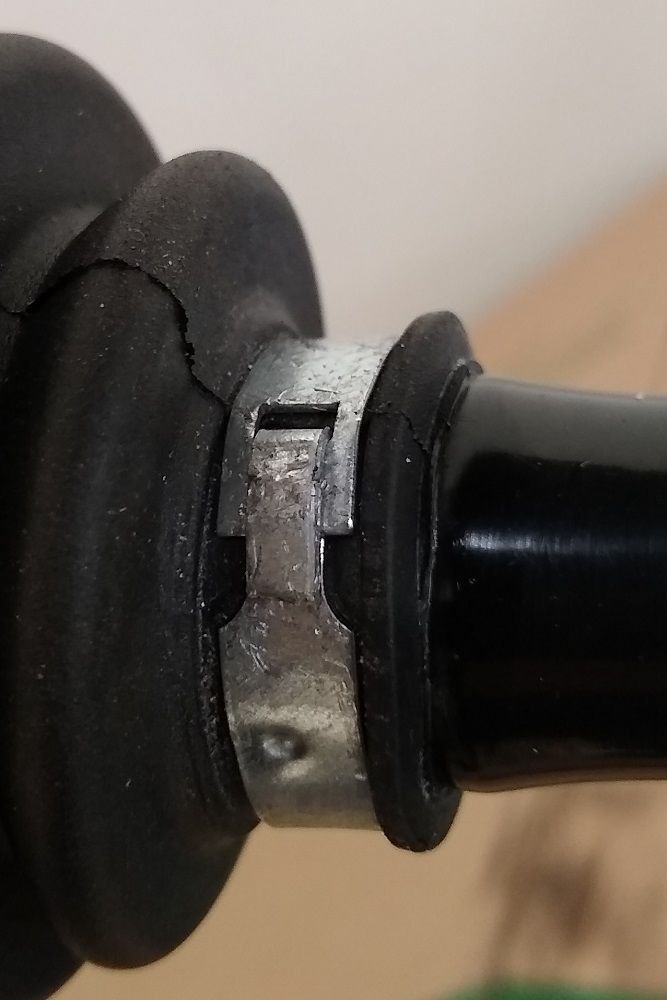
Got my ***** back in, but... What is the correct way to install this "clamp"?
Is this one as simple as it looks, wrap it around, through the hole and bend it back? or am i missing something here
I've been doing this project on a 997.2 C4S. There is another posting in the 997 Turbo forum. Some additional insights. If you disassemble the inner CV, after reviewing the videos posted about how to reassemble I found it almost trivial to reassemble if you do the process before mounting the inner race to the axle. Doing it this way allowed for moving the cage out/around with the ability to see or feel how close you are to being too far. Once the CV is assembled, I used a pair of spring clamps to hold the assembly together while pressing the race onto the axle.
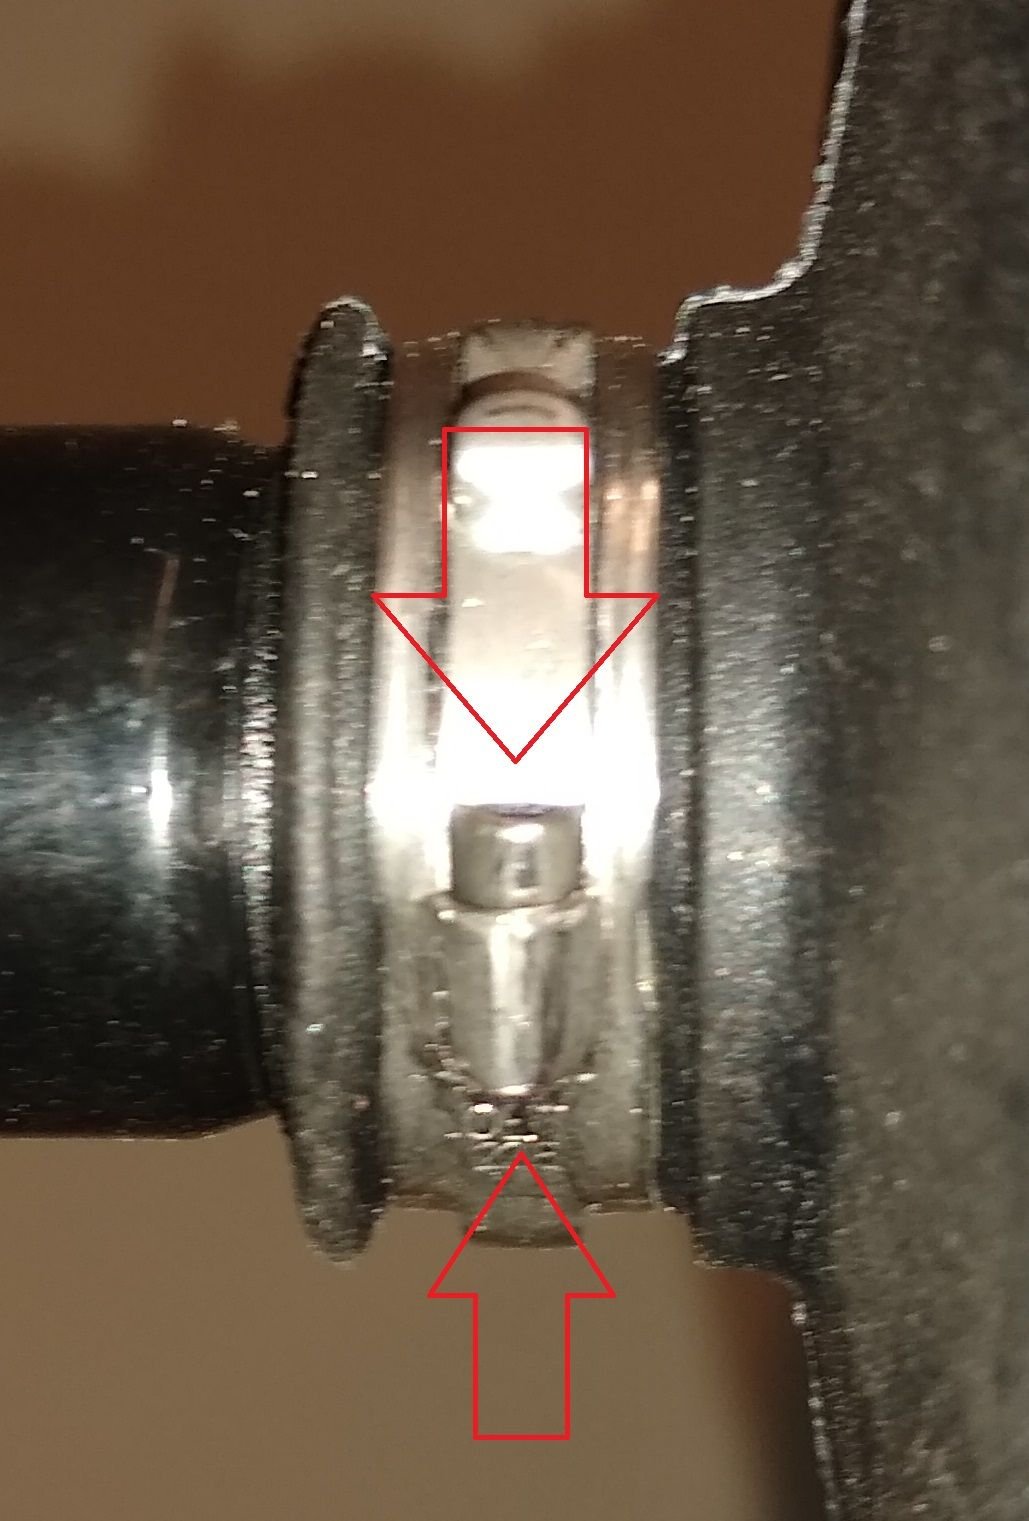
The boot kit I received has the same style oetiker small clamp as the original on the inner boot, but a different style on the outer. I'll get to the newer style clamp in a moment, but my porsche dealer is only stocking the newer style clamps. It is possible and easy to remove the smaller clamps with minimal damage. From the image below look for the section identified by the arrows. When you squeeze this section it causes the clamp to compress, which will allow for the tabbed section of the clamp to be pulled off its holder. While you can unwind the clamp better to leave it on the axle and take off once the CV is off. There are two small clamps and they are different sizes, inner is smaller than outer. BTW it looks like there is a special CV tool for this style of clamp but I was able to use regular pliers, other postings mentions needle nose but I found they tended to slip.
In reviewing other postings on replacing boots, one manual mentioned taping the splines with electrical tape before sliding on the new boots to protect from damage. Some postings mentioned keeping grease off of the boot area that seals onto the shaft or CV. While it makes some sense, other posting mentioned wiping grease onto the same areas if they were making it hard to install the boot. I found it easy to install the inner boot to the metal cover before putting in the grease and also for the inner I put almost all the grease in covers as it made little sense to put excess grease into that boot.
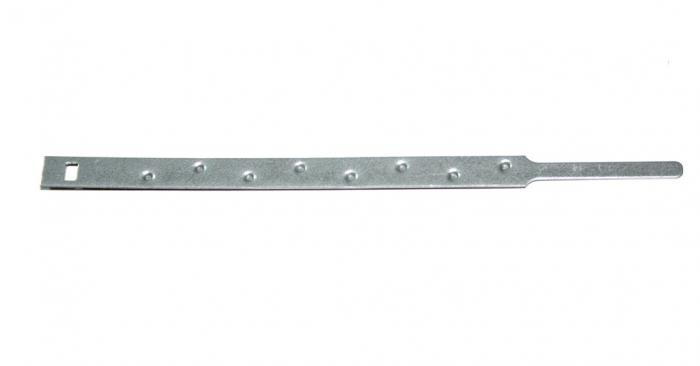
This is the newer style small clamp by kit included.
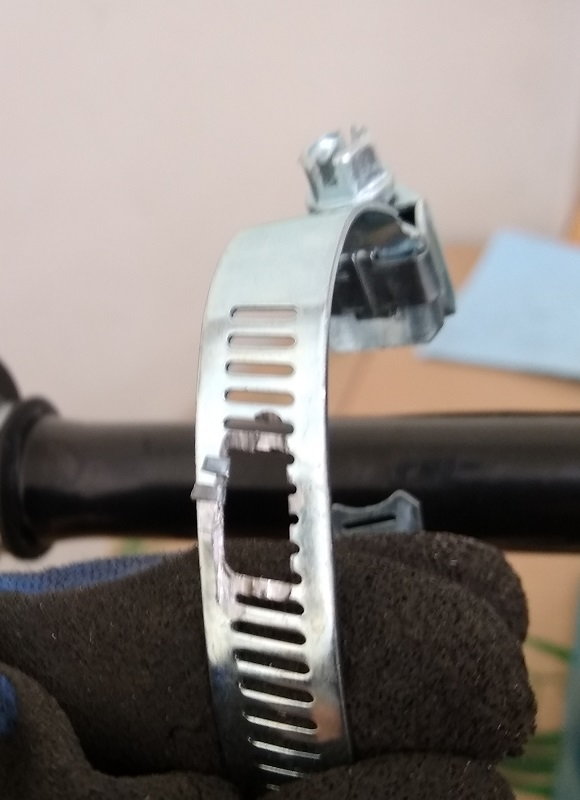
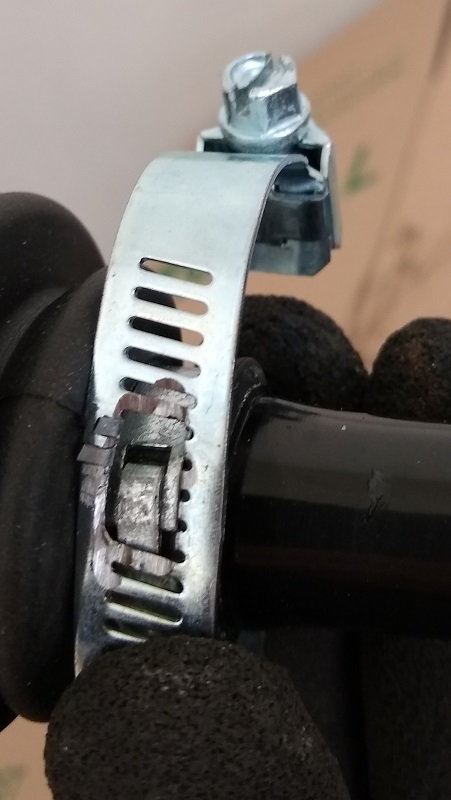
Someone already posted a pic of this but I couldn't find any explanation about how to put the damn thing on, nor find any reference to a special tool. What I did was use a screw type hose clamp slightly larger diameter than the axle and ideally same width as the new clamp, but larger width worked fine for me. Grind out a section of the worm clamp like zo:
Next bend the new clamp about 180 degrees using a socket similar in size to the desired ending size. I chose to put the dimples facing inside under the assumption they would help prevent the clamp sliding. Slide it onto the boot and put the tongue through the slot and hand press the clamp closer to being round. (I had the boots on before I messed with this clamp, it might be possible to bend the clamp the full 360 using a socket and then sliding onto the axle before the inner boot goes on.) Now slide the worm clamp over the new clamp pushing the tongue through the hole you cut into the worm clamp.
Tighten the worm clamp, occasionally pulling on tongue. Once you are satisfied with the tension, bend the tongue a little past 90 degree and try and press down the end of the new clamp at the same time. Remove the worm drive clamp and bend the tongue completely. I choose to cut the tongue somewhat as I can't see any advantage in leaving it long. I hammered it to make it all nice and round. If you notice in the finished pic the clamp could have gone tighter, I have no idea if max tightness is correct it just went by feel of the worm clamp.
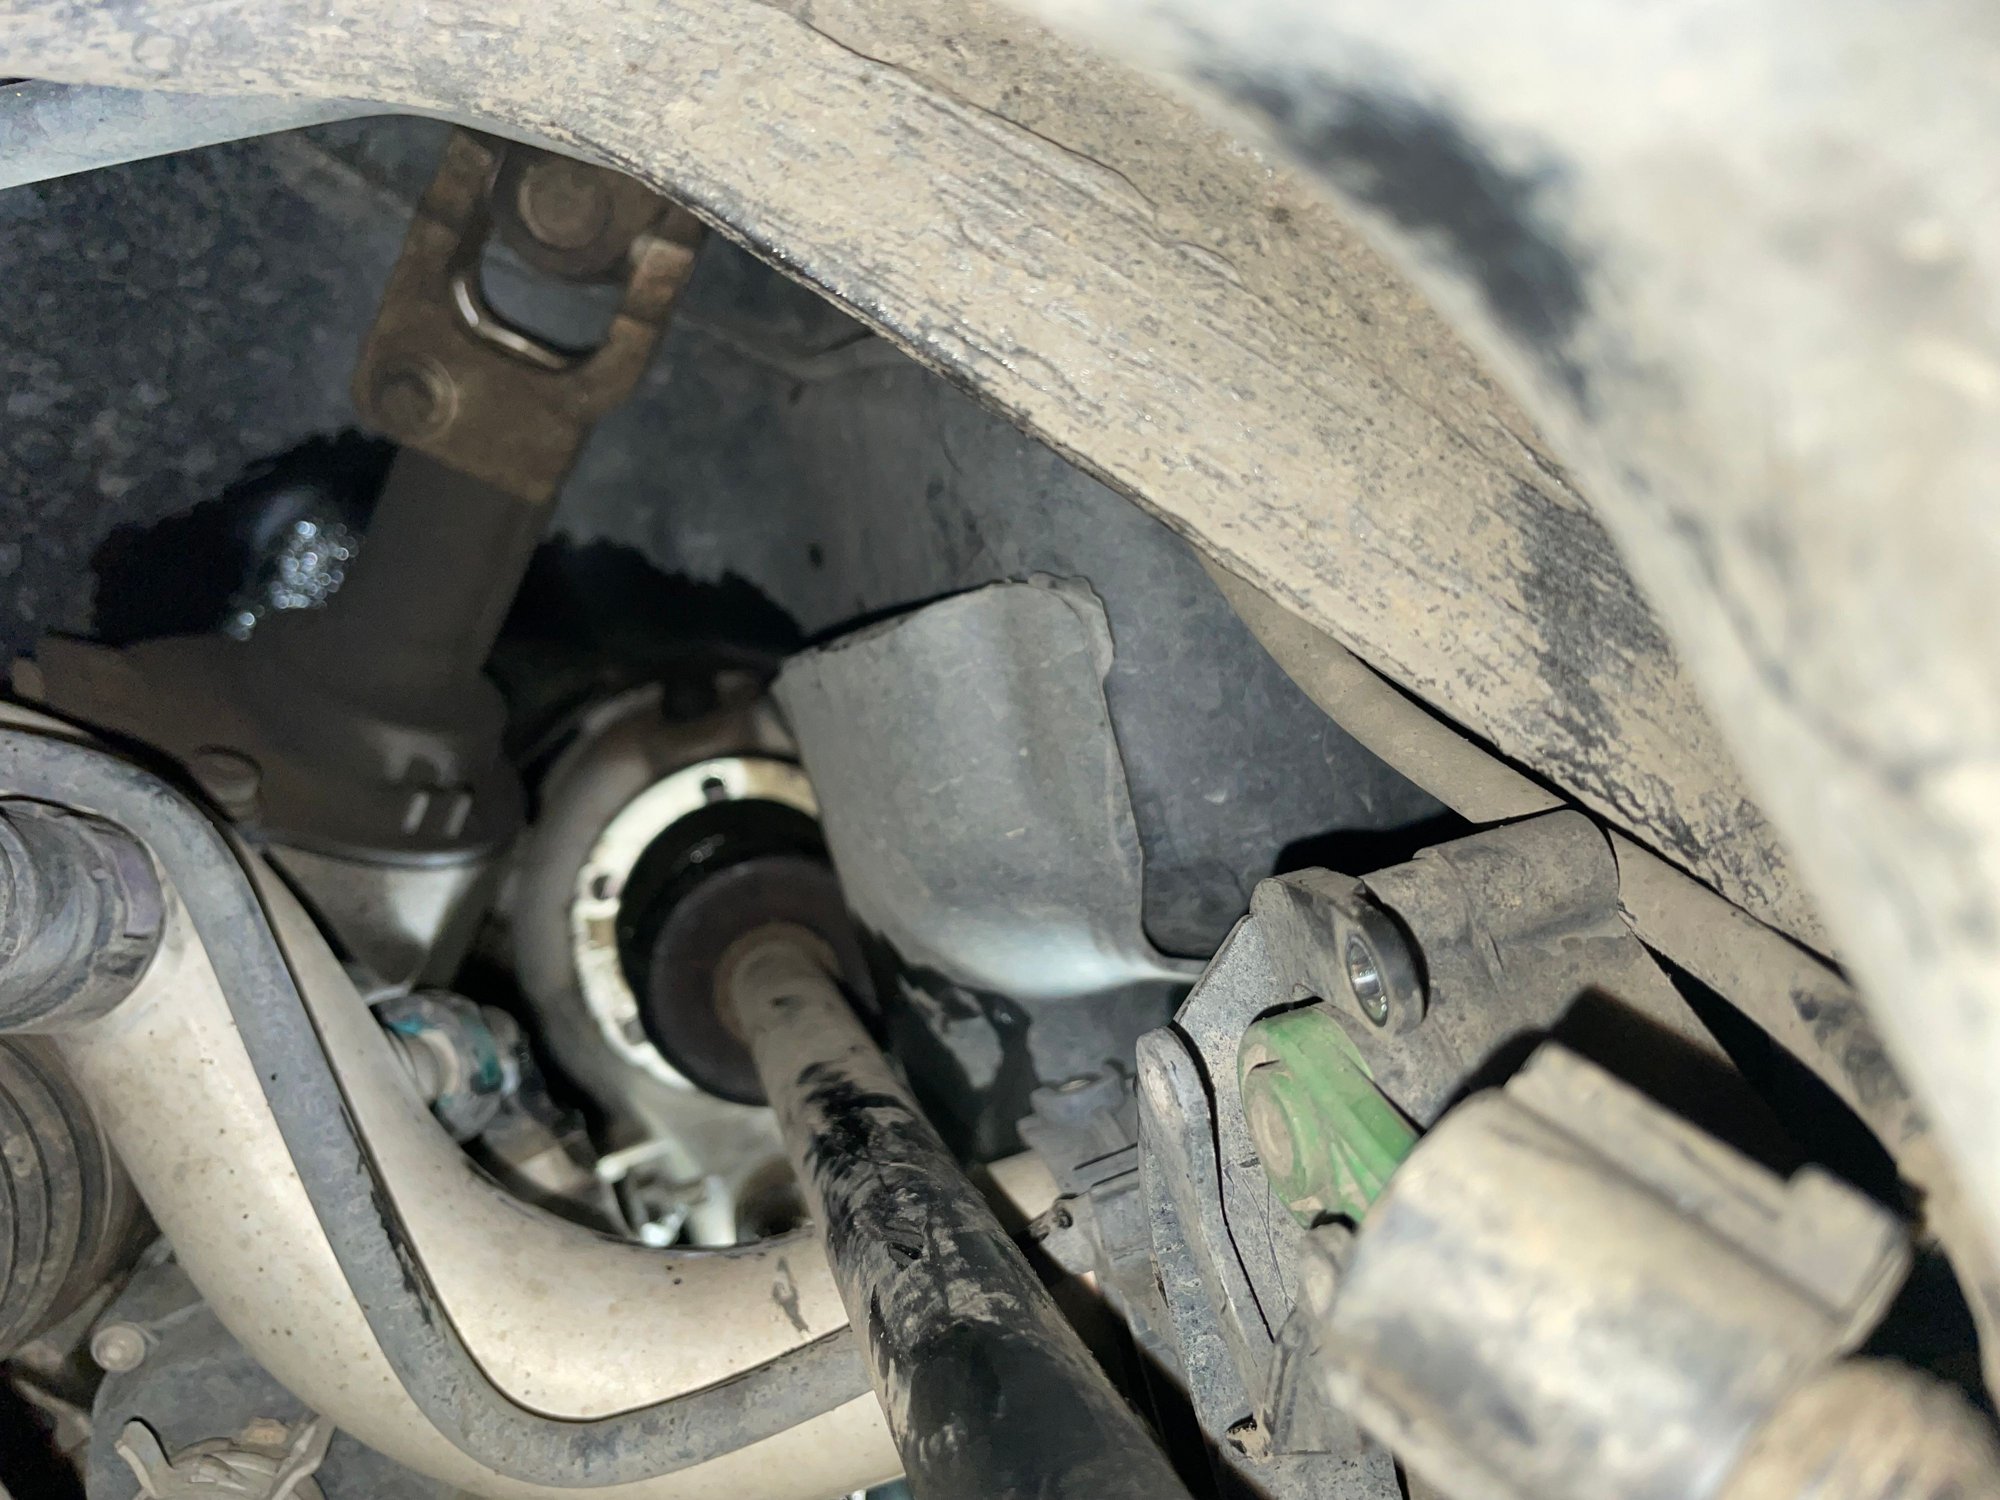
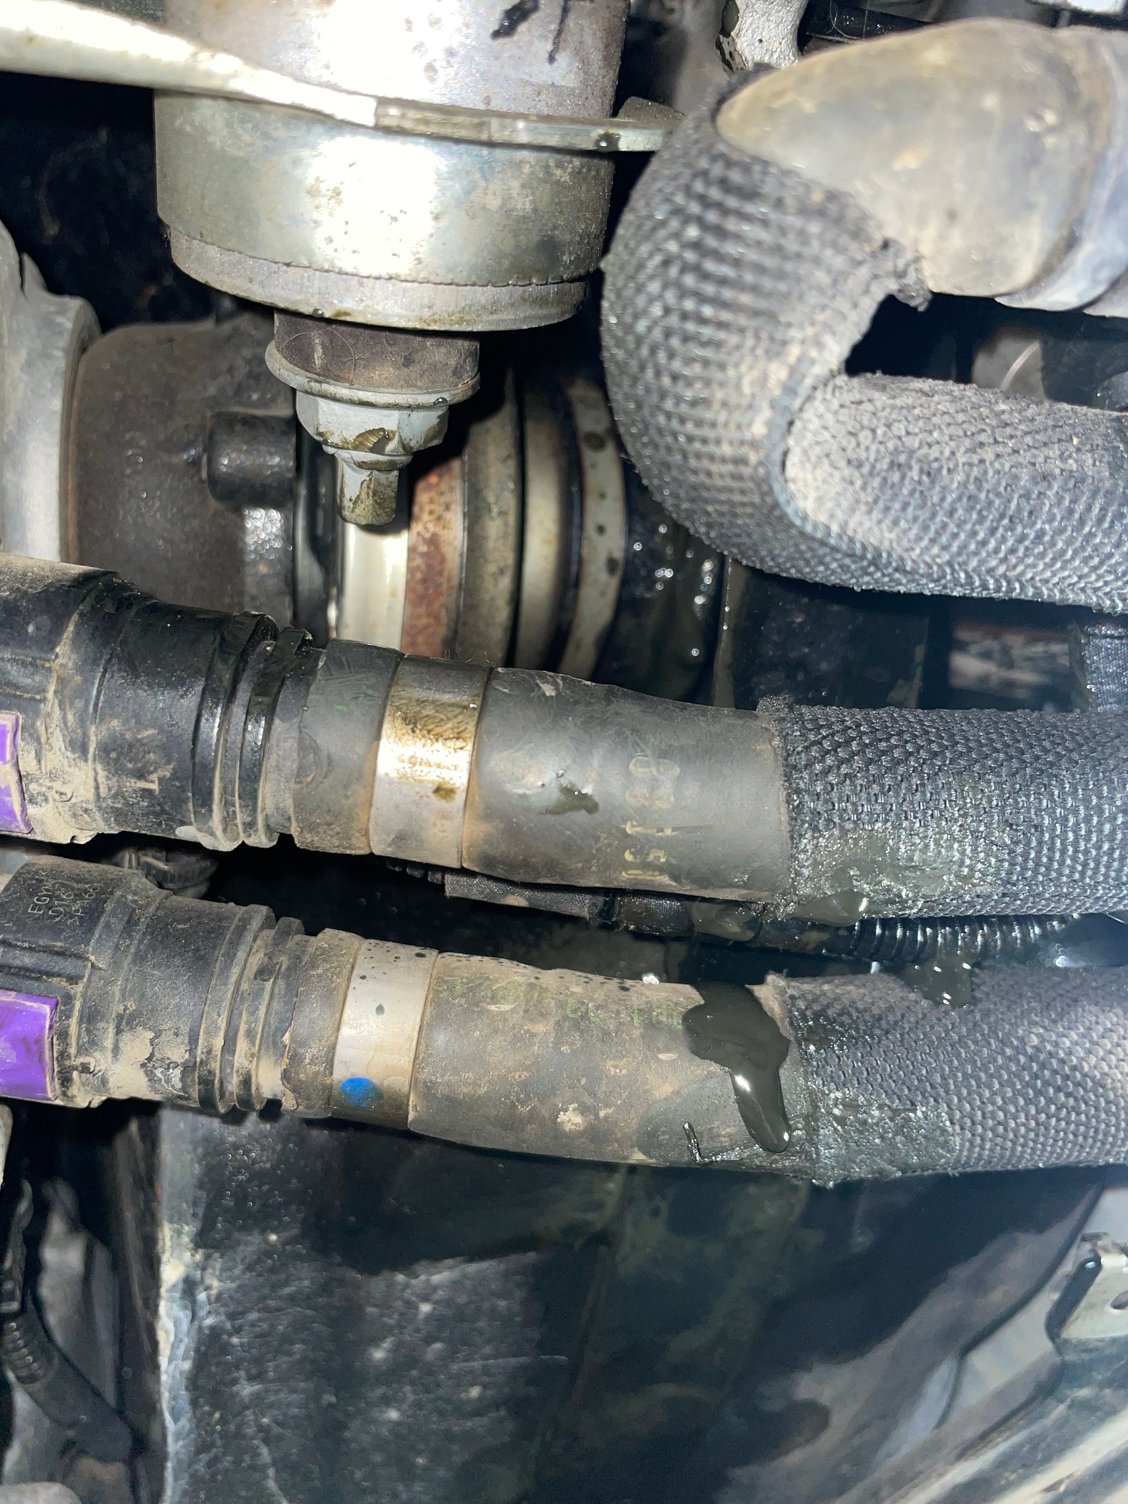
This job is not for the faint of heart!!!! Currently doing this job with a friend on my 991.1 turbo S. We had to disconnect the steering rack to get the front driver side axle out. It is currently out of the car, in a vice, and we are replacing the boots and applying the clamps and we are dreading having to put it back in the car. While on the bench we decided to slip the boots on from the �inside boot� side so we disassembled everything and your reassembly video was a massive help. We had to apply heat to that nut on the end of the axle to get it off, it was also a massive PIA, and sadly that wasn�t shown in your video how you got it off. Thanks so much for this thread though I will keep you guys updated.
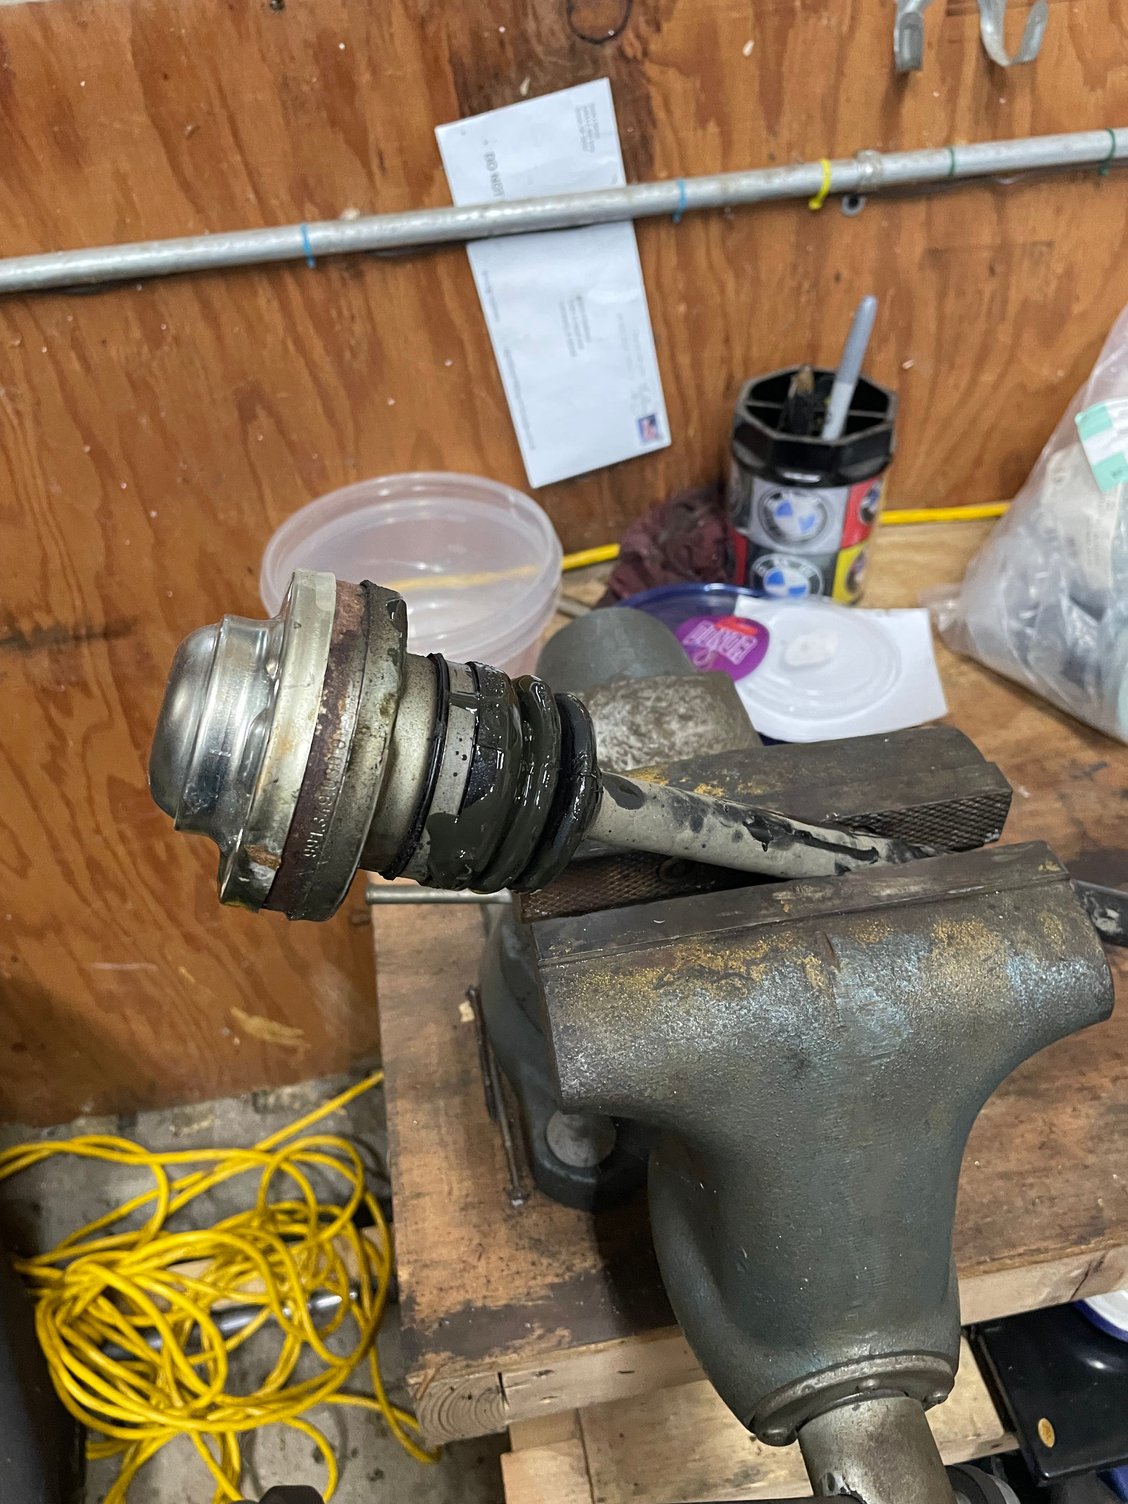
We were stuck here trying to get the axle out then decided to disconnect the steering rack which did the trick This is the view from the bottom of the car when we were stuck getting the axle out, hardly any room to reach in anywhere Axle finally out and on the bench this is what it looked like That nut in the center was on so tight we had to apply heat for a longgg time and bang on it to get it off after we removed everything else around it.


 04-08-2020, 11:47 AM