When you click on links to various merchants on this site and make a purchase, this can result in this site earning a commission. Affiliate programs and affiliations include, but are not limited to, the eBay Partner Network.
Doppelg�nger
In fiction and folklore, a doppelg�nger or doppelga(e)nger is a look-alike or double of a living person, sometimes portrayed as a paranormal phenomenon, and in some traditions as a harbinger of bad luck. In other traditions and stories, they recognize your 'double-goer' as an evil twin.
I thought that posting had expired. Nobody took me up on the offer, so I dug into it. I have my 1963 Convertible Falcon coming out of paint, and I needed the room in my garage to get back on that project. As it turns out, I had a little more time than I thought and am trying to get it done, before the paint shop calls and says "We're Done!"
The removal of the transmission was pretty easy. I just removed any hoses that were in the way of the path of dropping the transmission or needed to be detached to remove the Tiptronic. It was pretty obvious what needed to be done. I took a lot of pictures, so I knew how to orient the clamps and what hoses went where. There were also some vacuum line that had to be routed around some things. Before taking the brackets and mounting bolts off of the transmission, make sure you are supporting both the transmission and the engine.
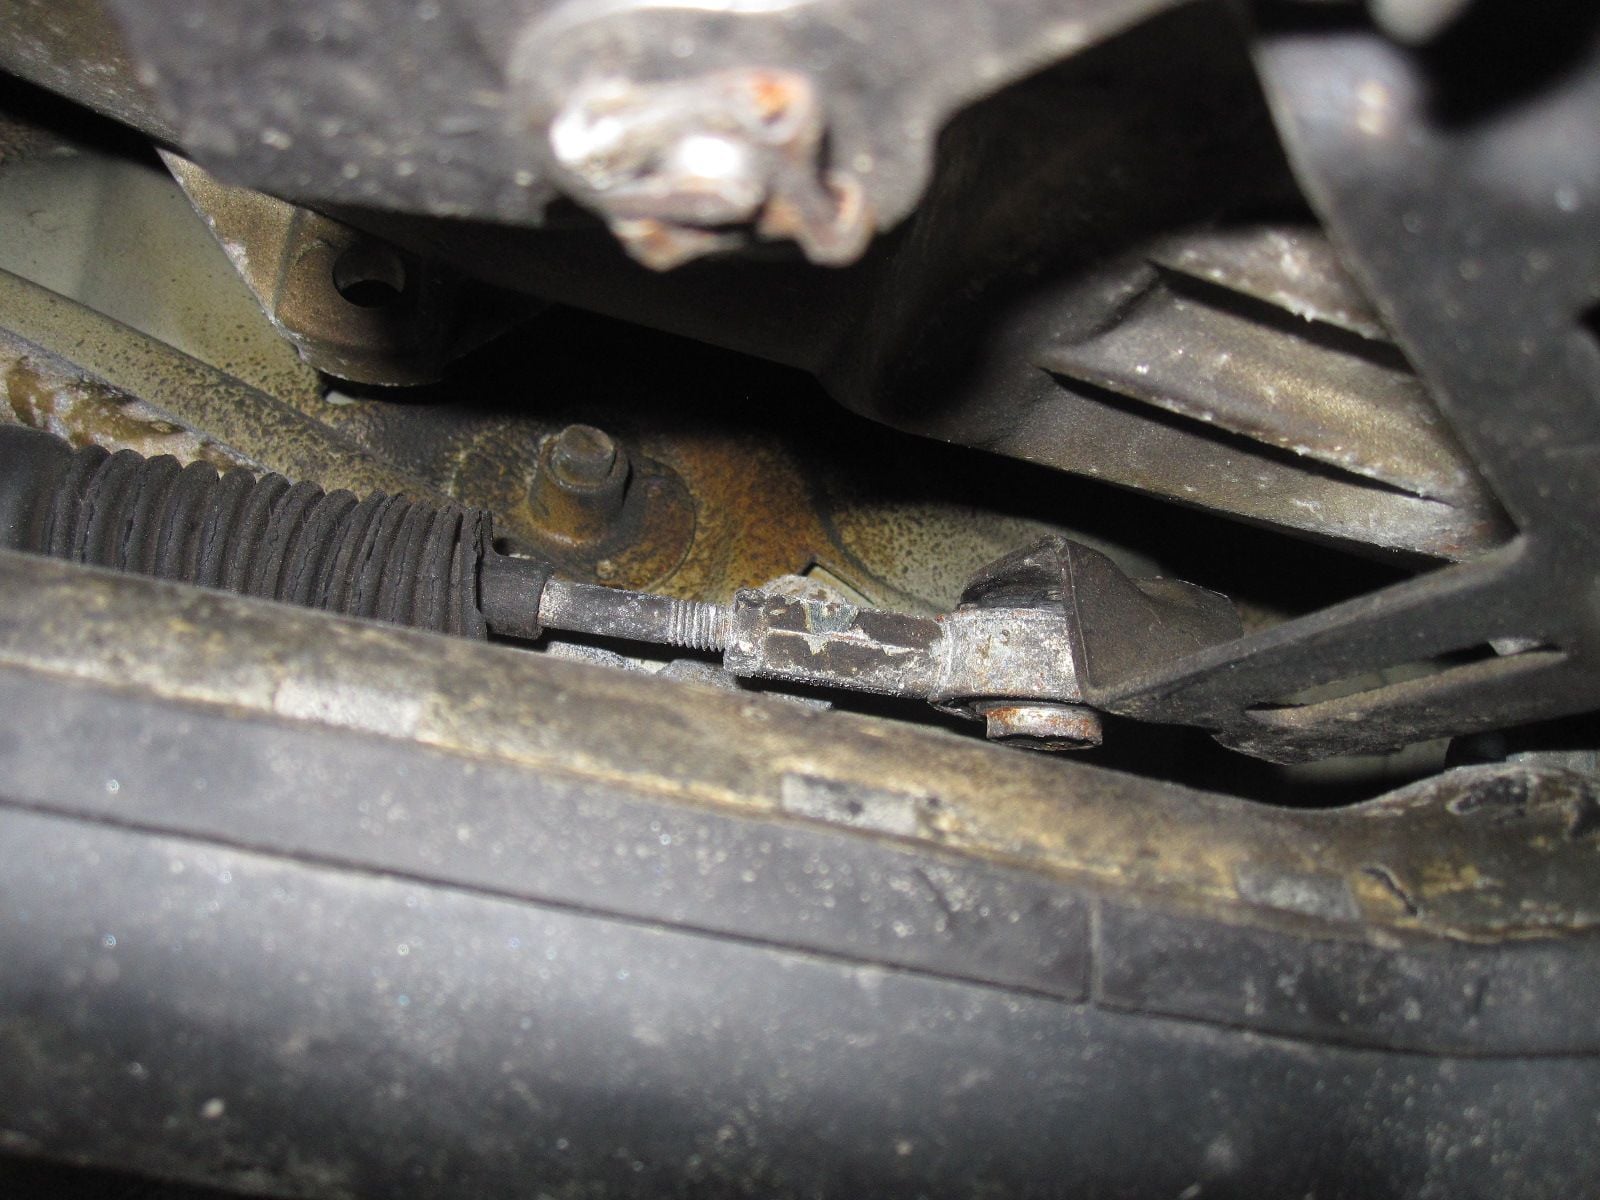
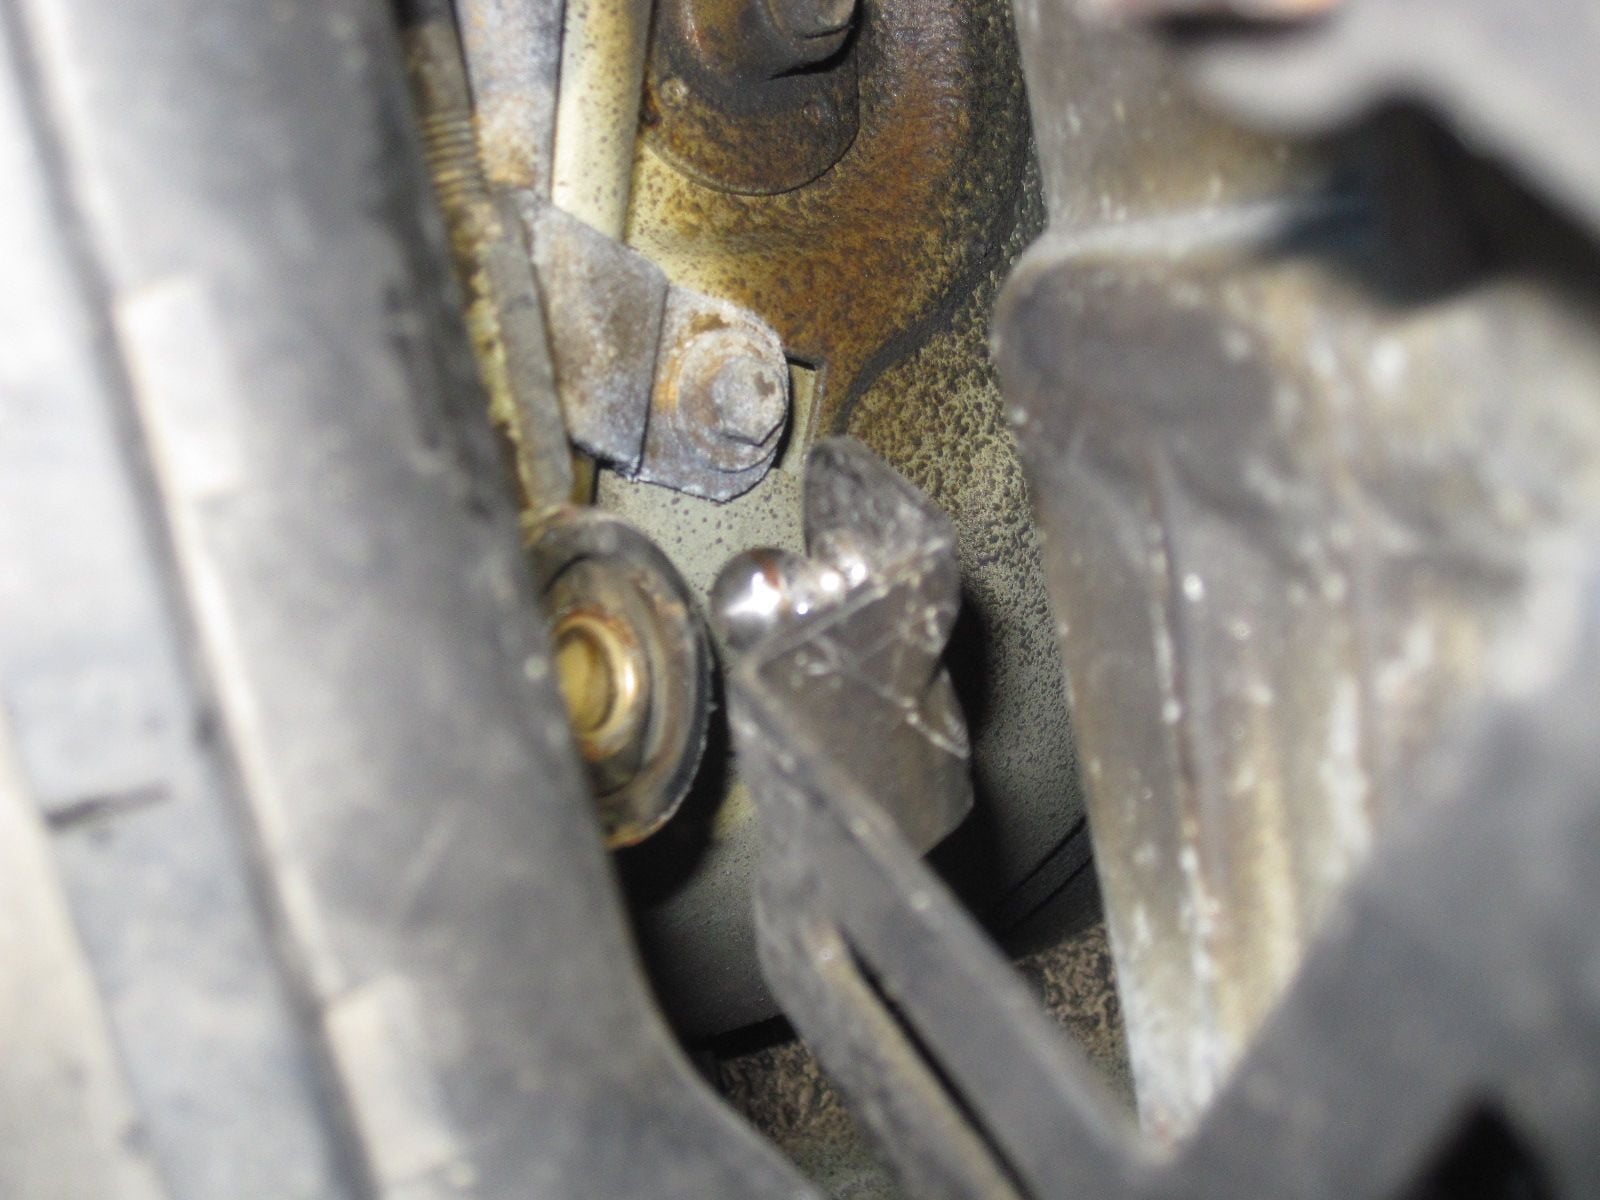
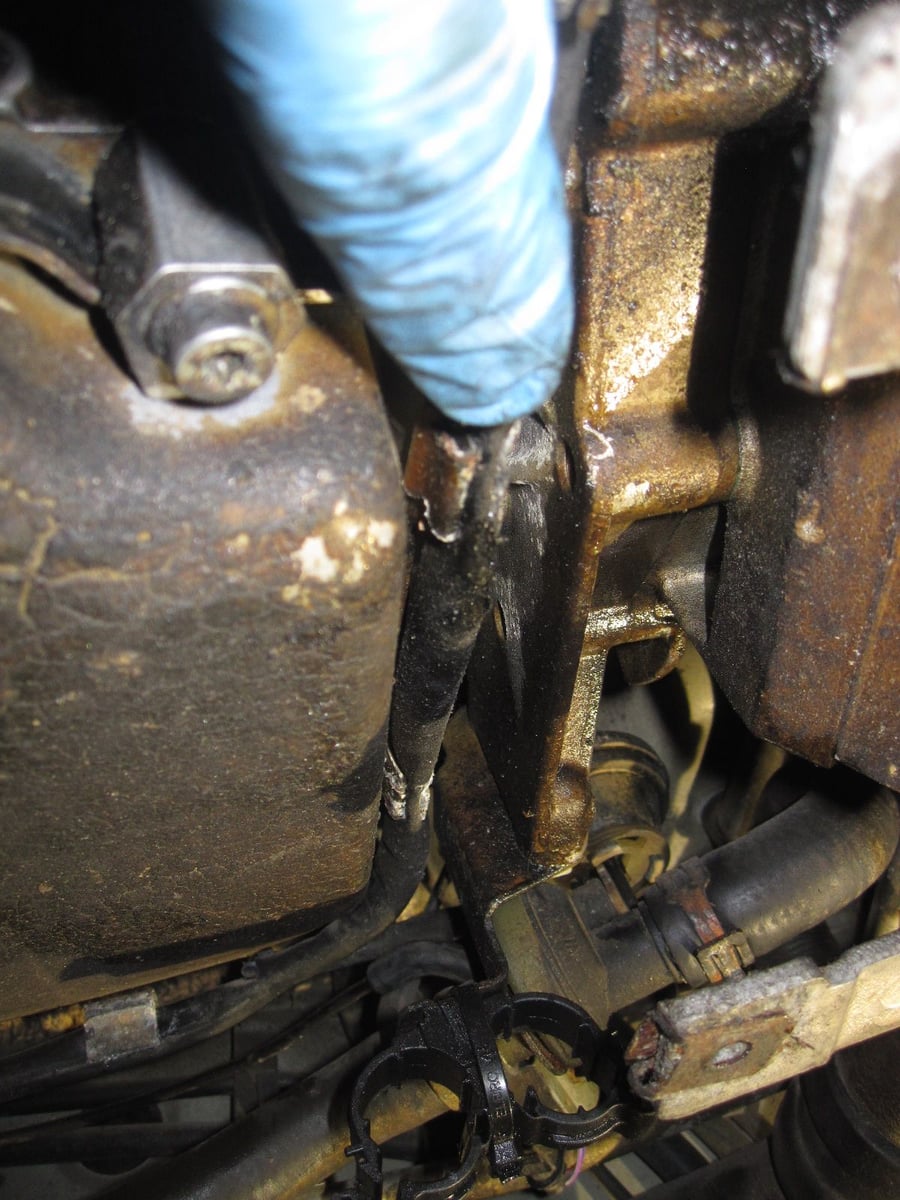
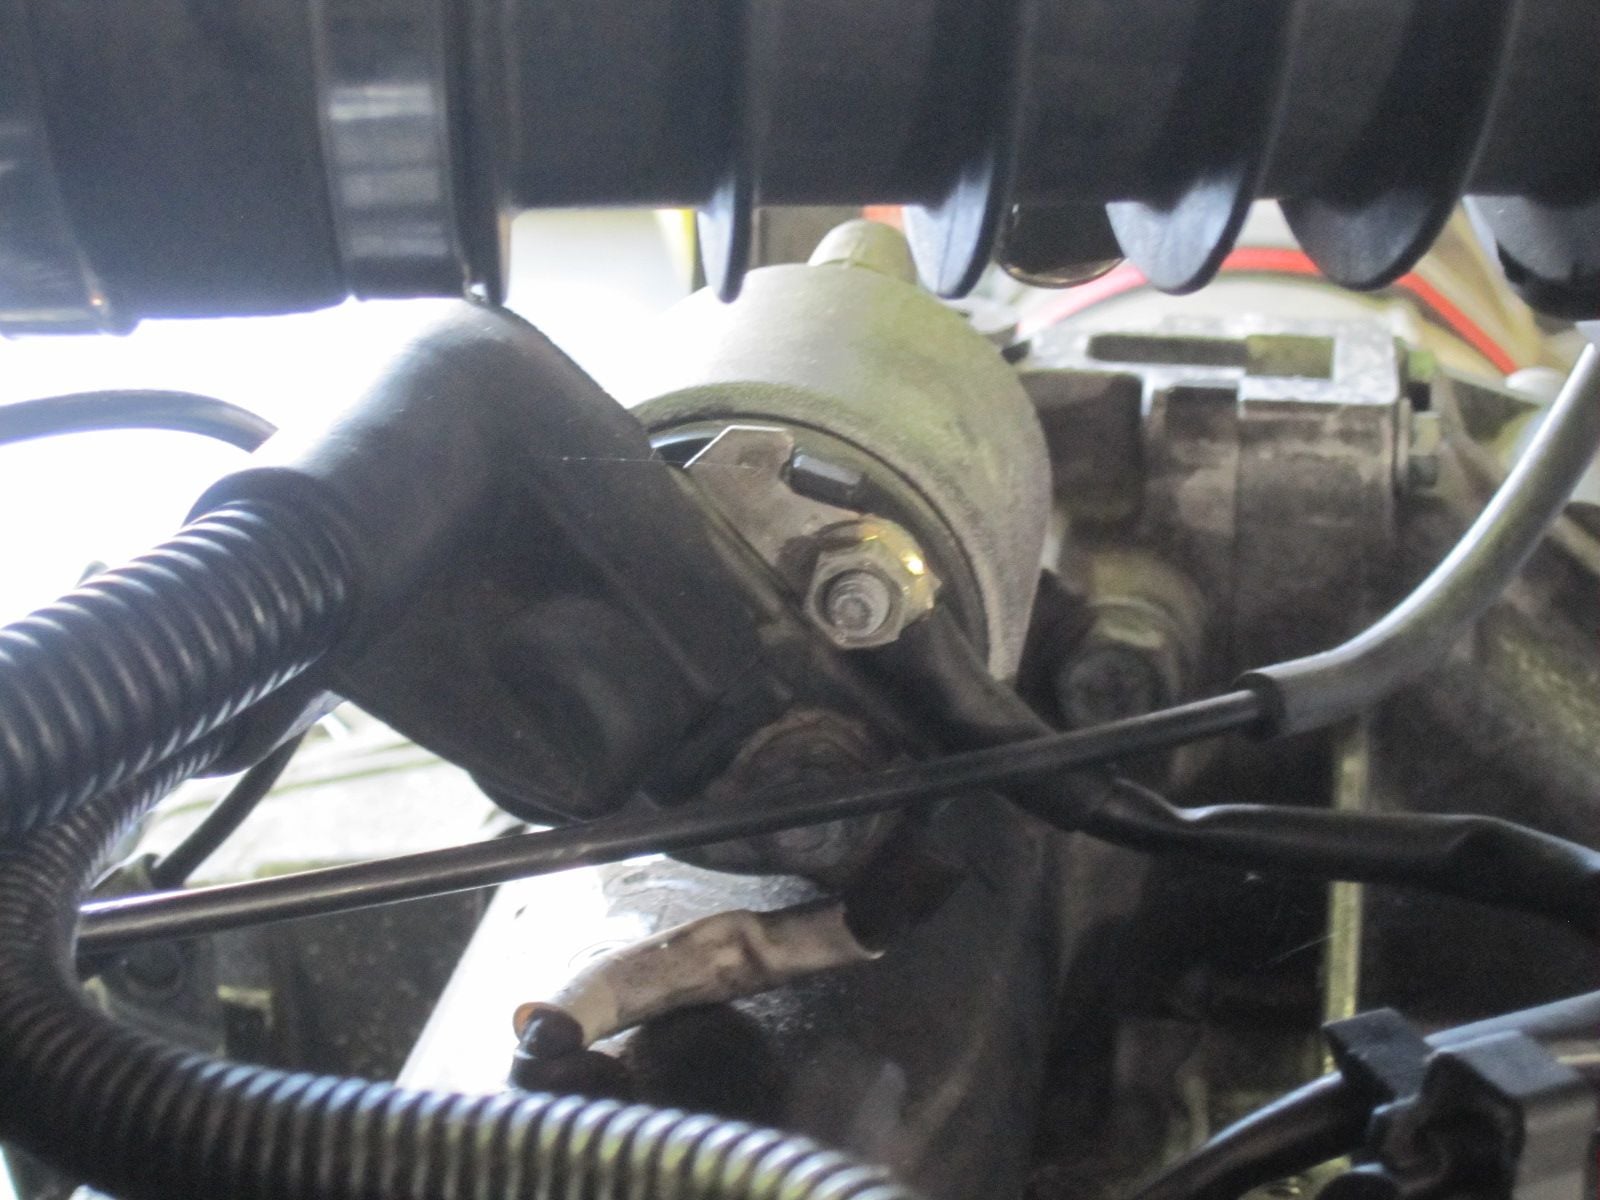
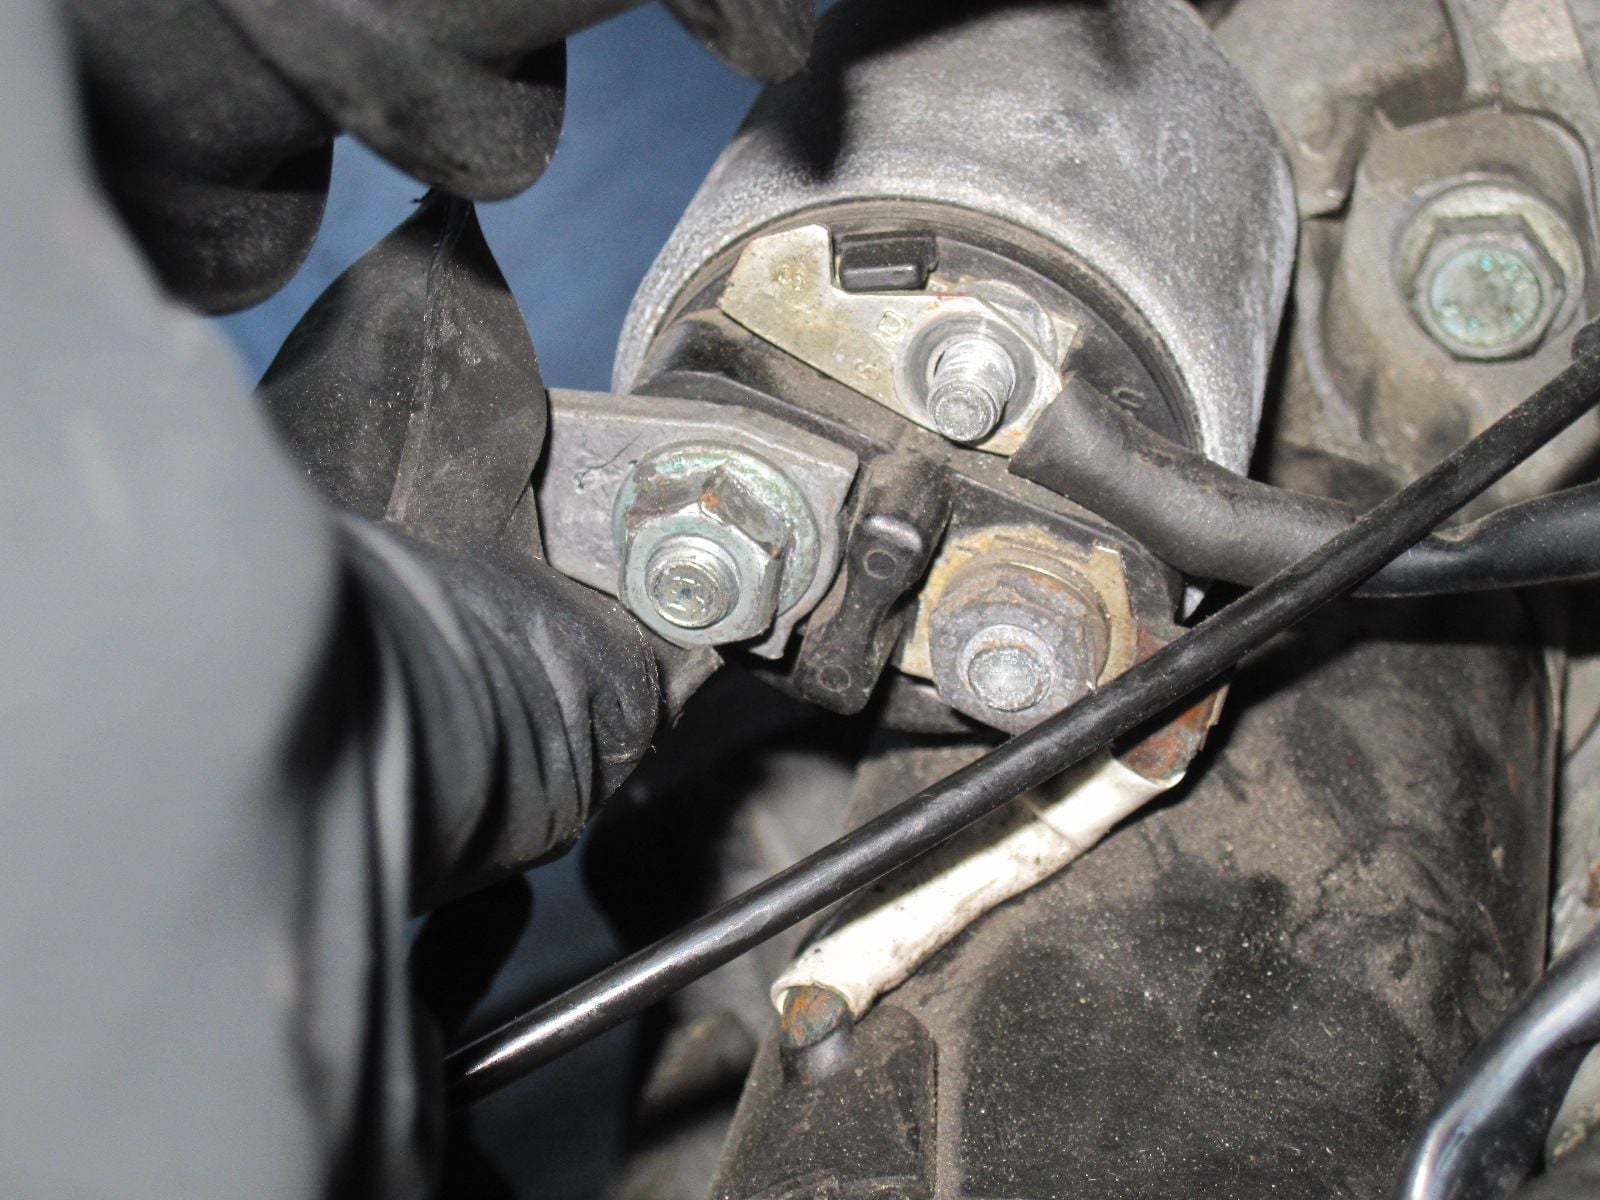
The first thing I needed to do was detach the shift linkage. You have to pop the head off of the ball that is on the pivot lever. It takes a little doing, and you have to get the right leverage, but when you do, it comes off.
Popped off....
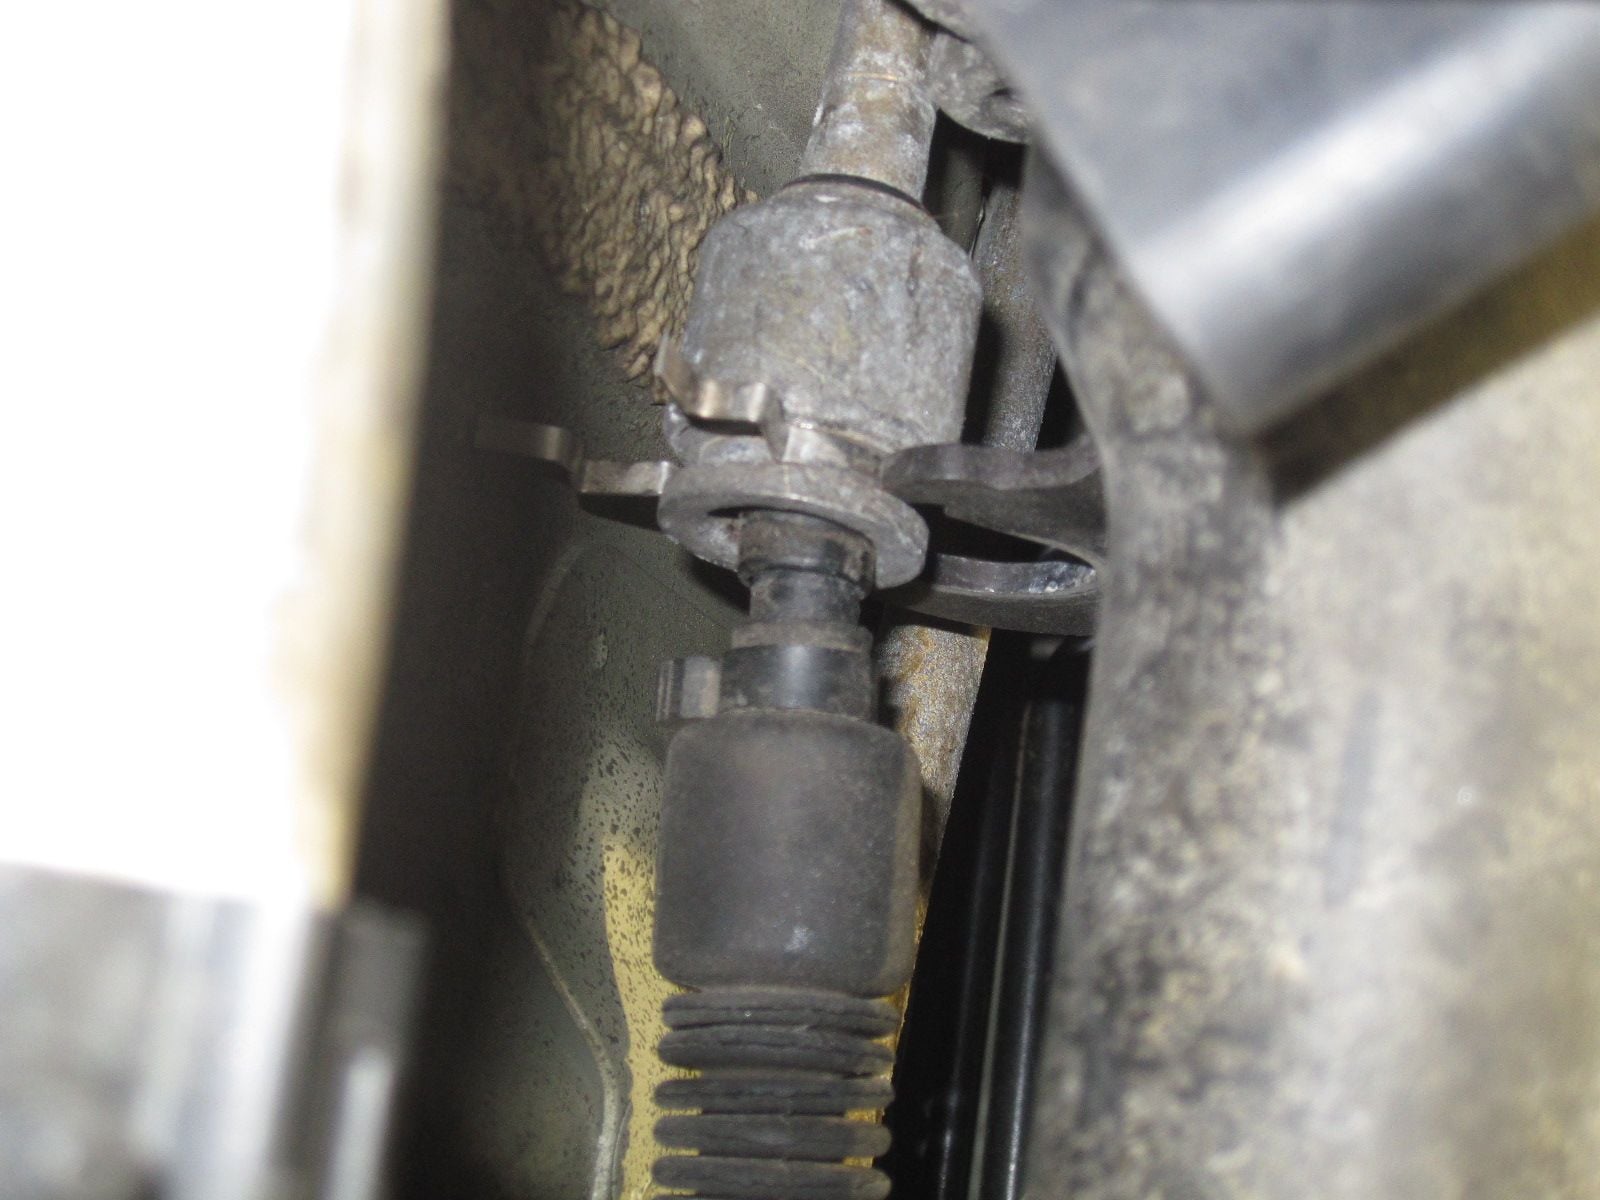
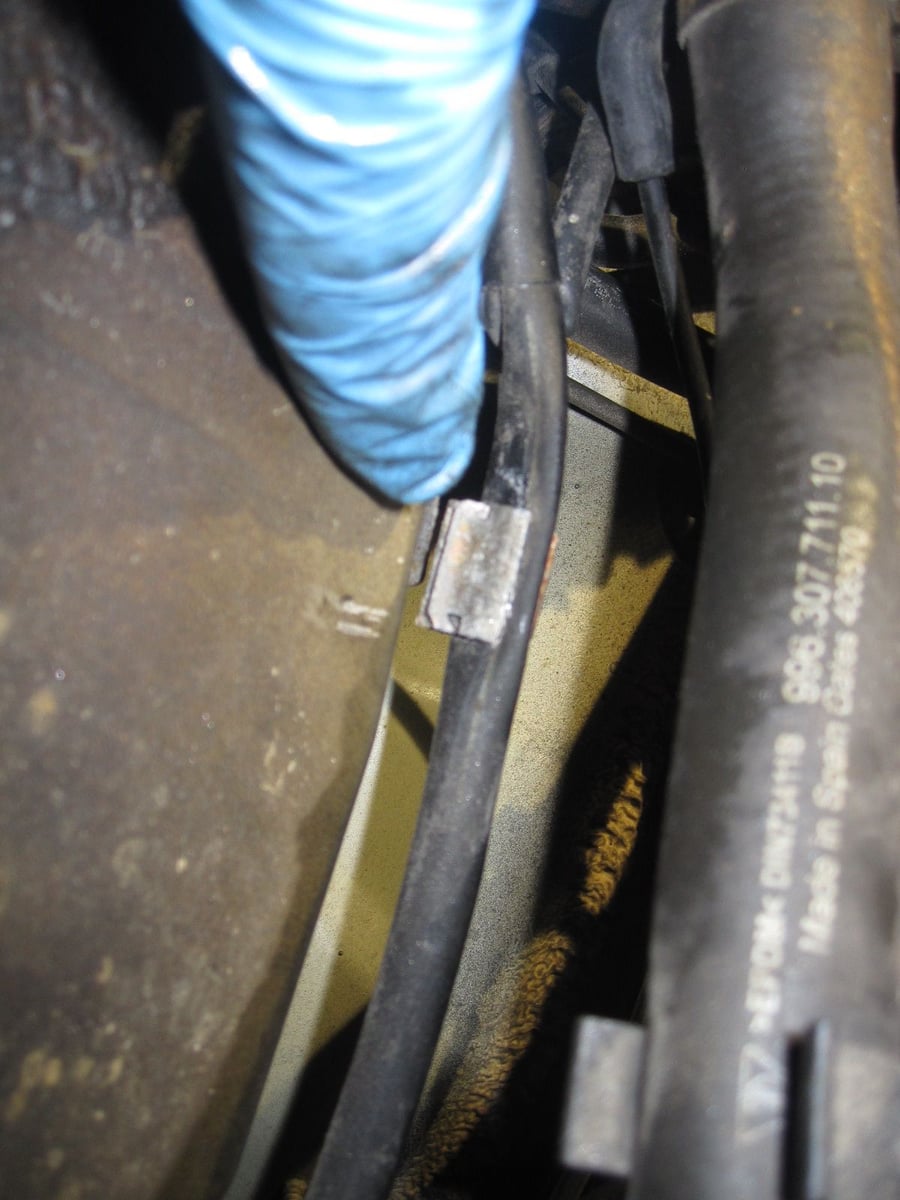
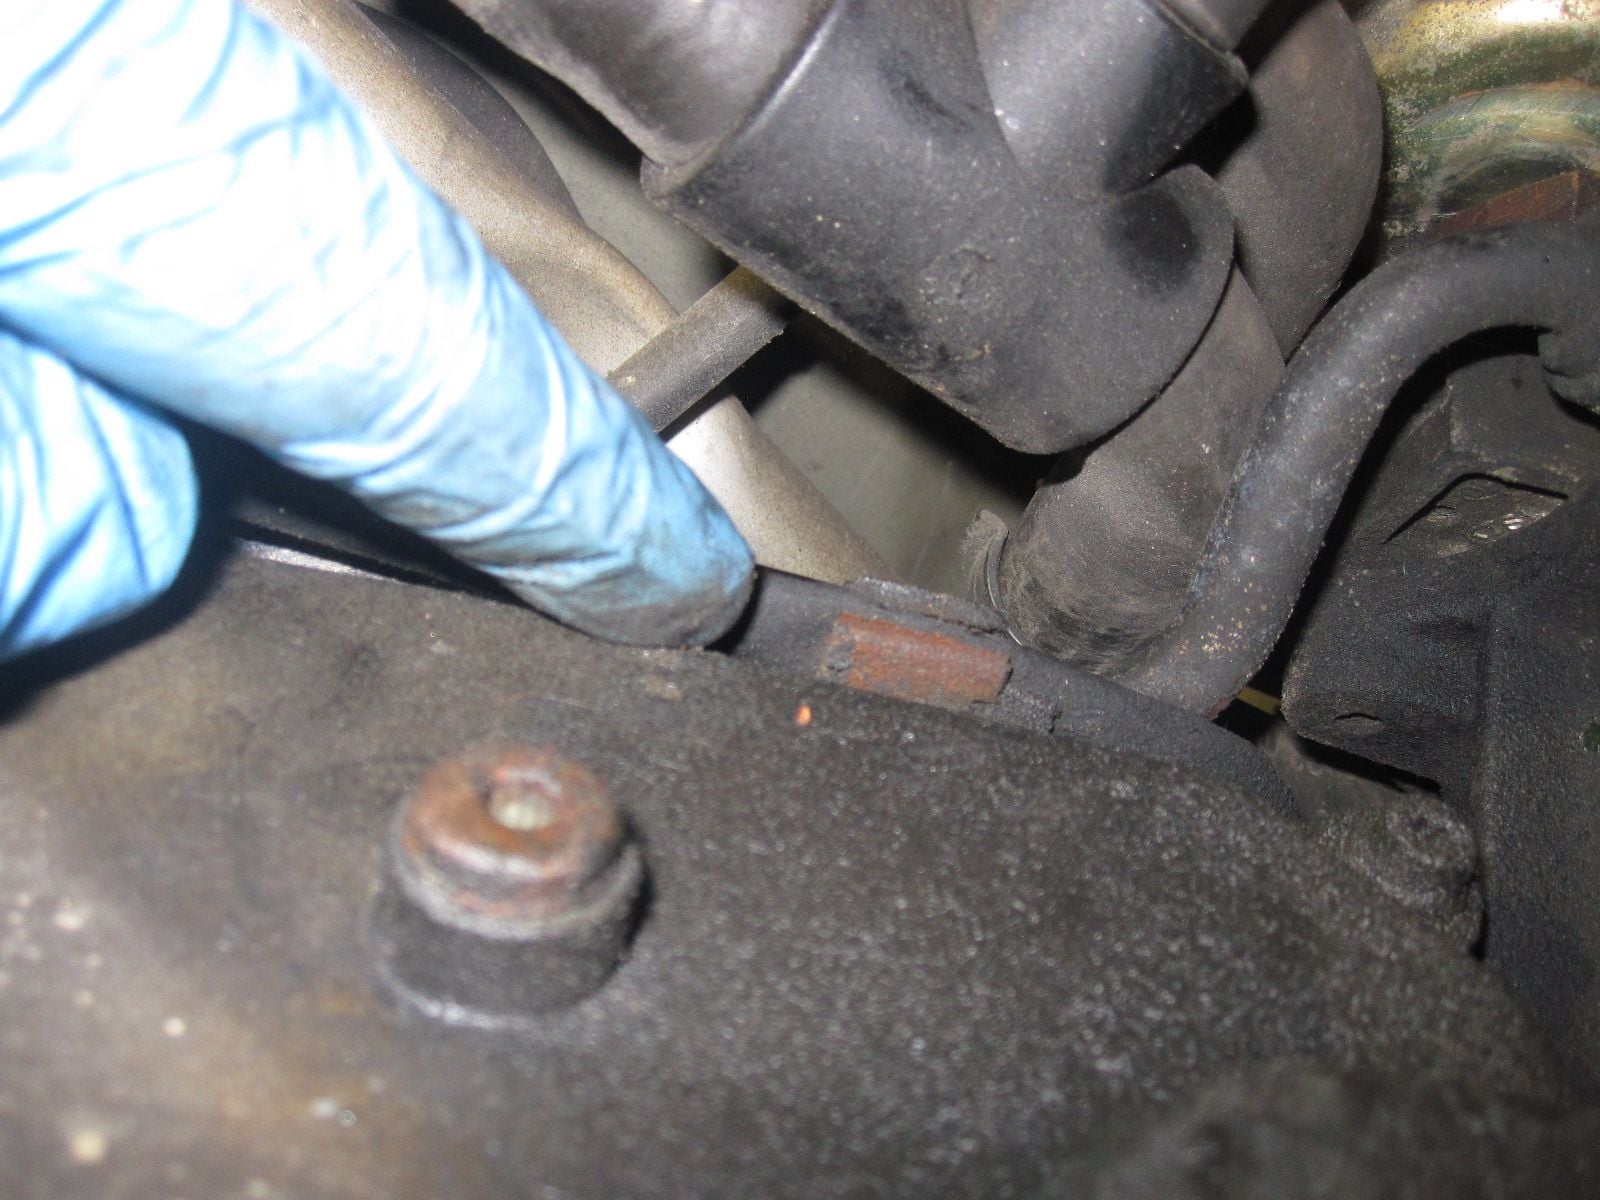
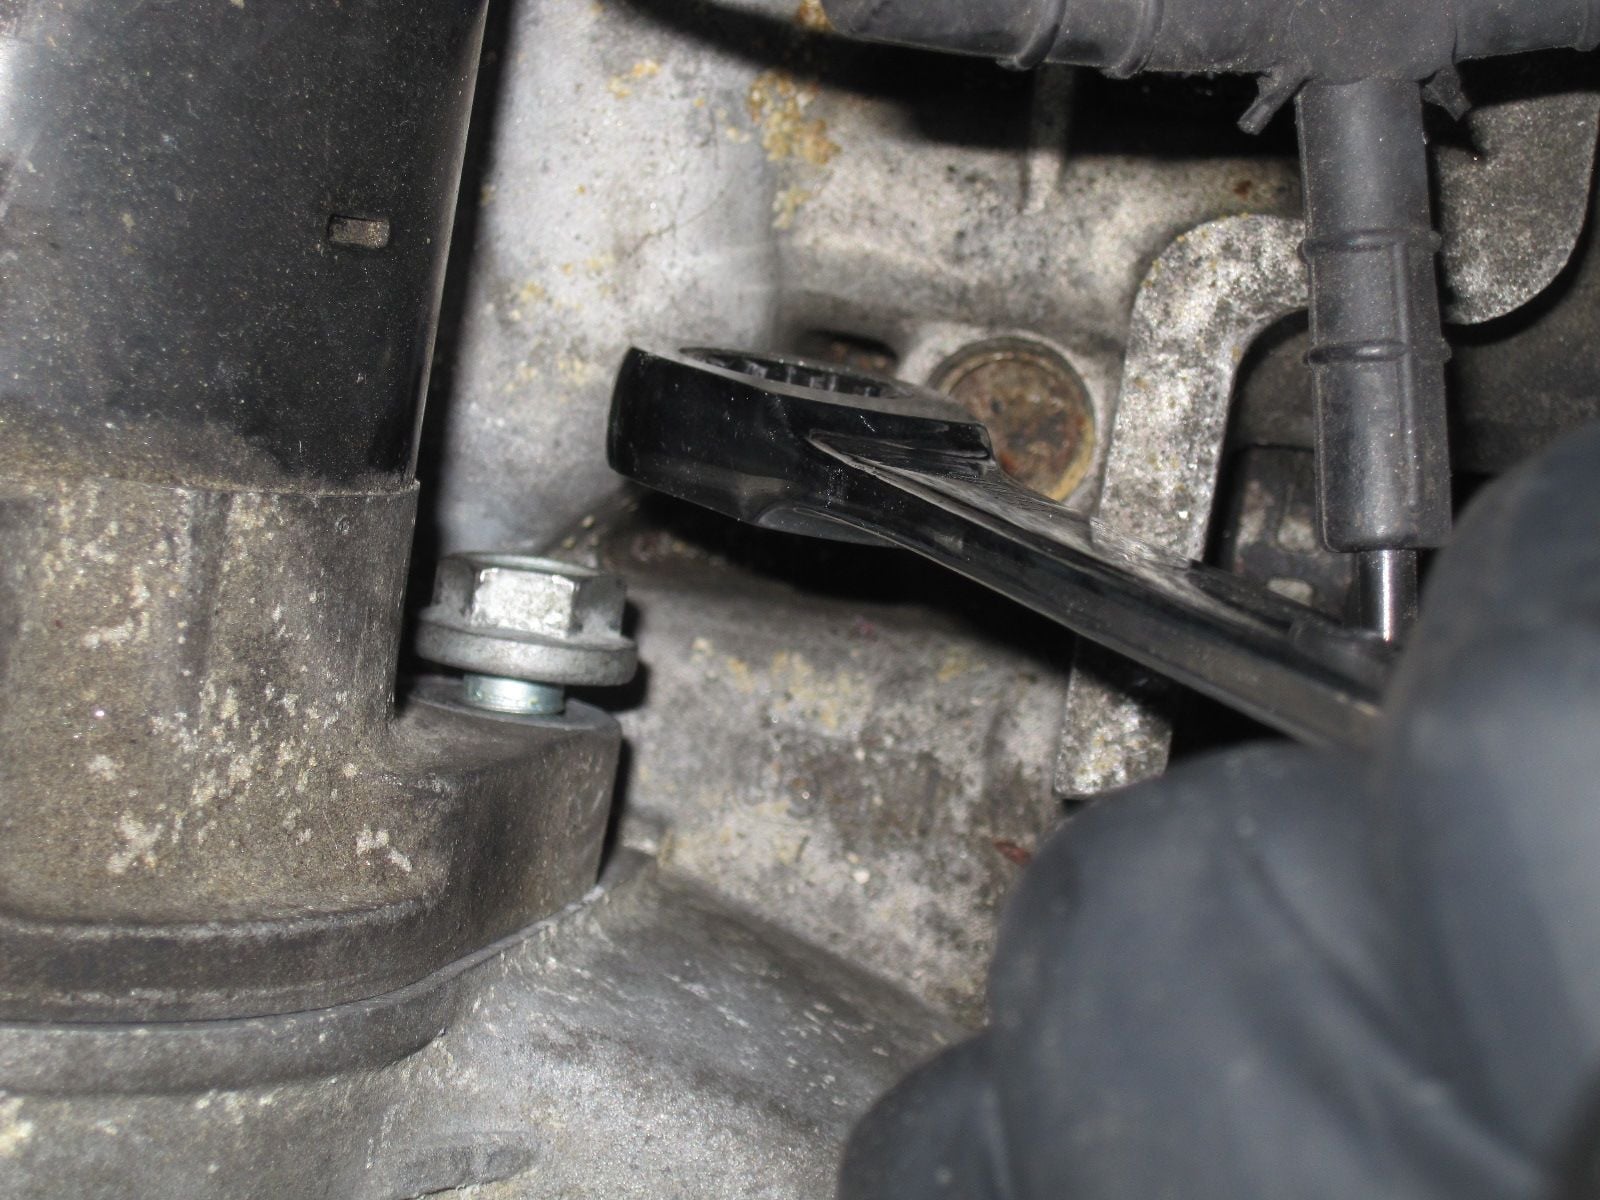
This is more toward where the cable enters the cab. The little metal ring slips out of the holder. There is a metal clip that holds it in.
See....
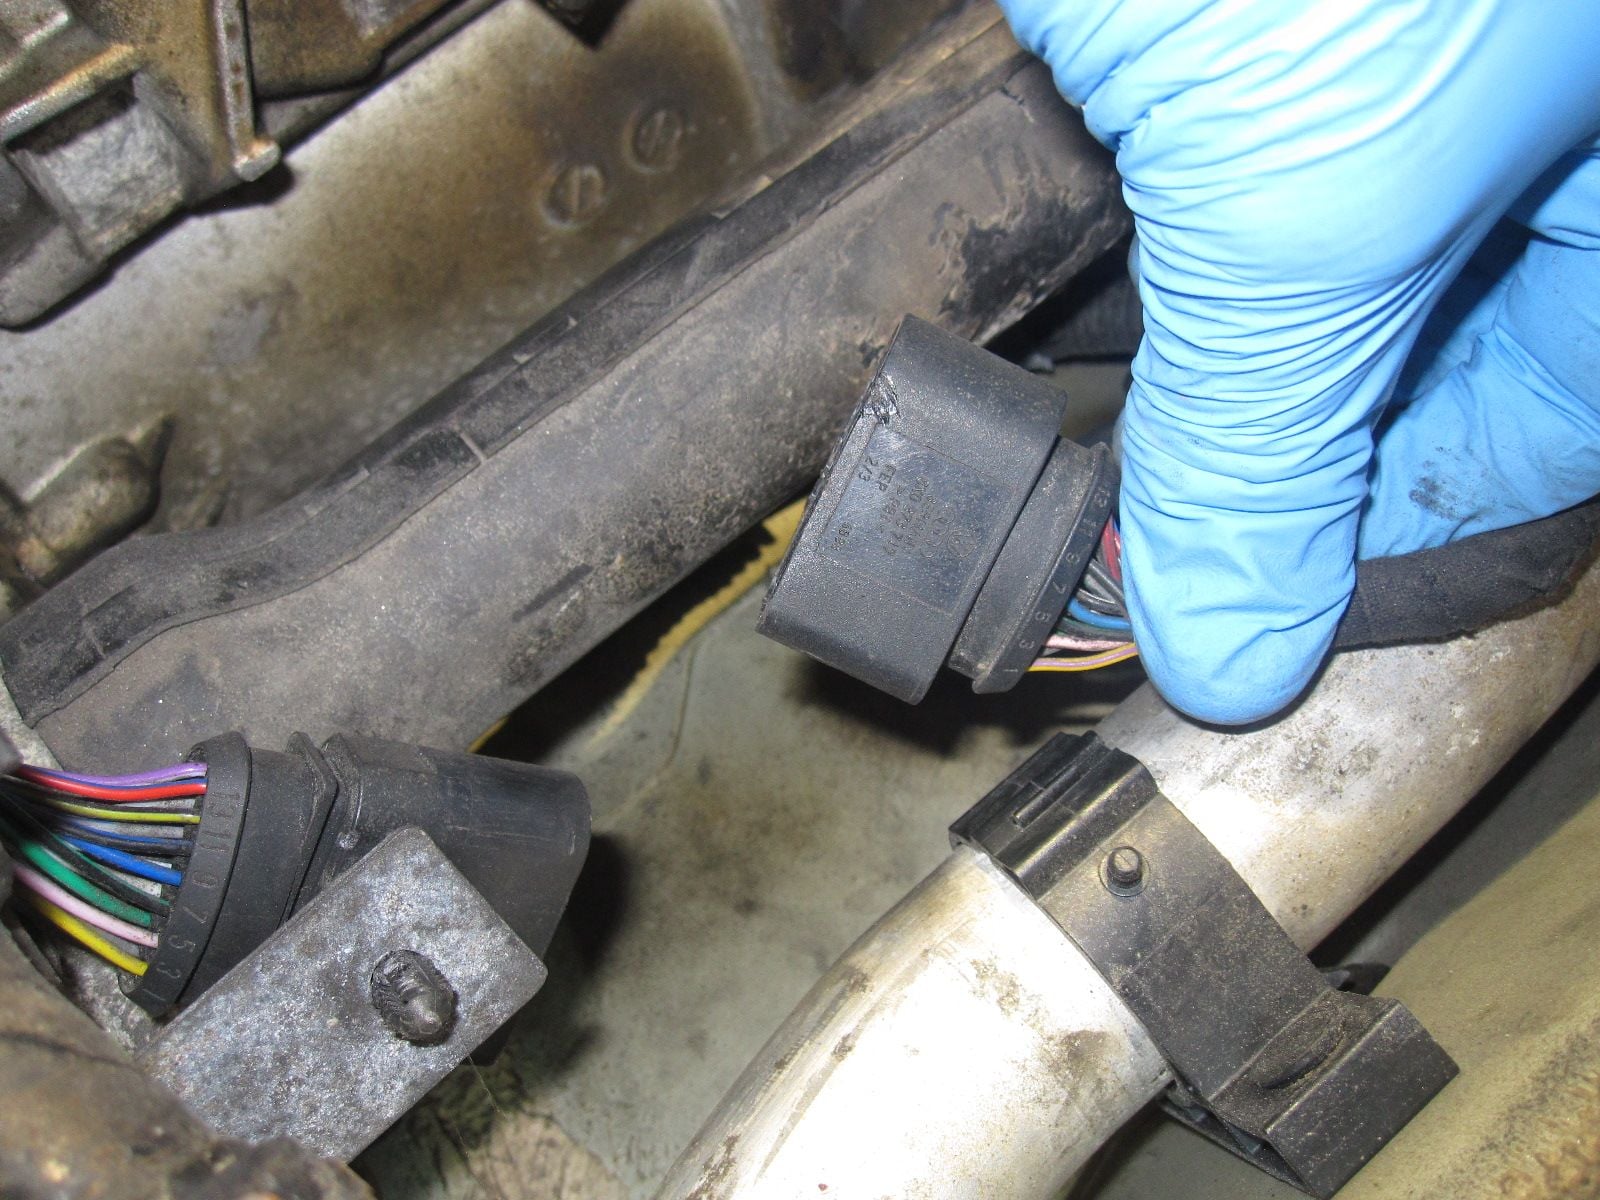
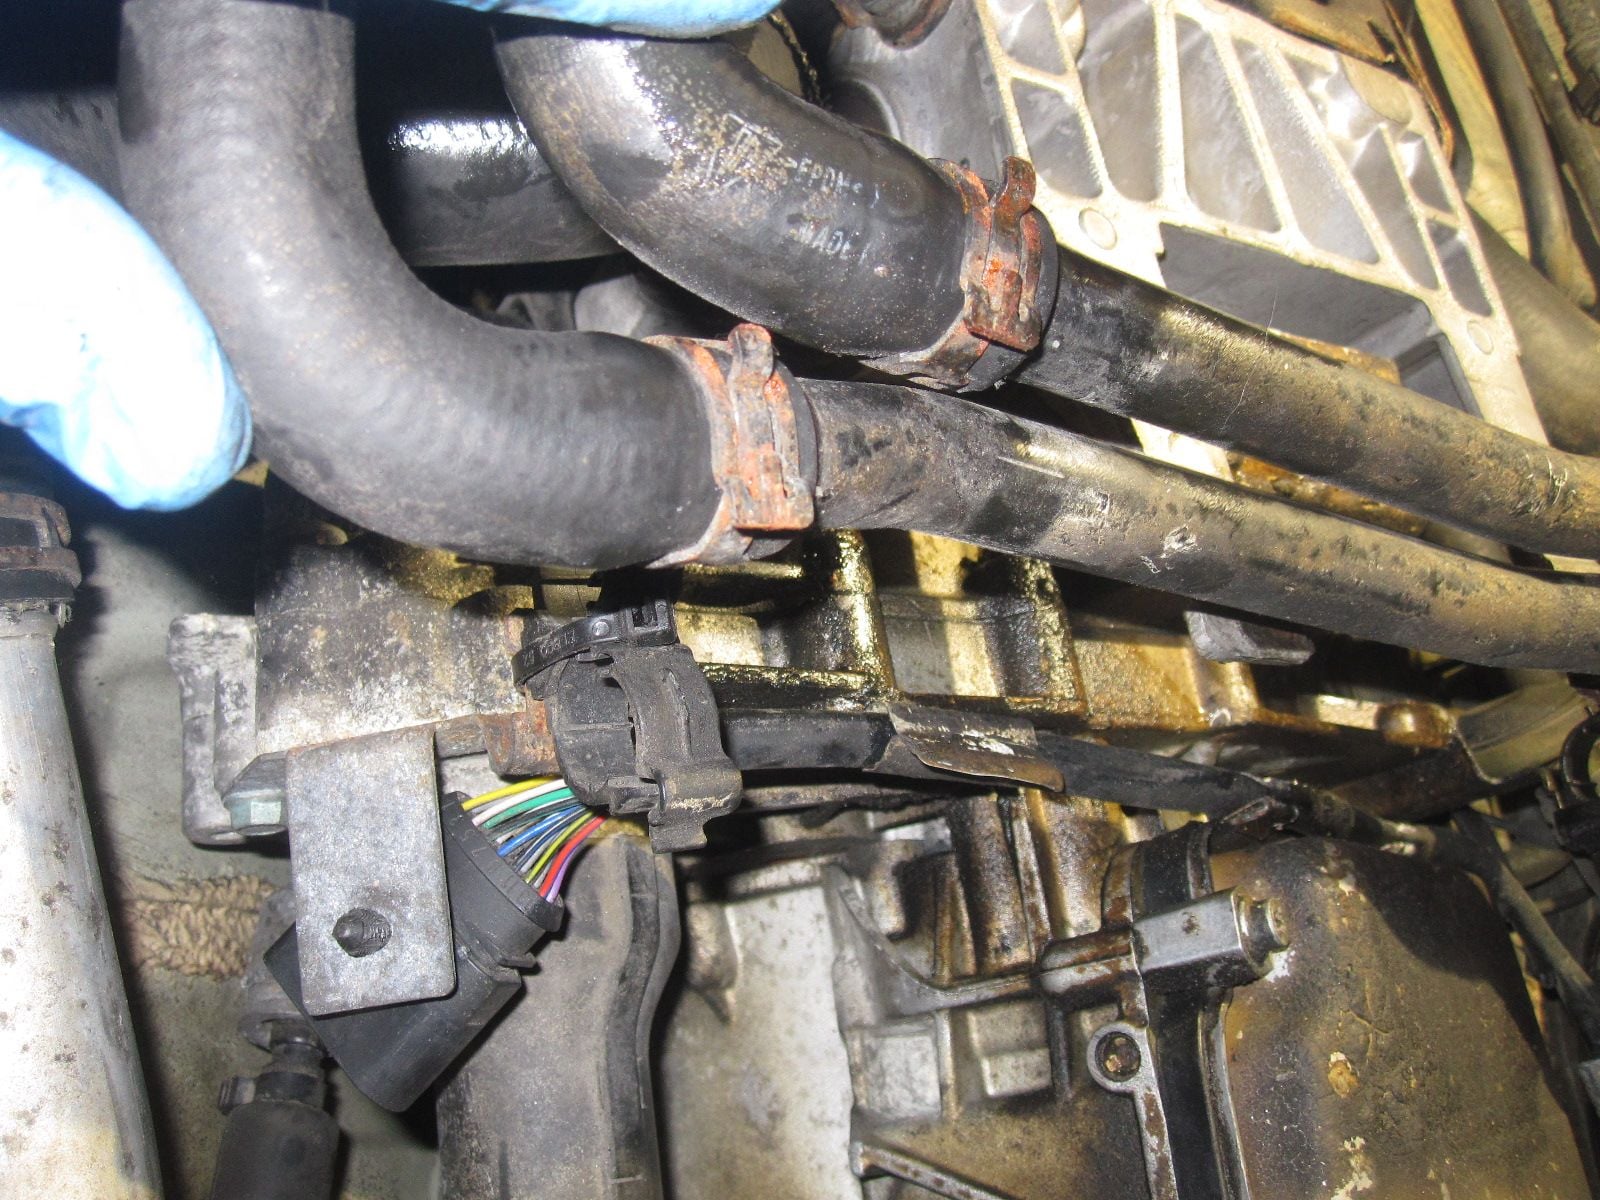
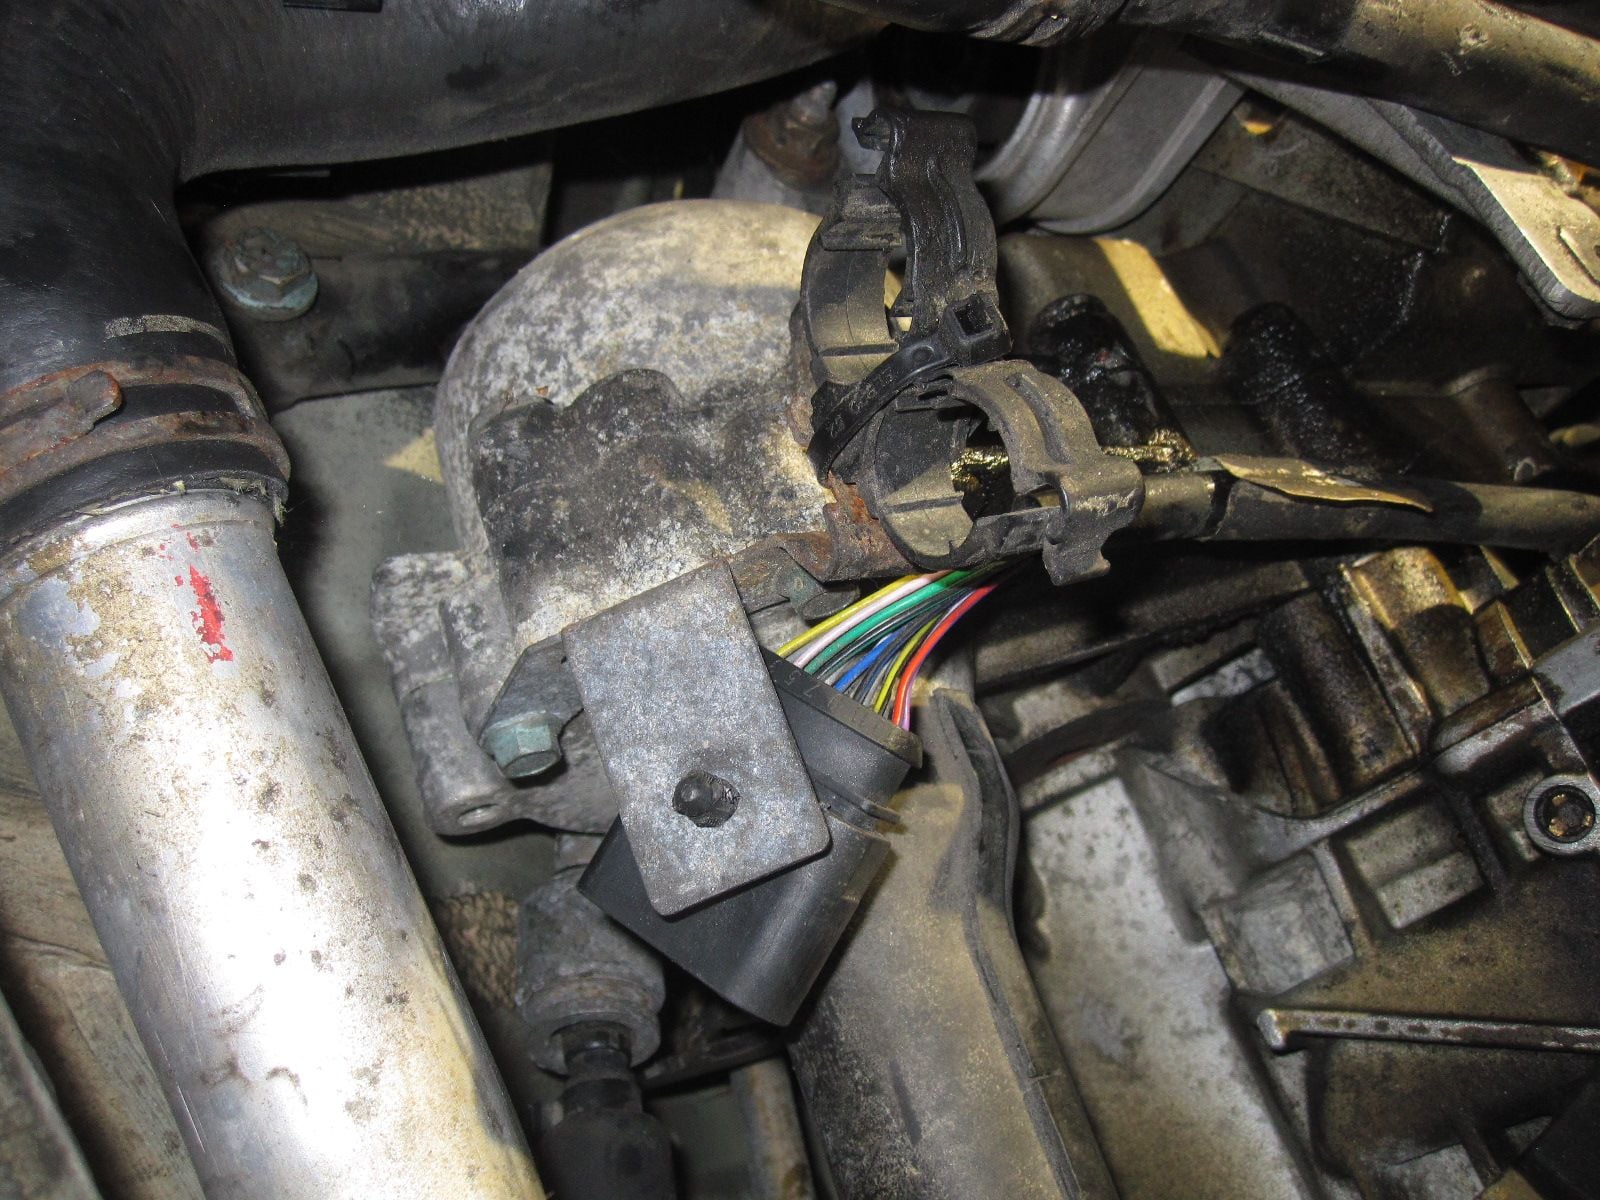
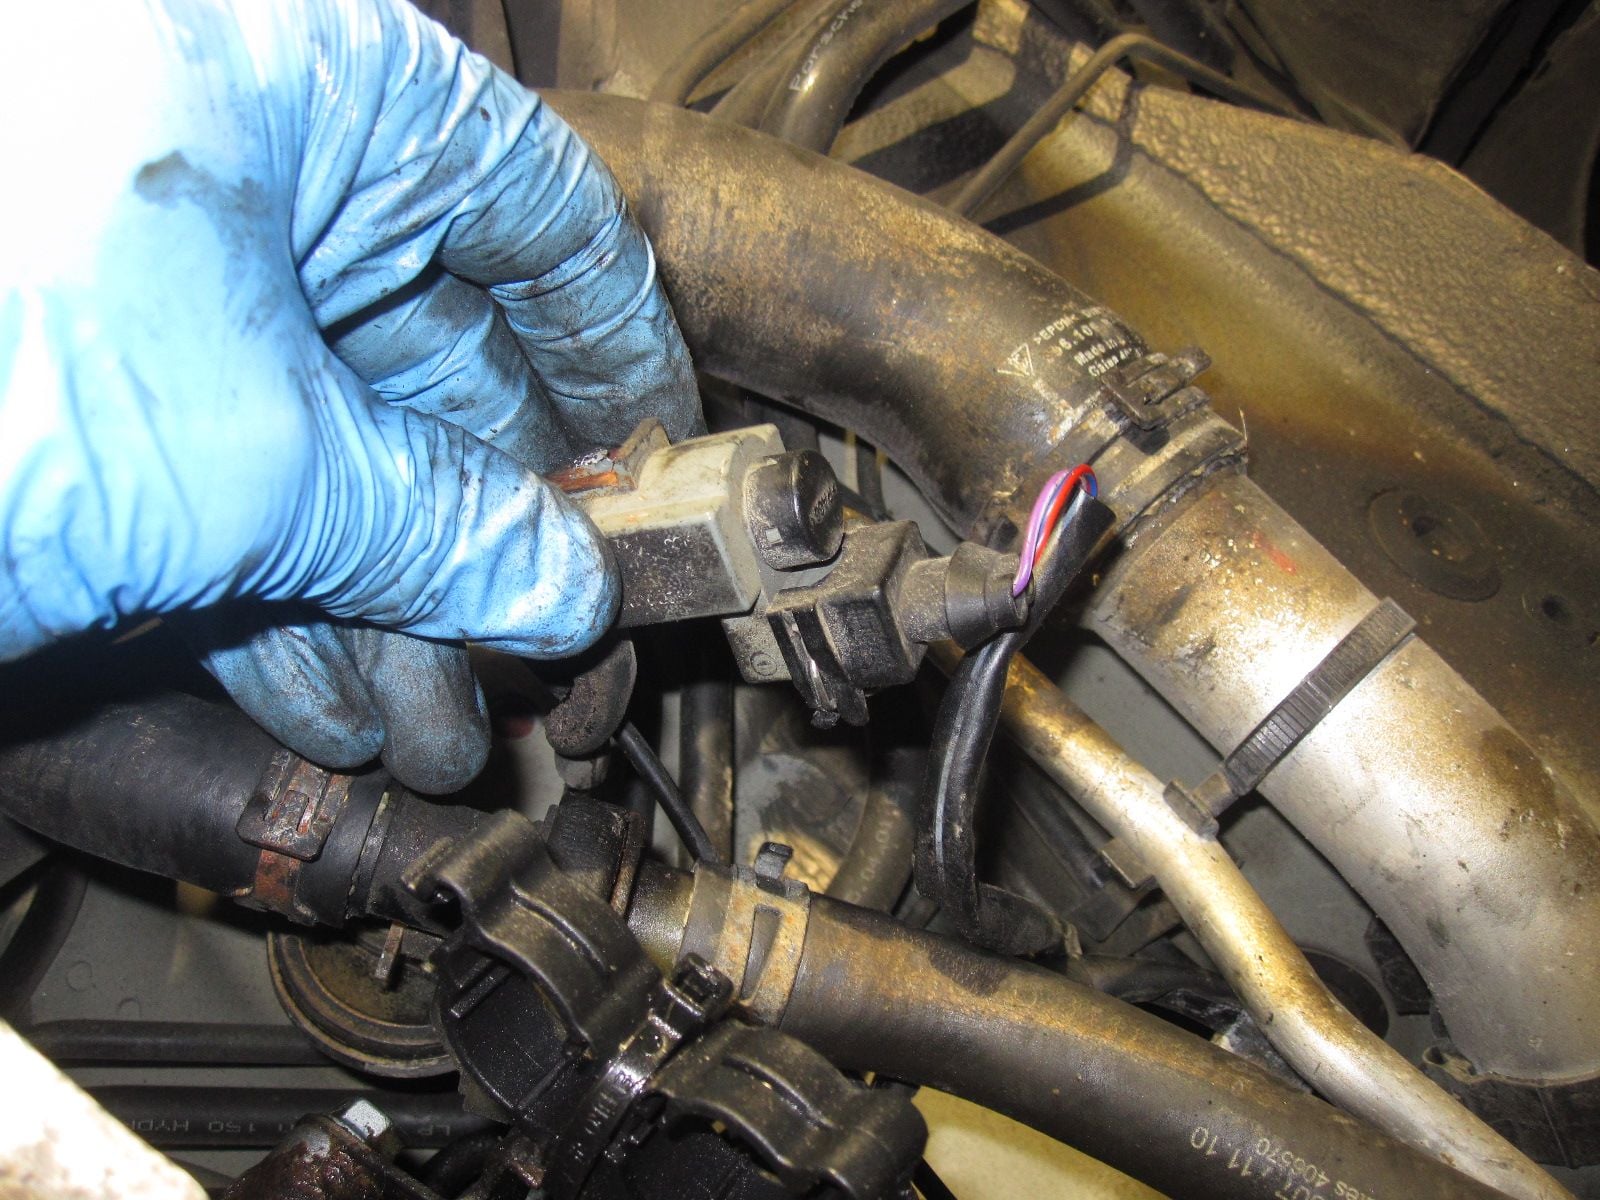
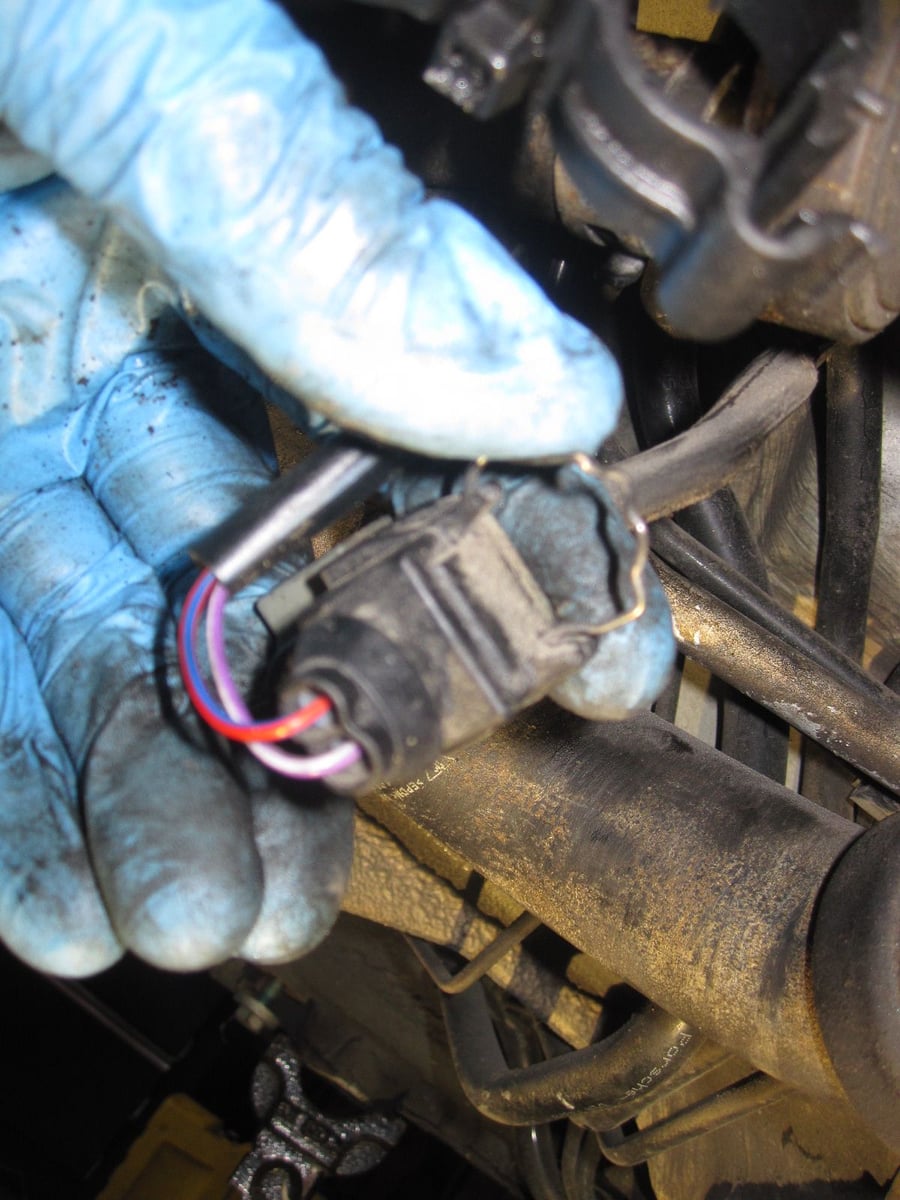
Next, I unhooked the connector. This is a different setup than is shown in Dempsey's book.
At some point, you need to support the engine and the transmission. I had a hydraulic jack holding the engine & a transmission jack holding the transmission. This plate comes off.
This is the end of the transmission that faces the front of the car.
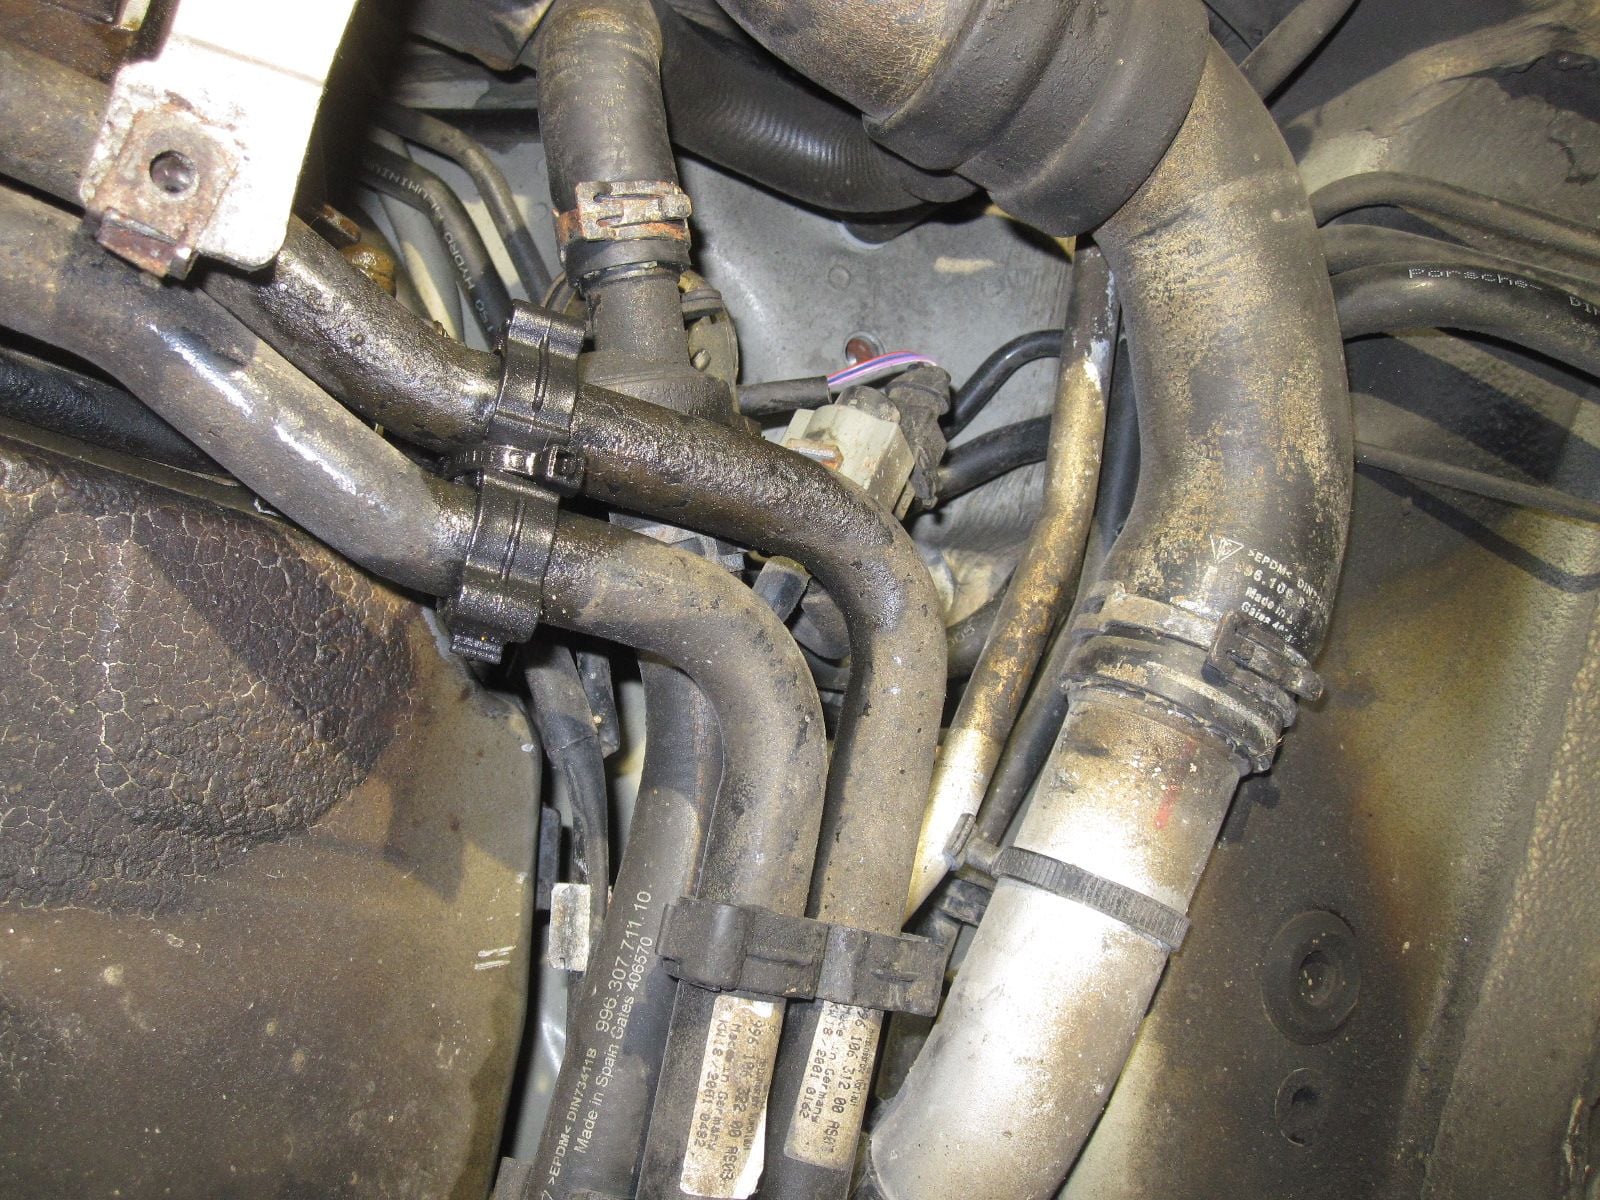
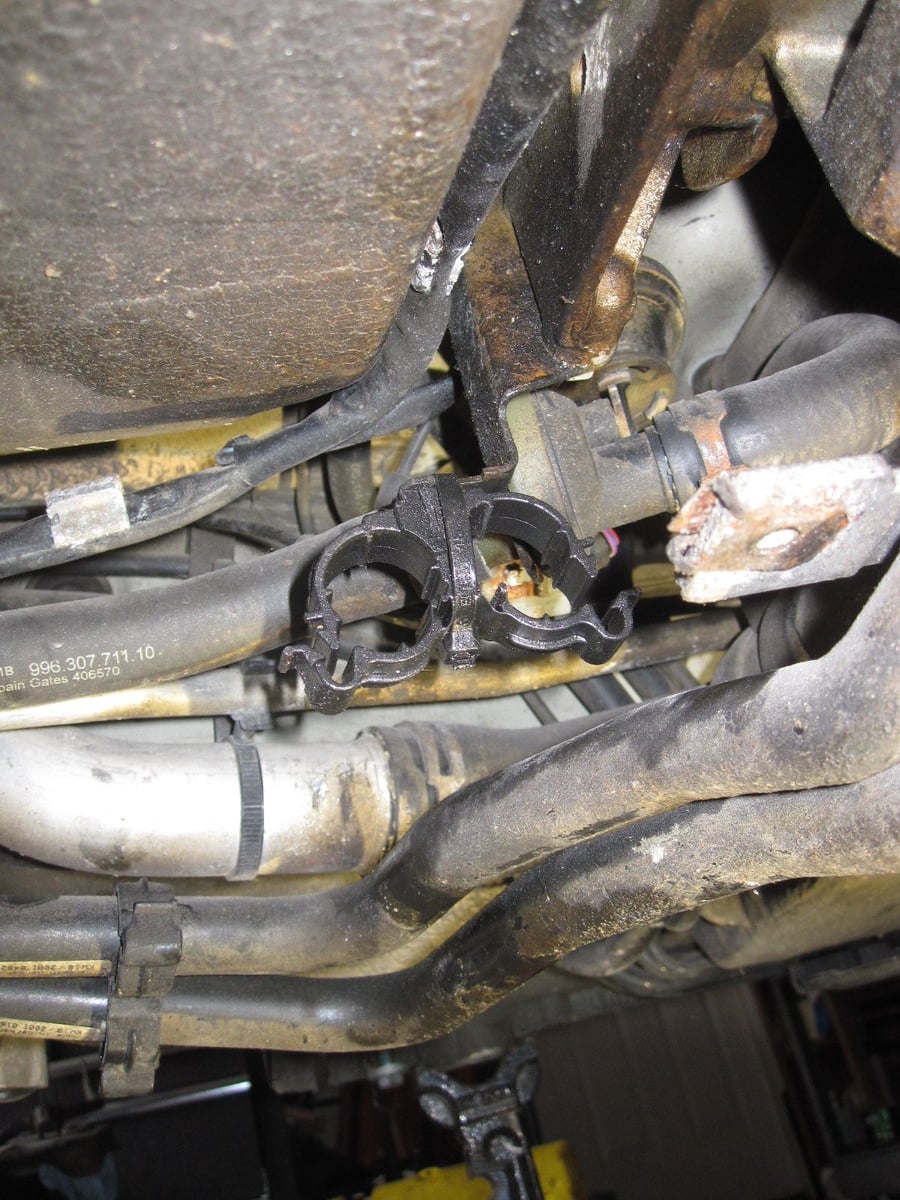
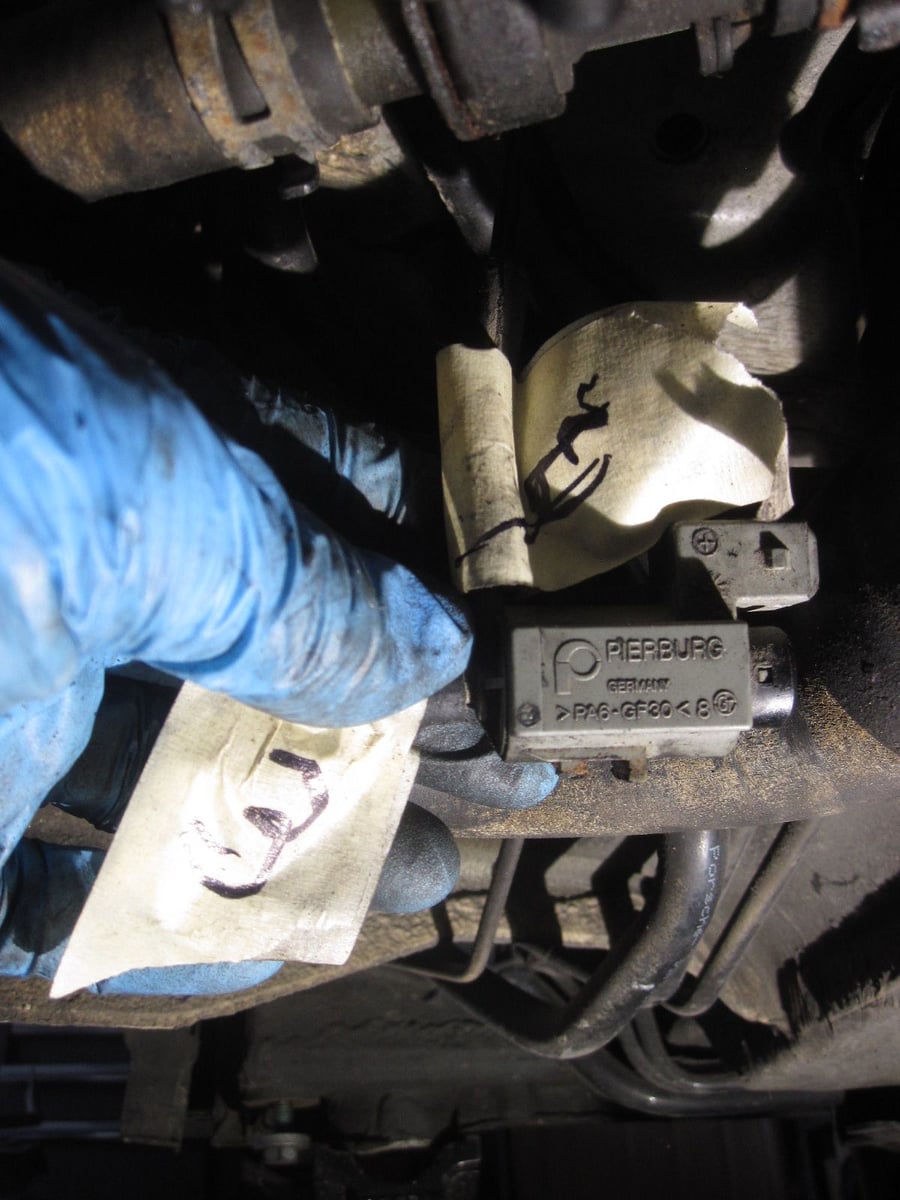
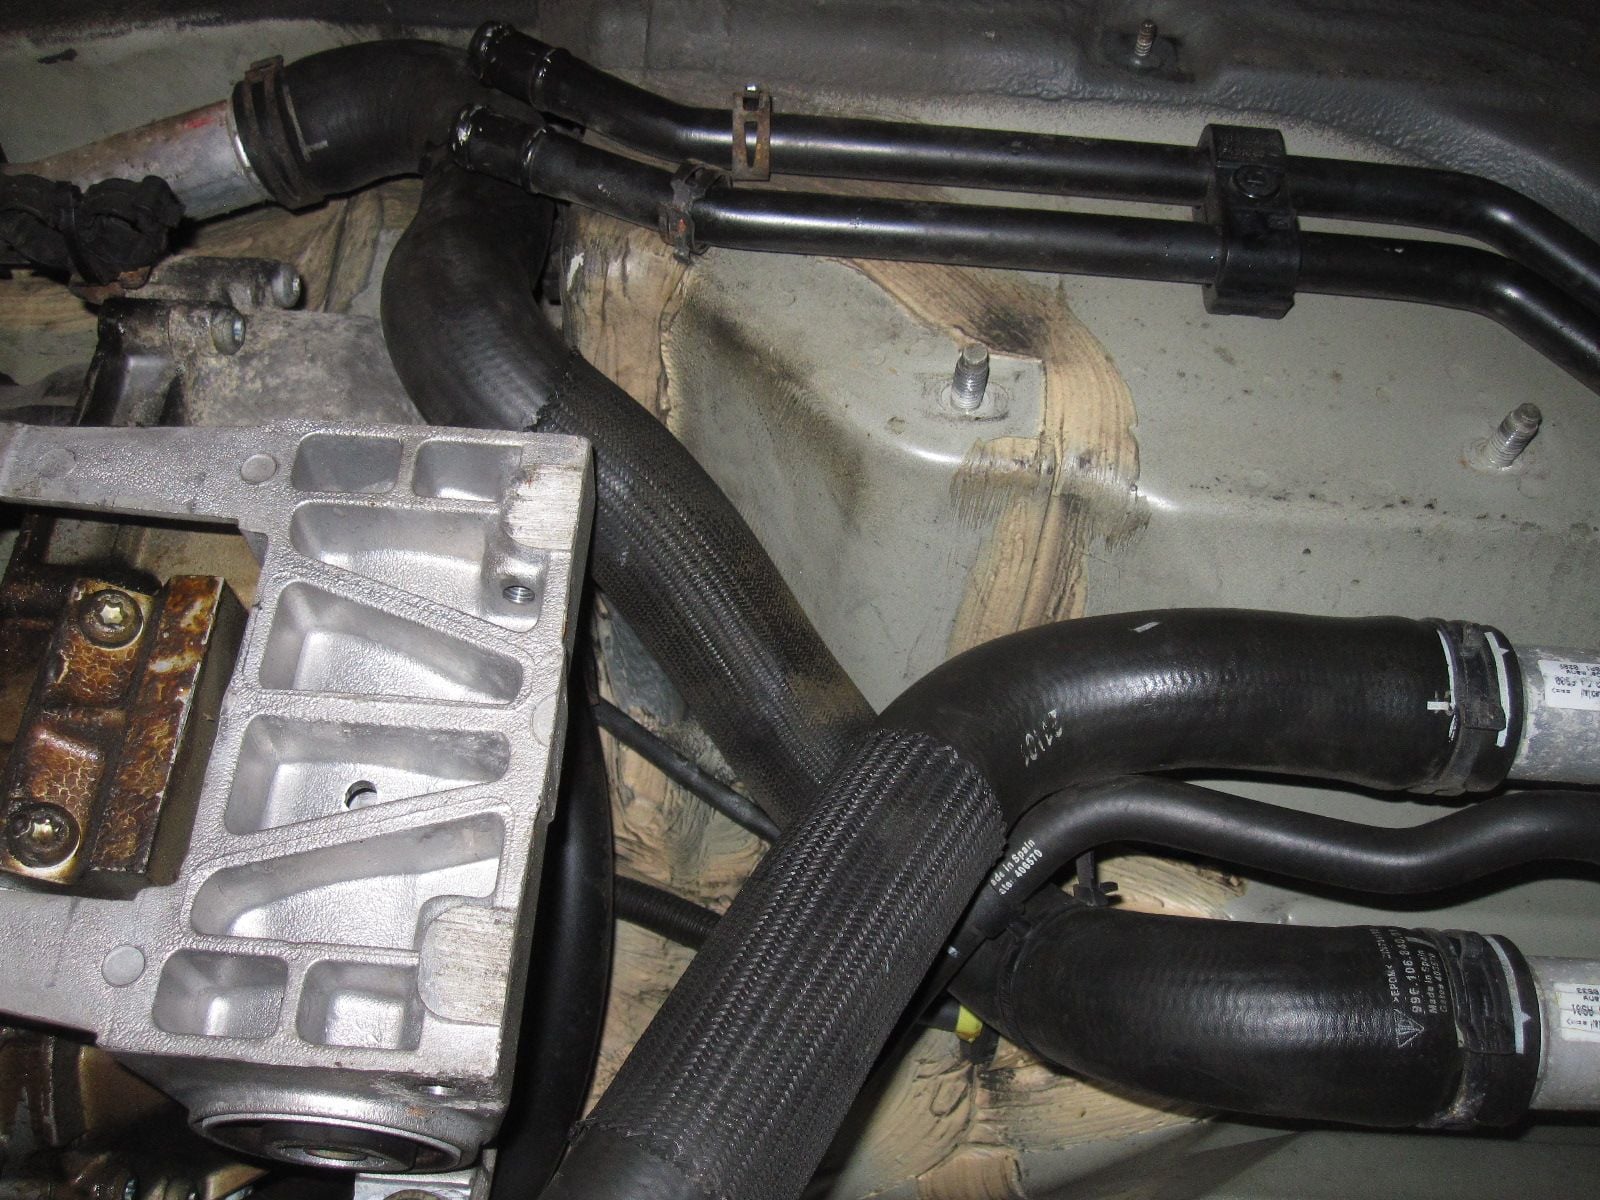
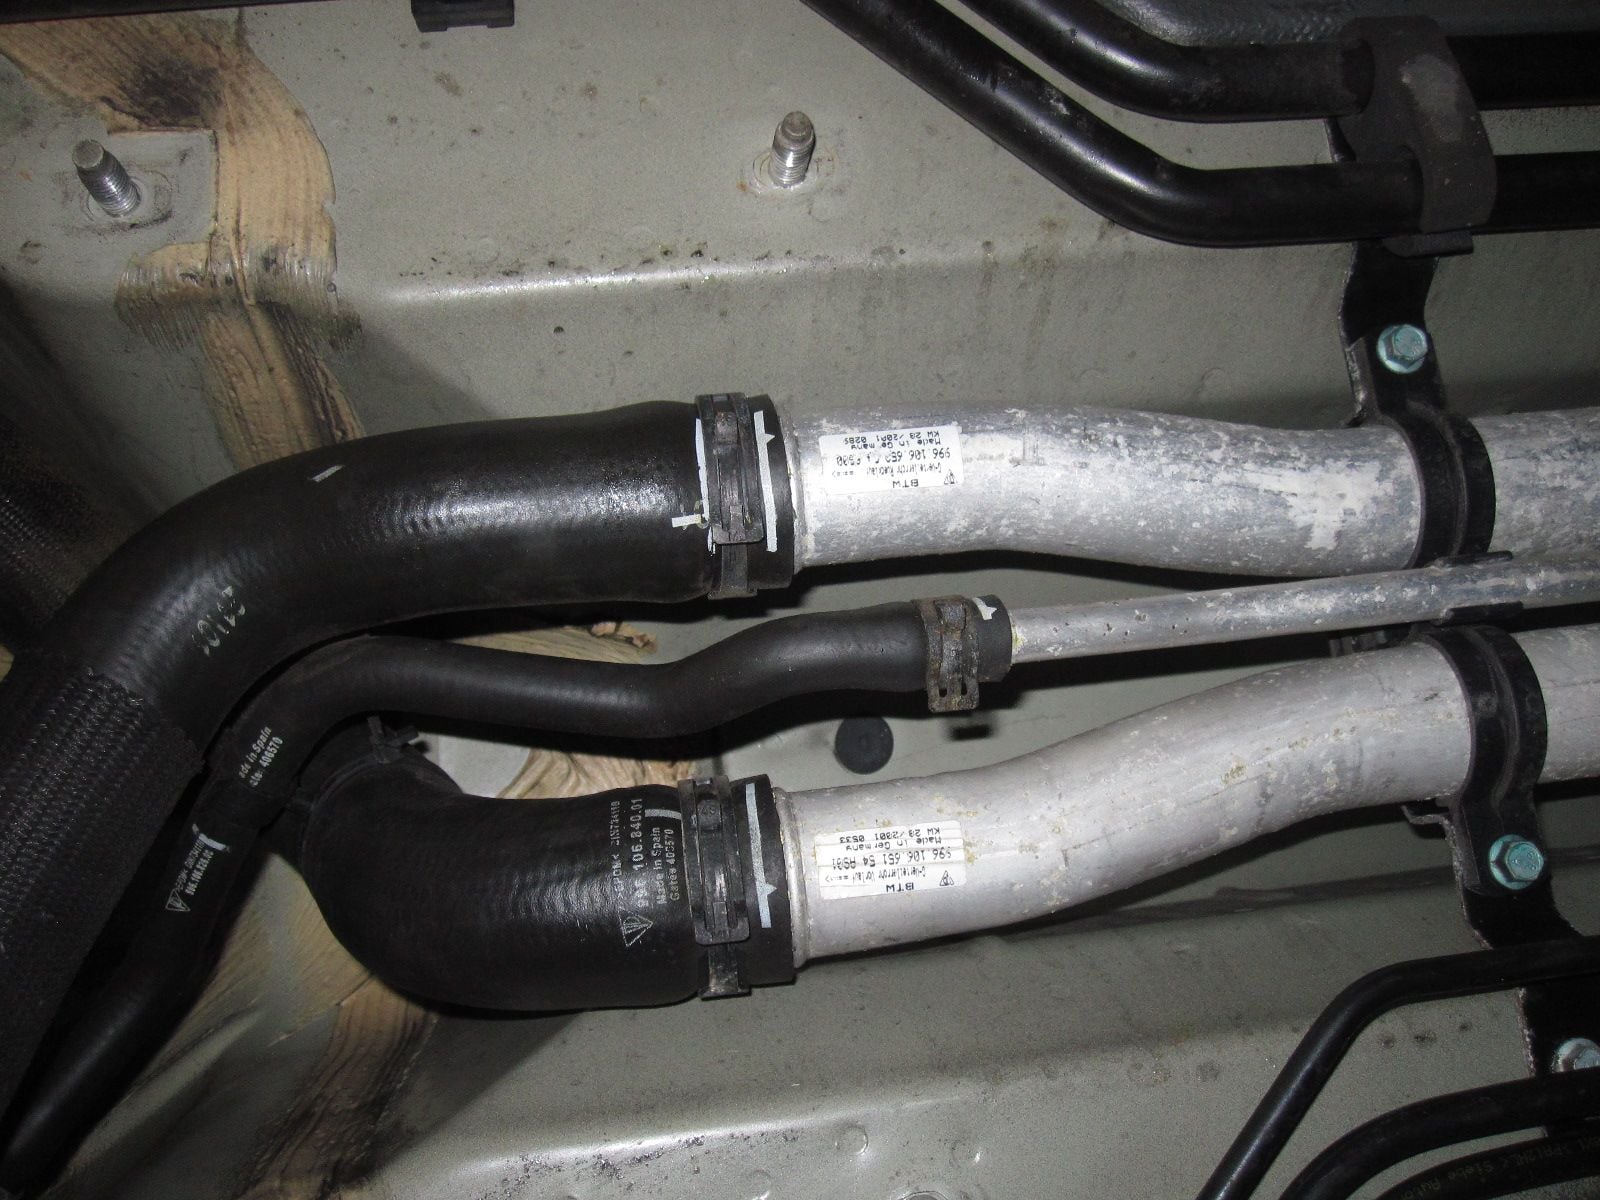
There are several hoses that run under the car and over the transmission space, where it need to drop. Mark them for future reference.
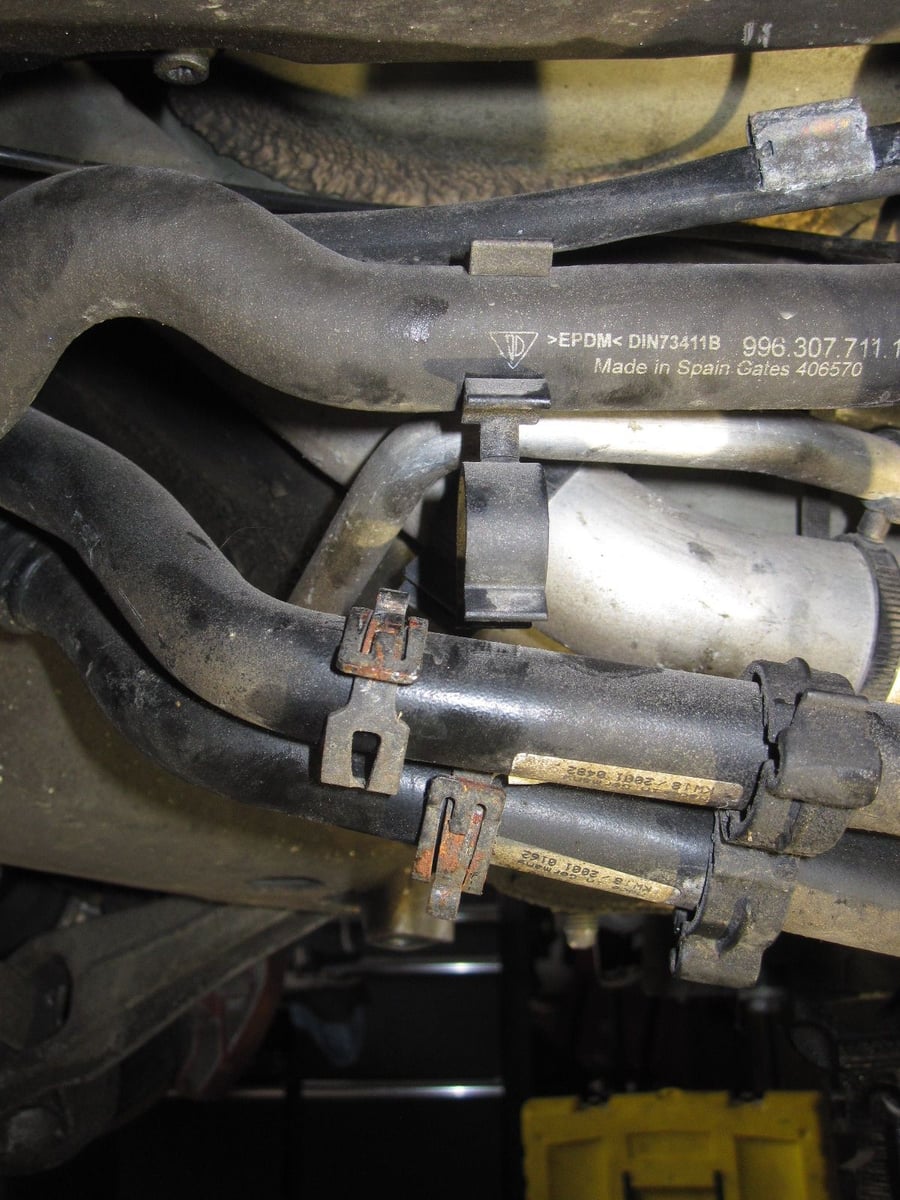
Also, there are several of these plastic clips that hold the hoses in place. Make note of where they go. Some I took off...others I left in place.
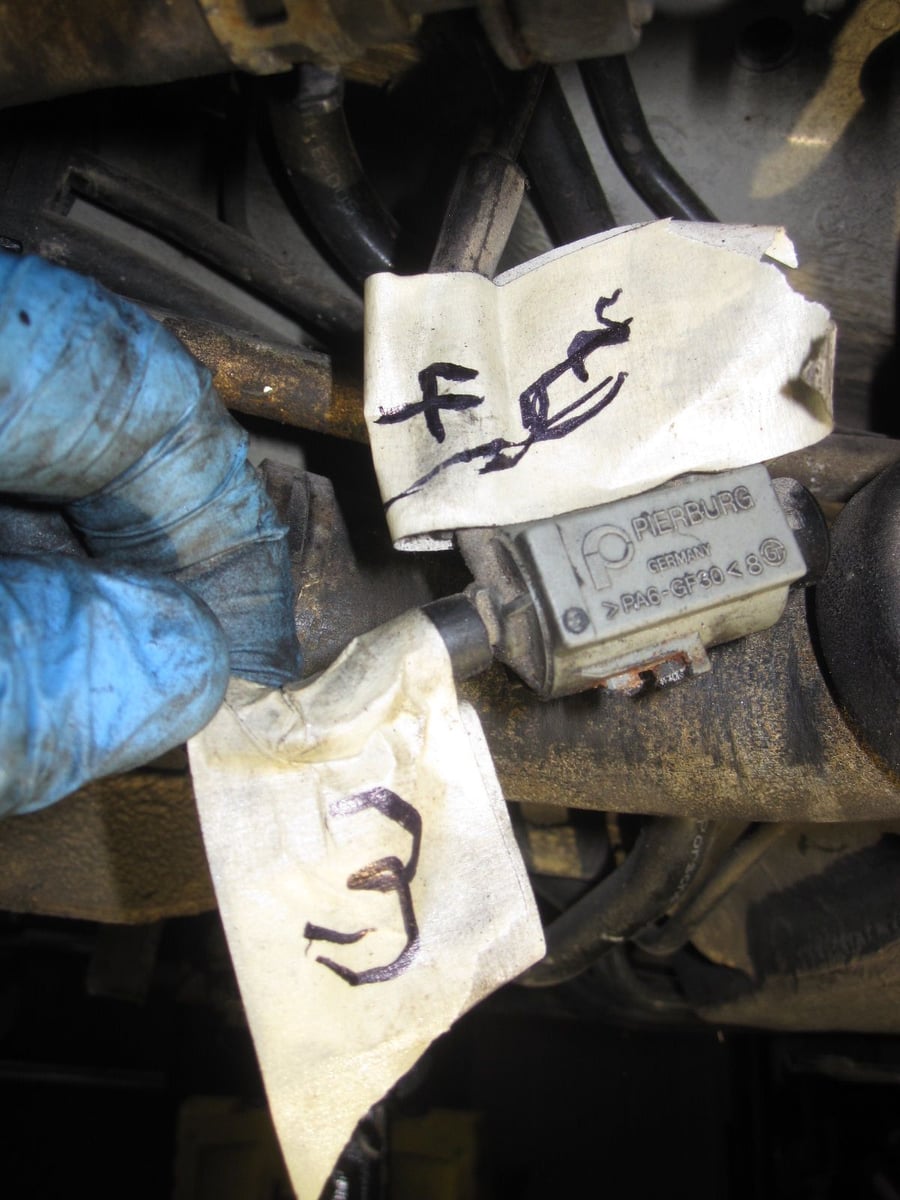
This is what I mean by marking them. I was afraid once they were off the car, I wouldn't know how to oriente them. So I marked them.
See how this clips in....
and here....
and here....
This sits on top of the transmission.
Dont lose the metal clip.
Disconnected....
More marking of wires...
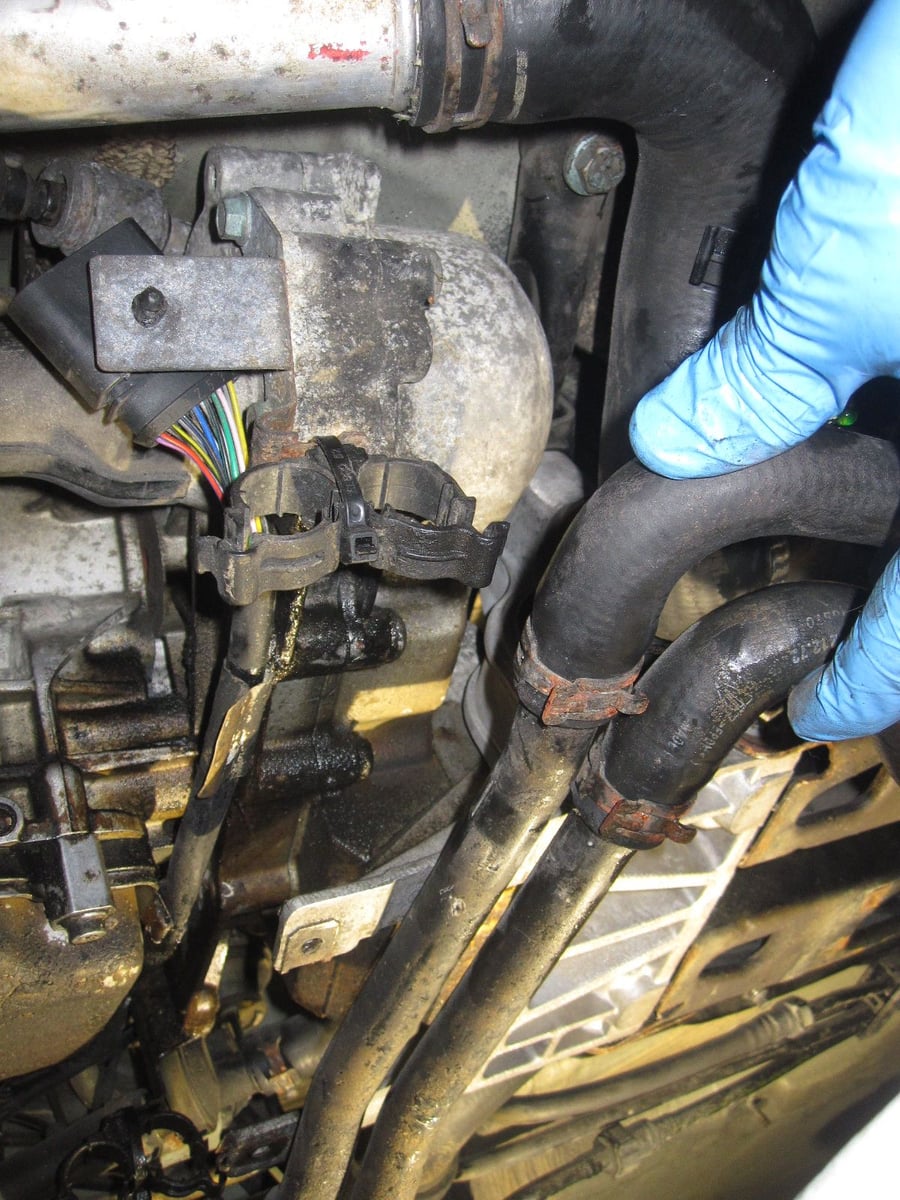
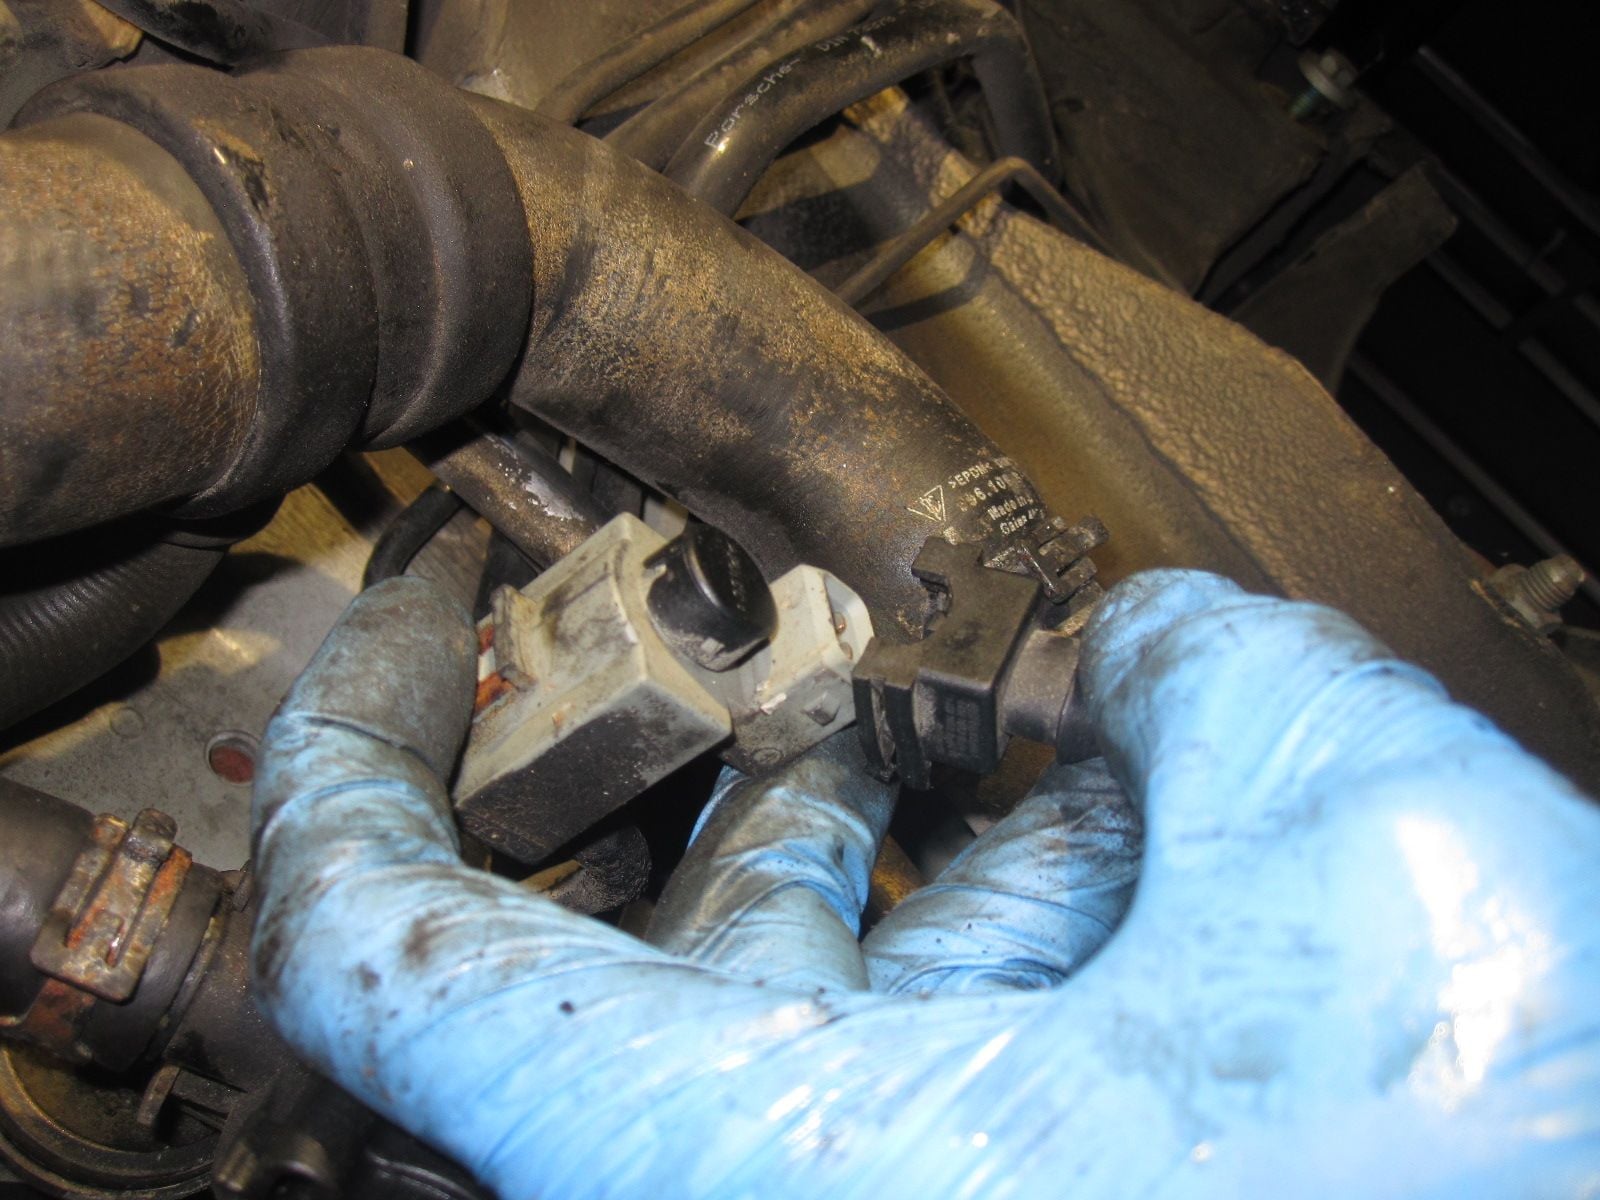
I believe that this a vaccum hose.
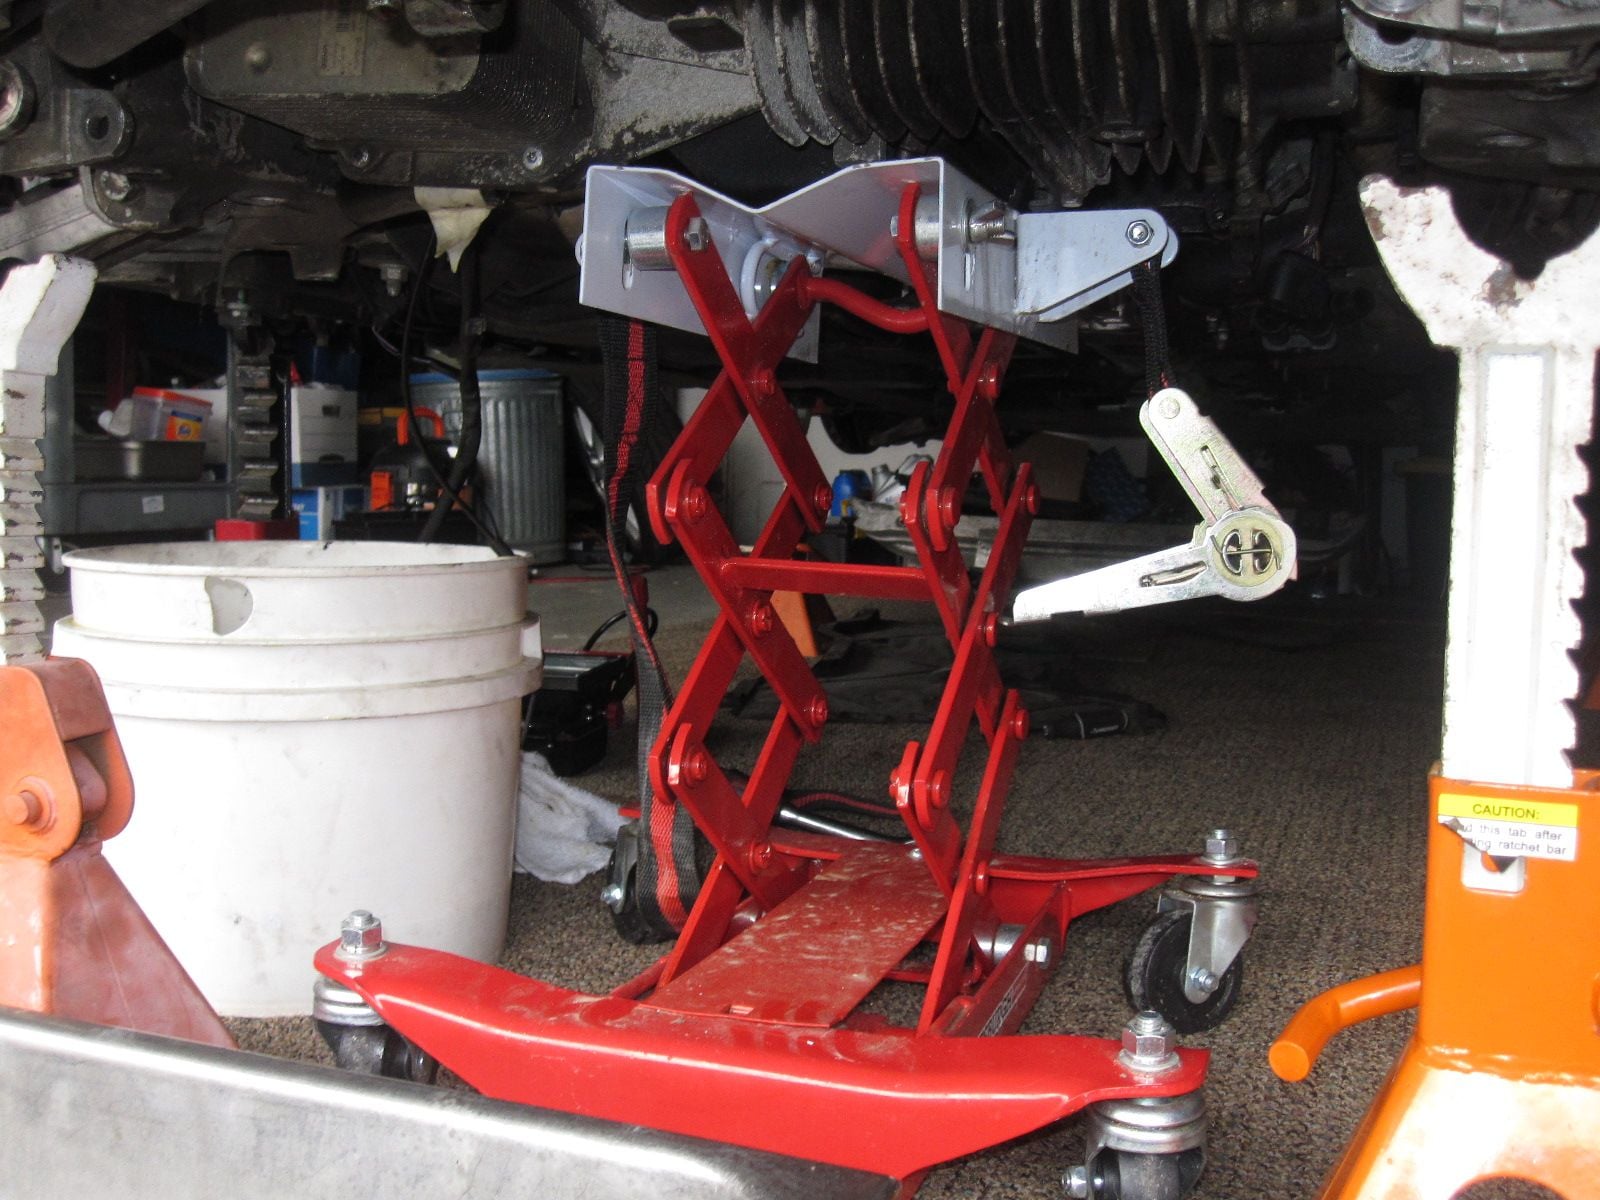
Harbor Freight Transmission Jack
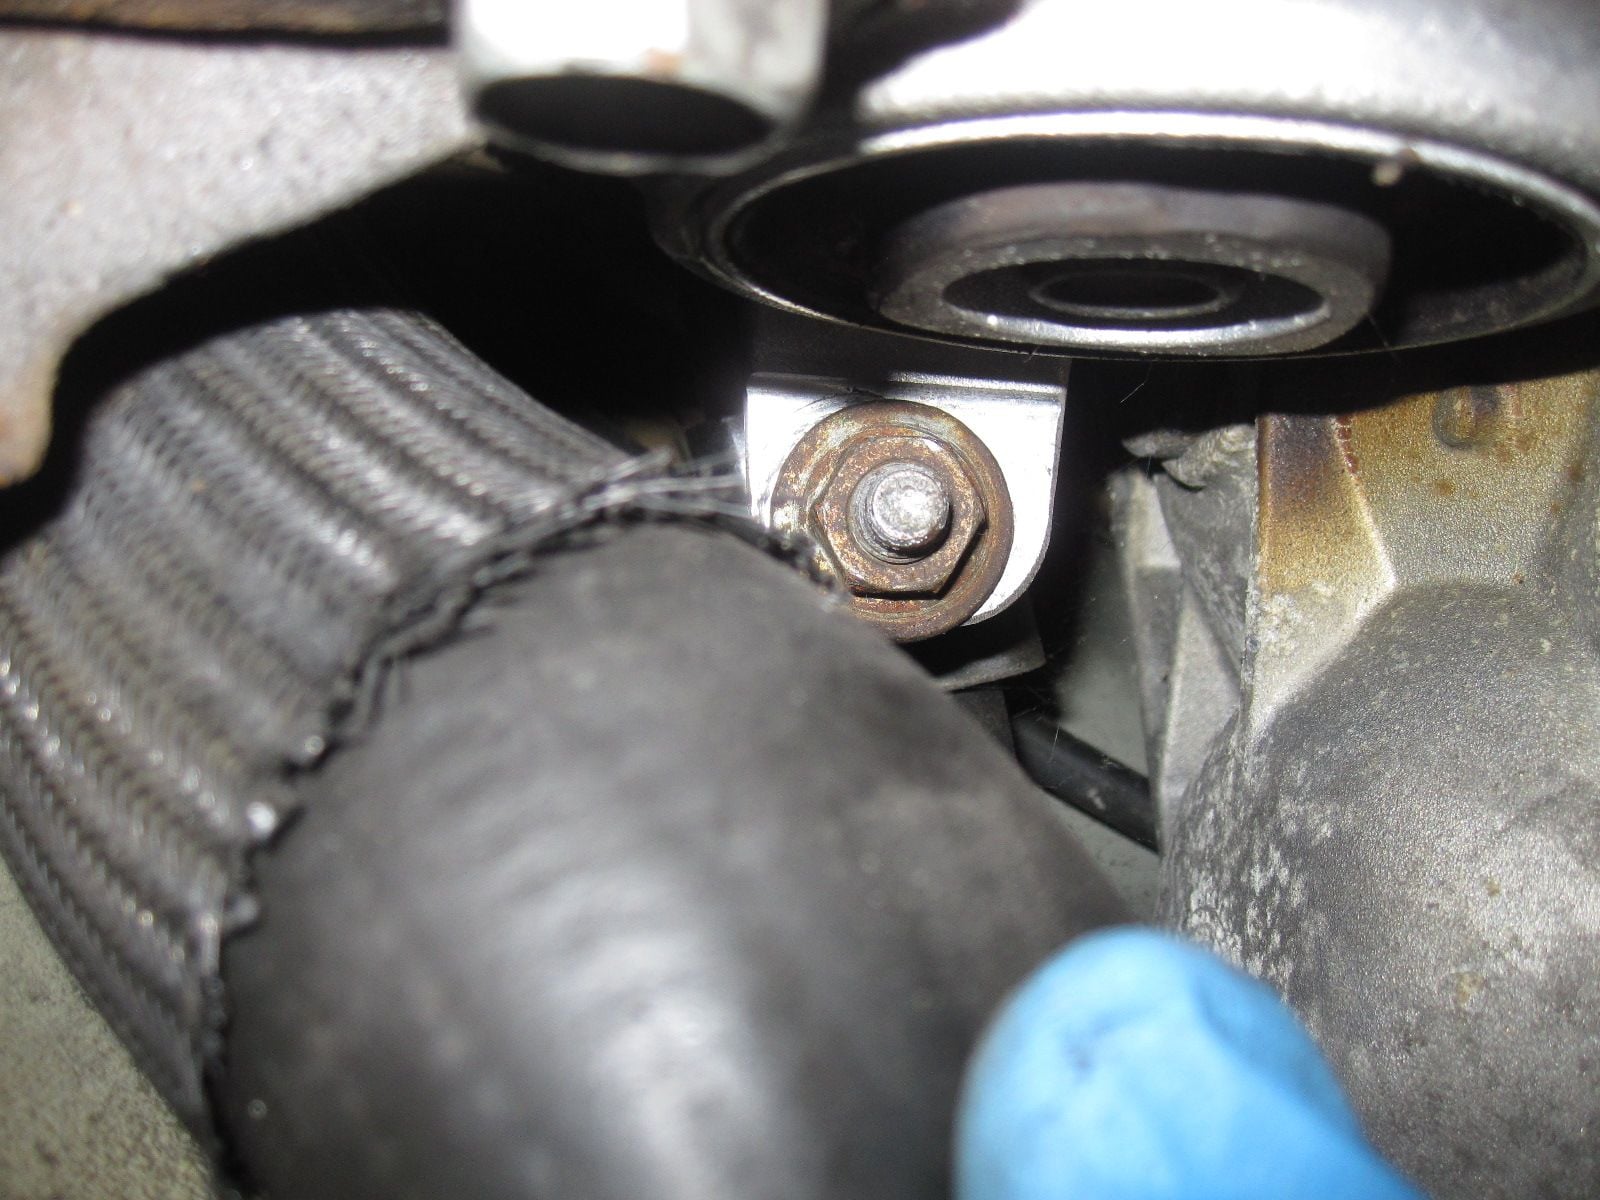
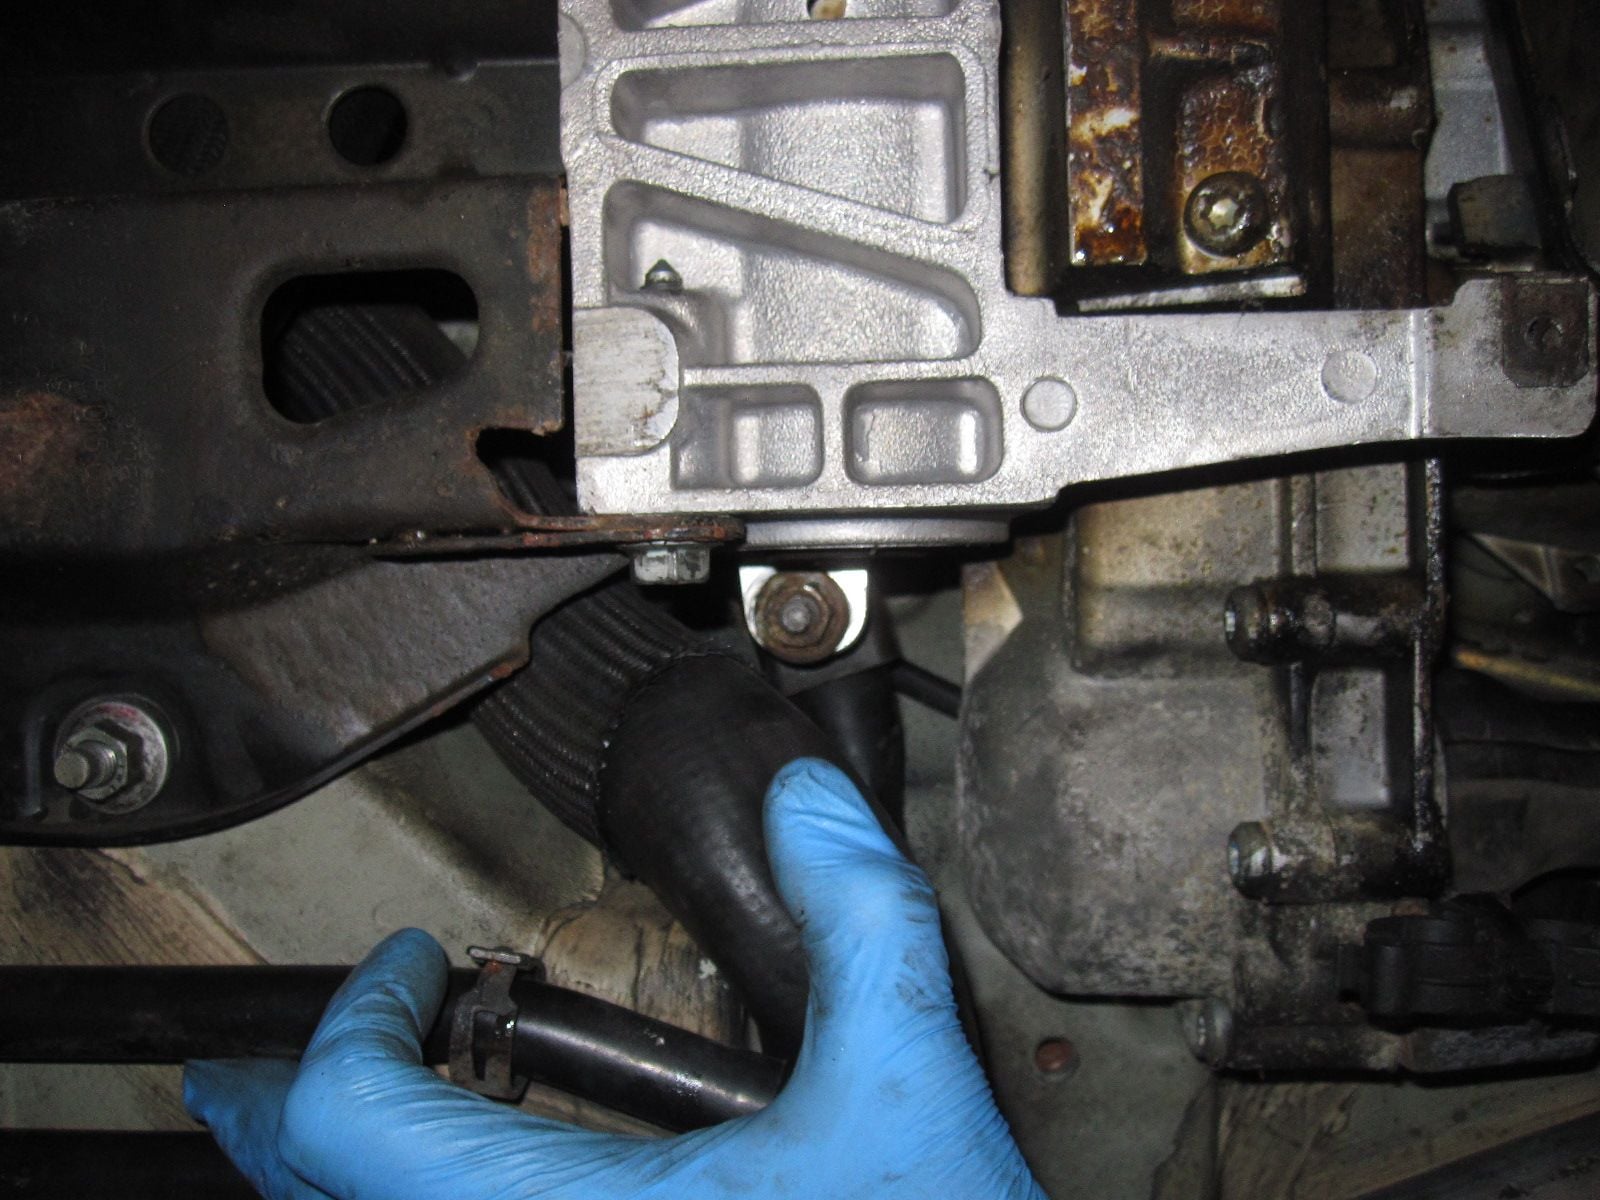
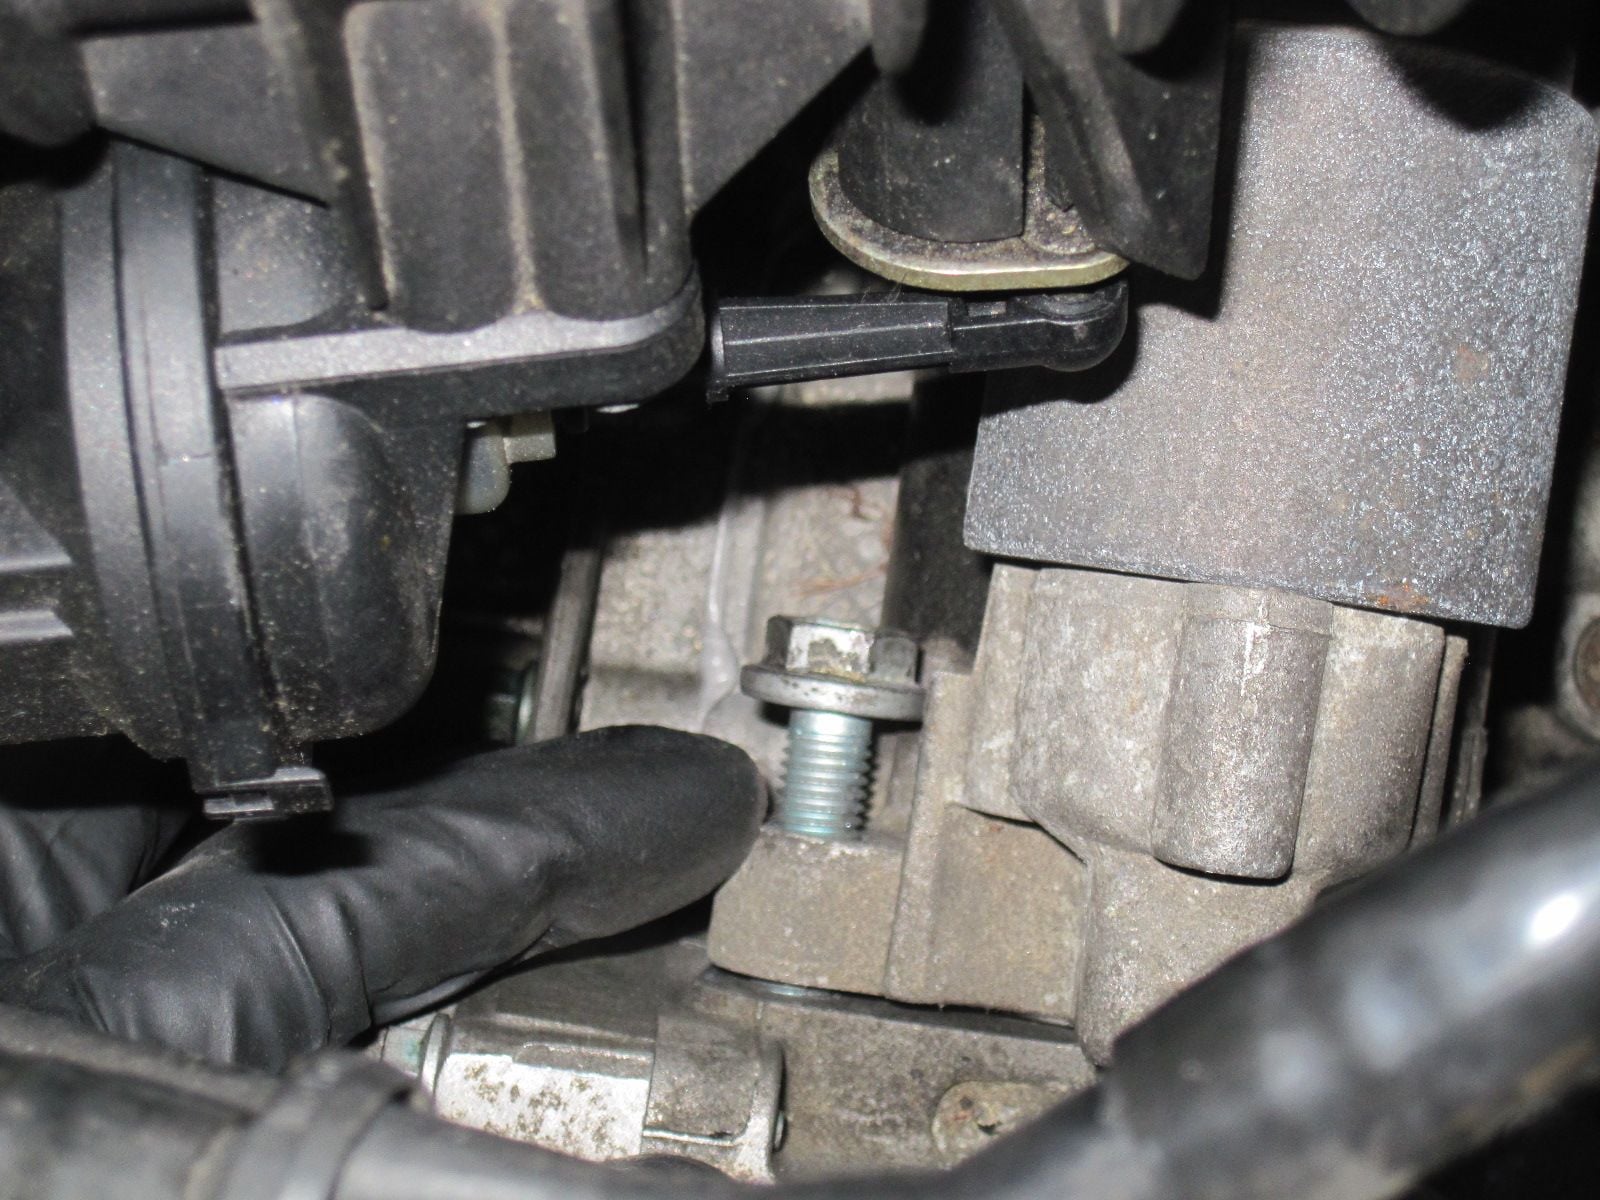
This is one of the bolts that holds the transmission up. I believe there was one on each side.
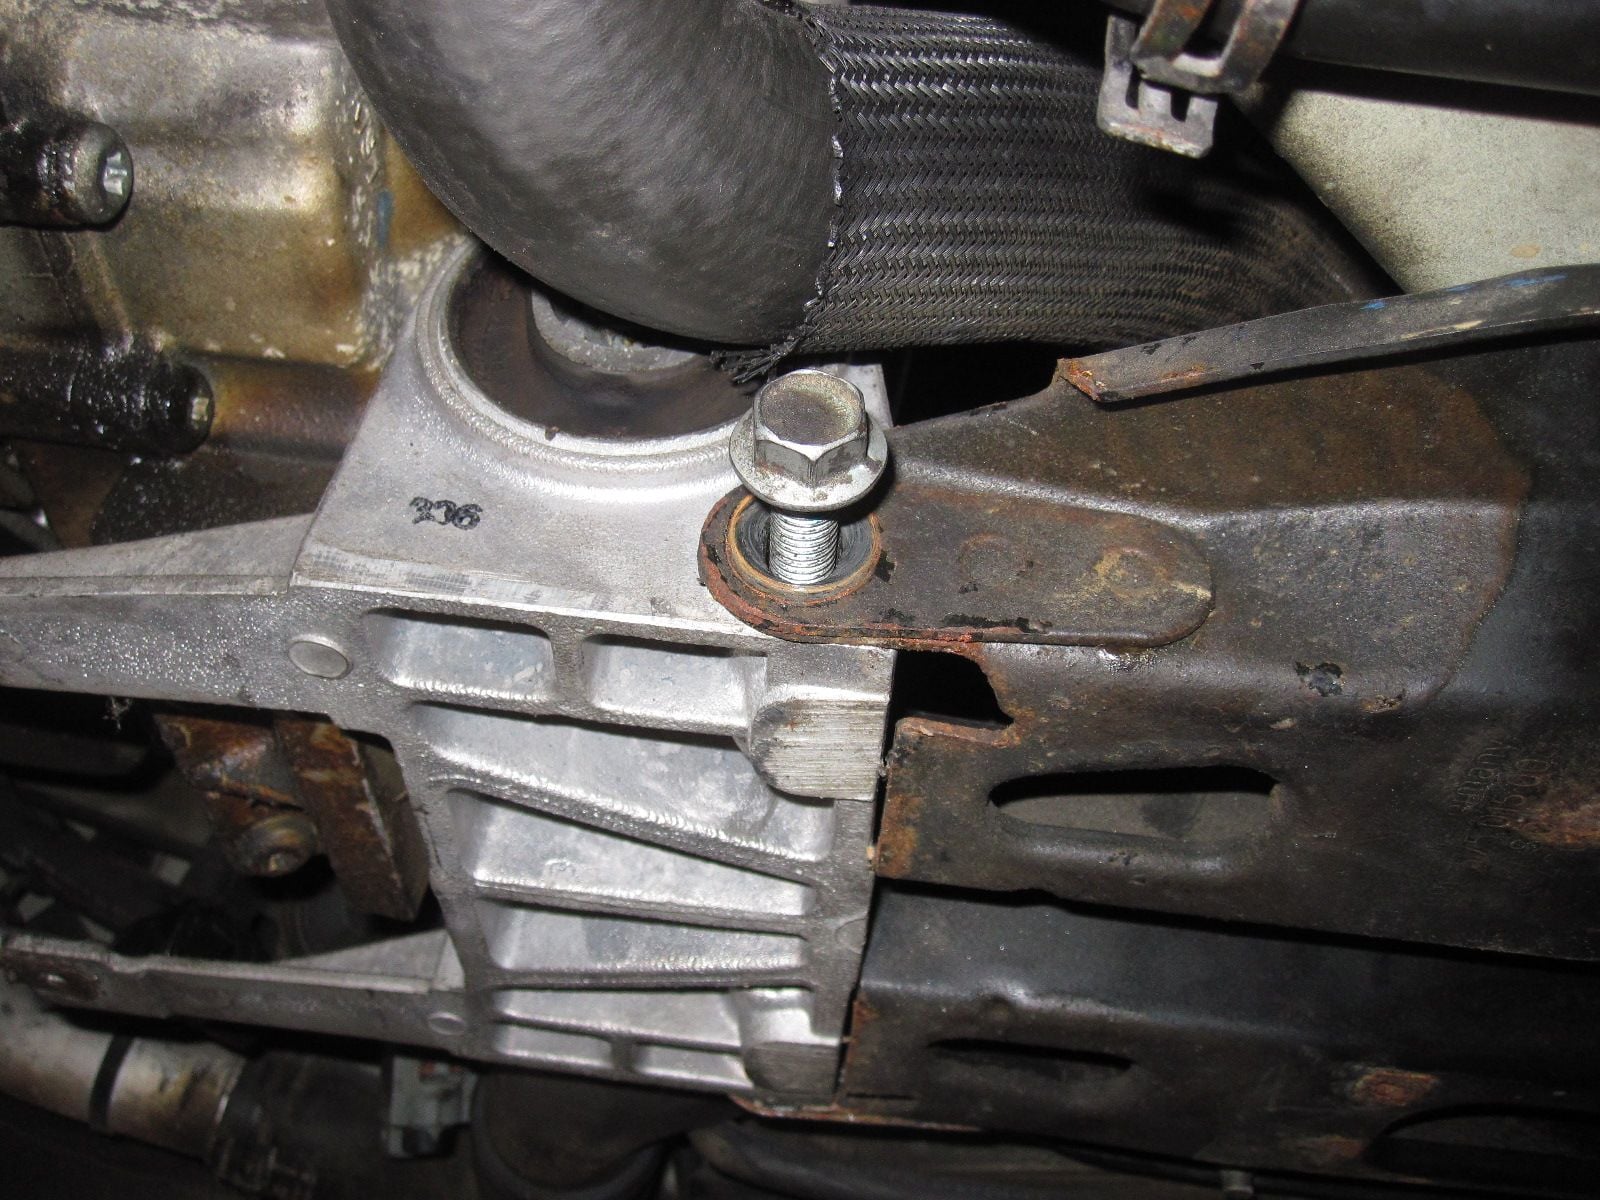
Now that the transmission what disconnected and supported by the transmission jack, it was time to lower the engine. There are two bolts that hold the engine up.
These are right by the rear bumper.
Make sure to double check and disconnect everything...
I came close to forgetting to disconnect this...
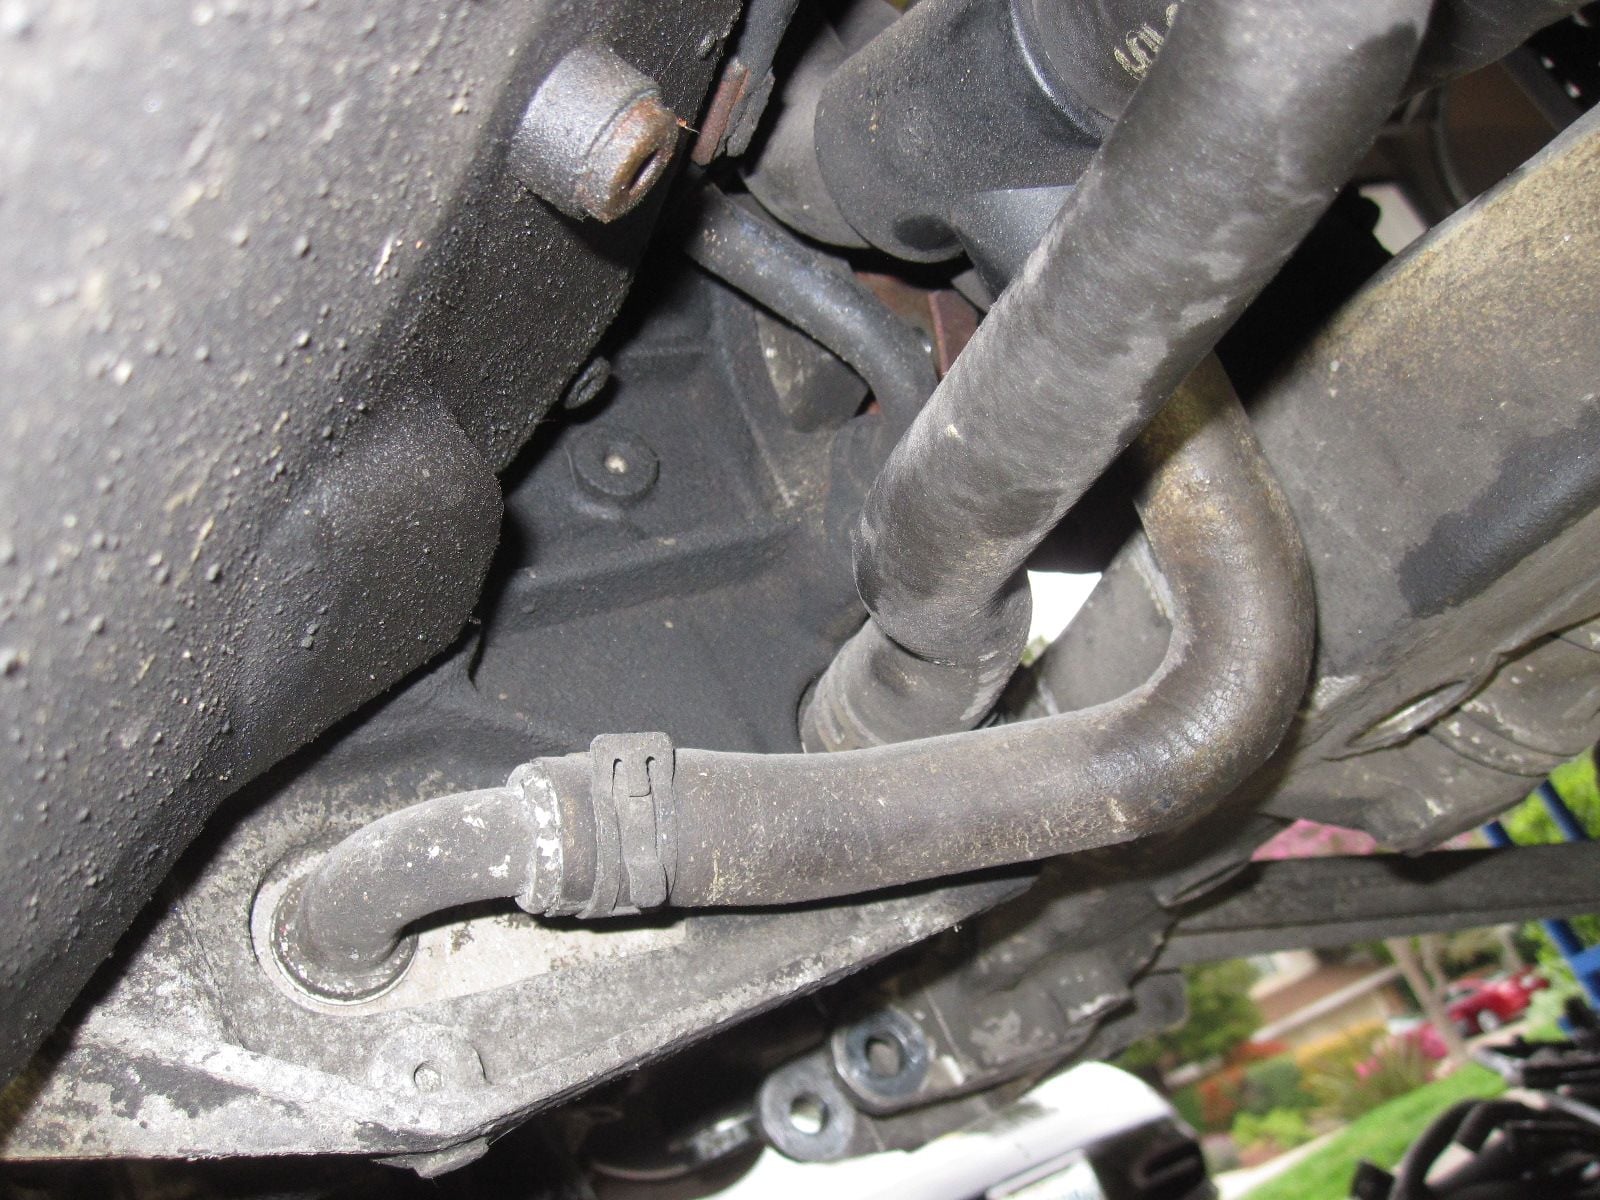
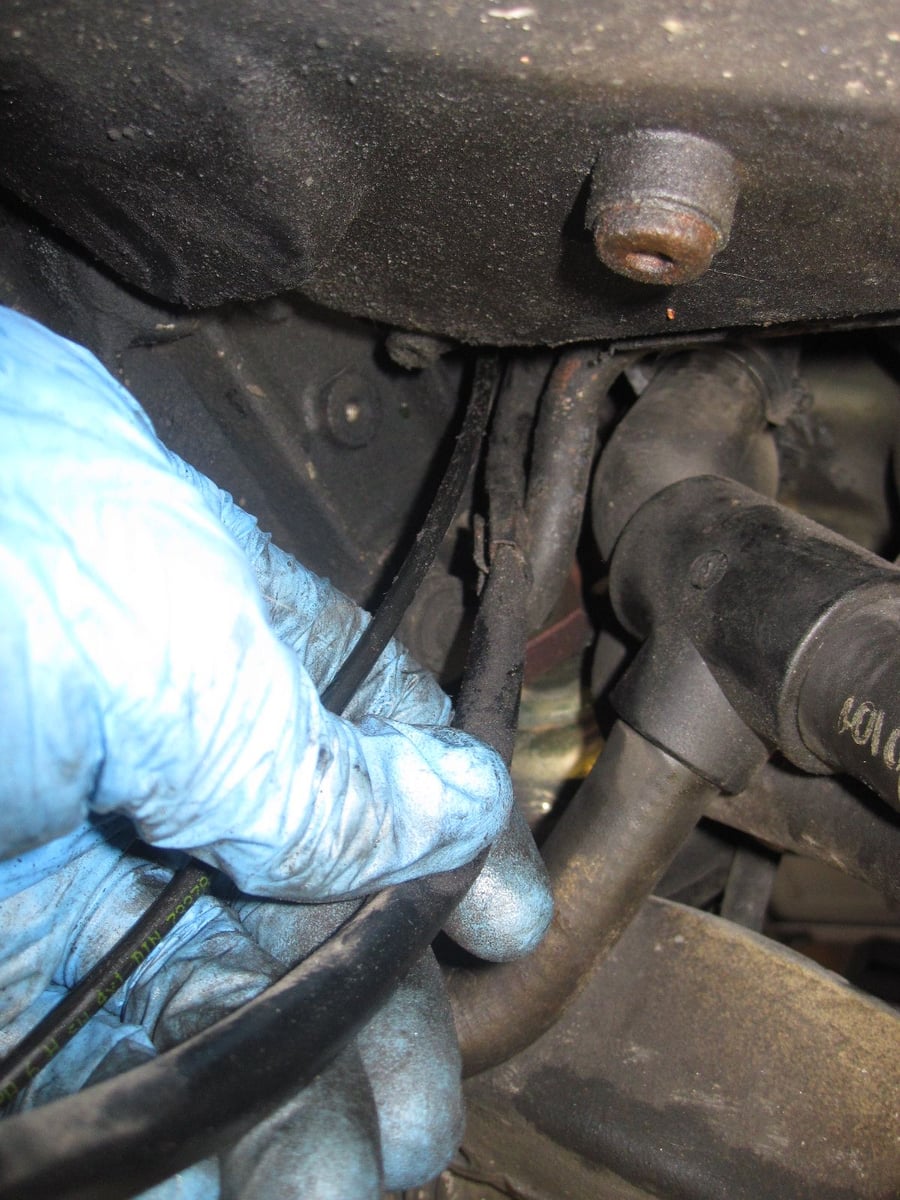
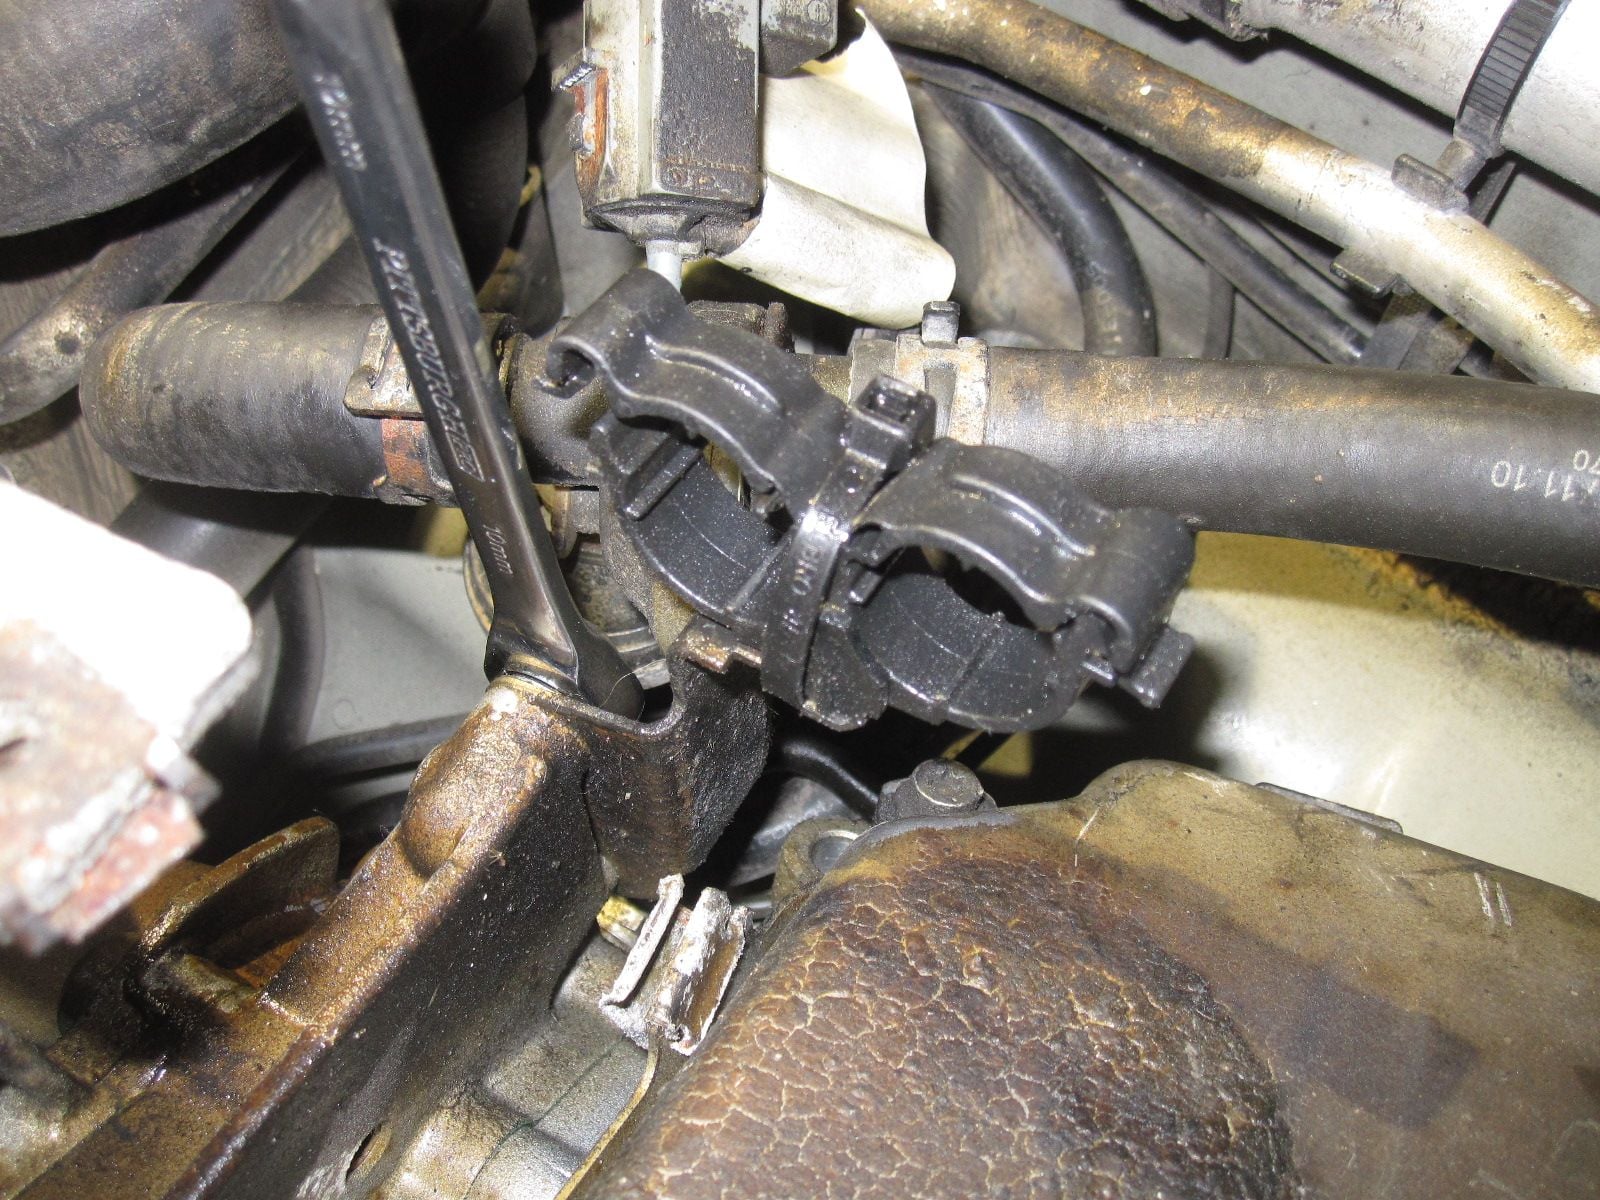
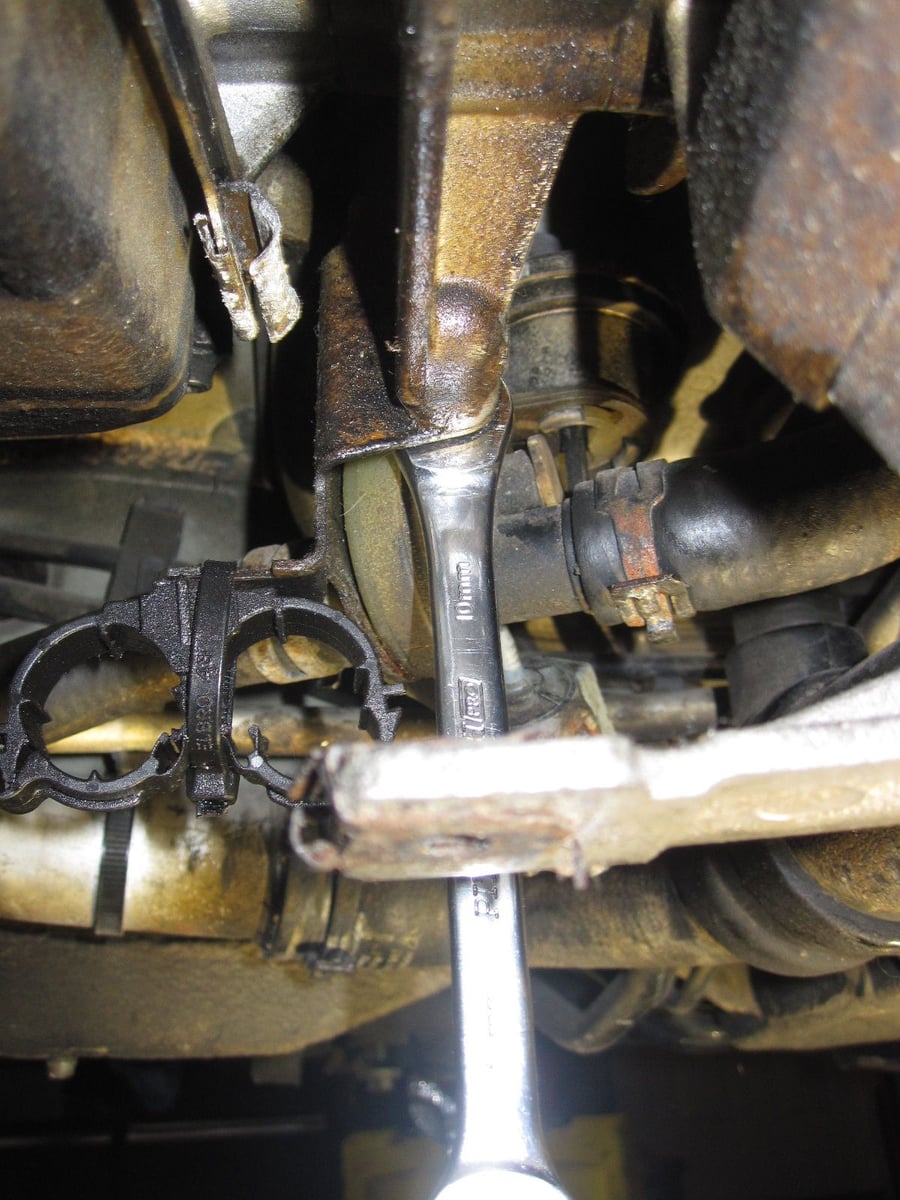
I should have mentioned before, but to disconnect the power steering hoses is a little bit of a pain. I needed to get two wrenches made for removing hoses...
You have to hold one end, and get leaverage with the other wrench. I think it is called a Crow's Foot wrench.
Here is the setup. Real tight quarters.
Here is how I dropped the engine. I had a dolly under the engine, with the arm of the jack sticking through it. I had the car about 24" off the ground.
Lowered to the ground. JUST barely fit under the car, buy taking it out the side.
Back end of the transmission resting on the HF jack.
Success! It actually rolled pretty nice.
Front of the engine. Will have to remove the carrier and put it on the replacement engine.
A lot of open space under the car now....This is looking toward the front of the car.
With the engine and transmission removed, I needed to turn to seperating the engine from the transmission. Here, having the right tools is necessary. There is also an adapter plate that goes between the transmission and the engine. The book does not mention anything about it and it threw me for a small loop, until I figured things out.
wow. Thanks for the great write up and I'm looking forward to what comes next! If you're in the bay area, I'd love to come over and watch. Thanks again for the write up!
The first step in separating the engine from the transmission, is to lock the torque converter in place. There is a small hole in the top of the transmission, and you need to insert a 5/16" rod. I found one at Home Depot, but a long drill bit might work as well. I needed to make sure that I kept the TC seated in the transmission, and didn't want to hassle with trying to reinstall it. Also, this locks the TC, making it possible to remove the flex plate. You have to remove the flex plate bolts to the TC, from the opening created, when you remove the starter on top of the engine. To do this, you have remove the front intake plenum. Here is that process....
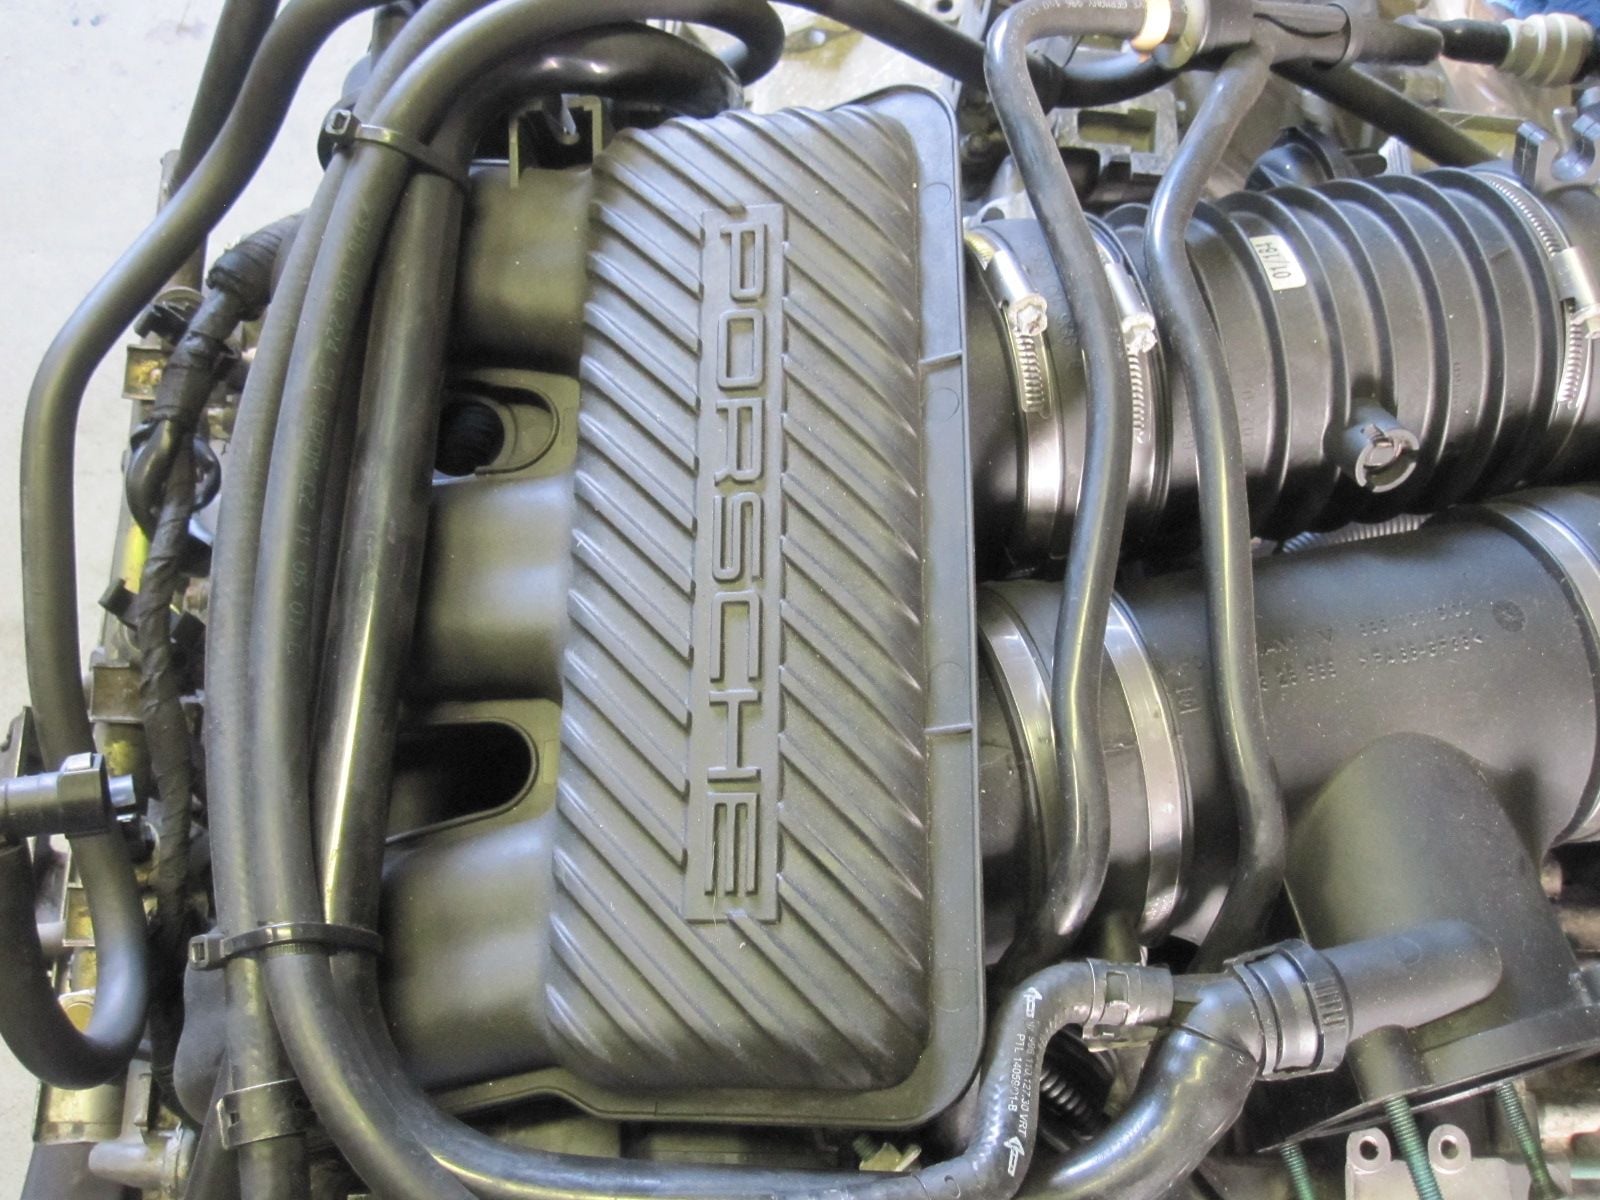
Reference images of what I started with, so I knew how things go back together. Driver side of top of engine
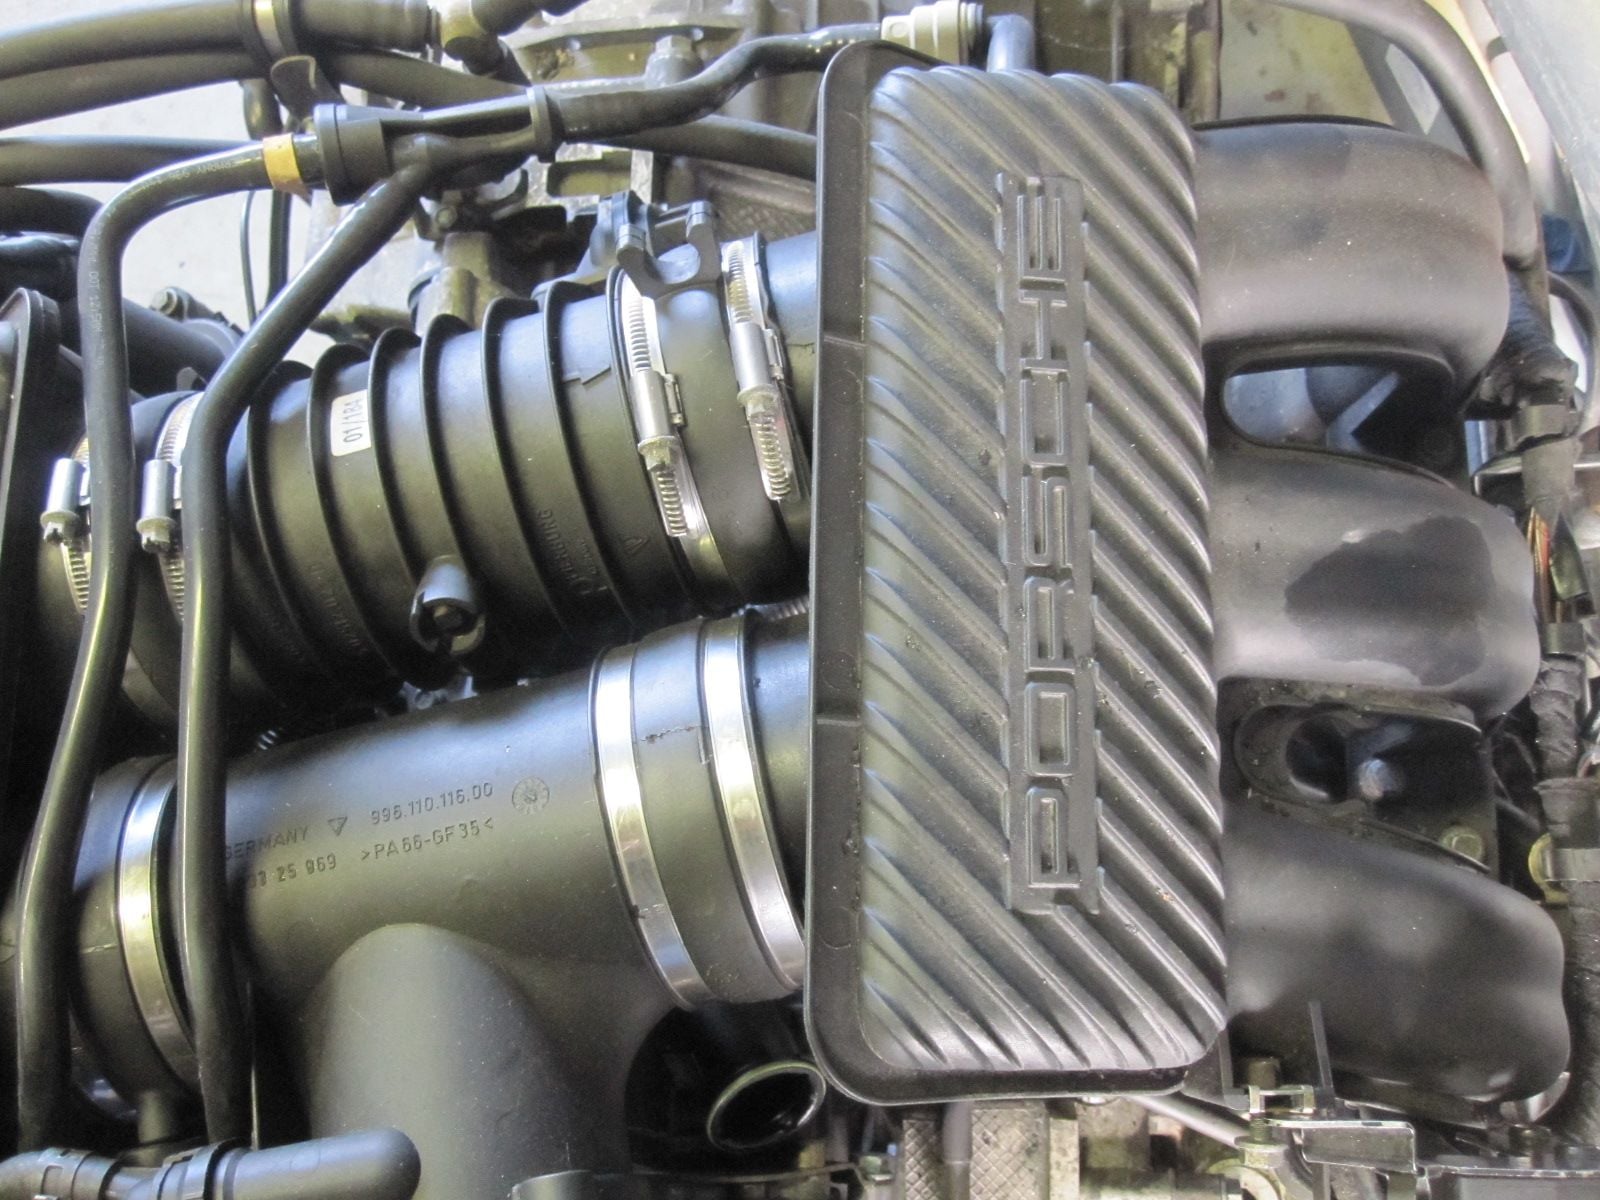
Ref. image. passenger side of engine.
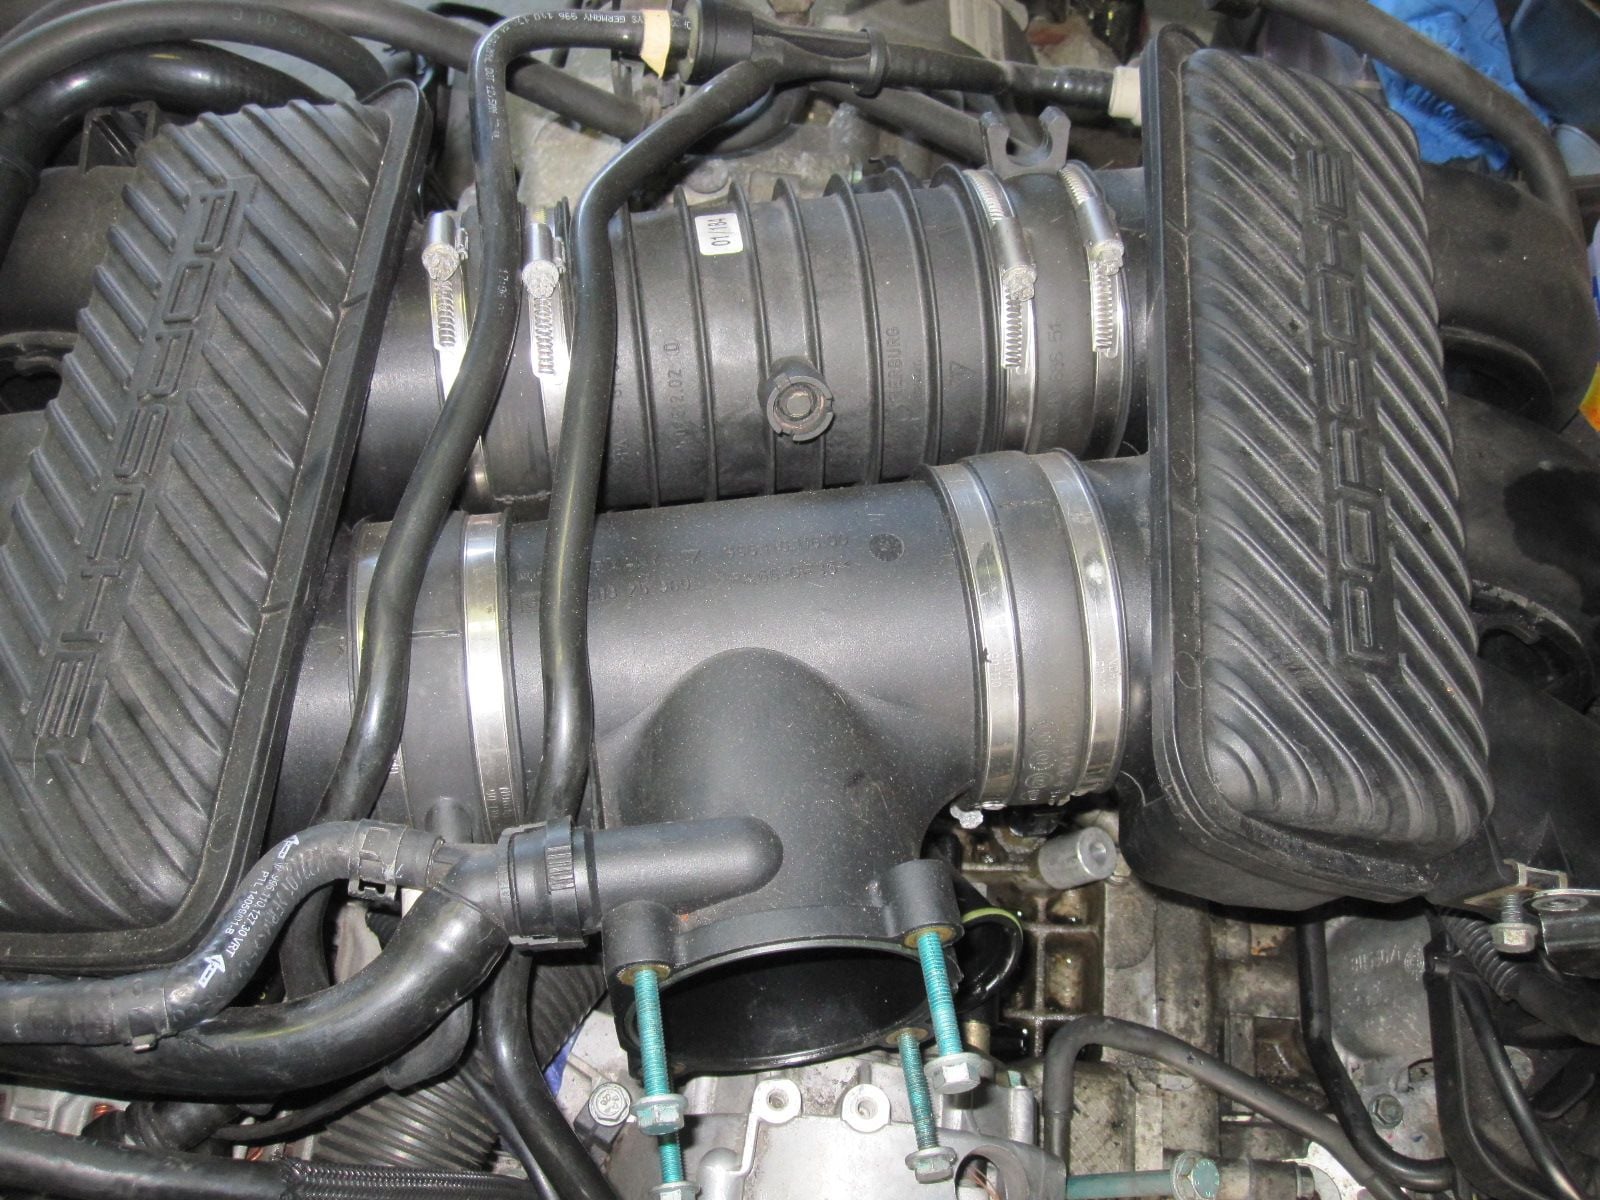
Ref. image...center
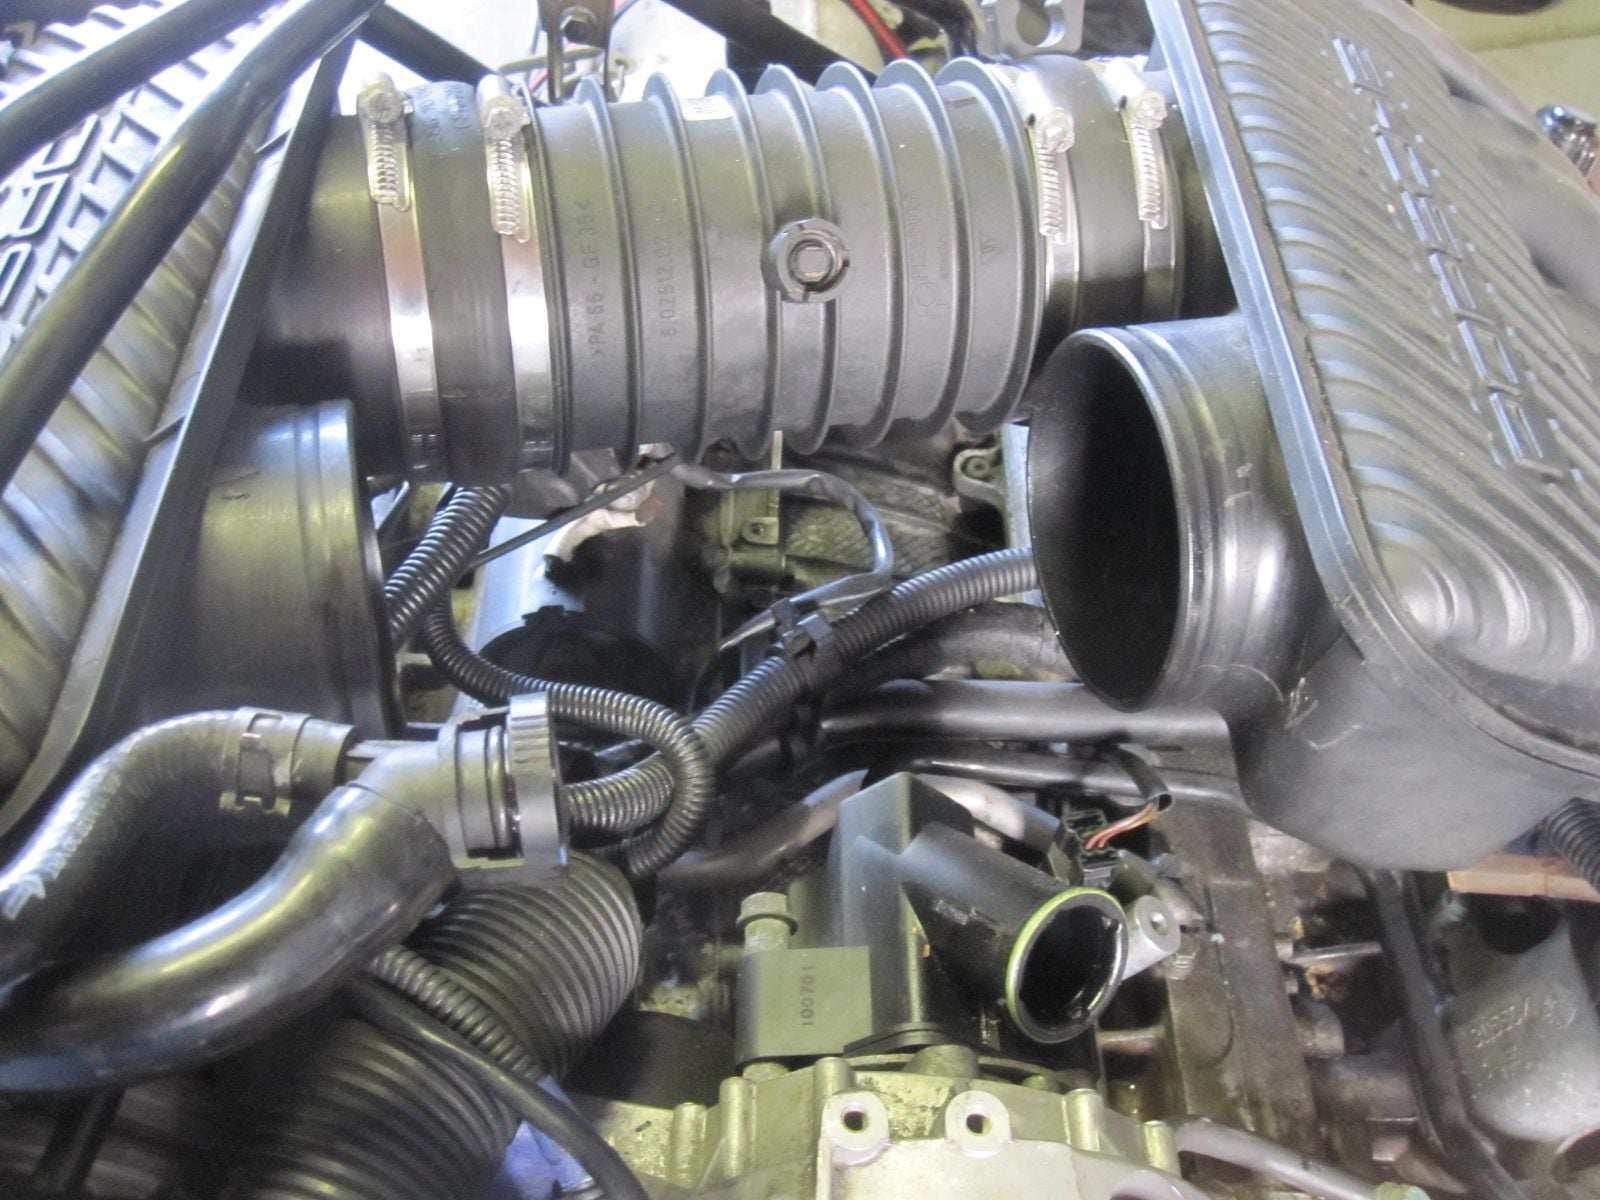
Start disconnecting stuff off the front plenum.
Take this out...keep it secure and dont lose it.
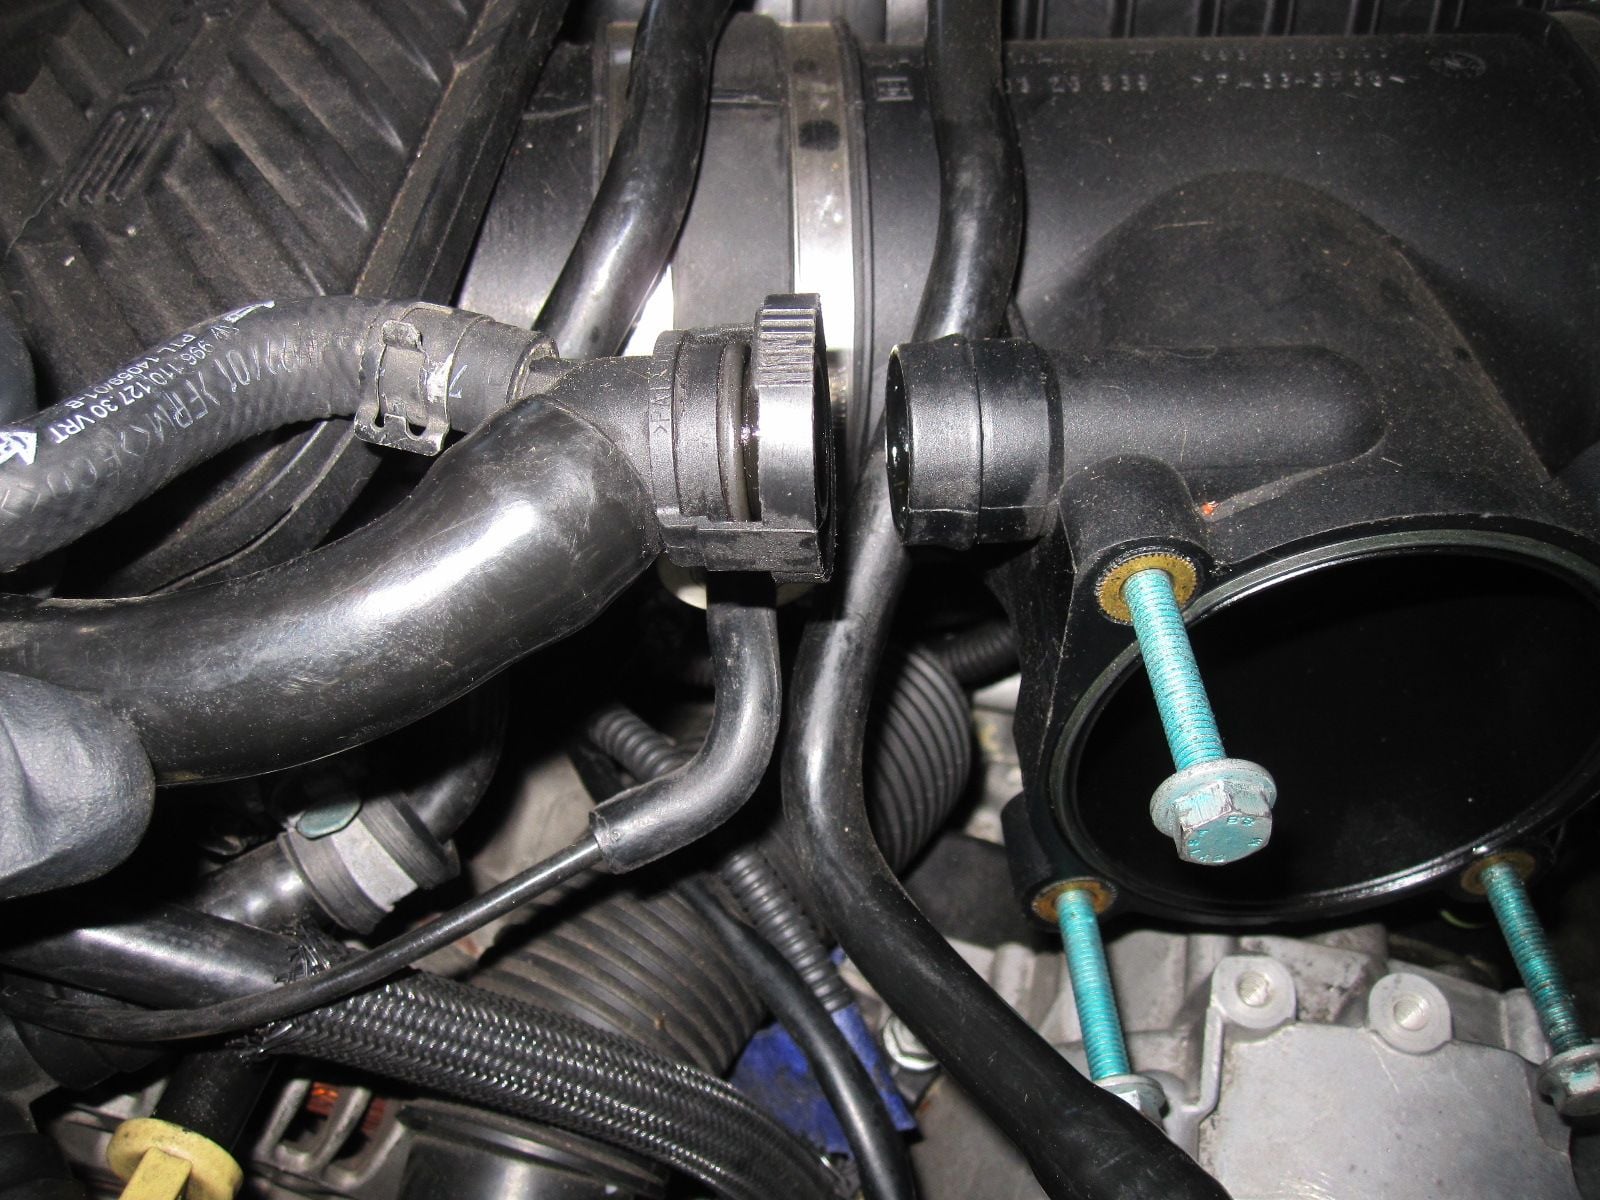
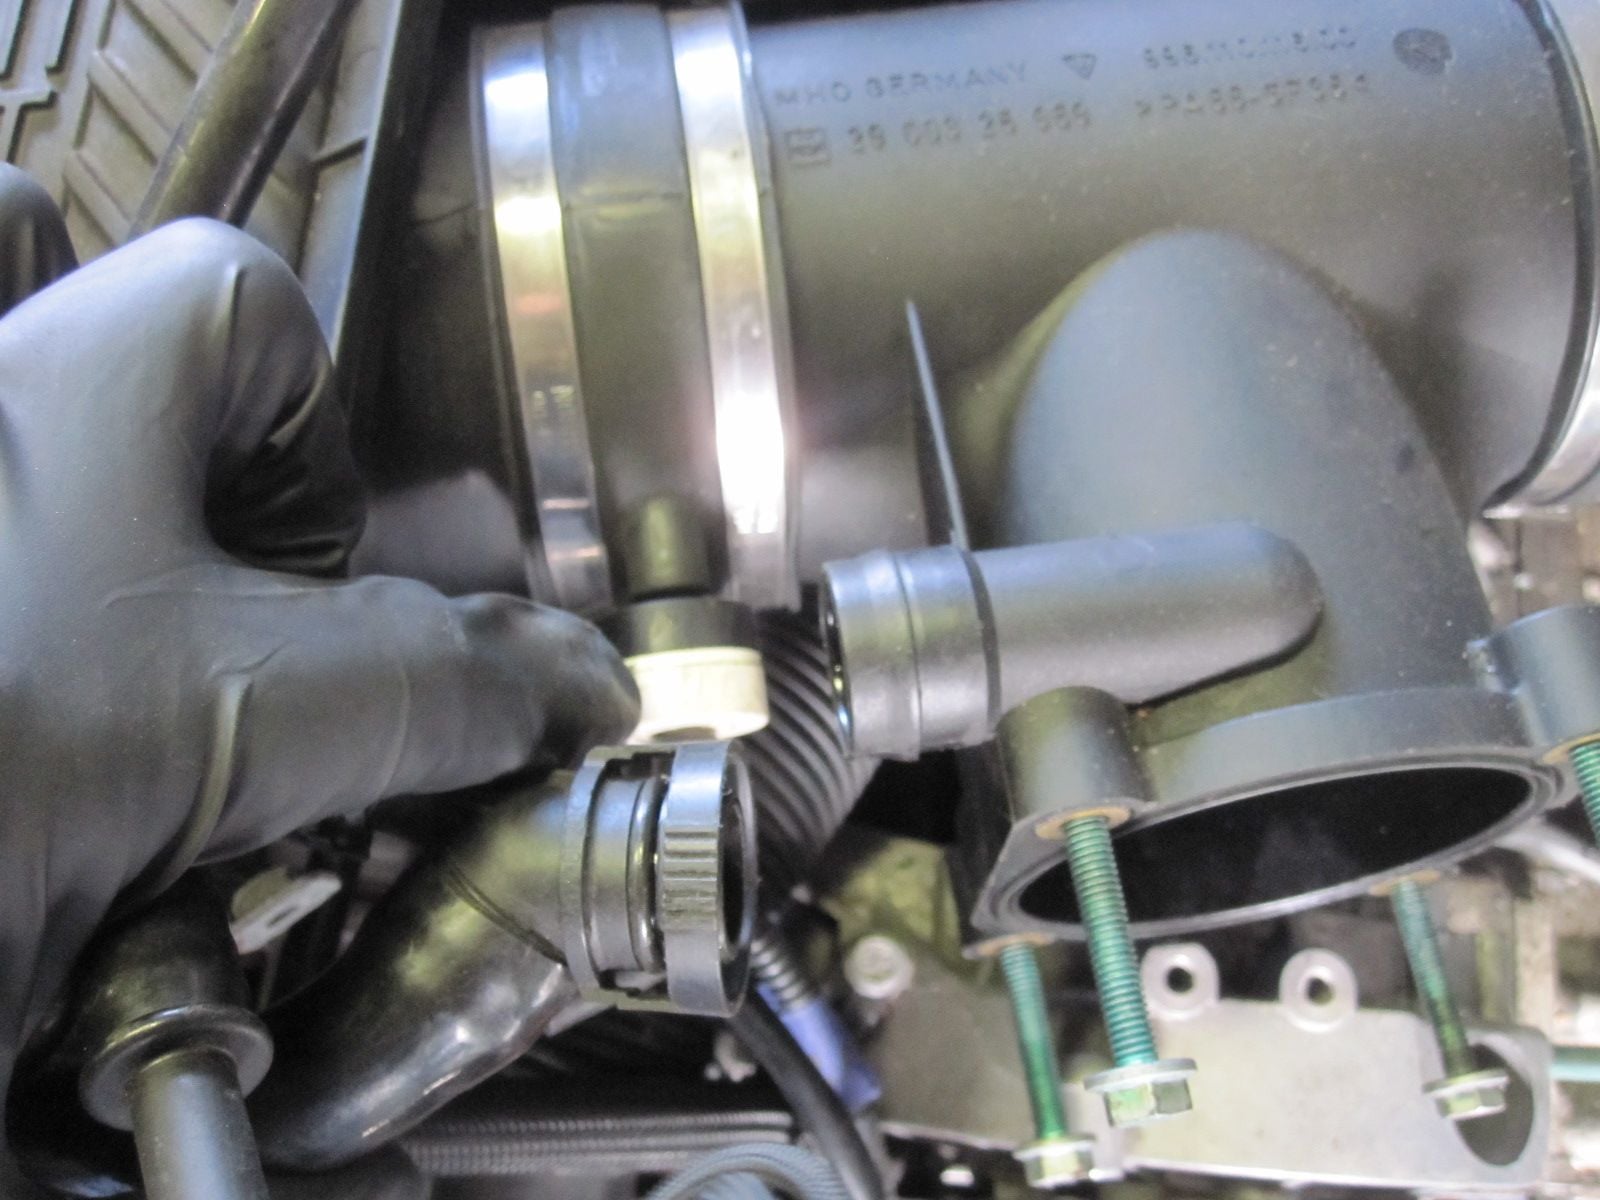
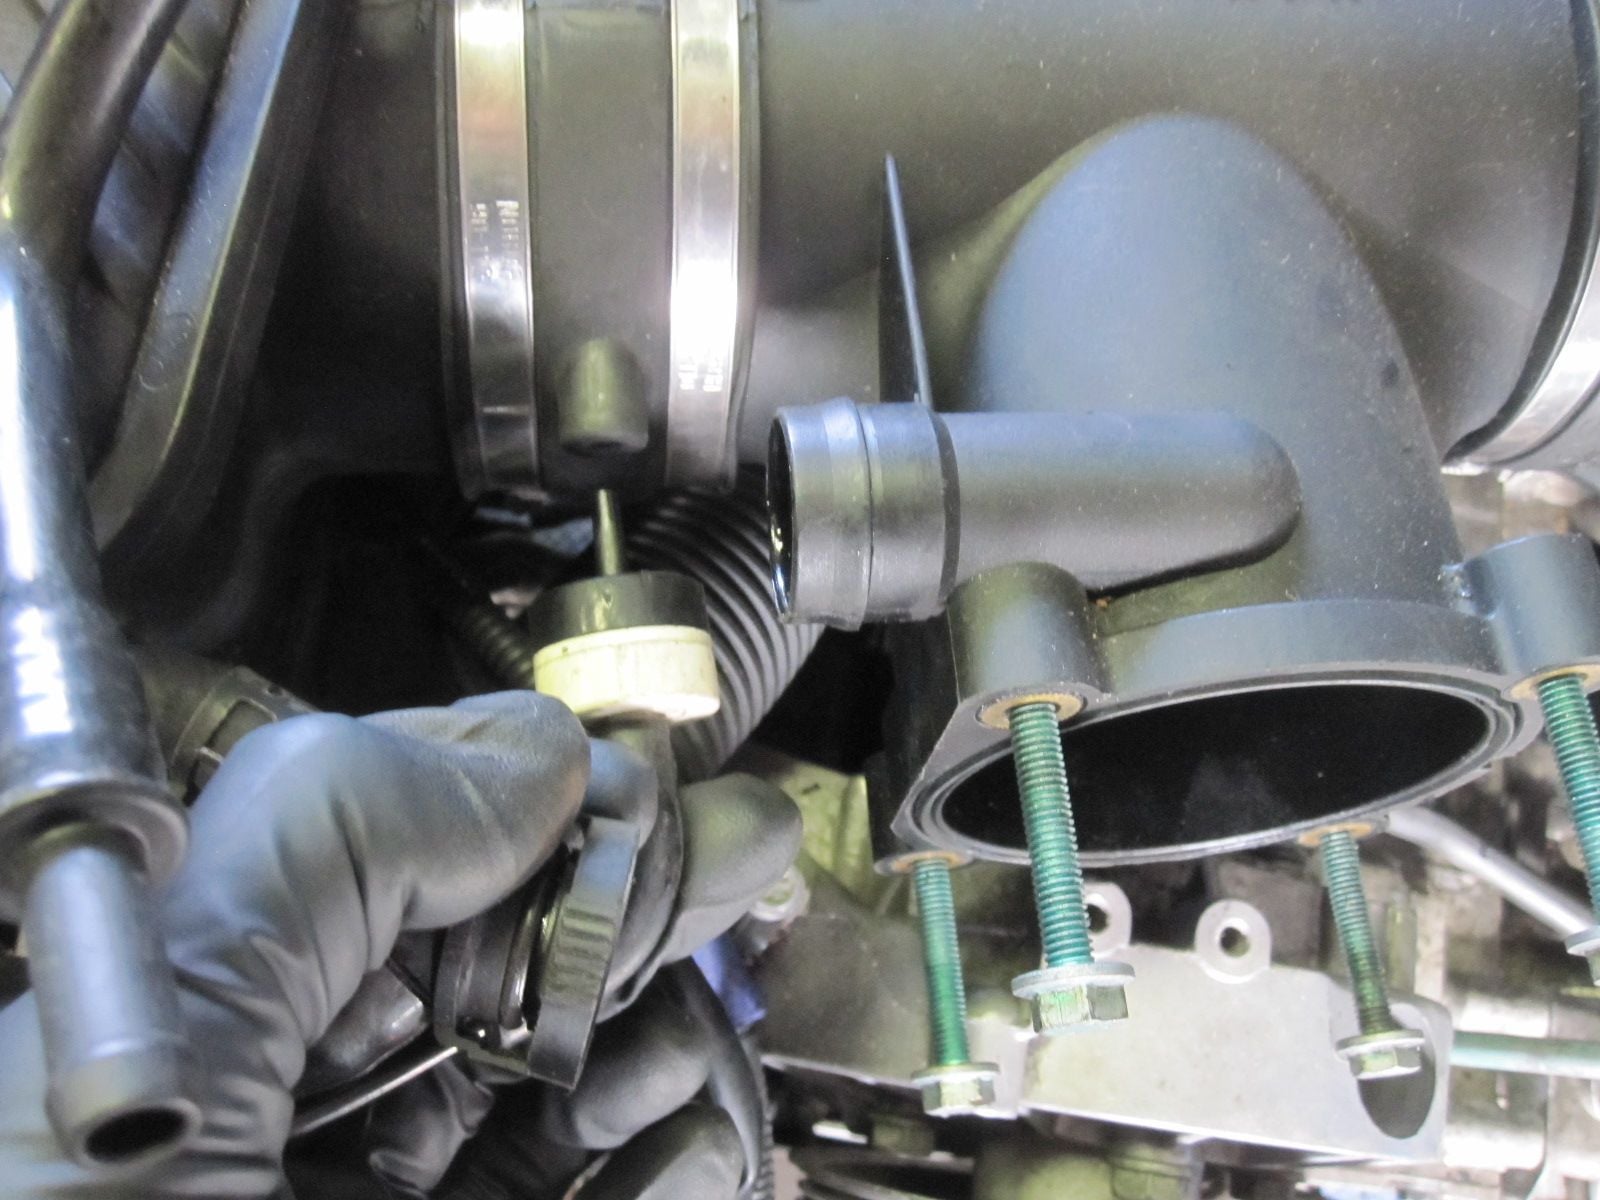
To get the center plenum out. Loosen the inner bands, rotate to break the seal. Tighten those and loosen the outer bands and rotate. Loosen all bands & force to the right to make room to remove.
Here is the starter, sitting under the rear plenum.
Need to remove the power and ground leads to be able to remove the starter. Place the nuts back on the starter.
Now remove two bolts (one on each side of starter) to gain access to the flywheel.
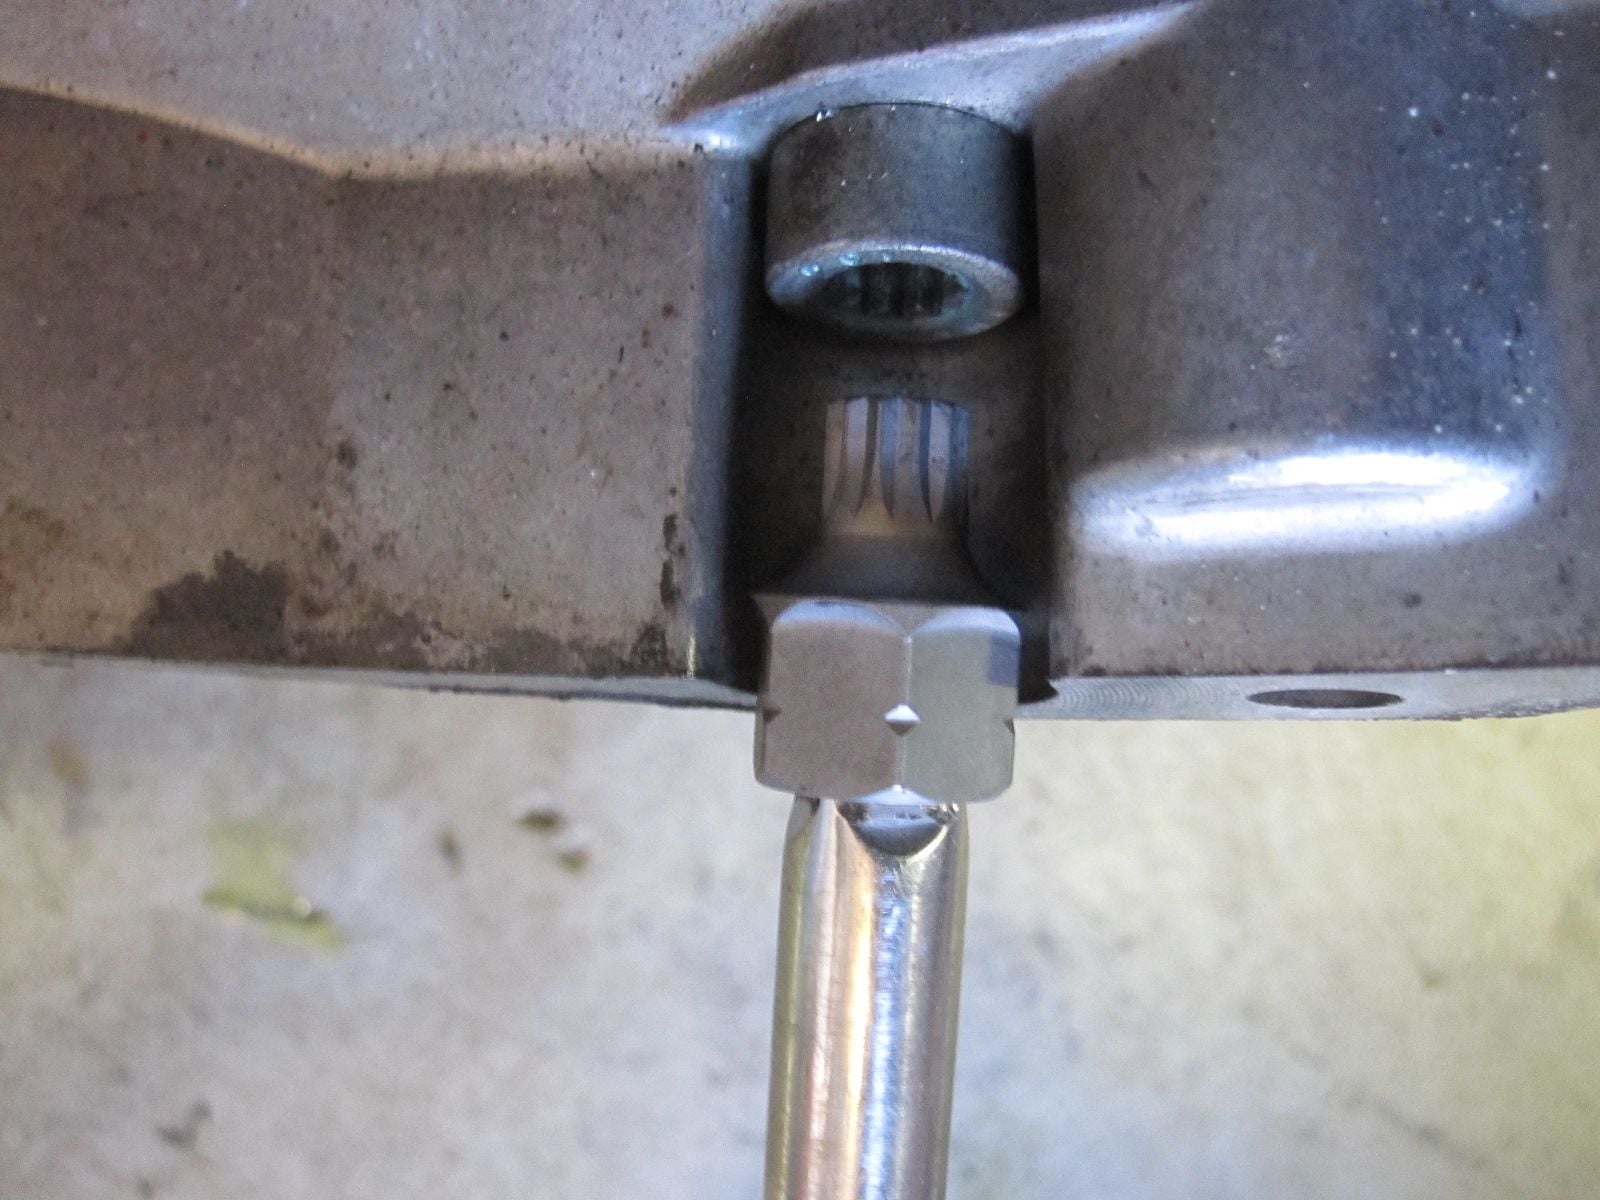
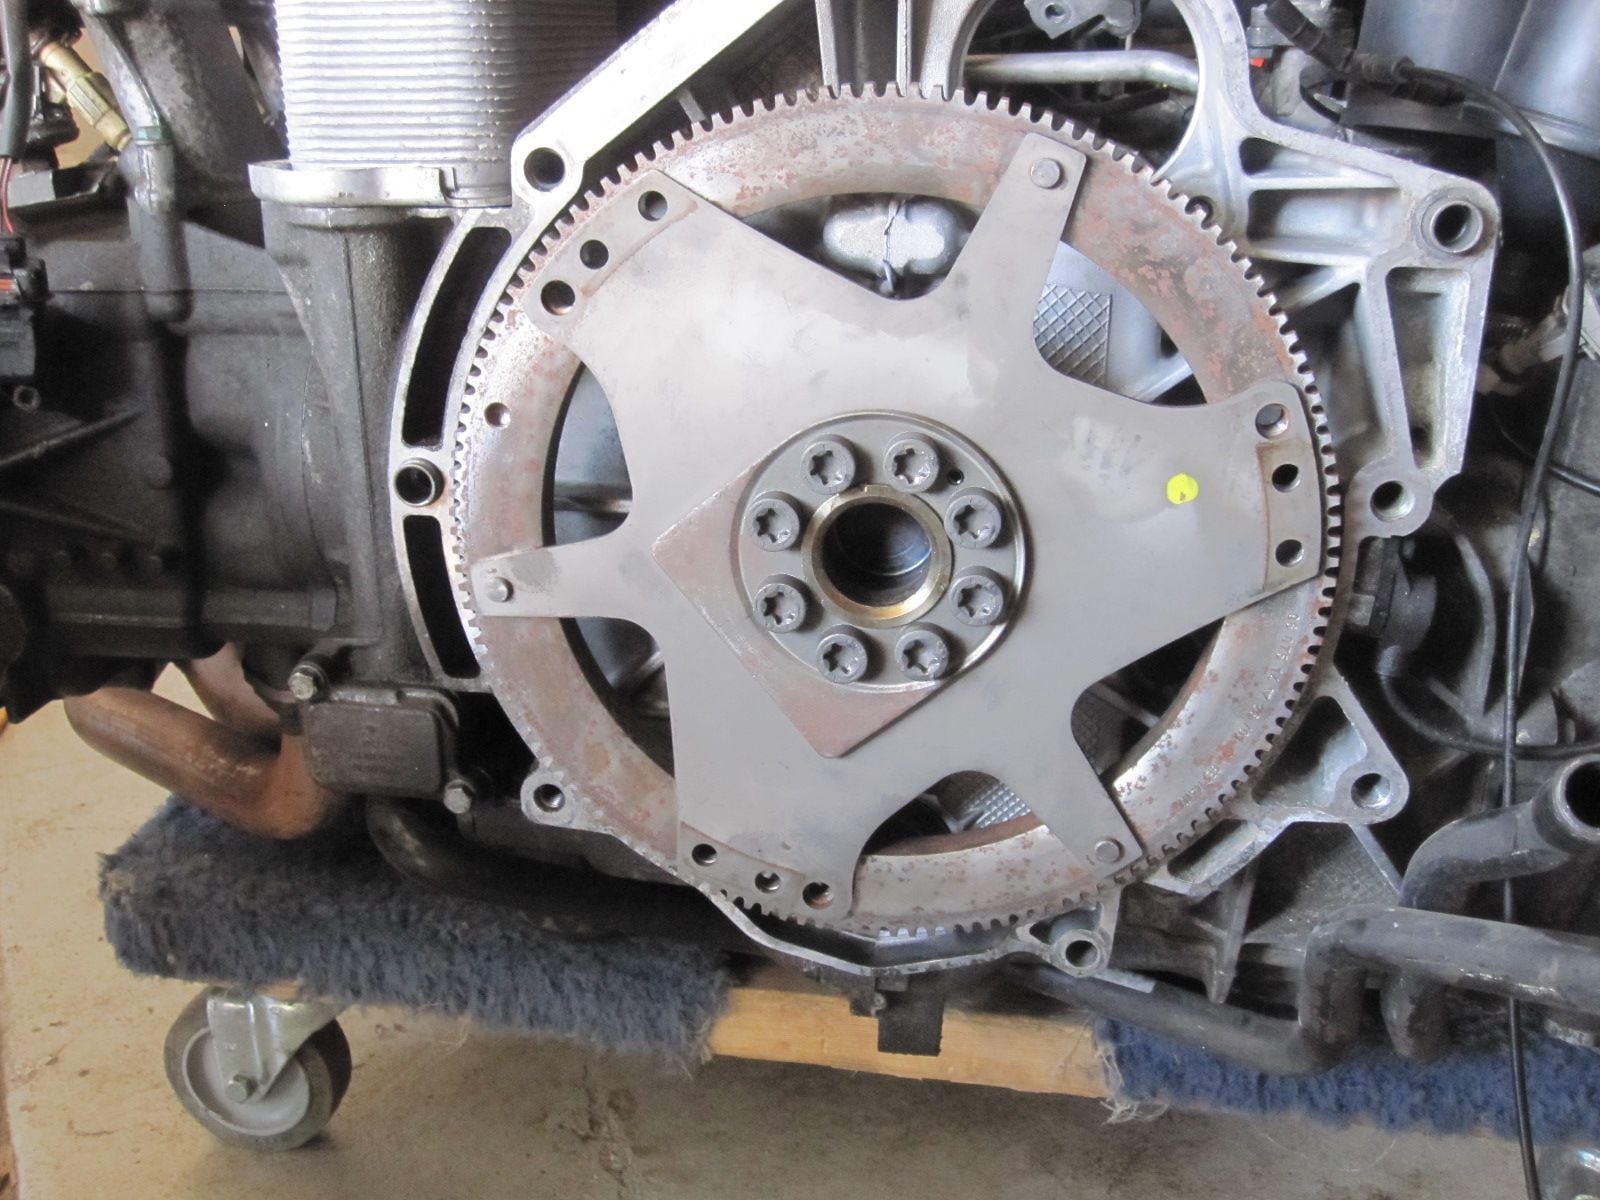
Get a large wrench and rotate the crank around, until you see two sets of fasteners. there is a hole between them. The 5/16" rod need to be inserted to lock TC.
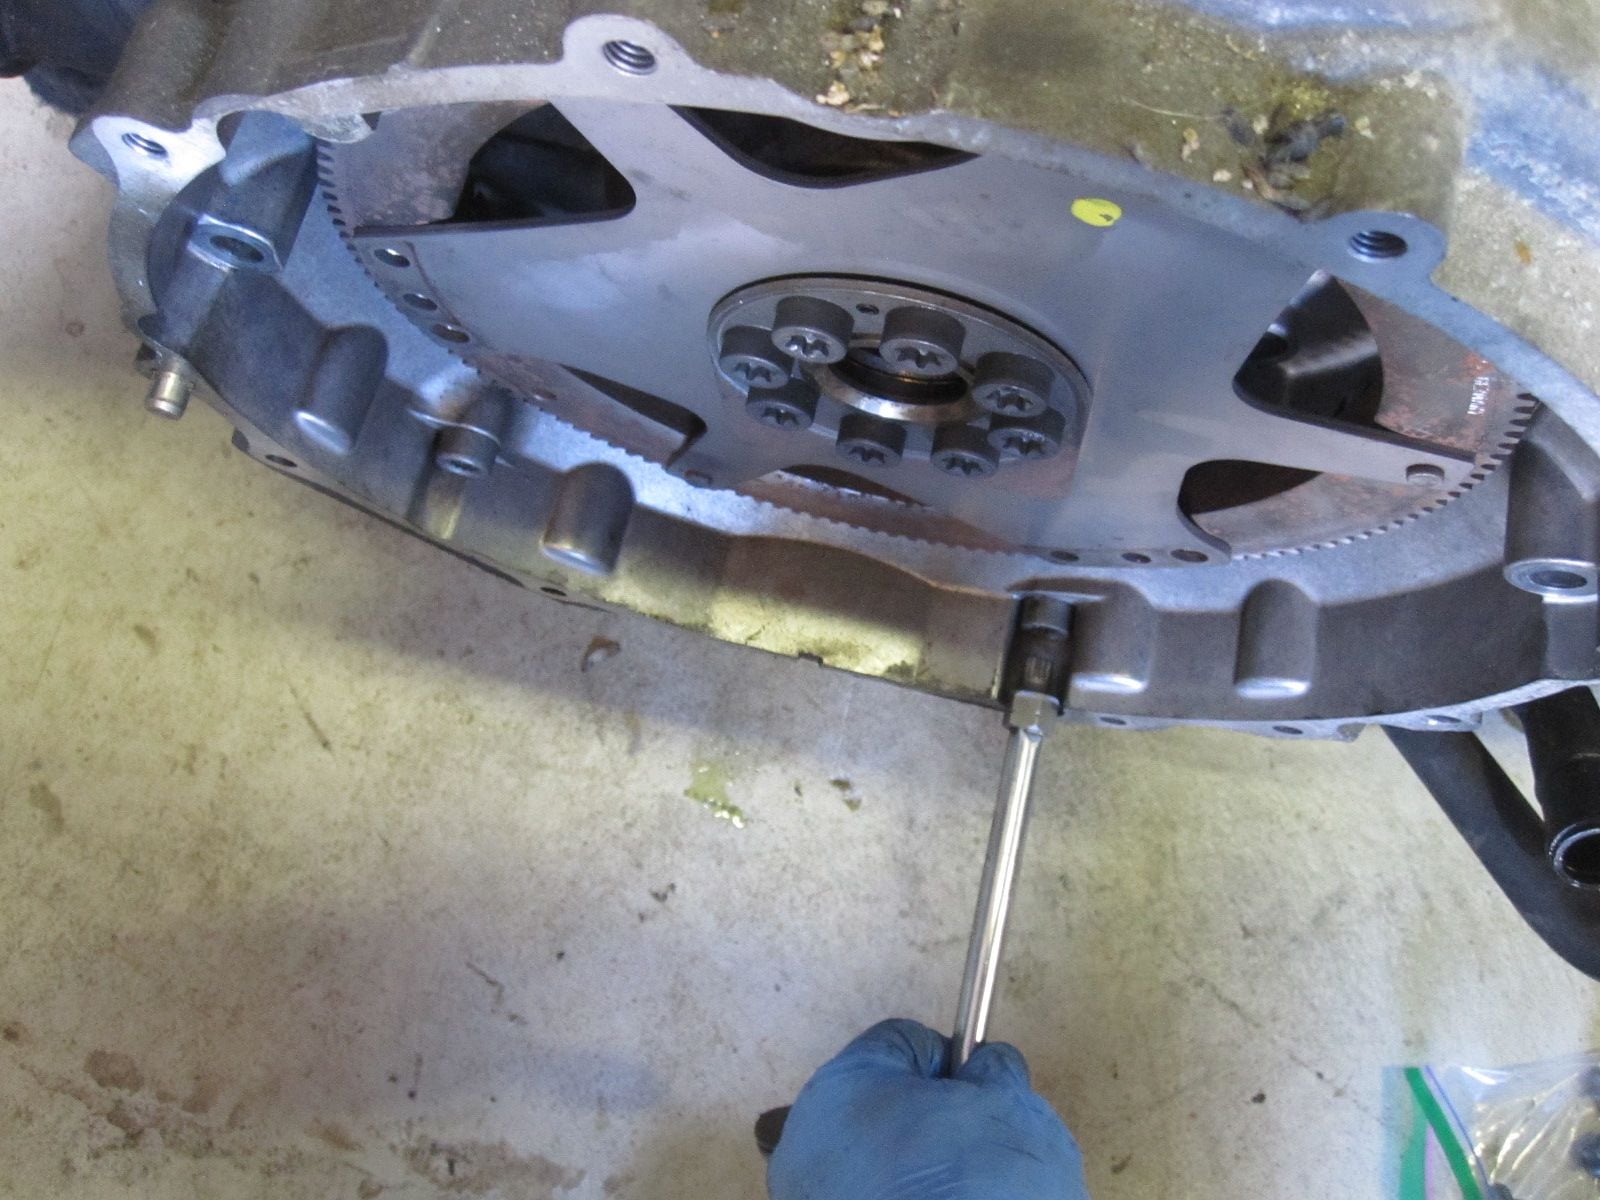
5/16" Rod inserted into TC. Remove three sets of two fastners. This will keep the flex plate with the engine and the TC with the transmission.
It is worth mentioning that you remove two fasteners and rotate the crank. When I removed the two fasteners, I had a magnet next to it, should I drop any of the screws. Maybe not necessary, but overly paranoid.
I don't know how you even got this far with all those Harbor Freight tools ! Didn't you know that they'll break the first time you use them - or the second if you're lucky? The horror Just kidding This is a great write up and I'll be referencing it soon when I drop my engine. How high did the car have to be for the motor/tranny to clear? Also, I'd be a little wary of lowering the with that block in the center of the oil pan (maybe you didn't but that's what the picture implies)...I'd probably go at least to the outer edges - but it looks like it worked out for you...Thanks for the documentation
I don't know how you even got this far with all those Harbor Freight tools ! Didn't you know that they'll break the first time you use them - or the second if you're lucky? The horror Just kidding This is a great write up and I'll be referencing it soon when I drop my engine. How high did the car have to be for the motor/tranny to clear? Also, I'd be a little wary of lowering the with that block in the center of the oil pan (maybe you didn't but that's what the picture implies)...I'd probably go at least to the outer edges - but it looks like it worked out for you...Thanks for the documentation
I usually don't have issues with HF tools. Some I have bee using for 10 years. Naturally, I wouldn't use them for commercial use, but for a weekend home warrior, they are fine. As with ANY mechanical work, safety is important and I always had a backup safety mechanism in place.
The center of the oil pan has a reinforced area, that works just fine. The block of wood is wide enough that it distributes the load over a wide area. It was balanced just fine and lowered without any problems. Also, with the car raised about 24" in the air, I needed some filler, to reach the engine enough to remove the rear mounts.
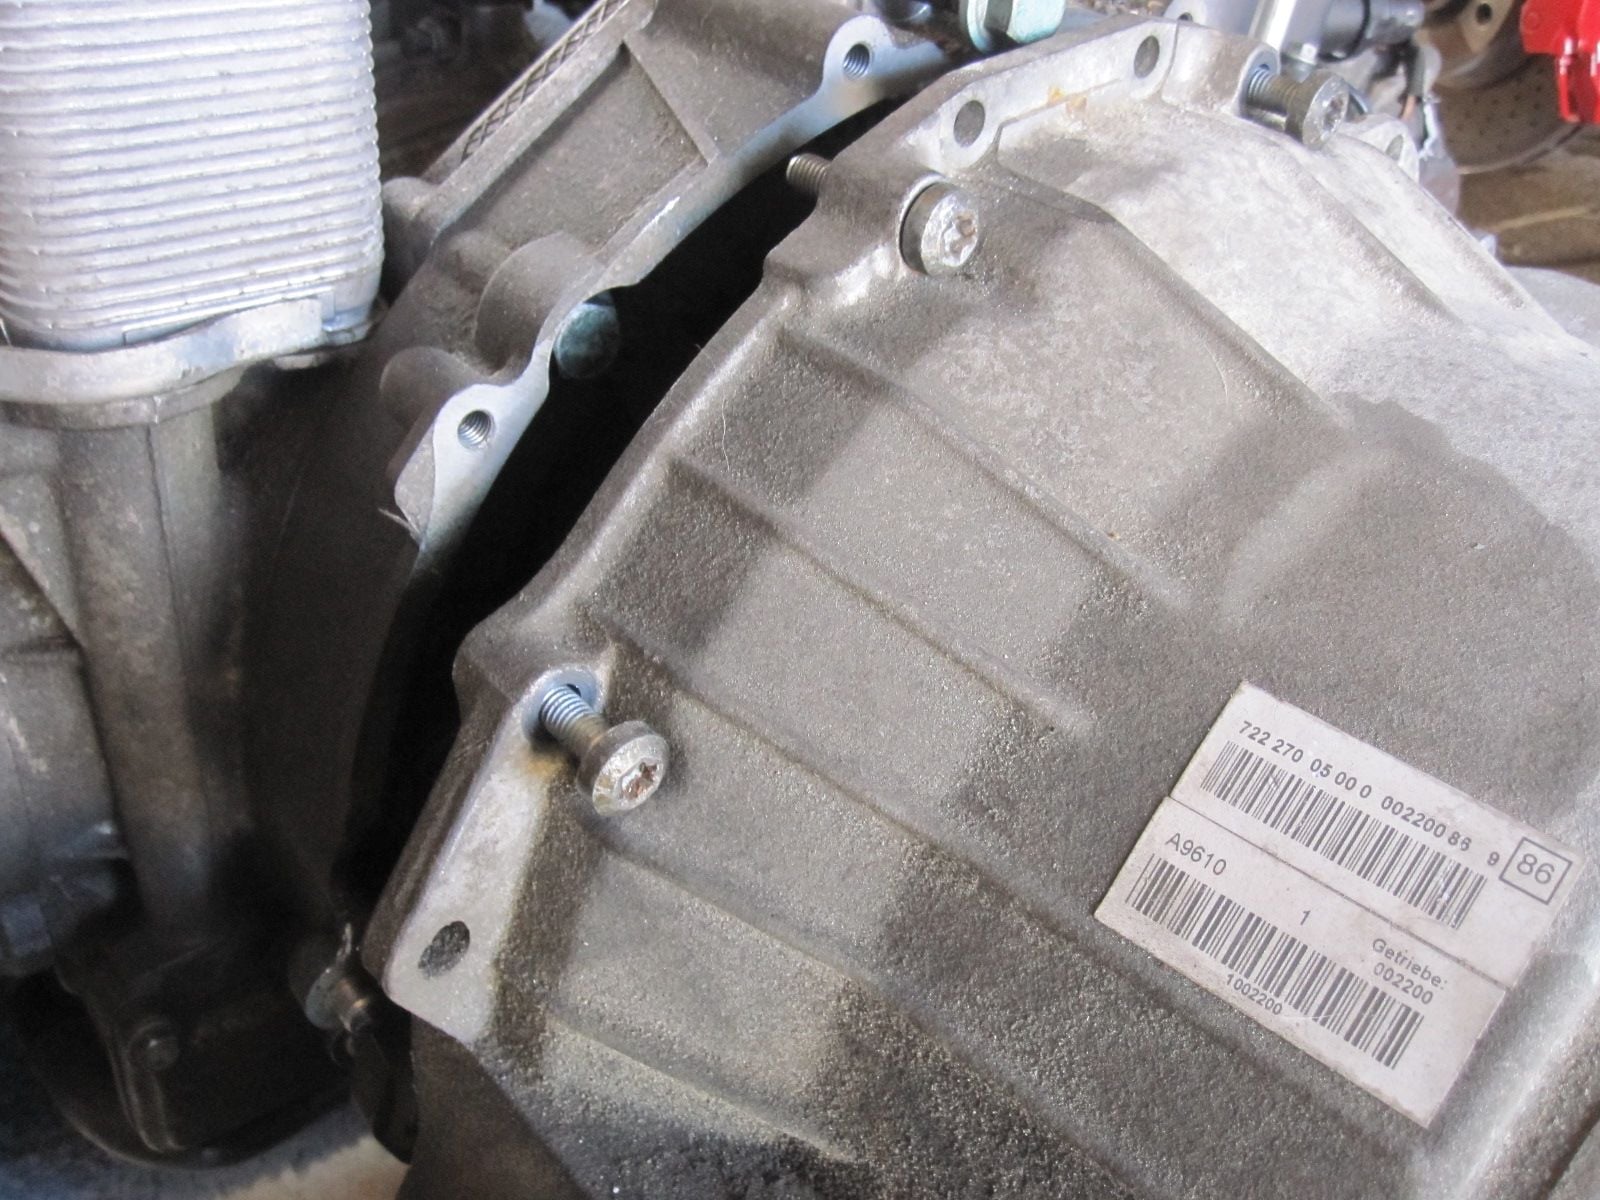
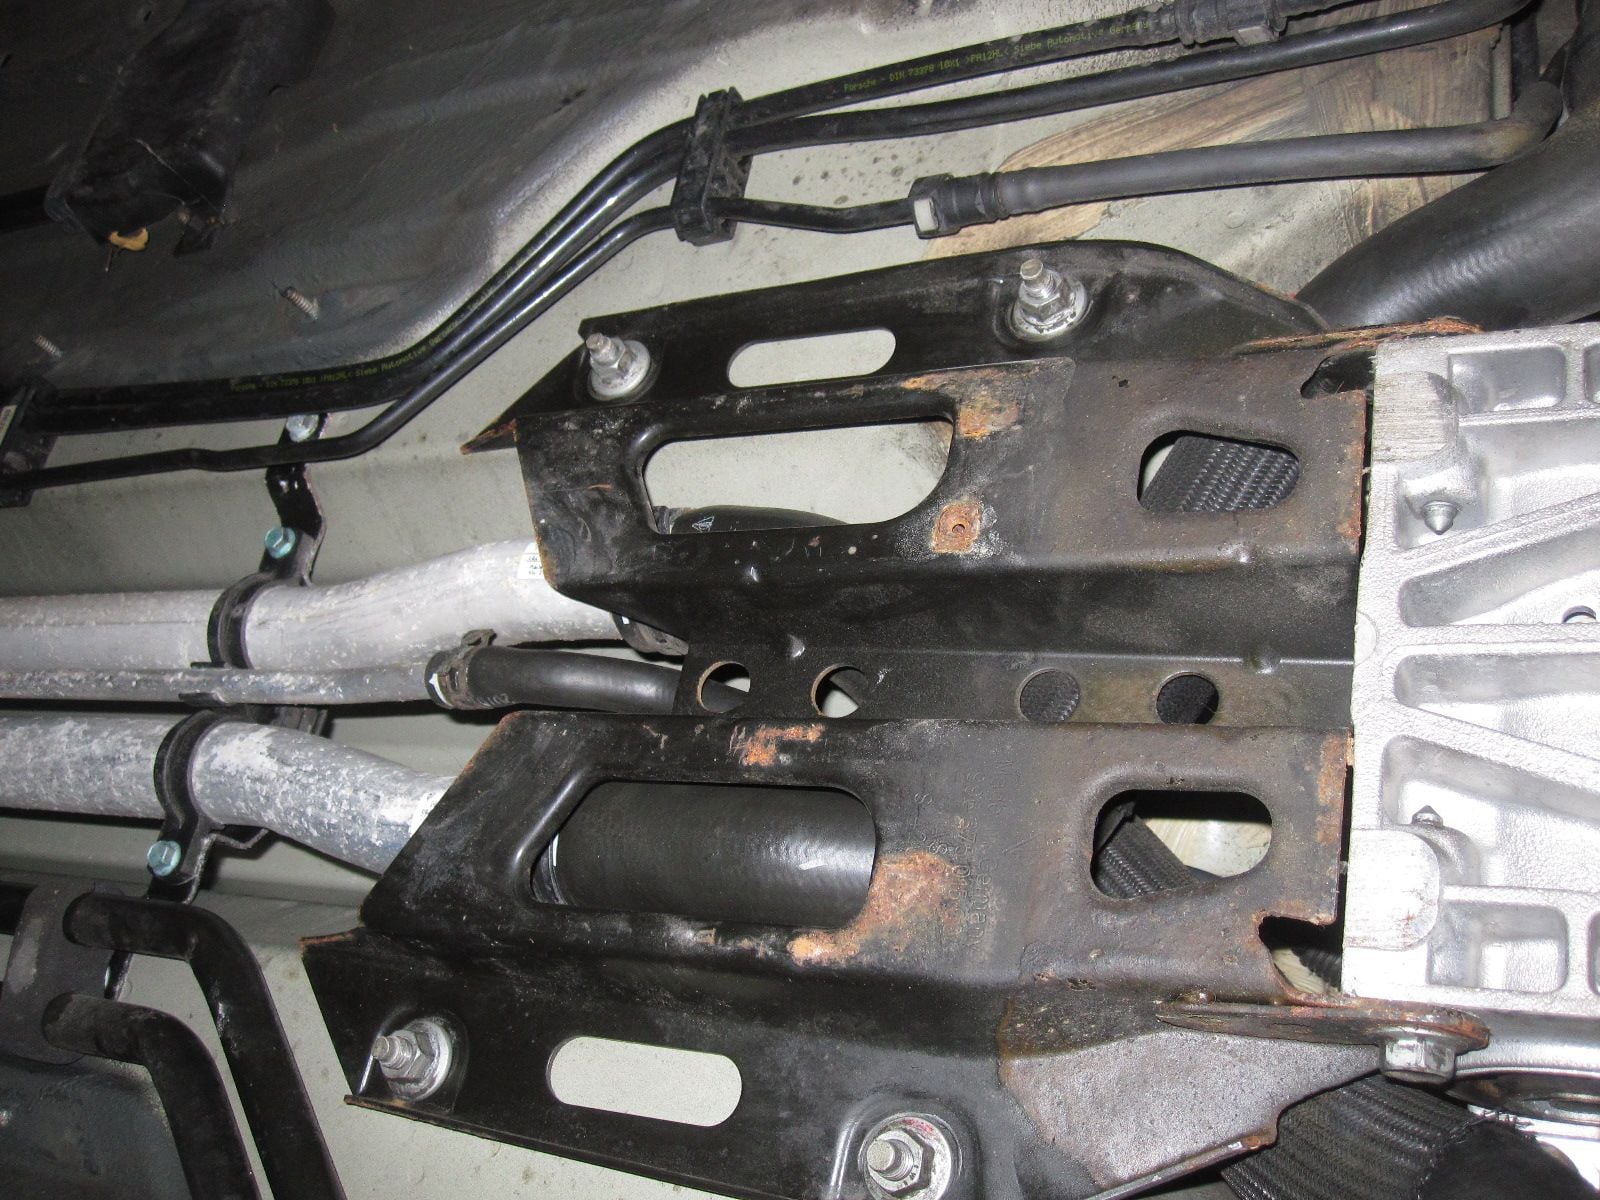
Now that I had the starter removed, I started the process of divorcing the transmission from the engine. If you are reading "the book", it references a manual transmission. The tip has an adaptor plate of sorts, that involve more bolt removal. Some at a little trick and in tight spaces.
You first have to remove the transmission from the adaptor plate. This picture is a little misleading, because there is a bolt on the side that was a PITA to remove. There was VERY limited space to get a wrench in there.
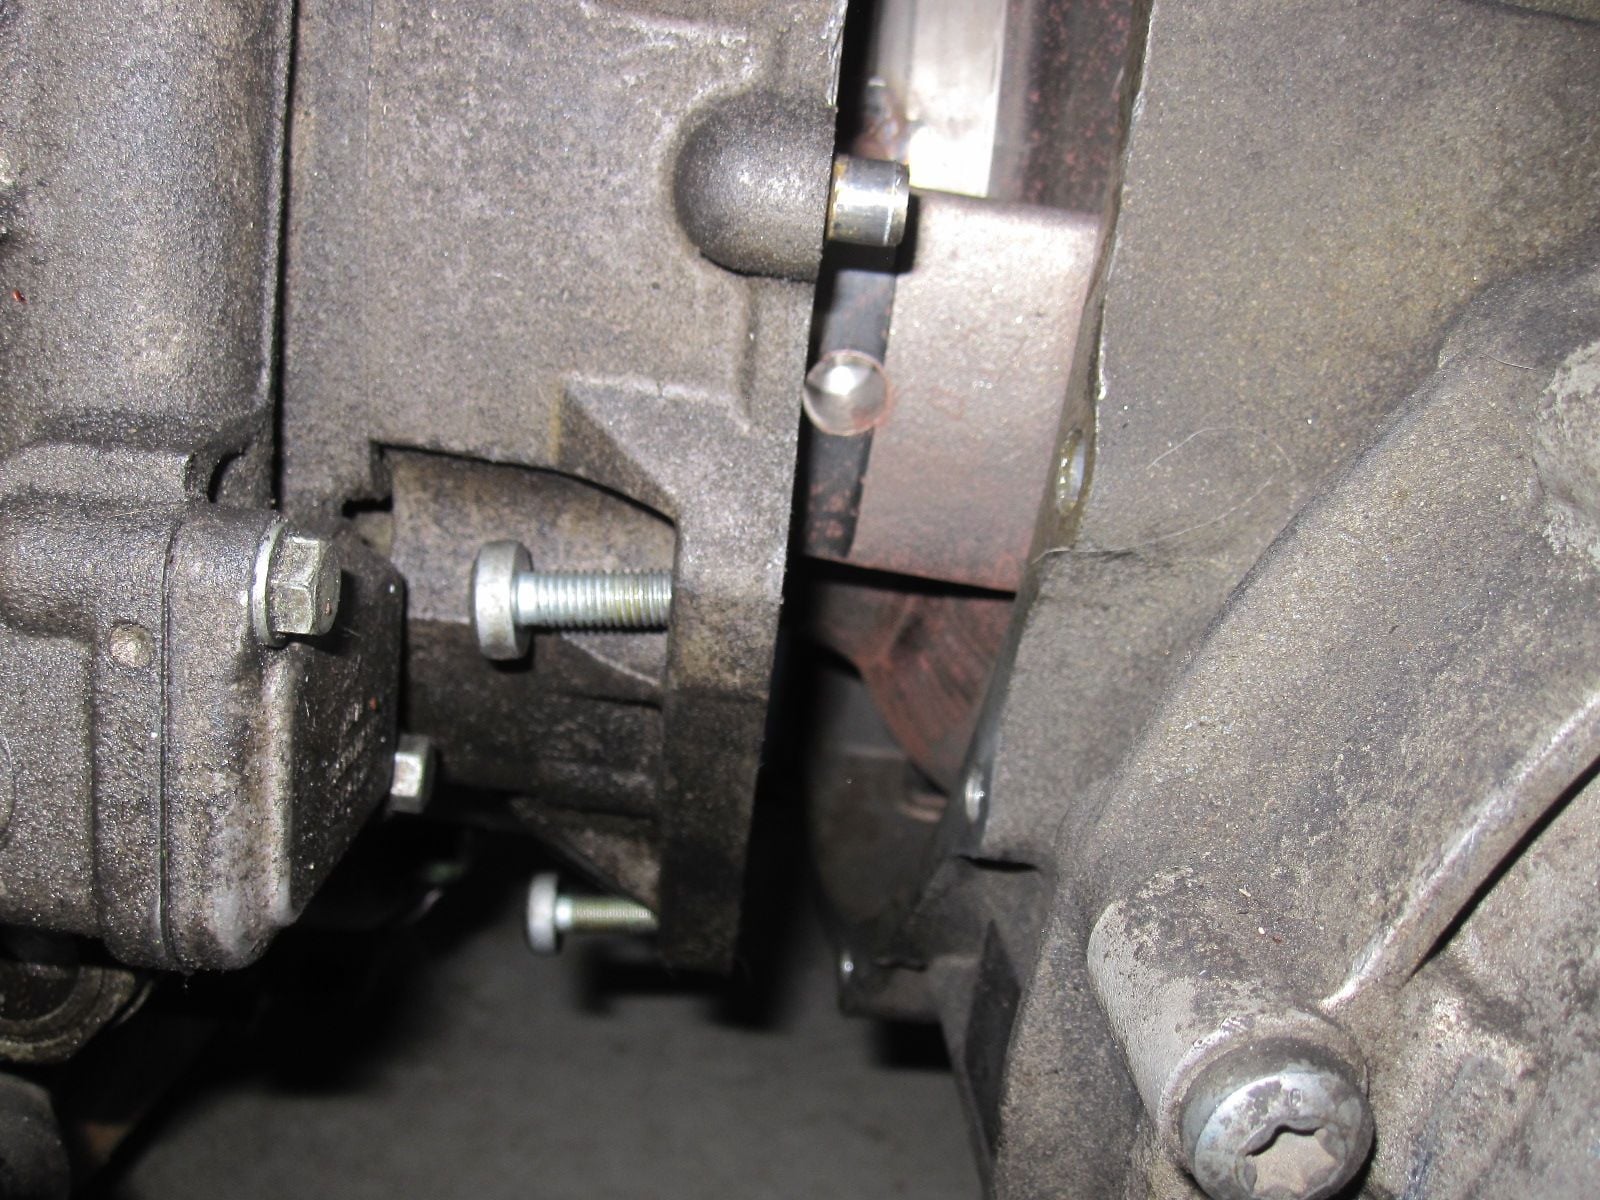
This is the bolt that was a PITA. I had to get my TORX bit in there, but all I had were sockets. To get enough room, I needed to remove the plate on the left, and then put a BIT (not socket) that I could put a closed end wrench around, to twist. Be careful not to strip it out.
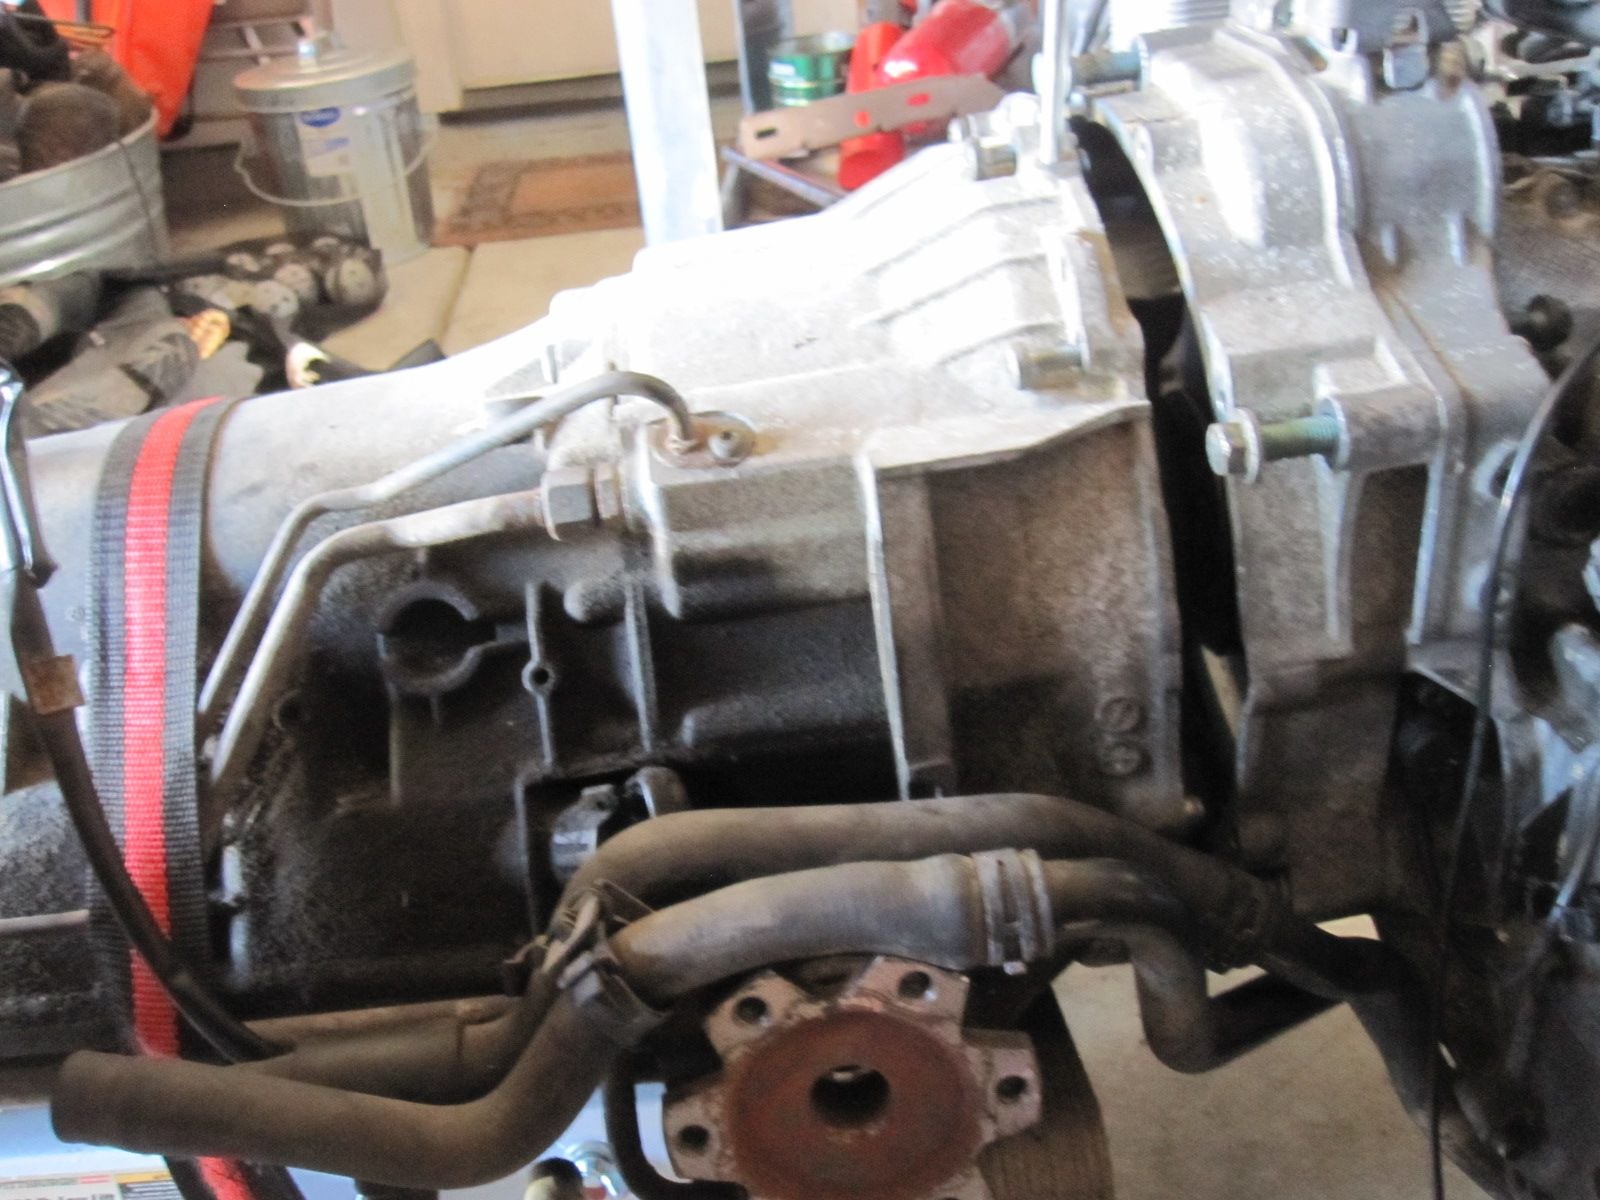
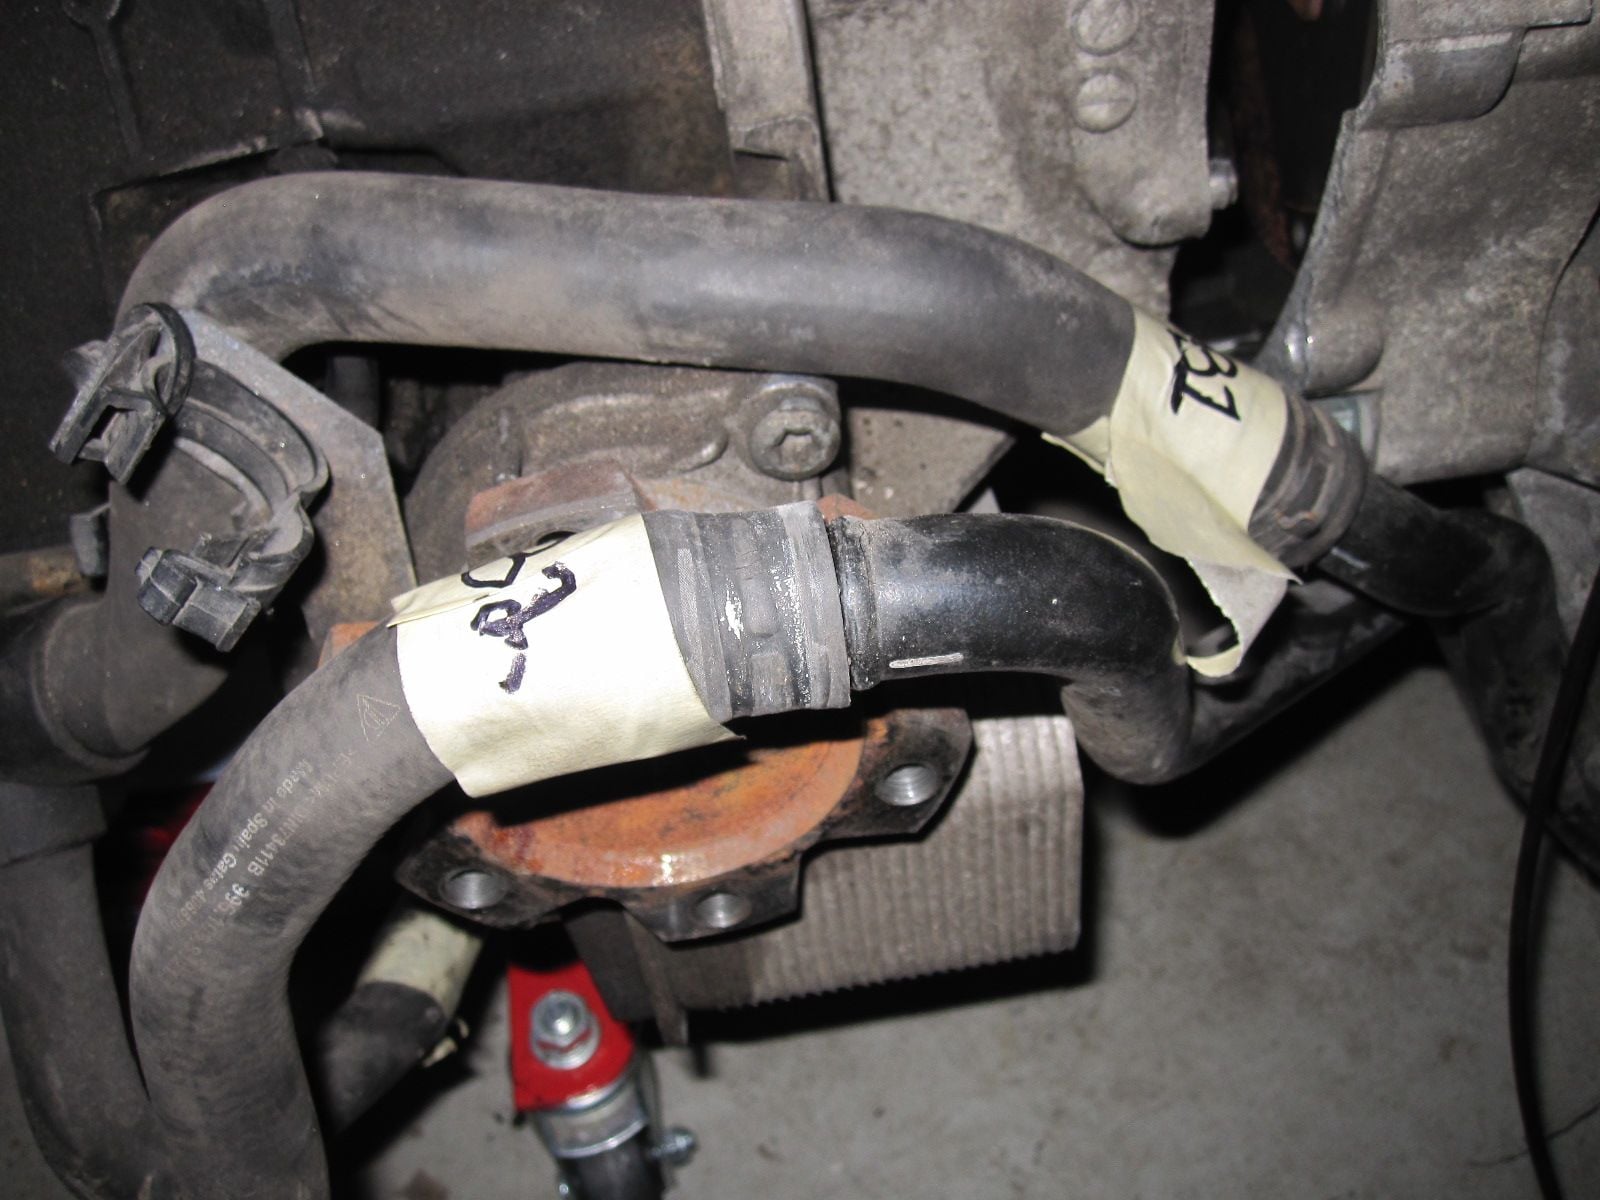
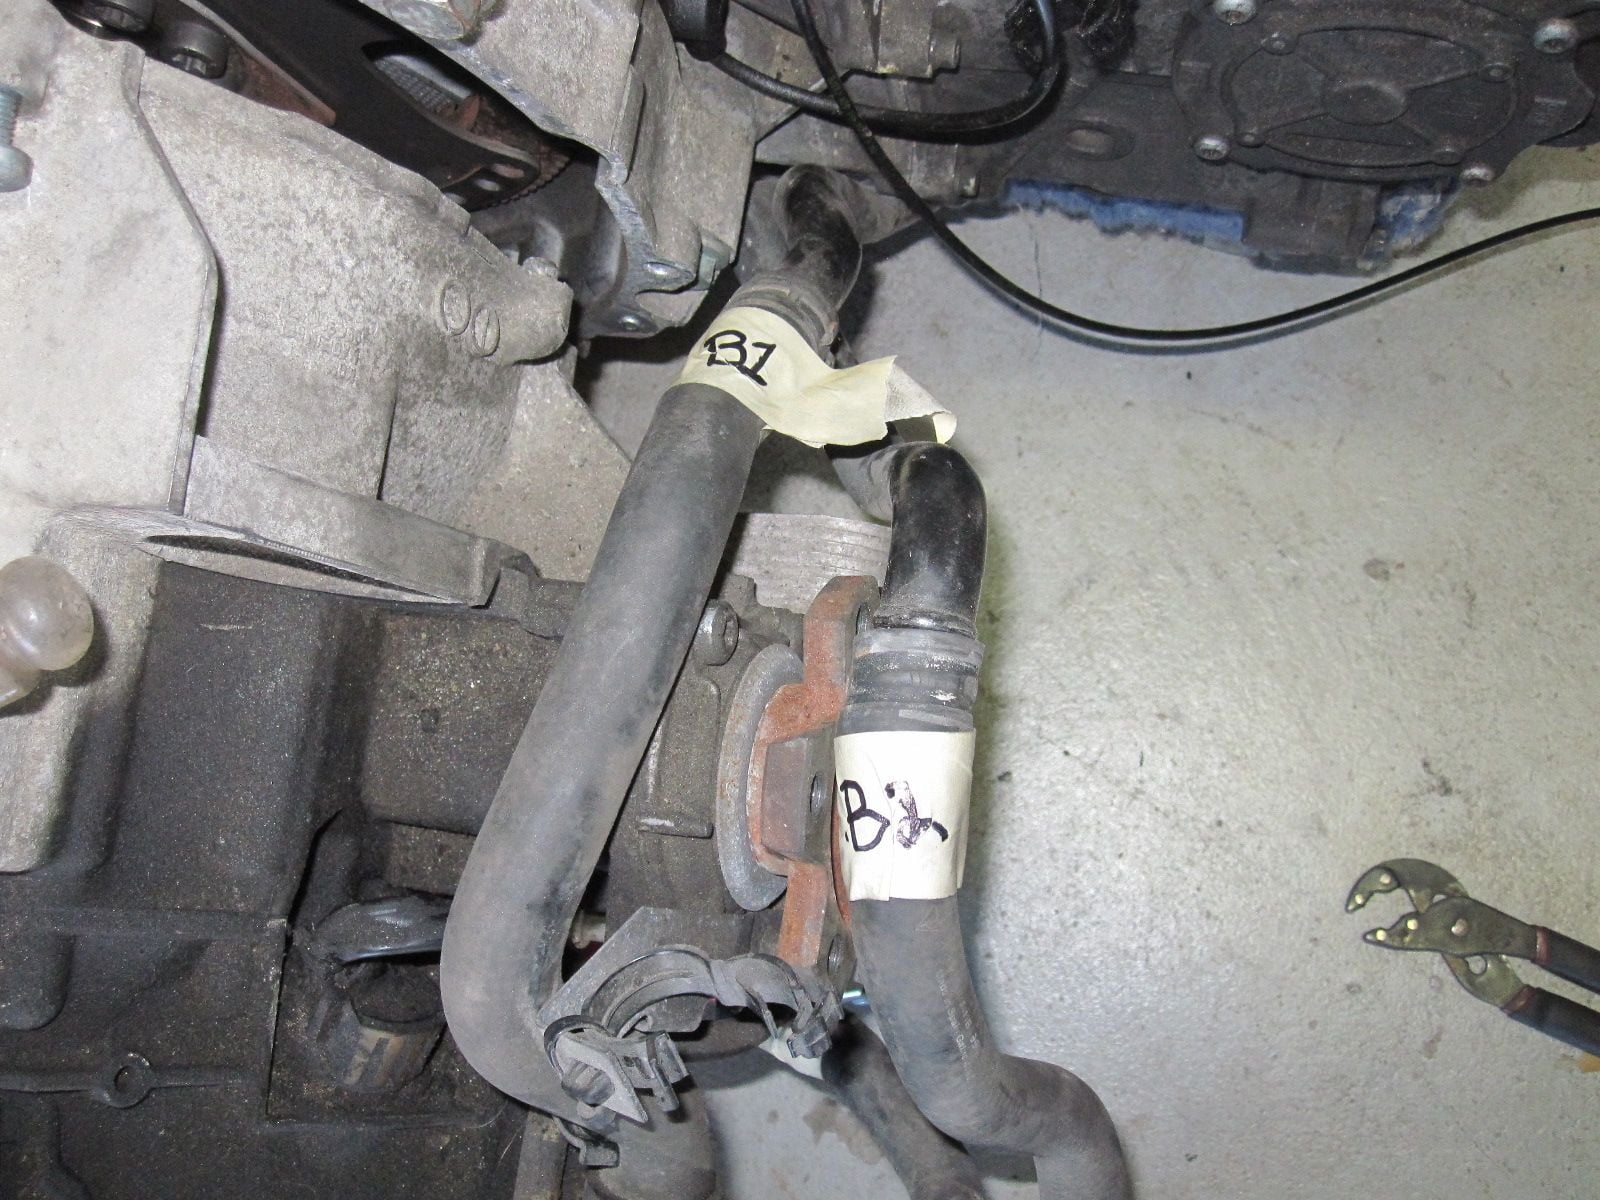
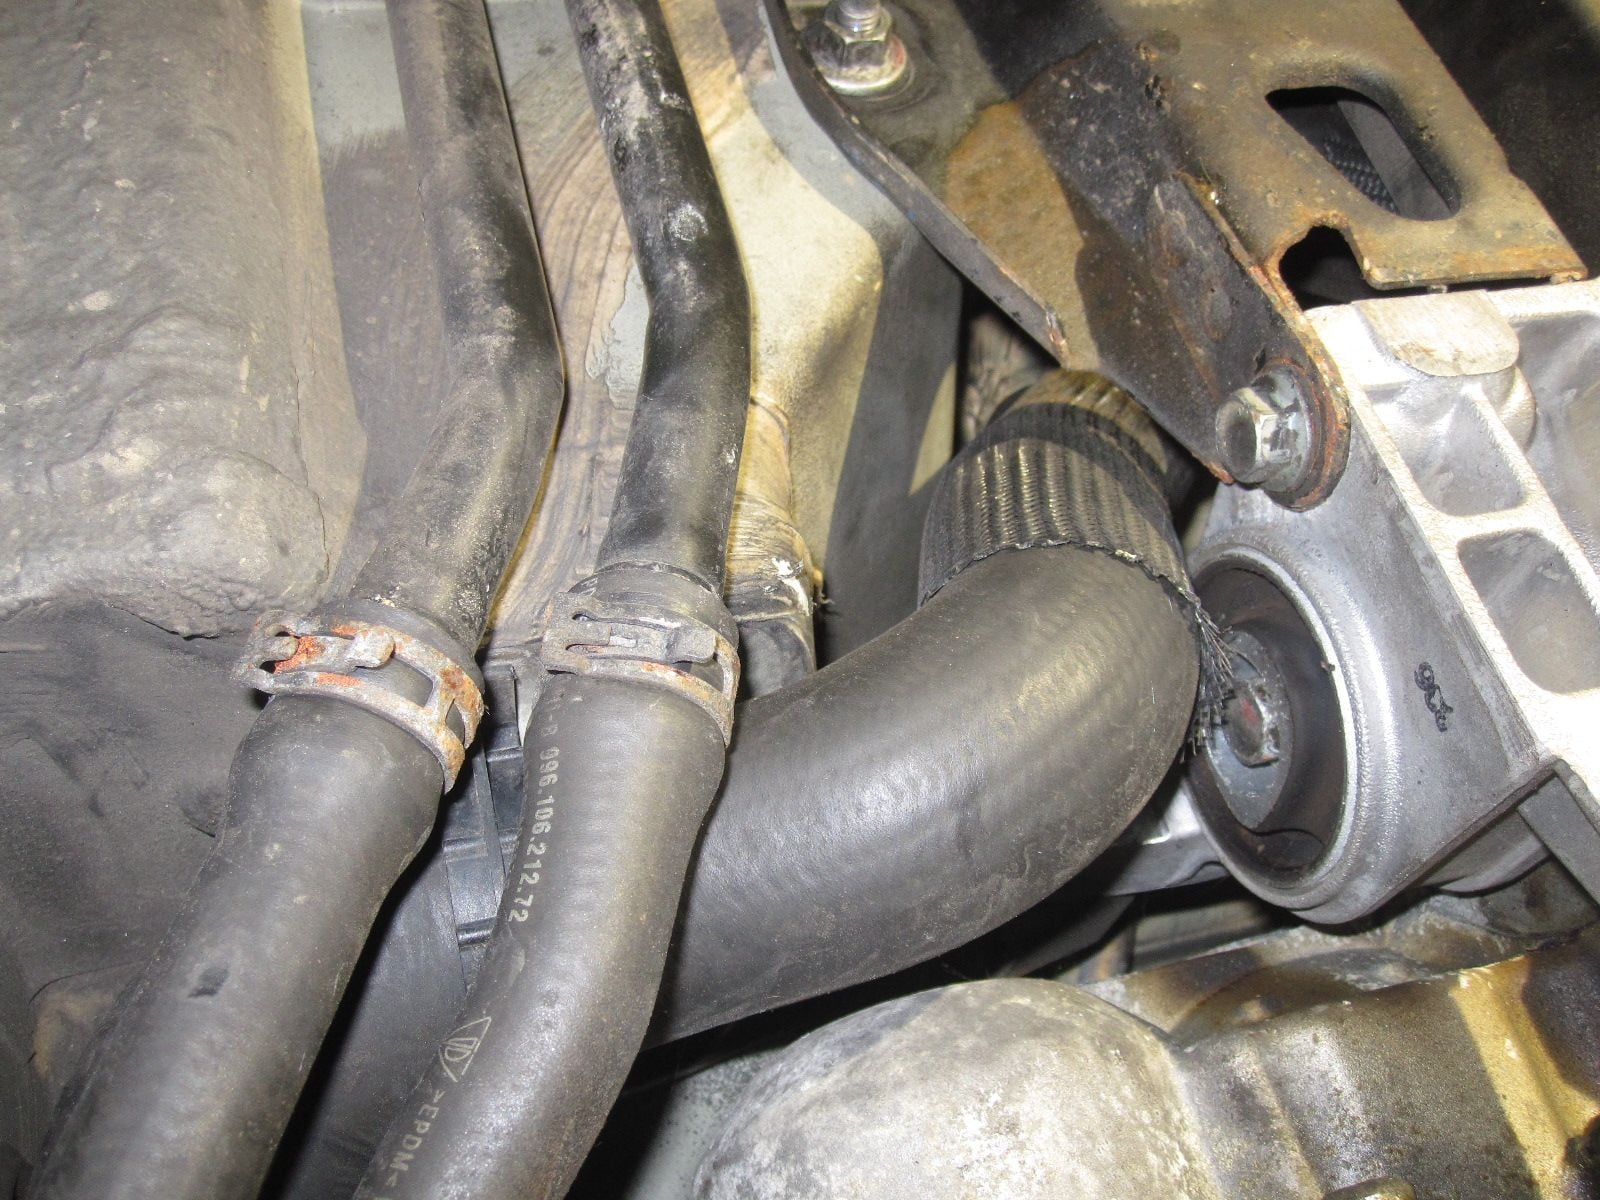
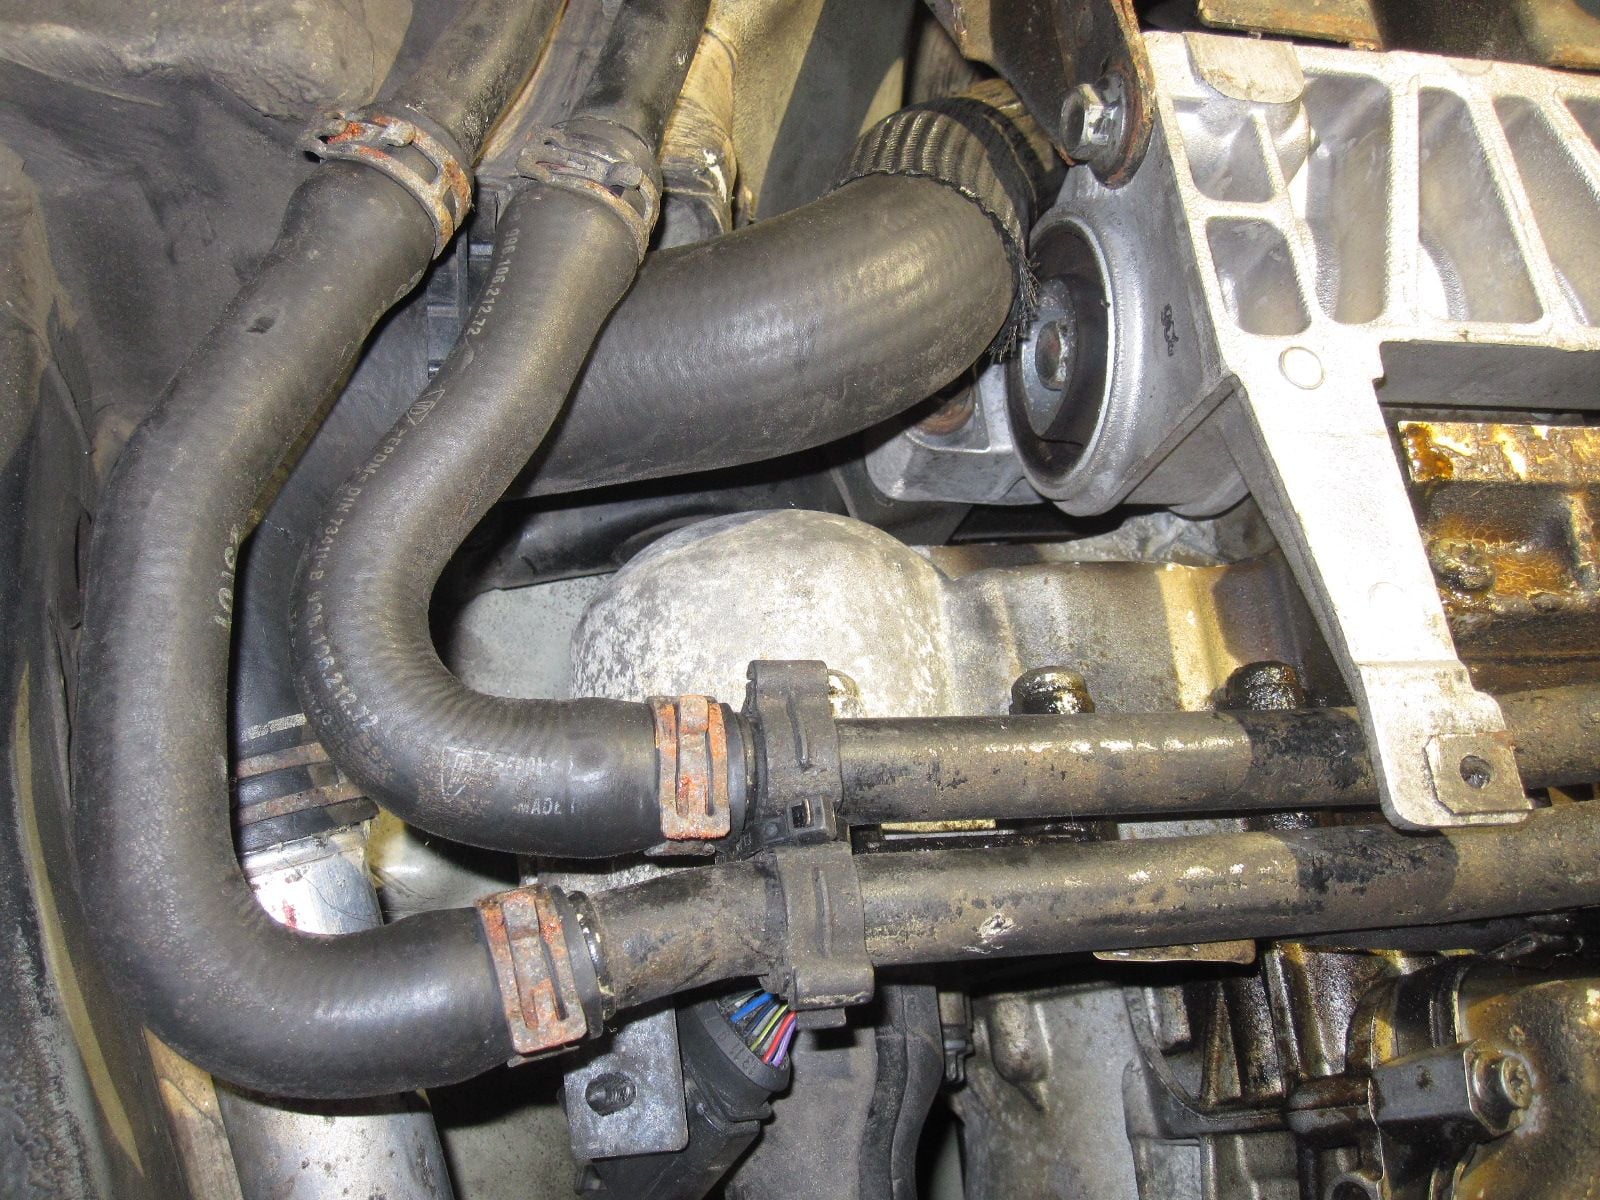
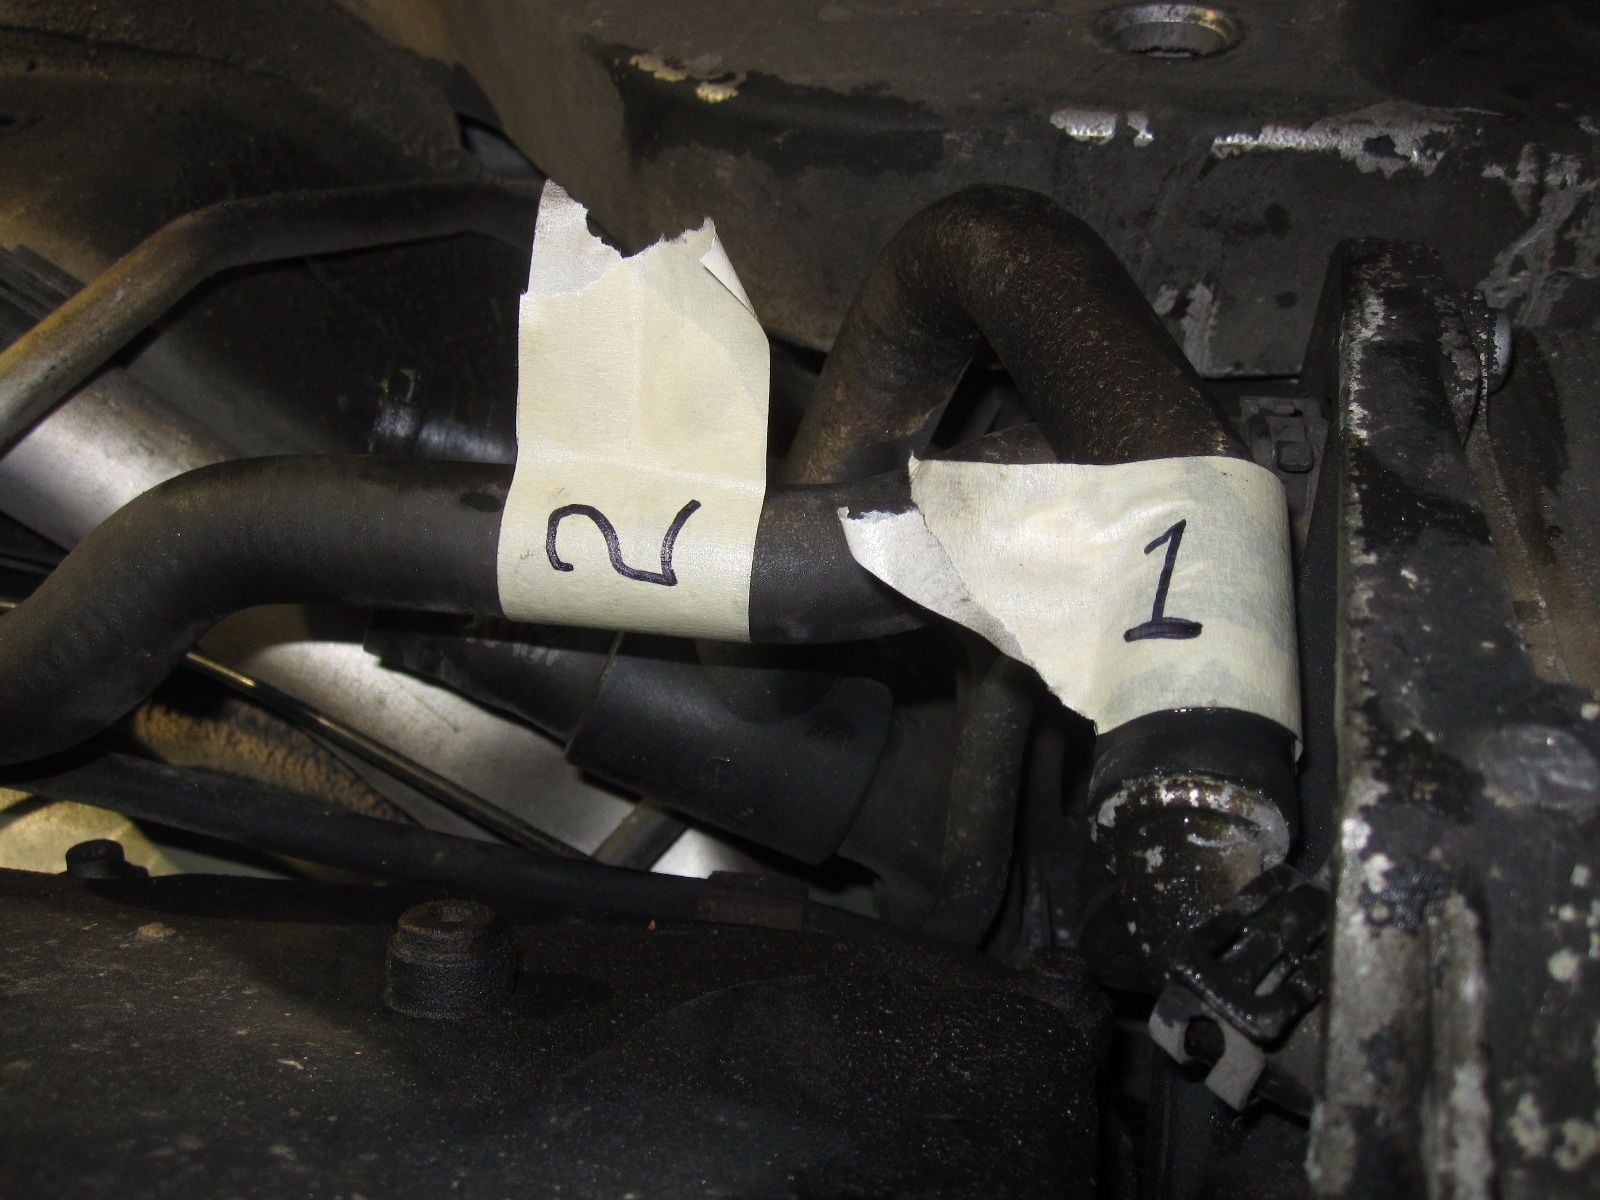
After I removed the 10 or so bolts, I then had to remove the two hoses on the side, from the tubes on the engine side.
I labeled the hoses, just so I didn't confuse them.
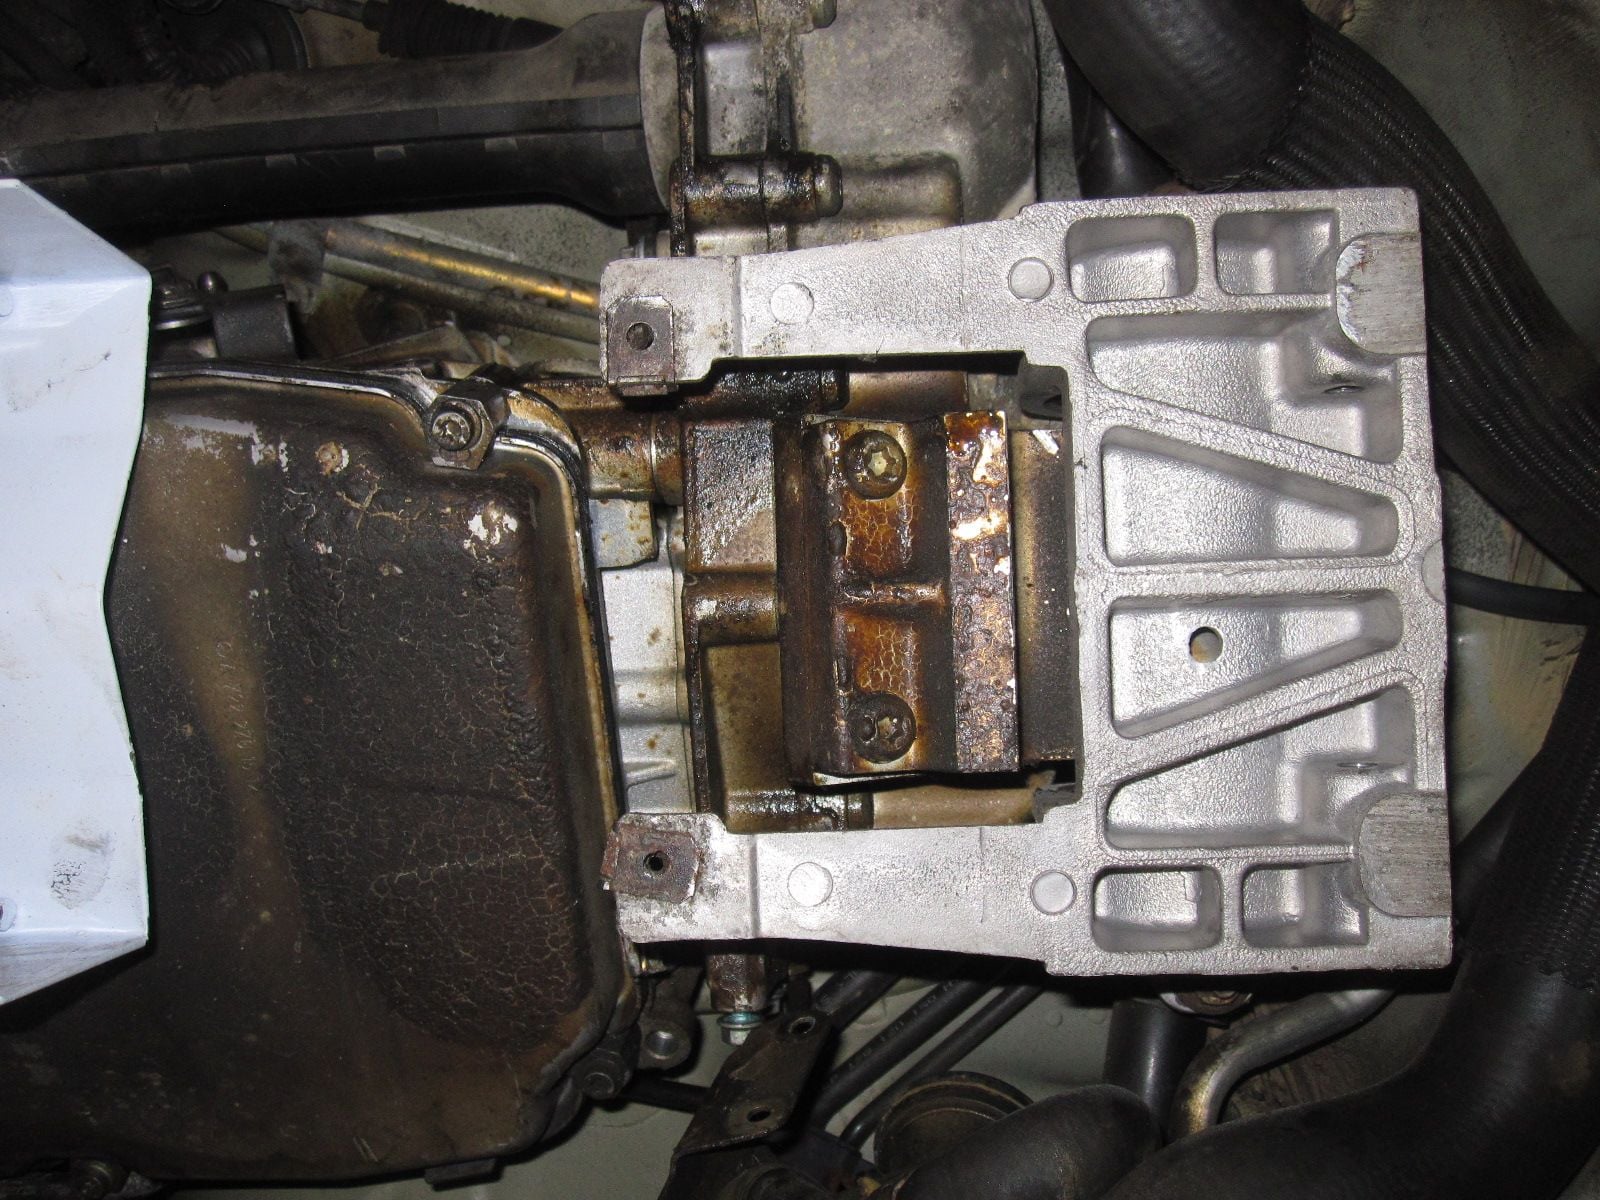
After I removed the transmission, I needed to remove the adaptor. I put the bolts in the adapter and proceeded to remove the ones holding the adapter to the engine.
Here is a close up of the triple square bit that is needed to remove the internal bolts. DON'T USE THE WRONG BIT!!! I found mine on Amazon.
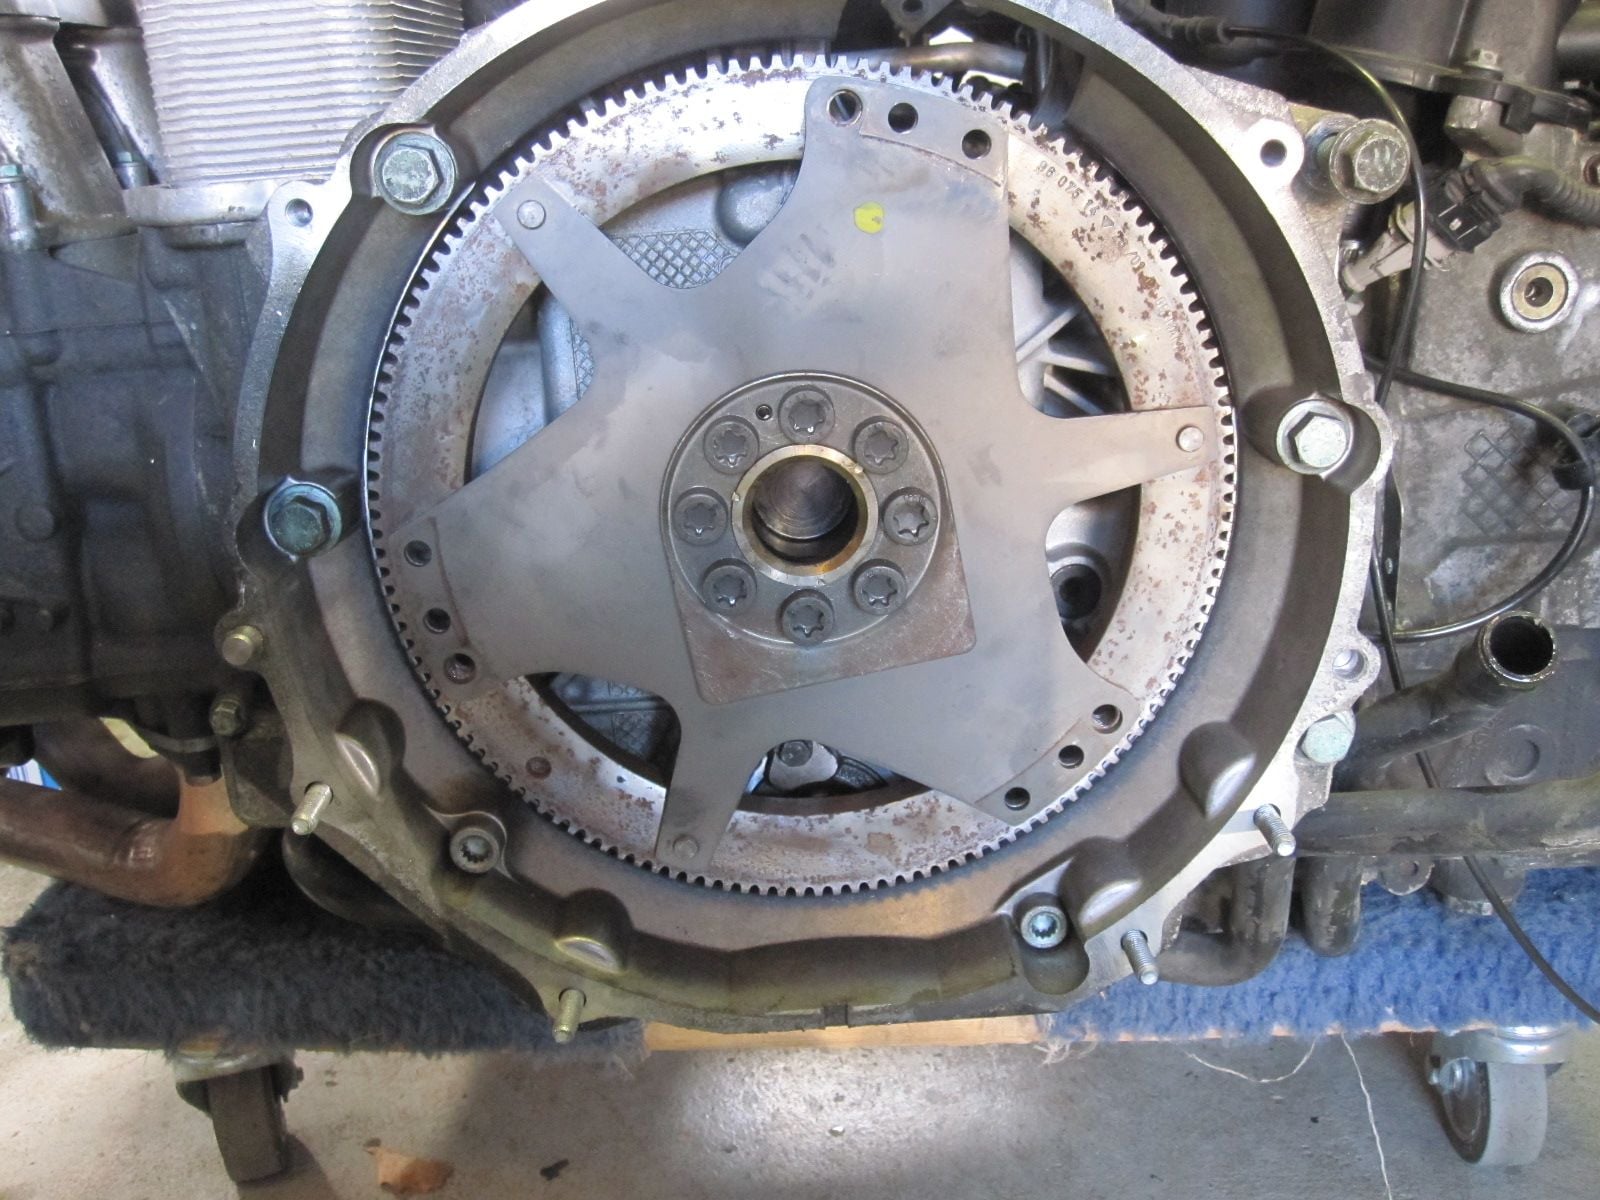
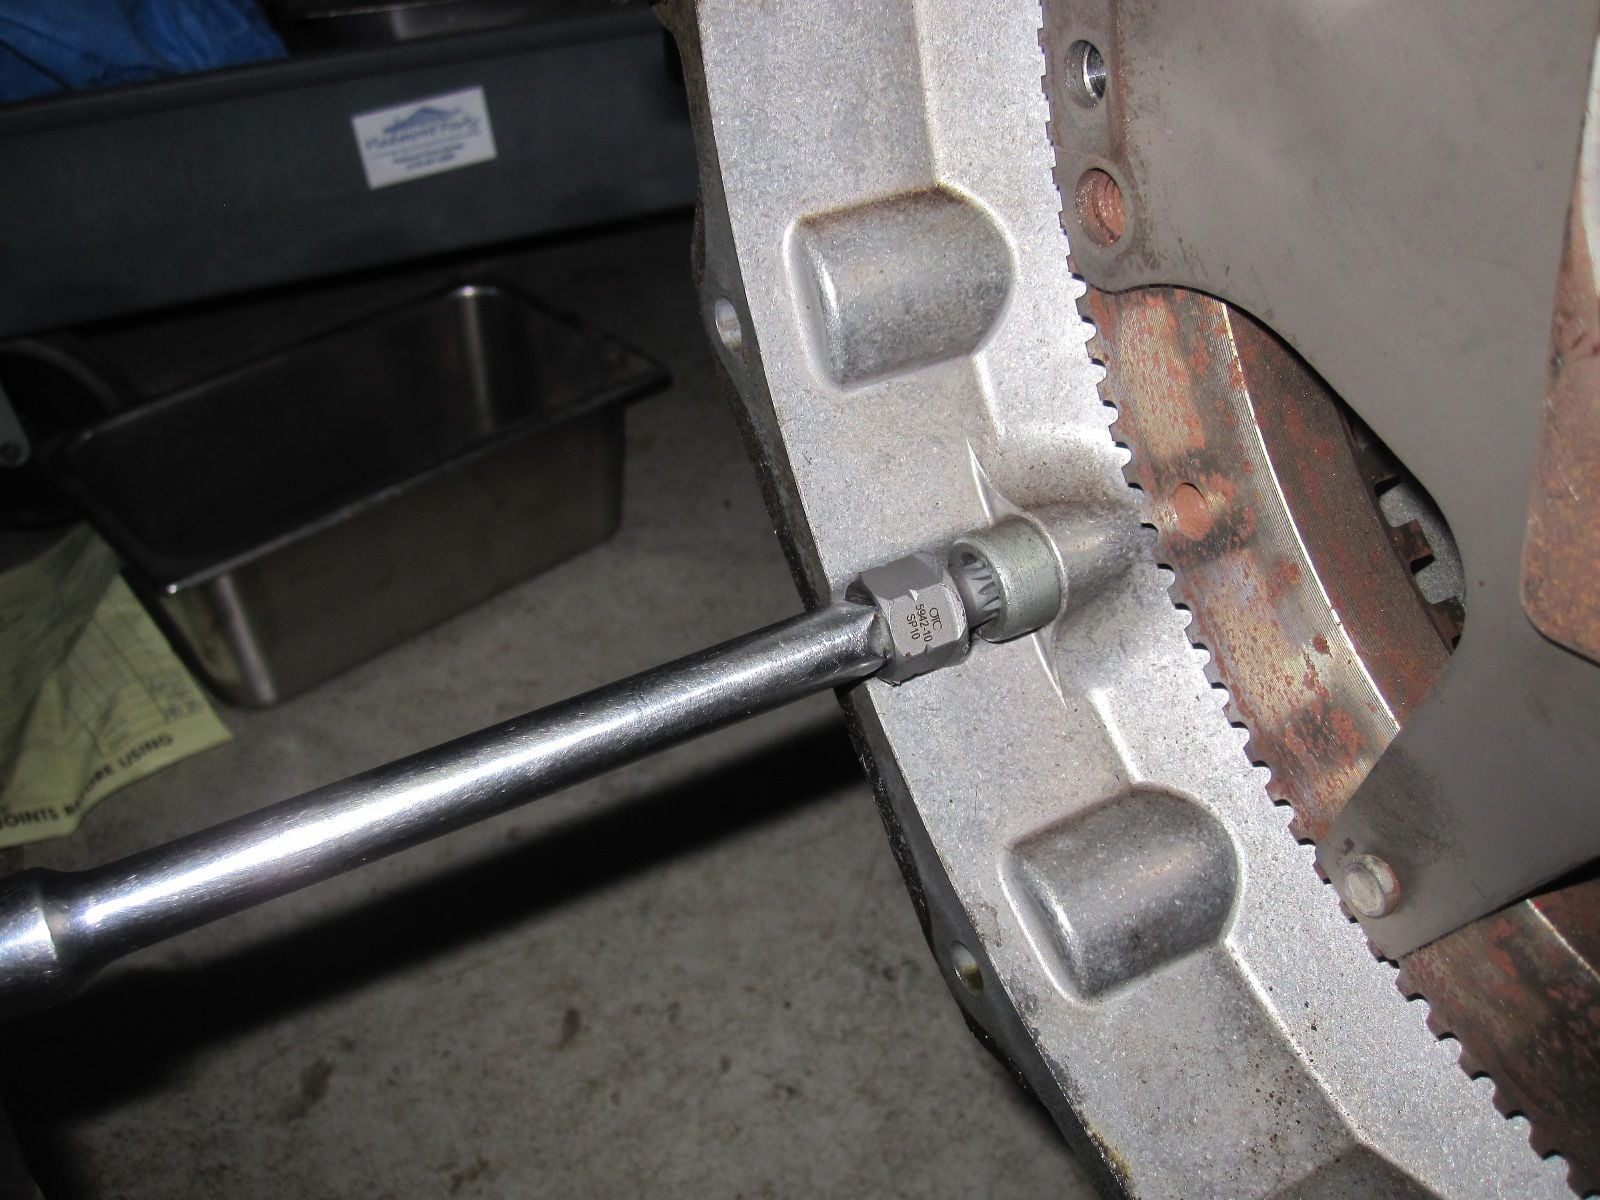
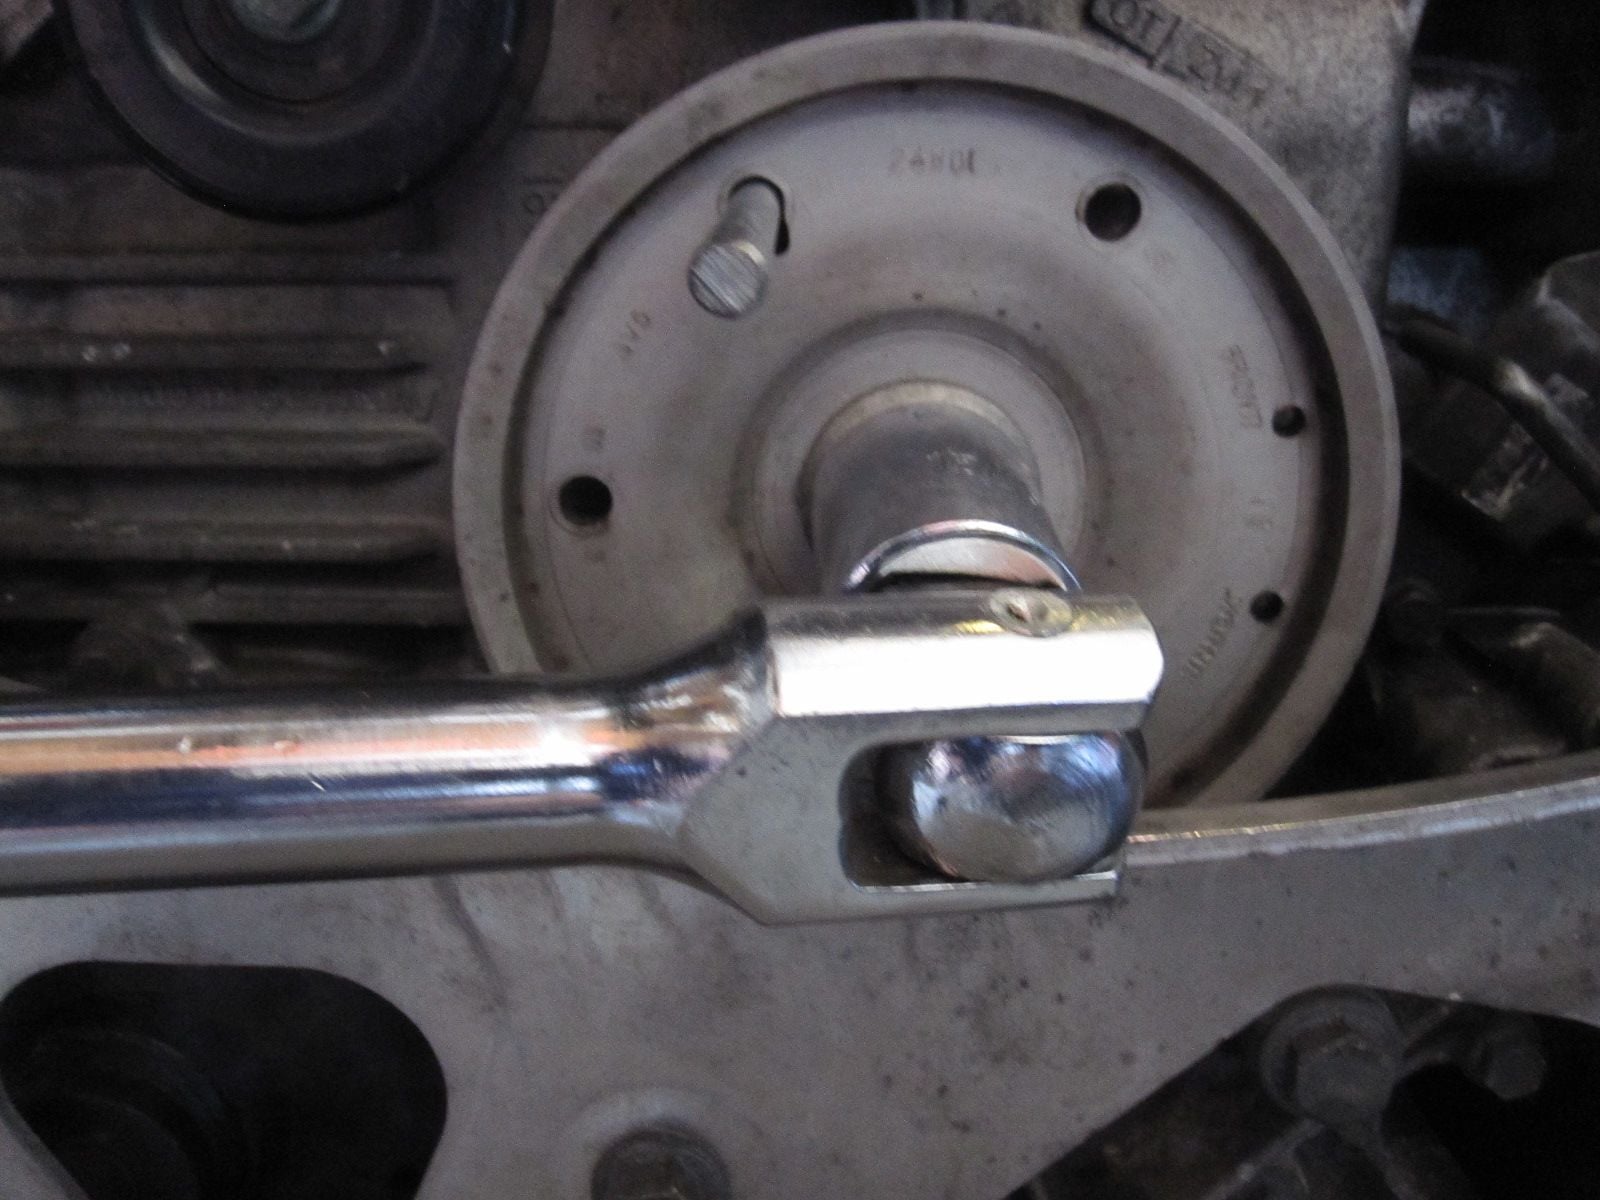
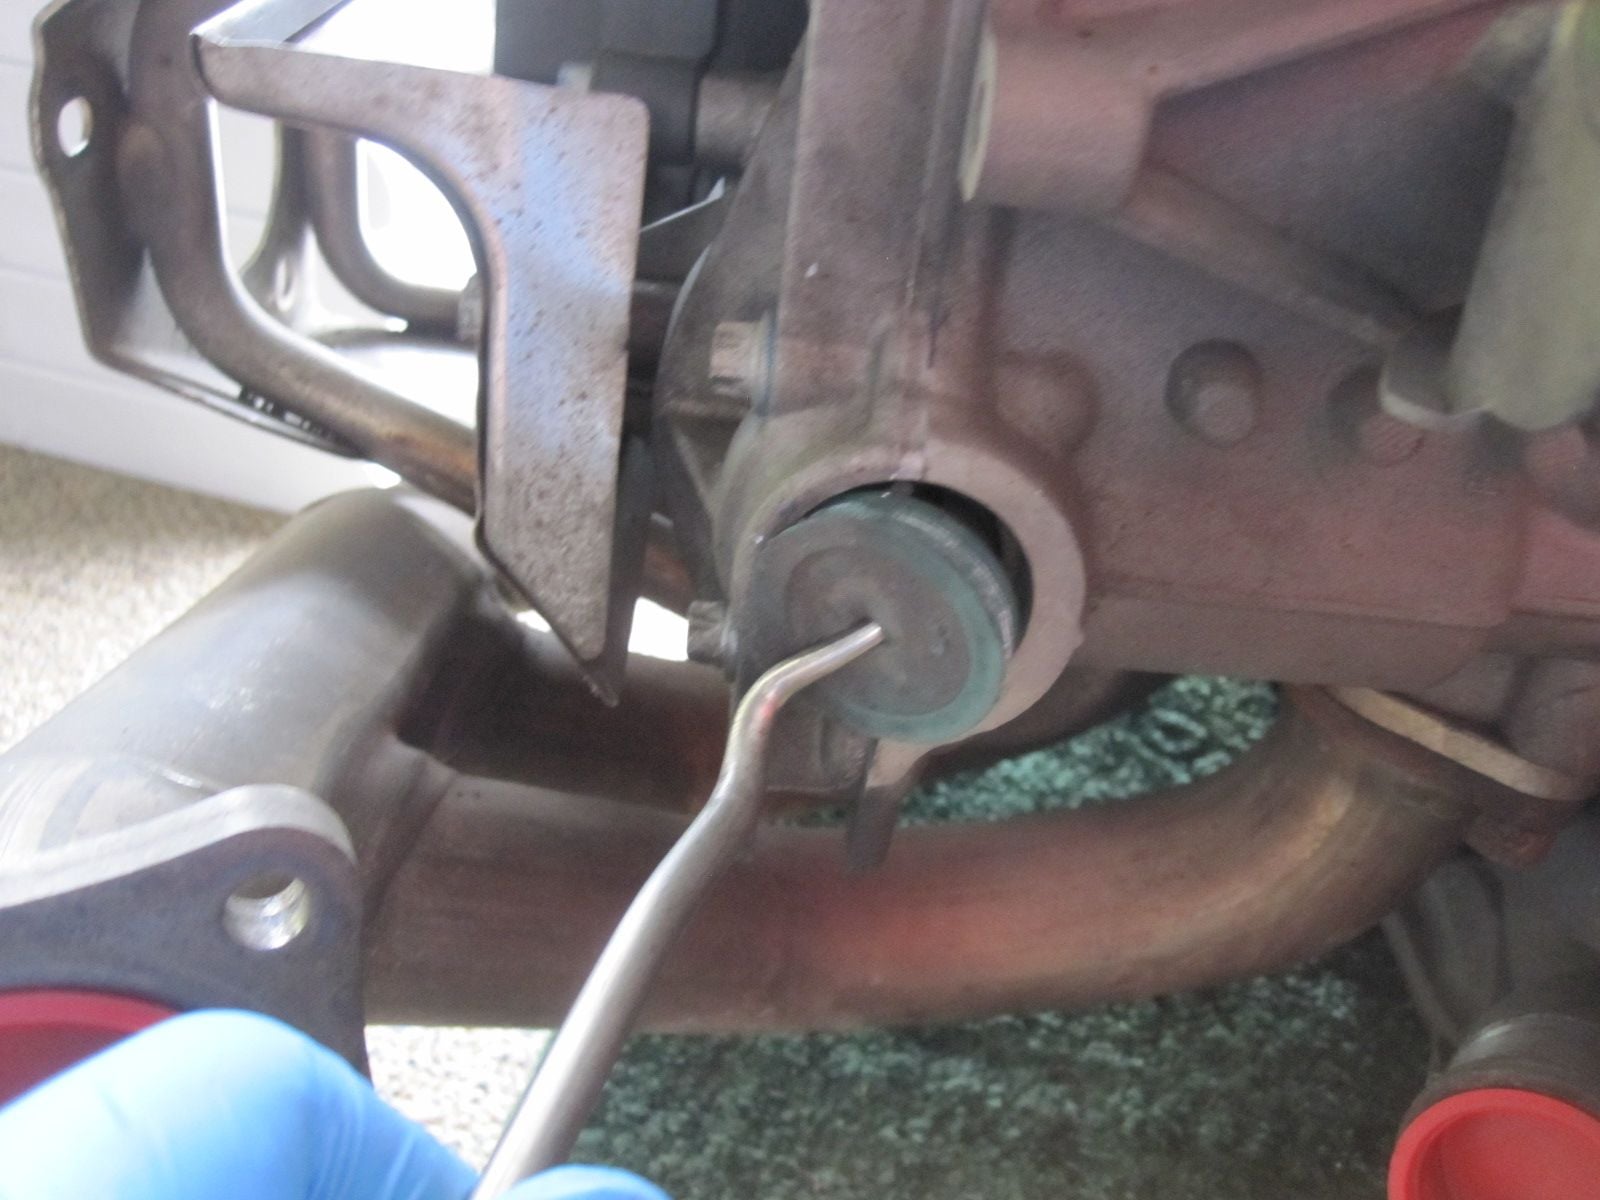
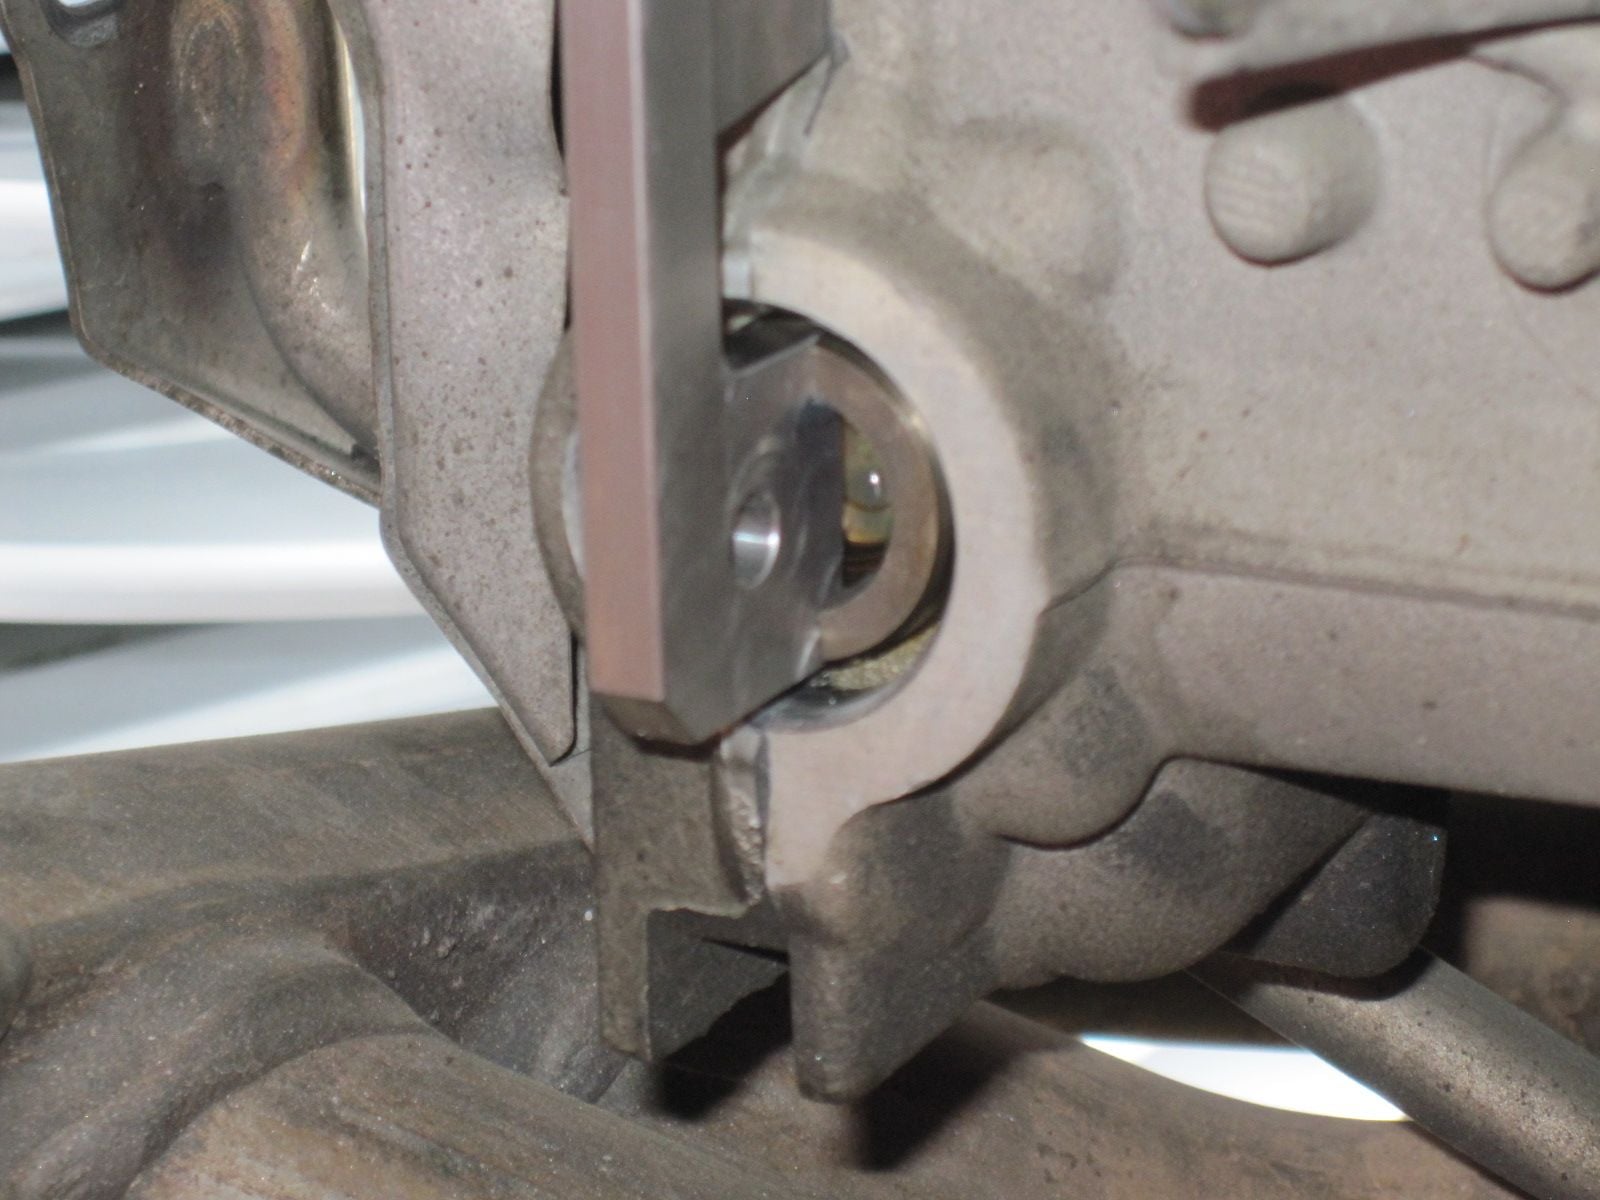
Trans and adaptor removed. Now for the flex plate. To remove the 8 bolts, you need to lock the crank. I used a short piece of the 5/16" rod, to insert into the hold on the pulley.
I used my large socket (1 1/4" I think) to rotate the engine at TDC. Once there, I inserted the rod into the tear drop shaped hole and into the case.
Now that the flex plate is removed, I turned my attention to the replacement engine. More on that next.....
The replacement engine did not come with a starter, so I will be moving the existing starter to the replacement engine. However, before doing that, I have plans to do some work replacing some stuff on the replacement engine. Specifically, and in no certain order....
1. AOS
2. Water Pump
3. Thermostadt
4. Spark Plugs
5. O-Rings on Oil Cooler
6. AOS hoses (these are a pain to get to with the engine in the car. Cheap to replace)
7. Alternator (the replacement one was slipping, will xfer current one to replacement engine)
8. Power Steering Pump (it appeared that the replacement engine had fluid that was leaking)
9. Flex Plate to Crank bolts (Do not reusee these...buy new. They are cheap.)
10. RMS - Shows no sign of leaking.
11. IMS....yes, we all knew it was coming...But WAIT...there is an issue with this....
12. Maybe more stuff....who knows...
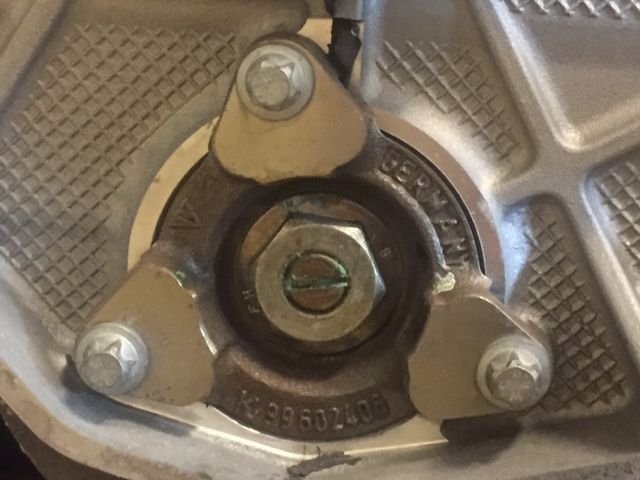
Here is a picture of the IMS bearing and cover.
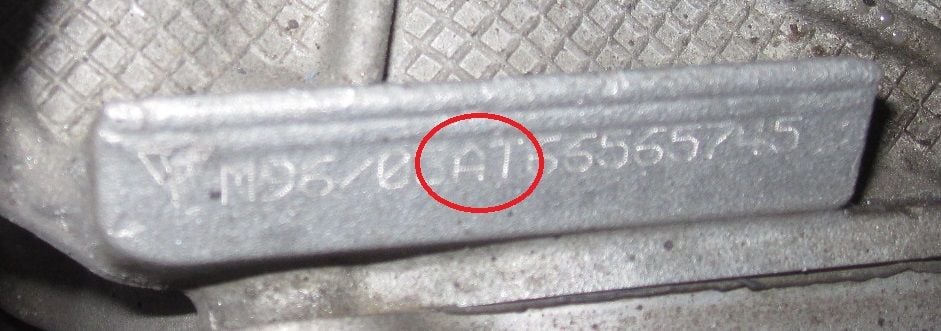
I had already ordered my replacement IMS bearing from Pelican Parts. I noticed that my nut was MUCH bigger that what the book mentioned should be there. Curious..I looked at the engine number on the bottom. First time....
Well...what did I find??? My replacement engine, is just that. A factory refurbished 3.6L WITH an upgraded (non removable) IMSB. That is what the AT means in the number. This is much more sturdier than the single or double row IMBS that came on early 996s. Unfortunately, I have no idea how many miles are on this engine. BUT..I shouldn't have any issues in the foreseeable future.
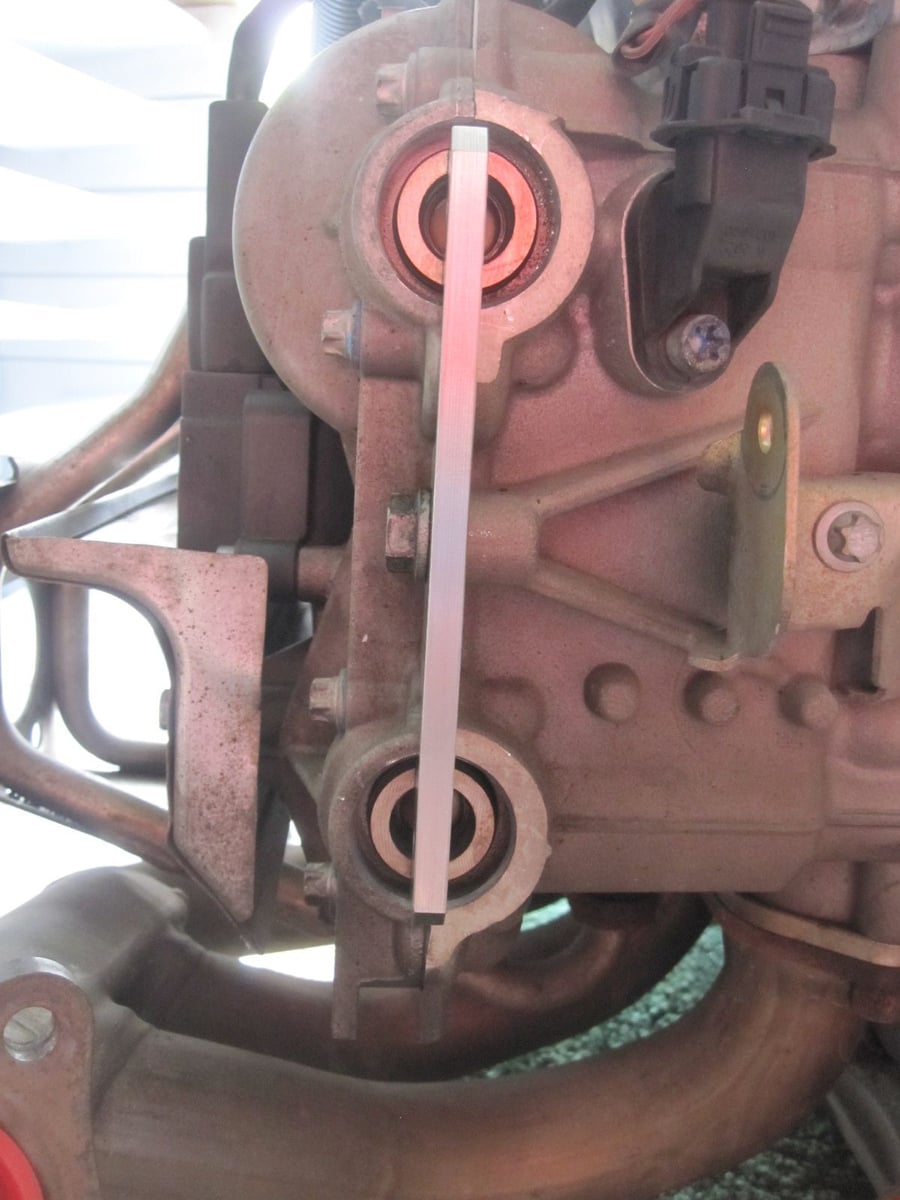
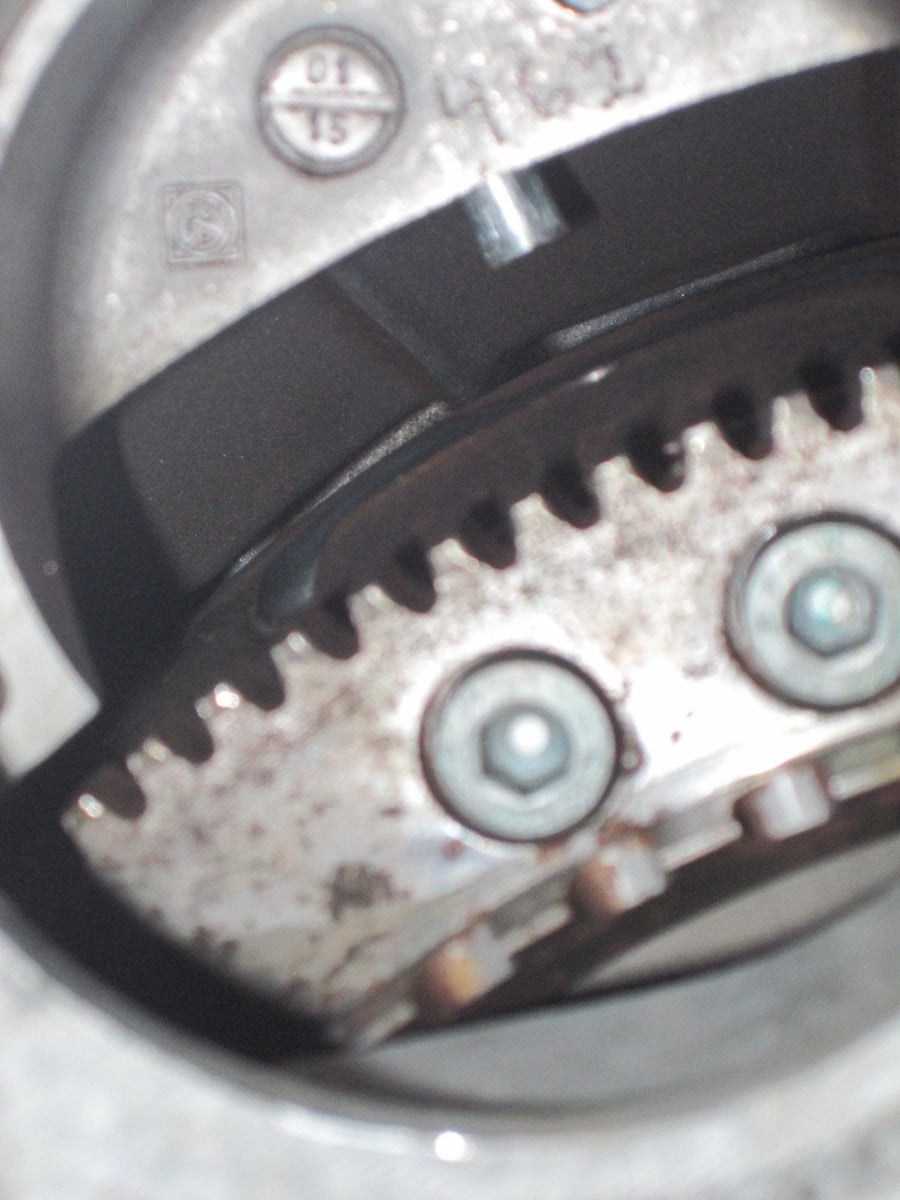
Before discovering my good fortune, I had already removed the cam covers and locked the cam in place.
Cam locking tool in place on the lower cam.
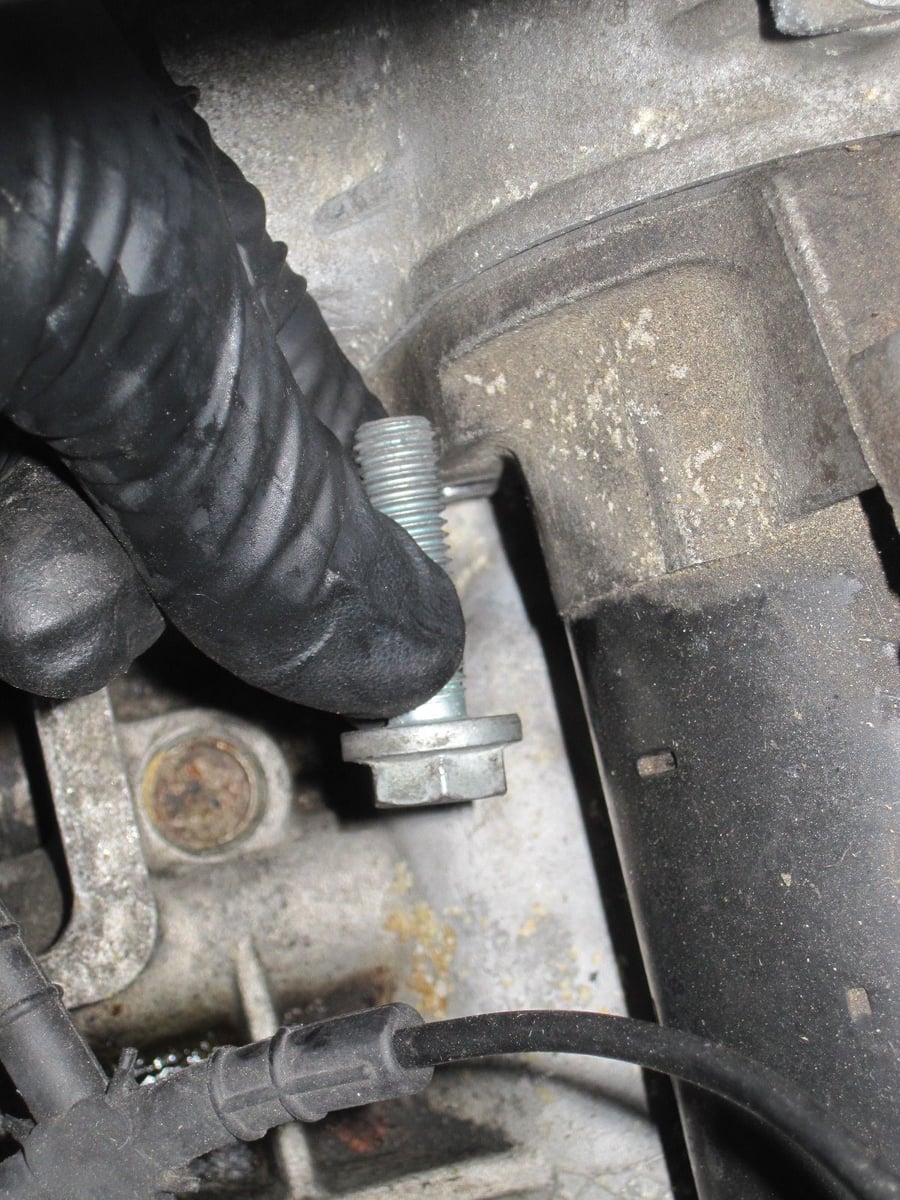
I had to steal the bolt off of the old engine to attach the locking tool.
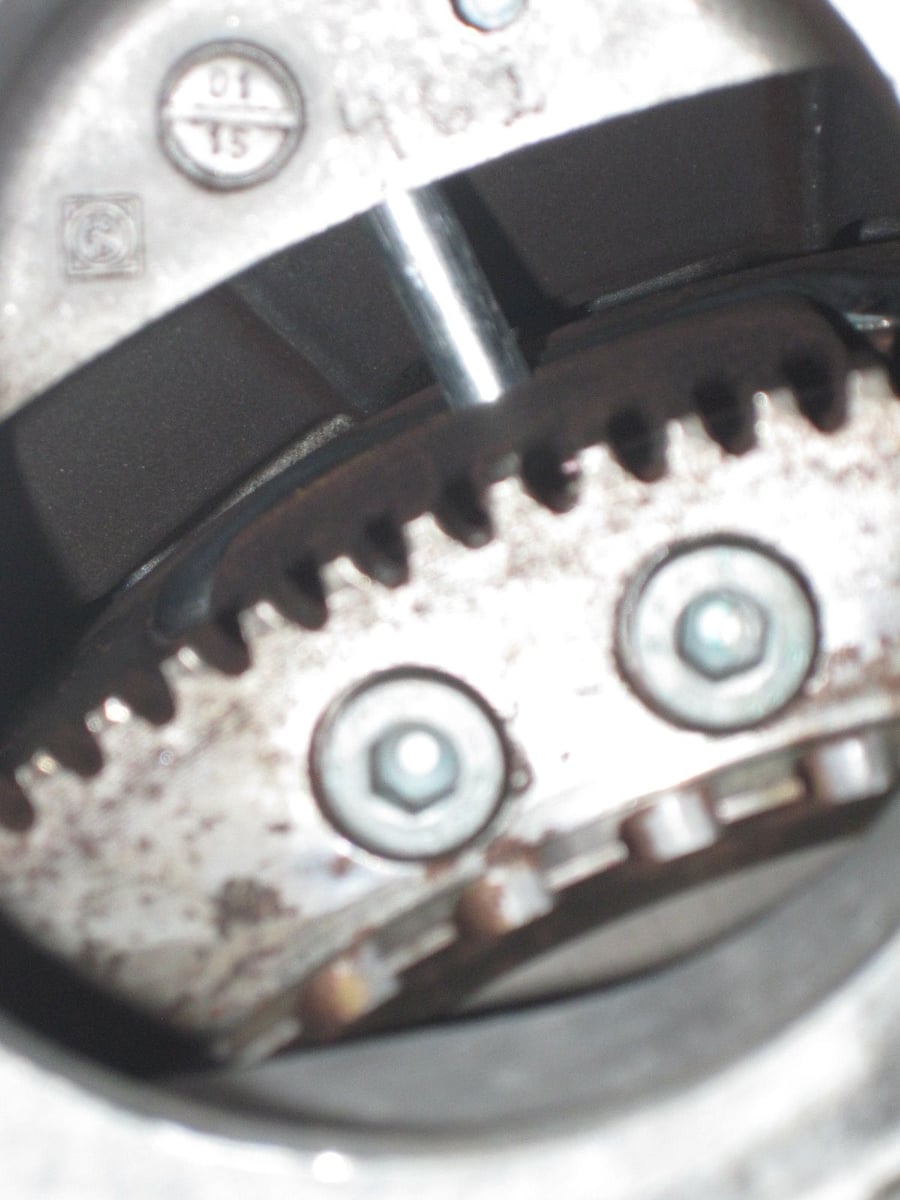
Here is the tool in place. I had to rock the crank back and forth a little to get it to line up and lock it in place.
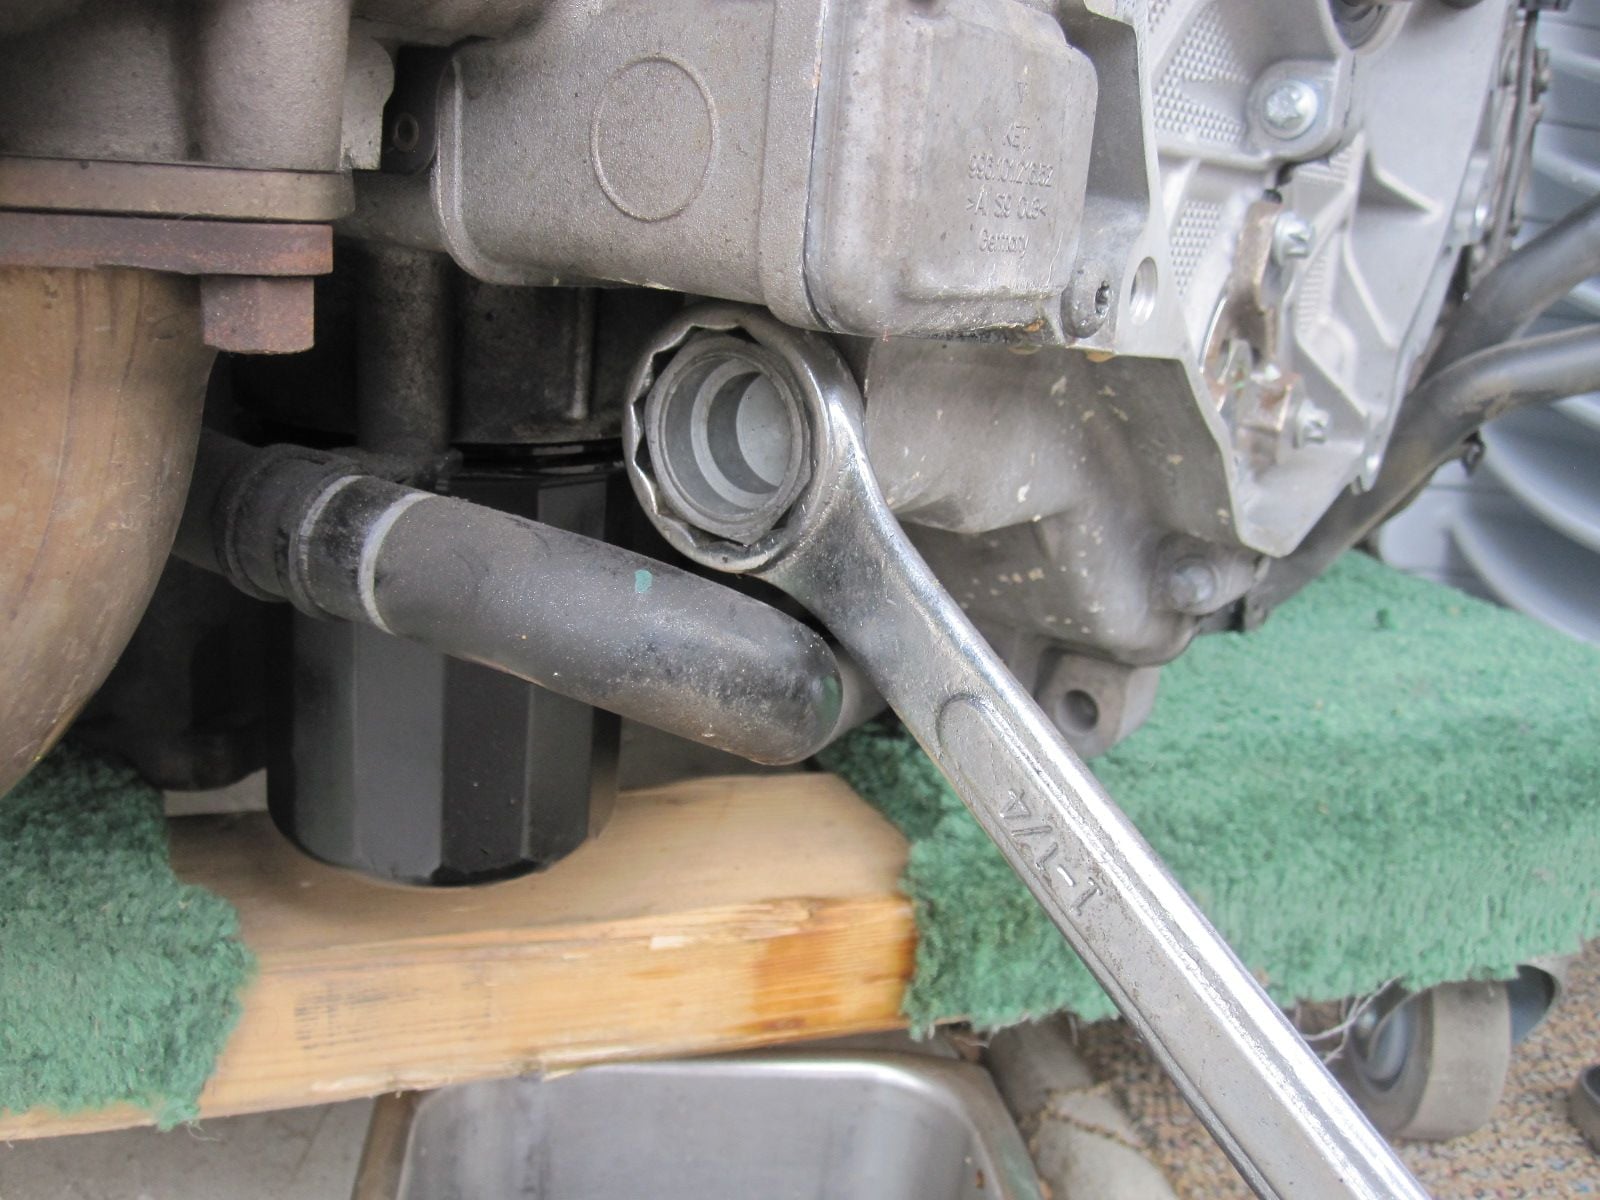
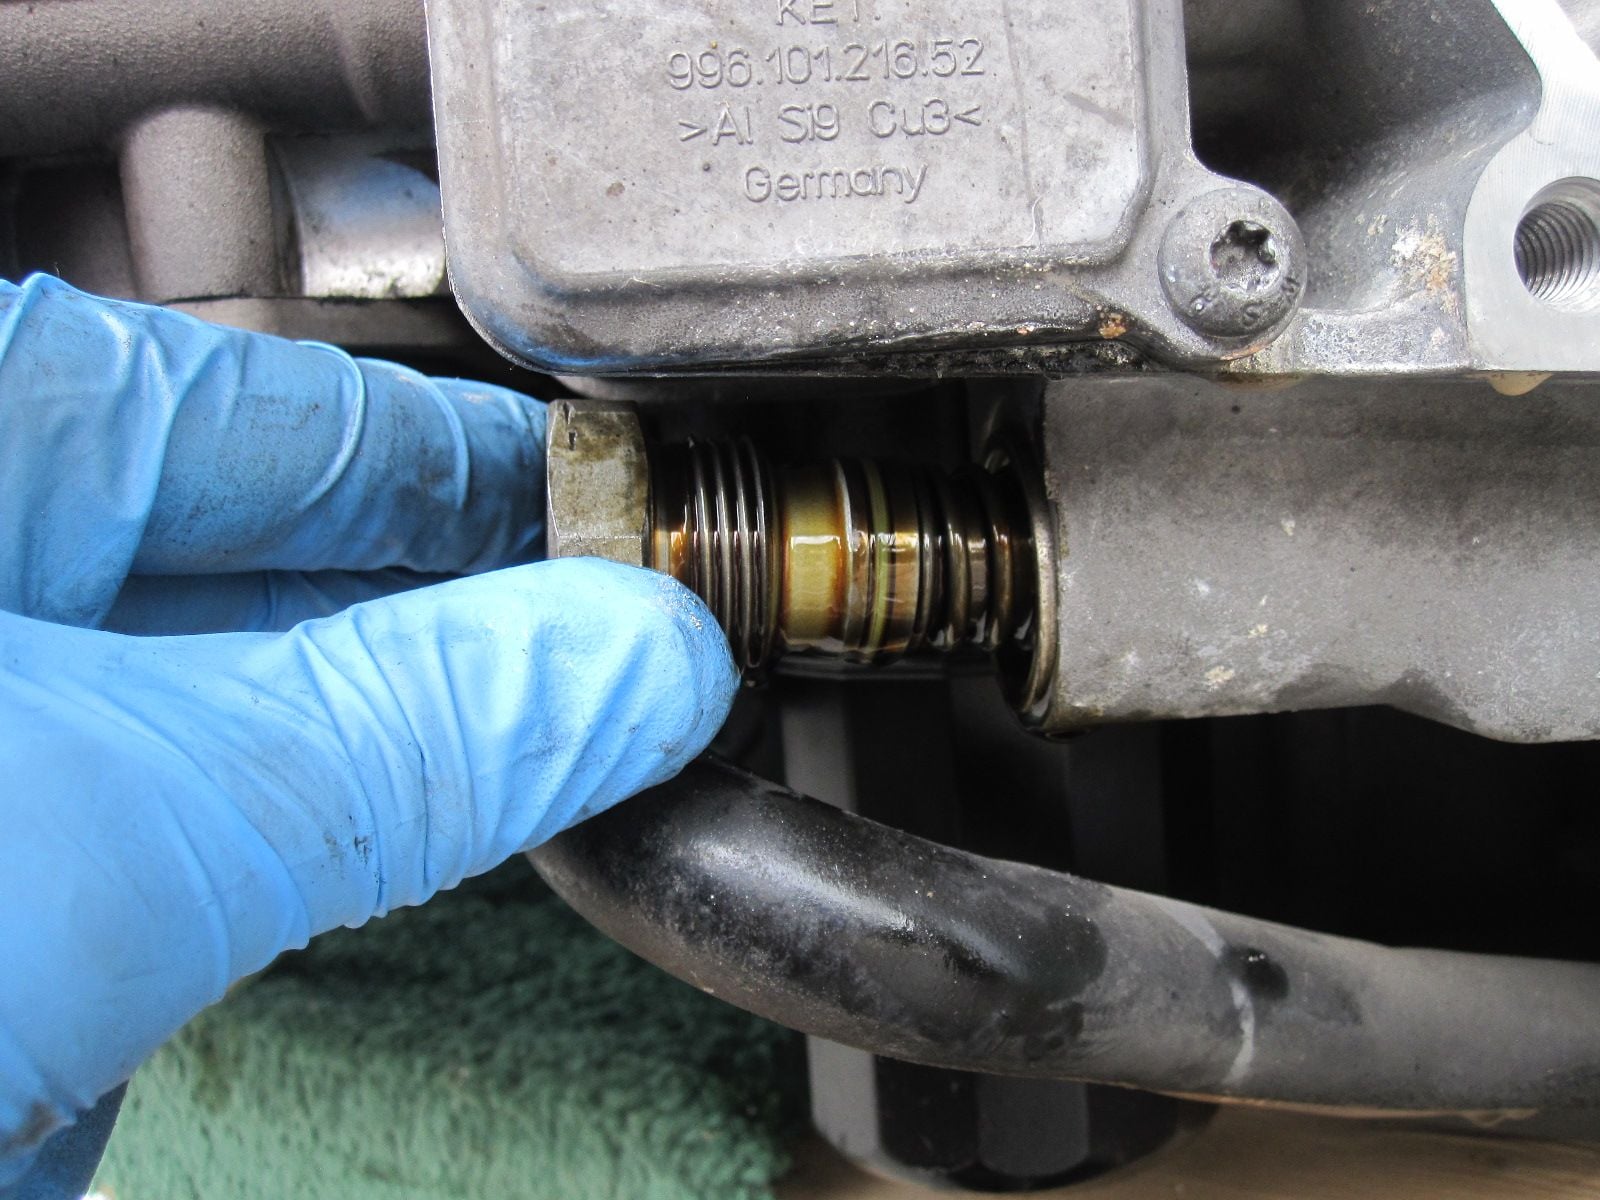
I had already removed the chain tensioners. Oil will seep out. Keep track of which one goes where. They are different.
Pulls right out...
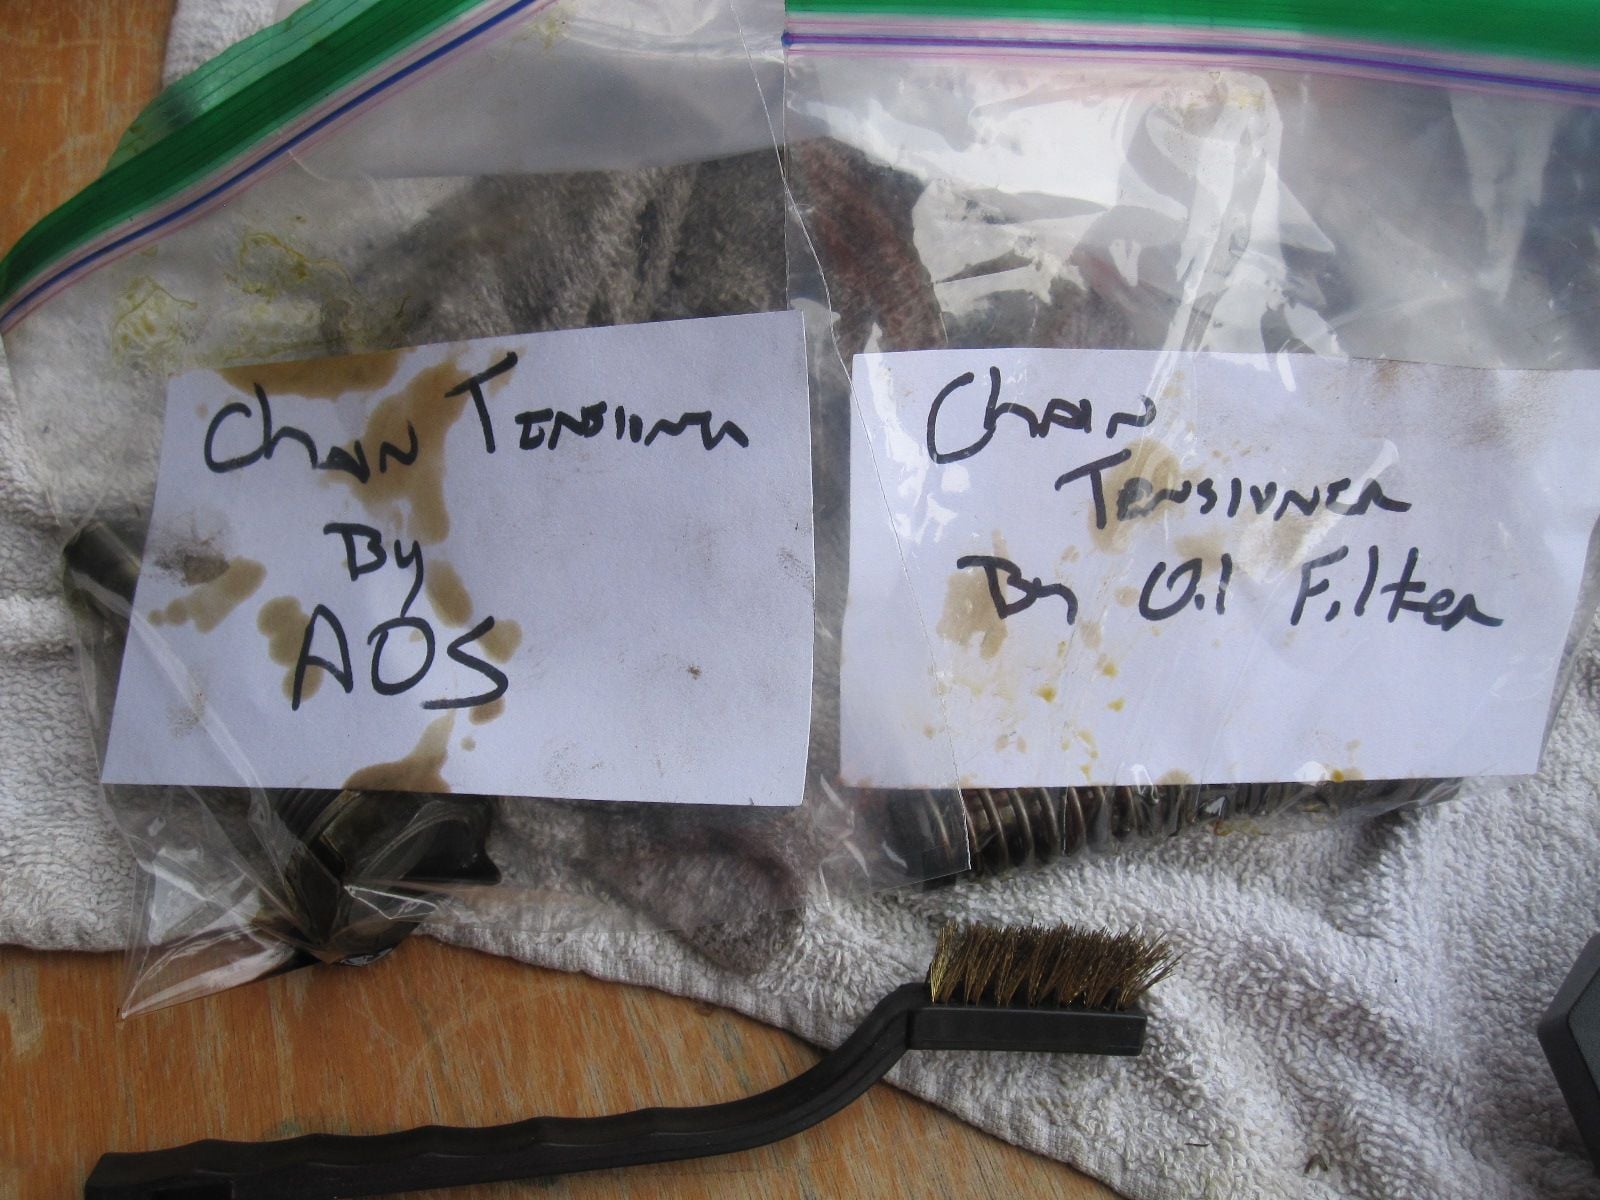
Here is my scientific way of keeping them apart. Baggies and note cards, with a description of where they go.
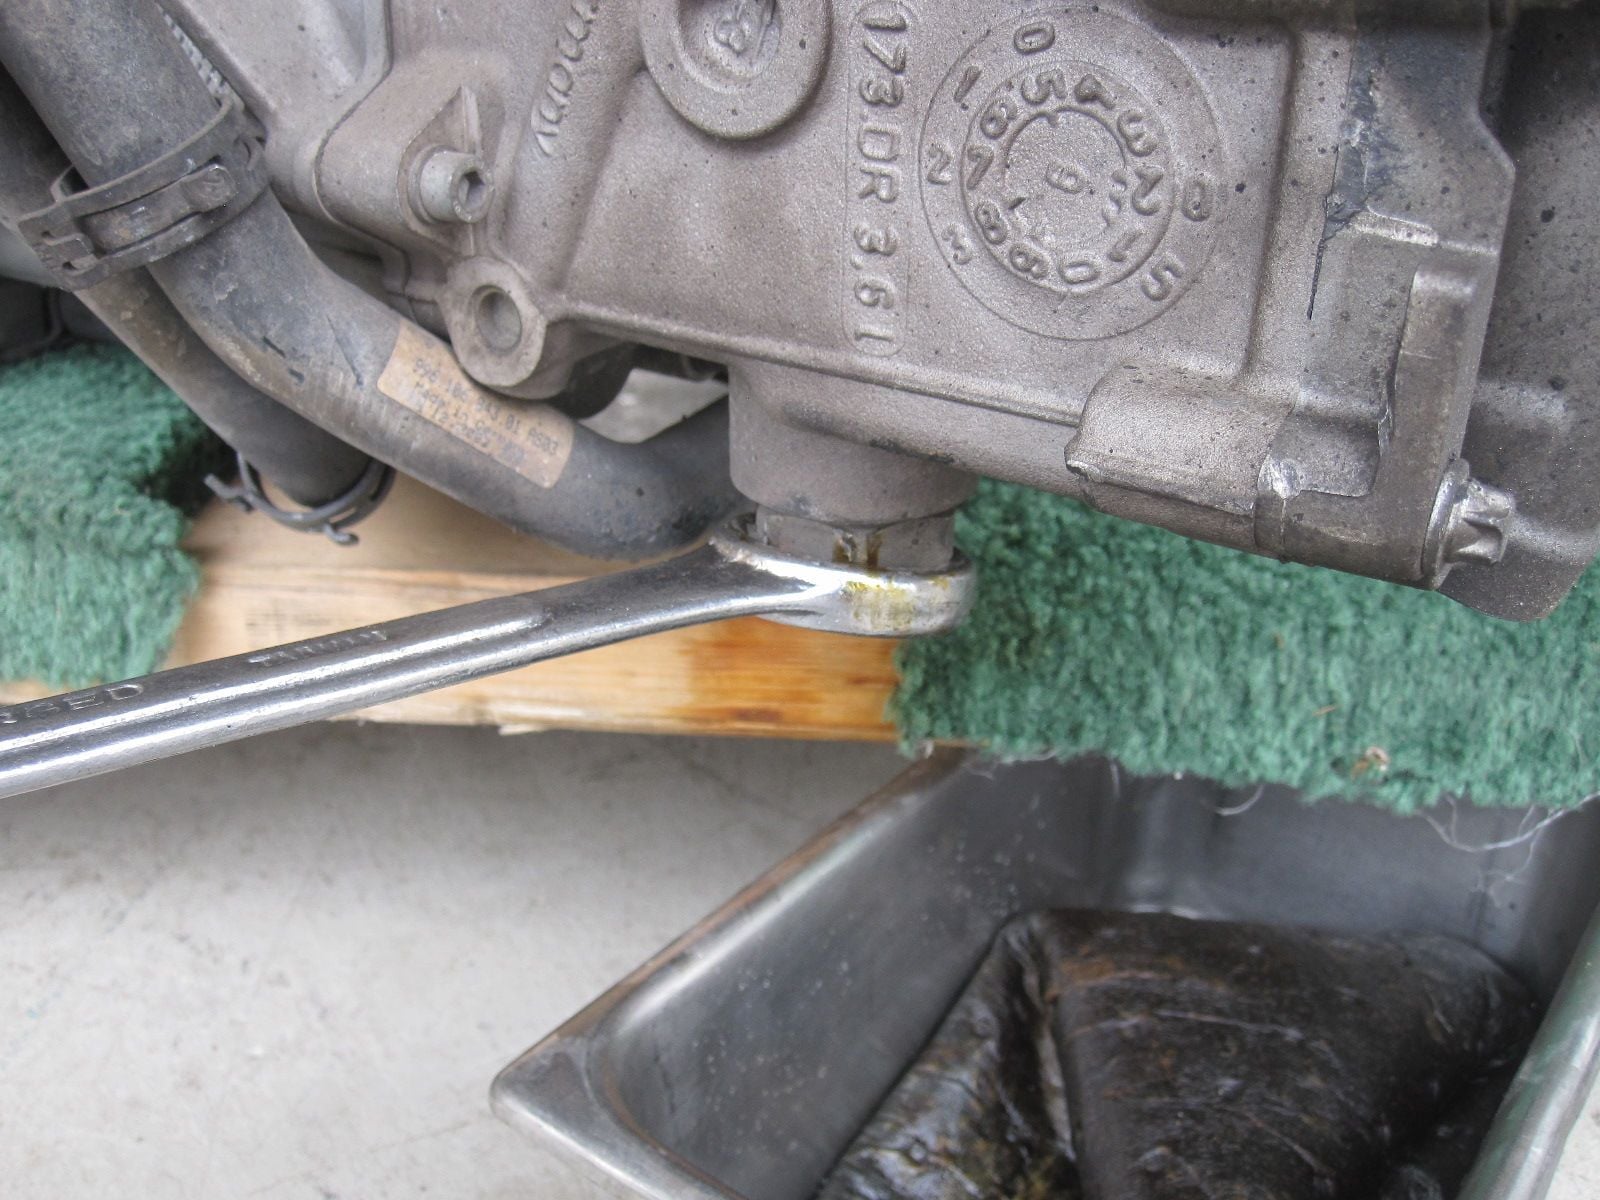
Now that my IMBS didn't need to be removed, I switched to the Rear Main Seal. There was no evidence of a leak, but not knowing how many miles were on the replacement engine, I figured it was best. The PO said the engine had 70,000 miles on it. I assume, that since it came from a dismantler, the CAR had 70,000 miles on it. If I assume (I know...very dangerous) that half of those miles were on the car's original engine, then this one might have 35,000 or so on it. Just to be sure, I had the oil left in the oil filter housing sent off to Blackstone to be analyized, to see if there are any issues. Results should be coming in shortly, but the oil didn't look too used.
Awesome write up and pics. I am sure a lot of people will be referencing this in the future. I stumbled upon the thread and had to read it. Nice score for $10K
 04-06-2017, 06:45 PM


 Didn't you know that they'll break the first time you use them - or the second if you're lucky? The horror
  Just kidding
  This is a great write up and I'll be referencing it soon when I drop my engine. How high did the car have to be for the motor/tranny to clear? Also, I'd be a little wary of lowering the with that block in the center of the oil pan (maybe you didn't but that's what the picture implies)...I'd probably go at least to the outer edges - but it looks like it worked out for you...Thanks for the documentation