When you click on links to various merchants on this site and make a purchase, this can result in this site earning a commission. Affiliate programs and affiliations include, but are not limited to, the eBay Partner Network.
Over the years I've made a number of upgrades on my 2003 996.2 Targa that other owners might be interested in. These include:
Stereo/GPS and amplifier
Subwoofer
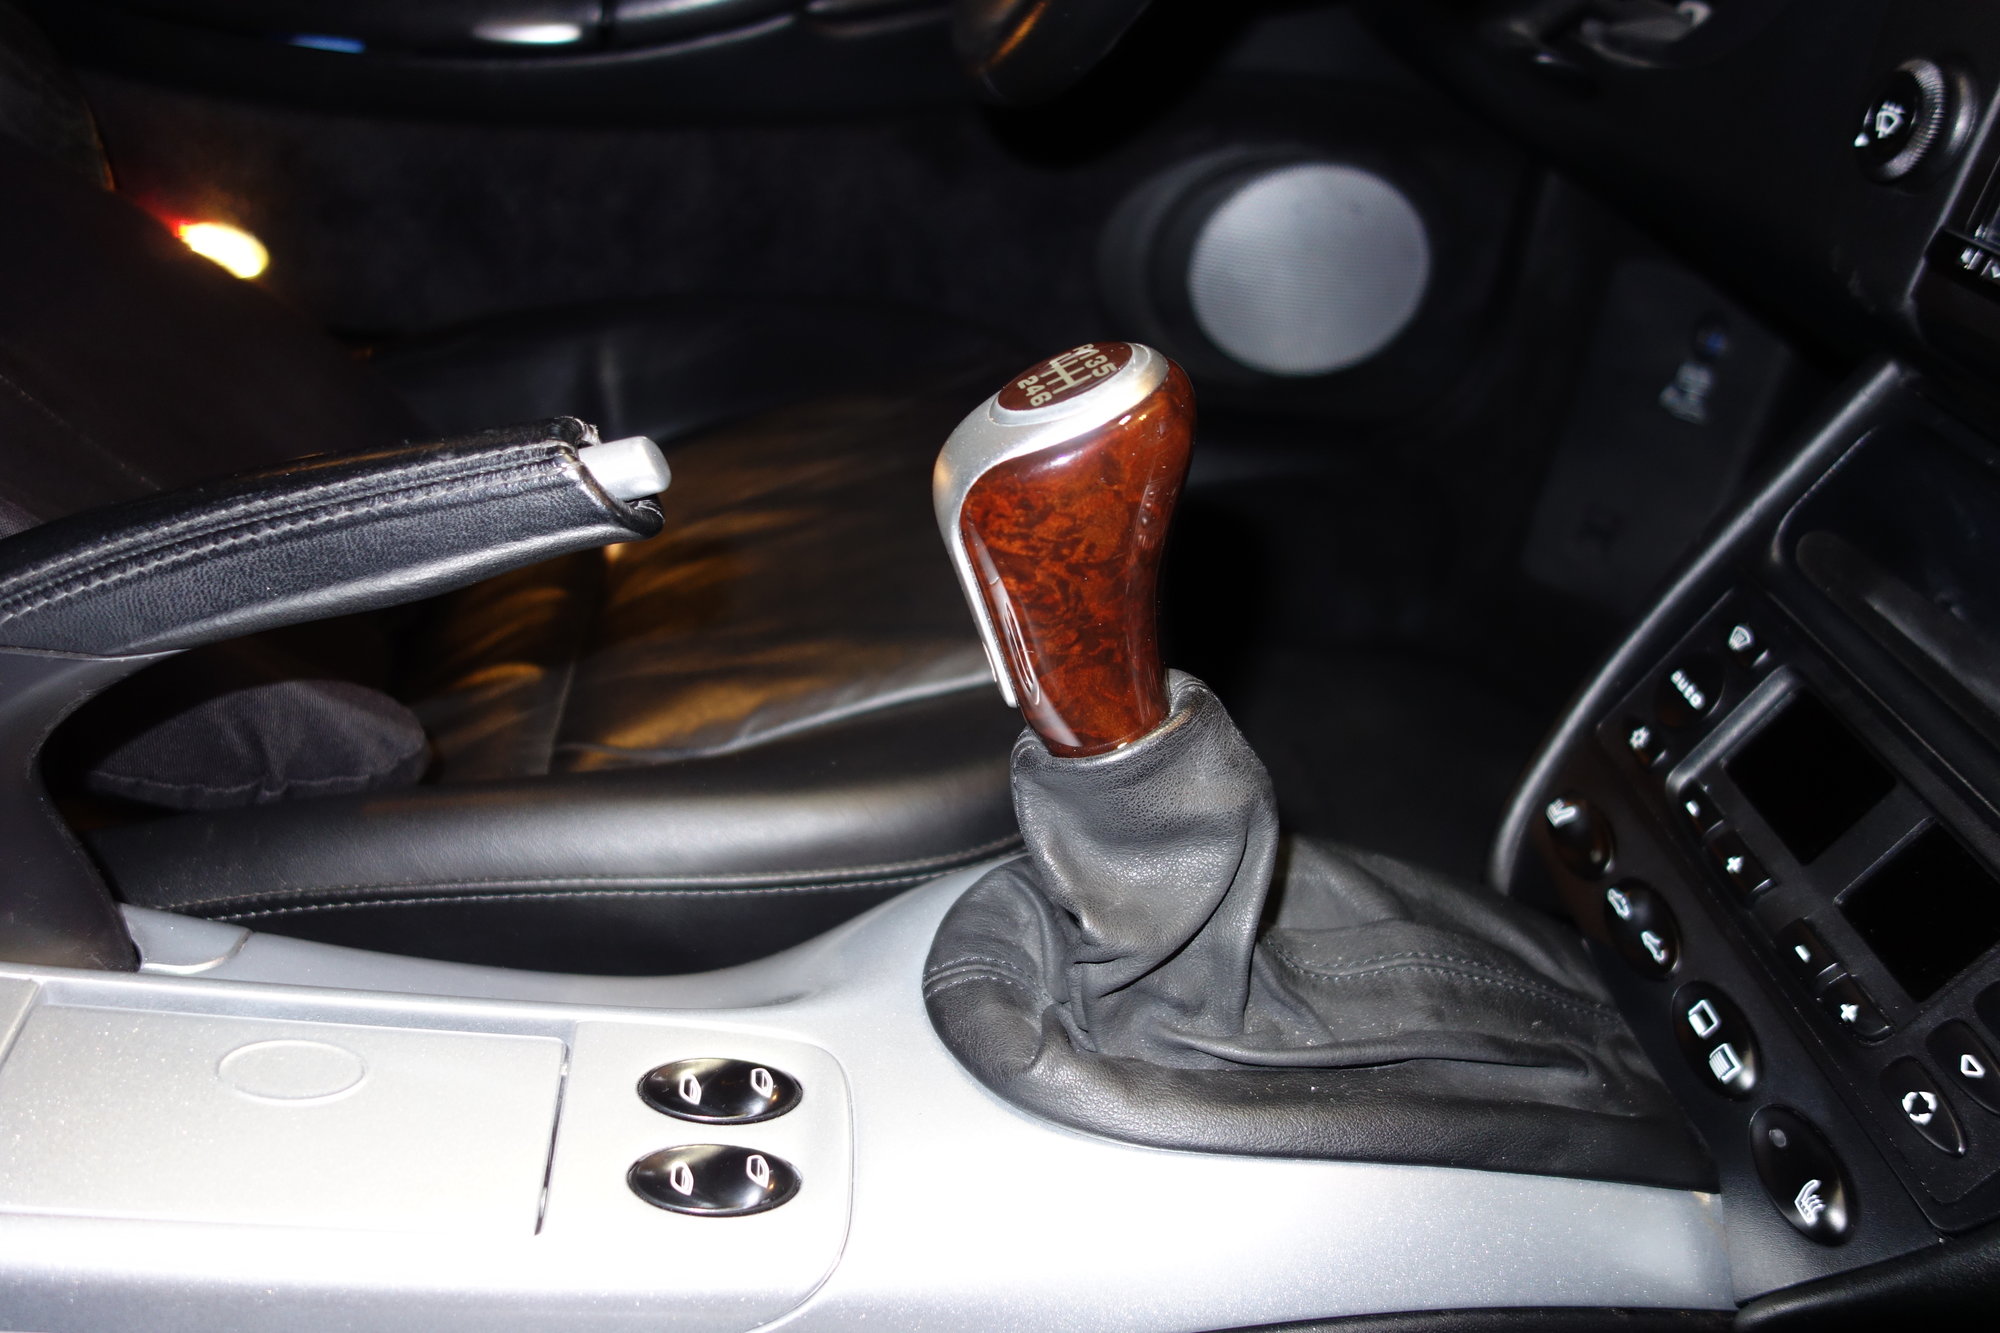
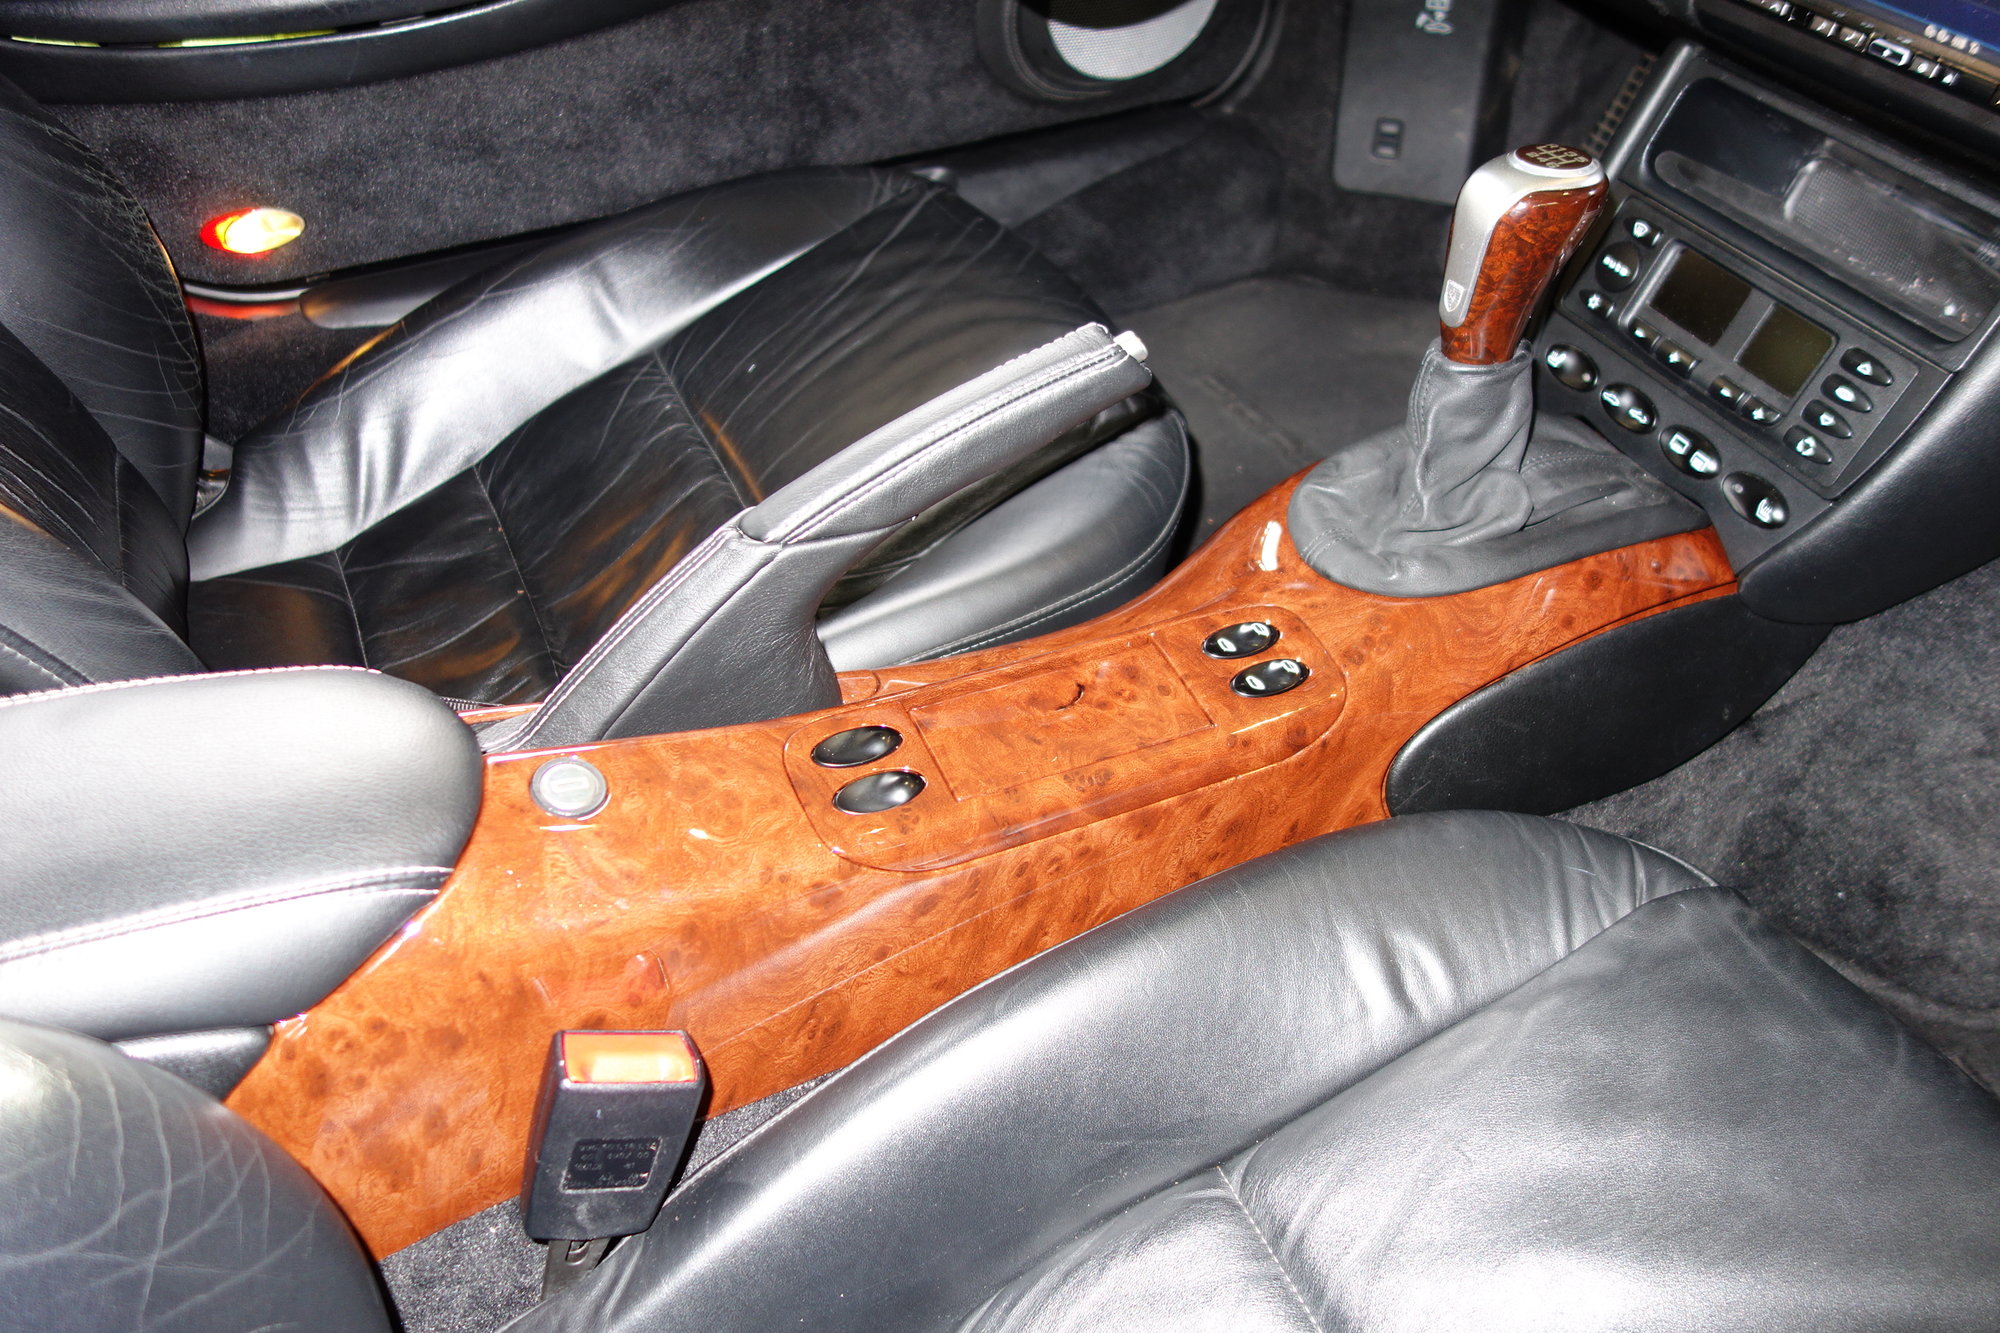
Wood shift ****
Short-shift-kit
Wood-look center console and ashtray
Leather-covered console lid
Leather-covered hand brake
Two-color leather steering wheel
Plastic ignition-key surround
White LEDs
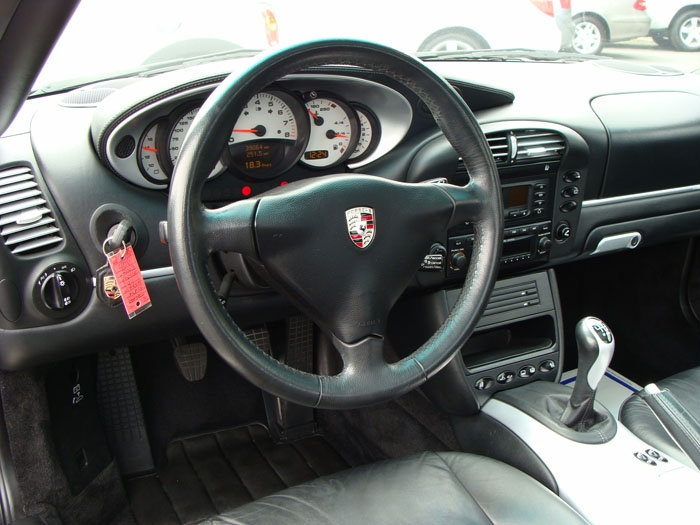
Here is the stock interior when I bought it. The leather was thin and shiny, there was a lot of plastic, and the aluminum-look shiny metal coating on the console looked chintzy to me. Stock interior
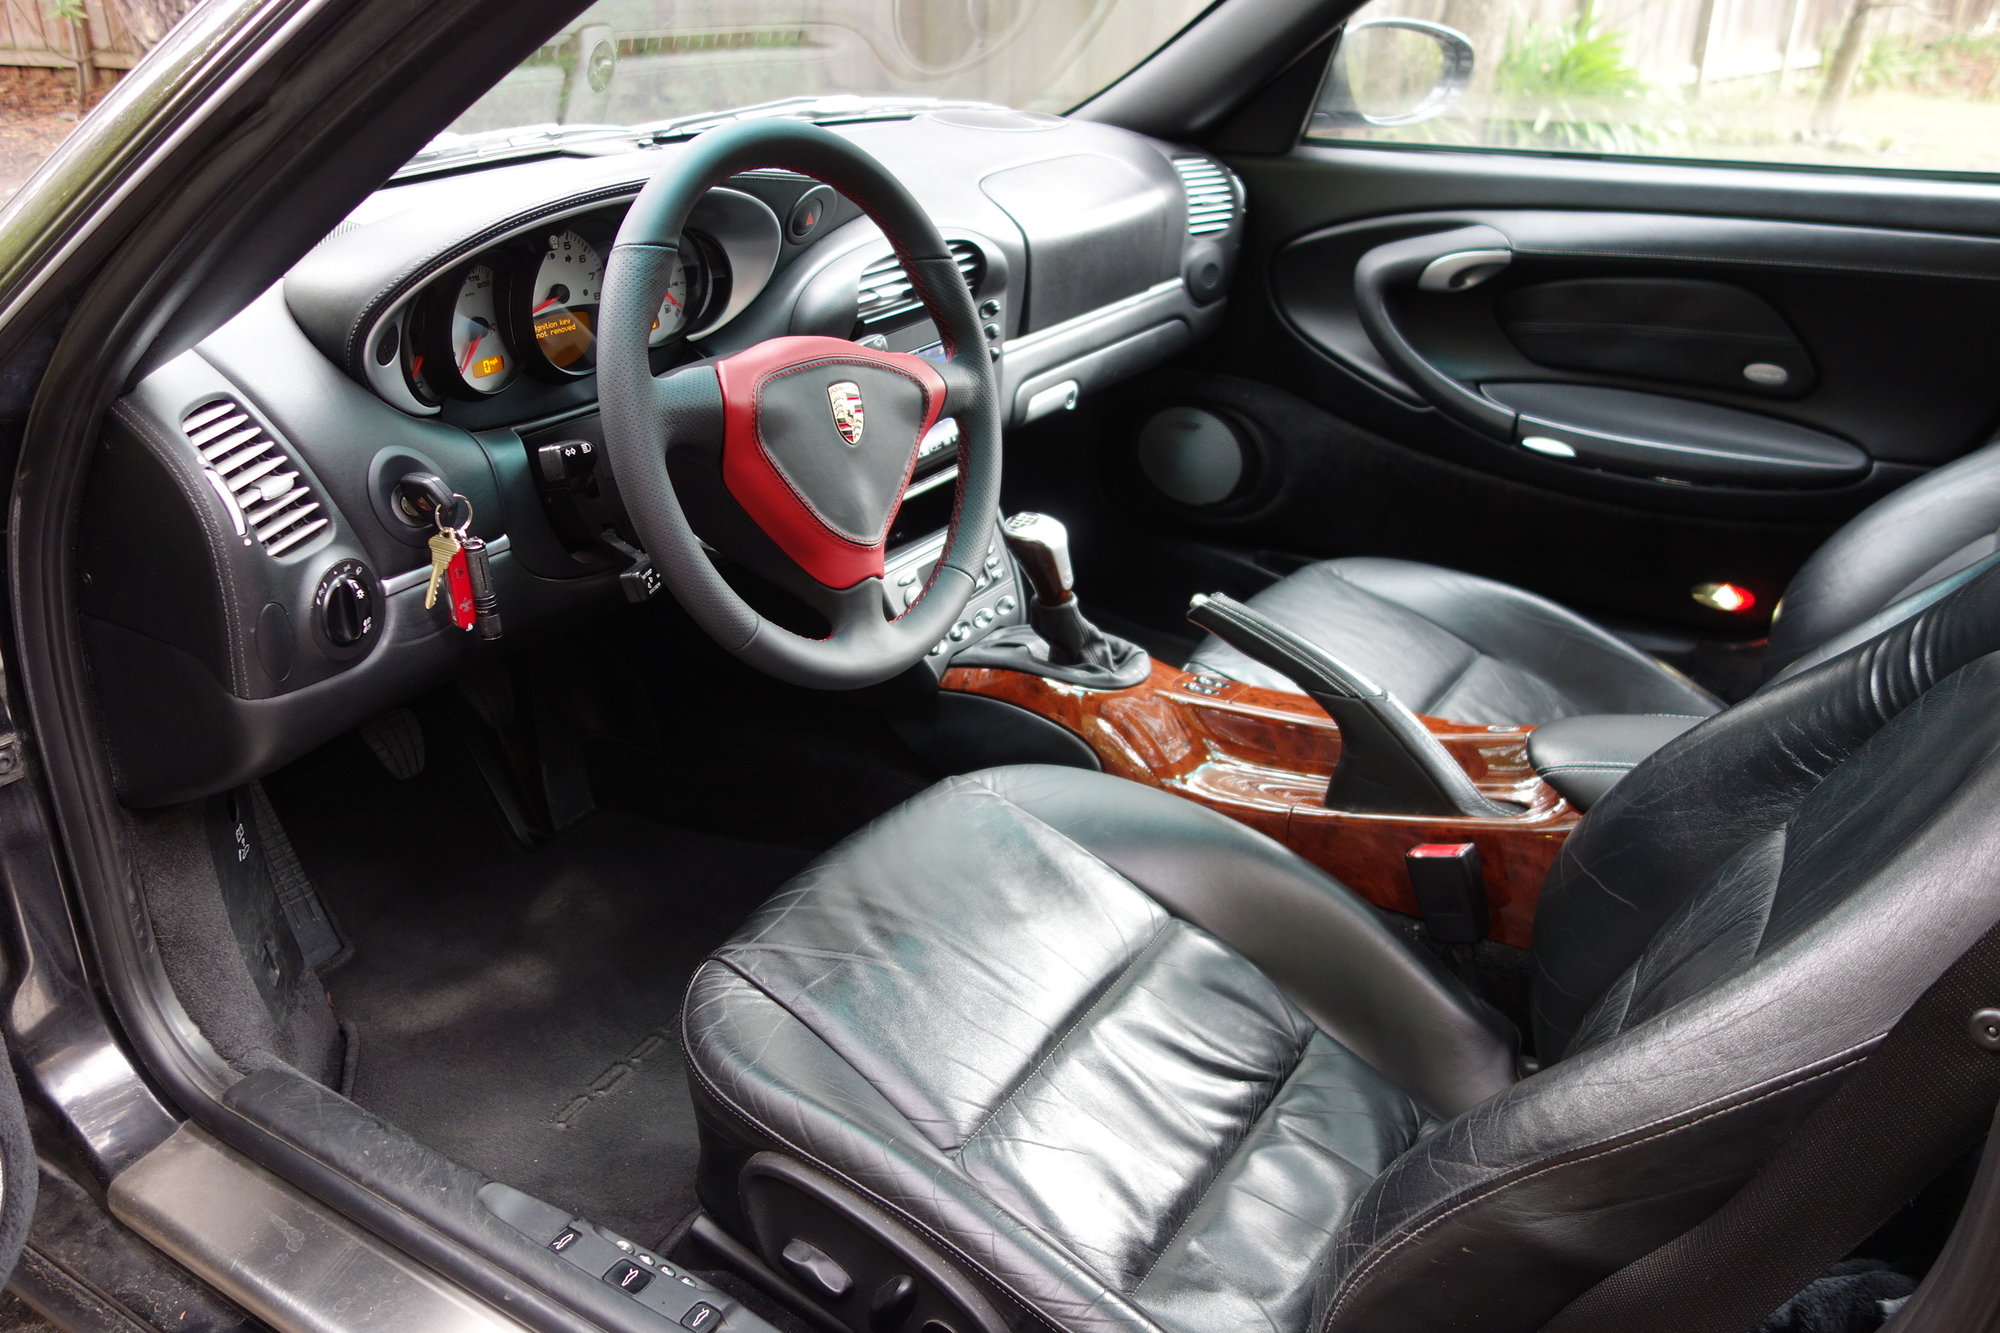
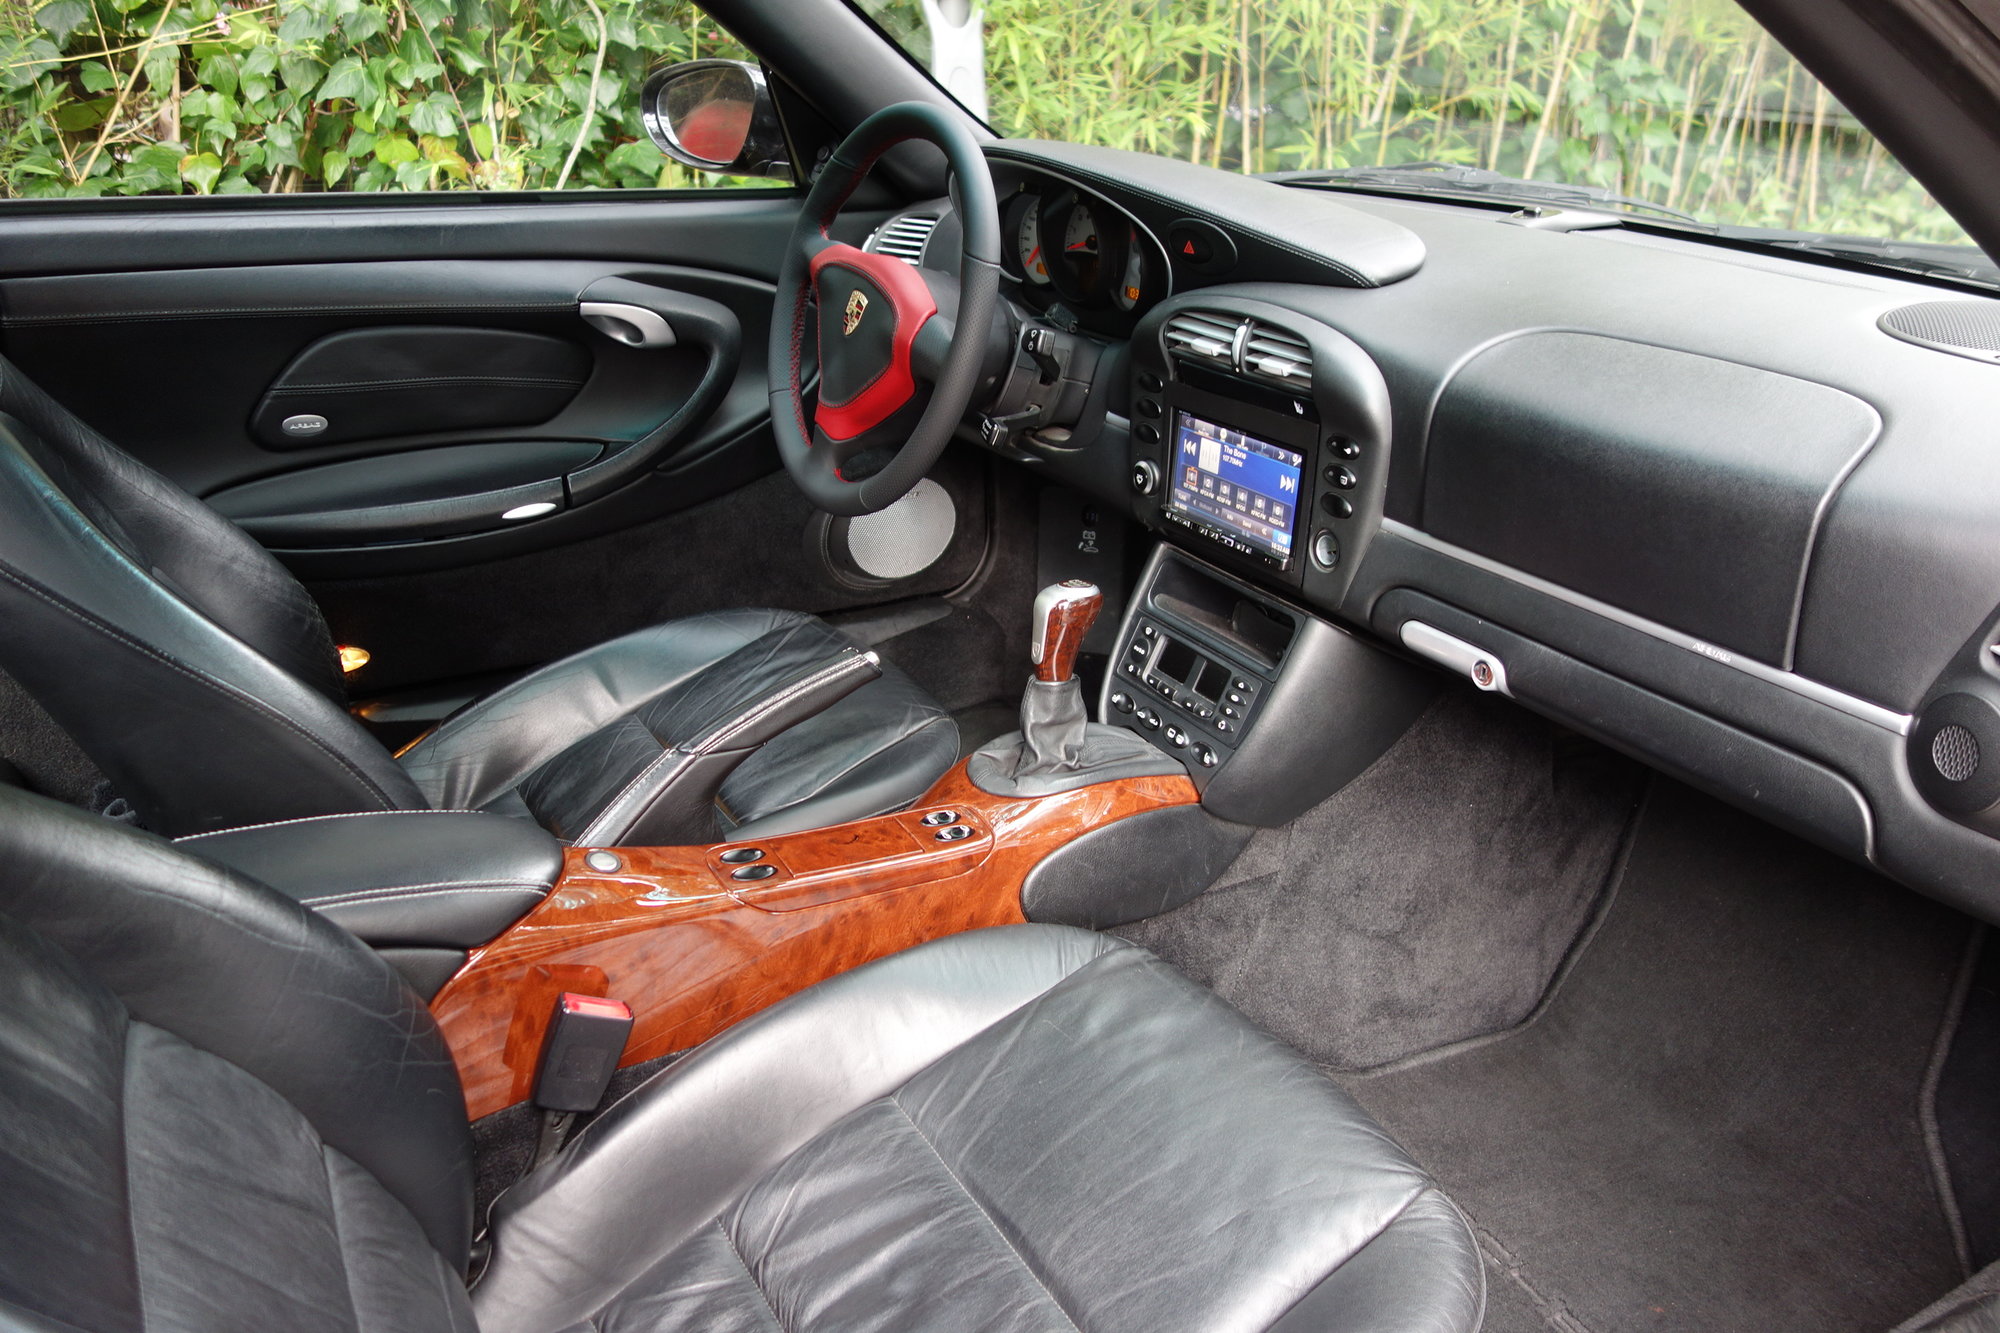
Here's the upgraded interior. Upgraded interior
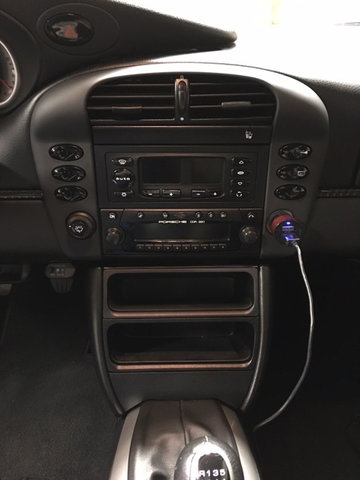
Stereo/GPS and Amplifier
I installed an Alpine INE-W927HD stereo/GPS head unit and Alpine PDX-V9 that I bought from Rod at Car Audio Innovations in California for $2536. I went with this based on Rod's recommendation and his years of experience in installing stereos into 996s and 997s. Rod and his team gave good support when I called a few times with questions.
Overall I like this stereo. These modern electronic units are little computers that take half a minute to boot up, but this one is designed to start playing music within 5 seconds. The graphic equalizer is pretty good. I have it programmed to remove an annoying resonance in the the stock speakers at 3-3.1 kHz. The amplifier in the trunk outputs 100 watts per channel for four channels, and another 500 W for the subwoofer. It is Class D, so it's efficient and much smaller than older amplifiers with the same power output. It does output white noise that is noticeable with the engine off.
The GPS display is not very good: It usually places the car icon at the edge of the screen to minimize the distance of road ahead, it displays distracting roads off the sides of the freeway that no one wants to see, and it rarely displays traffic ahead. The directions are good for getting me to the desired destination.
I have the microphone for the cell phone (connected via Bluetooth) mounted on the steering-wheel column less than two feet from my mouth. Even so, the cell phone sound quality is terrible for people listening at the other end. Listening at my end from the left front speaker is a little better, but still not great. I keep a Bluetooth headset nearby to switch to if I need to talk.
It took me 24+ hours over three weekends to install the system. Here are some photos.
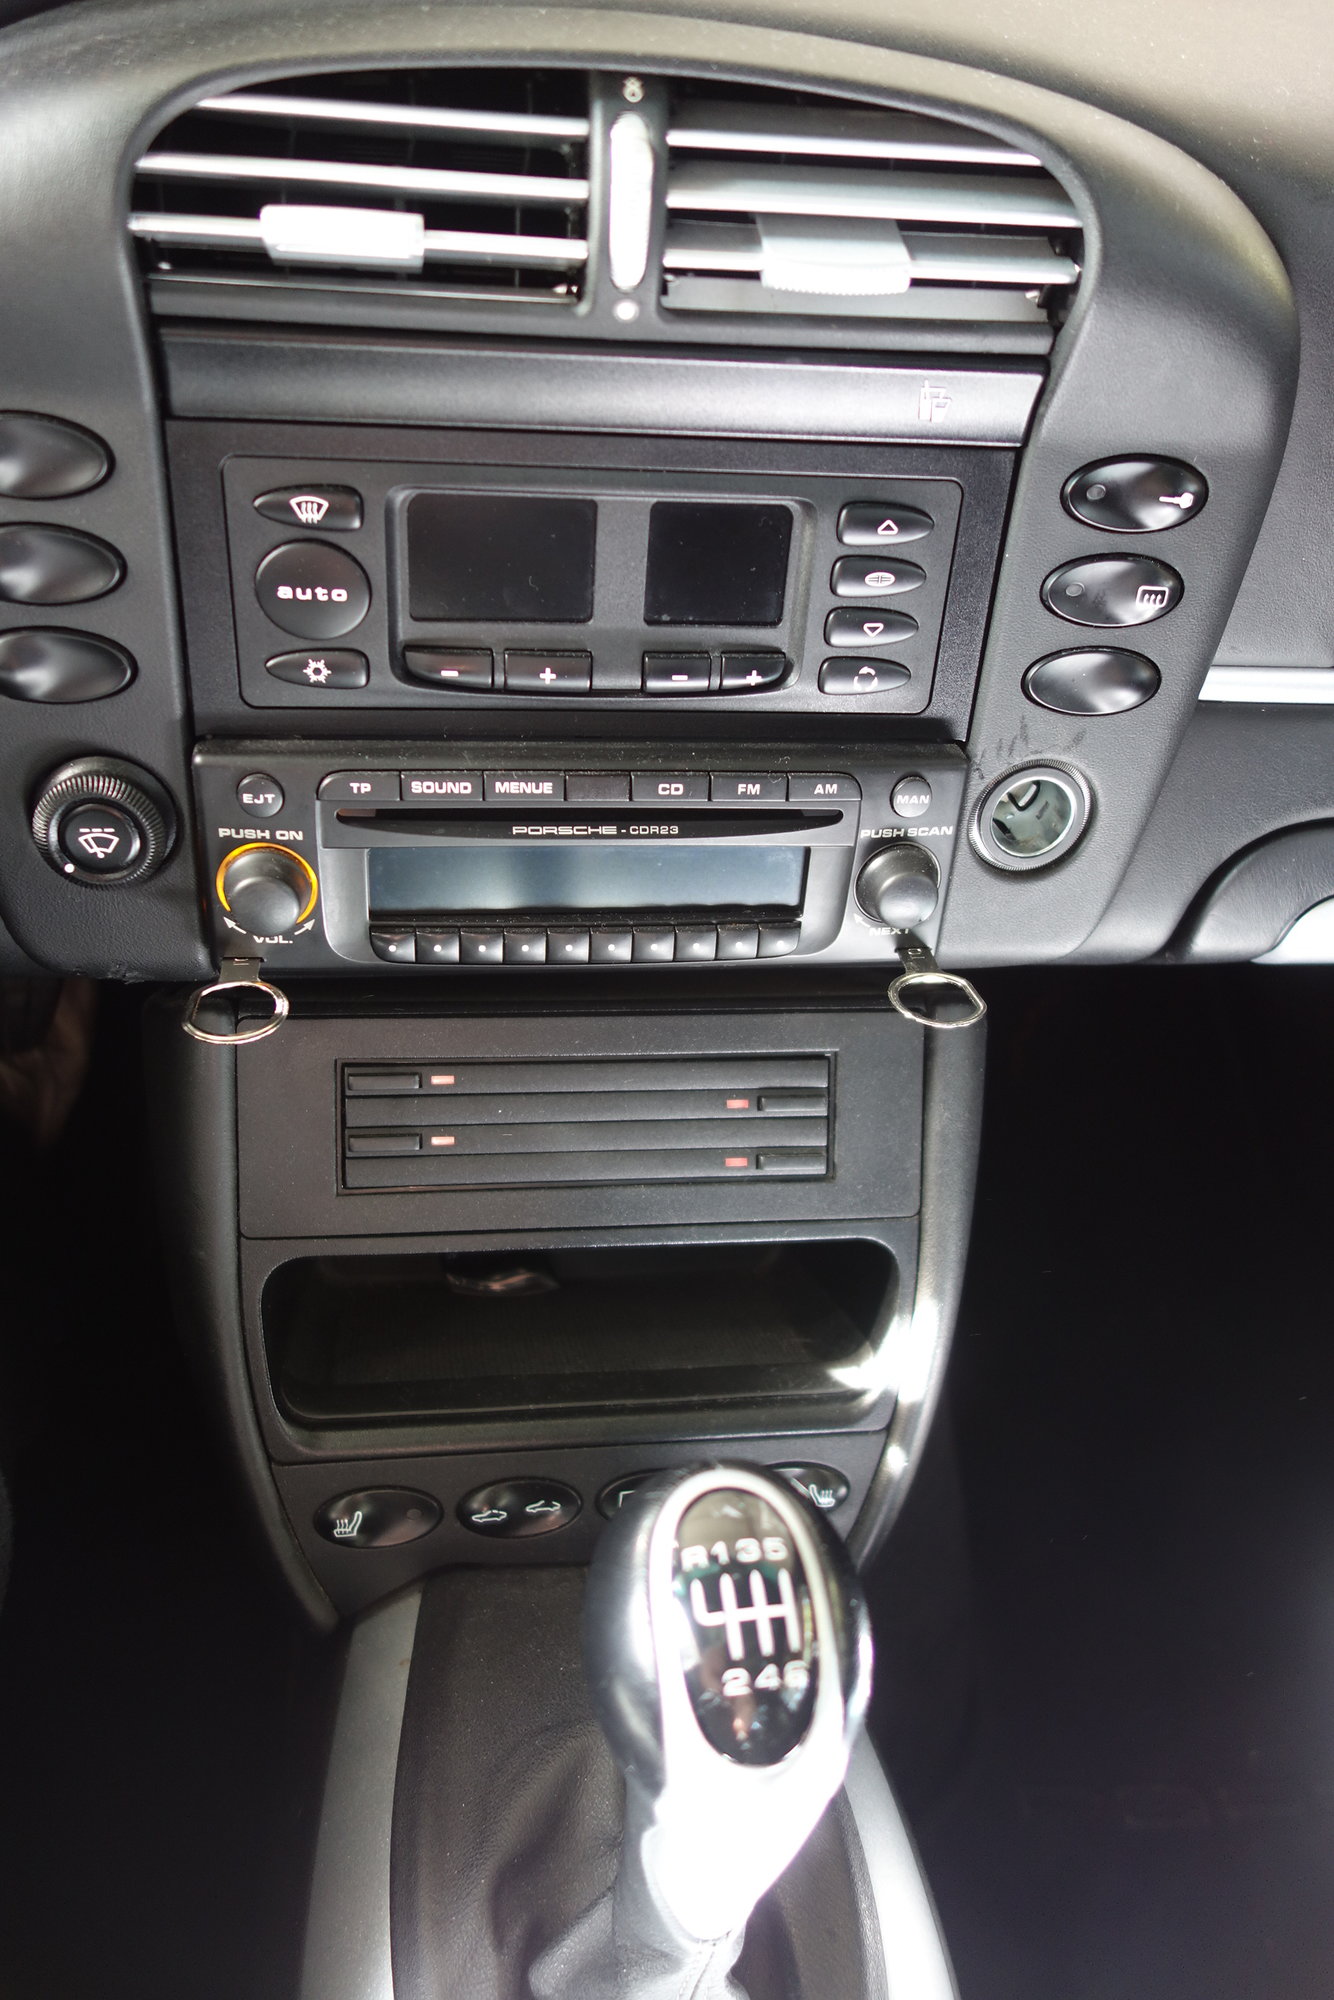
The old stereo head unit.
The old 5-disk CD player (left) and power amplifier (center). The new amplifier will go where the CD player is.
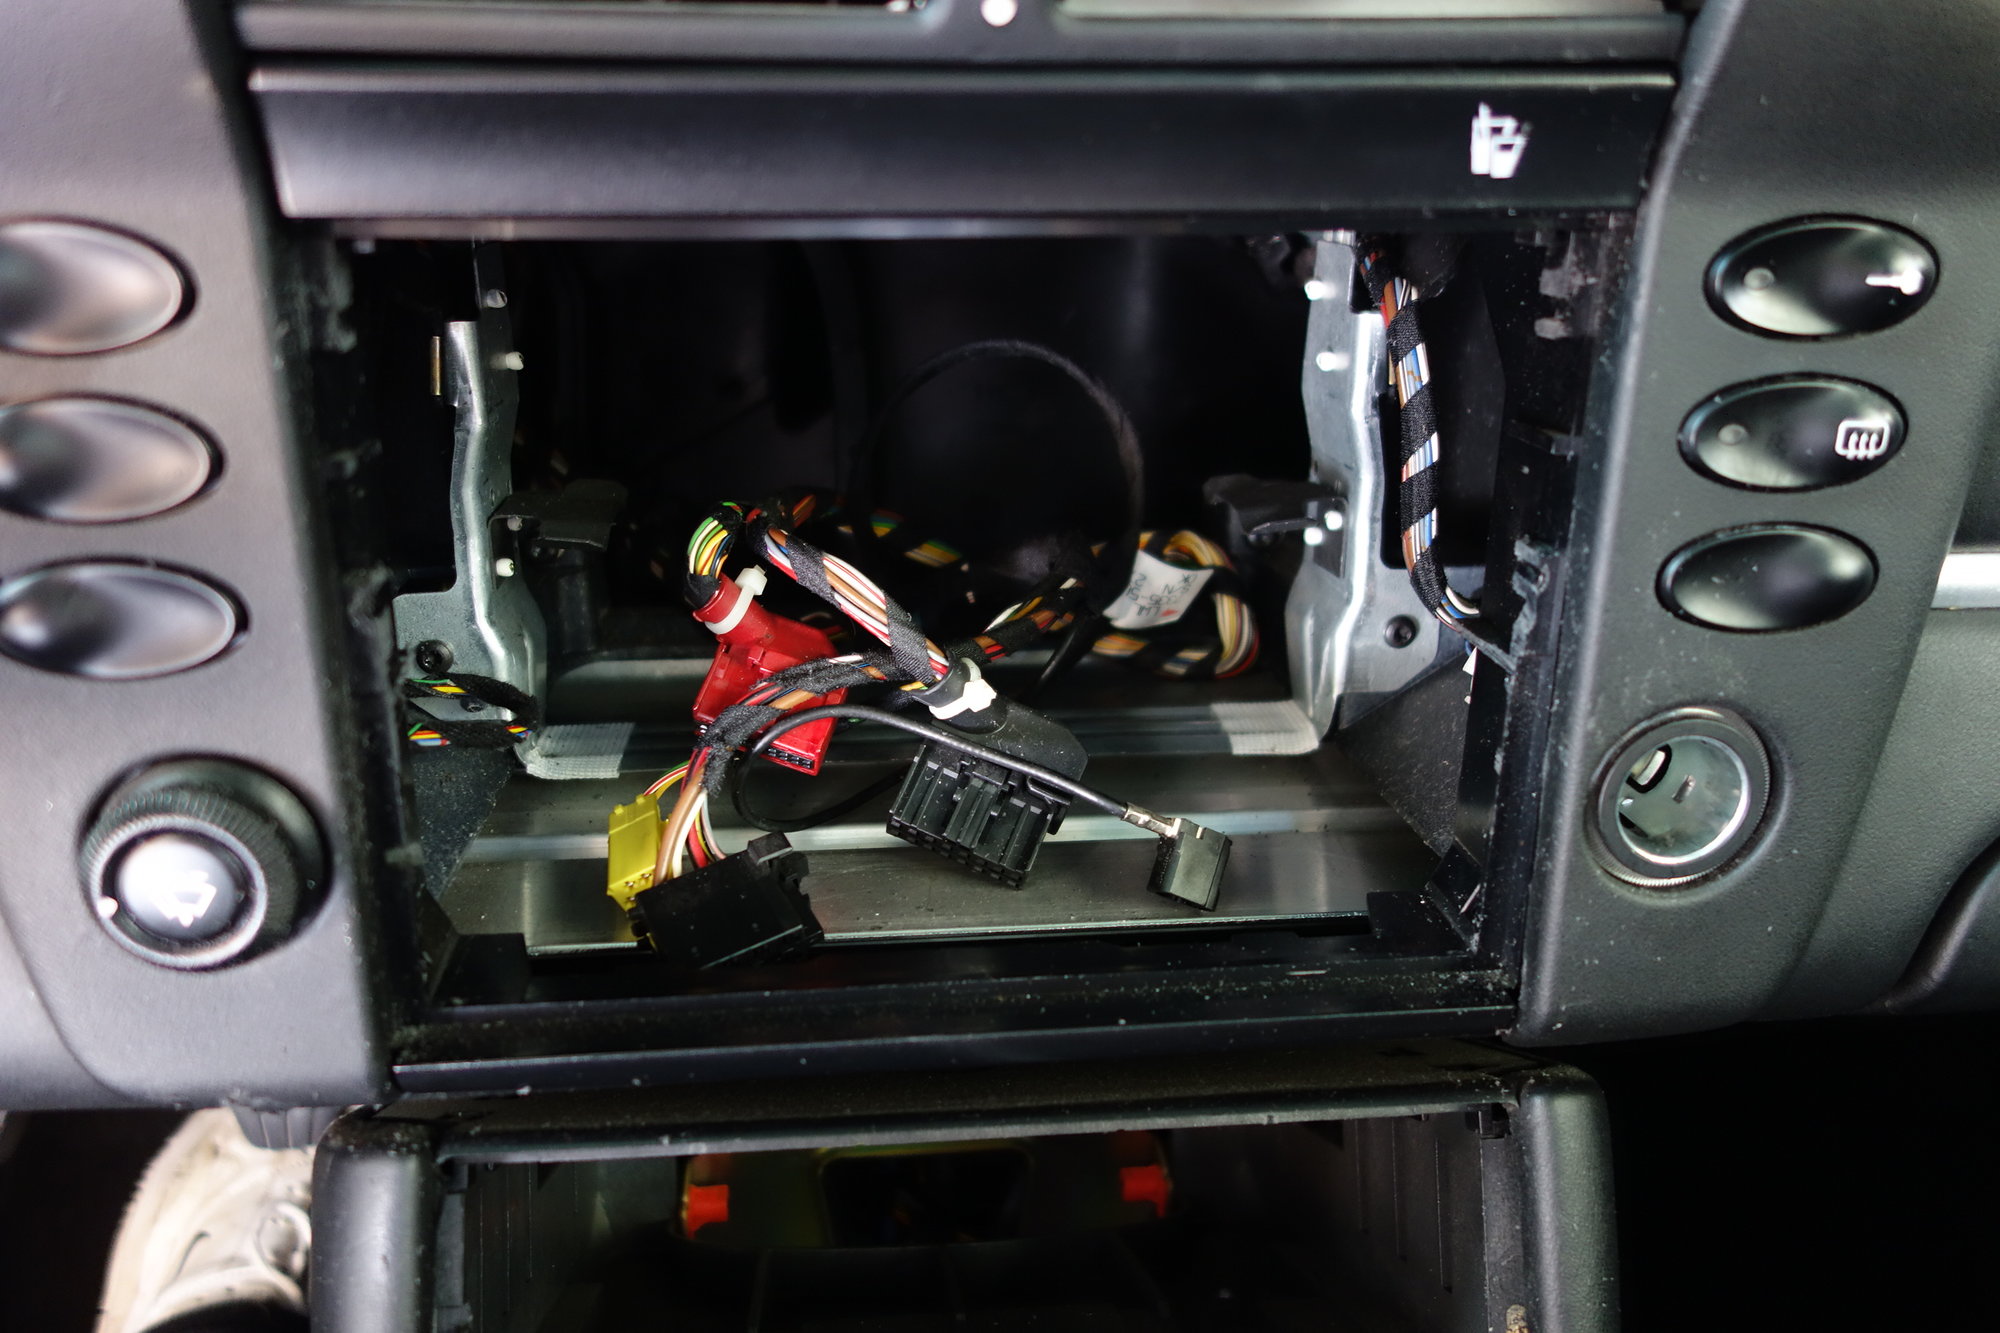
Old stereo and temperature control units removed. The temperature control will move down to where the CD storage was.
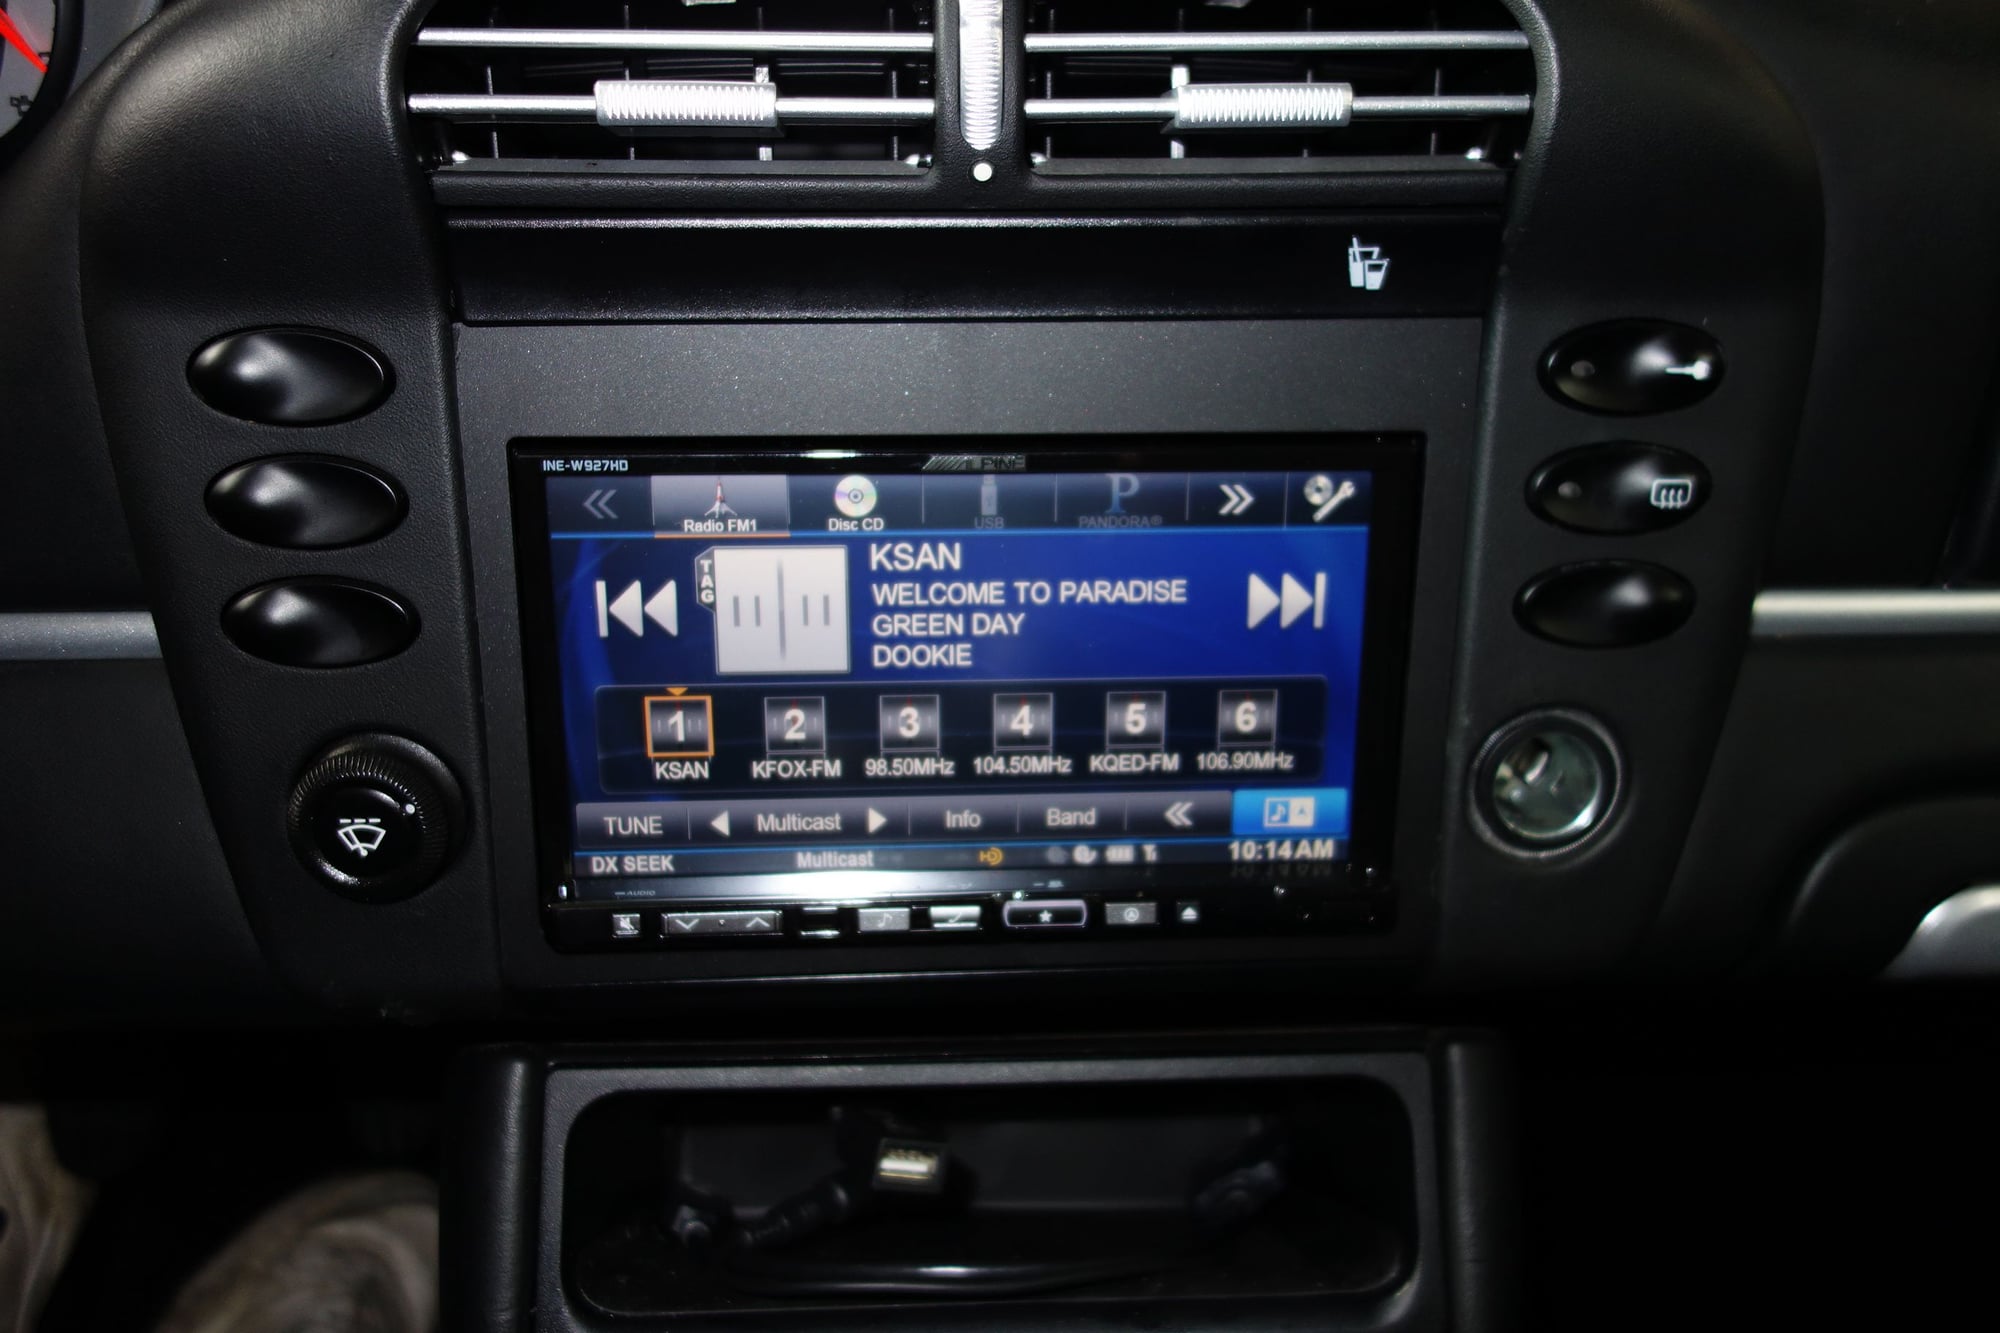
The finished product in the dashboard
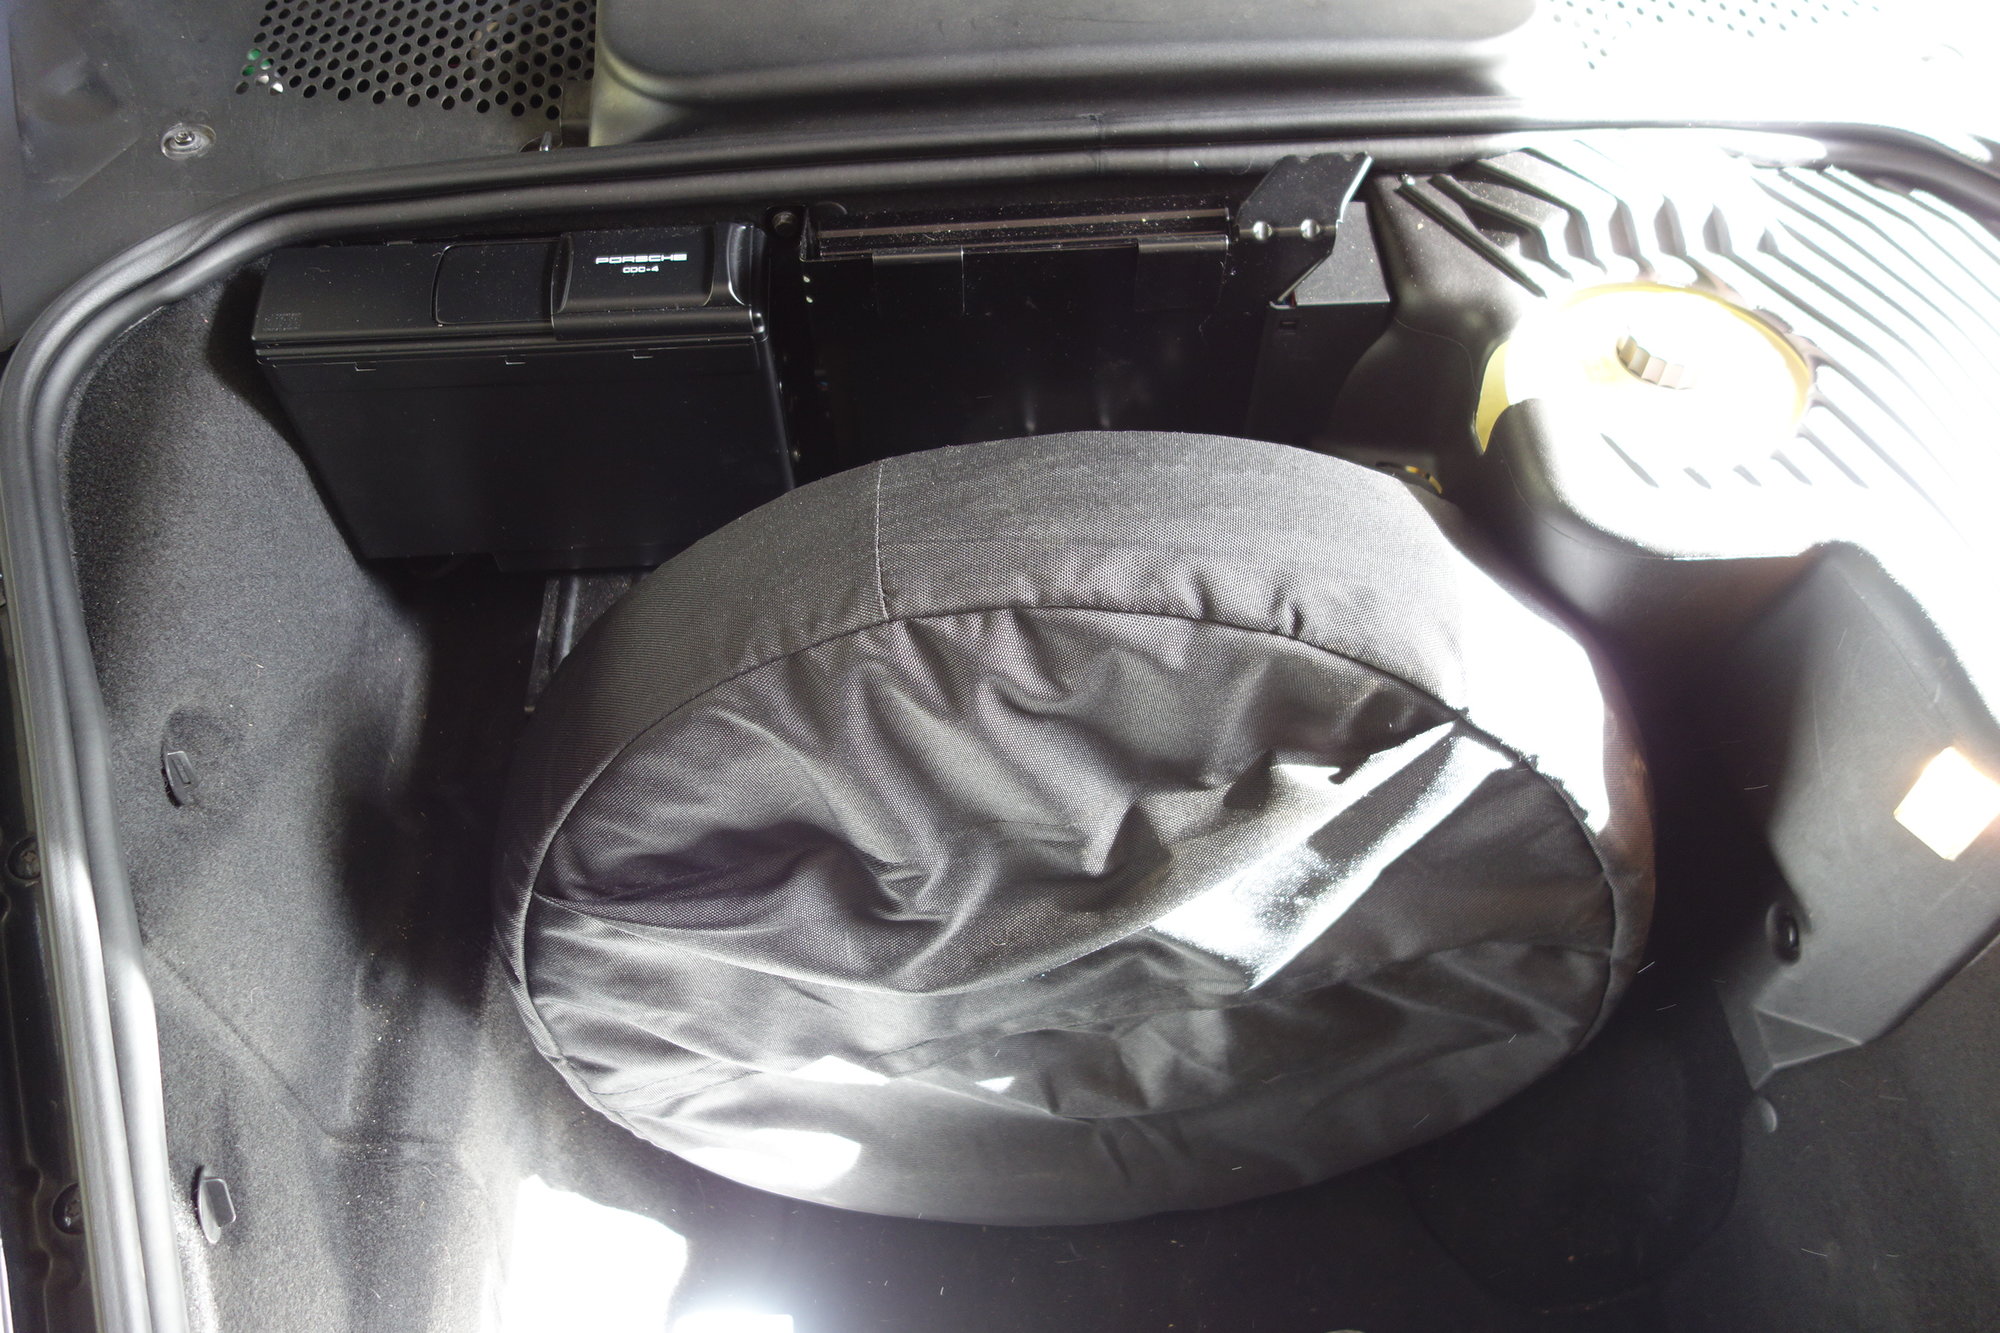
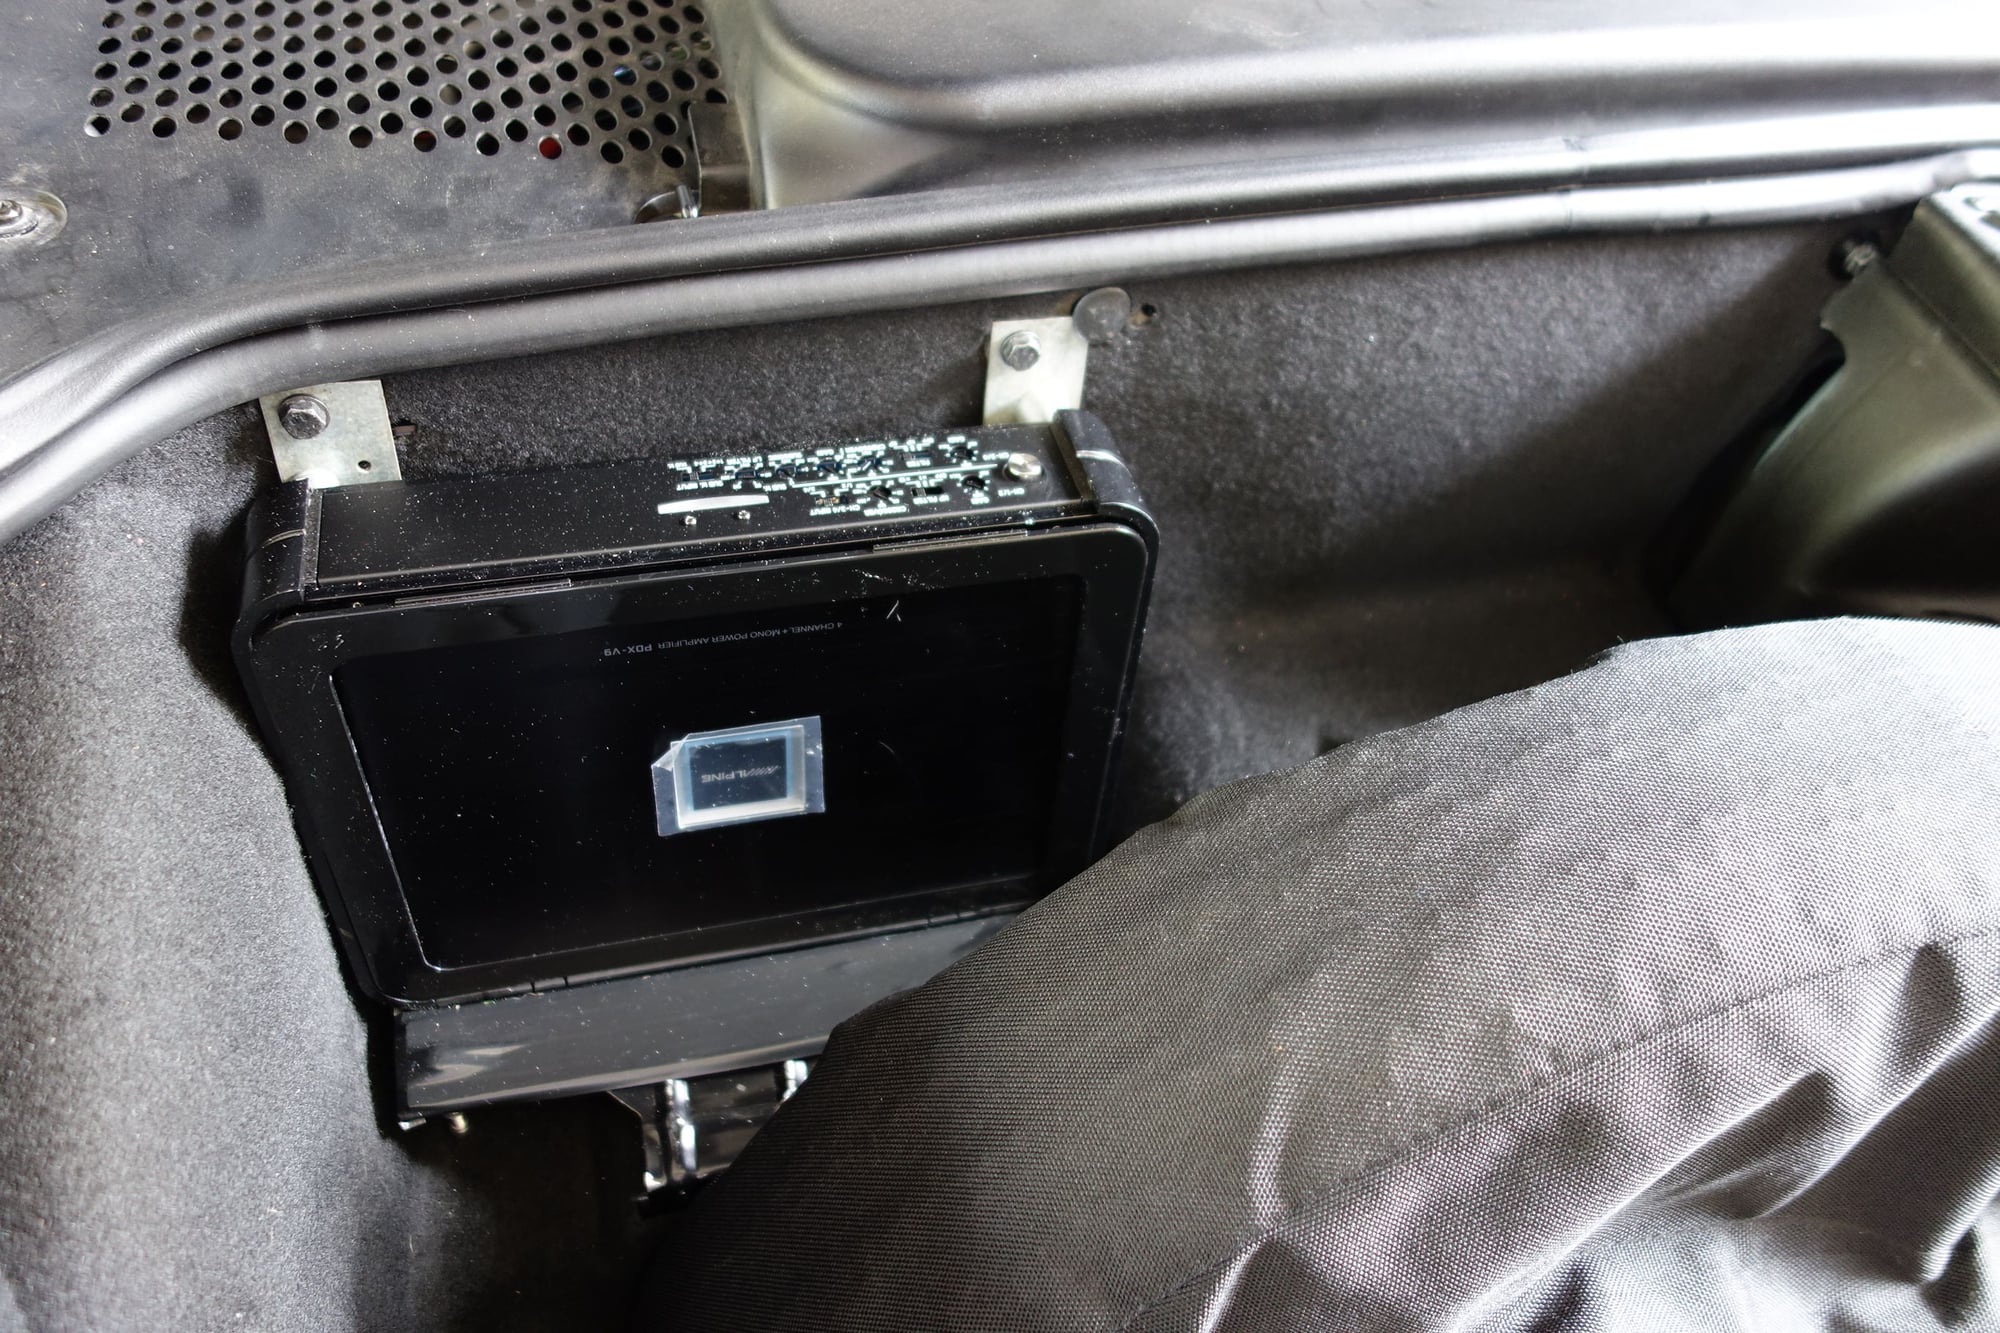
And the amplifier in the trunk. I had to build a little frame using the old CD-player frame and some metal stock. I later put black electrical tape over the shiny metal so that it blends in better.
Subwoofer
Someone on one Porsche forum described Bose subwoofer as a "one-note fart box" and I have to agree. There was a serious resonance at 50-60 Hz and not as much output as other frequencies.
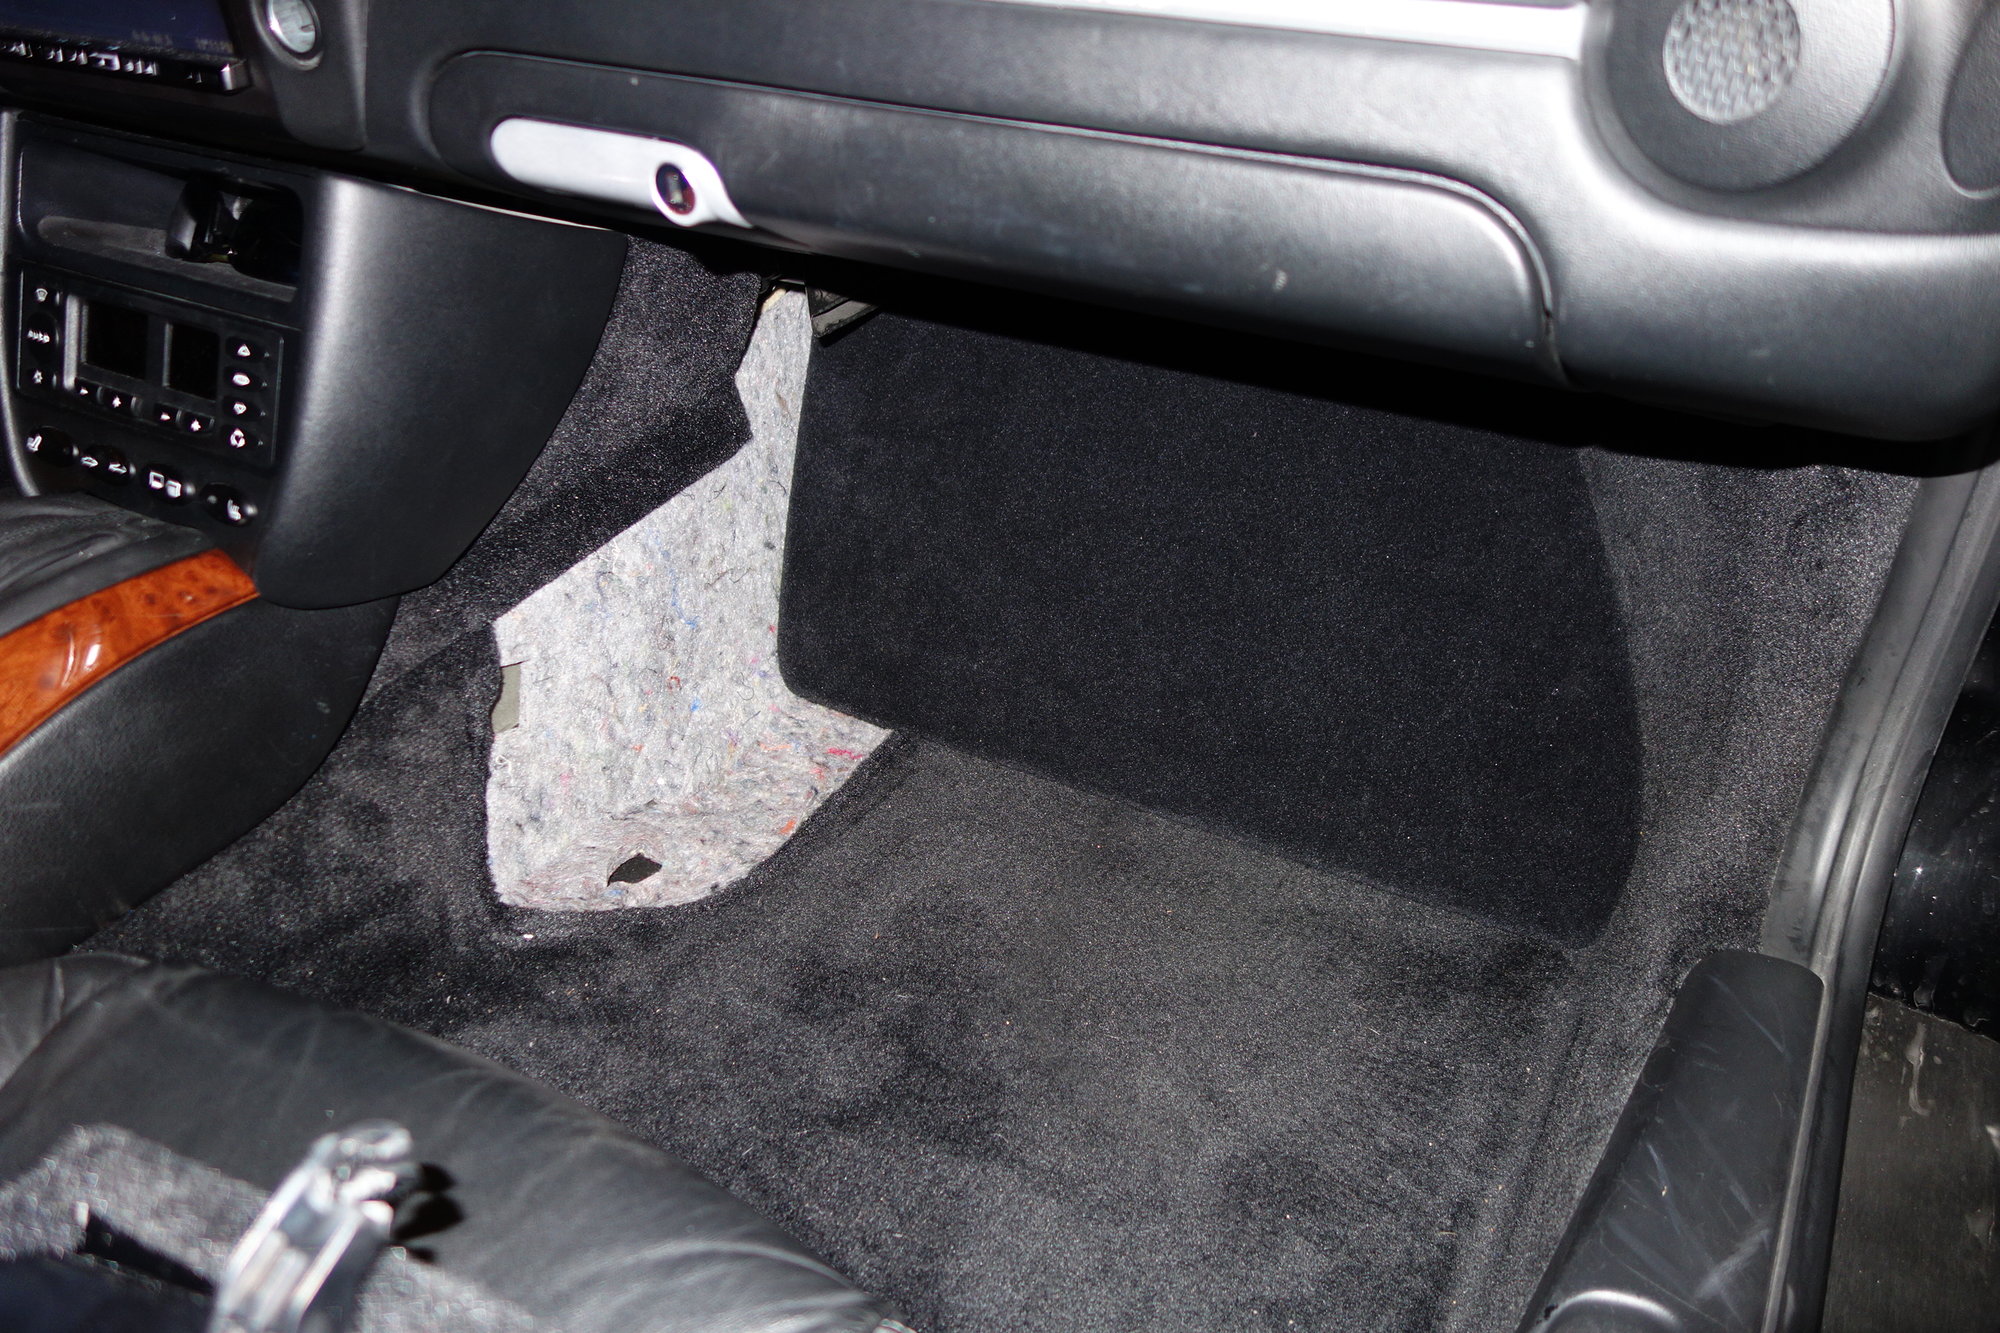
The stock Bose subwoofer was on the left side of the passenger footwell.
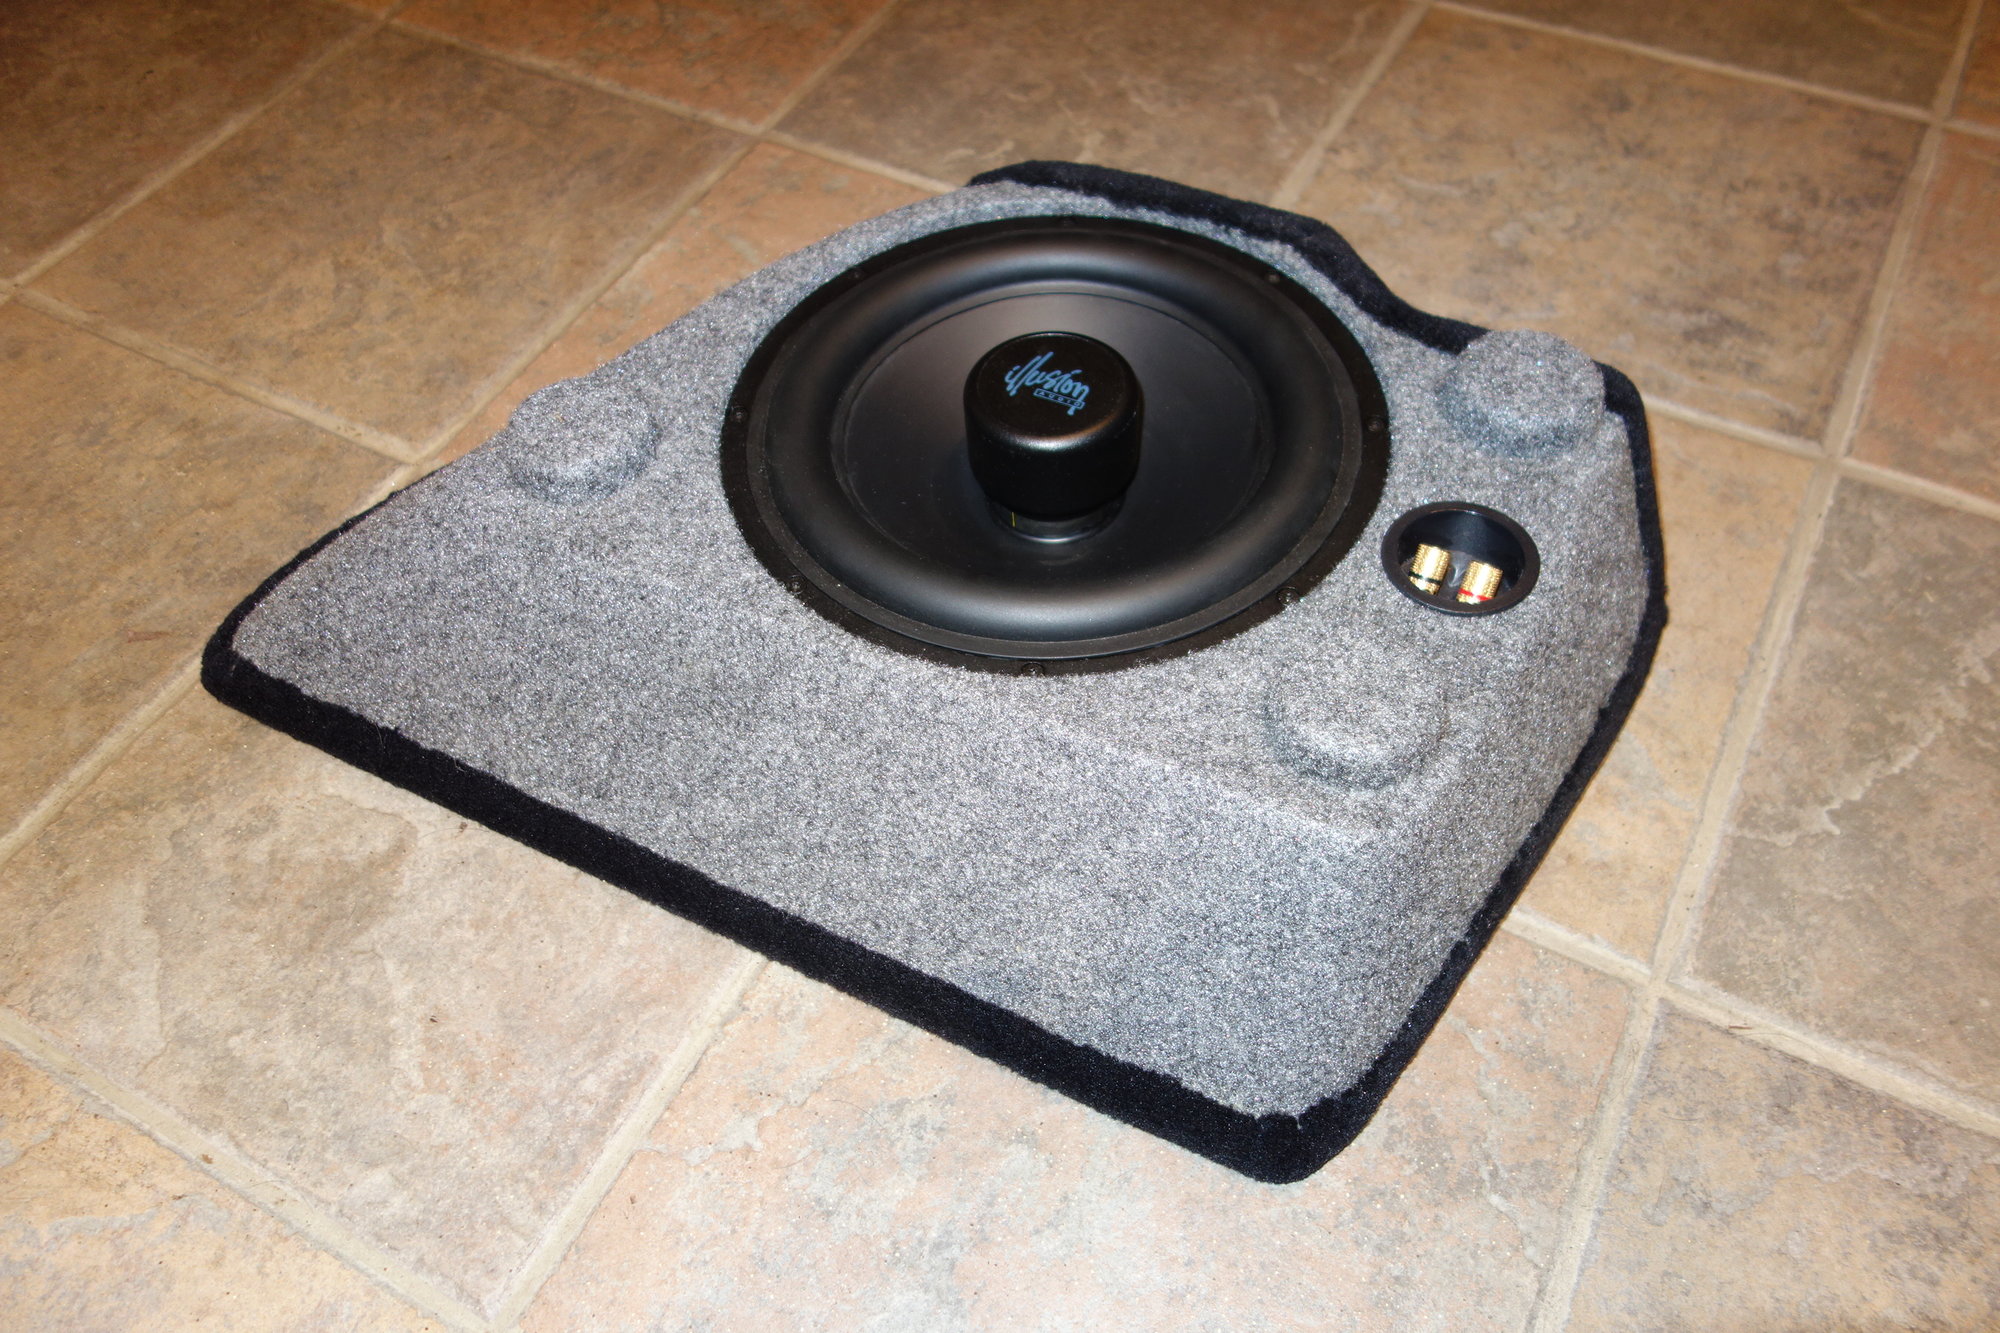
I bought a 10-inch, 150-W subwoofer and enclosure custom-made for the 996 form Sound In Motion in Massachusetts for $1800. The subwoofer and enclosure as received
I had to removed the old Bose subwoofer enclosure, cut it in half, then reinstall it to hold the subwoofer in place. If I didn't put the original enclosure back, there would be exposed undercarpeting.
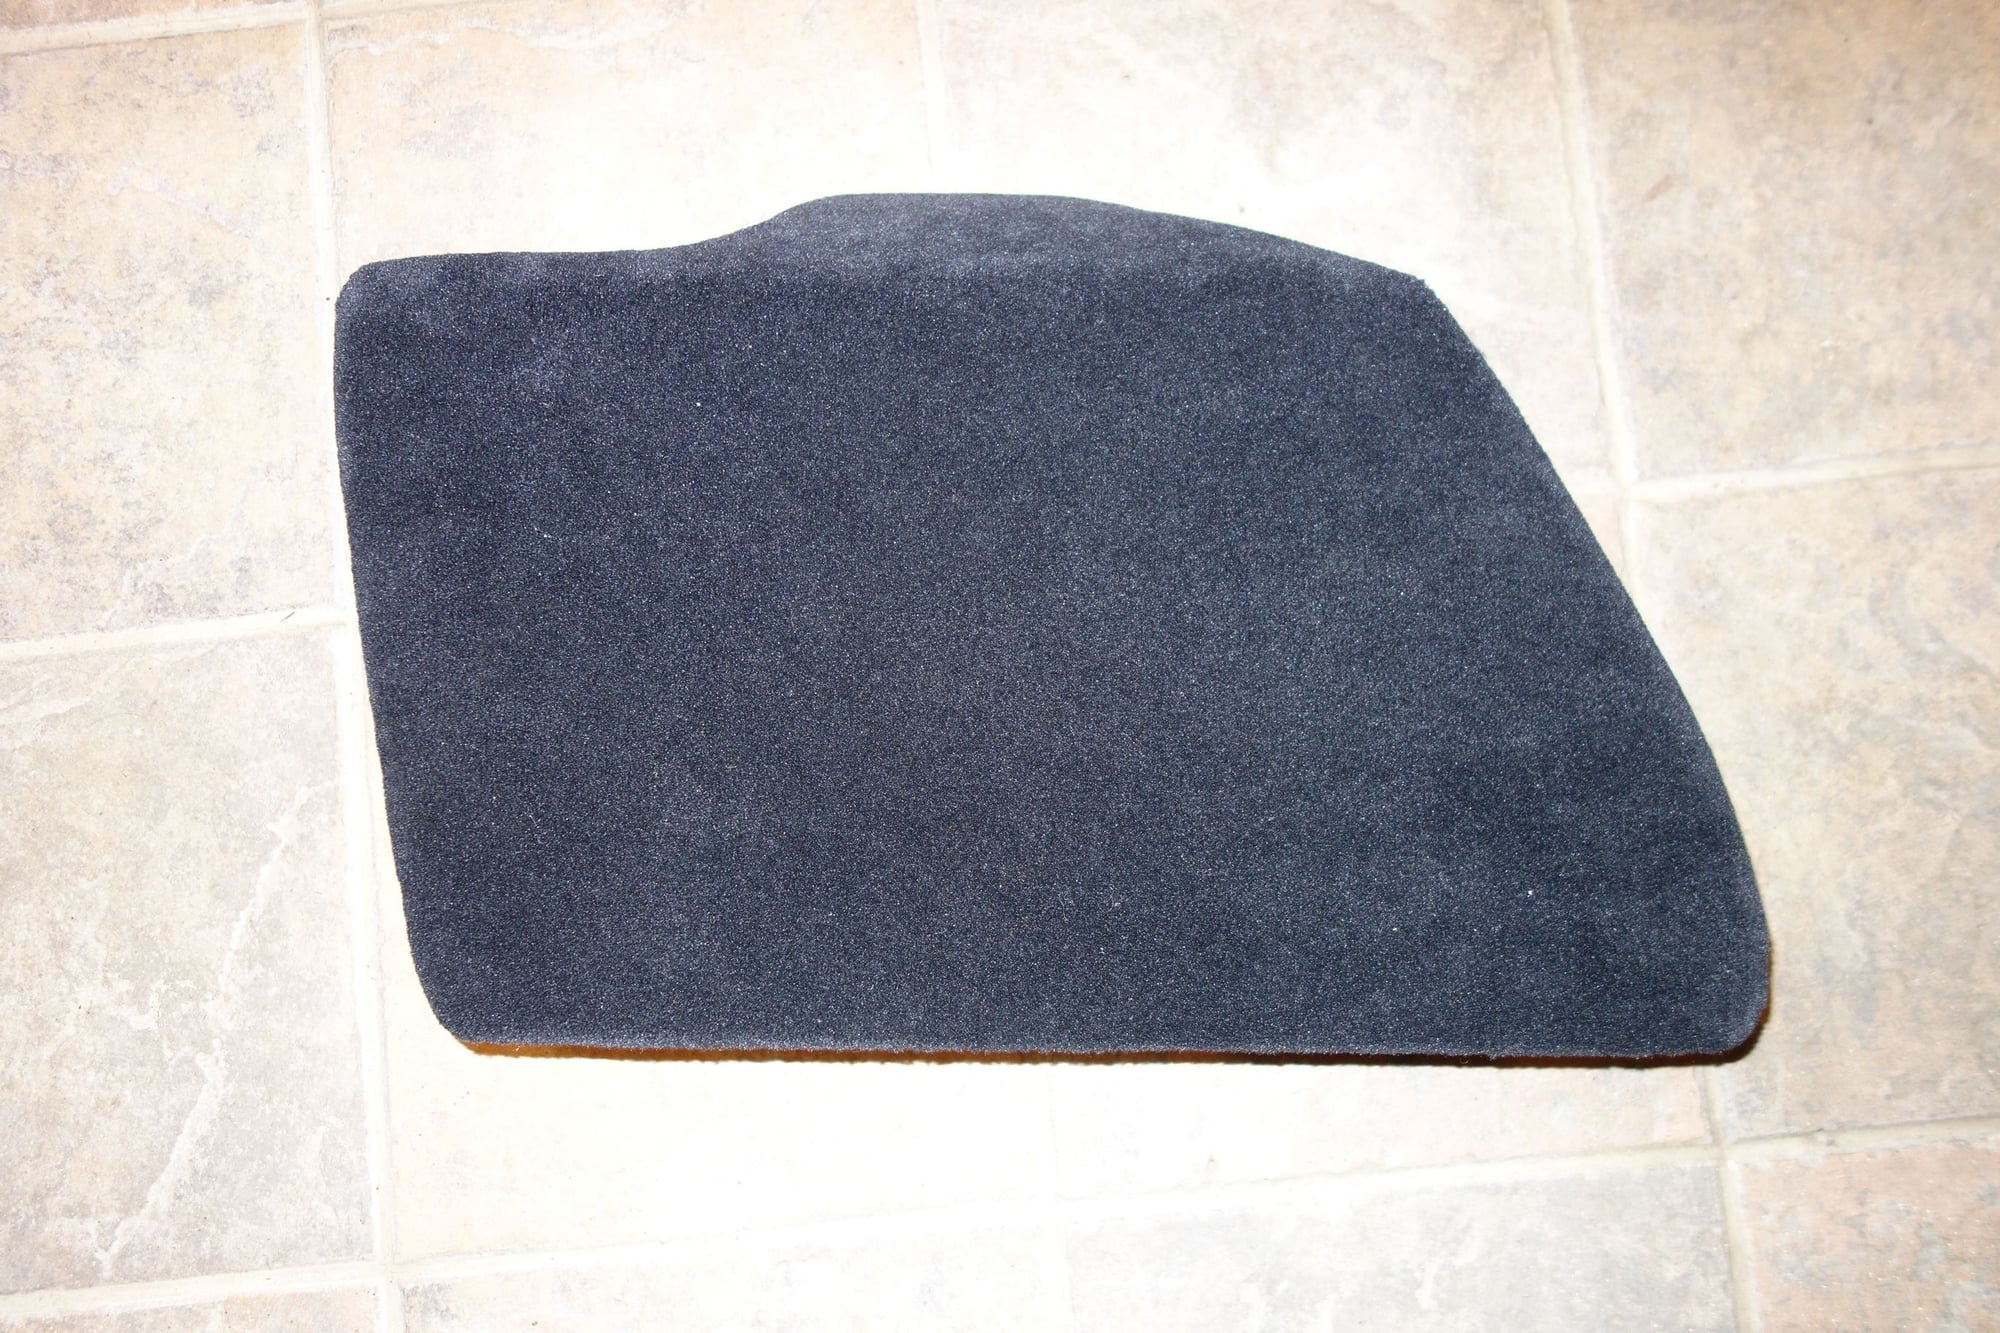
With the Sound In Motion subwoofer (darker black carpeting), there is undercarpet exposed
It looks fine with half of the Bose enclosure installed.
The subwoofer sits at the passenger's feet. It was only supposed to take away 4.5 inches, but it feels like more, so taller passengers can't fully extend their legs.
Wood Shift ****
I got a Porsche brand dark maple root wood shift **** from MS Road and Race for $323. This looks much classier than the stock plastic, metal coating, and thin leather version. This was an easy installation.
Porsche brand maple root wood shift ****
Short Shift Kit
Some people say that the stock shifter is sloppy. I felt that it shifted smoother, but I wanted a shorter throw. I went with the B&M short shifter from BumpPlugs for $251. It took me 4.5 hours to intall.
Initially, I didn't like it, but I got used to it after few weeks. With the shorter lever arm, it is noticeably harder to shifter when it's cold.
Wood-Look Center Console
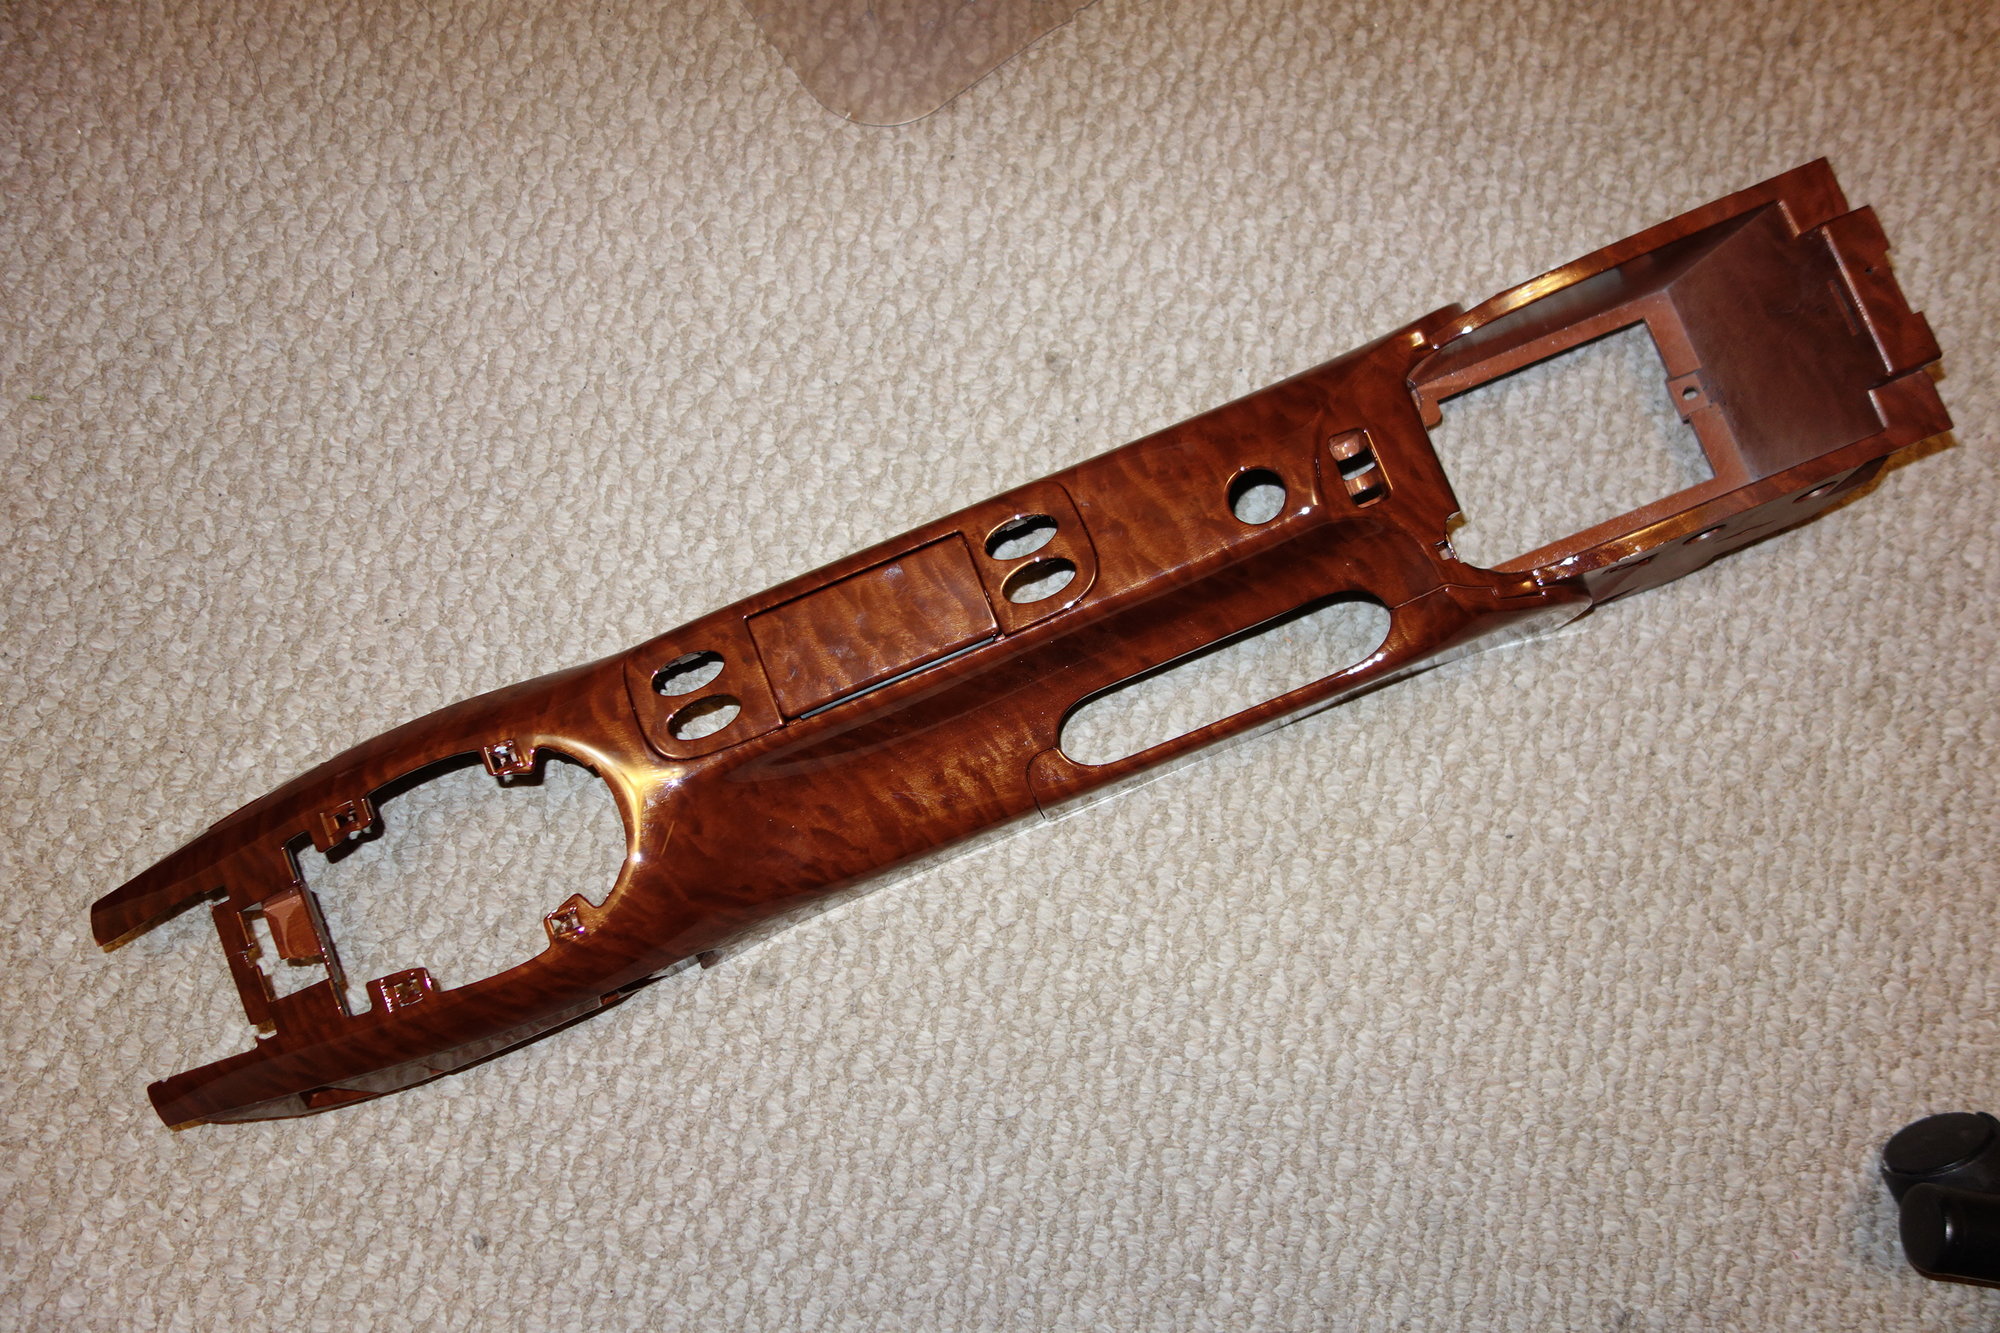
At this point the nice shift **** made the metal-look center console look even less classy. I was trying to figure out how to coat it with a wood vernier when I ran across the water-transfer coating process (WTP). There are a number of companies that can put hundreds of different patterns from different woods to desert camoflauge. I didn't know how it would turn out on my console, so I bought a used one and sent it to Classic Trim W.T.P. in Florida to have my selected wood-look coating applied for $266. It looked different in person, so I sent my original console in and had pattern WTP-355 applied for another $266 and 3 hours of installation work. This matches my shift **** much better, but it's still not perfect.
Pattern WTP-355 applied to the console
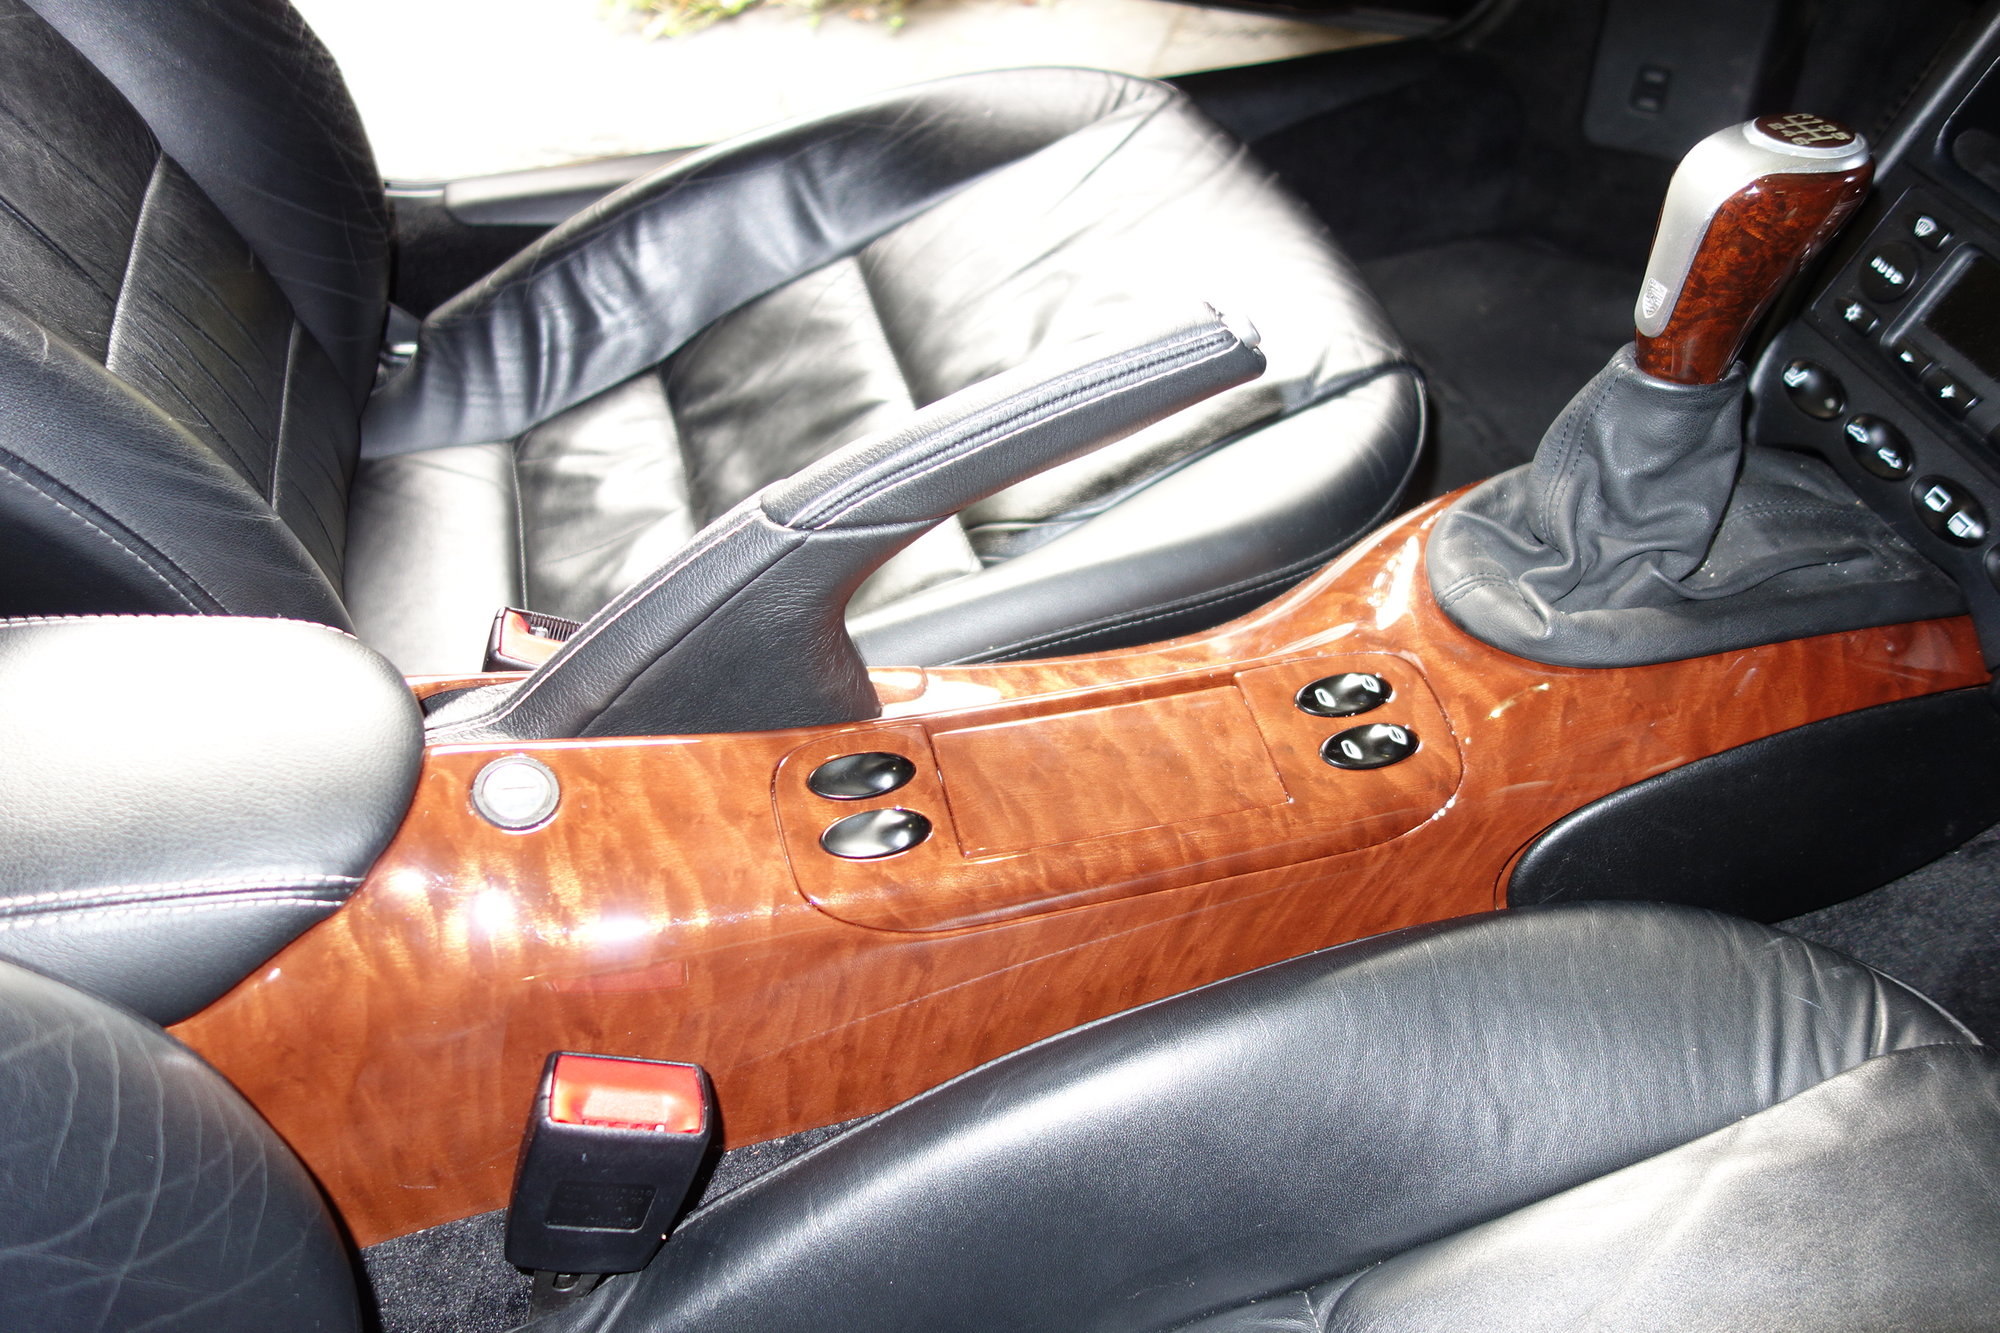
Console with pattern WTP-355 installed in my car. It's lighter than the shift ****.
Console with pattern WTP-231 installed. This matches the shift **** better.
Leather Console Lid and Hand Brake
The stock console lid was thin, shiny leather that looked plasticy. I bought a padded console lid fromDonald at Dallas Custom Steering Wheel. The padding is nice. Now I can comfortably rest my arm on the console with my elbow against the lid. I custom-ordered it with grey stitching to match the stitching on the doors.
I also got a leather-covered hand brake from DCSW with matching stitching. There is no longer exposed plastic. There was a problem with the first brake they sent me, but he rectified it right away.
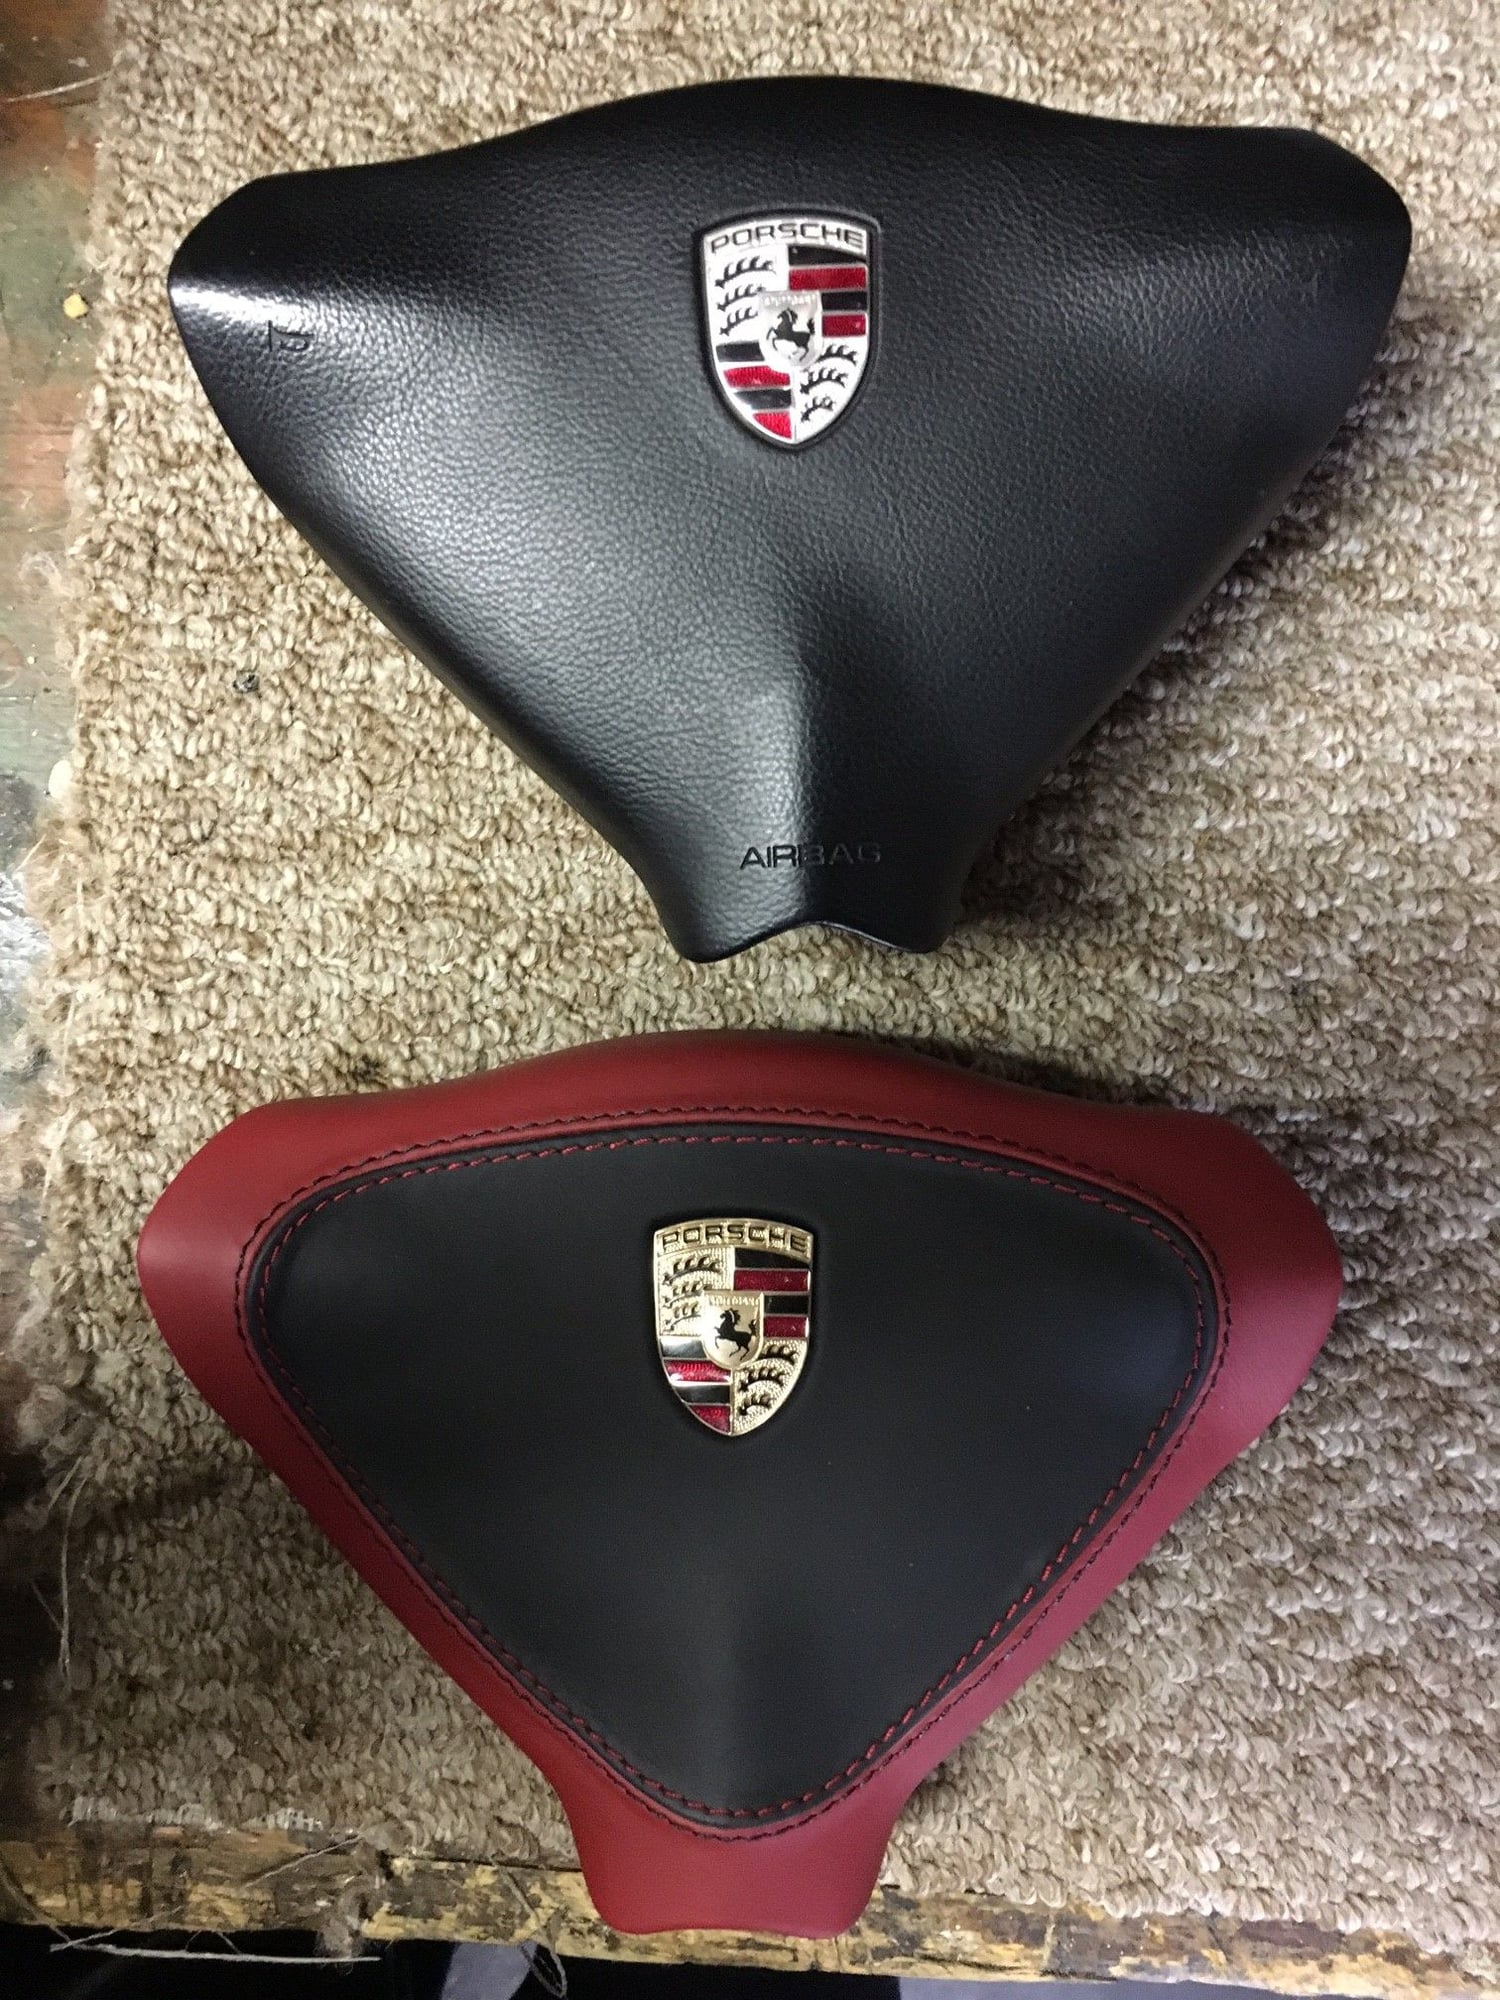
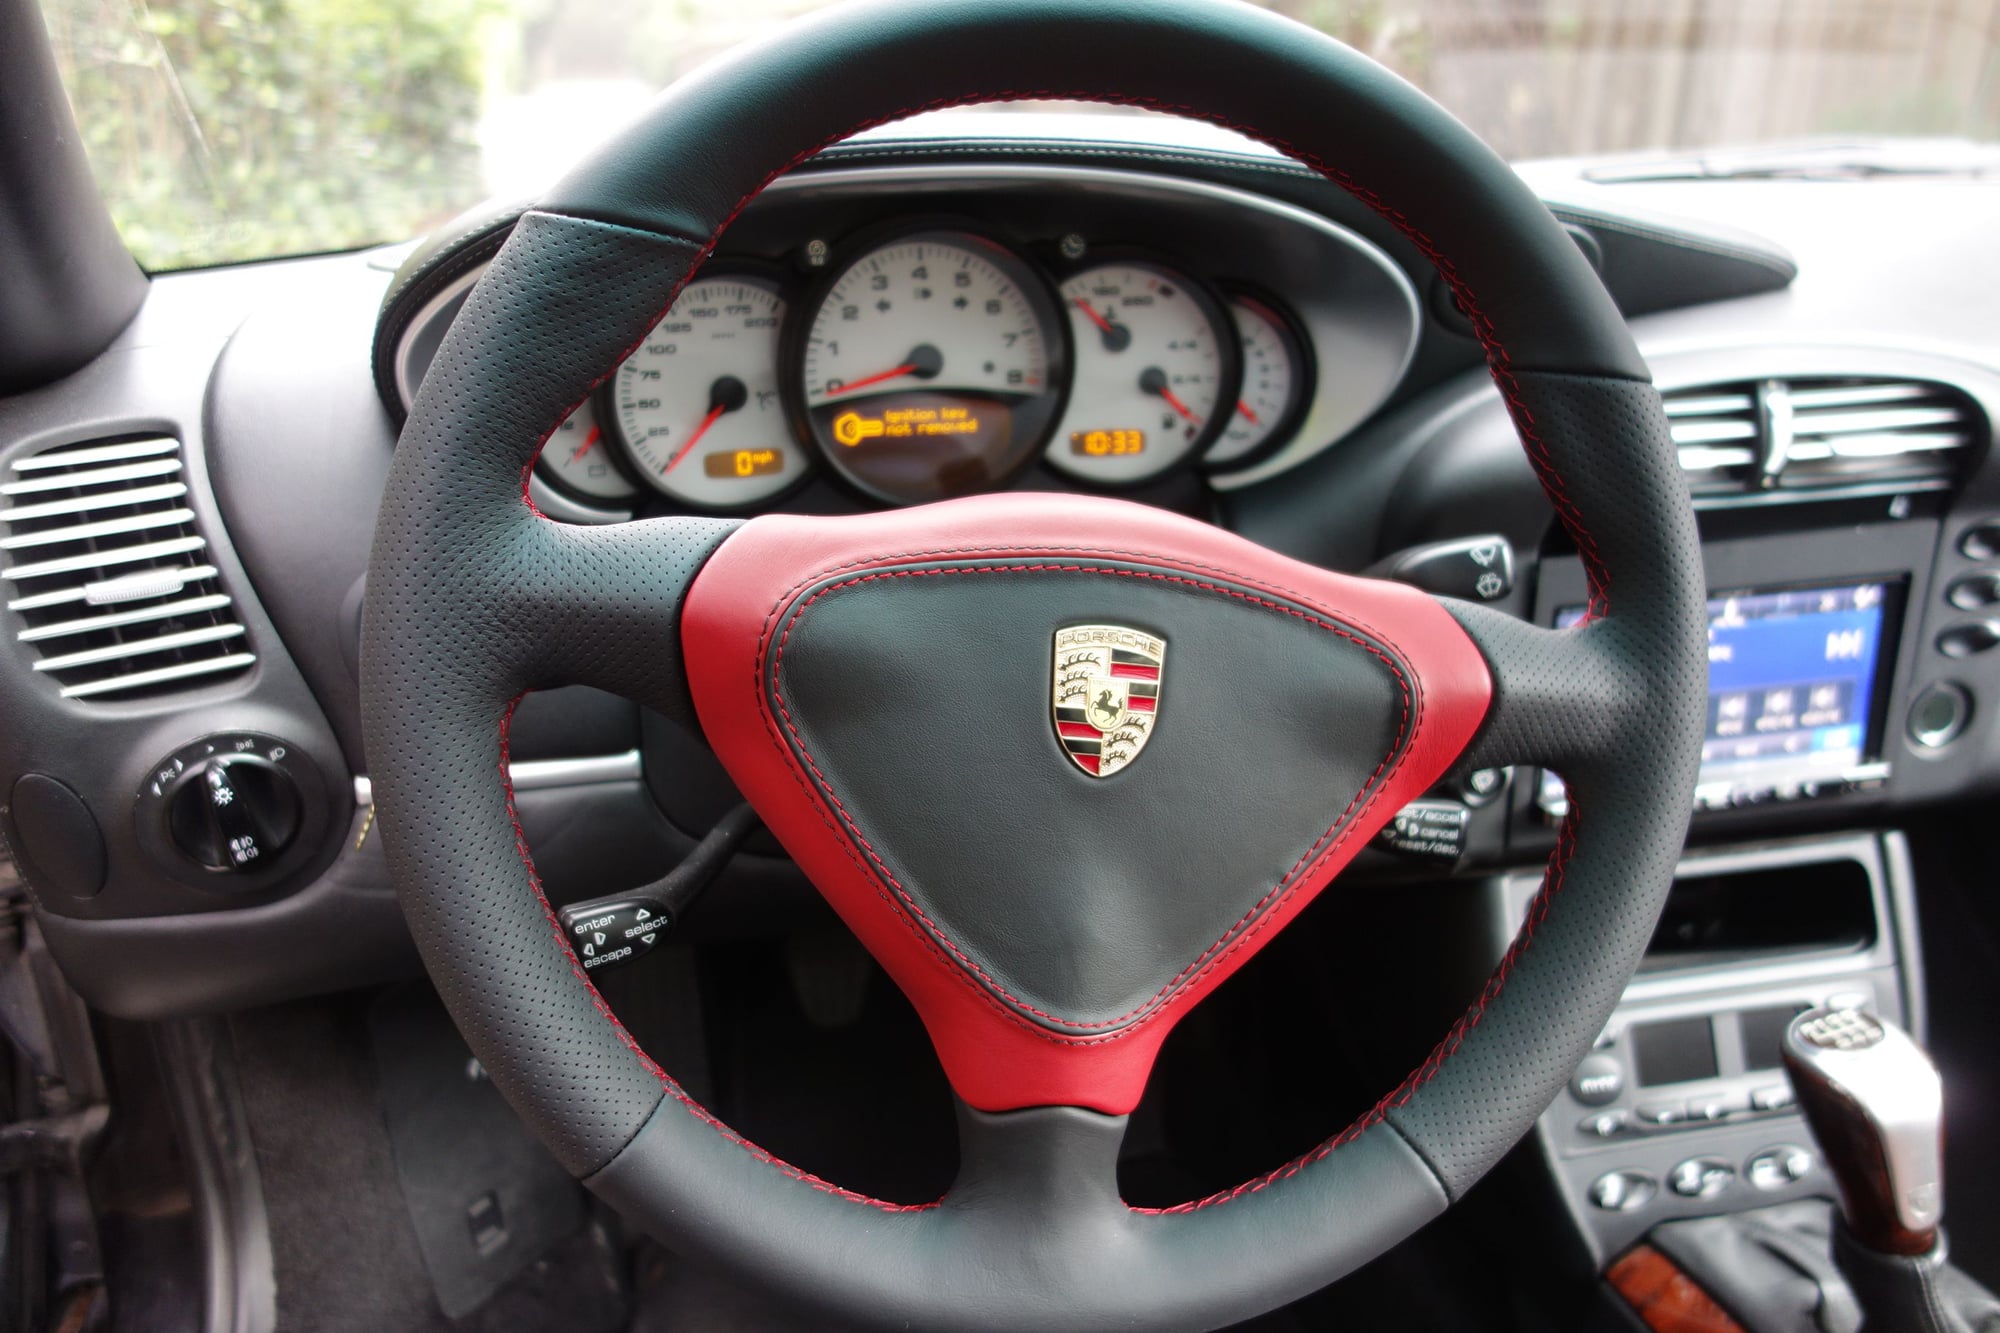
Two-Color Steering Wheel
I had been looking at padded steering wheels with colored stitching from DCSW for a while. Their prices seem to have increased in the past year ($674 for the wheel without the airbag cover), so I tried a local company, DCS Motorsports in California. I went in, looked at samples, and decided to go with some red leather on the air-bag cover, red stitching where there was black leather, and black stitching where there was red leather. Some of the leather grip is perforated, which seems to be the current style.
It was supposed to take three weeks to be made in Taiwan, but it ended up being three months, so they gave me a discount, bringing the cost down to $582. Installation took me two hours.
Old vinyl and new red-and-black leather air-bag covers
Old and new steering wheels
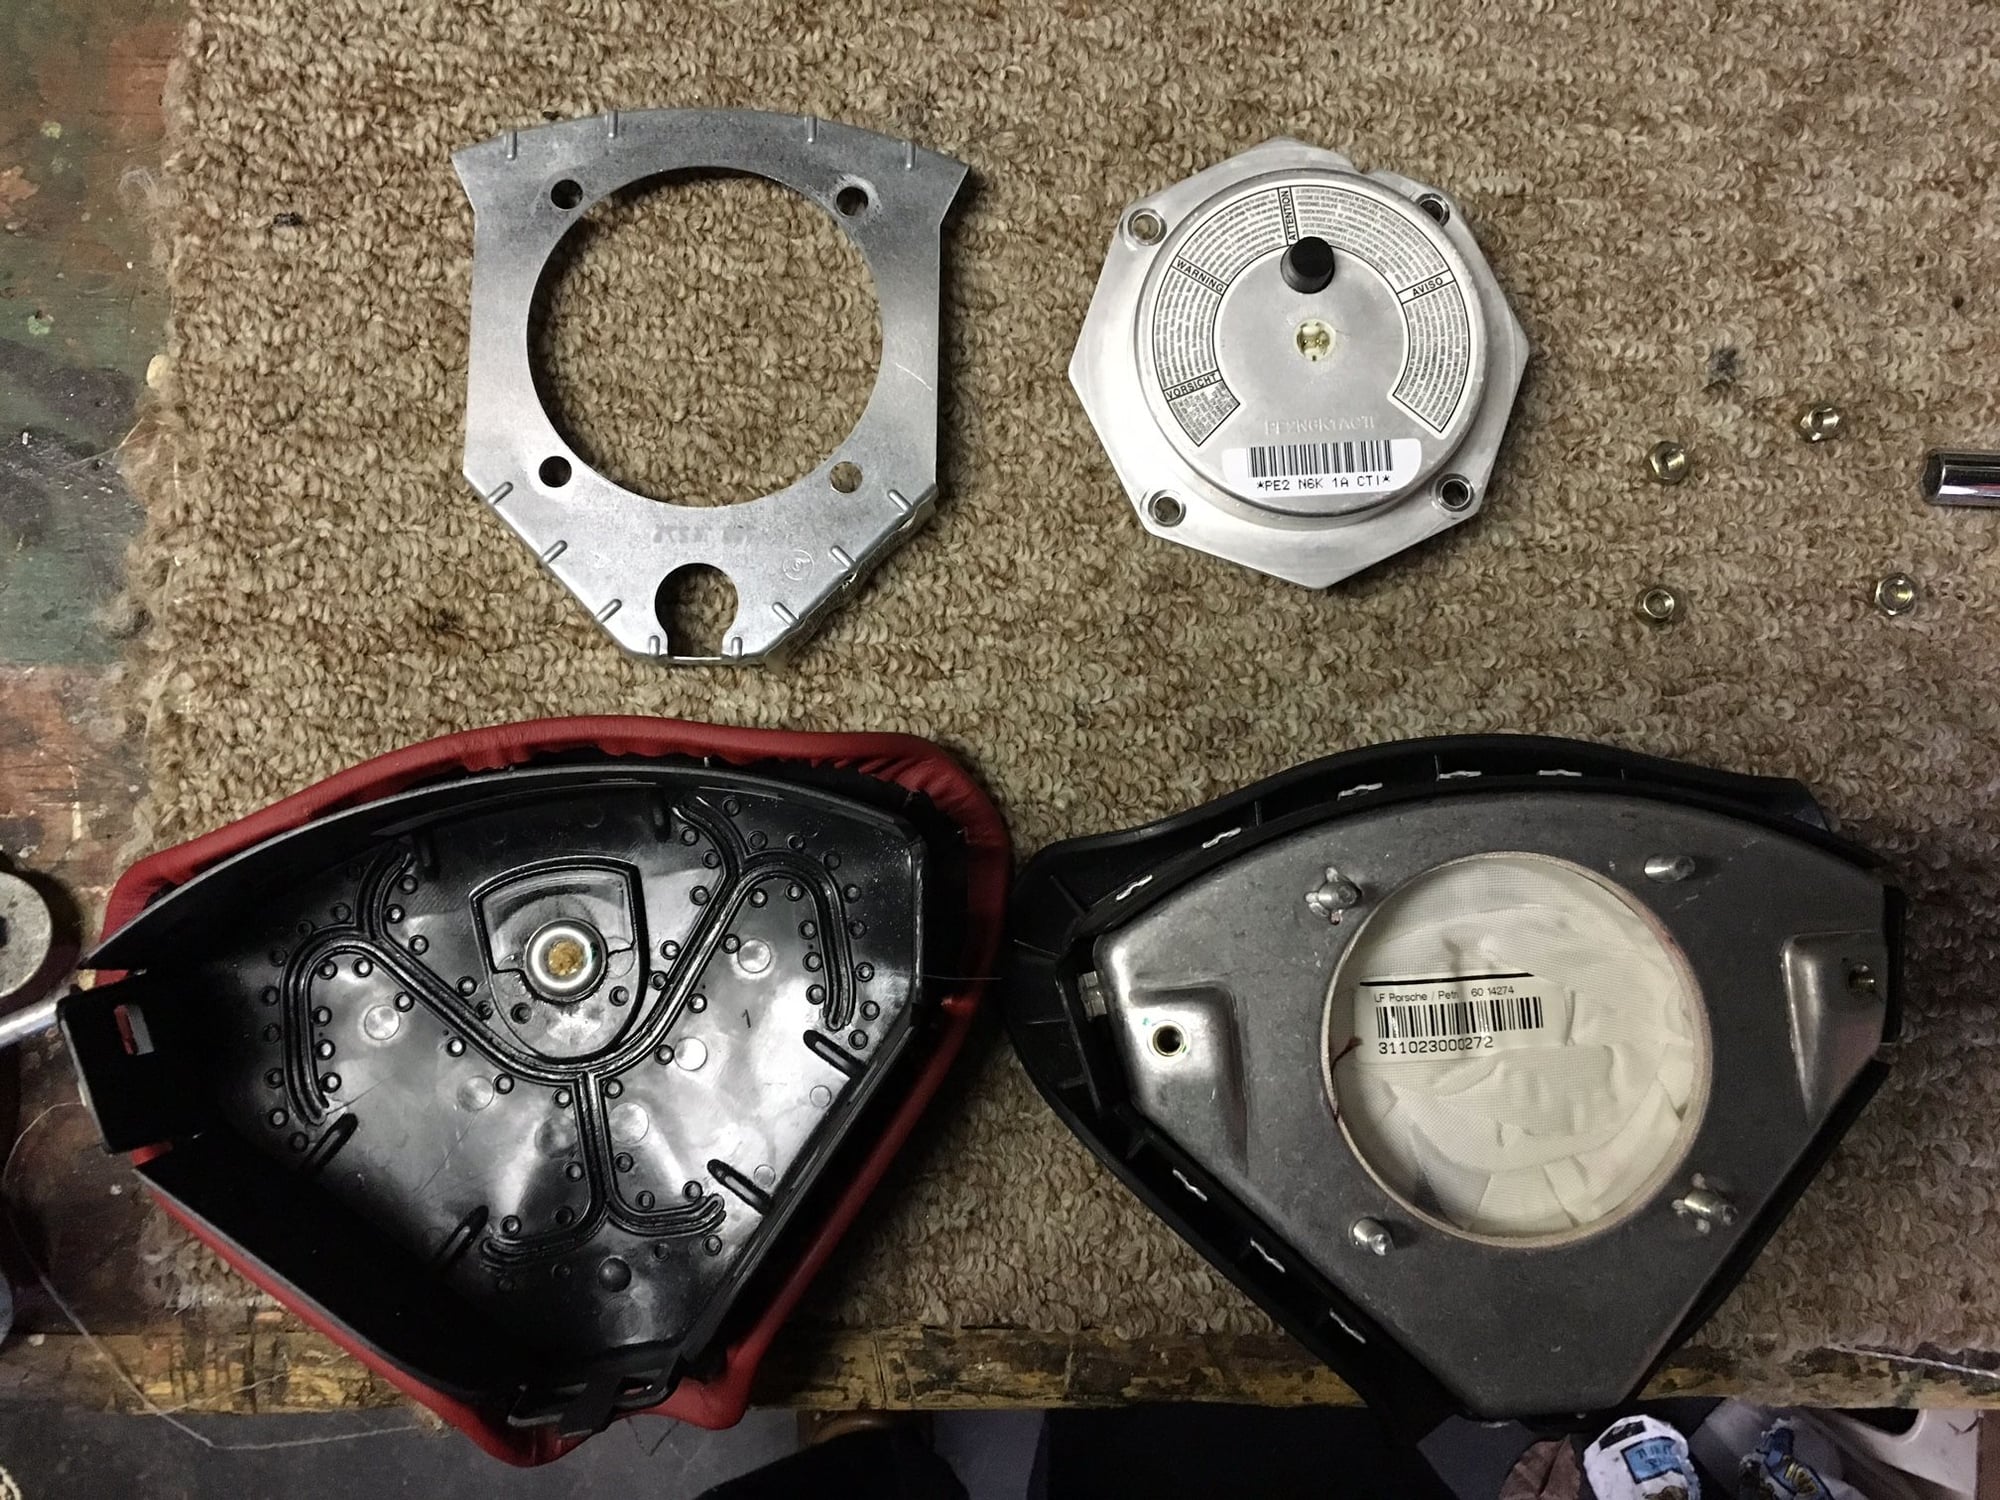
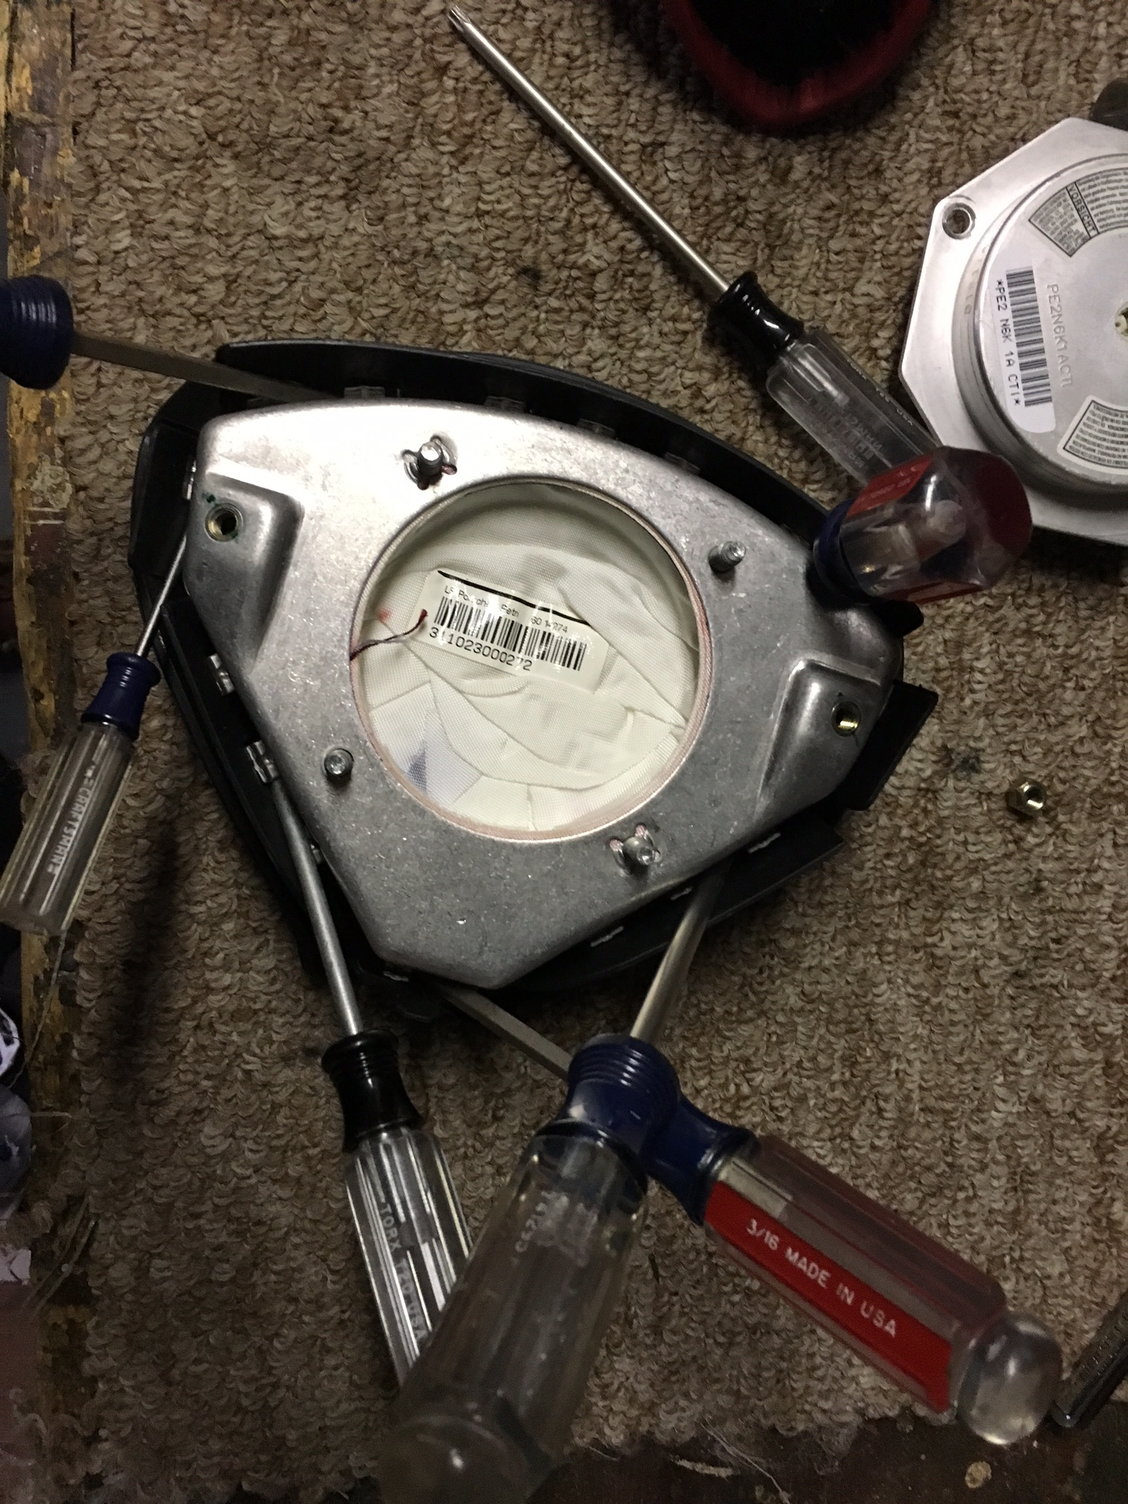
Disassembly
Getting the airbag out was the hard part
The red on the steering wheel somewhat matches the needles on the gauges
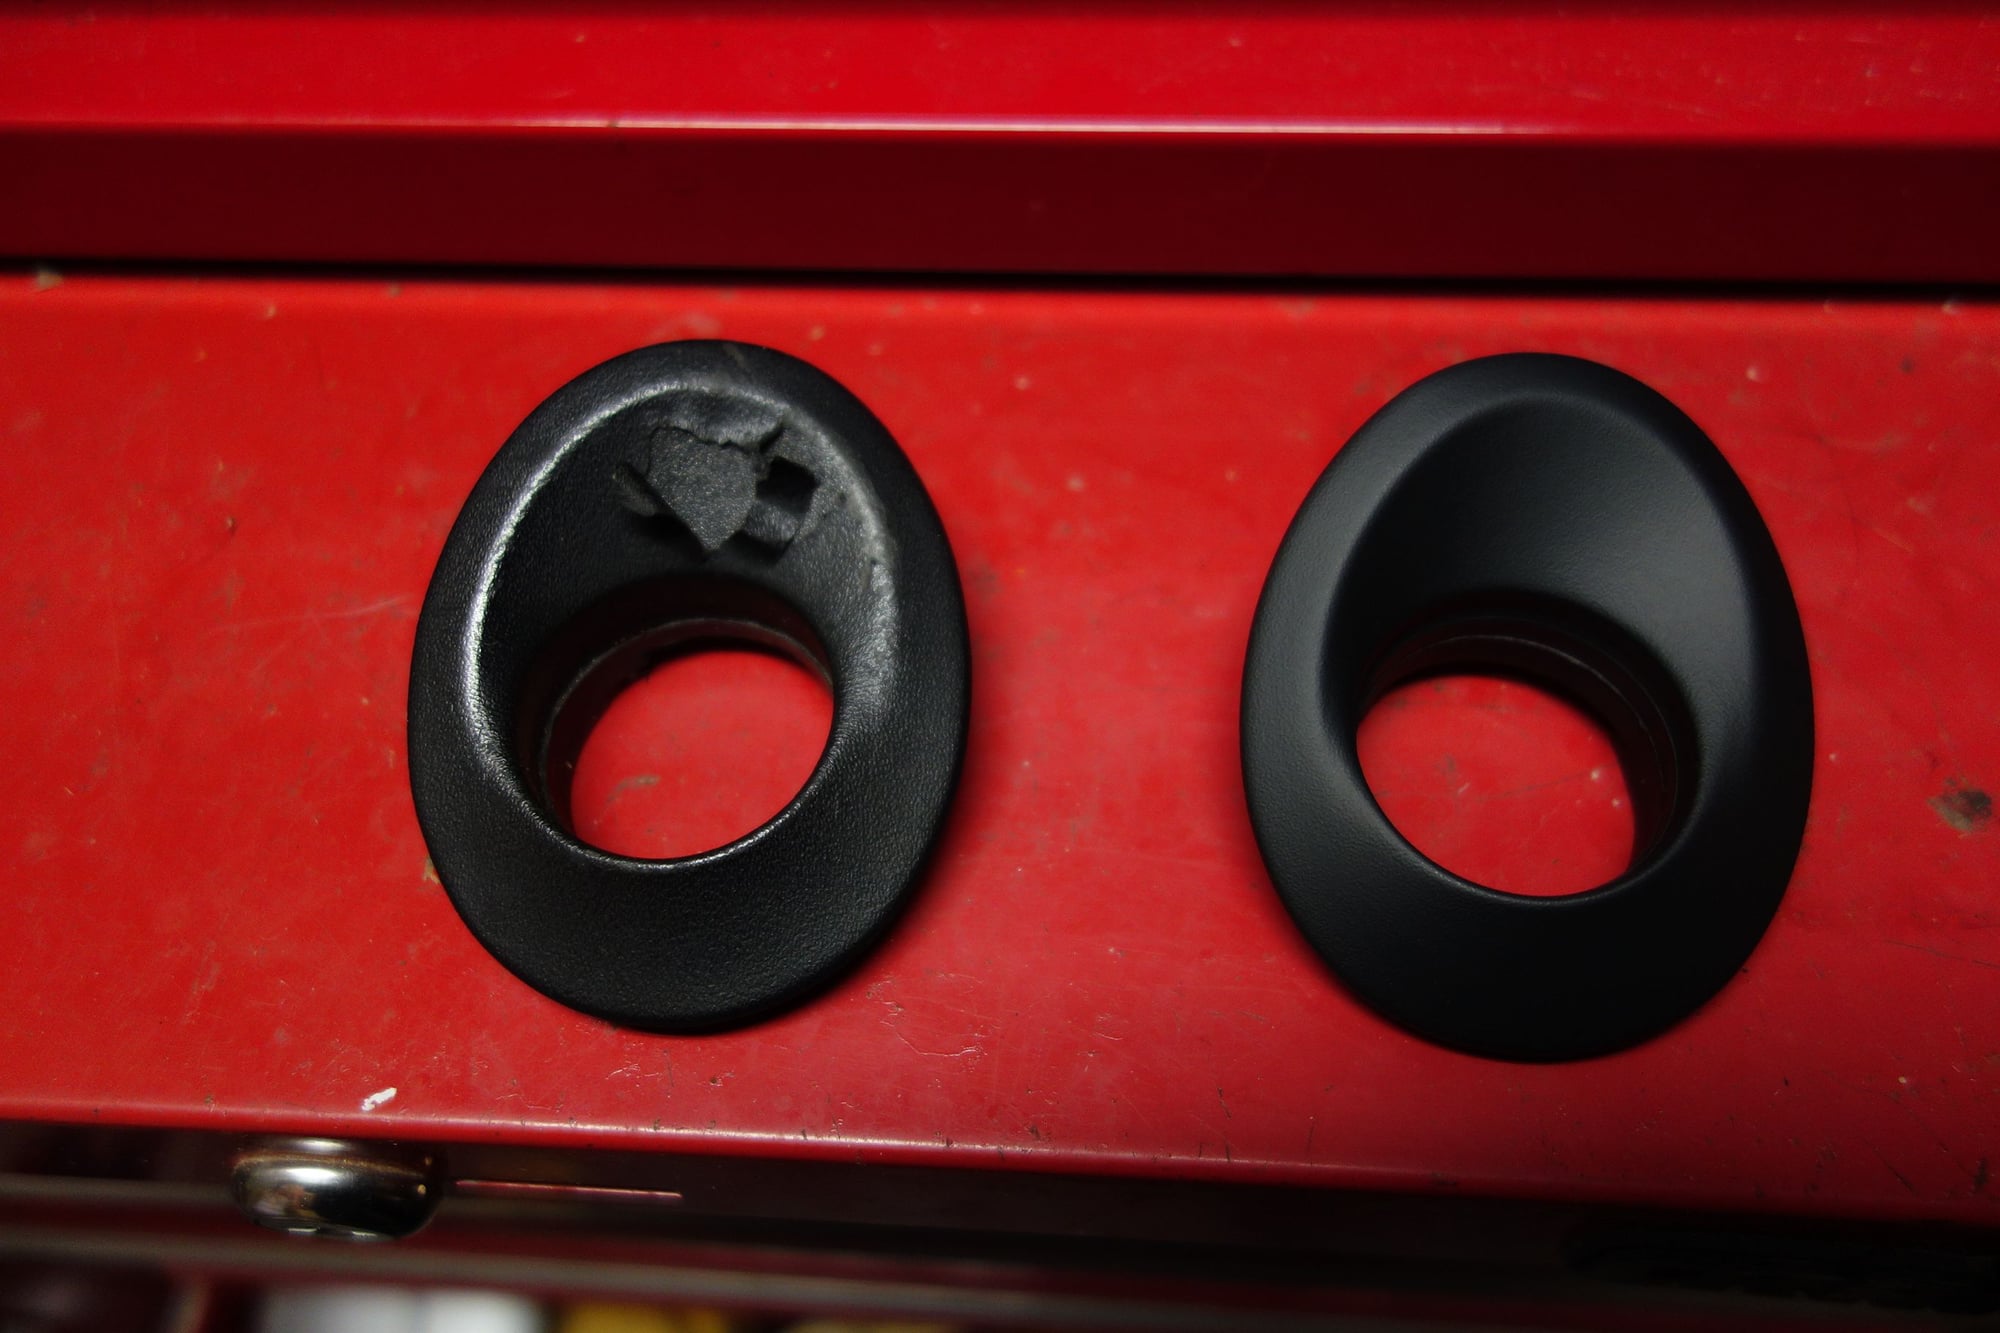
Igntion-Key Surround
The stock ignition-key surround was covered in very thin leather, which did not hold up to repeated stabbing with the ignition key.
I bought a textured plastic Porsche-brand replacement from Suncoast for a whopping $72. It does look nicer and should last longer.
The original ignition-key surround had torn leather
White LEDs
The stock light bulbs in the courtesy (overhead) lights, the doors, and rear were all incandescent lamps that drew enough current to drain the original battery when a door was left ajar all night. They were also really hot to the touch. I replaced them all with LEDs from Super Bright LEDs, using different models as follows:
Doors, rear hatch, and right courtesy light: WLED-NW6
Glove box: 3022-WWHP4. This is bring enough for the passenger to read with.
Front trunk, center courtesy light: 4410-NW9
Left courtesy light: WLED_WHP
Total cost was about $40.
That's all for now.
Last edited by DrMEMS; 01-16-2017 at 05:39 PM.
Reason: Added more information
Great job! Two quick ?s, who made the bezel for the head unit and how hard was it to fit the heat/ac controls in the lower mount? Thanks!
The bezel came with the Alpine kit. It's made to fit the standard double-DIN size of the opening in the dashboard.
Moving heater/AC controls was easy. IIRC, I unclipped two wire connectors in the back and moved the wires down to the new location. After reconnecting the wires, the heater/AC control slid into place.
I'm not a fan of the center console in wood, I personally would have left it silver. It's just too much wood for the car. In my opinion the shifter and handbrake are just enough. The other mods work. Now that you added red, you'll need red seat belts, and red stitching on the floor mats. Nice Targa.
I'm not a fan of the center console in wood, I personally would have left it silver. It's just too much wood for the car. In my opinion the shifter and handbrake are just enough. The other mods work. Now that you added red, you'll need red seat belts, and red stitching on the floor mats. Nice Targa.
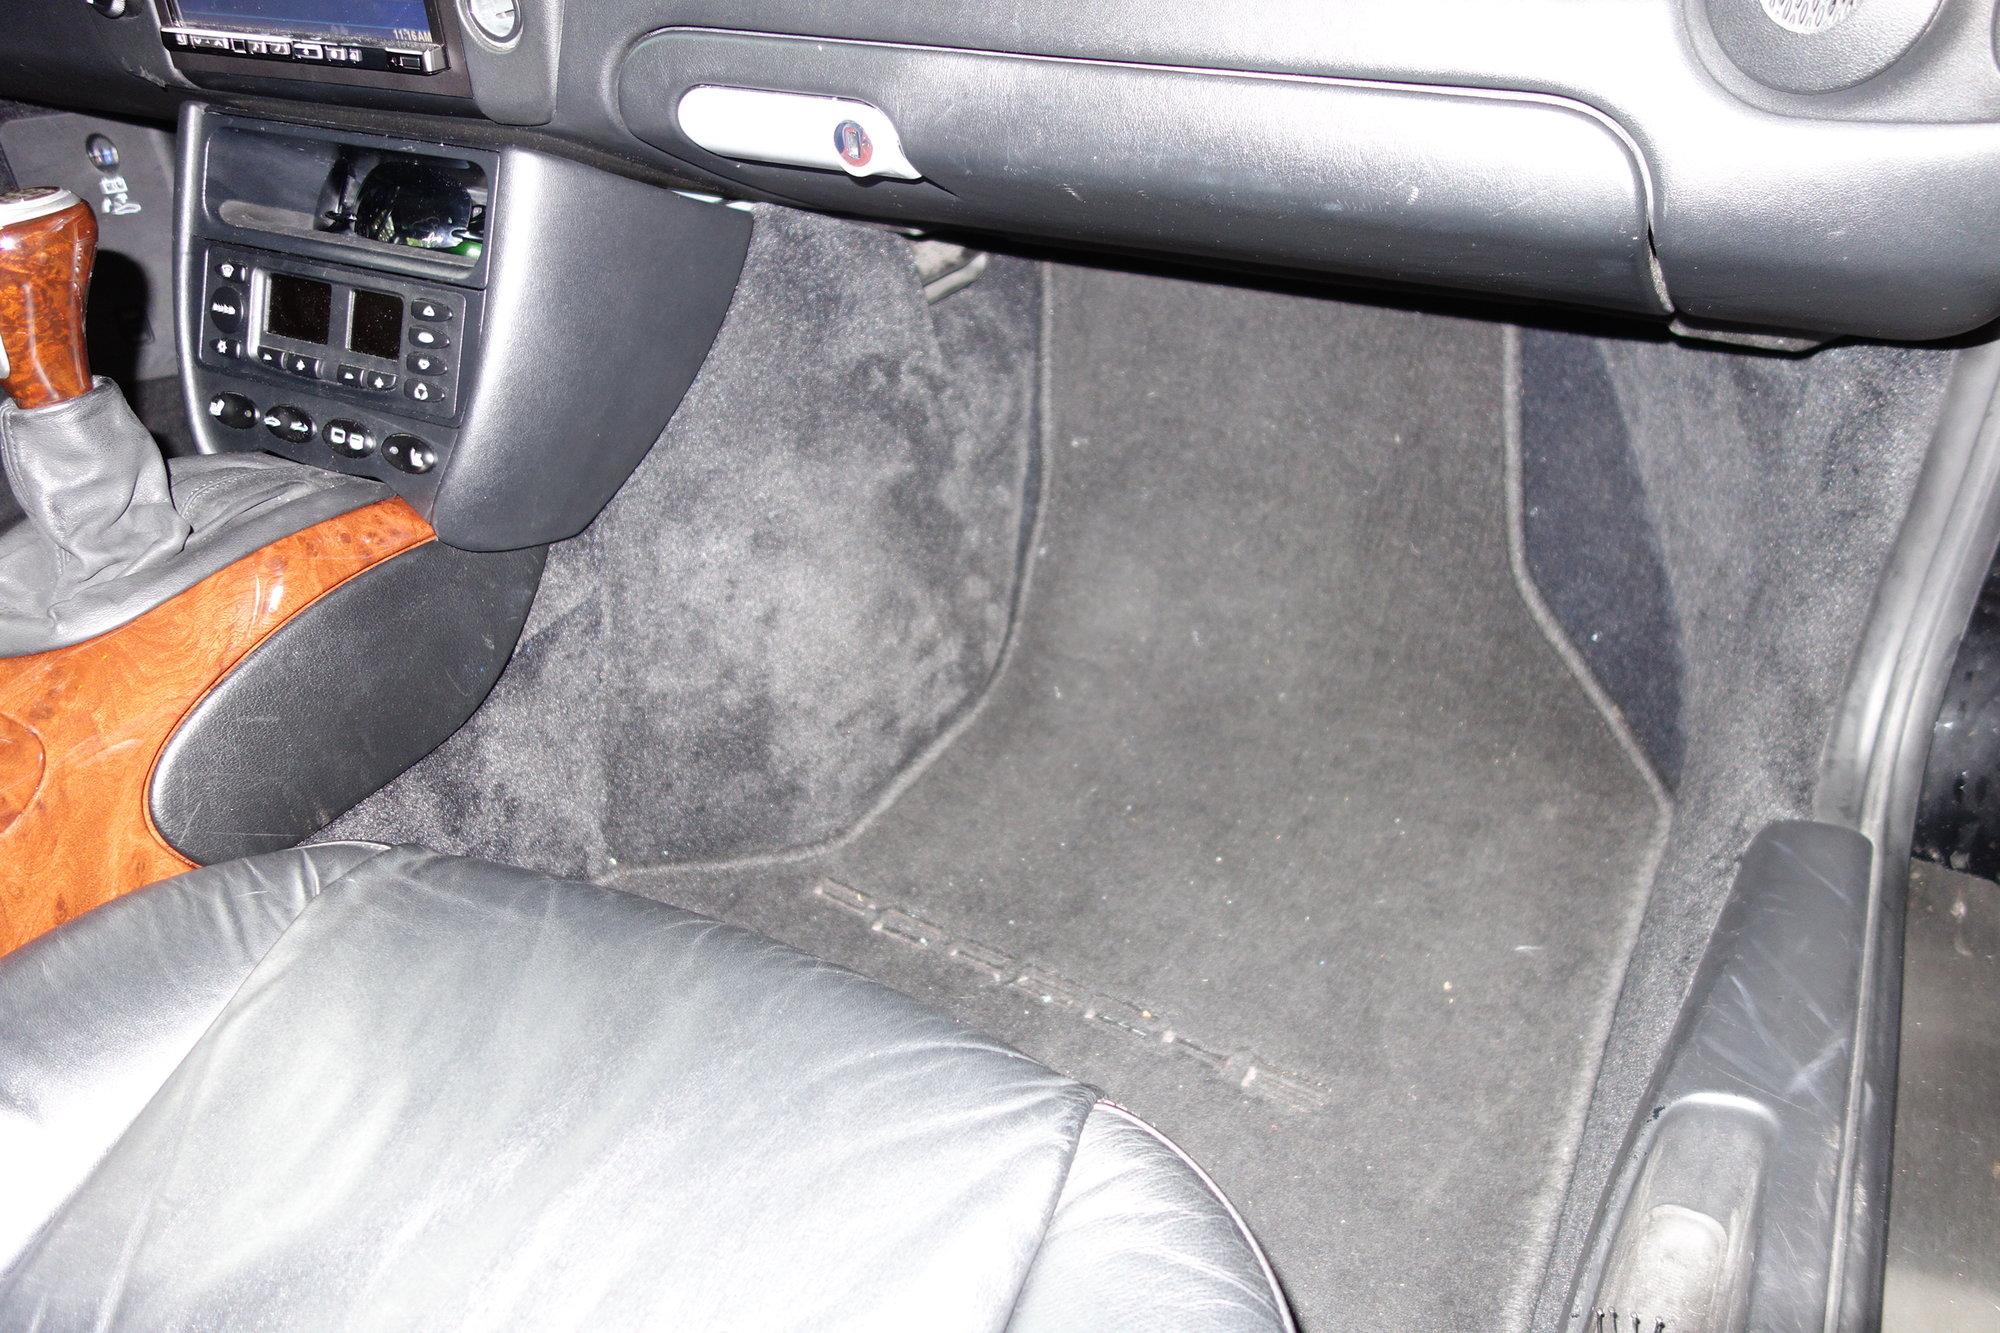
Before too long I'll get new floor mats with PORSCHE in red stitching. The driver's side mat is almost worn through.
Red seat belts would look nice.
It looks like polished burl wood to me, so I'm happy with it.
In one sense it's better than real wood vernier because it won't shrink and crack like real wood. I've seen a lot of Porsche-brand wood-covered parts and even solid wood parts (shift ***** and steering wheels) for the 996 that have cracks in them.
Kudos to making it your own, I like the simple black everything but thats me. Also I didnt know the iginition surround came in leather all the ones i've seen have been rubber. I like a well kept interior
We install these nifty ash tray delete trays from Porsche in our 996. We were tired of our shop dog stepping on the ash tray and opening the ashtray door :P
We install these nifty ash tray delete trays from Porsche in our 996. We were tired of our shop dog stepping on the ash tray and opening the ashtray door :P
Just a heads up, that console will fit boxsters (97-04) and Carreras (99-04) but the textures changed to soft touch coating for both in 02+. That page doesn't specify (although I guess you could figure it out from the part number).
 01-15-2017, 10:46 PM