Which O2 sensor to replace?
 12-30-2015, 10:42 PM
#16
Advanced
Thread Starter
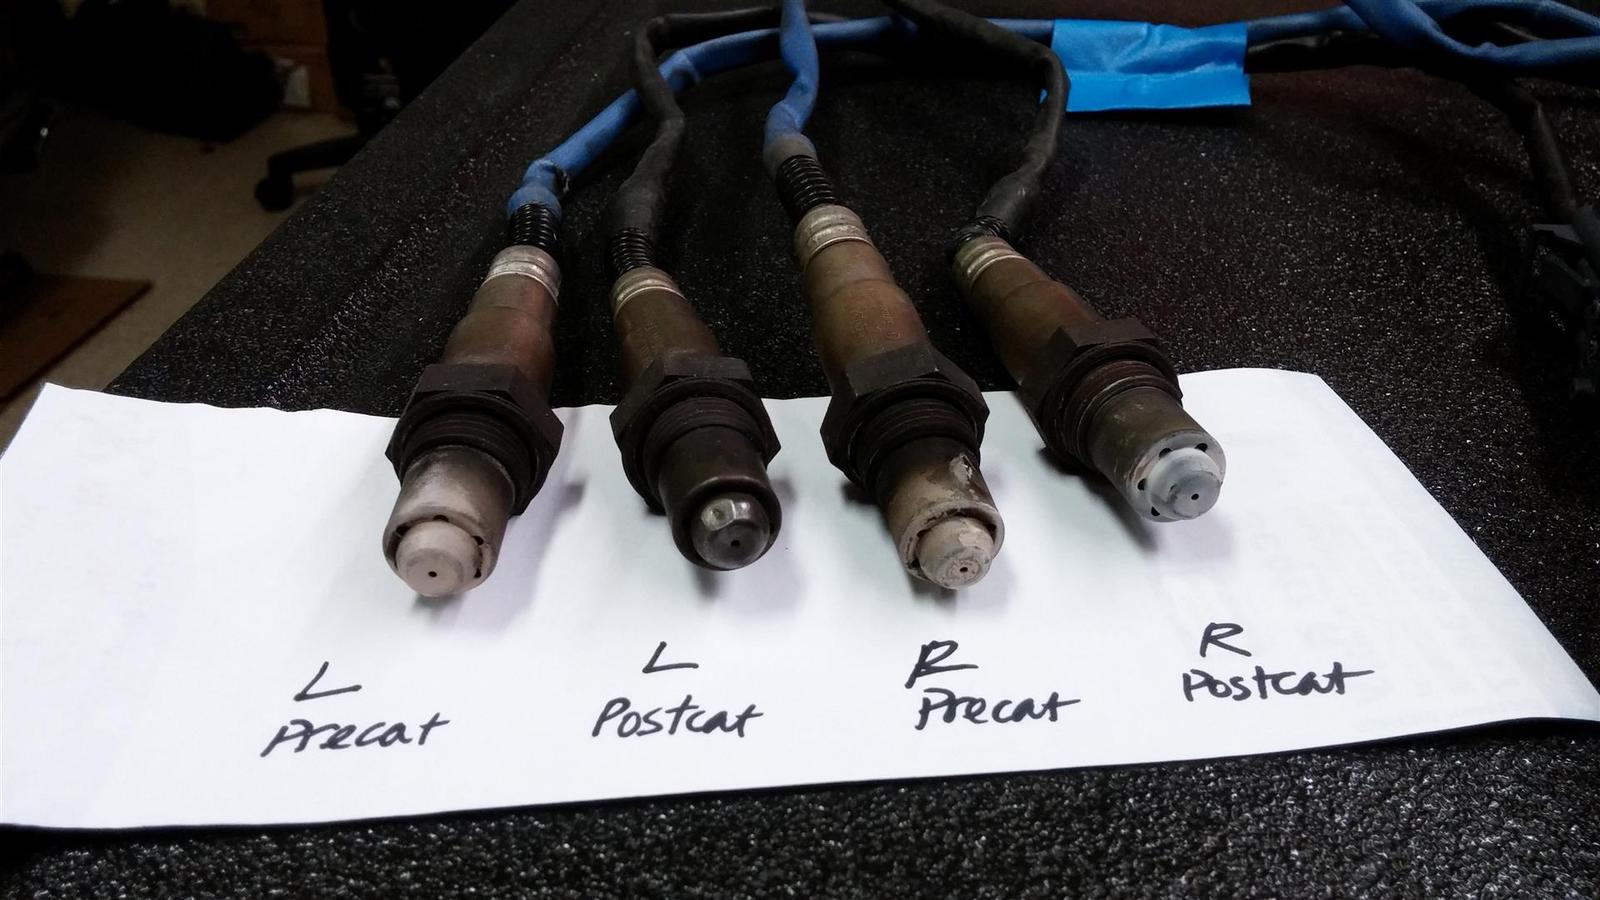
No rattling at idle or at higher rpm. Only evidence of loose element is the shiny metal tip on half of bad cat O2 sensor tip. Do you know where to find a shop drawing of the cat to see where the element is located within the chamber we see on the outside?
 12-30-2015, 11:59 PM
#17
The inside looks like this http://www.ocregister.com/articles/c...ions-cats.html
with two elements on the ends and the post-cat sensor right between the two elements. Yes, the sensor only monitors the upstream element.
with two elements on the ends and the post-cat sensor right between the two elements. Yes, the sensor only monitors the upstream element.
12-31-2015, 11:08 AM
#19
Race Director

Not the same of course but even though the converter brick in my Boxster's exhaust was loose enough to knock when cold and buzz when hot the #1 and #2 sensor on that side were just fine with no signs of any contact on the tip of either sensor.
I agree if the brick is loose the converter needs to be replaced although as has been mentioned in other posts cutting apart the converter housing and securing the brick then welding up the housing again is one possible solution to the problem. I have read of other owners having this done and with successful outcomes but how to find a place to do this... Ideally someone who has had this done and can recommend a place would be one way but one might be the first in his area.
12-31-2015, 01:14 PM
#20
It happened to my '03 so it's definitely not "out there".
Can the converter brick really be contacting the O2 sensor tip? That seems a bit out there to me. Based on my admittedly limited experience with sensors the tip doesn't look to be up to much of any contact with anything before it would be past the worn shiny point and coming apart.
Not the same of course but even though the converter brick in my Boxster's exhaust was loose enough to knock when cold and buzz when hot the #1 and #2 sensor on that side were just fine with no signs of any contact on the tip of either sensor.
I agree if the brick is loose the converter needs to be replaced although as has been mentioned in other posts cutting apart the converter housing and securing the brick then welding up the housing again is one possible solution to the problem. I have read of other owners having this done and with successful outcomes but how to find a place to do this... Ideally someone who has had this done and can recommend a place would be one way but one might be the first in his area.
 01-08-2016, 09:54 AM
#22
Advanced
Thread Starter
Assai, my post bad cat sensor had the exact same appearance as yours, but mine had not worn a flat spot yet. I have a buddy who can tig weld the converter shell back together after I open it up, so that is my approach. I will ask him to reattach the brick if there is an obvious failure of the original attachment mechanism. I will post pictures of what I find. Thanks for the confirming photos of your sensors. Jonhums.
01-08-2016, 12:11 PM
#24
Damn, I need a buddy like that 
Once you take off the cat, you should be able to shake it and feel the brick rattling inside. Keep us posted.
Once you take off the cat, you should be able to shake it and feel the brick rattling inside. Keep us posted.
Assai, my post bad cat sensor had the exact same appearance as yours, but mine had not worn a flat spot yet. I have a buddy who can tig weld the converter shell back together after I open it up, so that is my approach. I will ask him to reattach the brick if there is an obvious failure of the original attachment mechanism. I will post pictures of what I find. Thanks for the confirming photos of your sensors. Jonhums.
01-08-2016, 12:15 PM
#25
Yes, once the brick is loose, the post cat sensor is the only thing stopping the brick from shooting further down. The honey comb material of the brick just polishes the tip of the sensor from vibration, kinda like those vibrating toothbrush.
01-10-2016, 11:45 PM
#26
Advanced
Thread Starter
I opened up the upstream weld on the bad cat and was not able to separate the shell at the weld. I got it to move about 3/8" but it seems to hang up on an internal sleeve that connects the two bricks. That sleeve has a hole in it for the sensor and is free on the downstream side of the shell but somehow attached to the upstream head of the shell. I can't see how the sleeve could have been welded to the upstream head and am soaking that joint with PB blaster overnight. Any experience with taking one of these guys apart would be appreciated.
01-11-2016, 12:33 PM
#27
Maybe someone knows but I've never seen a pic of one opened up. I'm sure it can be done though as I had Carnewal put in some 200-cell bricks on mine. Is the upstream brick loose?
01-11-2016, 04:36 PM
#28
Advanced
Thread Starter
It slides within the inner sleeve, but does not rattle. I probably caught the problem early enough to avoid more damage. Do you have a name at Carnewal? I would like to pick his brain for a clue as to what to try next. Thanks.
01-18-2016, 11:36 AM
#30
Advanced
Thread Starter


Post cat sensors. Top driver side; bottom passenger side
Driver side sensor port. Note sensor contact area on edge of brick.
Update on problem solution. My buddy welded up the bad cat converter shell and I attempted to solve the problem of the shifting brick by installing a stainless steel leaf spring retainer through the sensor port. The spring was placed up against the second brick and anchored on the body of the sensor while exerting pressure against the first brick in the middle of the spring. The spring was a 6" rule pictured below. The first 200 miles with this solution have been CEL free.

6" stainless steel rule with clip on top to distribute spring load on second brick edge and radius on bottom to lock into the sensor body.