When you click on links to various merchants on this site and make a purchase, this can result in this site earning a commission. Affiliate programs and affiliations include, but are not limited to, the eBay Partner Network.
How to install OPT7 LED H7 low beams in a Porsche 996.2
After driving a newer car with much brighter low beams than my 2003 996.2, I wanted brighter lights in my Porsche. I chose OPT7 brand FluxBeam model LED lamps because they are supposed to be drop-in replacements for the stock type H7 tungsten-halogen lamps, because they had good beam-pattern ratings, and because they appeared to have good cooling with a large heat sink and a fan.
After seeing photos of lamp upgrades on a 996.1 in Wayne Dempsey's book 101 Projects for your Porsche 911 1998-2008 (996 and 997), I figured that it would be easy. Because the lamps are held in place much differently, the mod was not easy, so I documented how I completed the project so that you other 996.2 owners could do it as well, and maybe even better.
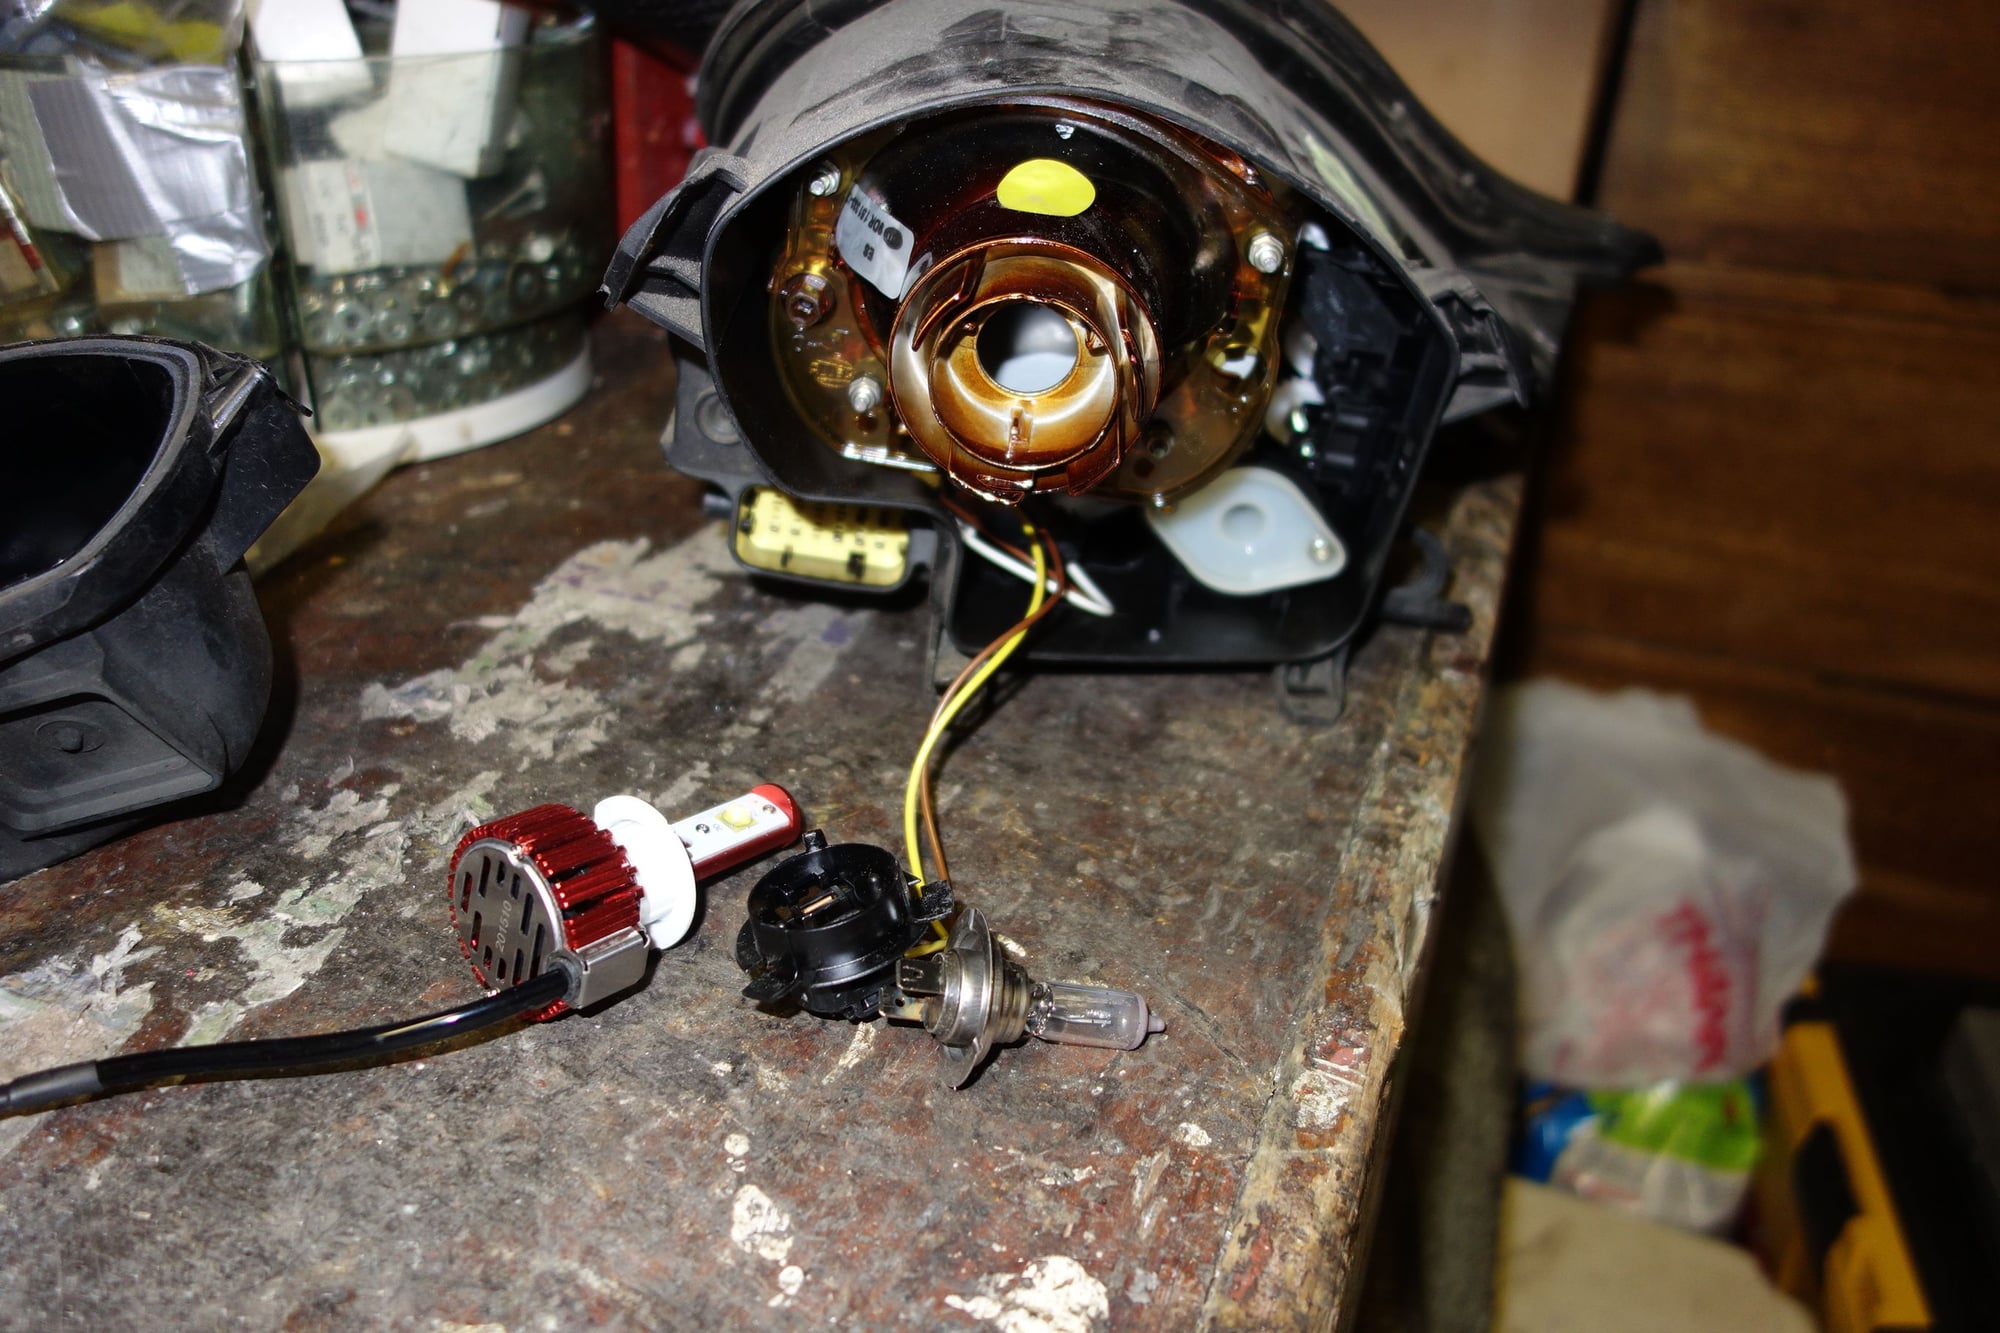
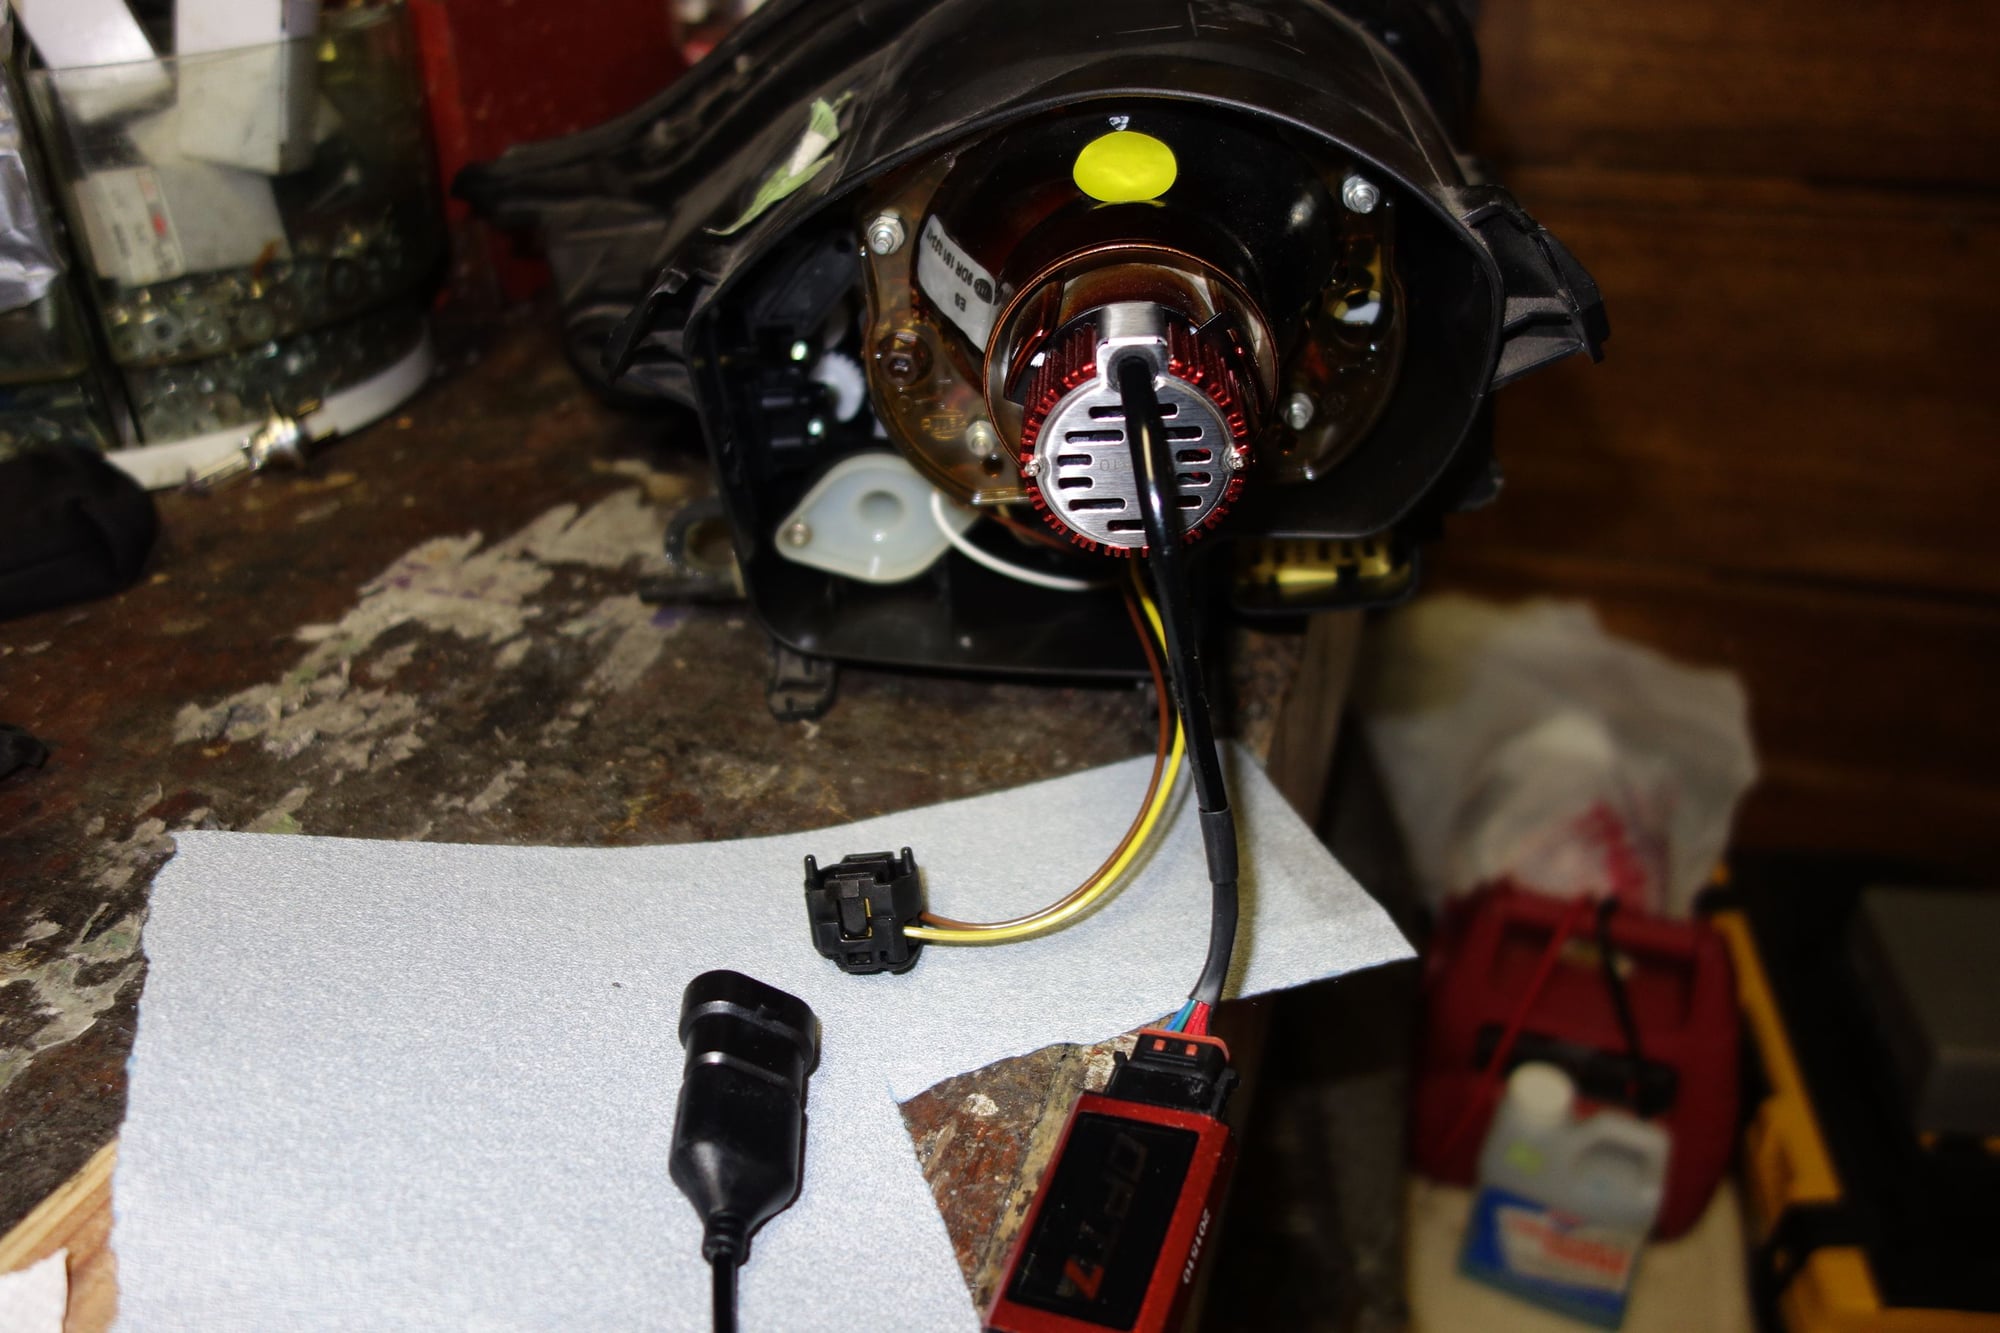
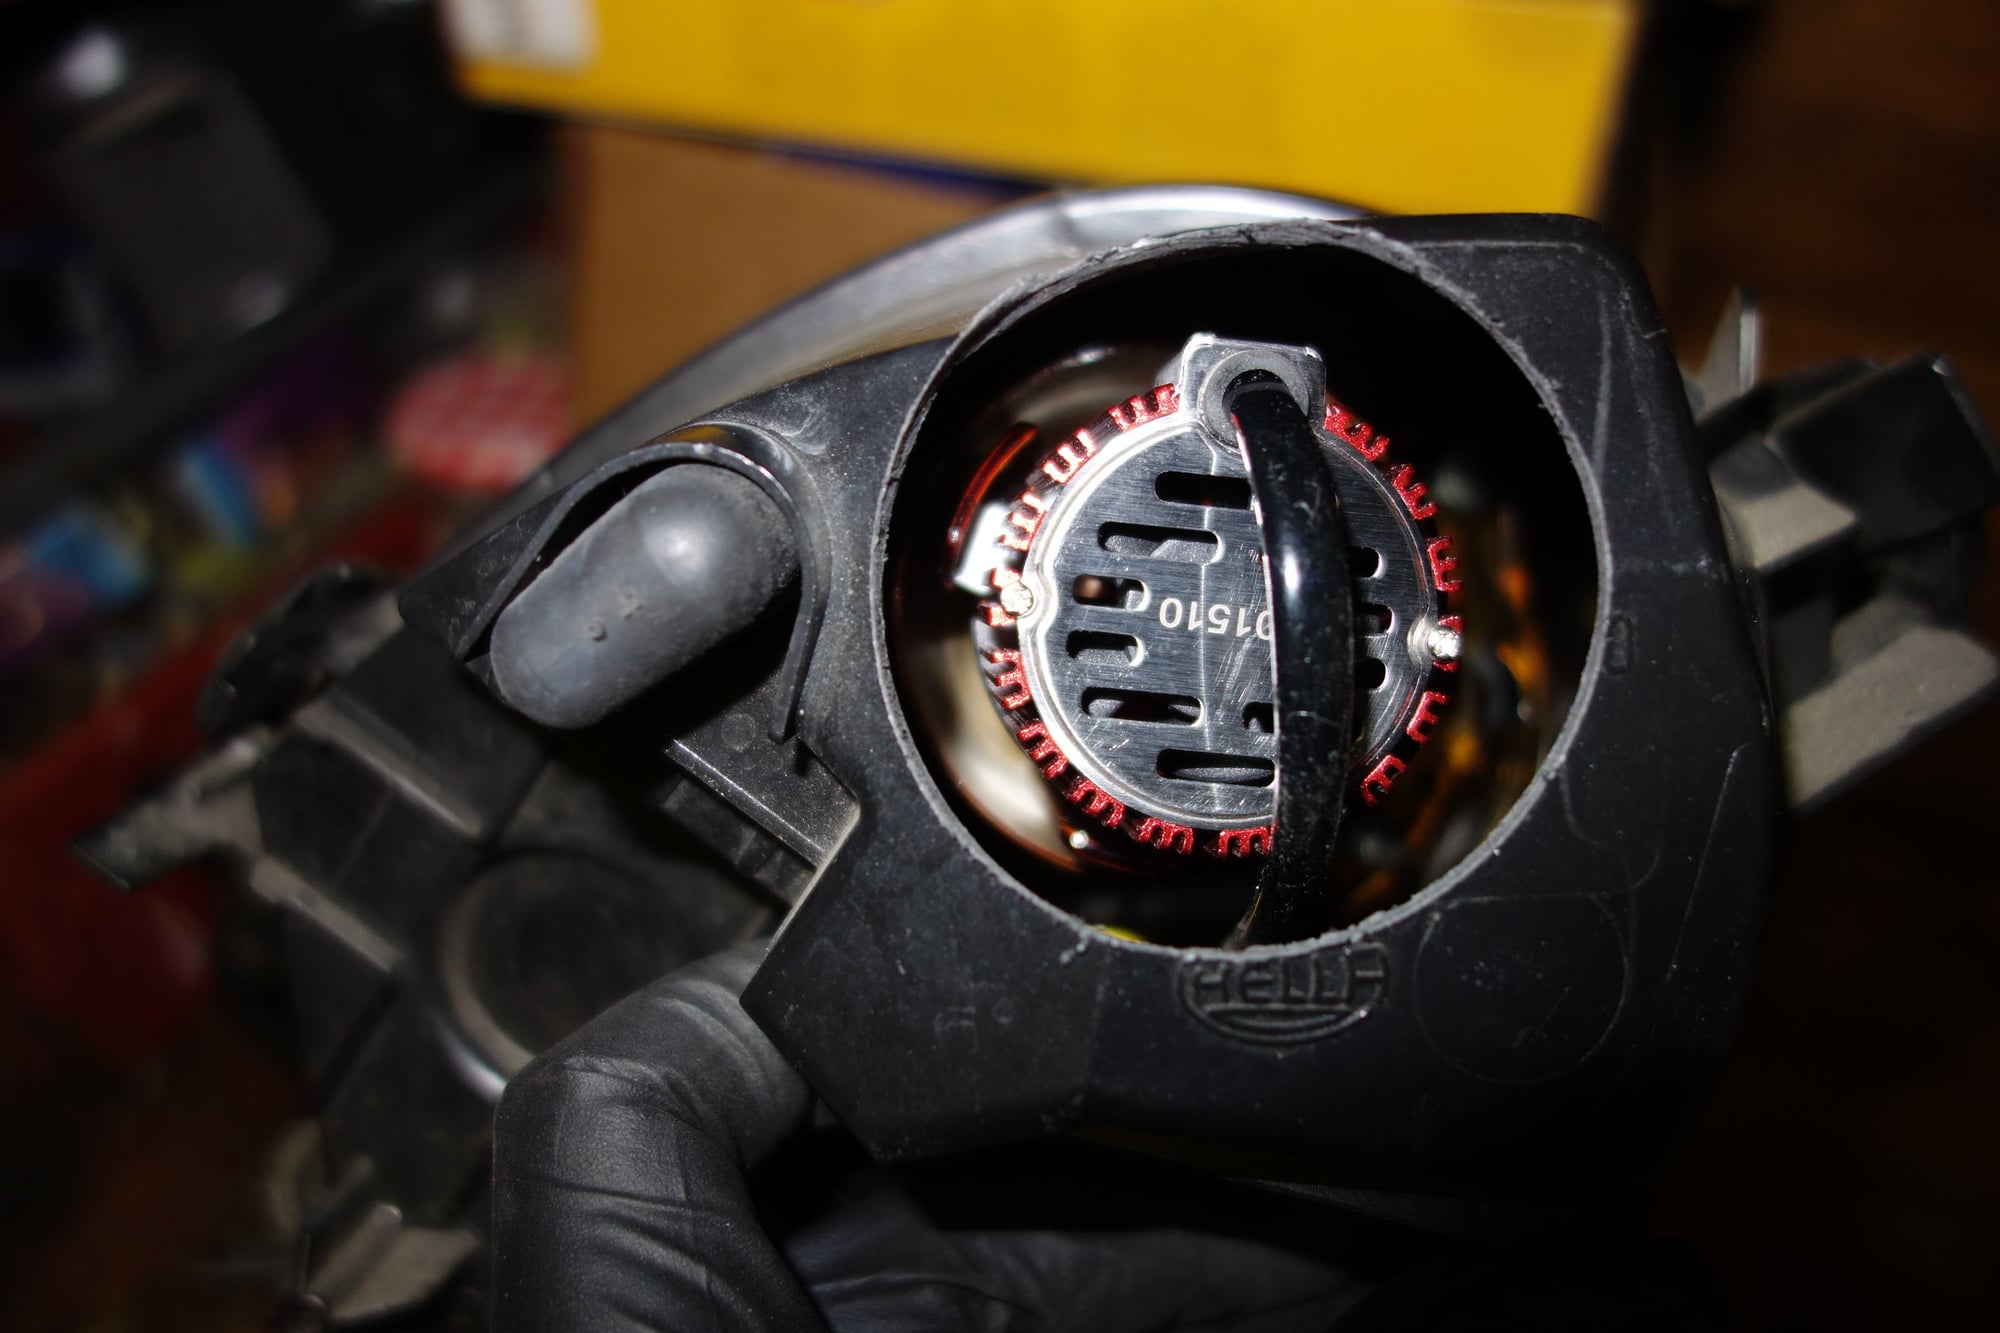
The problem is that on the 996.2 headlight assembly, the stock lamp plugs into a black plastic holder (see photo below). The black plastic holder then twists about 1/12 of a turn into the rear of the glass projector assembly. The new LED has a big red heat sink and wires hanging out the back, so it's not possible to plug it in.
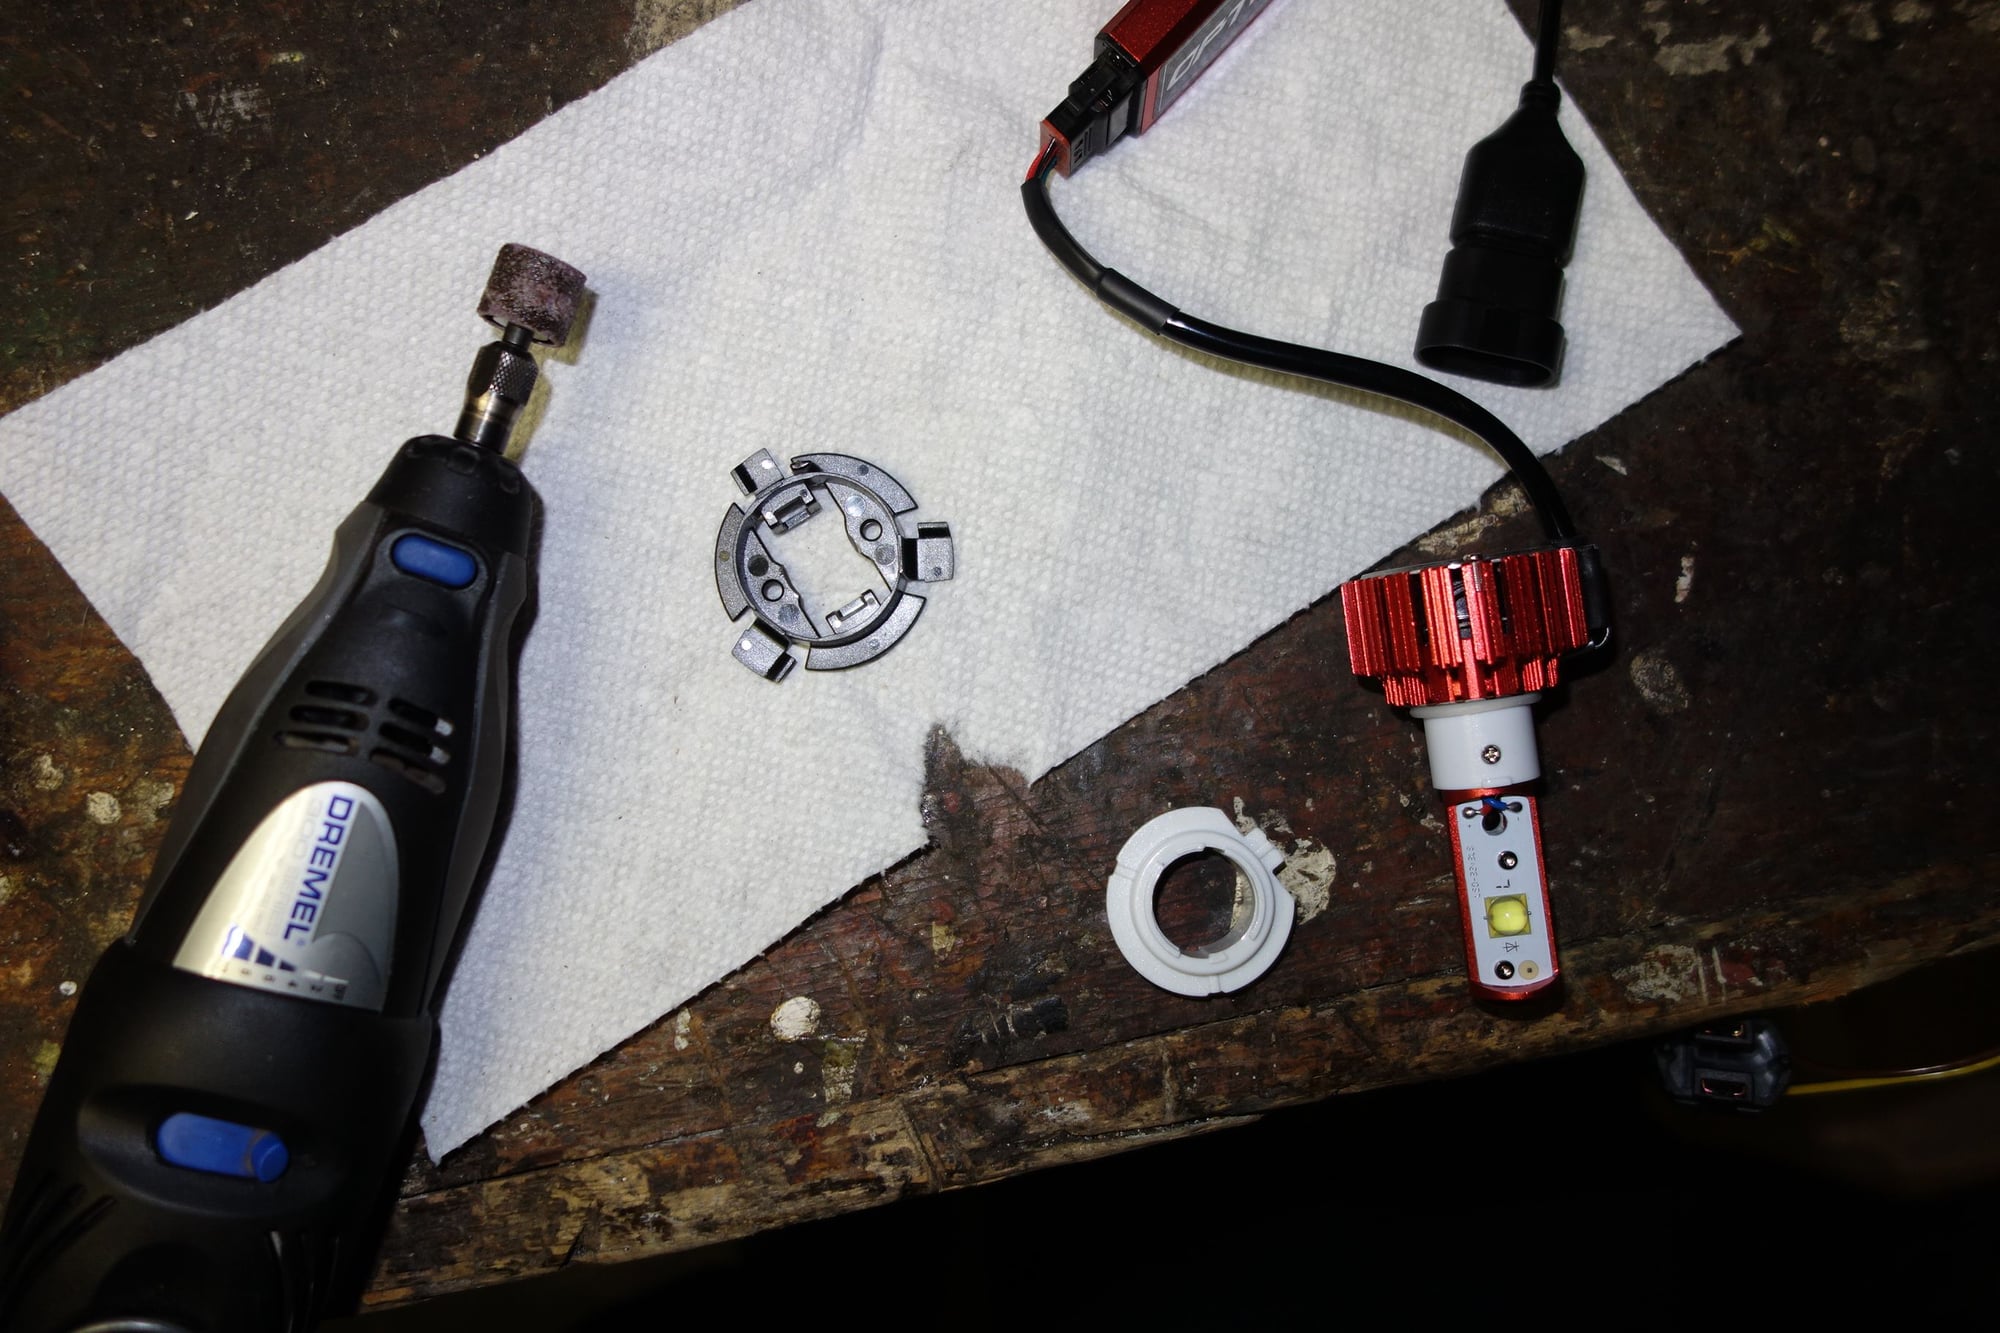
I found that I could disassemble the black plastic portion into two parts: the electrical plug and a ring with three tabs sticking out. The three tabs are what screw into the glass headlight assembly. The photo below shows the black plastic ring.
I untwisted and removed the white ring on the LED. I then used the sanding tool on a Dremel to remove a circle inside the black ring. The circle was just large enough to allow the black ring to slide all the way onto the LED as shown in the photo below.
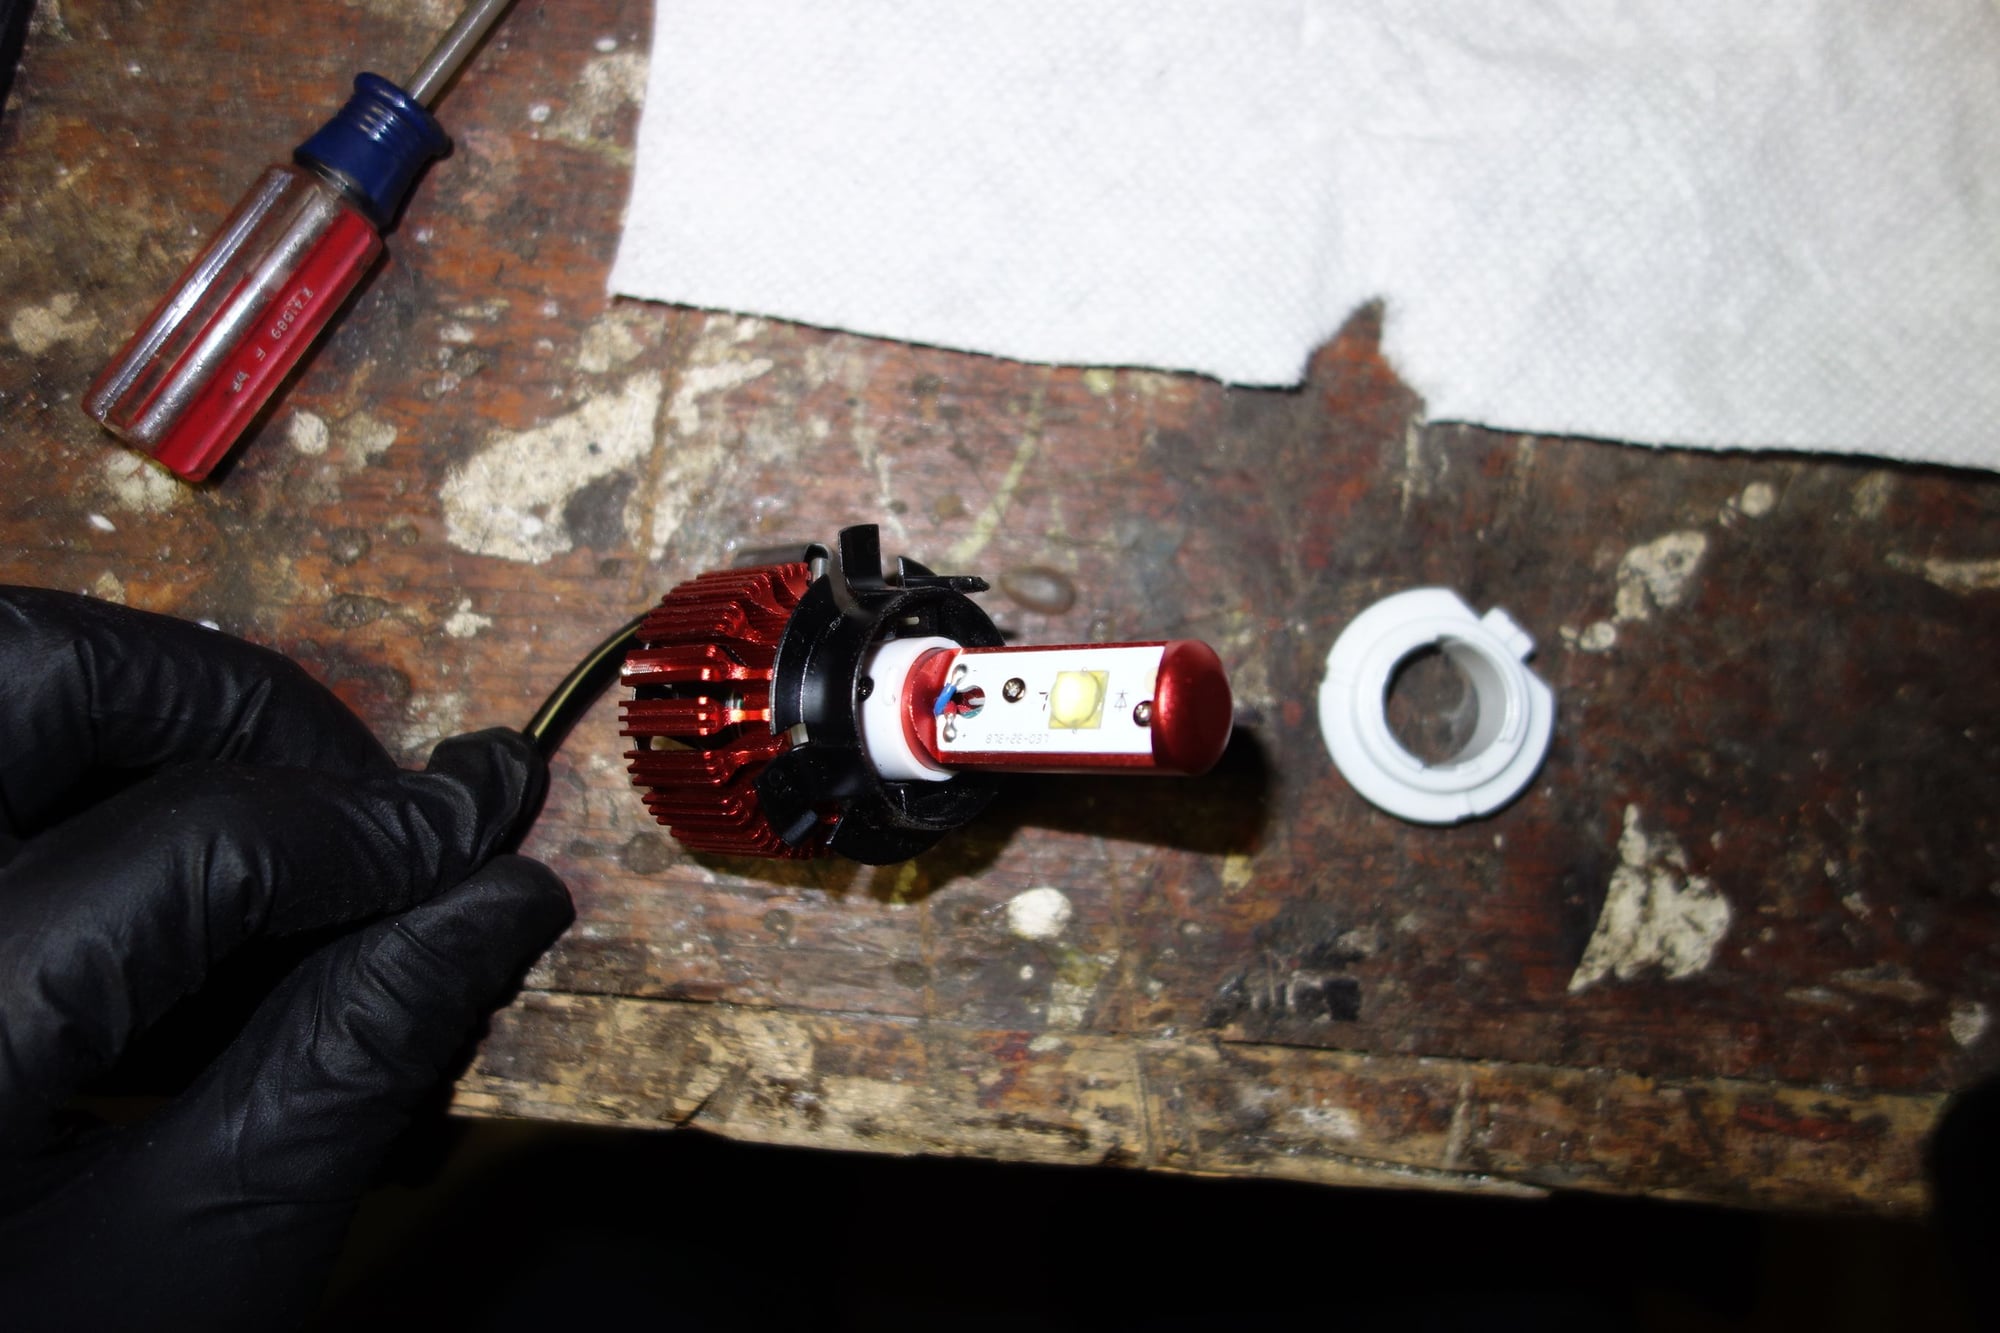
At this point, the white ring would be returned to the LED and twisted on to clamp the black ring in place. The black ring is a little too thick for this, so I gradually sanded and filed the black ring down in thickness until the white ring could be forced down and twisted on.
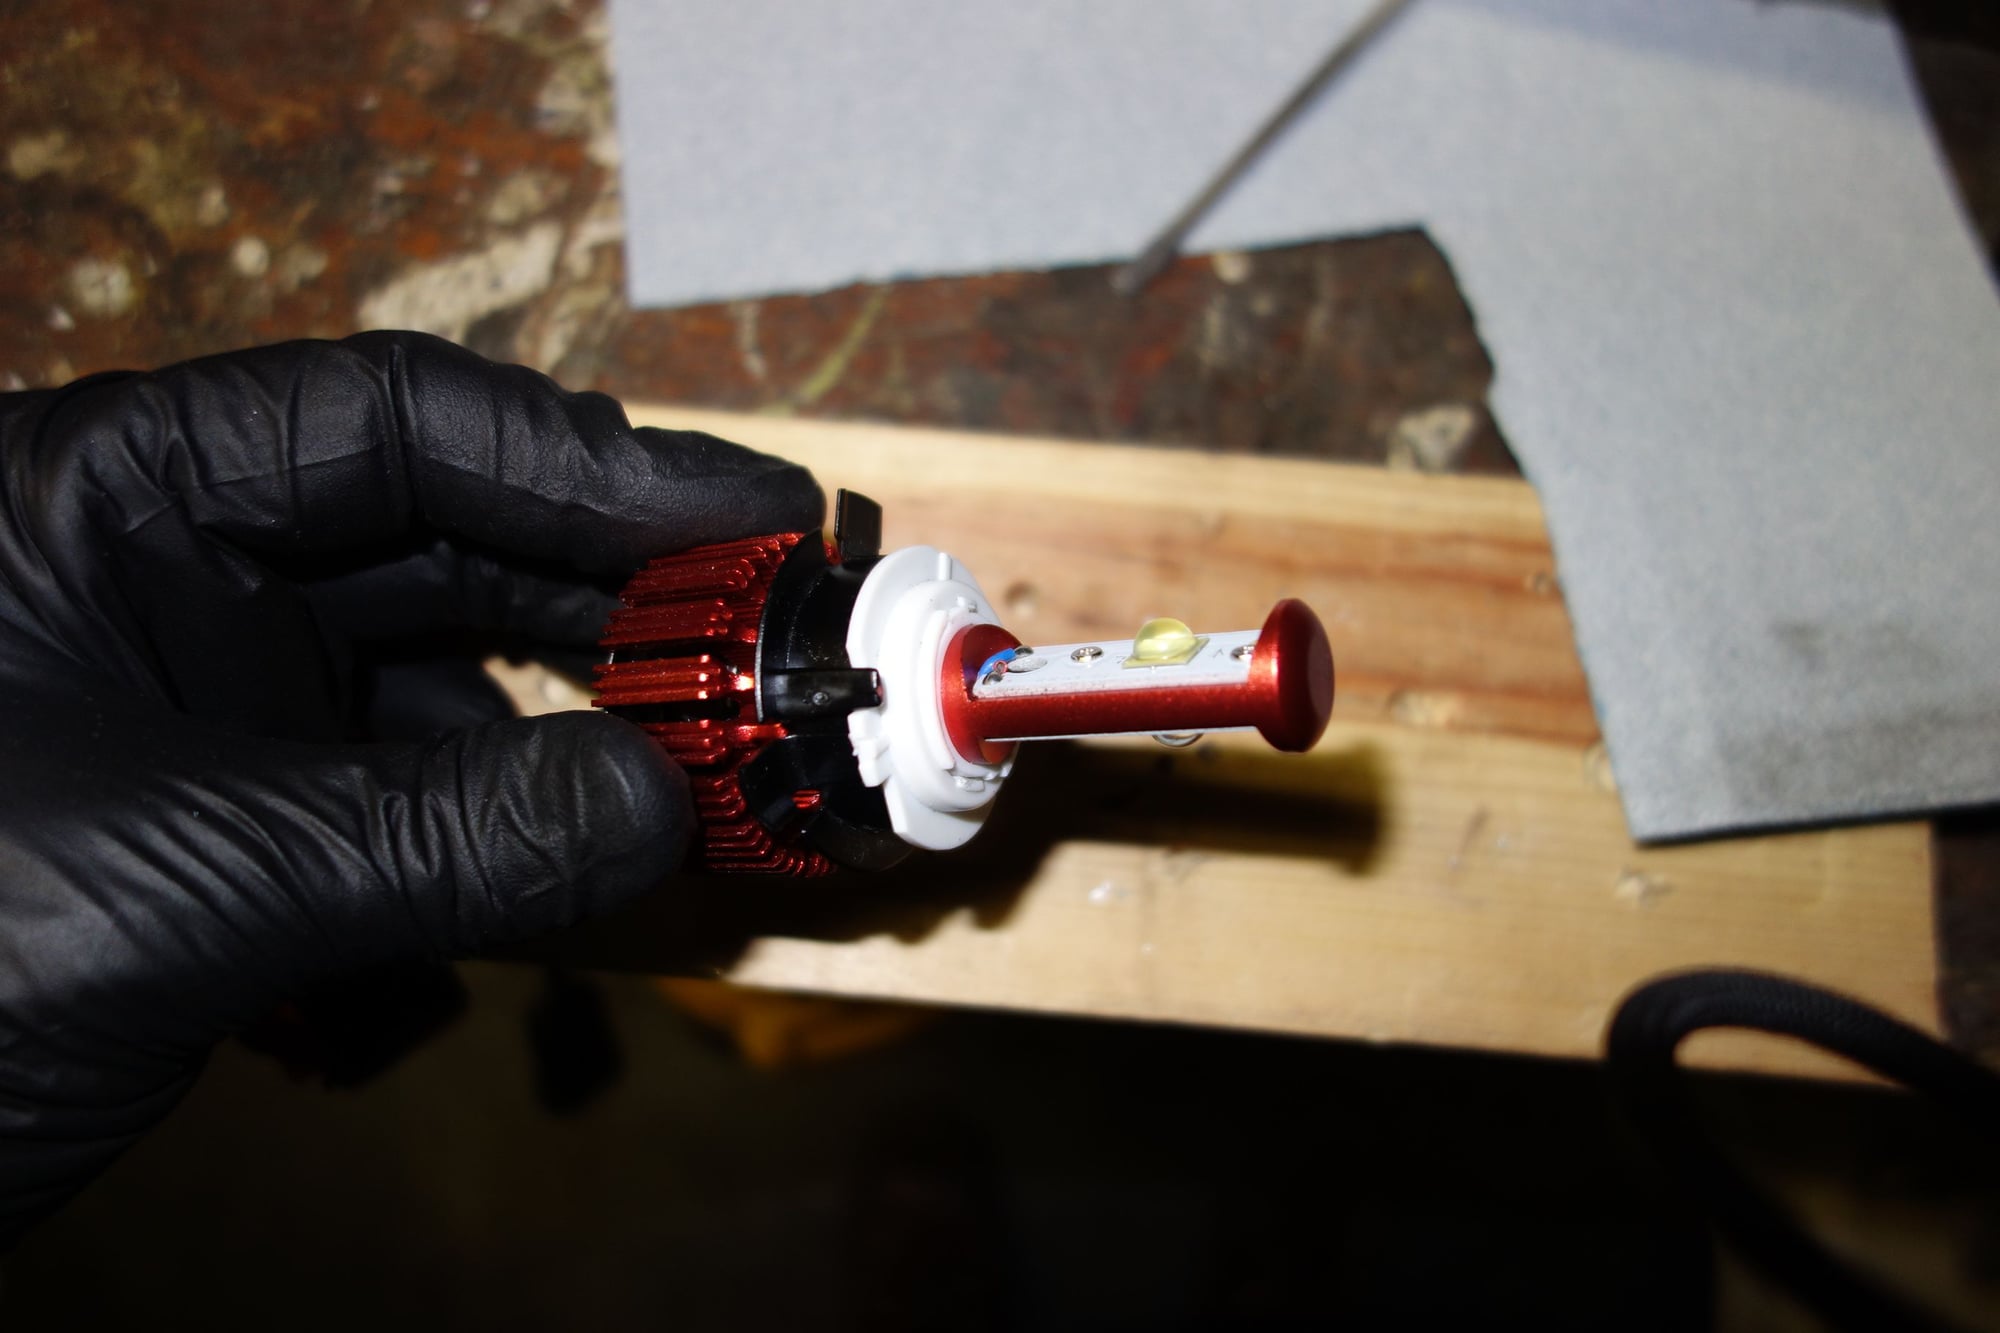
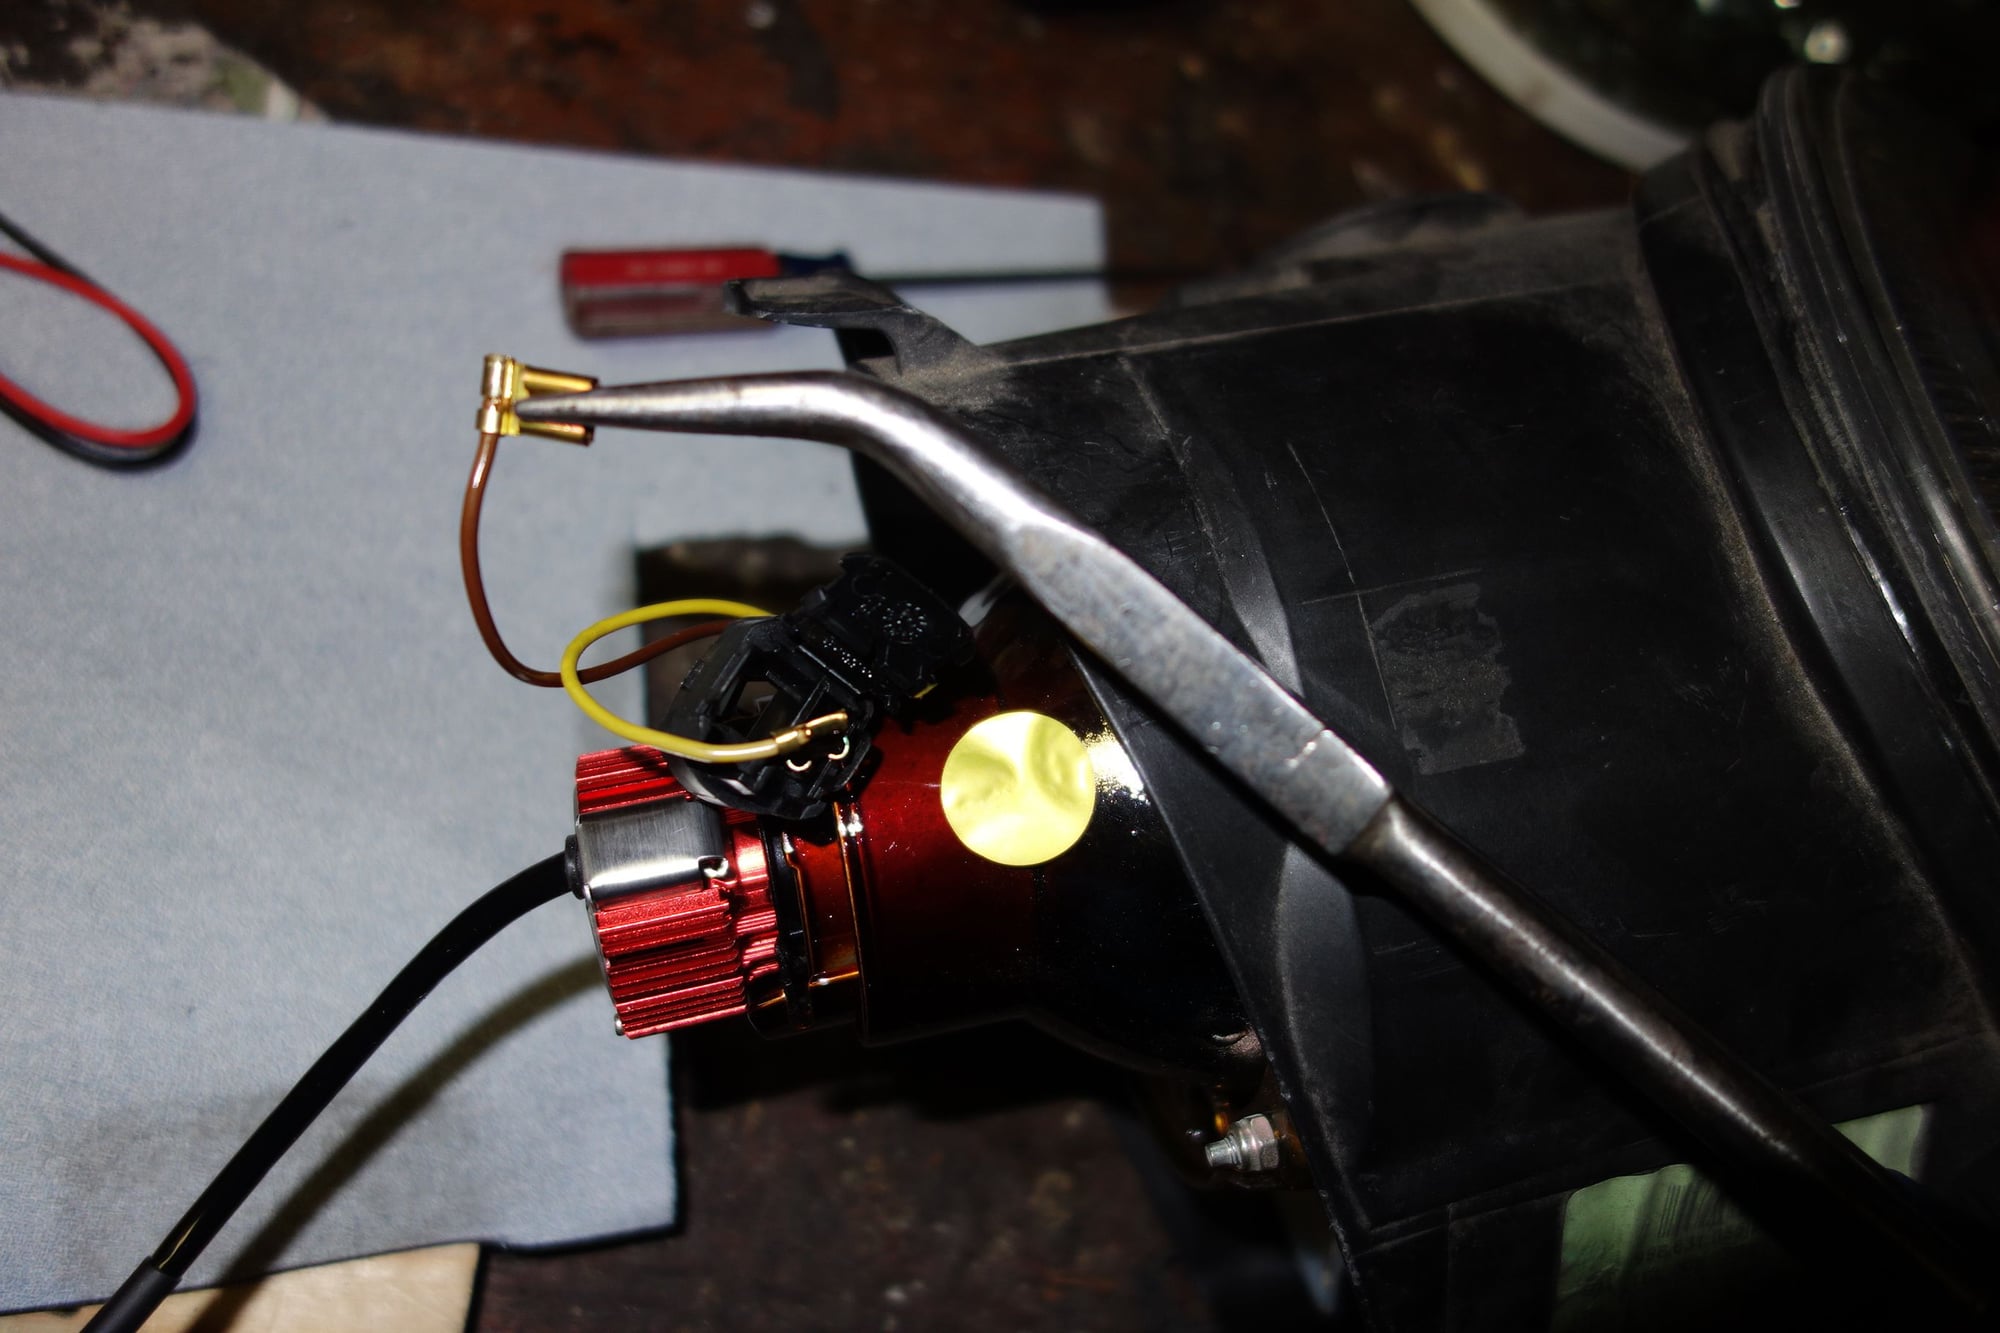
The LED with the black ring attached could then be screwed 1/12 of a turn onto the glass headlight assembly. Note that it looks "upside down," but due to the tab on the white ring (which mirrors that on the stock lamp) and the arrangement of the tabs on the black ring, there's only one way it can go on.
That was the hard part. Now for the electrical connections. A brown wire and a yellow wire come from the headlight assembly to the electrical connector. Flip open the electrical connector and pull the female connectors out. Use pliers to squeeze the connectors a little tighter as shown in the photo below.
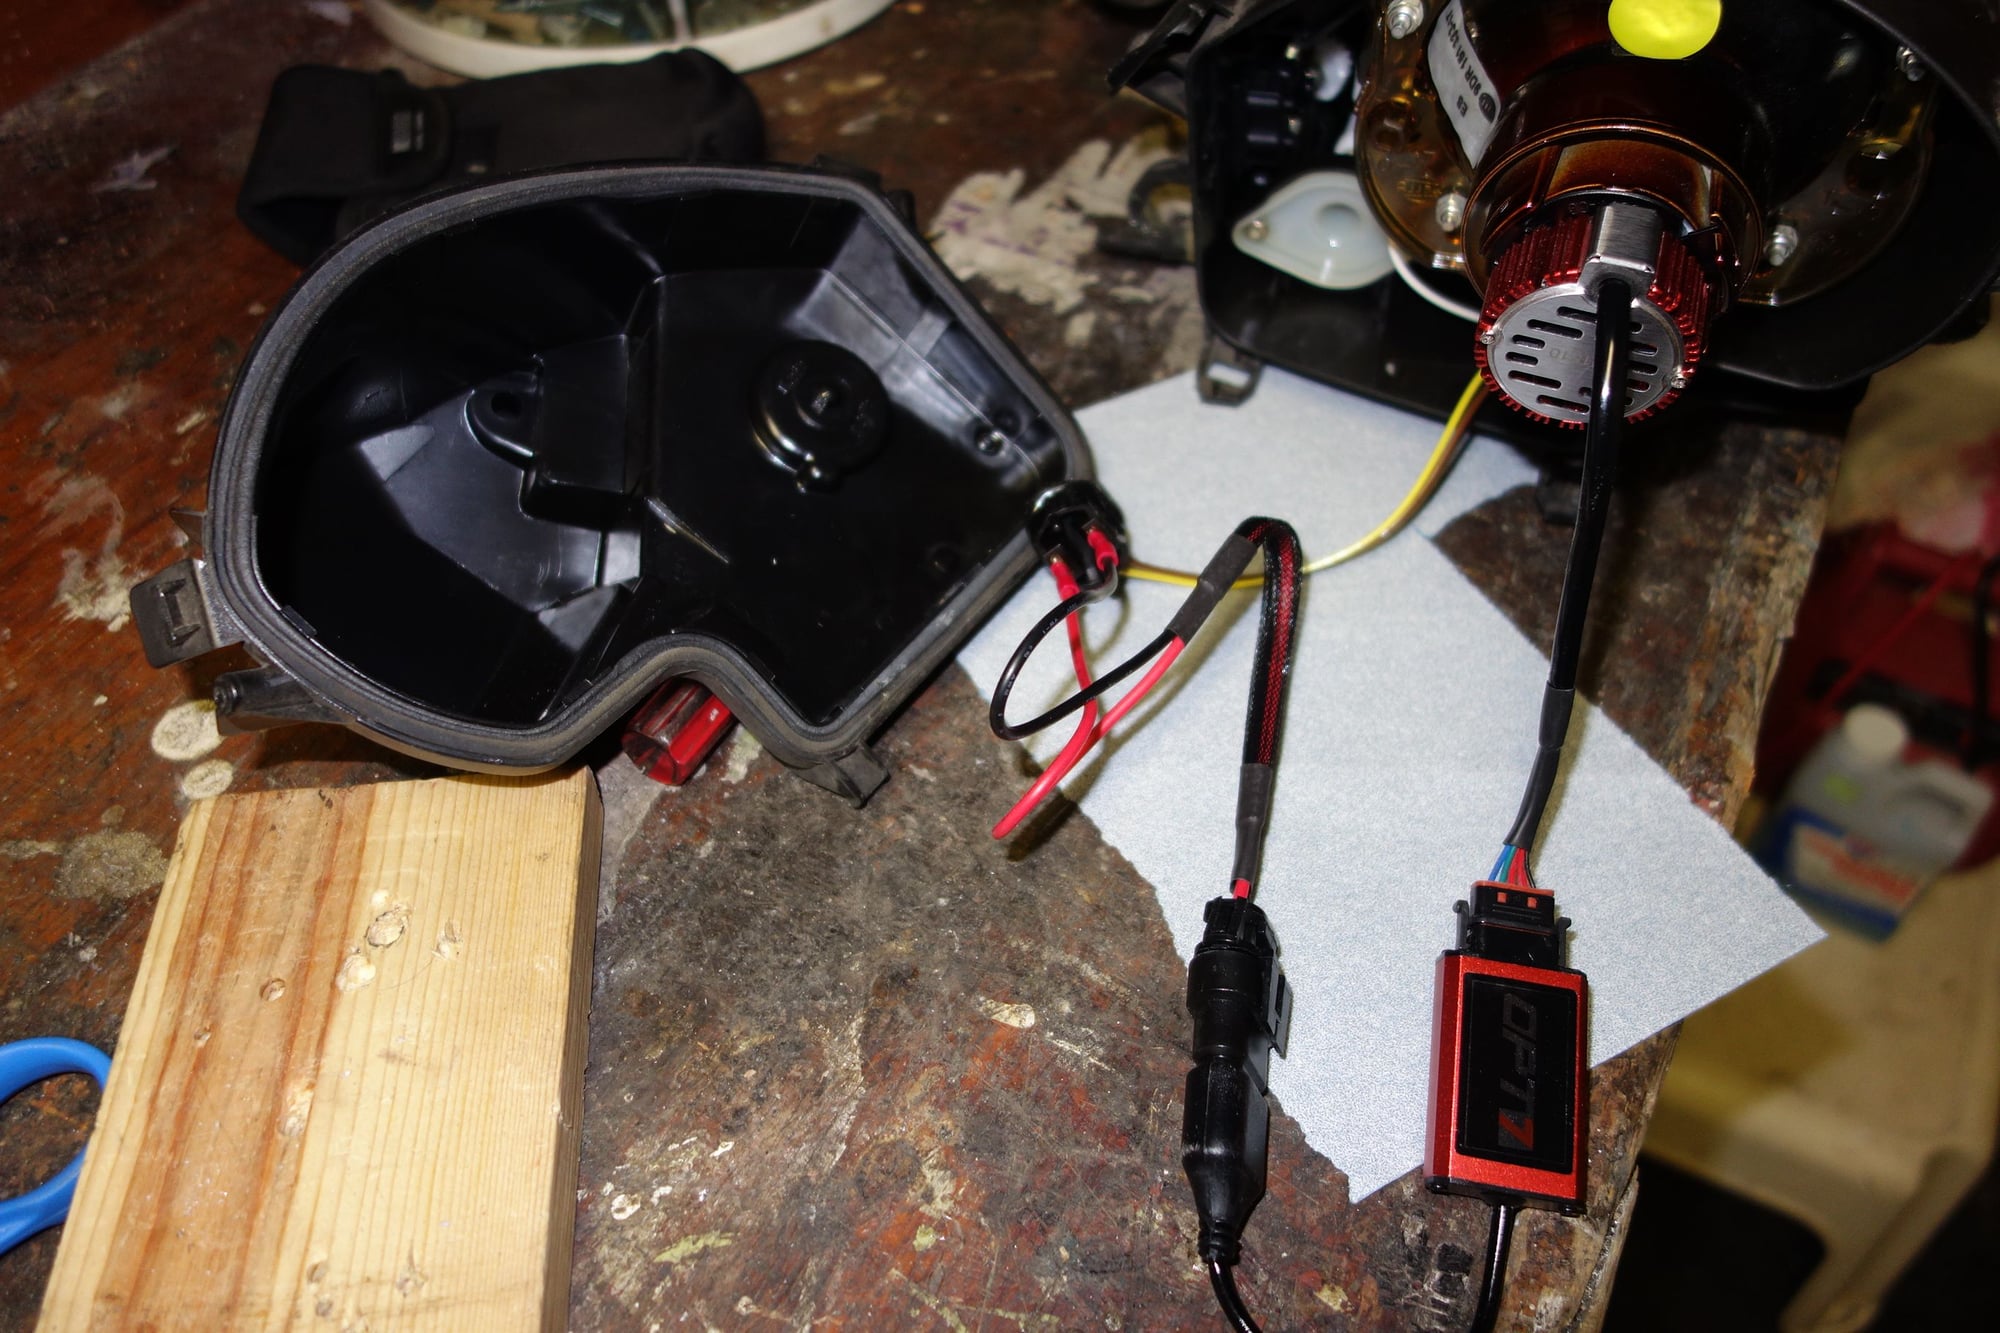
I used the adapter supplied with the LEDs to slide the red spade terminal into the yellow female end and the black spade into the brown female end. I then wrapped this with electrical tape to help prevent any unintended electrical contact. I folded and slid the wires and LED driver box into the side of the lamp assembly.
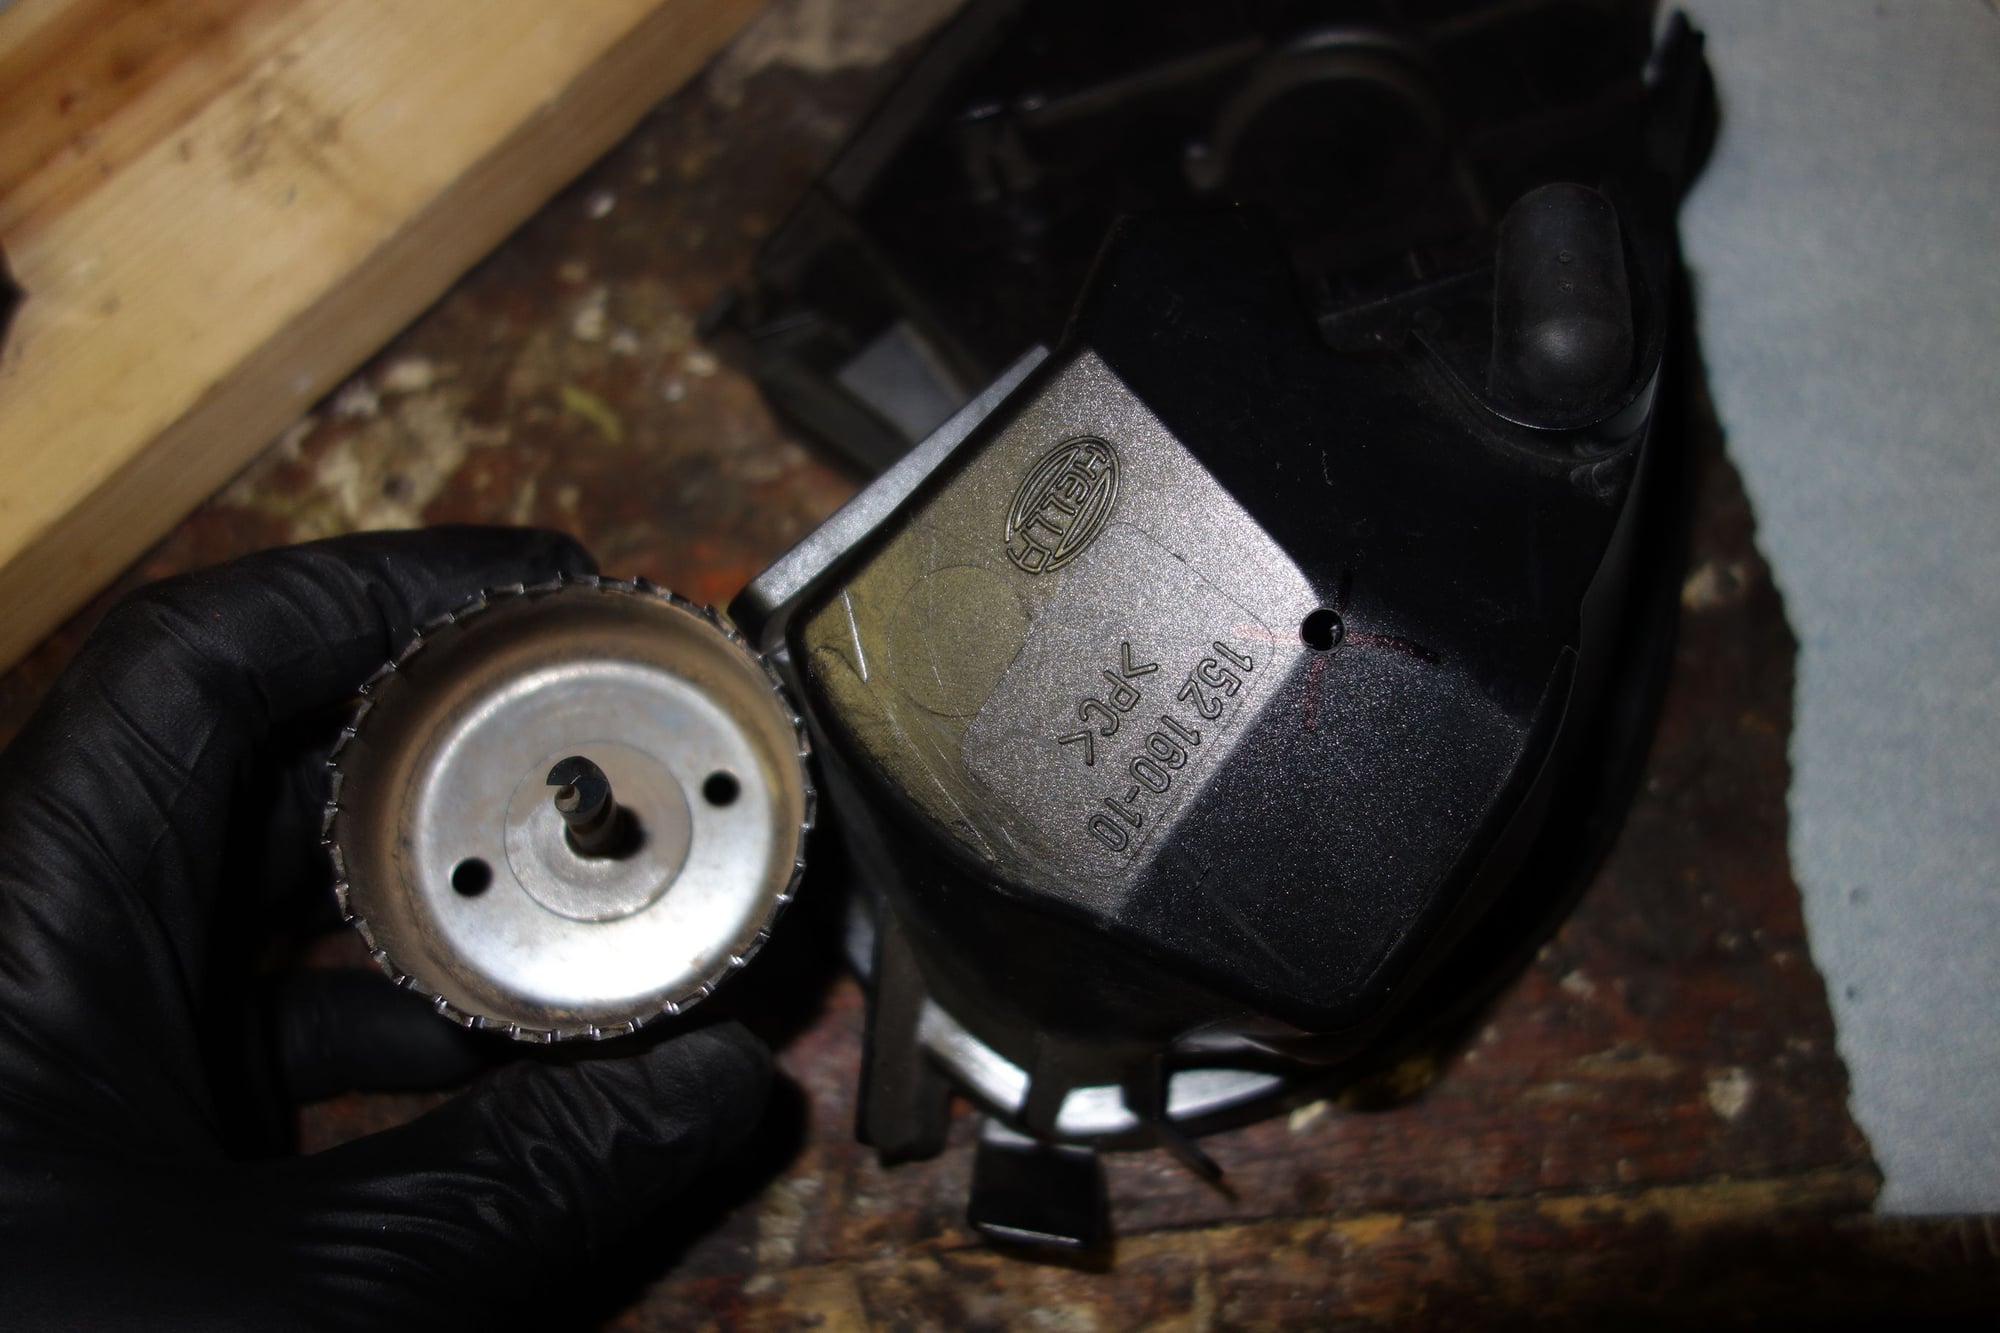
All of the new LED components will fit into the headlight enclosure and the rear hatch can just barely be closed, but there is a problem with this: the LEDs put out a lot of heat, which must go somewhere. I used a hole cutter on a drill to cut a round hold around the heat sink.
The photo below shows how it looks with the rear hatch installed. The previously water-tight enclosure now has a big hole in it. I can peak through the sheet metal behind the headlights and see the ground, so some water may get in there and cause corrosion or other problems. I'll update this thread if I have reliability problems in the future.
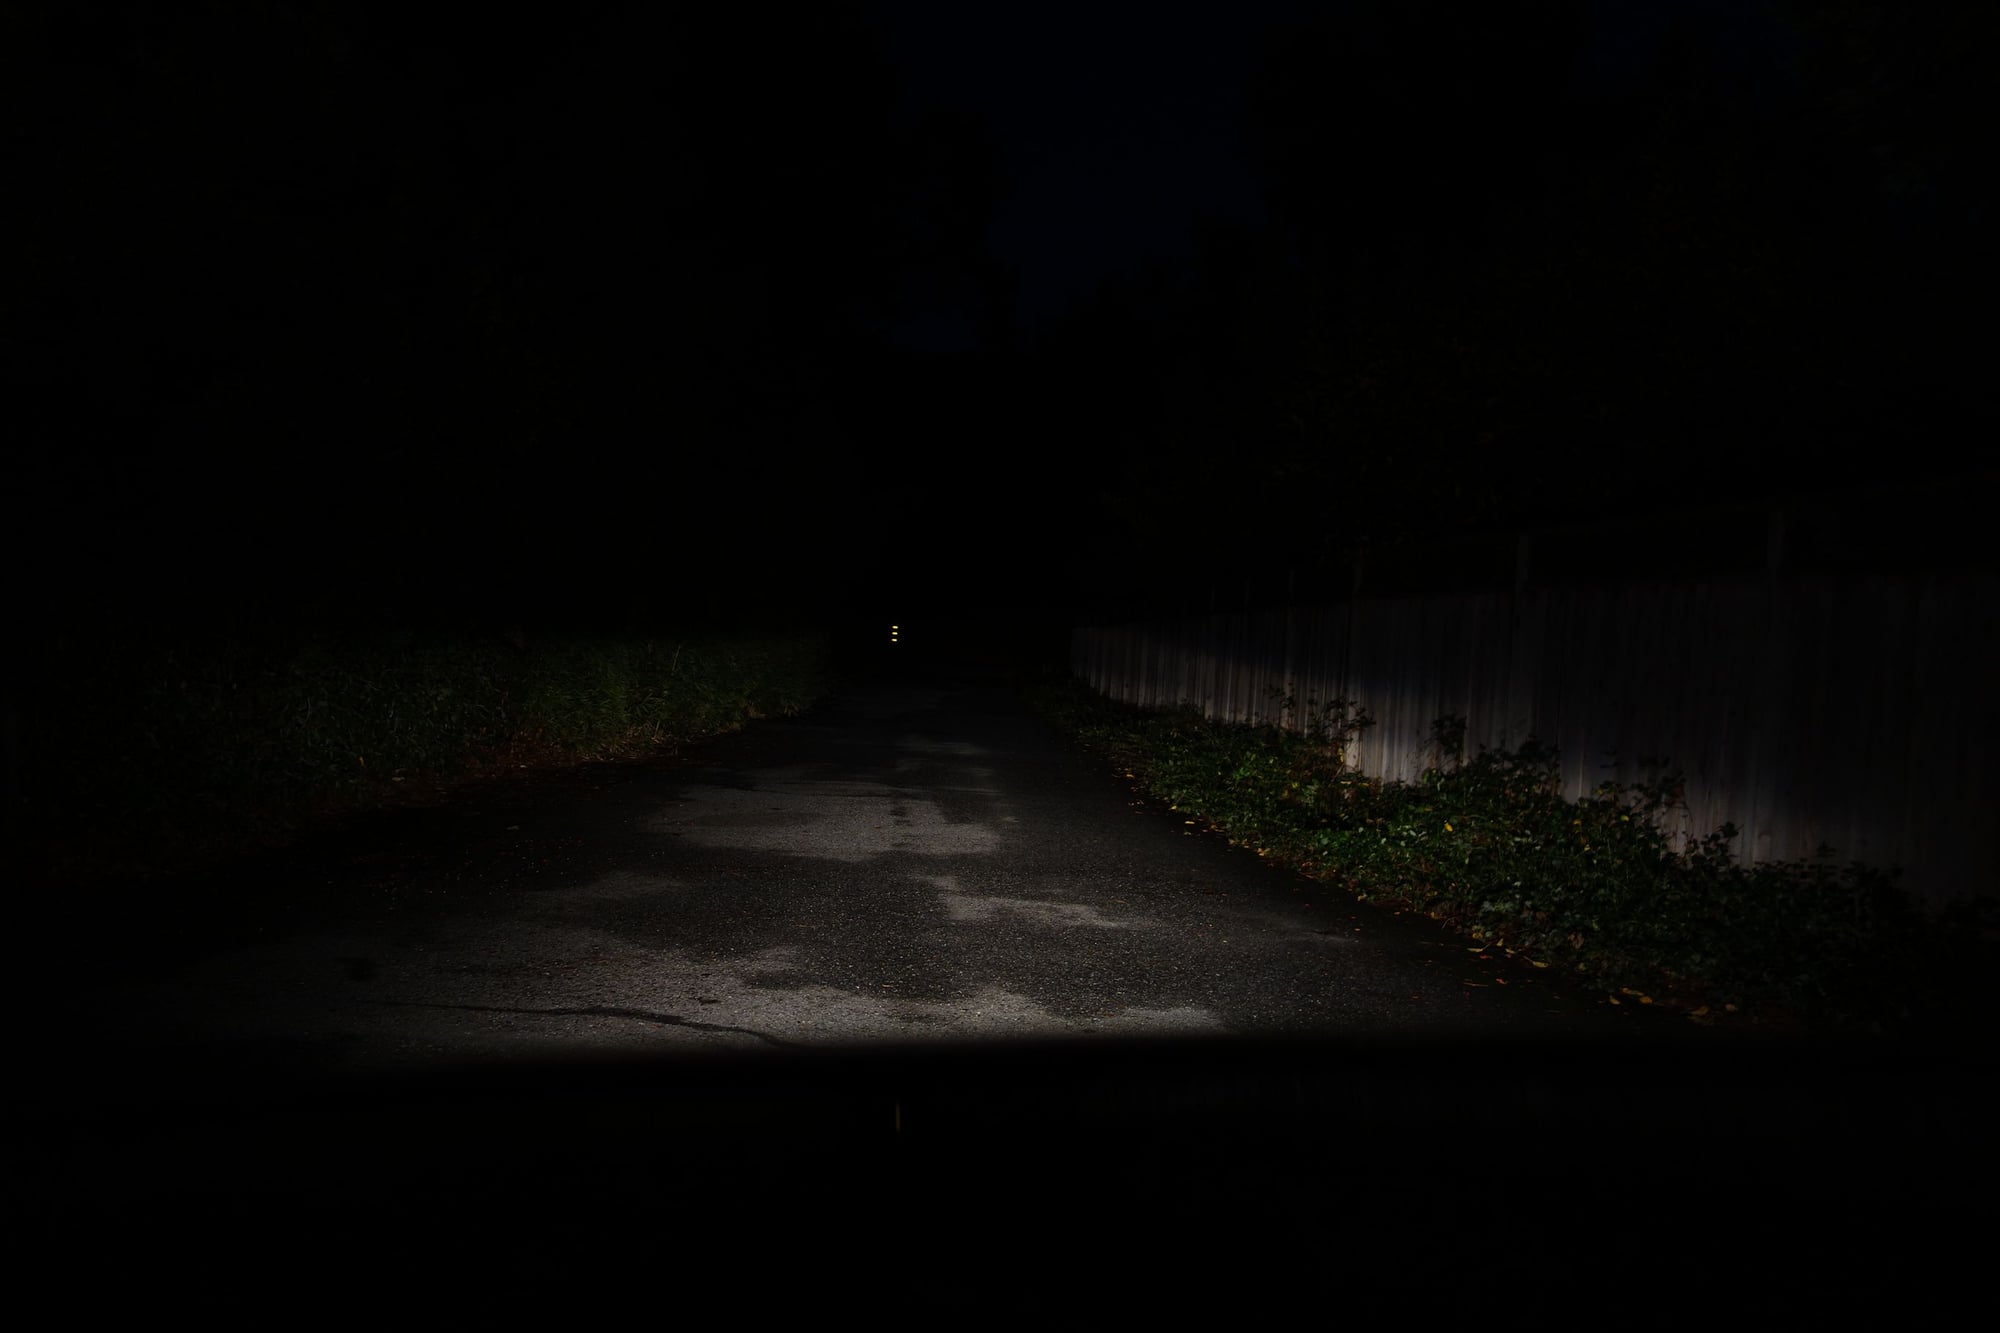
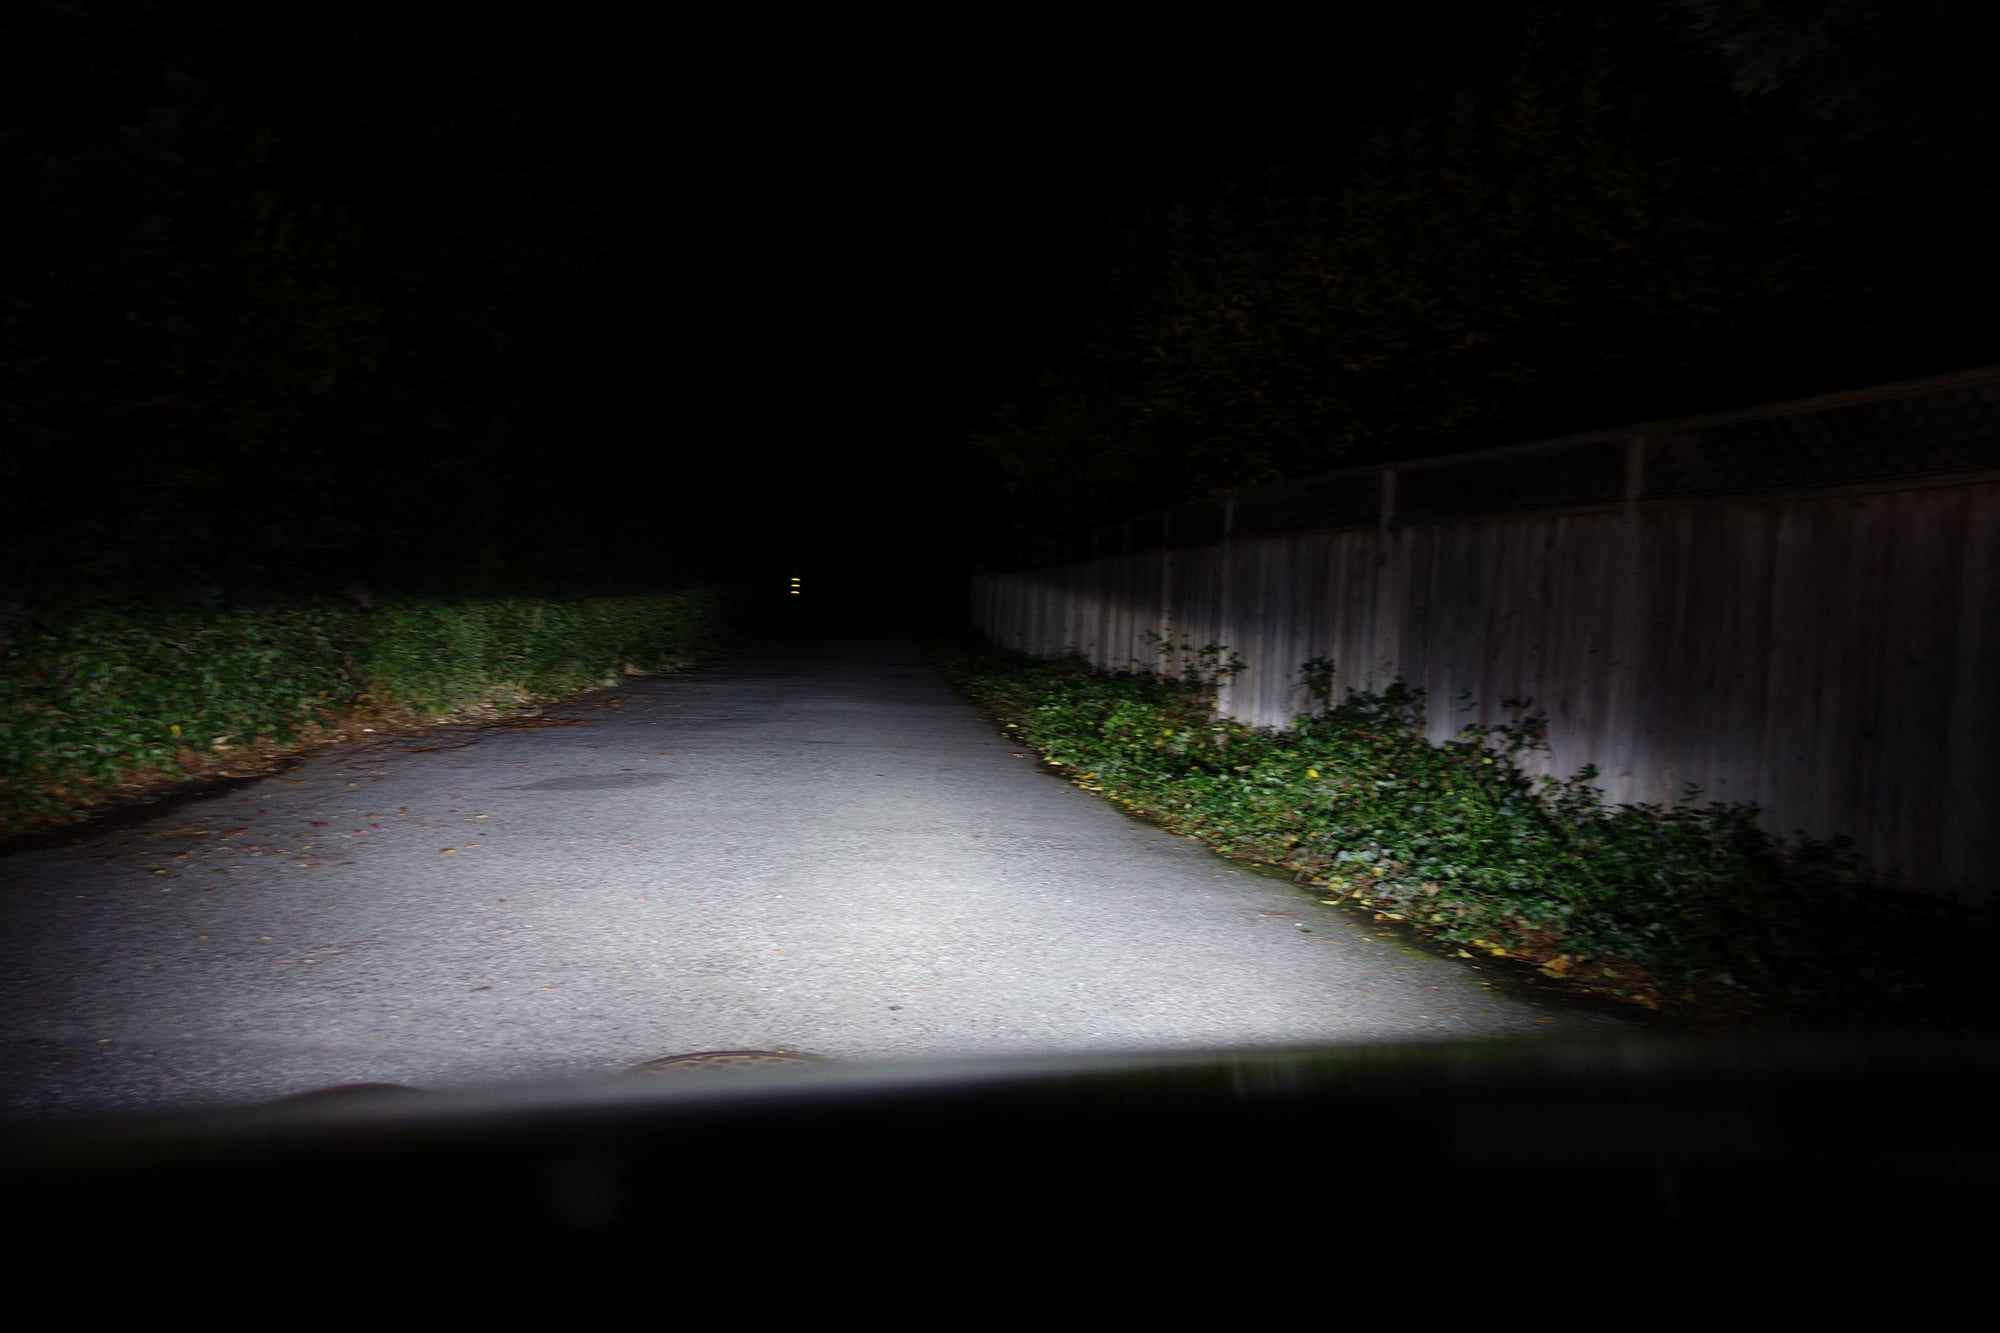
So how bright is this? Below you can see a comparison of the stock tungsten-halogen (yellowish-white light) 1450-lumen beam pattern and the OPT7 6000-K (white light) 3500-lumen (so they say) beam pattern. Both photos are are looking out 300 feet on my driveway to a power pole with three yellow reflectors on it. The photos are with the same camera exposure settings (f/1.8 and 1/8 s). The difference is like, well, sunrise and daylight!
Stock tungsten-halogen low beams. These put out about 1450 lumens each.
New OPT7 LED low beams. These are supposed to be 3500 lumens each. The color temperature is 5000 or 6000 K (white). I don't detect any blue tint.
The beams with the LEDs appear to go upward a bit. I spent a lot of time trying to get the aiming just right so as not to bother oncoming drivers. If I lowered the low beams any more, the high beams followed them downward and pointed at the ground instead of straight out. The low beams as set do not seem to be a problem when I stand 100, 200, and 250 feet in from of the car. I wish the light was projected more outward, rather that onto the ground in front of the car, but the stock bulb has a similar beam pattern, as do other cars.
After the success with the low beams, I was thinking of upgrading the high beams as well. The H9 lamps are supposed to put out 2100 lumens each, so 3500 lumens of whiter light would be nicer.
Looking at the headlight assembly, however, there is just no room for the heatsink. HID lamps might be an option.
V
Let us know how the lights work for you as they age... and how the "venting" works as you drive around?
When the engine is off and the low beams are on, I can hear a little whine from the LED cooling fans. Once the engine is running, the whine is barely perceptible. Inside the cabin I can't hear the whine with the engine off or on.
It's been two months since installation. I've driven in the rain a lot, and parked in the rain some. From the outside, the headlights look dry. I will post an update if this changes.
Will dust/dirt enter the inside of the head light assembly, covering the inside of the lens now .... just a thought? And if so, how would this get "cleaned out"?
Will dust/dirt enter the inside of the head light assembly, covering the inside of the lens now .... just a thought? And if so, how would this get "cleaned out"?
The Porsche 996.2 headlights have two sets of seals protecting the low and high beam lamps. When I used a hole saw to cut into the outer plastic enclosure, the first seal was defeated. For the second seal, the lamps themselves fit tight against the glass of the headlight projector/reflector assembly. This is metal on glass without anything squishy to make a tight seal, so it is possible for dust to sneak its way in there. This is the same as on other cars I've seen.
If dust becomes a problem, I'll probably pull out the LED and rinse the glass out with water. The hole for the lamp is too small to fit a hand into.
Great job but just wondering instead of one big hole, can't you just drill a lot of smaller holes with a regular drill bit? Thanks!
 11-30-2015, 02:45 AM