996 Oil Leak
 06-05-2012, 07:13 PM
#16
Instructor

Join Date: May 2003
Location: Edmonton, AB, Canada
Posts: 117
Likes: 0
Received 0 Likes
on
0 Posts
Its quite common for the four rear case bolts to loosen. May not be the RMS or IMS seal at all. Once the trans is off, look carefully at the upper-most area of oil seepage for clues about the real source (oil runs downhill, always).
Fix is to remove the four bolts that hold the case halves together, clean the threads, and replace with new factory bolts (they are encapsulated). A bit of flange sealant is extra insurance.
Considering the labor involved, I would replace the RMS and the seal on the IMS flange at the same time. Upgrading to the L&N Engineering IMS is a good idea also (they sell a kit complete with all necessary cam & crank holding tools). New clutch too, if warranted.

 I haven't been there in a while. Anyway, my car never leaked that much oil when I had RMS issues. Good luck.
06-06-2012, 08:39 PM
I haven't been there in a while. Anyway, my car never leaked that much oil when I had RMS issues. Good luck.
06-06-2012, 08:39 PM
#18
Three Wheelin'
Just did this job - although it was my clutch that prompted it. I did document my progress with pics - but woefully inadequately. I considered it a blessing in disguise but was a bit disappointed to find a M97 IMS bearing which meant I couldn't replace it.
Your height looks ok - higher is always better, but as long as there's enough room to slide the trans out when it's sitting on the ground it will work. I had to remove the trans from the jack before I could slide it out from under the car.
Also - the AOS is not as hard as people say, but a pain in the a$$ nevertheless. It's worth doing now.
Get a lot of extensions, drop your motor an inch or more, drop the tail of the trans more still, then go for the top bolt entirely working above the transmission, with the ratchet extended all the way past the tail.
Geez I wish I had taken better pictures.
06-08-2012, 03:43 PM
#20
Instructor
Thread Starter
 06-08-2012, 03:53 PM
#21
Three Wheelin'
I slid the gearbox under the car on a piece of cardboard, then blocked it up inch by inch with lumber ends until it was high enough to get the ATV jack under it, then rolled the ATV jack underneath, then blocked it up inch by inch on the ATV jack until it was high enough to line up with the motor when the ATV jack was fully extended, then strapped the gearbox to the ATV jack with the blocks in place using a ratcheting strap.
Actually it was much easier than I expected and than how it sounds.
I also got real lucky when I went to mate the gearbox and engine. It went together first try very easily. (Either that or I am better at this than I thought).
Sorry for the lack of photos. It did look pretty, but I was on a roll. Only took an hour.
Last edited by jasper; 06-09-2012 at 03:04 AM.
06-09-2012, 09:10 PM
#23
Instructor
Thread Starter
Next Entry
Stand back and let me work, here. You’re crowded around like I’m a blond with a stripper pole installed in the garage and I just turned on the CD player.
This is actually fairly straight forward and simple, so far.
I ran over to my C5Z06 Corvette friend’s country retreat and borrowed his transmission jack. I would say that while probably not necessary, I would not like to try this without one. Beg, borrow or steal a tranny jack.
Then I raised the car up some more with a combination of cherry and pine spacers. I wasn’t sure 17” was high enough so I added about 4 more inches. I used the pine on the bottom of the stack and the cherry under the jack stands as it is a very hard wood and will support the weight of the rear of the car without flinching (hopefully).
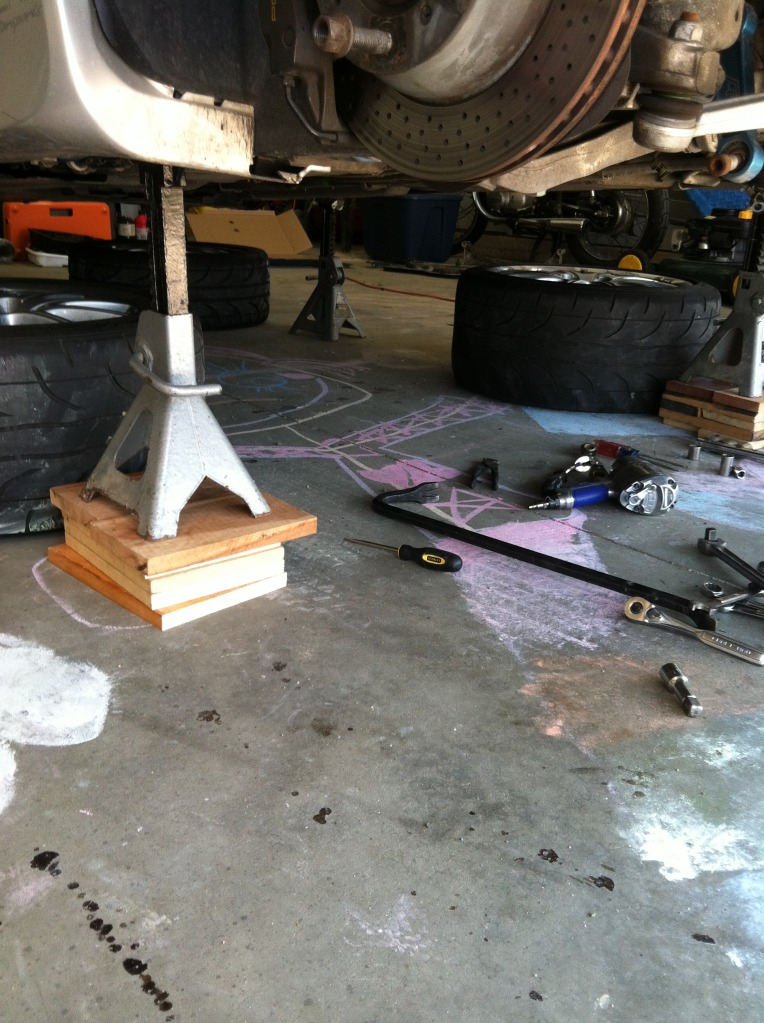
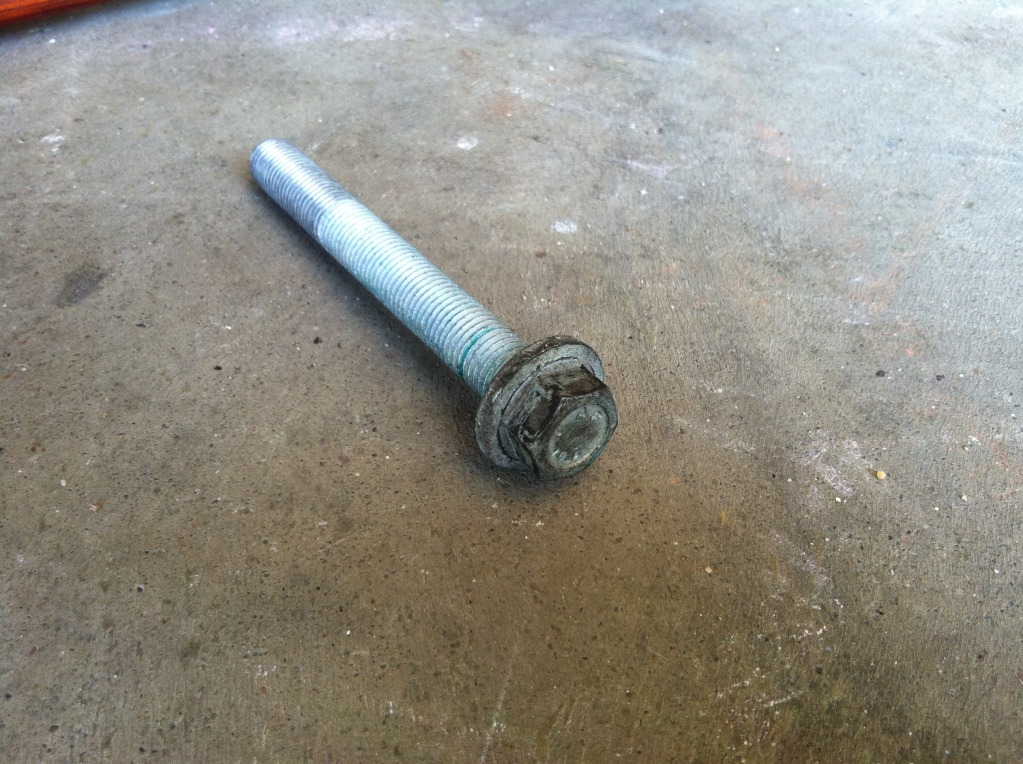
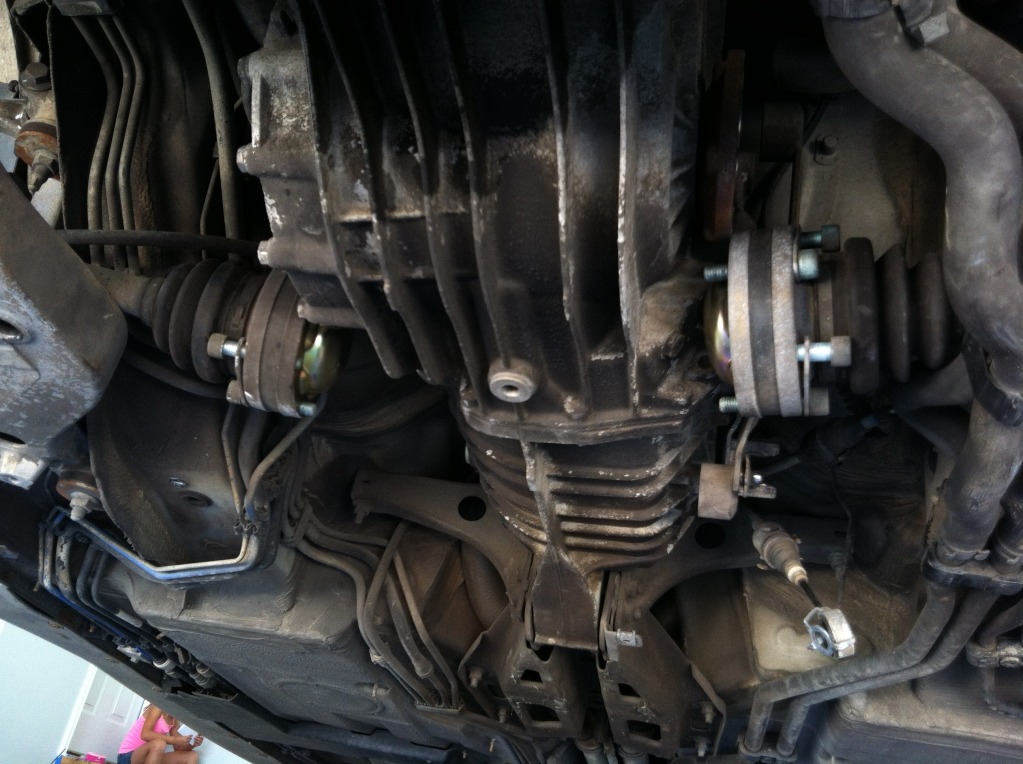
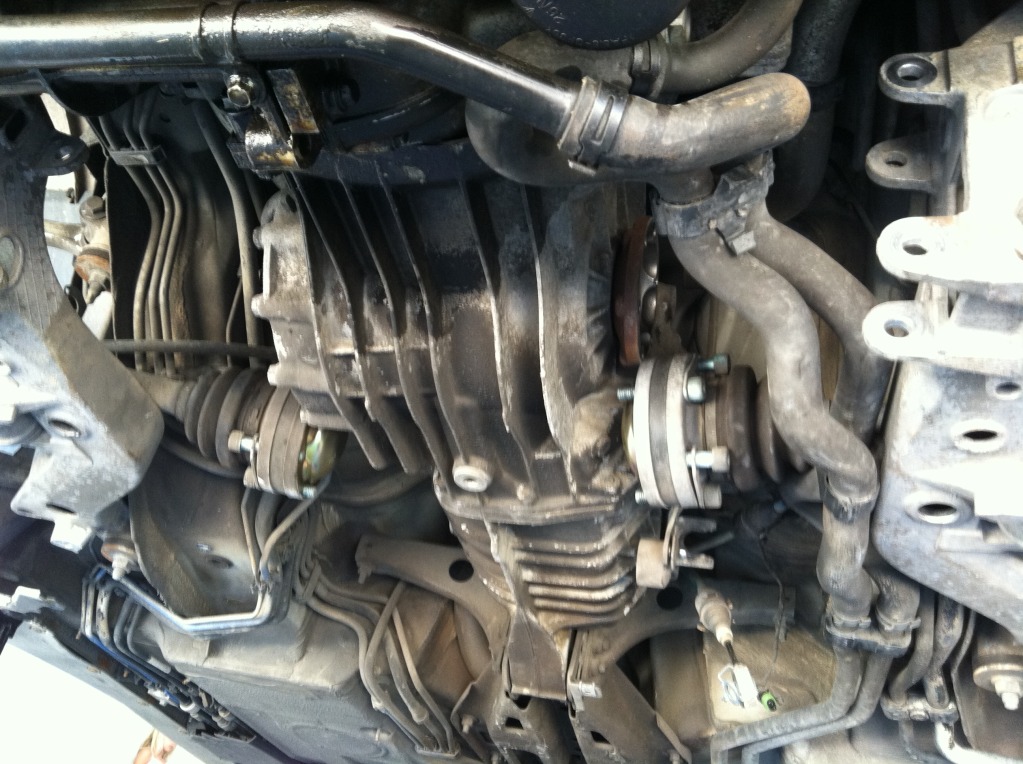
I removed the rear undertrays. Then I loosened all the axle bolts (I took a few of the bolts out of the axle before I realized that you can just leave them in place. You can see the bolts in a few of the upcoming pictures. Take off the sway bar. I have adjustable end links so this was very easy.
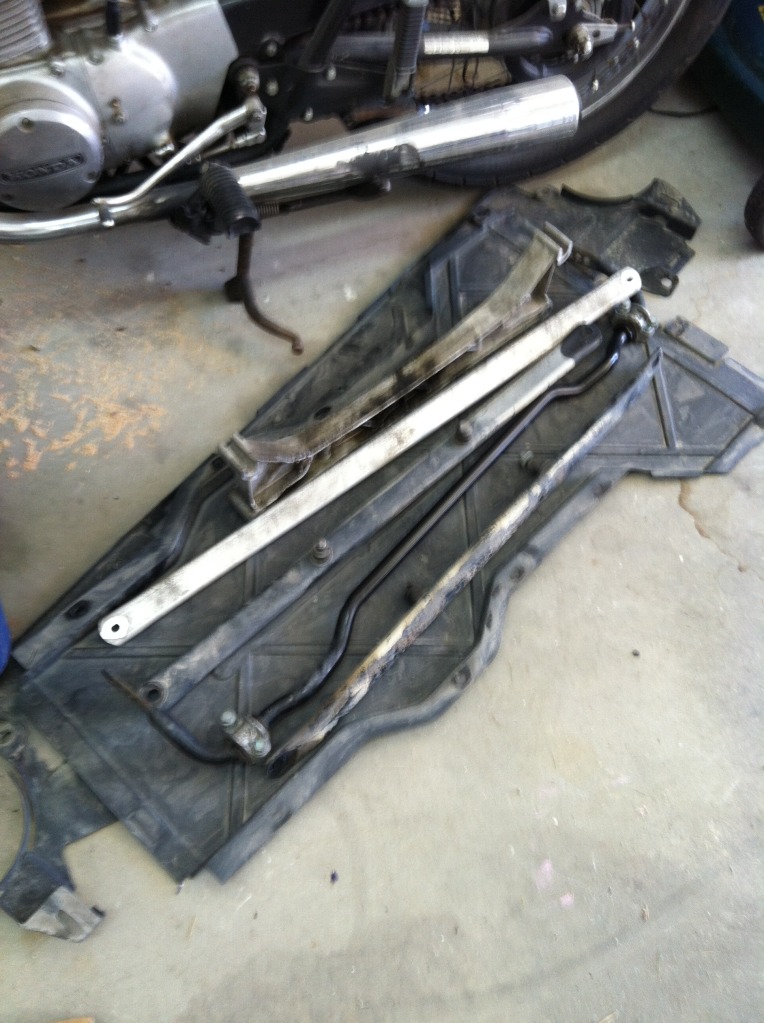
Next, remove the x-braces and crossmember. And put them on top of the undertrays next to my (was my Grandpa’s – RIP) 1973 Honda CB350 to get them out of the way. Sorry about the blurry picture.
After that I unhooked the shift linkages. And the reverse light switch plug.

Now is the time to support the engine with a jack. Sorry, no picture of that. I used a block of wood and my floor jack.
Once the engine is supported I took out all the bell housing bolts. The top two are a mother. Let me say how much I like air impacts and air ratchets and loooong extensions. LOVE them , in fact.
After the engine is supported put the transmission jack in place. The jack I used has a chain that you can wrap around the transmission but I used a nylon ratchet strap instead as it was easier and I didn’t really want to wrap a chain around my tranny, you know?
Finally, it is time to remove the forward transmission brackets. Before you do this the engine and trans must both be supported by their respective jacks.
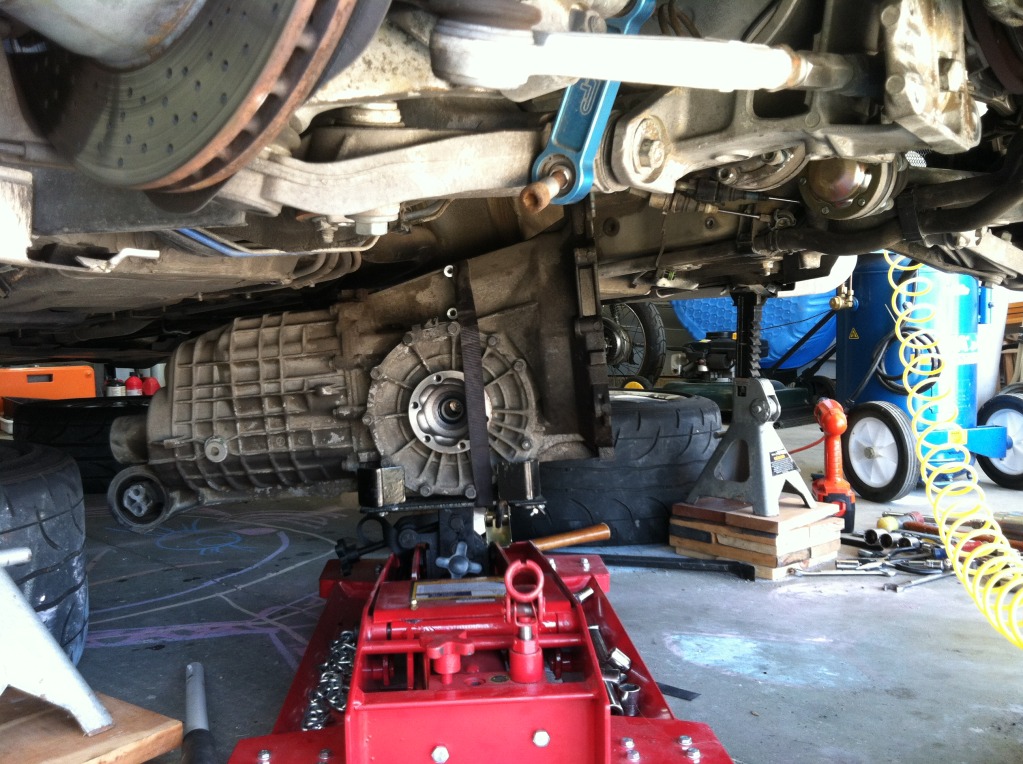
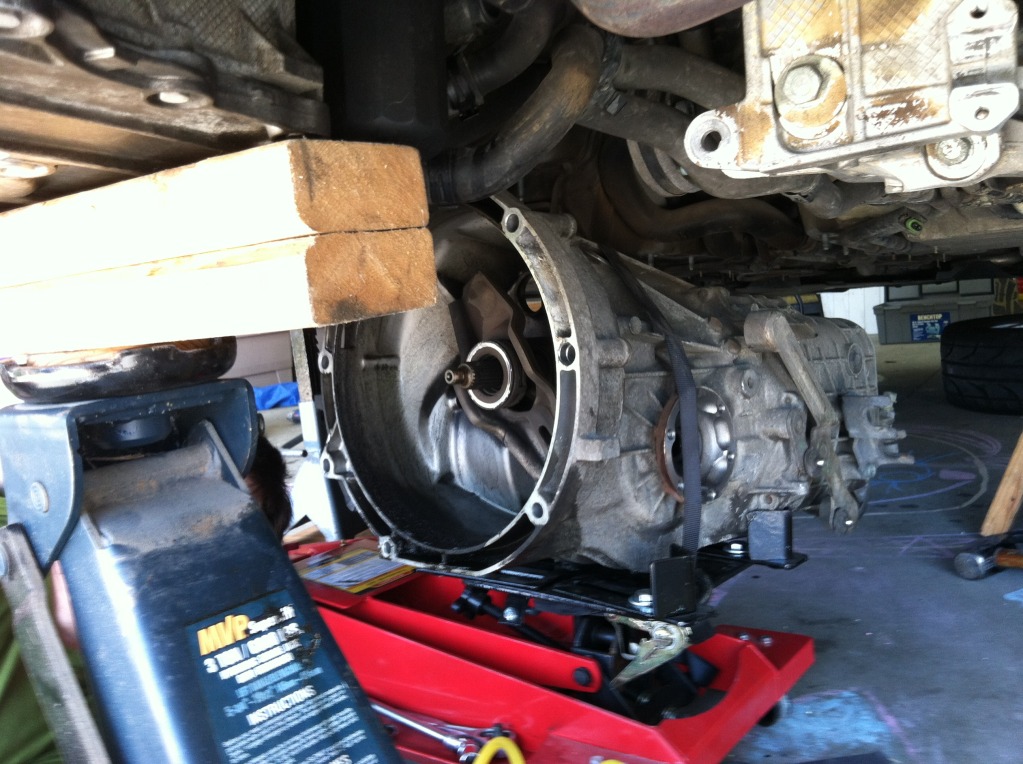
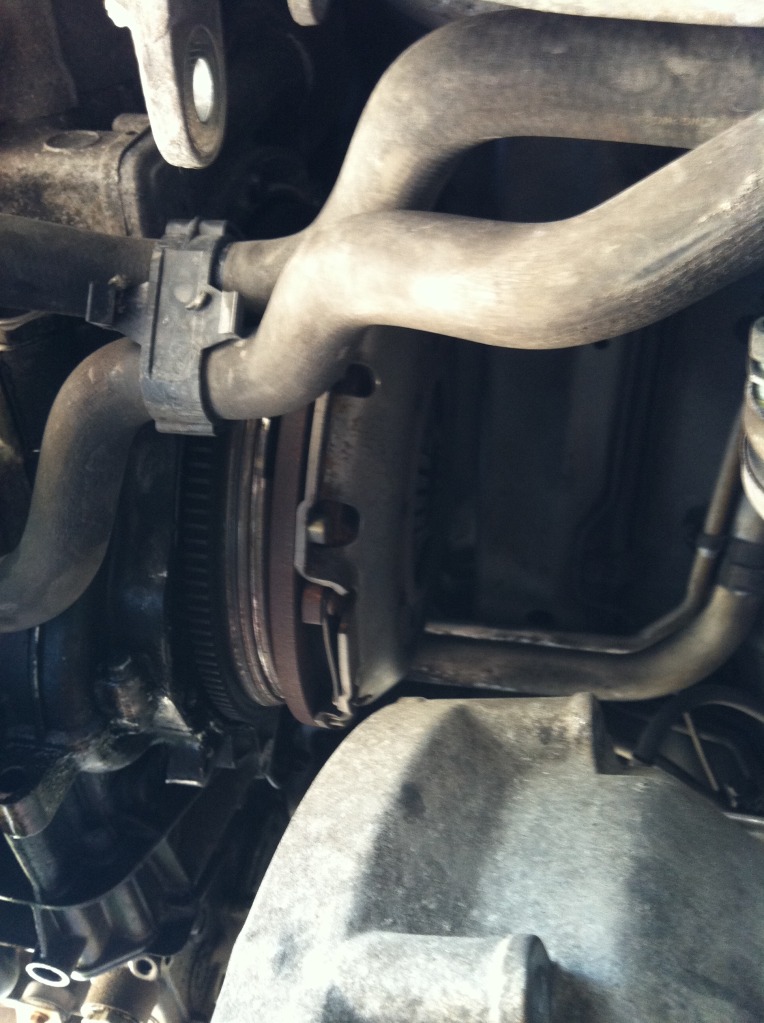
Now, slowly start to work the transmission and engine apart. I used a pry bar (gently, everything is made of soft aluminum!) and just grabbed the front of the transmission and wiggled and pulled. Once it is separated from the engine lower it down a few inches and remove the clutch slave cylinder. Then lower the trans the rest of the way. Pretty soon it will look like this!
When you are done with that take a picture of your clutch, then go to the pool with the wife and kids.
To complete the day, I highly recommend some USA Gulf Caught shrimp and a margarita made with your choice of tequila. Garnish with lime slice and a funky July 4th straw and enjoy! Cheers!

Woo hooo! Next, I will remove the clutch and see where the leak is coming from.
Stand back and let me work, here. You’re crowded around like I’m a blond with a stripper pole installed in the garage and I just turned on the CD player.
This is actually fairly straight forward and simple, so far.
I ran over to my C5Z06 Corvette friend’s country retreat and borrowed his transmission jack. I would say that while probably not necessary, I would not like to try this without one. Beg, borrow or steal a tranny jack.
Then I raised the car up some more with a combination of cherry and pine spacers. I wasn’t sure 17” was high enough so I added about 4 more inches. I used the pine on the bottom of the stack and the cherry under the jack stands as it is a very hard wood and will support the weight of the rear of the car without flinching (hopefully).
I removed the rear undertrays. Then I loosened all the axle bolts (I took a few of the bolts out of the axle before I realized that you can just leave them in place. You can see the bolts in a few of the upcoming pictures. Take off the sway bar. I have adjustable end links so this was very easy.
Next, remove the x-braces and crossmember. And put them on top of the undertrays next to my (was my Grandpa’s – RIP) 1973 Honda CB350 to get them out of the way. Sorry about the blurry picture.
After that I unhooked the shift linkages. And the reverse light switch plug.
Now is the time to support the engine with a jack. Sorry, no picture of that. I used a block of wood and my floor jack.
Once the engine is supported I took out all the bell housing bolts. The top two are a mother. Let me say how much I like air impacts and air ratchets and loooong extensions. LOVE them , in fact.
After the engine is supported put the transmission jack in place. The jack I used has a chain that you can wrap around the transmission but I used a nylon ratchet strap instead as it was easier and I didn’t really want to wrap a chain around my tranny, you know?
Finally, it is time to remove the forward transmission brackets. Before you do this the engine and trans must both be supported by their respective jacks.
Now, slowly start to work the transmission and engine apart. I used a pry bar (gently, everything is made of soft aluminum!) and just grabbed the front of the transmission and wiggled and pulled. Once it is separated from the engine lower it down a few inches and remove the clutch slave cylinder. Then lower the trans the rest of the way. Pretty soon it will look like this!
When you are done with that take a picture of your clutch, then go to the pool with the wife and kids.
To complete the day, I highly recommend some USA Gulf Caught shrimp and a margarita made with your choice of tequila. Garnish with lime slice and a funky July 4th straw and enjoy! Cheers!
Woo hooo! Next, I will remove the clutch and see where the leak is coming from.
Last edited by smokindav; 06-09-2012 at 09:21 PM. Reason: fixed typos
The following users liked this post:
Cityfisher (08-25-2020)
06-10-2012, 01:53 AM
#24

nice jobs on the pics 
I am waiting to hear if your clearance is good enough to pull the tranny on the jack but it looks like you might have to put it on the floor and then slide it out, or may be you can even jsut move it forward while you work on the clutch plate area but doubt it.
good pics waiting for more
I am waiting to hear if your clearance is good enough to pull the tranny on the jack but it looks like you might have to put it on the floor and then slide it out, or may be you can even jsut move it forward while you work on the clutch plate area but doubt it.
good pics waiting for more
06-10-2012, 10:02 PM
#27
Instructor
Thread Starter
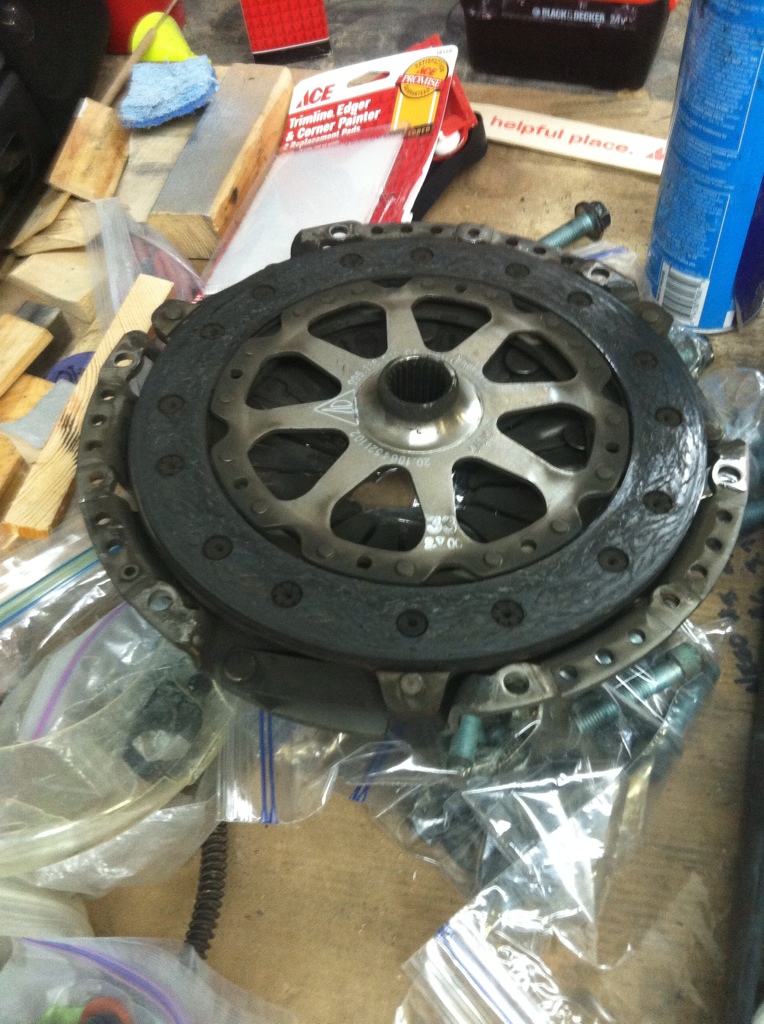
I thought I would pull the clutch and flywheel really quickly tonight so I could order some parts, once I took a look at what style IMS I had. I got the clutch out but don't have a big enough torx bit to remove the flywheel. Anyone know what size it is?
06-11-2012, 02:07 AM
#28
Rennlist Member
clutch disk looks pretty good for 54k
check the flywheel while it is attached.
TSB 911 (996) 8/02 1360 Dual Mass Flywheel Check procedure
http://www.renntech.org/forums/index...-procedurepdf/
Can the dual Mass Flywheel be twisted approx. 15mm in each direction, left/right, and does it return to approximately its initial position? If so it is good.
Can the DMF be twisted beyond dim stated above without a noticeable increase in the spring force? Or is it fixed (no rotation?) if so bad
06-11-2012, 02:55 PM
#29
Instructor
Thread Starter
Flywheel performs as the test describes. No problems there.
I just bought the T-55 Torx bit that is needed for flywheel bolt removal. Tonight I will pull the flywheel, inspect everything (including clutch parts) to determine what needs to be replaced.
I plan to order parts tonight. I hope to start reassembly next weekend. I think I can probably get everything put back together in one day. It's not too difficult.
clutch disk looks pretty good for 54k
check the flywheel while it is attached.
TSB 911 (996) 8/02 1360 Dual Mass Flywheel Check procedure
http://www.renntech.org/forums/index...-procedurepdf/
Can the dual Mass Flywheel be twisted approx. 15mm in each direction, left/right, and does it return to approximately its initial position? If so it is good.
Can the DMF be twisted beyond dim stated above without a noticeable increase in the spring force? Or is it fixed (no rotation?) if so bad
check the flywheel while it is attached.
TSB 911 (996) 8/02 1360 Dual Mass Flywheel Check procedure
http://www.renntech.org/forums/index...-procedurepdf/
Can the dual Mass Flywheel be twisted approx. 15mm in each direction, left/right, and does it return to approximately its initial position? If so it is good.
Can the DMF be twisted beyond dim stated above without a noticeable increase in the spring force? Or is it fixed (no rotation?) if so bad
06-11-2012, 11:49 PM
#30
Instructor
Thread Starter
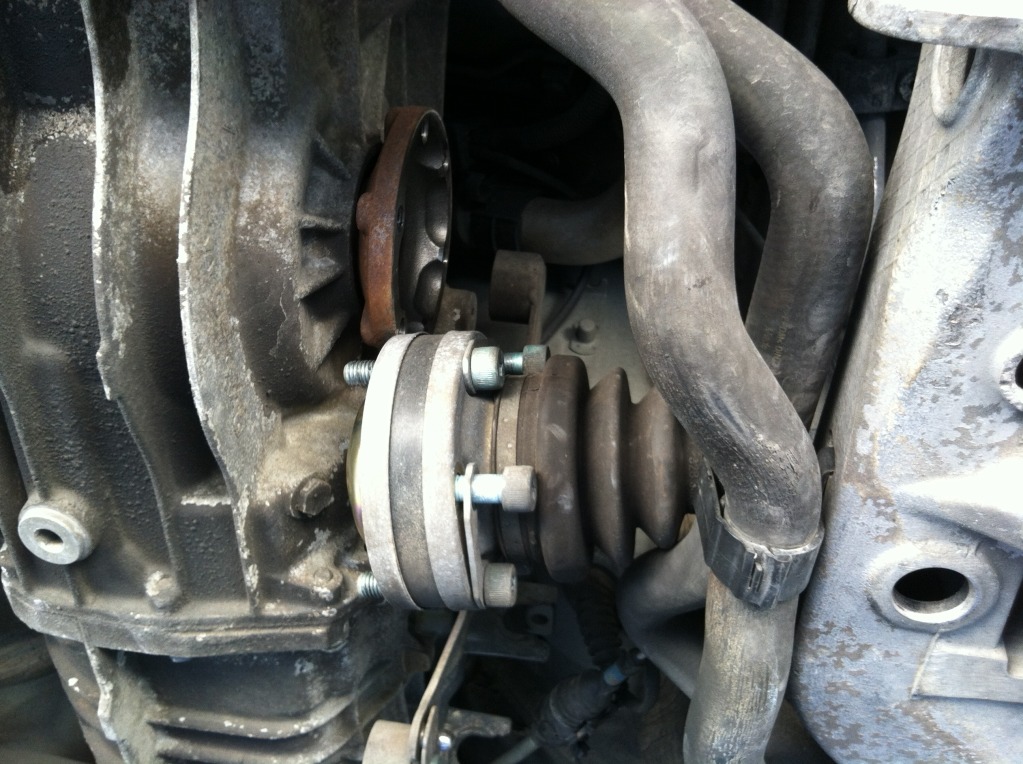
Flywheel removed, leak revealed
I picked up the T-55 Torx at my local Blain's Farm and Fleet (seriously) for $4.99. Came home and zapped those flywheel bolts right out of the crank. Impact wrenches are the shizzle.
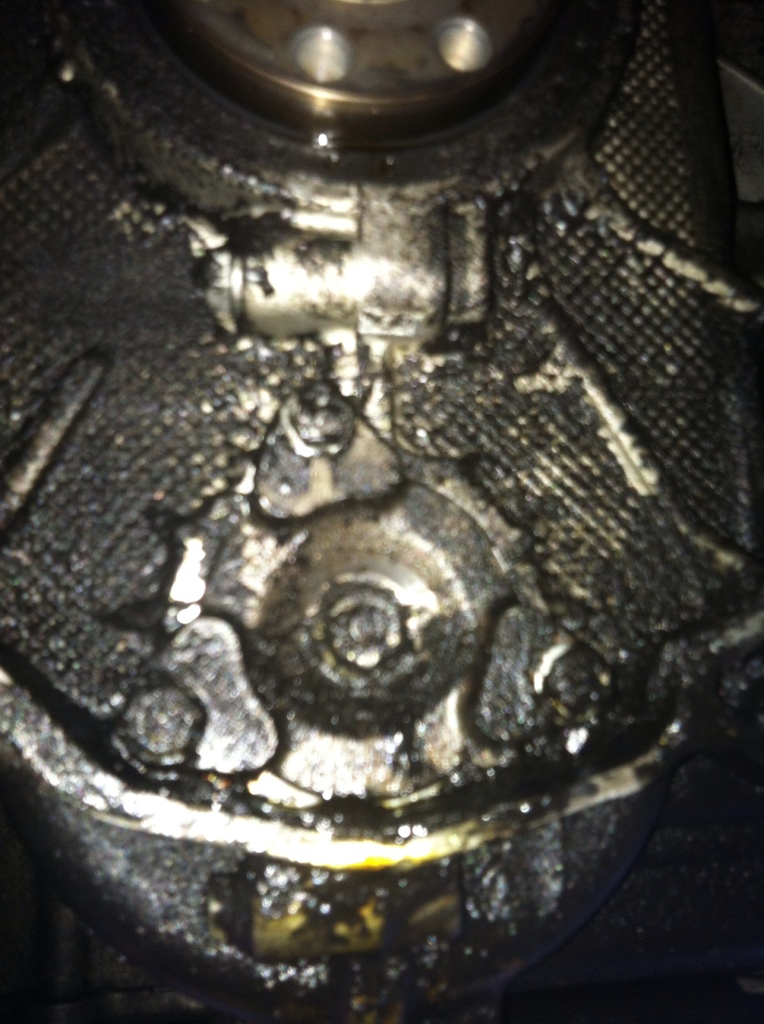
As you may or may not be able to tell from the crappy iPhone pictures, the oil is coming from the rear main seal.
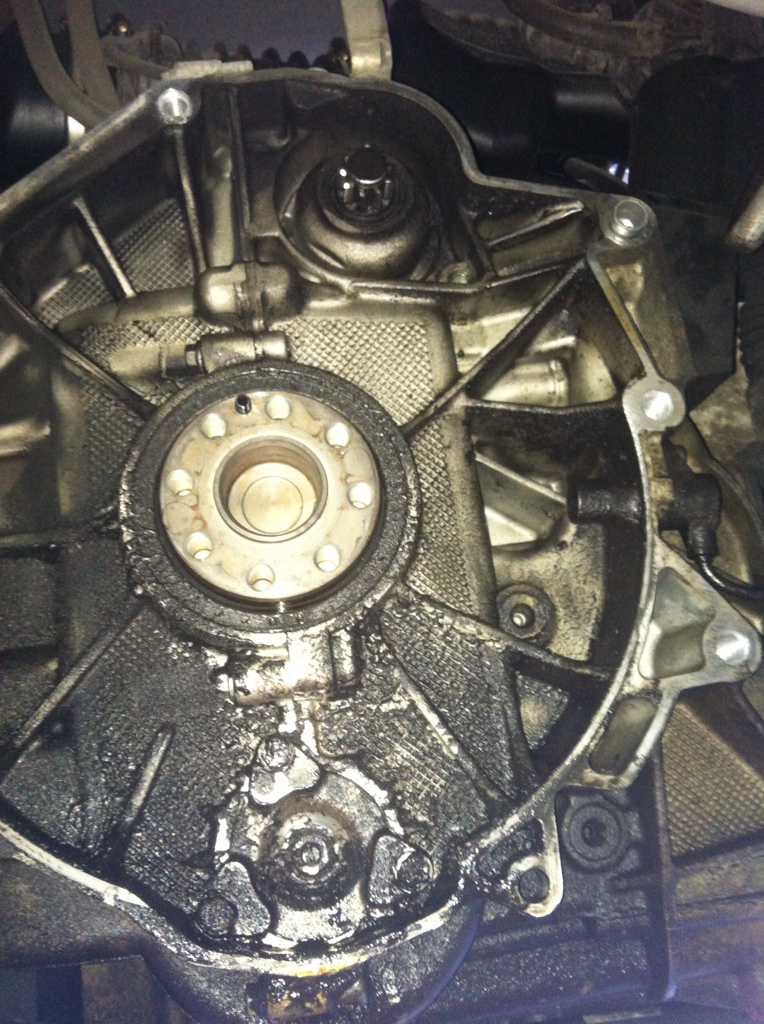

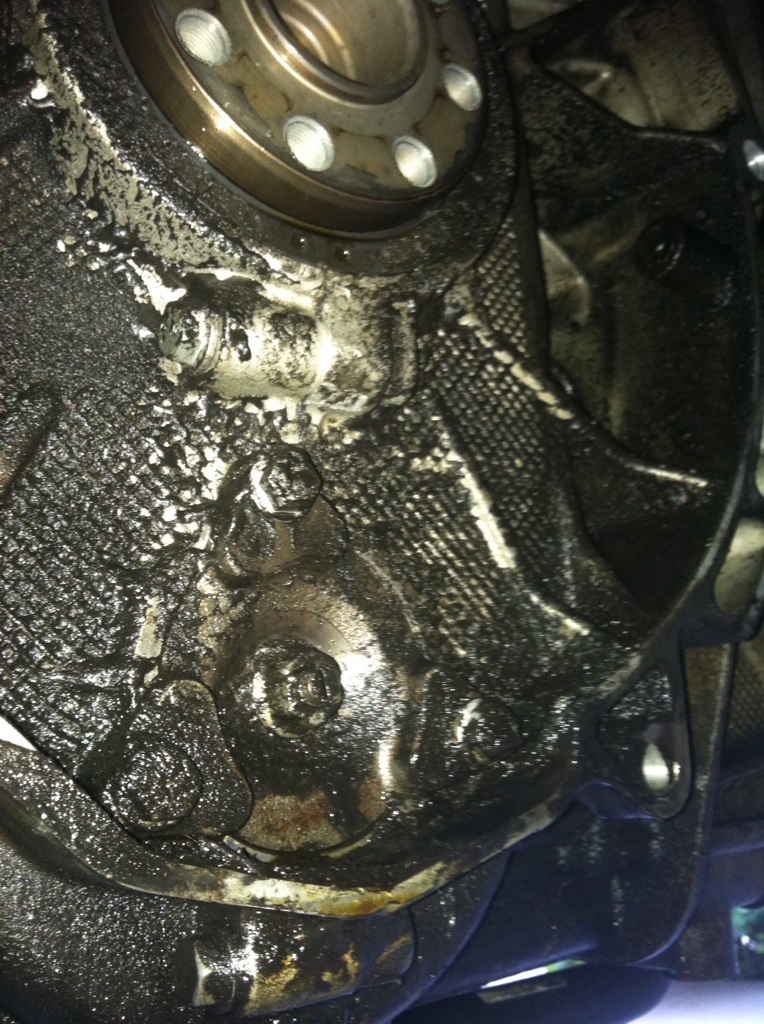
Also, from what I can tell I have an early style double row IMS bearing. Take a look at the different versions and tell me what you think.
http://www.lnengineering.com/ims.html
Early double row bearing cover.

Later single row bearing cover

Non-serviceable style:

I picked up the T-55 Torx at my local Blain's Farm and Fleet (seriously) for $4.99. Came home and zapped those flywheel bolts right out of the crank. Impact wrenches are the shizzle.
As you may or may not be able to tell from the crappy iPhone pictures, the oil is coming from the rear main seal.
Also, from what I can tell I have an early style double row IMS bearing. Take a look at the different versions and tell me what you think.
http://www.lnengineering.com/ims.html
Early double row bearing cover.
Later single row bearing cover
Non-serviceable style: