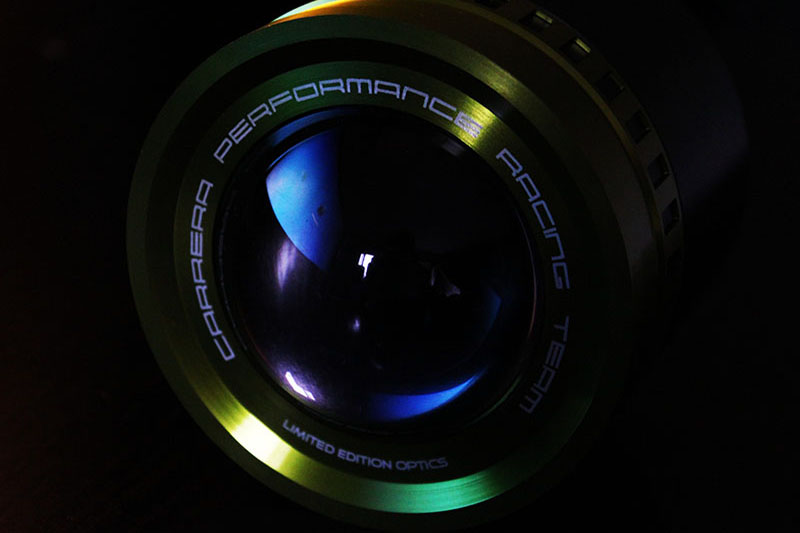
DIY-Bi-Xenon headlight conversion - Really can be done- $300
#19
Instructor
Thread Starter
I have written instructions and will post pics on the original 1st post. I figure that makes more sense that nesting it in the middle of the post.
I installed a complete BiXenon assembly with reflectors with Hi/Lo shutter. Inserting just a Xenon bulb is a poor idea. the reflector and les wasn't made for it.
I might do a batch if interest
I do have the amber signals but painted the cover with translucent automotive paint. I did check with Bosch to see if i could get new lenses, but no luck. Only solution would be to source from overseas. But would need sufficient $$ or orders. I would think there would be some demand for new complete clear lenses. ....still investigating
See my first post. I am updating...
See first post. You will spend the most time removing the lenses. And it is messy and you want tot make sure not to melt the plastic with too much heat. I practiced on an extra headlight assembly, before I tackled my real set, and I swallowed real hard just before I started up the heat gun. You can also put the assembly into the oven, but I decided not to irritate the wife with a smelly house, and the heat gun method had worked on the test assembly.
I might do a batch if interest
Looks great! I'll be following this one for sure.
Did you have an amber turn signal section in your covers and amber triangles along the bottom to start with or are you somehow changing them to clear in addition to the Xenon? I had always thought we were stuck with the amber bottom section since its a one piece lense cover.
Did you have an amber turn signal section in your covers and amber triangles along the bottom to start with or are you somehow changing them to clear in addition to the Xenon? I had always thought we were stuck with the amber bottom section since its a one piece lense cover.
See first post. You will spend the most time removing the lenses. And it is messy and you want tot make sure not to melt the plastic with too much heat. I practiced on an extra headlight assembly, before I tackled my real set, and I swallowed real hard just before I started up the heat gun. You can also put the assembly into the oven, but I decided not to irritate the wife with a smelly house, and the heat gun method had worked on the test assembly.
#22
Instructor
Thread Starter
You want to start at the top and then work down the sides, alternating back and forth.
#24
Instructor
Thread Starter
I think this is the first 996 conversion.
I bought the parts from http://www.theretrofitsource.com . (no affliation)
They are very helpful and knowledgeable. You want 35w, Mini reflector, H1. Let me know if you want more info. I bought on a 'group buy' that was on a Mazda forum. I could set one up.
Good source for BiXenon installs and general info http://www.hidplanet.com/forums/
#26
I know this thread dates back 2+ years ago, but I'm planning on doing the same, and I sent you an email 15psi asking for more information.
I'm new to Porsche, as it's my father's car, but his 996 C2 headlights have the "burnt" plastic from the light bulbs, and this would be a great alternative instead of buying a new set of headlights.
Maybe someone can confirm, the low-beam and high-beam are separated in the middle? I can't make out if he only used the bi-xenon projectors and a "high-beam" bulb or simply the projectors.
Thanks,
JP
Last edited by jproy12; 08-19-2013 at 04:03 PM.
#27
I know this thread dates back 2+ years ago, but I'm planning on doing the same, and I sent you an email 15psi asking for more information.
I'm new to Porsche, as it's my father's car, but his 996 C2 headlights have the "burnt" plastic from the light bulbs, and this would be a great alternative instead of buying a new set of headlights.
Maybe someone can confirm, the low-beam and high-beam are separated in the middle? I can't make out if he only used the bi-xenon projectors and a "high-beam" bulb or simply the projectors.
Thanks,
JP
I'm new to Porsche, as it's my father's car, but his 996 C2 headlights have the "burnt" plastic from the light bulbs, and this would be a great alternative instead of buying a new set of headlights.
Maybe someone can confirm, the low-beam and high-beam are separated in the middle? I can't make out if he only used the bi-xenon projectors and a "high-beam" bulb or simply the projectors.
Thanks,
JP
Sent from my iPad using Rennlist
#28
Rennlist Member
Join Date: Oct 2013
Location: Montreal, QC. (currently expat to Shanghai)
Posts: 69
Likes: 0
Received 1 Like
on
1 Post
Have a look at: http://986forum.com/forums/diy-proje...-finish-3.html
Identical headlight. Page 3 and 4 are filled with pictures.
Identical headlight. Page 3 and 4 are filled with pictures.


