Notices
996 Forum 1999-2005
Sponsored by:

***SOLVED*** convertible top not folding closed quite right (PICS) -

Thread Tools
 
Search this Thread
 
Old 07-15-2016, 05:07 PM
  #31  
pesuazo
Pro
 
pesuazo's Avatar
 
Join Date: Dec 2003
Location: NYC - Now near Raleigh, NC
Posts: 515
Received 49 Likes on 28 Posts
Default

Instead of pulling, try pushing to see if the broken end comes out at the end of bead (channel)...it is possible a kink developed and is keeping it from sliding smoothly.

I finally got to do the work over the weekend, happy with the result, compared to how it looked previously.

I sourced the cable from Lowe's home improvement for less than 10 dollars (like 20 feet of it).........and can make eyelets to crimp at both ends.......

By the way....the length of the cable......33.5 inches from eyelet to eyelet
Attached Images     

Last edited by pesuazo; 07-18-2016 at 02:58 PM.
Old 07-19-2016, 07:23 AM
  #32  
Aaronh430
3rd Gear
 
Aaronh430's Avatar
 
Join Date: Jul 2016
Posts: 3
Likes: 0
Received 0 Likes on 0 Posts
Default

Excellent I'm going to have a go today and video it for youtube. Wish me luck...
Old 07-19-2016, 09:03 AM
  #33  
pesuazo
Pro
 
pesuazo's Avatar
 
Join Date: Dec 2003
Location: NYC - Now near Raleigh, NC
Posts: 515
Received 49 Likes on 28 Posts
Default

Originally Posted by Aaronh430
Excellent I'm going to have a go today and video it for youtube. Wish me luck...
Looking forward to the video !

I struggled for months trying to get this done until I found the post with the instructions, but a video will make it extremely easy for the next person !
Old 07-19-2016, 09:36 AM
  #34  
Aaronh430
3rd Gear
 
Aaronh430's Avatar
 
Join Date: Jul 2016
Posts: 3
Likes: 0
Received 0 Likes on 0 Posts
Default

Well Now I need a crimping tool! It's never ending!! I got the cable out by spraying WD40 into the lining and then pulling it. No problem. Threaded the new one through and hooked it onto the spring no problem... now for clamping.
Attached Images  
Old 07-19-2016, 09:53 AM
  #35  
pesuazo
Pro
 
pesuazo's Avatar
 
Join Date: Dec 2003
Location: NYC - Now near Raleigh, NC
Posts: 515
Received 49 Likes on 28 Posts
Default

From post #28 in this thread :

"IF YOU ARE REPLACING THE TENSION CABLE YOU WILL NEED A HAND HELD HYDRAULIC CRIMPER!!!!! $50 at harbor freight."

I did not need one, since I went a different route....
Old 10-30-2016, 10:38 PM
  #36  
ilikebigbumpers
Advanced
 
ilikebigbumpers's Avatar
 
Join Date: Sep 2016
Posts: 83
Likes: 0
Received 2 Likes on 2 Posts
Default

Originally Posted by jerry1847
So ill go ahead and reply to myself....


To get access to the cable on the top end.
1. Remove 3 torx above window
2. Peel back rubber seal
3. Remove 4 Phillips head screws ( the 4th is under a rubber seal and sealing gunk) took me a while to find this one

I'm not sure the next few are required. These are from the front of the top and per side.

4. Remove 2 torx holding the convertible latch in place (the latch will fall)
5. Remove 1 torx holding the rubber seal in place at the corner
6. Remove 1 smaller torx holding the headliner in place
7. Remove 3 torx on the front holding the rubber seal in place
8. Fold rubber seal out of the way
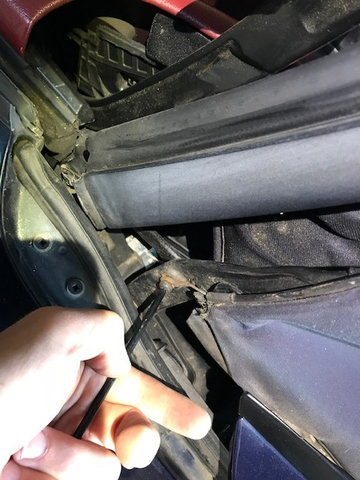
9. Pull the side of the top out and fold it so you can work on the rail.

You may need to peel some of the top away from the base on the front corner.

Boom. You have access to fix the river or replace the tension cable.

IF YOU ARE REPLACING THE TENSION CABLE YOU WILL NEED A HAND HELD HYDRAULIC CRIMPER!!!!! $50 at harbor freight.

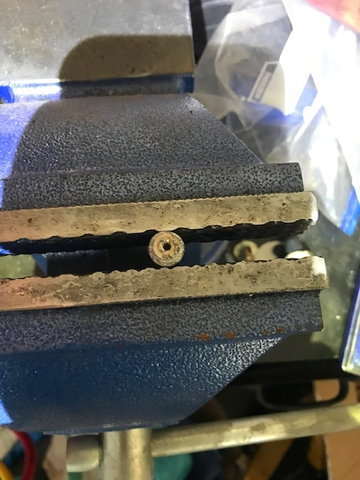
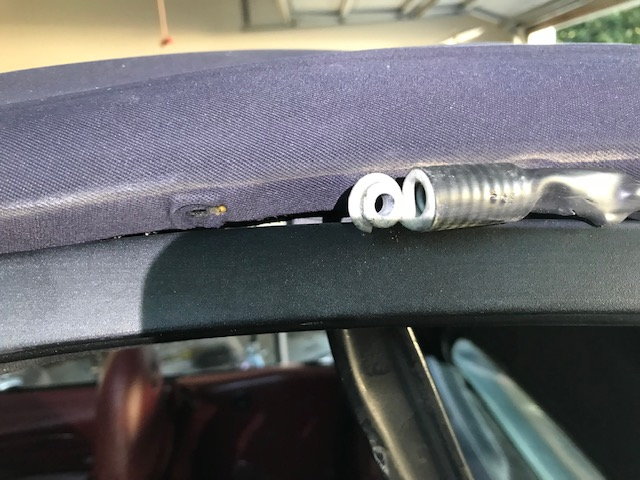
In my case the cable broke at the base from corrosion. I used the ECS replacement and it worked perfectly. The old cable pulled right out, I greased the new one and it slid in very easily. Then.....

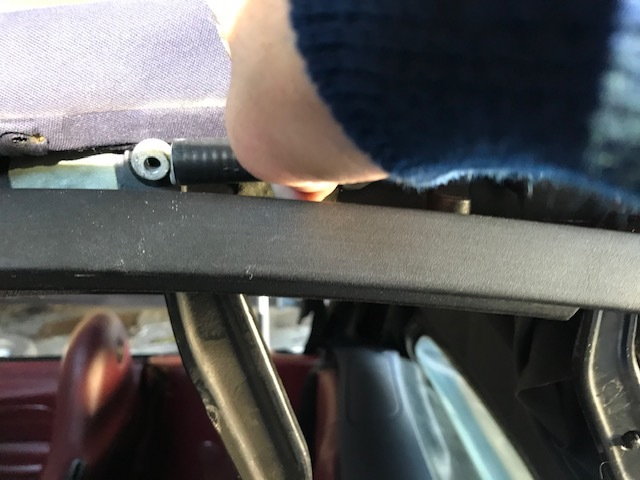
10. crimp the base cable to the eyelet and re attach the eyelet to the base
11. Hook top eyelet to tension spring.
12. Apply heat wrap to spring/hook
13. Put everything back together
Followed this and a couple other posts to fix my problem with the cable. Thought I'd share.

-Step 4 and on are indeed not needed.
-If you do follow step 4 and on, make sure during reinstallation that you hook the corner of the rubber weather seal back onto the corner of the top frame
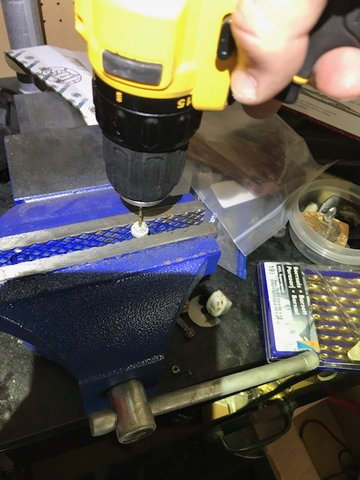
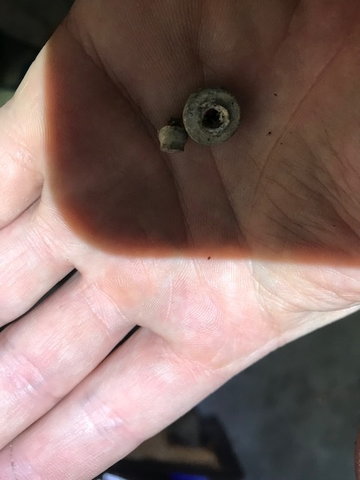
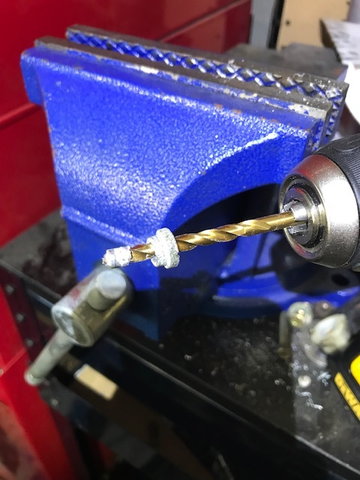
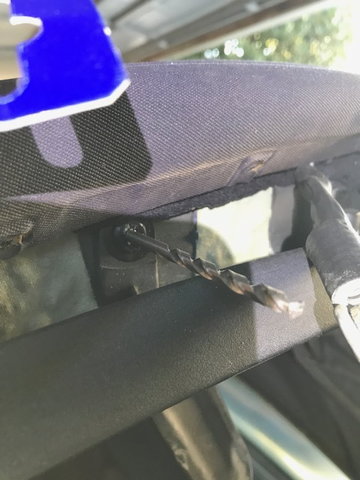
-in my case, the rivet that holds the spring to the frame snapped. the right pop rivet size is 5/32 x 1/2.
Old 10-17-2017, 08:28 PM
  #37  
myronf
Instructor
 
myronf's Avatar
 
Join Date: Sep 2017
Location: WI
Posts: 137
Received 6 Likes on 5 Posts
Default

My car has the same problem. I assume that it makes sense to replace both the driver and pass side.
Old 10-17-2017, 08:34 PM
  #38  
ilikebigbumpers
Advanced
 
ilikebigbumpers's Avatar
 
Join Date: Sep 2016
Posts: 83
Likes: 0
Received 2 Likes on 2 Posts
Default

Originally Posted by myronf
My car has the same problem. I assume that it makes sense to replace both the driver and pass side.
the two sides each has a cable. fix whichever side is slacking. in my case, the other side snapped within a month after i fixed the original side
The following users liked this post:
jasmanjr (06-28-2020)
Old 10-23-2017, 11:50 PM
  #39  
brianbbs67
Instructor
 
brianbbs67's Avatar
 
Join Date: May 2016
Posts: 129
Received 7 Likes on 4 Posts
Default

Glad to find this post, as I am replacing the same now.
Old 10-23-2018, 06:34 PM
  #40  
abhijitpat
6th Gear
 
abhijitpat's Avatar
 
Join Date: Oct 2018
Location: Chantilly, VA
Posts: 6
Likes: 0
Received 0 Likes on 0 Posts
Default

Originally Posted by pesuazo
Looking forward to the video !

I struggled for months trying to get this done until I found the post with the instructions, but a video will make it extremely easy for the next person !
Hello,
did you get a chance to post the video? Just bought a 2004 C4S and I have the same problem
Old 10-24-2018, 06:02 PM
  #41  
Anders Flodin
Advanced
 
Anders Flodin's Avatar
 
Join Date: Dec 2017
Location: Raleigh NC
Posts: 90
Received 23 Likes on 10 Posts
Default working on it now

Attachment in vice for cleaning out


Cleaning with small drillbit

Boom, rivet and attachment


Cleaning out a bit more with larger bit and what is left of rivet sits on bit


This how the attachment sits on the spring


This is where it goes, to the joint where top frame arms are attached


I loosen the cable down here so it is easier to rivet the thing in place


Measuring with a drill bit the size of rivet 5/32 fits nicely
Now off to get rivet
Old 10-25-2018, 08:58 AM
  #42  
abhijitpat
6th Gear
 
abhijitpat's Avatar
 
Join Date: Oct 2018
Location: Chantilly, VA
Posts: 6
Likes: 0
Received 0 Likes on 0 Posts
Default

Hello Anders,

Extremely helpful. Thank you for posting the detailed images. I decided against crimping and bought the tension rope from the local stealer for $80 - Part# 997-561-921-00

Abhi
Old 10-25-2018, 10:53 AM
  #43  
Anders Flodin
Advanced
 
Anders Flodin's Avatar
 
Join Date: Dec 2017
Location: Raleigh NC
Posts: 90
Received 23 Likes on 10 Posts
Default Glad if I could be of help

Good luck, if you need any more input, just post it here.

Thanks
Anders

Originally Posted by abhijitpat
Hello Anders,

Extremely helpful. Thank you for posting the detailed images. I decided against crimping and bought the tension rope from the local stealer for $80 - Part# 997-561-921-00

Abhi
Old 02-21-2019, 10:31 AM
  #44  
ultrahuck
4th Gear
 
ultrahuck's Avatar
 
Join Date: Jan 2019
Posts: 4
Likes: 0
Received 0 Likes on 0 Posts
Default

Hi, I have the same problem on my 2006 C2 Cabriolet. Just curious, how did you do the recrimping??? Thanks very much.
Old 02-21-2019, 11:04 AM
  #45  
cds72911
Drifting
 
cds72911's Avatar
 
Join Date: Jun 2001
Location: VT USA
Posts: 2,417
Received 149 Likes on 123 Posts
Default

https://www.google.com/search?q=how+...TF-8#kpvalbx=1


Quick Reply: ***SOLVED*** convertible top not folding closed quite right (PICS) -


All times are GMT -3. The time now is 12:05 AM.