When you click on links to various merchants on this site and make a purchase, this can result in this site earning a commission. Affiliate programs and affiliations include, but are not limited to, the eBay Partner Network.
Today I replaced the center LCD panel on my instrument cluster. The purpose of this post is not to provide a soup to nuts how-to but rather just add my lessons learned and comments on things that I didn't find on other strings or youtube. And I've attached three photos just because.
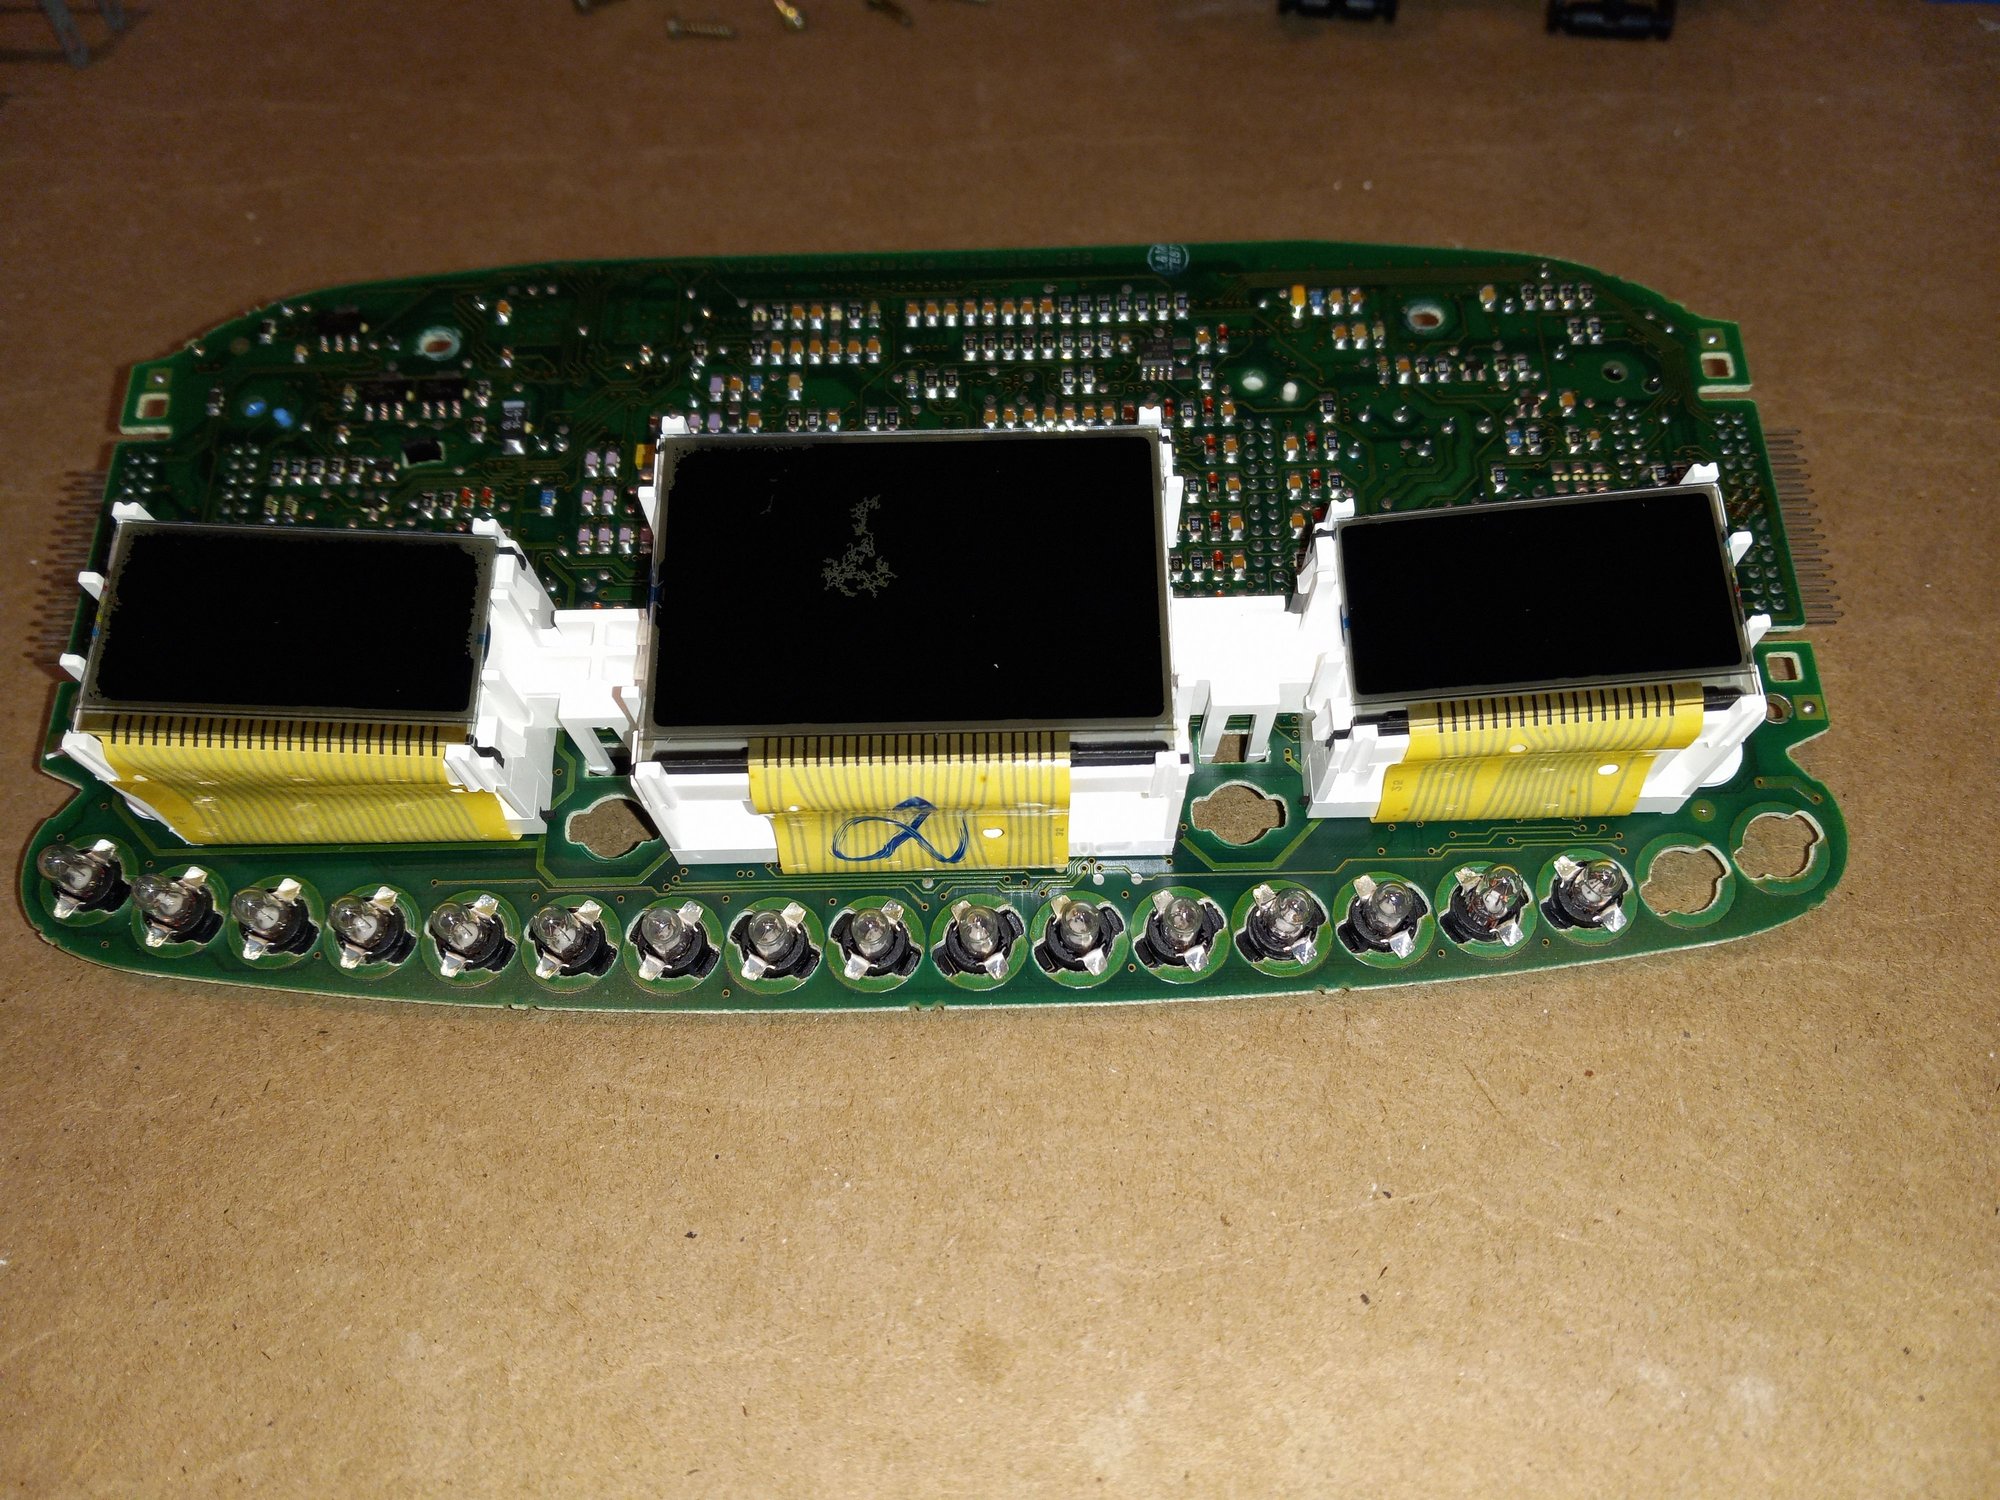
1. I researched both here and on youtube for 'how to' - lots of info out there. how to remove the cluster, how to take apart the cluster, how to replace the lcd. That helped me figure out what I needed to do and what tools. The main tool was the T soldering bit (I actually bought the whole iron with bit to make sure it would fit.) I purchased one on ebay. I also picked up an exacto knife blade with a curved face from the local box store. - I didn't want to poke the board and felt the curved blade would be safer. It would allow me to scrape just one or two contacts at a time. I also purchased a set of magnifying glasses but found I really didn't need them - but my eyesight is pretty good....these glasses had various lenses. The lowest were 10x and I think that is too much. 2 or 4 x would be ideal if you can find them - I think. Mine have lights built in. I liked that feature.
2. Two separate vendors told me how difficult/treacherous it was to replace the lcd and offered their services. I watched a number of youtube videos and felt I had the skills and as it turns out the job, in my opinion just isn't that difficult. Btw, I did the whole job in about two hours total. But I've had my car for 22 years and I've had it apart a million times. I can pull out the cluster in about 5 minutes.
Pulling the cluster and disassembling it - lots of youtube out there. pretty straigh forward and nothing to add
3. LCD removal - Like one youtube guy did, I used the t-bit to loosen and remove the old lcd. I held the heated t-bit on the ribbon cable for just 4 or 5 seconds and I was able to pull the ribbon right off. I think another guy just pulled it off. I felt better heating it.
4. Contact Clean up - this was the part that made me nervous but it was easy. Using the curved blade in the exacto knife, I gently scraped the surface of the contacts with an up and down motion. The old contact material scrapped off as a black/grey powder. I sprayed electrical contact cleaner onto a q-tip and wiped the contacts clean. One guy cleaned his just with contact cleaner but after trying just that I felt the surface needed to be scraped. Gently. And just the contacts.
5. IMPORTANT - New LCD install set up- I carefully lined the ribbon up with the contacts. Then mimicked the steps and pressure to heat the ribbon cable. This made me realize how the board and lcd needed to be supported in order to keep things lined up. I then put what I needed under the instrument panel and likewise under the lcd. Also, make sure you protect the face of the lcd against scratches. One youtube guy recommended to position the ribbon so that just enough of the connections underneath it were visible at the top to help keep things lined up. Very helpful.
6. LCD ribbon attachment - With everything lined up I held the heated t-bit onto the ribbon cable for a couple of seconds at a time. The t-bit was shorter than the ribbon cable so it wouldn't do the whole ribbon at one time. I just moved it left and right until I felt that the ribbon was attached. Maybe 10 - 15 seconds all together? I then let it cool down before testing the connection. held strong.
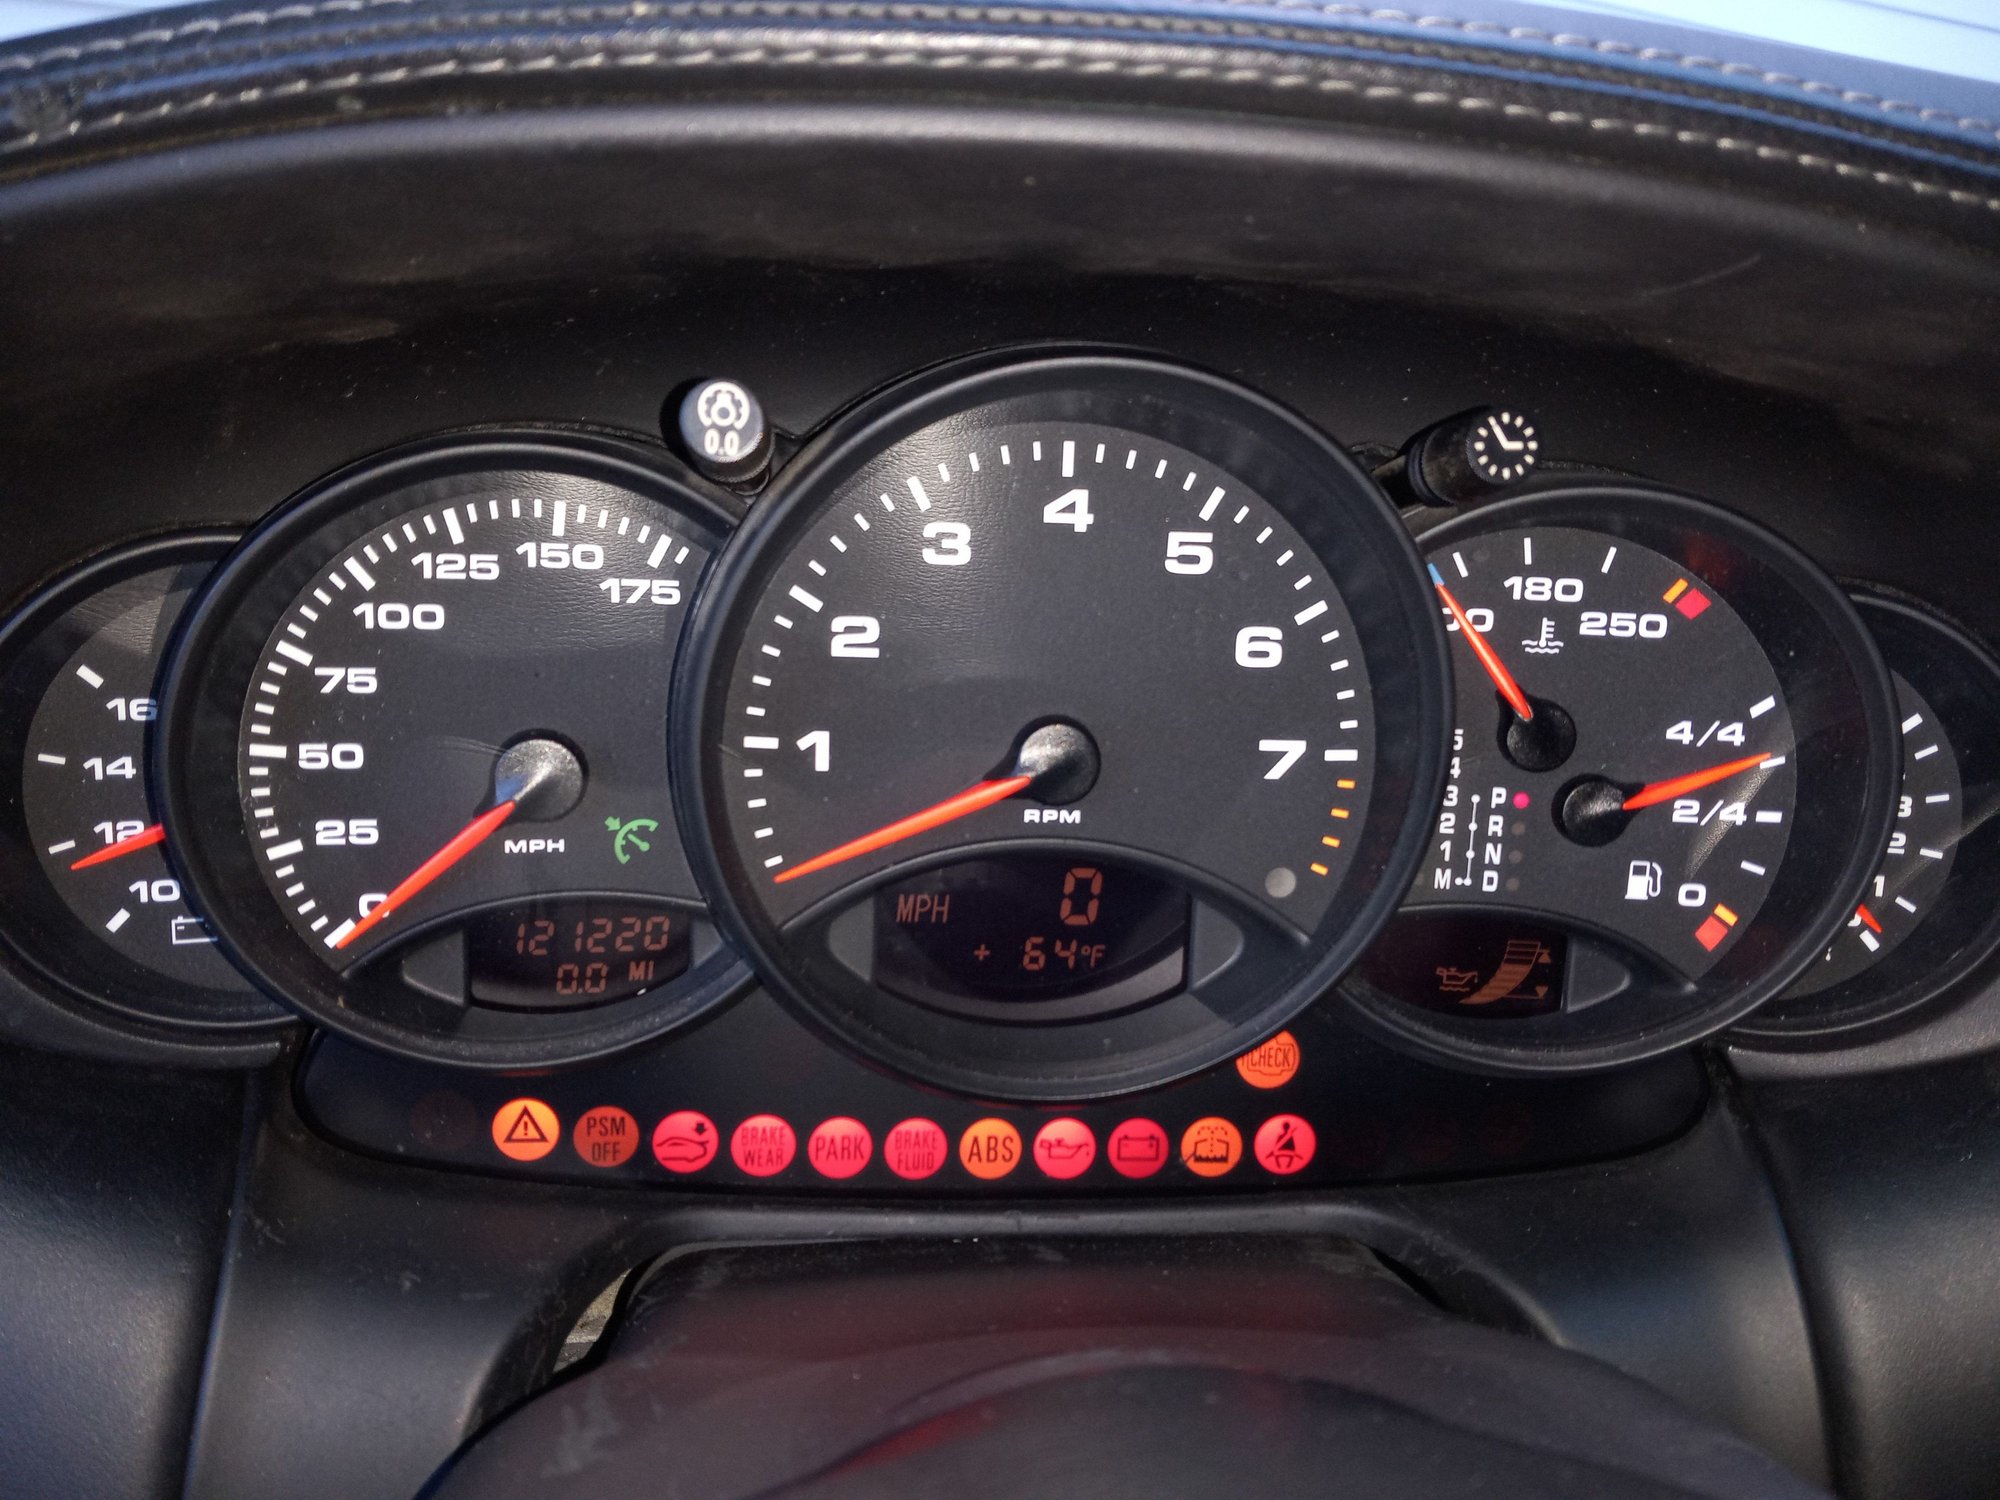
7. Reassembled and tested on the car. Worked like a champ.
8 One thing that struck me as soon as I removed the metal covers on the lcds is that I could see the degradation of the other two LCD. The edges looked ragged. I really wish I had gone ahead and bought all three panels and done them together. - This point is the real reason I'm posted this. No one mentioned this and wanted to share with you. Similarly, once I got it back in the car and the ignition on, I can see that the two older lcds are slightly grayer than the new center lcd. You can't tell in the photo but if you sitting there looking at it, you can just tell they are just slightly different.
Hope this helps. p.s. And yes, it really was only 64 degrees here in Key West today...
Before with damaged center LCD Apart and ready for replacement Done