When you click on links to various merchants on this site and make a purchase, this can result in this site earning a commission. Affiliate programs and affiliations include, but are not limited to, the eBay Partner Network.
I got the leather at Global Upholstery Supply. I will warn anyone considering this; The leather the factory used to cover interior bits is MUCH thinner than what they sell. It’s more akin to the leather used for the seats. This makes it very difficult to do what I did and required trimming plastic to get things to fit right. That being said, it looks identical in texture to the rest of the leather in the car. The color is a bit lighter but I’d attribute that to the car being almost 20 years old. It’s more than close enough.
I used contact cement for the entire job. There’s a couple of YouTube videos on how to do it. You start by picking one spot and glueing a line. Then you glue another inch, then another. You also have to pay attention and plan the orientation of the leather as it only really stretches in one direction.
I was going to comment on the thickness of the leather. The stuff that Porsche used to cover vents and accessories was almost paper thin. It must have been difficult to get the stuff you used to fit properly. Did you have to do anything special to get it to wrap without wrinkling? Heat? Moisture? Great job, it looks really nice
I like it. Did you do it yourself or did you send it out?
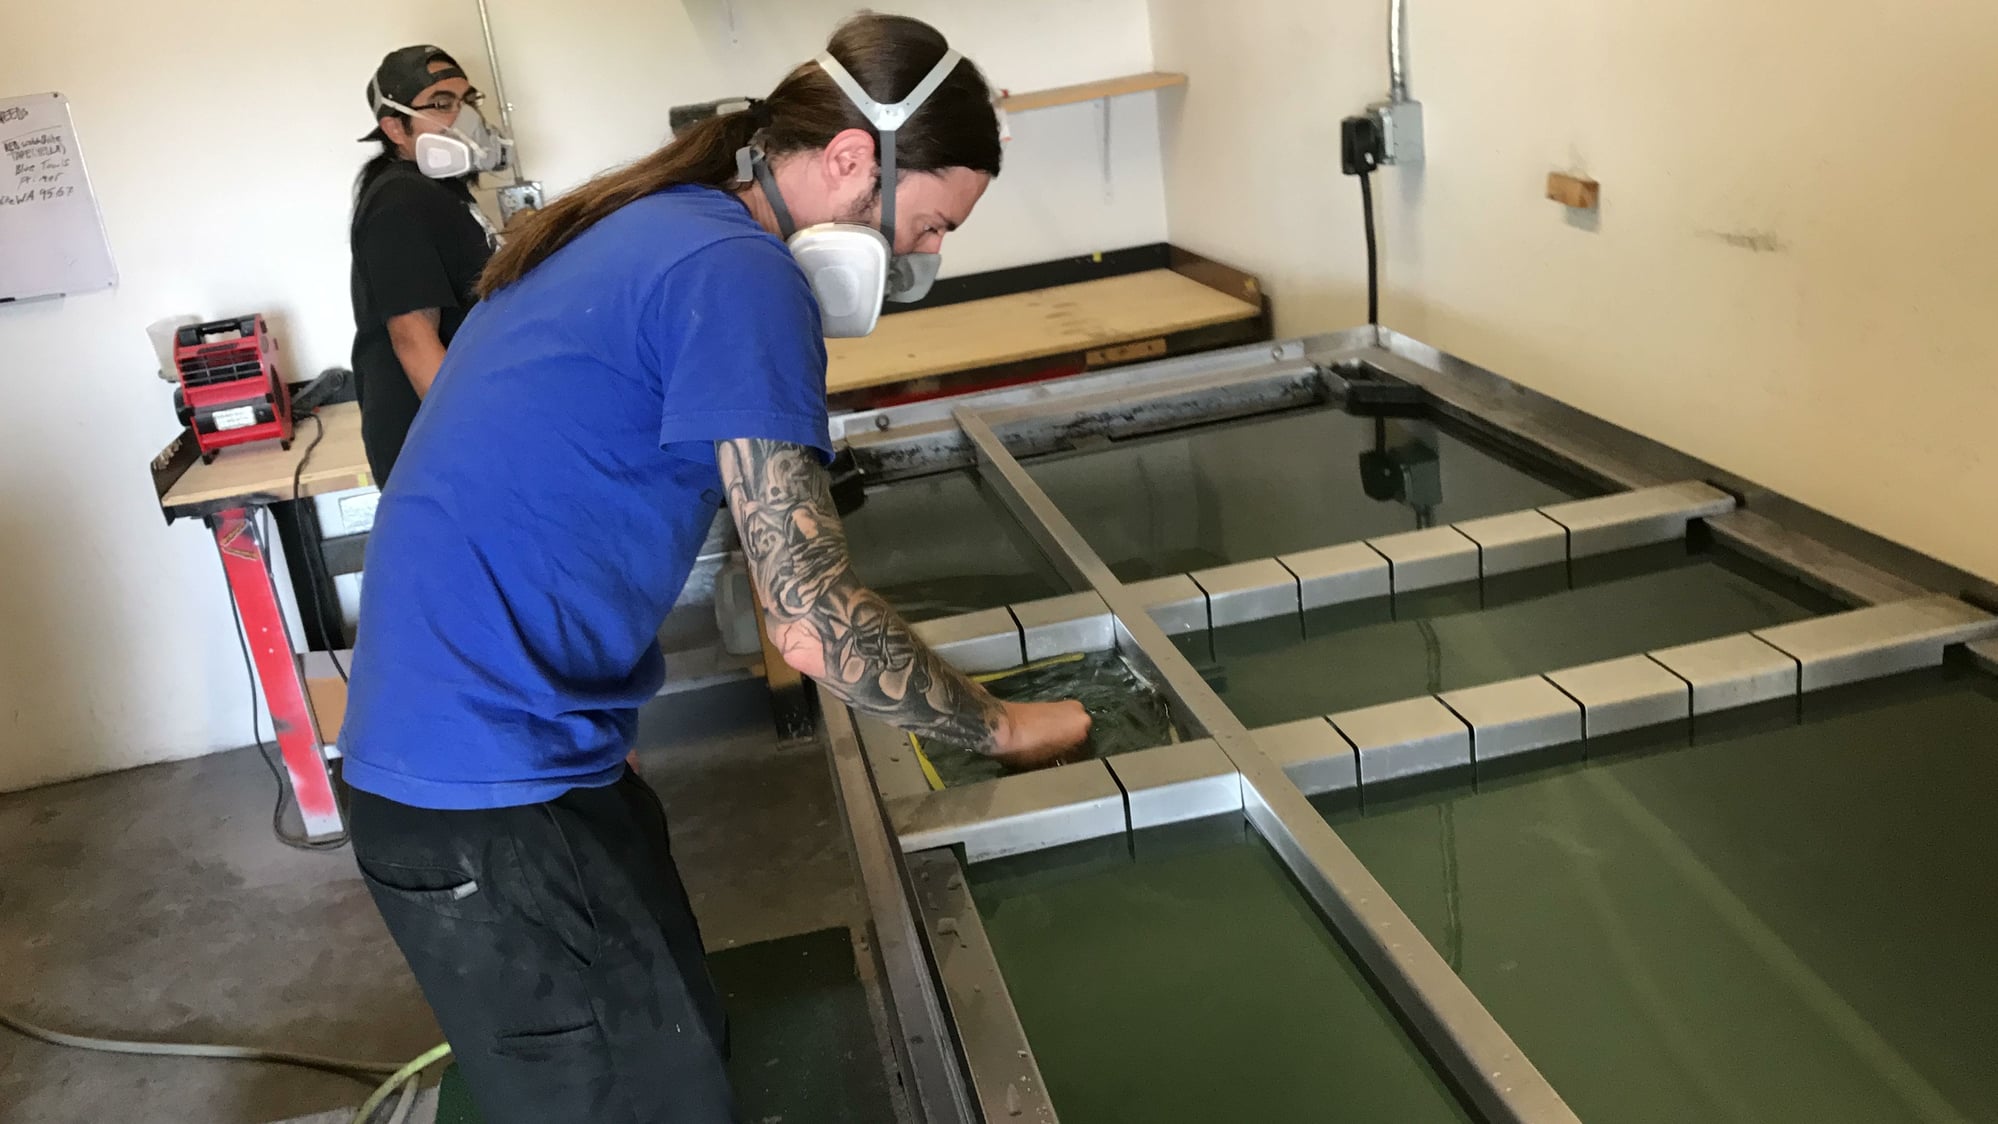
No, I sent the console, along with pretty much every other interior plastic piece, to a local shop. I think if I was doing a single small piece I might give it a go, but I didn't have the patience to remove all the soft touch paint or the vat to handle big pieces. Plus, while the basics of hydro dipping are pretty easy, doing it well is more of an art. I ended up using L&S Customs on Metric in Austin, if anyone happens to see this thread. Michael there is talented. Here's a blog post I made with more details... http://porsche.rossie.net/all-about-hydrographics/
The hardest part for me was finding a decent shop in Austin to do the work. I swear, it's like some of them are just fronts for meth houses.
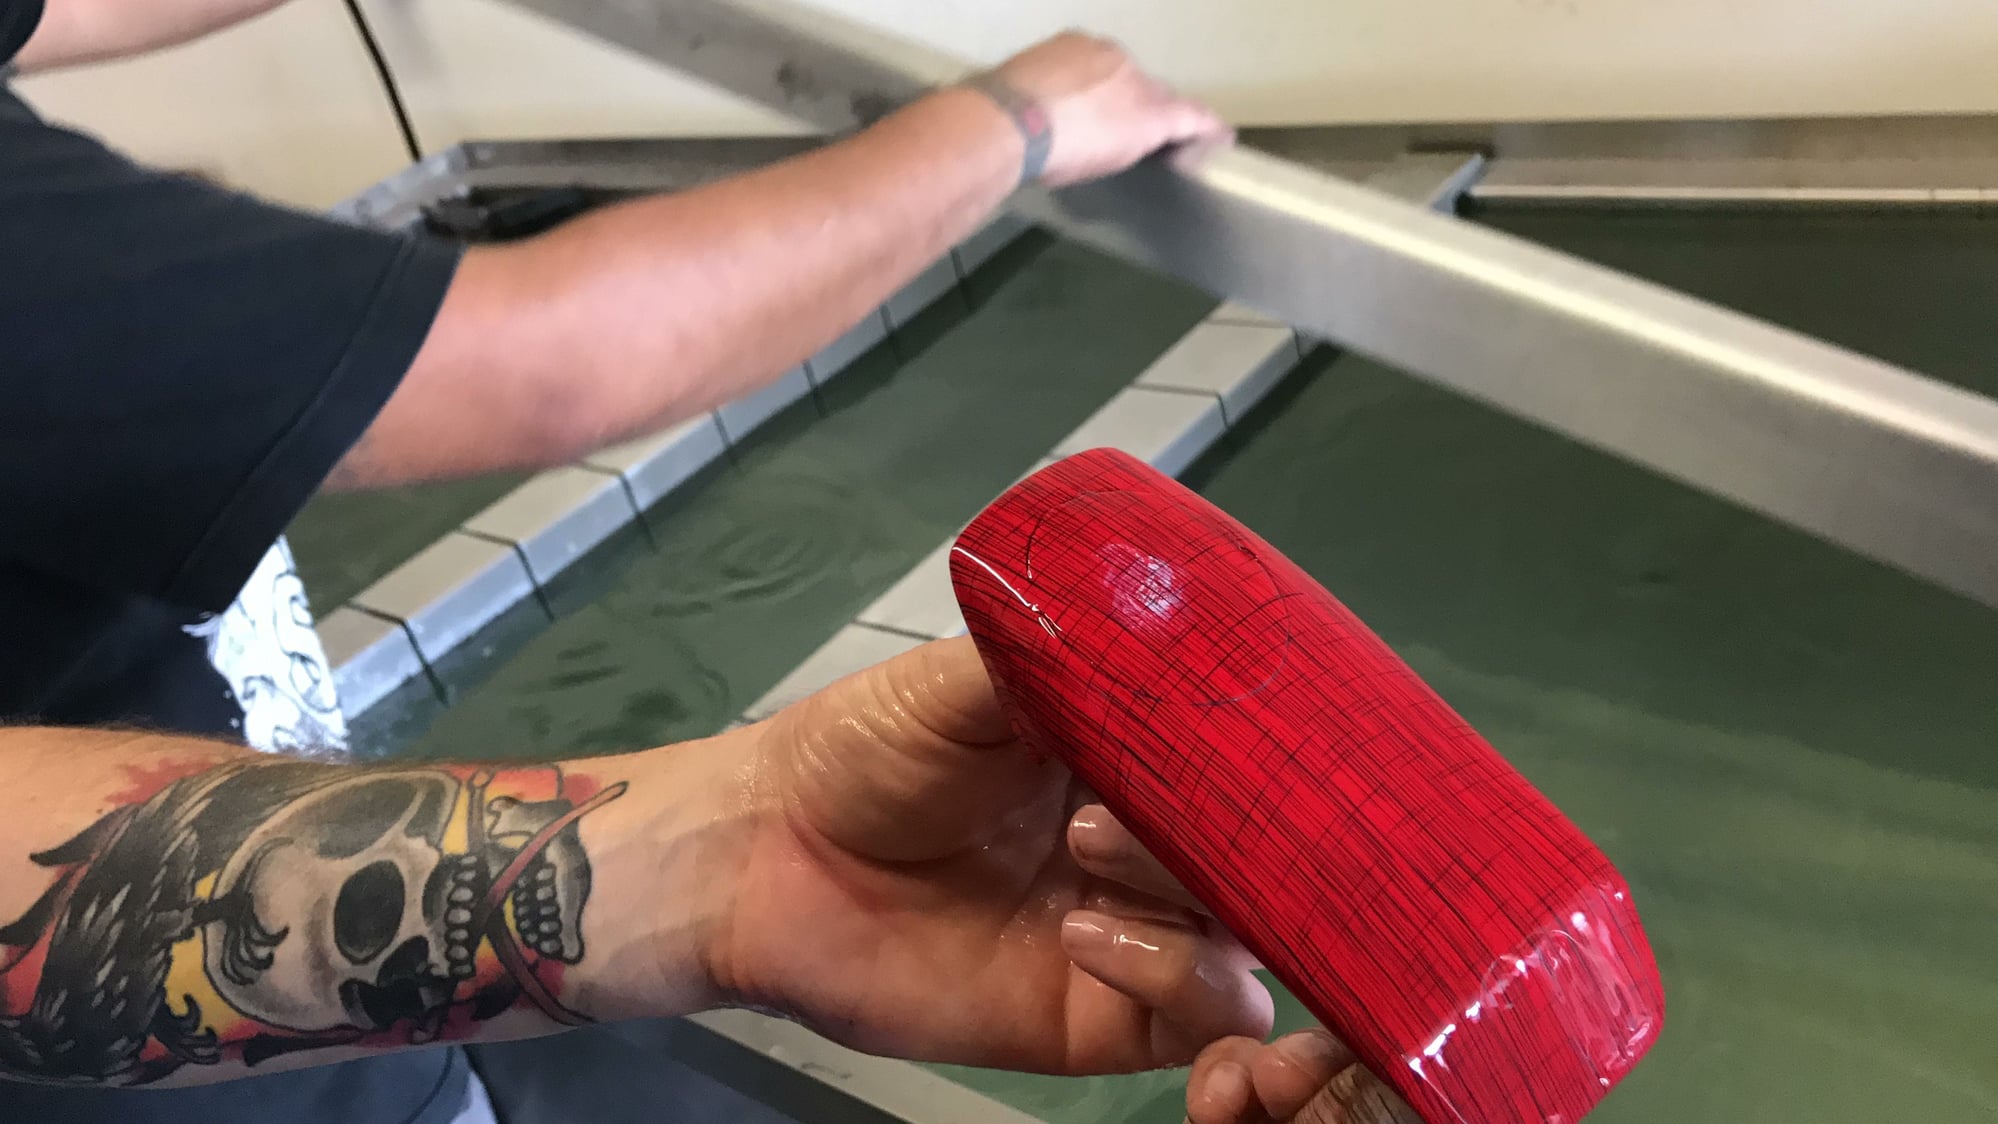
Here's a couple pics of the guys at L&S doing the work... This is the little dash light sensor cover.
I was going to comment on the thickness of the leather. The stuff that Porsche used to cover vents and accessories was almost paper thin. It must have been difficult to get the stuff you used to fit properly. Did you have to do anything special to get it to wrap without wrinkling? Heat? Moisture? Great job, it looks really nice
I did trim/shave/sand all the points where two pieces came together. I think that for the piece of leather I had this job was about as much as it would take before having trouble with wrinkling, bubbling, etc.
I finished the first stage of my center console modification journey. The center console is in and the window switches are relocated to horseshoe. I finished after dark, so the pic isn’t the greatest.
A NOTE to anyone who would attempt to do this, I bought a Boxster center console. Although the center console itself is the same and I believe carries a 996 part number, there is an extra part behind the center console that extends to the back seat that is unique. More importantly, the rear “side pads” are unique to the 911 and there is an extra leather covered piece on the top.
That being said, stage two is to cover the side pads, the console cover and the little piece behind it, and refinish a turbo shift ****/boot in “Guards Red” leather. I’ve got two problems; I need the rear pads and I can’t find leather in “Guards Red”. If anyone can help...
Another note; if you’ll notice the surround for the climate control is silver. I also have plans to “modify” the upper center console. Eventually, I’m going to relocate the climate control to the bottom section and I’m going to replace the CD/radio with a modern unit. Most of the modern units come with a bezel which I will also finish in “alumalook” and the remaining storage bay will have its bezel refinished in “alumalook” as well.
I'm in the process of trying to figure out what to do with my seal gray interior, and midnight blue outside. I've been toying with, painting it the same color as the body, seal Gray, or maybe some other contrasting color like black, or silver.
I never considered covering it in leather. There are some real good leather shops here in San Antonio, I might look into that.
Yup, sadly they are no longer available. The Function First console riser kit is one of the best usability modifications I’ve done to my 996 (first place would go to the Numeric shifter and third place would go to the Rennline adjustable accelerator pedal).
Nice work on the console. I wish I had your skills and patience.
I have little skills and even less patience. What I do have is the willingness to try something like this and accept failure, lol. I think the neat part about this would be the fact you can buy a part on EBay and just try it. Since you’re covering it in leather (and sanding) you can buy a really beat up part and give it a go. I got the console dirt cheap because it was all scratched up, but mechanically sound.
I orbital sanded most of my center console’s slab sides but could not attack the top narrow edges around the shifter base, or the “valley” where the parking brake resides. Something flexible is needed or attack it by hand. May look for sanding block/pads next.....
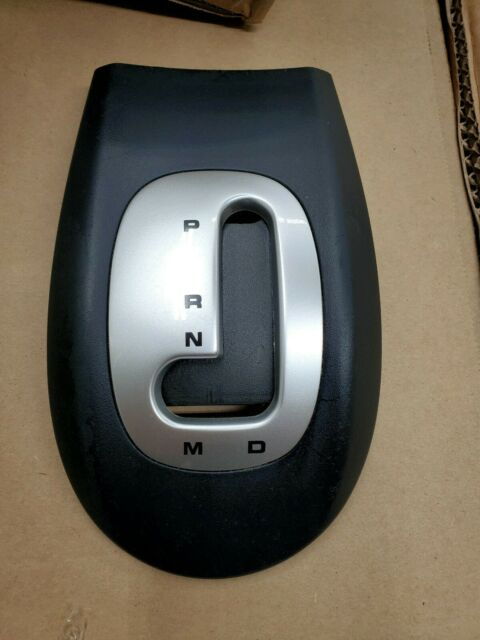
Thanks for all of the great tips on the stripping and repainting/recovering of the console. I have the tiptronic console and wondered if anyone has a tip on removing the center silver piece with the PRNDM on it? I know this has to come off, but my gently prying is yielding no results and I am concerned I am going to break something. I need this center piece to come off in order to properly sand or cover this piece. Any thoughts would be appreciated.
 07-17-2018, 11:52 AM