When you click on links to various merchants on this site and make a purchase, this can result in this site earning a commission. Affiliate programs and affiliations include, but are not limited to, the eBay Partner Network.
As an update, I just finished dropping off parts at a shop to laser cut the mounts and assemble the reinforced bumper mounts. I'll be getting them powder coated and do a final test fit of all the pieces. Assuming everything goes well, I will have finished product in my hands in two weeks (only making one set to test) and I can begin to order my first round of 10, with hopefully another two week lead time. They will be top notch quality, lifetime warranty. I'll update you all when they come in and disclose pricing when I have finished pictures of the entire kit.
Very Interested.
I'm about to r&r my blown motor so I'd love to get this installed at the same time. Thanks!
Update
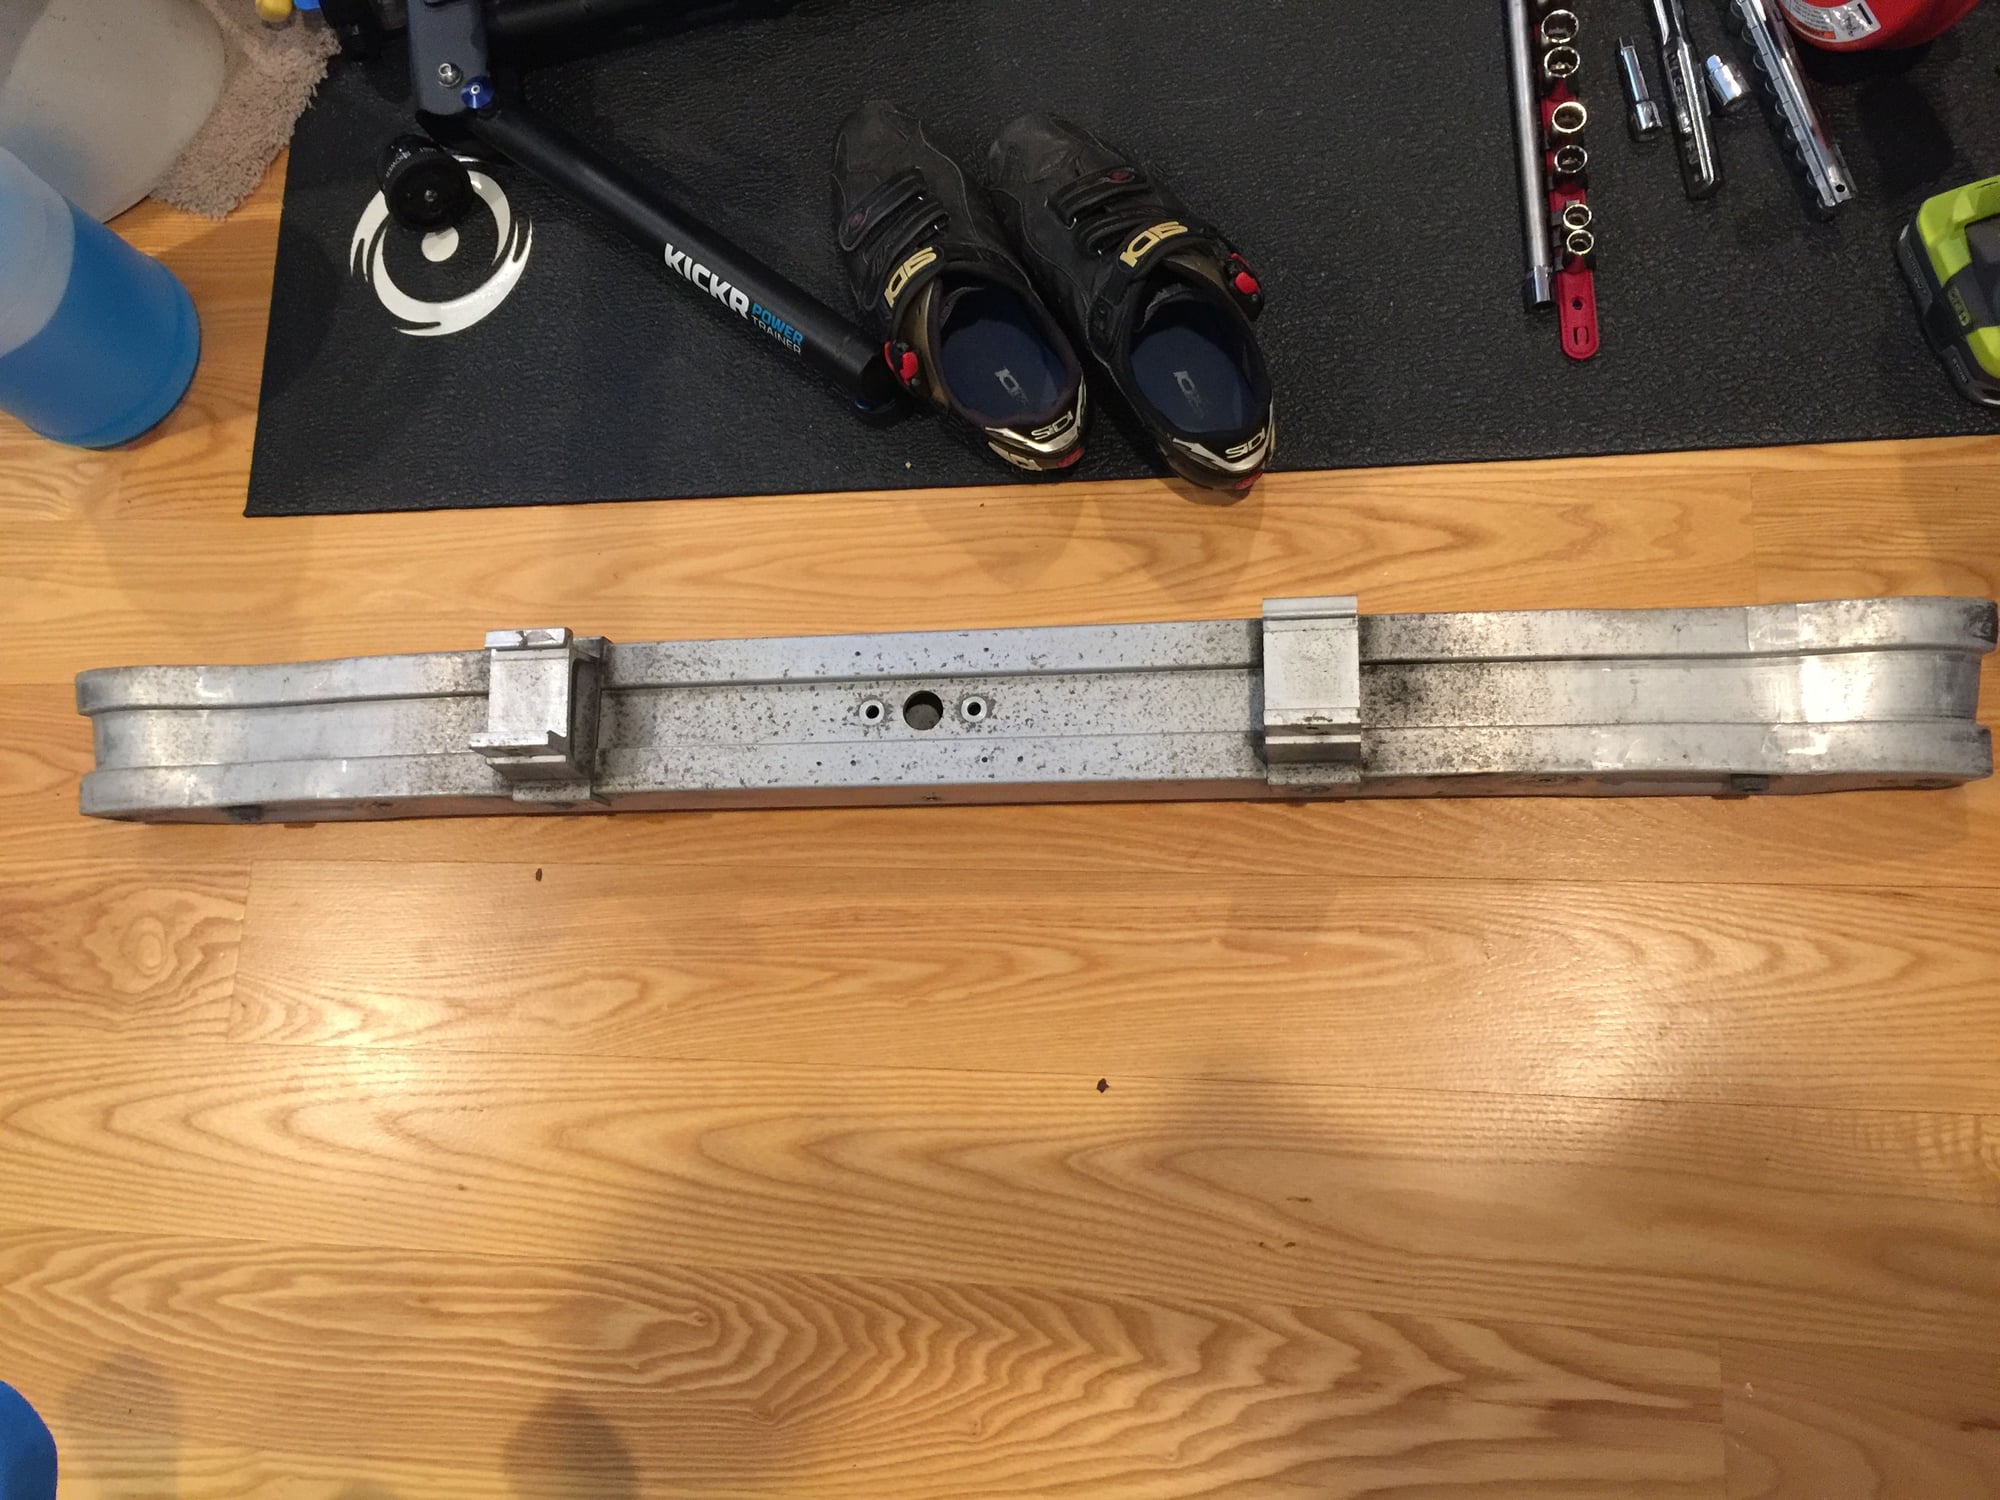
I have received a finished product late last week and was able to install over the weekend. Fits great, and only had to make a small adjustment in the form of taking off a slight amount of metal on the far end (near where the bolt that holds the aluminum bumper goes through). Going for as close to a bolt-in, no issue affair as possible and will be adjusting some sizes slightly to reflect this. Parts came out great, and they look very professional. Currently getting quotes to make 10 of these. I will be including all of the hardware, license plate hinge kit, bumper brackets, and the receiver bracket so you will get everything you need to make it fit right and look OEM from the outside.
If you are interested, I will be looking to sell the complete kit for $350. This will include free shipping to the continental U.S. To our friends across the pond, I rarely ever ship to your end, but I'm happy to if we work something out! Lifetime warranty on the parts.
I will not be asking for a pre-order. I'd like to have all the pieces finished and in inventory before asking for anything. If you would like one of the kits feel free to shoot me a Private Message here, and I will add you to the list in order of messages received. I will also be adding more pictures of the finished products once they are finished (shooting for 1.5-2 week lead time). As soon as I am finished getting a tear in my family's Turbo 996 seats fixed I will have my 996 back and can take some snazzy pictures with my road bike on to show how it all looks. Spoiler, very cool.
From what I have read, this kit should work the same for 997/986. I have not been lucky enough to own/work on one before but this should work just fine for your cars. If you would like to purchase one and are not sure if it would fit, let me know and I'm happy to work something out. Whether that is a deposit or money back/free return I am open for discussion to make you happy!
- As soon as these kits are done, I can begin work on my friends Cayman S 2007/2008 and would be able to get those out for anyone interested in the coming weeks.
-Bonus points if you can guess the red car in the background
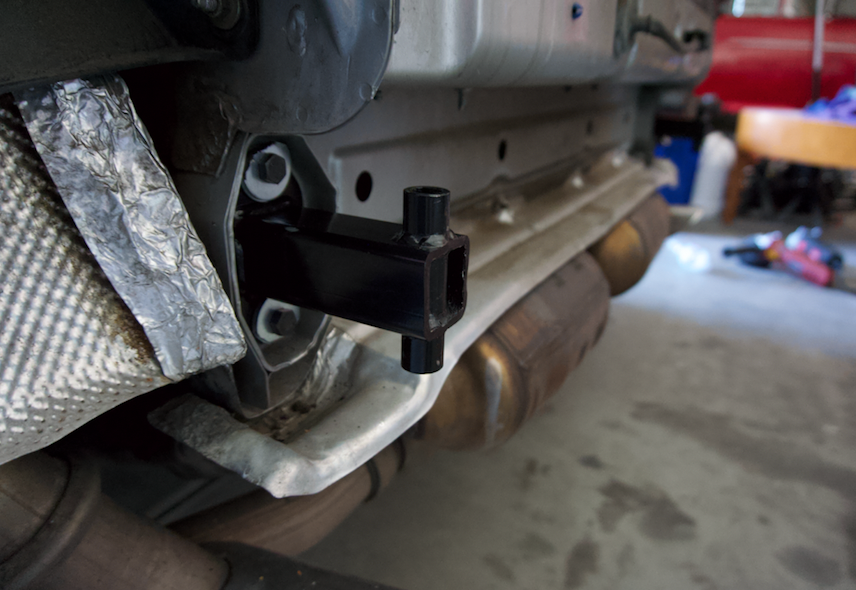
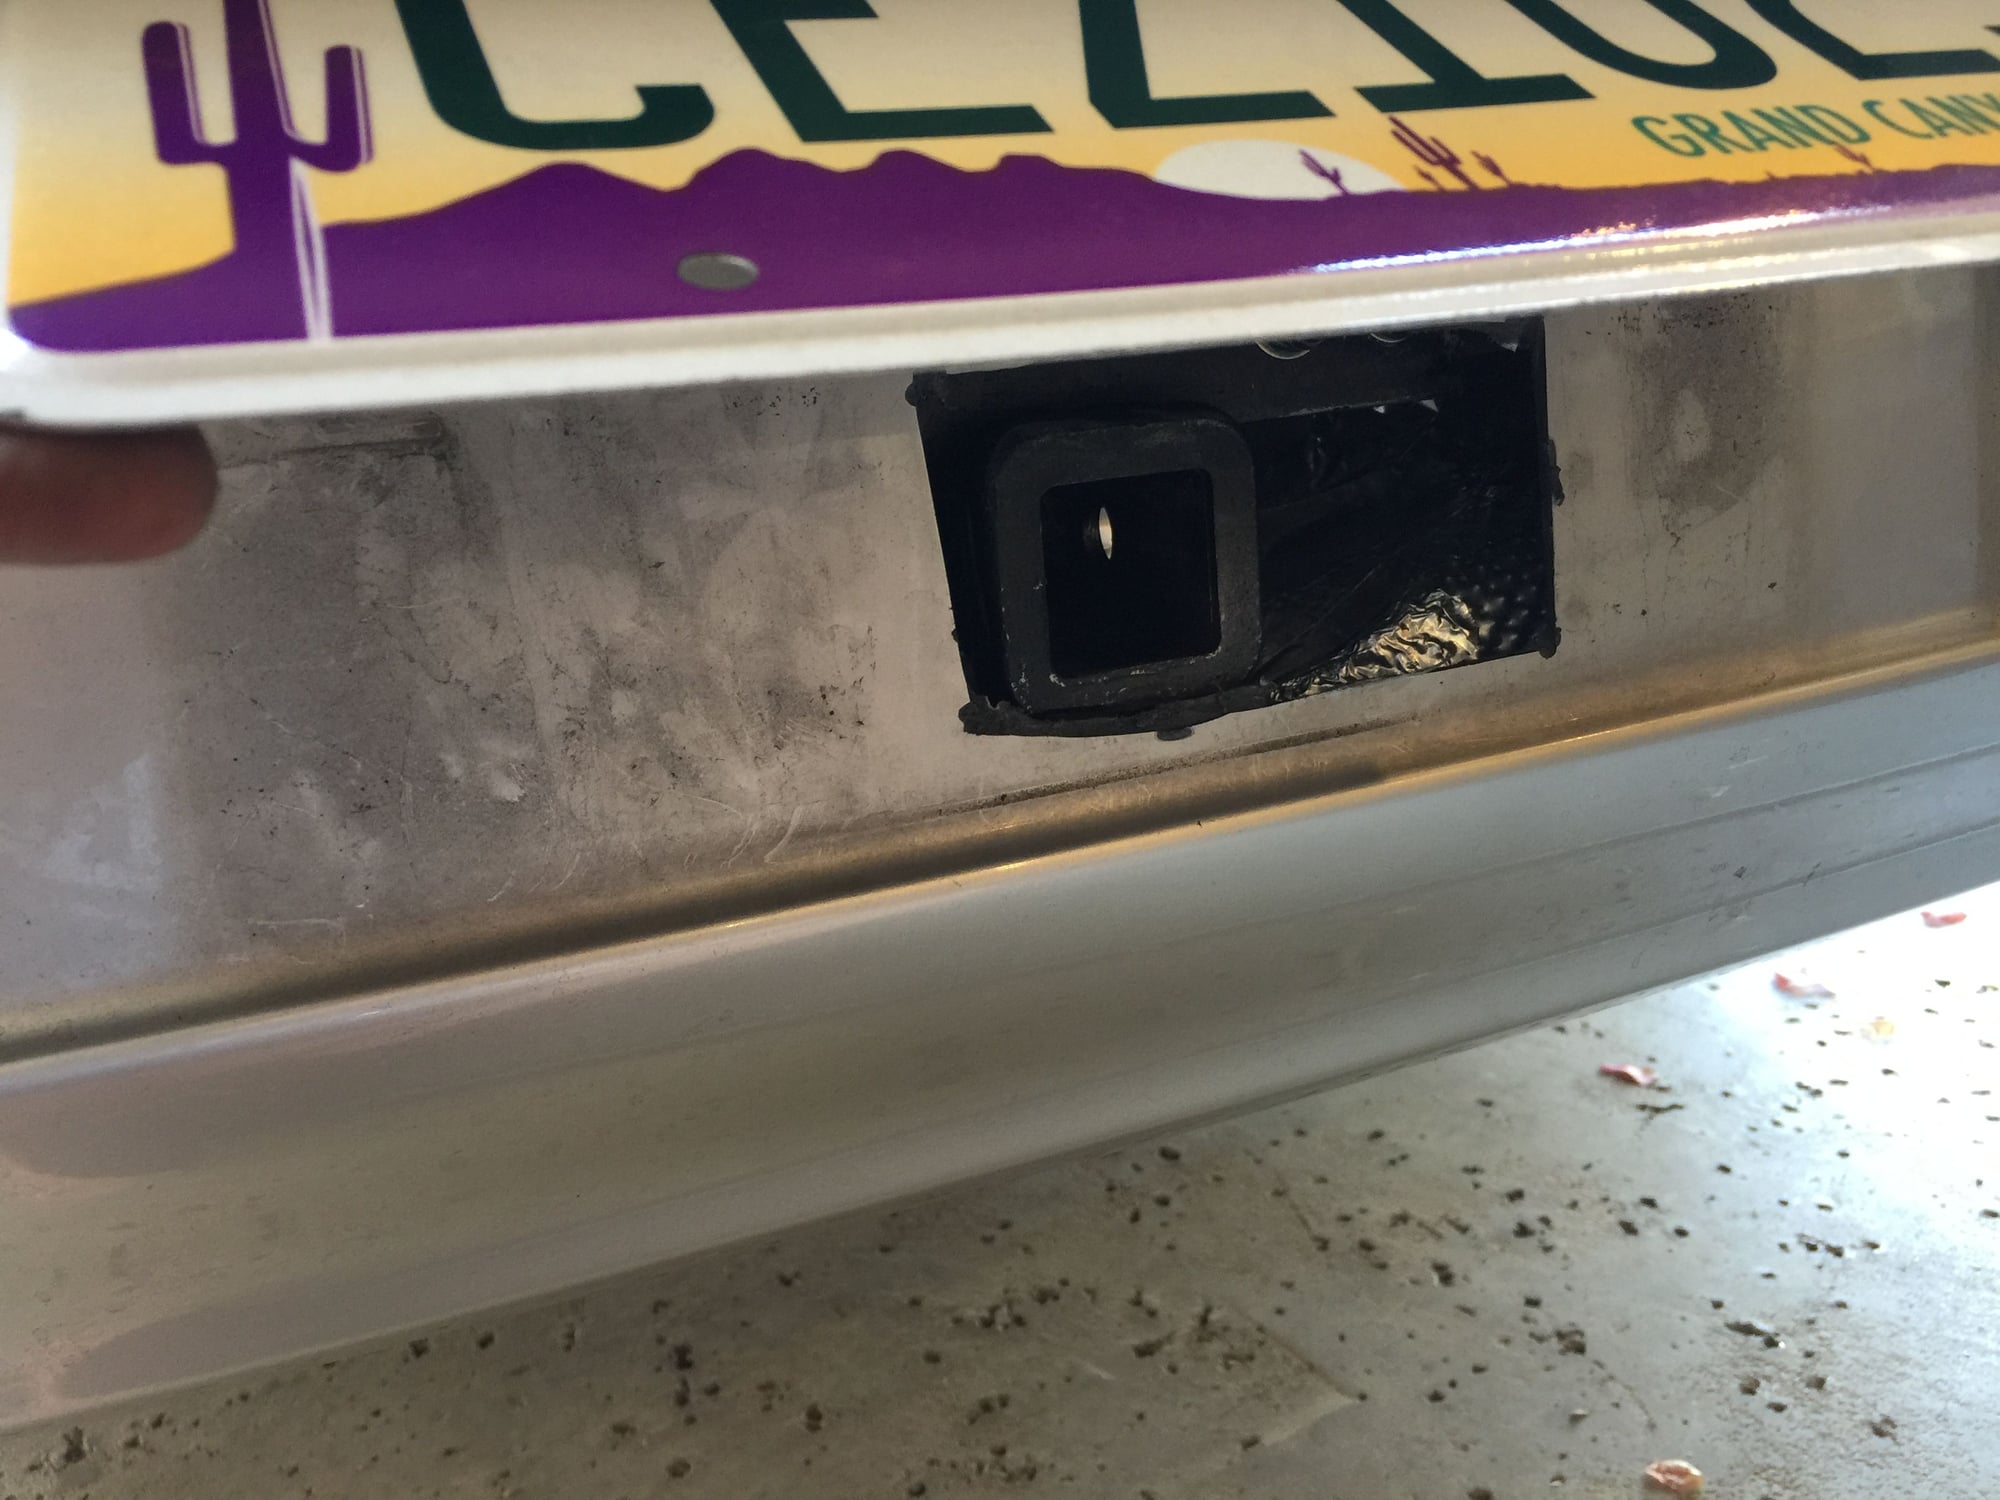
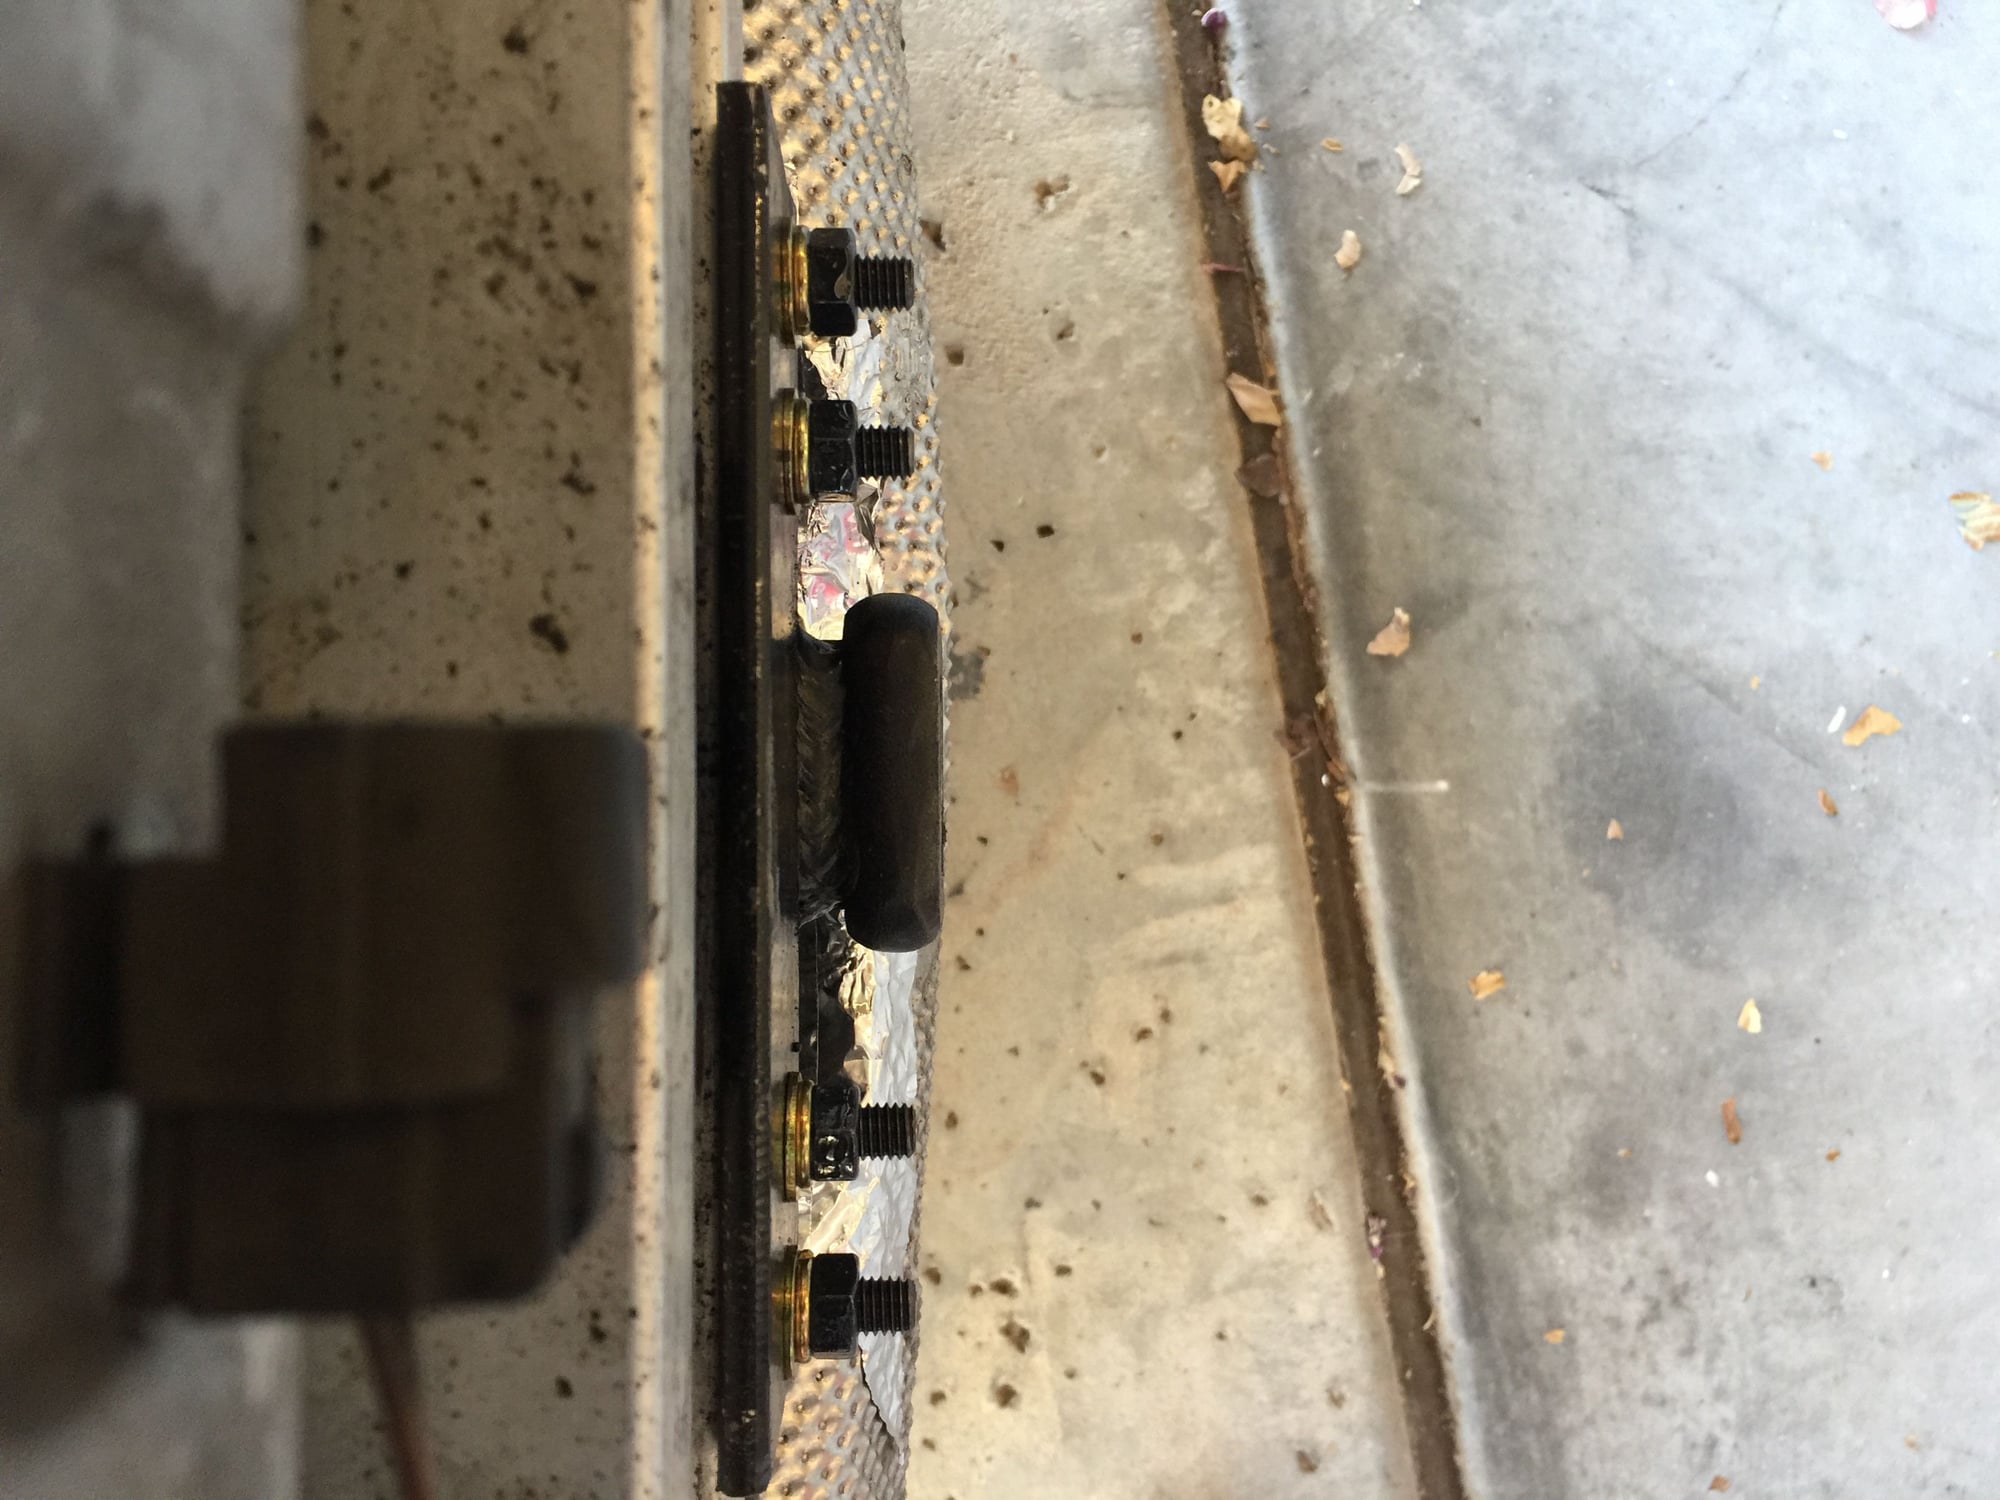
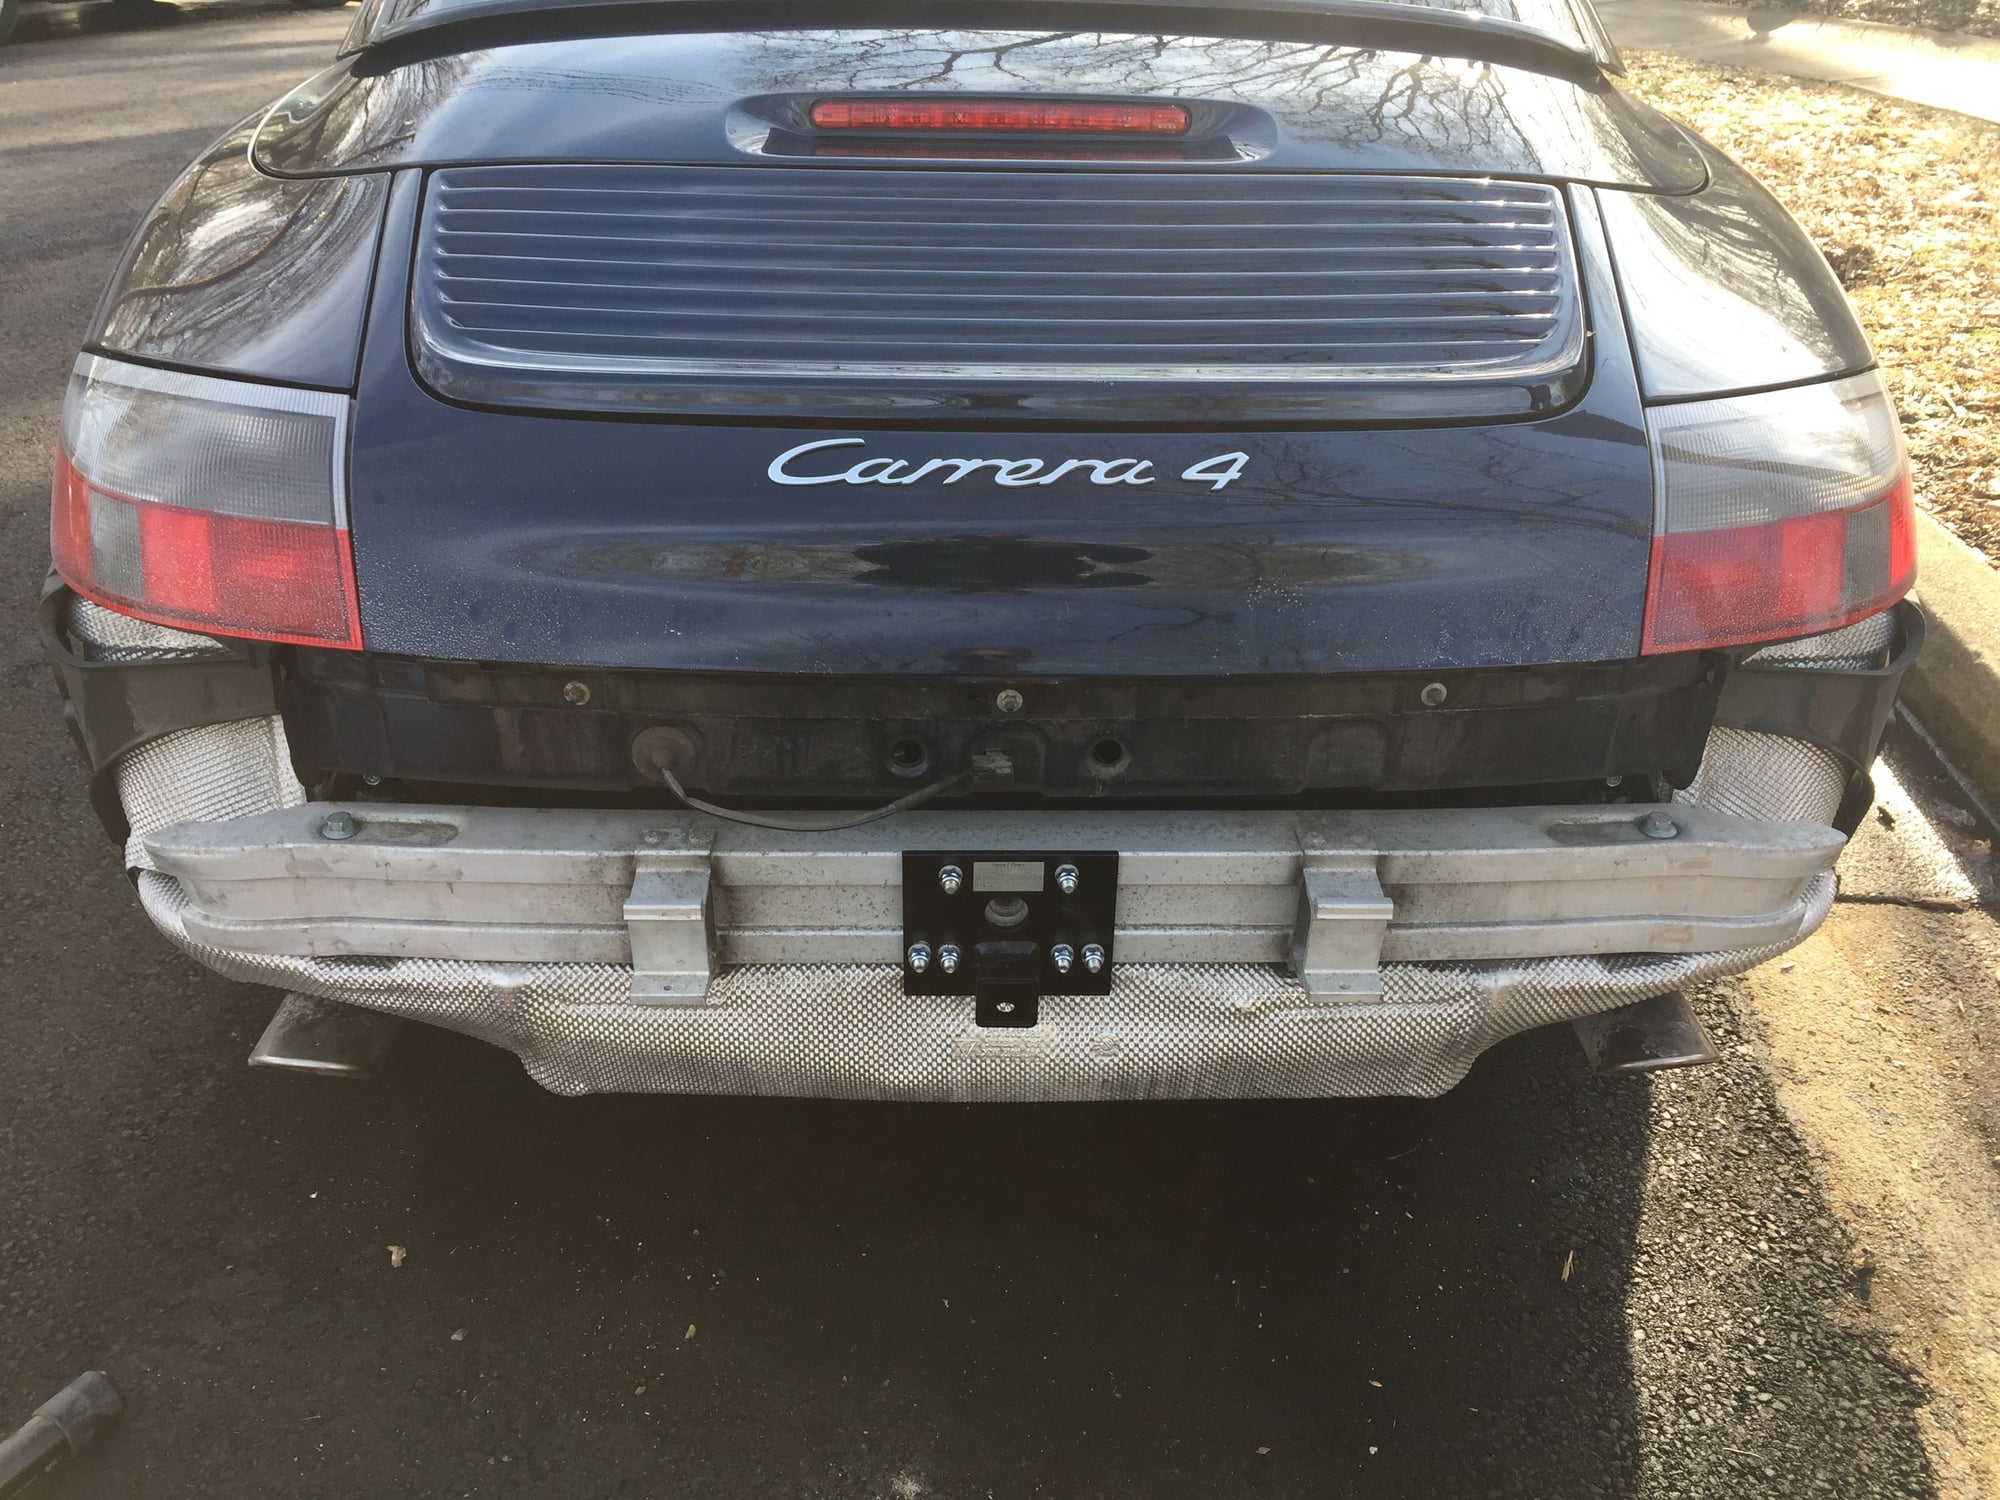
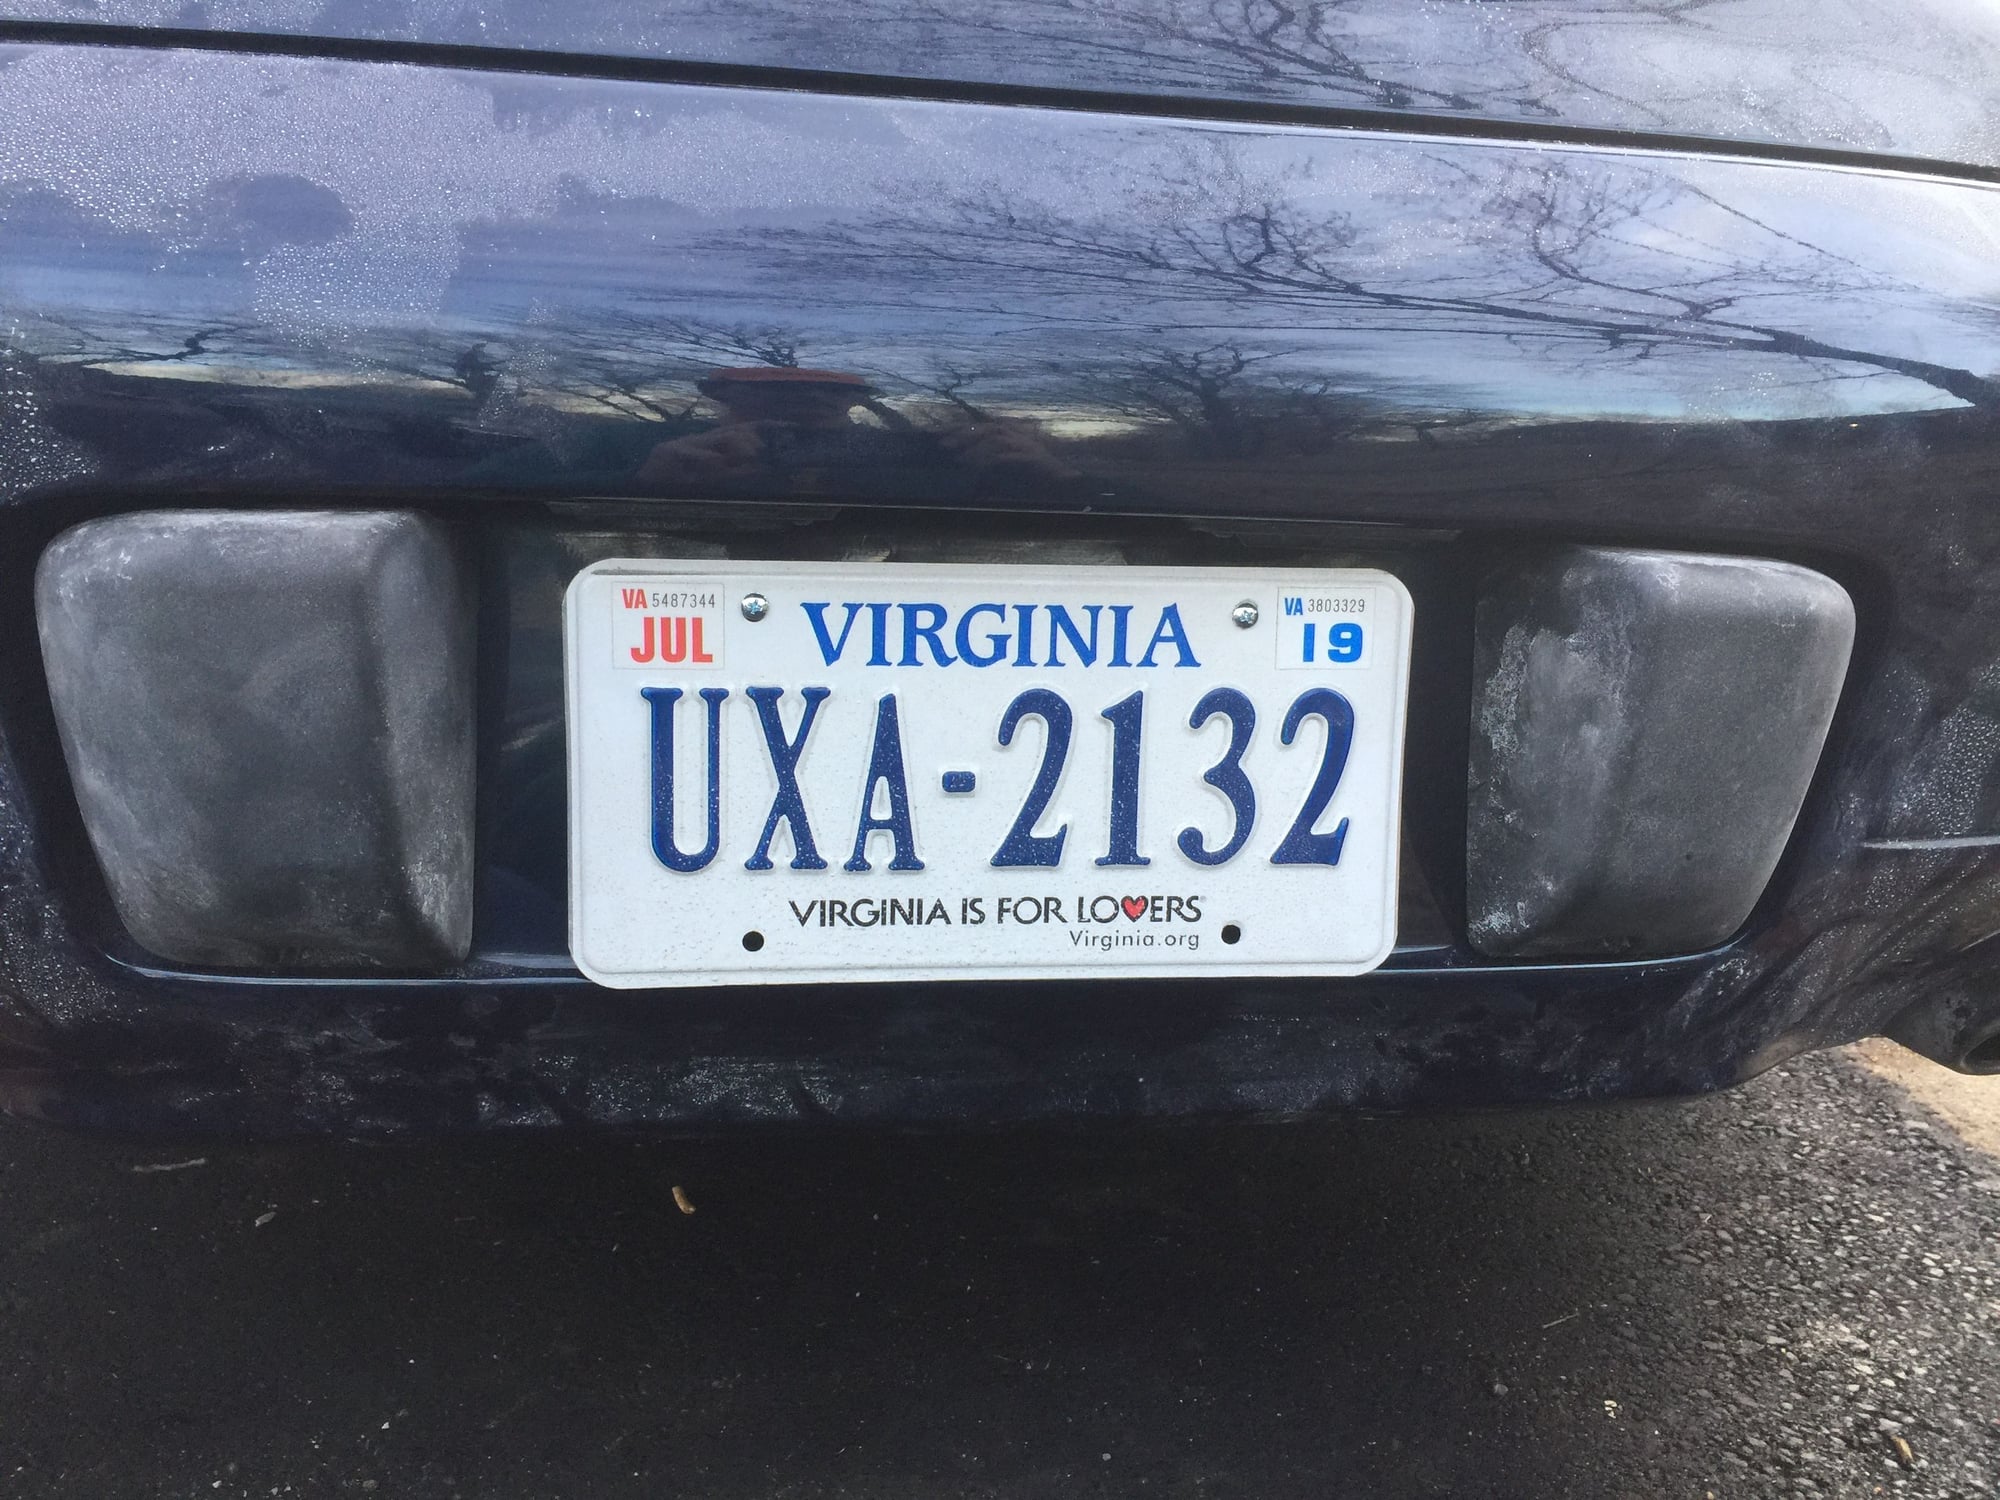
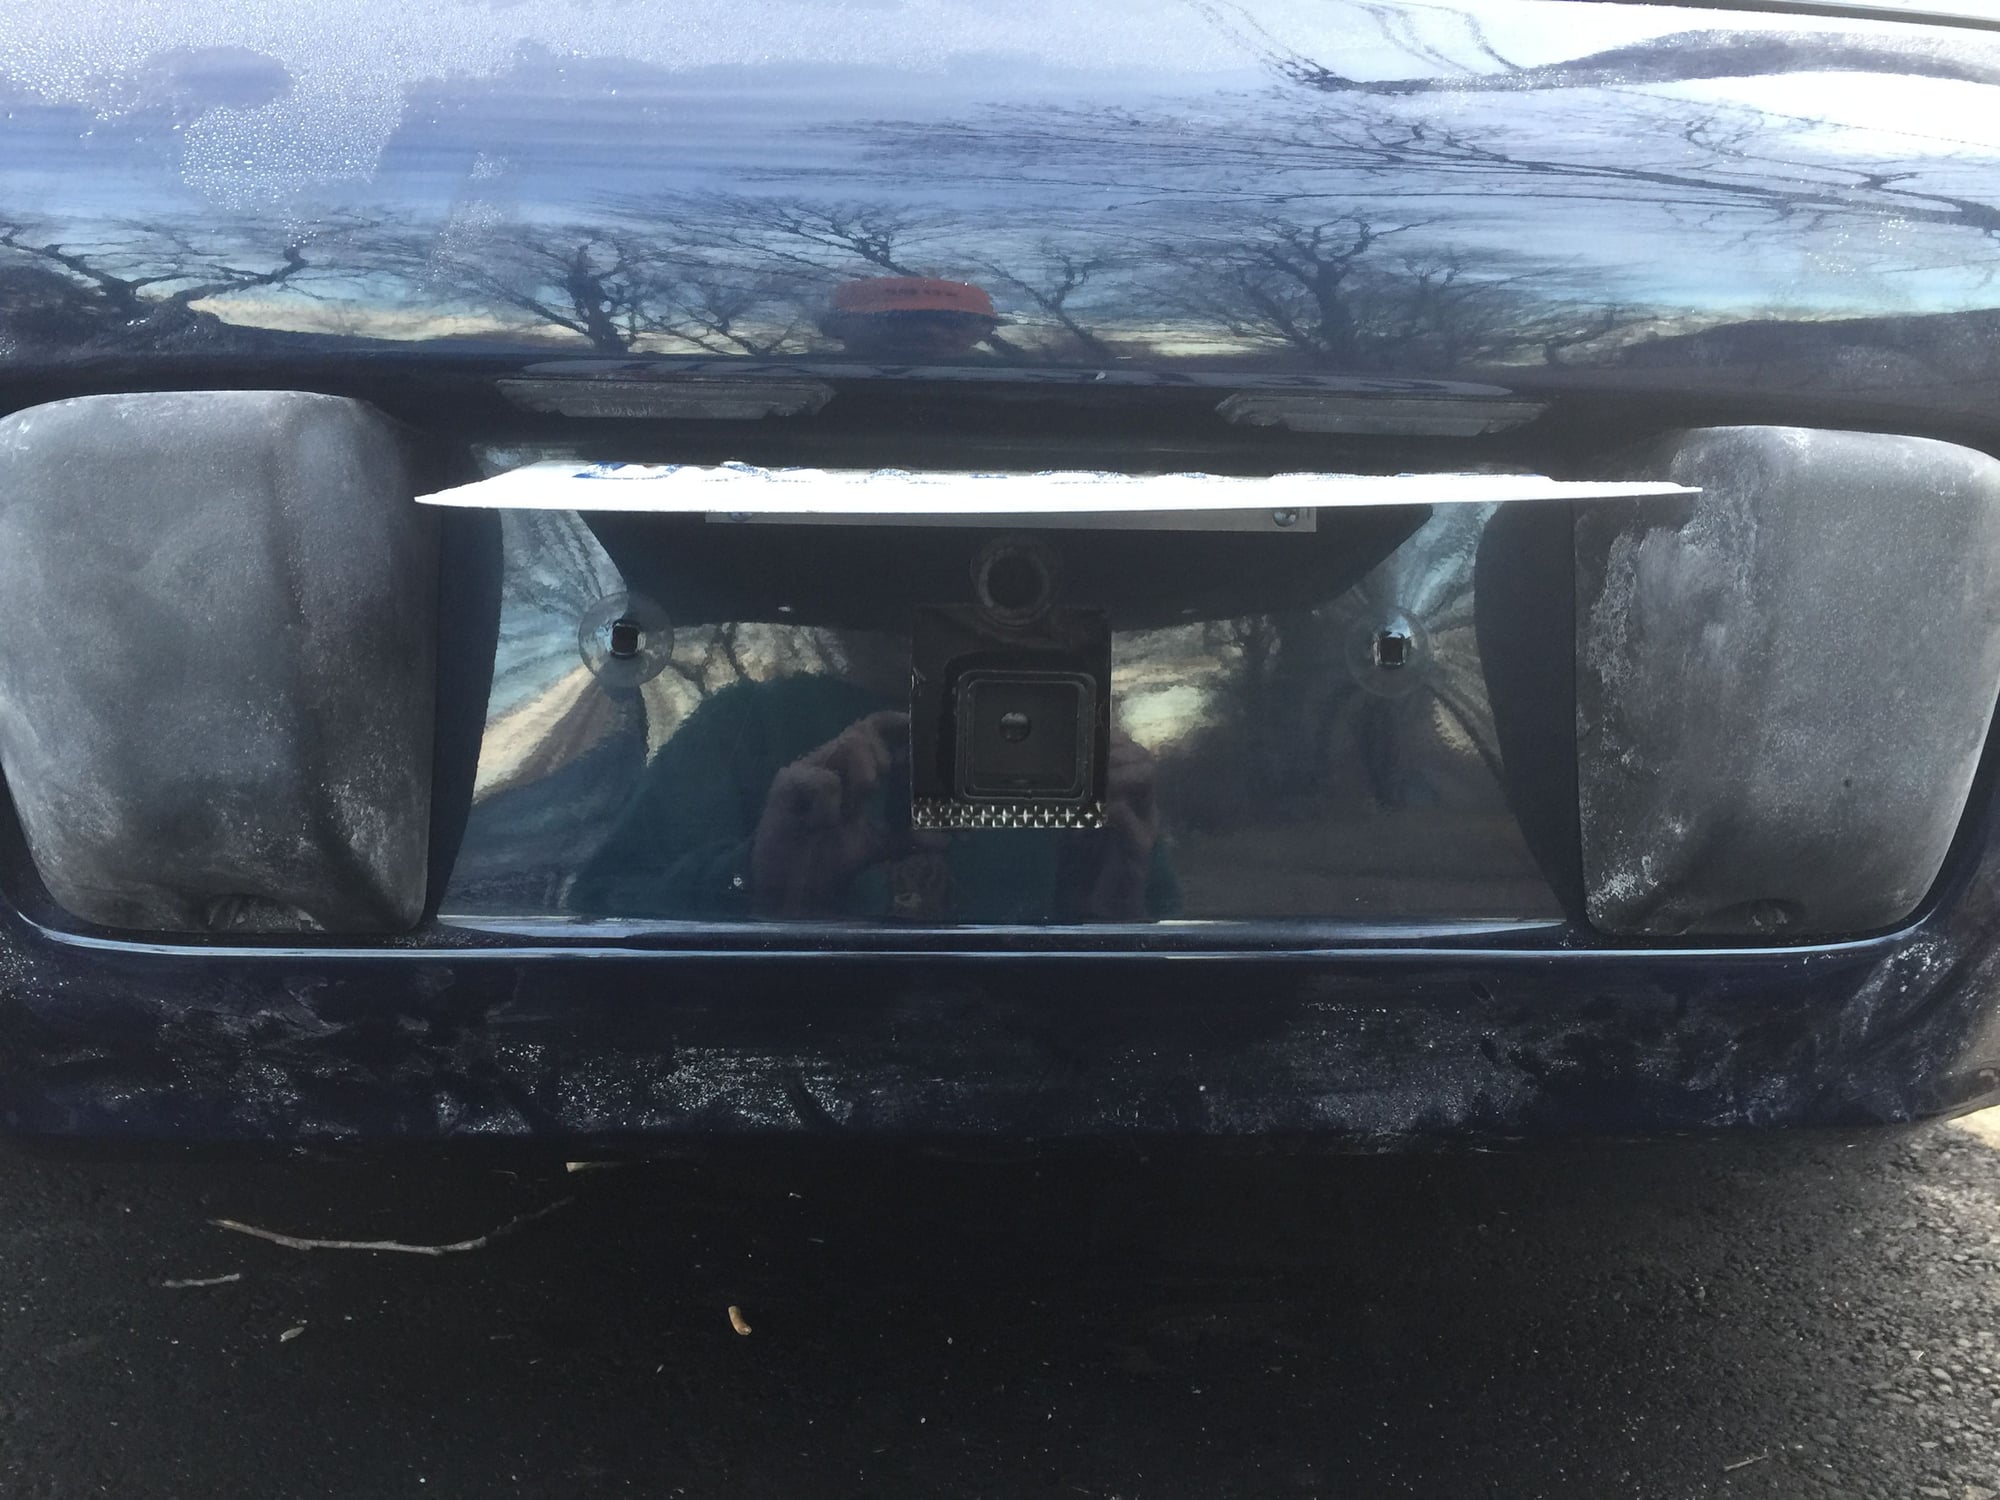
Here are a few pictures from the rear, side, and above. I'm happy to take a few more pictures with the license plate fully off early next week. Definitely a good idea to use a razor knife NOT a grinder like I did. Both methods cut through very easily. A razor would look much cleaner than mine. Patience is a virtue...
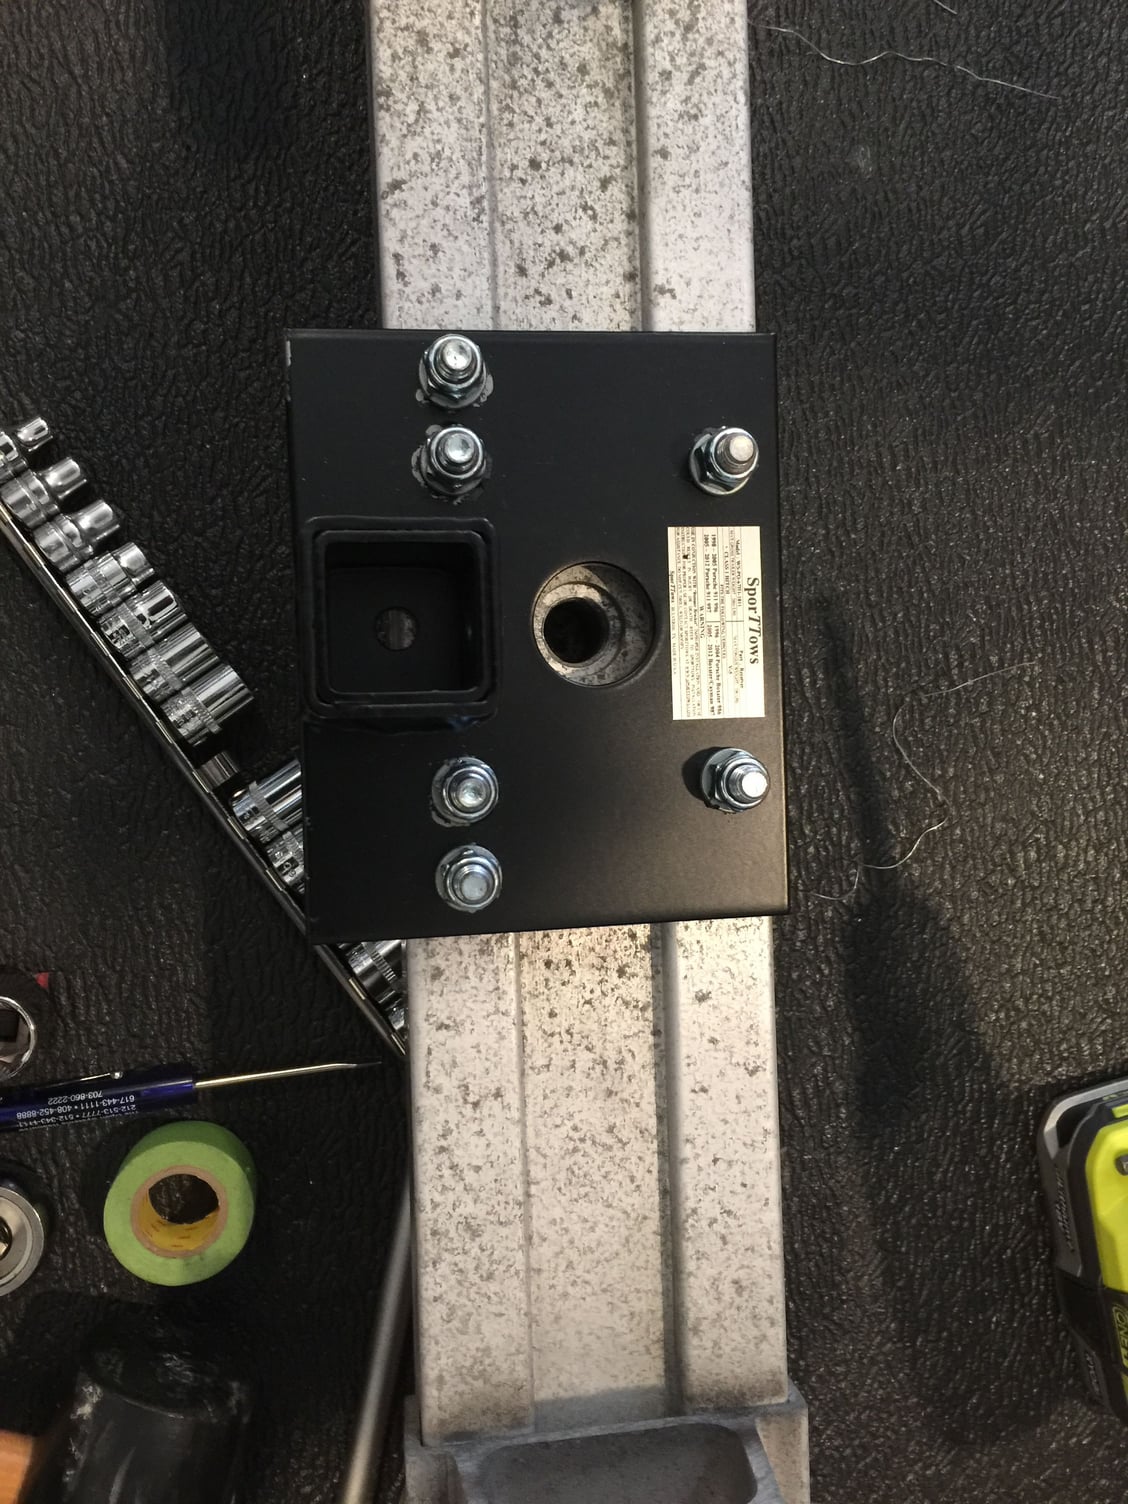
License plate is hinged and works as intended. Hitch pins would go in from the side, much more traditional. My rack screws in with a bolt on the right side, so only the right is cut out. The receiver is fully behind the plate. Magnets hold the plate in place when not in use. All is hidden behind the plate. Bumperettes fit just fine as well.
Bravo for the effort.
Must say though I'm lost.
Is the design changing as you go from
originally a center mount receiver and cutting holes in the plastic bumper with a hinged licence plate
then to two side mounts using the bumperette mounts?
If so idea two allows existing bumper holes for bumperettes to be used without grinding holes in the plastic bumper.
As a further perhaps have a crossbar drop down below the licence plate affording plate visibility
with the centre mounted receiver attaching below the plate keeping it tight to the bumper lessening all that rear slung weight.
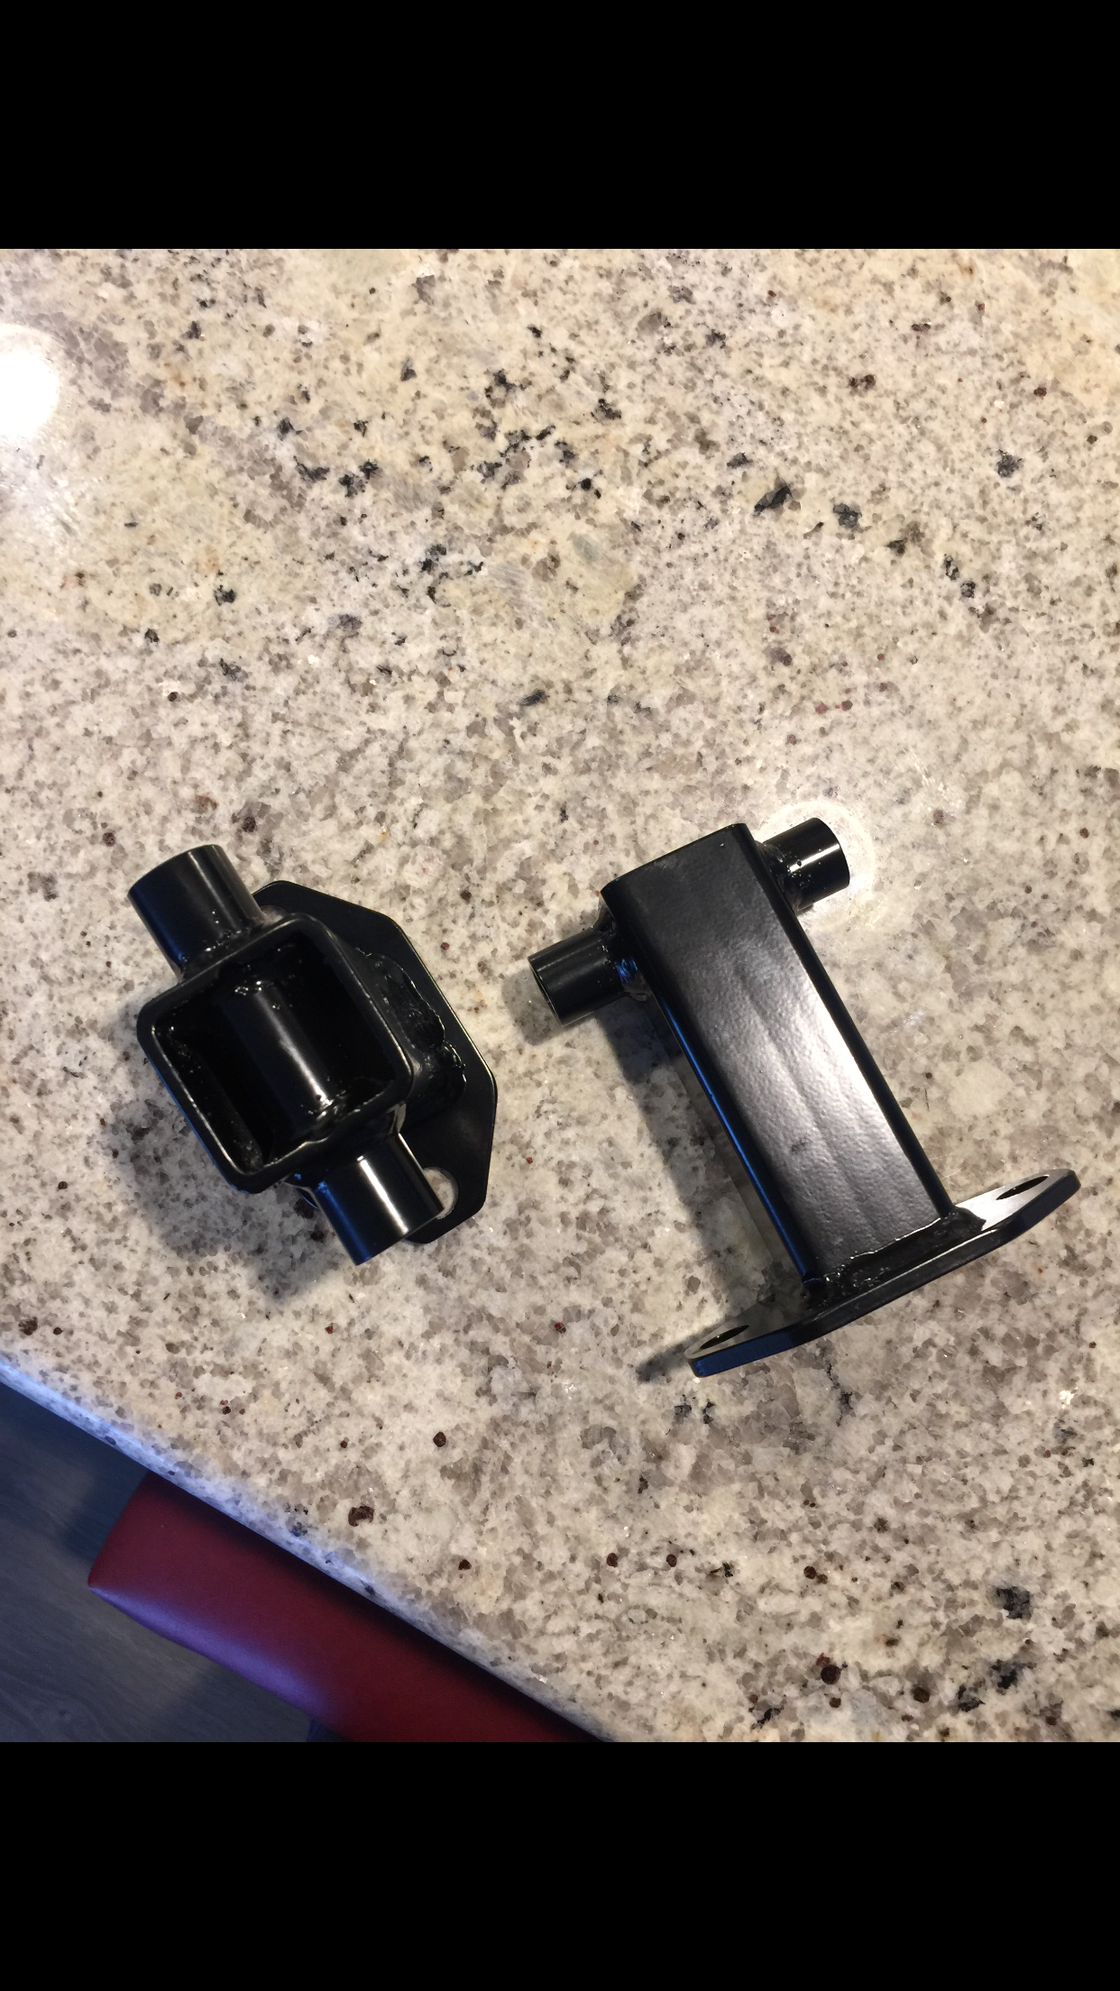
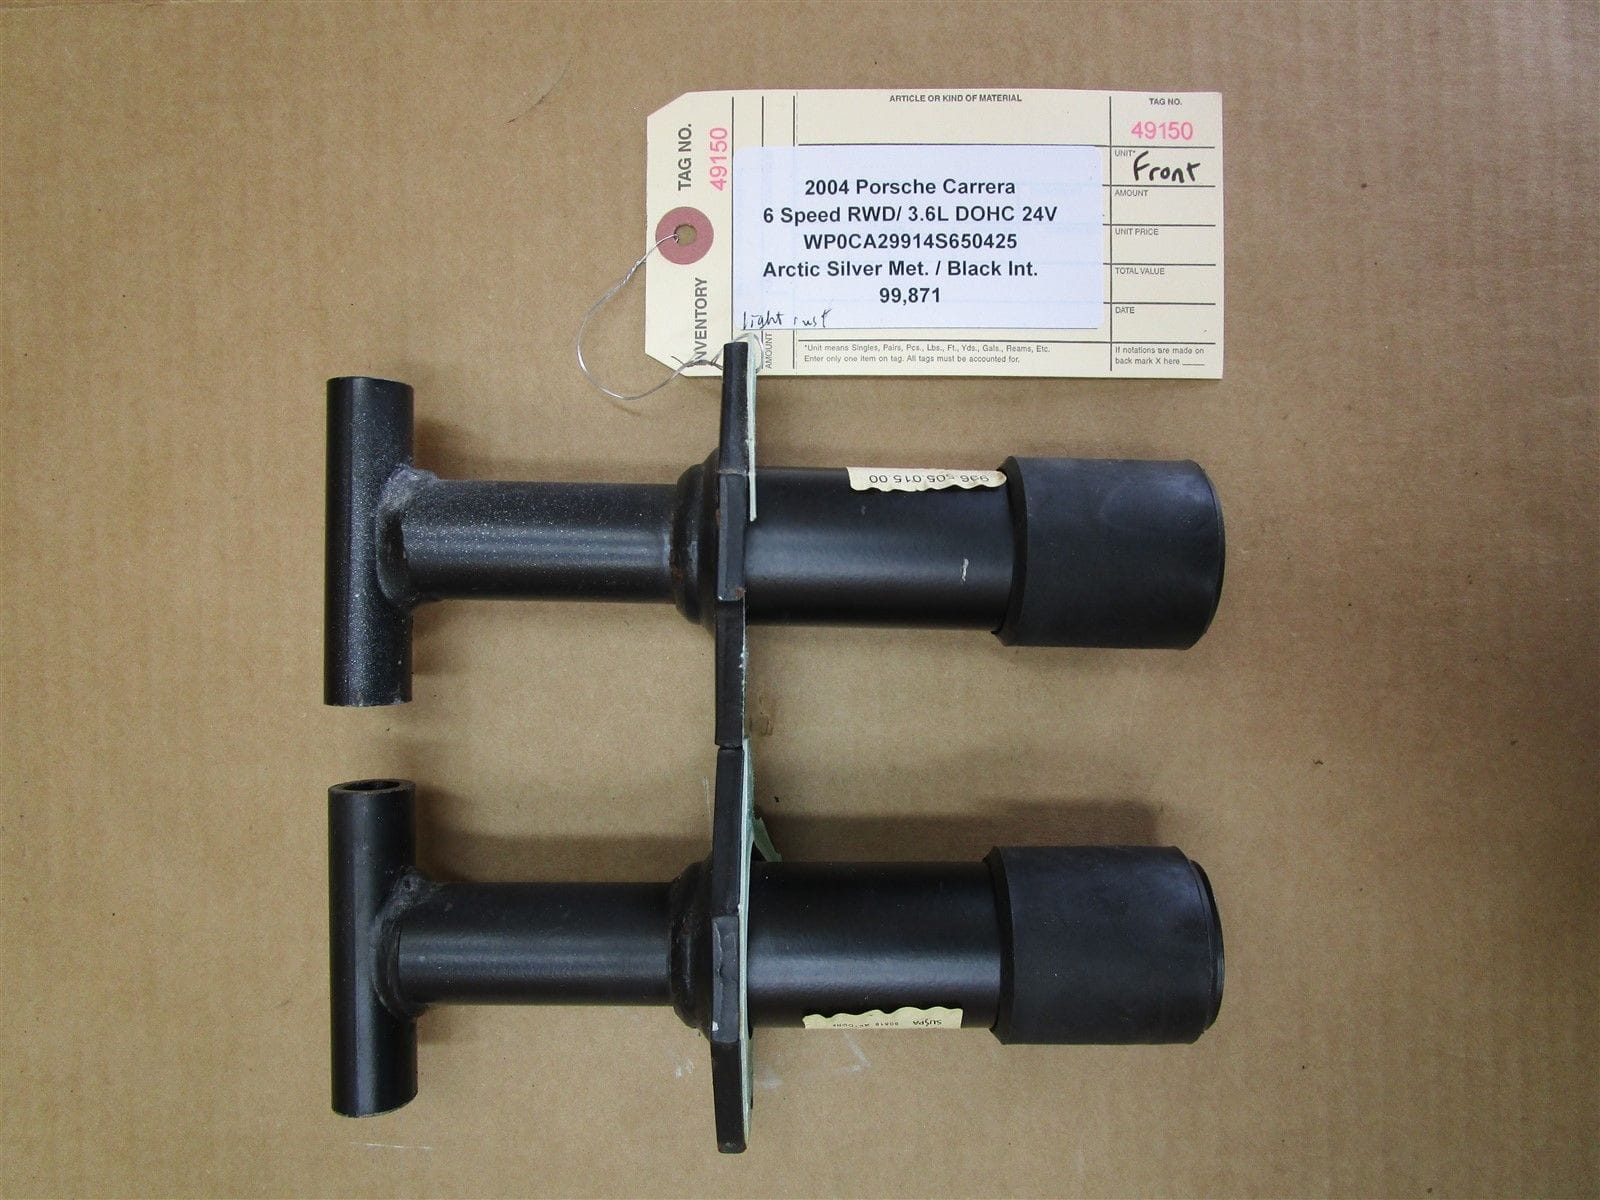
Sorry for the confusion. The idea has been the same throughout, I just simply replaced the existing 5 MPH shocks with a heavier duty mount that has zero chance of moving. Using a shock as a support didn't seem like the safest call to me. I have however heard that people have used the factory 996 mounts with no issues. I have included a picture of the original part for reference. This should also kill two birds with one stone, as I've heard that the Cayman bumper mounts are a weaker/thinner design so I can carry this over to my friend's car assuming everything is the same size.
I have seen the idea you mentioned, using the existing holes in the bumperettes and attaching a mount to the aluminum mounts that stick out, but I personally like the center mount behind the plate.
Someone can easily make a clean cut (I was slightly hasty as my Girlfriend was promised an exciting bike date night on the town!). This idea keeps everything hidden and allows the hitch to be at an acceptable height, too low and a trailer would be leaning forwards quite a bit. I think you meant putting the receiver below the bumper, correct?
I'm happy to weigh everything once its all said and done. The parts don't add an absurd amount of weight to the rear. I believe the newer bumper mounts are slightly lighter than the factory ones. I'll get a scale when I have the batch made and get an exact answer to the ounce on how much weight it adds.
Is there anything that is near the mount that one could hook safety chains on to? So if there is a failure the chains would keep a trailer from fully detaching from the car?
Here is what I have been thinking for safety chain mounts. Excuse the crudeness of the drawing, but the safety chains can mount on either side of the receiver. This way each would be independent and wouldn't rely on a safety chain mount on the hitch that extends outside of the car (pin being the only thing keeping it on). I will more than likely have these put on every single hitch kit, unless I am asked well in advance and can make special accommodation.
This should work well, as there is plenty of room once you make the bumper incision for the chains and hooks to go in without marring up any of the bumper material/paint. Still, I may put on a fabric tube over the chain if I feel there is any chance of scuffing up anything important.
I have yet to add this to mine partly because I don't have any plans to tow anything in the near future, but also because as much as I would like to just keep my car in one piece, I know I will be making an exhaust in the coming months so I can add it on then.
If I can actually sell several of these, I would like to make more parts with no "Porsche Tax". $1500 for an exhaust fab speed? Basically asking someone else to come in and undercut that.
Last edited by ryanabab; 06-26-2018 at 11:18 AM.
Reason: Picture not attached correctly
As far as an update, I threw out a few feelers to interested parties and the demand is not there for a current production run. Graduated recently and job hunting currently so this is officially on the back burner. If demand changes, the status here can change.
Most wishes for success in your job hunt and hats in the air for your graduation.
Your effort and ingenuity reflect well on you.
Looking forward to more of your contributions.
Is there anything that is near the mount that one could hook safety chains on to? So if there is a failure the chains would keep a trailer from fully detaching from the car?
I suppose you could just install the tow hook in its receptacle and attach safety chains to the tow hook.
Sorry if this is a dumb question, but how do you insert the retaining pin when the hole is behind the bumper? do you have a specific hitch attachment to allow you to lock the rack in place?
You need to cut enough clearance around the hitch to get the pin and your finger in there. I have my pin on a safety cord in case it slips before I get it in place.


 06-11-2018, 03:55 PM