When you click on links to various merchants on this site and make a purchase, this can result in this site earning a commission. Affiliate programs and affiliations include, but are not limited to, the eBay Partner Network.
Replacing lifters to address a misfire, some questions.
I’ll break this up into 2 posts, the first to outline the history and issue, the 2nd to pose the questions I have regarding the lifter replacement that I will do myself. I know it is a little long but having trawled posts for the last week hopefully if someone has a similar issue in the future they can relate and hopefully find the solution helpful.
Some background, I purchased a 40AE (my 2nd) nearly 2 months ago, 47k mile car well looked after, no issues. After purchase I drove the car home 2,500 miles, on day 2 of the drive a CEL came up P0303, car drove fine. Had misfires on my last AE and was linked to fuel. As the car ran fine I put it down to fuel.
When I got the car home I trawled through the extensive service history that came with it. Amongst the repairs was a list of repeated misfires and the work done by the last 2 owners to address them. The original purchaser had a Porsche dealer look into a misfire on cyl 4, this was around 2015 with ~40k miles. They checked many items and recommended replacing all of the lifters, the owner declined and only had the faulty lifter on #4 replaced, the also replaced O2 sensors at the time. They reported that the car ran fine.
The car was sold to the PO and he has a few receipts from 2015-2017 ~45-47k miles with Porsche and Indie’s for various work including full service, IMS, clutch, water pump, thermostat. During the various services he also had the plugs and coils replaced in 2017 at around 47k miles.
The last few show the specialist looking into misfires during the service work, they checked crankcase pressure and recorded 4.85, within specs. The also measured compression at 240 with “very little leakdown”. One Indy noted that the misfire was on Cyl 1 & 3. They replaced crank sensor, replaced a timing chain tensioner, swapped Variocam actuators over (presume to see if the misfire moved) and ran Swepco through before an oil change which makes me think they felt it had a lifter issue towards the end. Each time noting that it looked like the misfire was cleared.
When I got it home and had to replace rad’s due to a slight leak. Whilst bleeding the system I had the car idling up to temp to open the thermostat. Whilst blipping the throttle to 5k RPM the CEL can on and at idle the car ran rough, I ran Durametric and it flagged P0300, P0301, P0303 & P0305, misfires on cyl 1,3 & 5. The car cooled a little and I cleared the codes, the car restarted and ran fine, no rough idle or stumbles, rechecked Durametric and no codes. Ran the car for 30 minutes or so, got it home and ran Durametric and checked the cam deviation, its running 0 on bank 1 and 1.43 on bank 2 so well within spec and not looking like a Variocam issue or overly worn tensioners.
Driven around 400 miles trouble free running the car up to 5k rpm no issues, including a 100 mile trip. Yesterday got the car up to temp and ran it spiritedly, including taking it to 7k rpm. At one time as the revs dropped below 3k the engine CEL flashed and at idle the rough running came back, checked it and it has a P0303 cylinder misfire on #3. Cleared the code and let the car cool and it ran fine again, no CEL.
So after plenty of reading and the above facts I am sure I have sticking lifters, it also makes sense when you look at the symptoms, then the car is hot and you run at high RPM when the liter is activated, it sticks and then as the revs drop it is over filling the cylinder and triggering a CEL. It cools, the lifter retracts and then it runs fine.
So hopefully this thread will eventually record the repair and I sincerely hope the resolution.
If you read my first post you will have seen the history and how I got the point that I’m looking at replacing my lifters, whilst it seems to be affecting Cyl 1, 3 & 5 I’m going to replace them all, its an additional $1k in parts as they are not cheap but I get the feeling my car has a bad batch, and if your going so far as to drop the engine to replace 3 cylinders you may as well do them all and hopefully fix it once and for all.
I’m going to do the work myself, whilst not having taken out a 911 engine, I am mechanically savvy and confident of the work. I have read the 996 101 projects and the Bentley and it seems pretty straight forward as long as you use the right tools and follow the process. I have a 4 post lift, so will remove/disconnect as much as possible, then roll the car onto the floor, jack it up and drop the motor for the work.
So onto my questions:
1. With the engine out I plan on replacing the tensioners, all the seals and O rings, all the lifters, AOS and add a low temp thermostat. Anything else people would suggest adding to the list?
2. Looking through the manuals it shows you can replace the timing chain rail slide (one that the chain tensioner runs on), I can’t see anything about replacing the opposite timing chain rail that’s fixed. Can this be replaced with the engine out doing this work?
3. I plan to but OE parts, however I see that Pelican lists the OE exhaust lifter at $55 each and an OEM INA exhaust lifter for $20 each. Anyone use these?, are they the exact same part without the Porsche tax?. I have purchased Pelican OEM supplier parts before and they were exactly the same. It’s a $400 saving so worth looking at.
So overall with buying some tools for the job and parts I’m looking at a $3,200 bill, I’m glad I’m not paying labor on top of that!!
I have a few spring jobs around the house to tackle first before I inform my wife I’m spending $$ and dropping the engine out of my 2 month old 911.
Have you really ruled out everything else before you do this? lifter problems on these motors seems quite rare from what I have read. Its a pity you couldn't get the old lifters already replaced to examine them.
Also don't forget the lifters run in an aluminum part that bolts into the head, I have heard of the bores becoming oval; putting new lifters in won't fix the problem if you have oval lifter bores.
If I were you I would do some more logical investigation before pulling the motor and putting new lifters in. Stuff like fuel pressure, injector condition, air leaks, spark plug condition etc etc.
^^+1^^...I've never heard of lifter problems in a M96 leading to misfires. This isn't to say "it CAN'T" happen, but...I wouldn't put $ on it. Misfires are usually related to; coils, plugs, injectors, MAF, bad fuel, etc...
I agree that you shouldn’t rule out other points, however:
Fuel: This has happened over the last 3,000 miles at various times, in various states. I would suggest that rules out fuel
Injector: Happens randomly with heat and revs, however when you stop the car and restart is sometimes goes. + on a steady journey including lots of traffic you get the same heat condition but no misfires. Symptoms to me feel more mechanical.
Plugs & Coils: Less than a yr. old Porsche parts, admittedly they could have failed and I will be doing the swap test first.
If you do a search there is quite a few 996 cases of sticking lifters causing misfires. The Variocam works on the intake, if the sliding center sticks then the valve is working in high lift mode which is fine over 3k rpm. But below that it’s overfilling the cylinder for the revs and timing and can cause the misfire condition. I been trawling the threads and it is more common than you think, where people did all the usual (plugs/coils/MAF) checks first. Then finally doing lifters after the dealer tried everything else.
I also think it’s telling that the original owner has misfire issues that was finally resolved by replacing a lifter by Porsche. And subsequent owner had cyl 1 &3 misfires and took it to 2 indies +Porsche who by the look of the receipts have done all the usual replacement parts.
I’d love it to be something more simple, and will for sure try all the usual suspects firs before tearing anything down and buying parts.
Last edited by D6lc; 04-26-2018 at 03:25 PM.
Reason: typo
996.2 lifters for the intake valves are eye-wateringly expensive, and there's 12 of those. Plus, the labor involved (since doing this engine-out is nearly mandatory) costs quite a bit.
Also the replacement of the valve covers is tricky, since the valve covers incorporate one half of the camshaft journals.
It's an expensive job, and I'd recommend further diagnosis to confirm the lifters are the issue before committing to this repair.
Last edited by sfv_rider; 04-26-2018 at 04:33 PM.
Reason: Spelling
"Fuel: This has happened over the last 3,000 miles at various times, in various states. I would suggest that rules out fuel"
By "fuel" I didn't strictly mean the fuel itself, but the fuel system in general. You're overlooking all the stuff internal to your car including: Fuel tank, fuel pump, fuel filter(s), fuel rails, pressure regulator(s) etc... also, the injectors are electronic, so their wiring and connectors should be checked.
Thanks for the feedback, I can assure you I will be trying every avenue to fix it before open heart surgery, thats is my last resort. An easy electrical fix would make me a very happy man!!
As some additional data, I tried for the last few days and can consistently trigger the misfire and CEL. Yesterday another high rev run triggered the flashing CEL and rough idle, after a few seconds idling the CEL cleared itself and idle stabilized. The car recorded a pended P0303.
I’m away on business for a few days but when I get back I’ll be doing a plug and coil swap between 2 and 3, as 2 never seems to be running fine, also checking and cleaning all the electrical connections. I haven’t looking into how easy it is to get to the injectors on a X51 car. I hope that is accessible so that I can swap those and see if it changes anything.
Update, I swapped over coils, plugs and cleaner all the connectors in an attempt to diagnose and fix my misfire, but no change. I can still trigger the Cyl 3 and Cyl 1 misfire, so decided to drop the engine and do a refresh on the top end. TBH I love working on my car so call it a labor of love aside from the $ involved, just don’t tell the wife……..after all how hard can taking the engine out of a 911 be?
Whilst the engine is out I’m going to do the following:
Replace all intake and exhaust lifters
Replace cam chain guides and rails
Replace AOS
Replace oil filler
Replace all gaskets and seals linked to the above
Fit low temp thermostat.
Send the injectors out for refurb.
The total parts bill comes in at $2,500, $1,500 of that total being the 12 intake lifters, which I believe is the problem I have with my misfires hence deciding if I am going to do this to replace them all. The early 3.4 engines used the same simpler lifter on both intake and exhausts, they are INA parts that you can get for $14 from Pelican. However the 3.6 whilst having a simpler variocam system has a more expensive intake lifters that costs $127 each!!. Replacing all the camchain rails and guide rails were relatively cheap at $233 from Porsche, so whilst I have the engine stripped I may as well replace those. The rest is O rings and seal + the AOS at $121 and filler tube seems expensive at $57 for a piece of plastic.
I shopped around for parts for a while and found Jim Ellis Porsche to be the cheapest, I purchased most of the parts from them with a few from Pelican, overall that came is at nearly $1,000 cheaper than my local Porsche store quoted. The Jim ellis website is great for looking up parts diagrams and their parts manager Daniel was super helpful over email whilst I was sorting out my order. All parts are ordered and expect to have it all by next week.
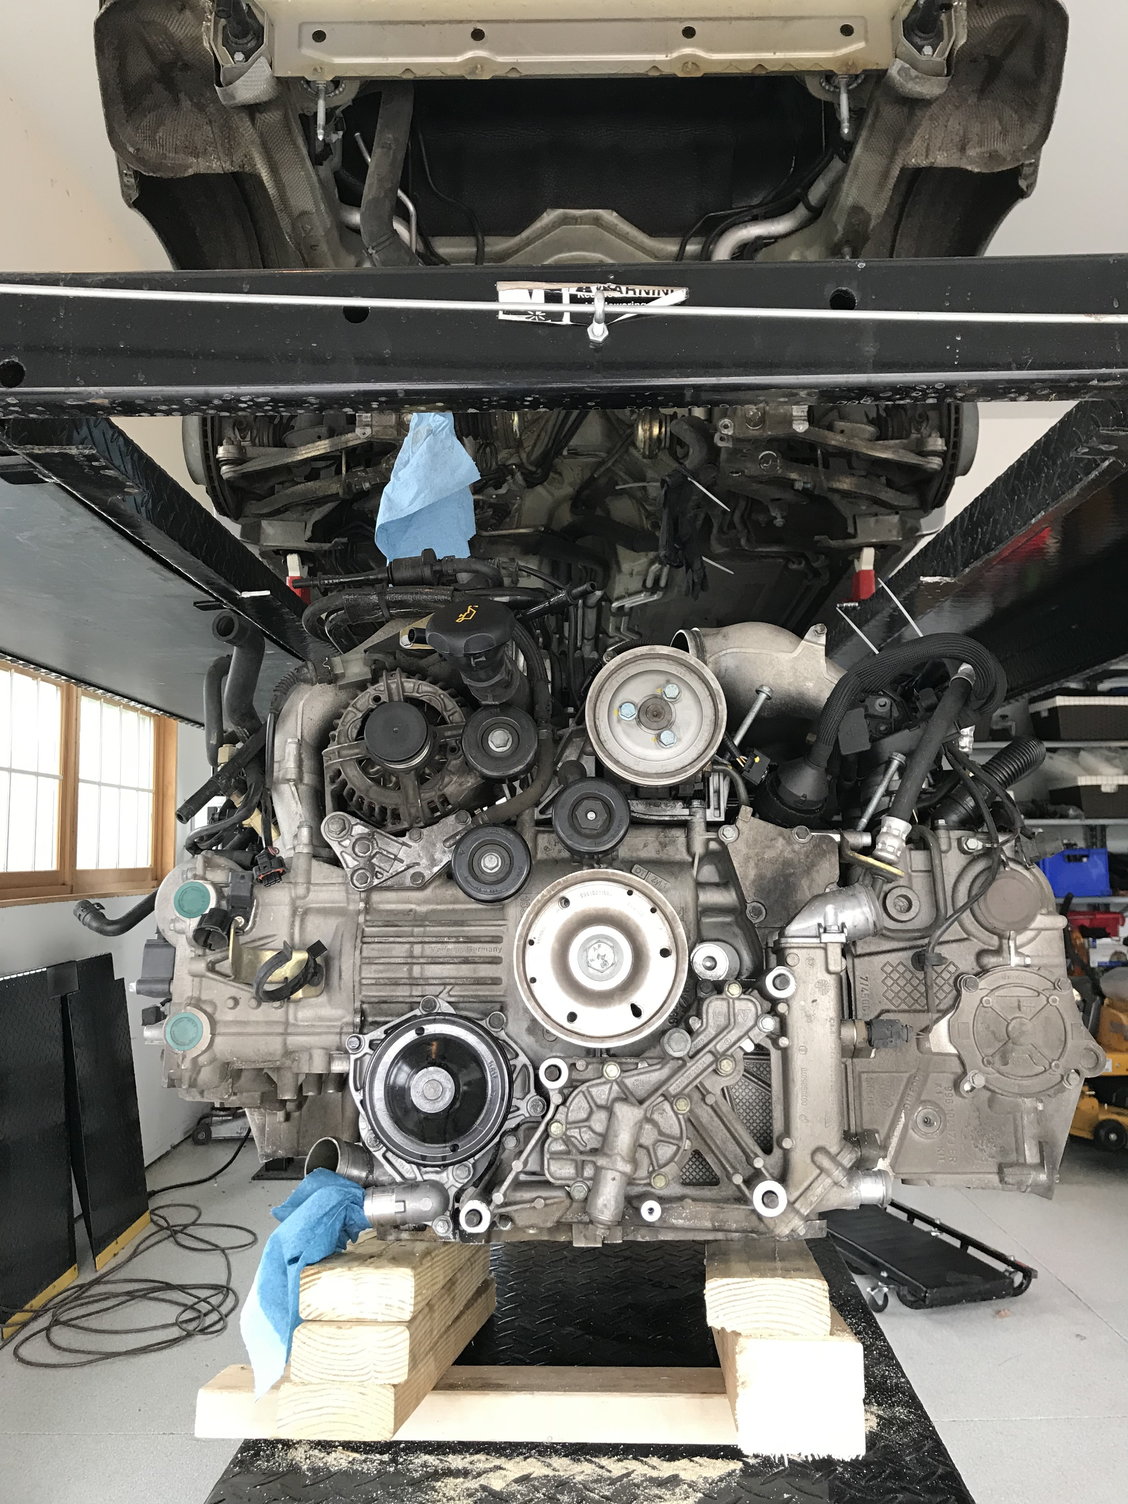
I fortunately have a 4 post lift, originally I thought I would disconnect and remove most parts on that then push it onto the floor and jack the car up to remove it. But when it was up on the lift it looked like with some work I could drop the engine through the lift rails.
Drove the car on the car on the lift around 11am last Friday and started work, there are a lot of videos and tutorials on removing the engine, I won’t go into every detail as A, I didn’t take pics of everything I did and B I probably forgot a few steps. I’ll summarize it below, but overall its pretty logical and I’d suggest easy.
1. Drain oil, whilst thats draining:
2. Disconnect battery, remove airbox, serp belt, rear bumper & heat shields & mufflers.
3. Drain coolant and disconnect thermostat hose, whilst that’s draining:
4. Drain PS reservoir and remove, to remove the reservoir on the X51 engine I had to remove T body, intake plenum to give better access.
5. Disconnect O2 sensors, SAI, harness connectors, brake booster, fuel rail,
6. With the intake plenum off you can reach behind the AC compressor to find the hidden bolt at the back, then a 13mm socket on an extension through the bank 2 intake manifold temp sensor hole reaches the socket to remove the compressor. Rest this on the outside of the car then you don’t have to mess about with evacuating/filling the AC system.
7. Remove the headers and lower muffler mount screws, as once the engine is on the stand these would be tough to get to.
8. Jack up and place rear on jack stands
9. Disconnect/remove: wheels, undertrays, chassis crossmember, chassis diagonal braces, rear sway bar, rear drive shafts, gearchange cables and reversing light switch.
10. Remove coolant lines connecting the engine to chassis, there are a few, but easy to get at,
11. I used a MC bike stand under the engine and supported it on wooden blocks and raised it to support the engine and transmission.
12. Remove the front transmission mounts nuts attaching it to the chassis, and rear engine mounts, clearly make sure the stand fully supports the engine!
13. Lower the engine a few inches
14. Now you have better access to the clutch slave cylinder to remove it.
15. Finally disconnect the PS lines which are top RHS of the engine bay, dropping the engine a little gives much better access. These are brass fittings 19mm and 15mm I think. I would suggest getting a set of box flare wrenches as these fitting and very soft and its very early to damage the nuts. My car’s engine was already dropped by Porsche a few years back and the tech had slightly rounded the 15mm brass nut. So take care and get the right wrenches.
16. Lower the engine gradually and make sure you haven’t forgotten something connecting the engine to the car!!
All in all I was pretty easy, I took my time. Bagged every nut and bolt in notated zip locks and checked everything repeatedly. By 5pm the engine was out. I am sure experienced tech drop them in ˝ that time.
With the engine lowered out of the car, the muffler mounts and coil shields removed, I only needed to take ľ of an inch off the lift inner rails (sill leave 2+ inches so I have no fears of damaging the lift) and the engine was out.
So on reflection: “how hard can taking the engine out of a 911 be?” ……its pretty easy with basic tools and common sense. More to come……
Last night for once I didn’t have a kids soccer game or track meet to attend, so had a chance to start stripping the engine. However, I was listening to Pearl Jam and ran the battery out on the phone so didn’t take all the pics I wanted. I’ll post some more over the weekend.
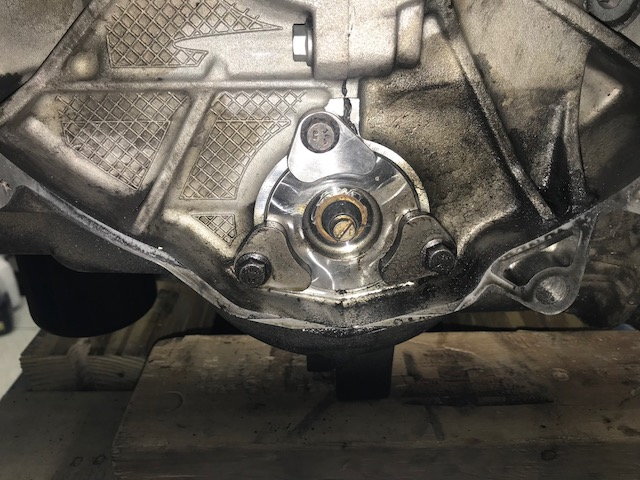
My car’s history shows that it had a new clutch RMS & RND IMS fitted by Porsche last year around 5k miles ago, however under the car you could see some dampness around the bellhousing, so I pulled the transmission off first to check it out.
The RMS is good but it looks like the IMS is weeping from either the flange seal or the lower flange bolts, new flange seal ordered from Jim Ellis, there have been great and added it to my existing order.
Next removed the injectors, they were pretty tough to pull them out of the rails, how on earth you do this with the engine in the car is anyone’s guess. I also had the added the attraction to smelling of gas as I splashed it over my T shirt getting them off. They were bagged up and sent off to WitcHunter, $22 an injector, clean them and send them back with new O rings with a before and after flow report.
Onto Bank 1, removed the following (I think in this order, however follow a manual not me!)
1. Remove coils, plugs, valve and can actuators.
2. Remove cam plugs, pinned engine in cyl 1 TDC, if the cam locking tool doesn’t fit rotate the crank another 360 degrees.
3. Remove scavenge oil pump
4. Remove cam cover, watch out for oil on removal.
5. Loosen intake and exhaust cam sprocket bolts
6. Remove cam chain tensioner, watch out for oil on removal
7. Remove cam chain guide (bolts also secure the cam caps)
8. Remove cam sprocket bolts, remove cam locking tool
9. Remove note cam cap location and orientation, then remove
At this stage my phone died, just as it gets interesting!
10. Lift out cams and sprockets, be careful as if the engine is flat on a bench the cams and lifters can fall out.
11. Remove lifters
12. Remove cam chain fixed and sliding tensioner rails
Following the manual the above didn’t take long at all about an hr I would say. Cams showed normal wear on the lobes and journals. Camchain guide and rails were in good condition for 53k miles, with some wear, I’ll post some pics later. Lifters showed normal wear on the bores.
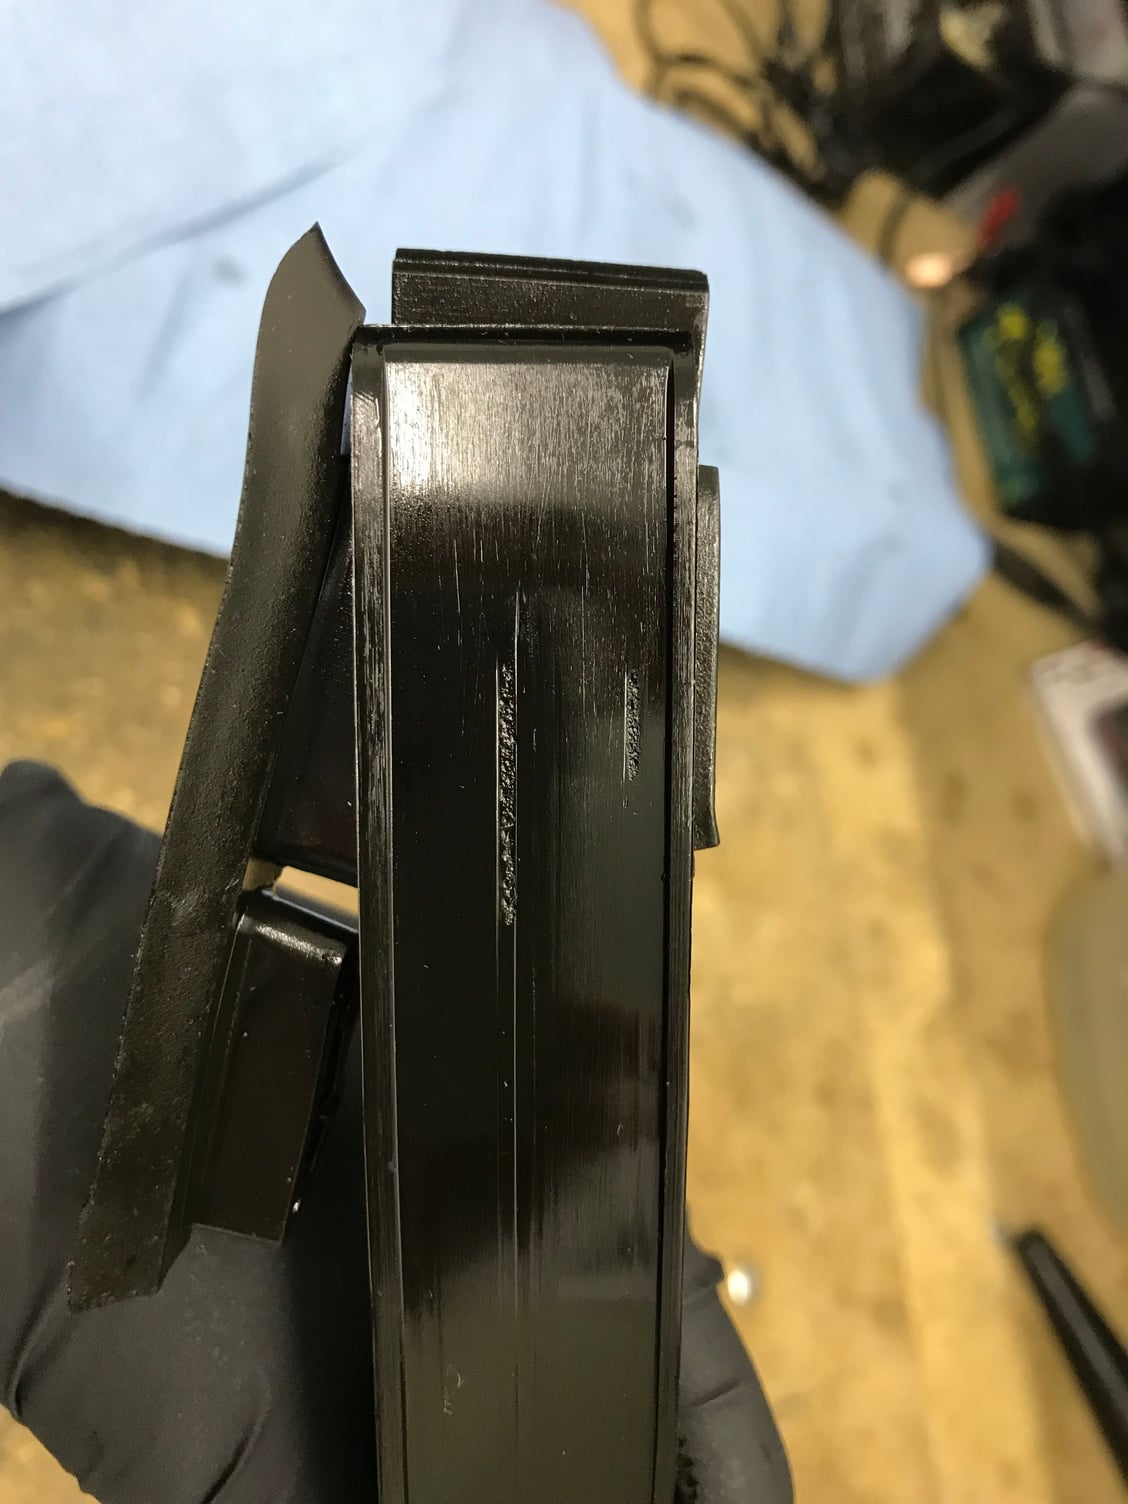
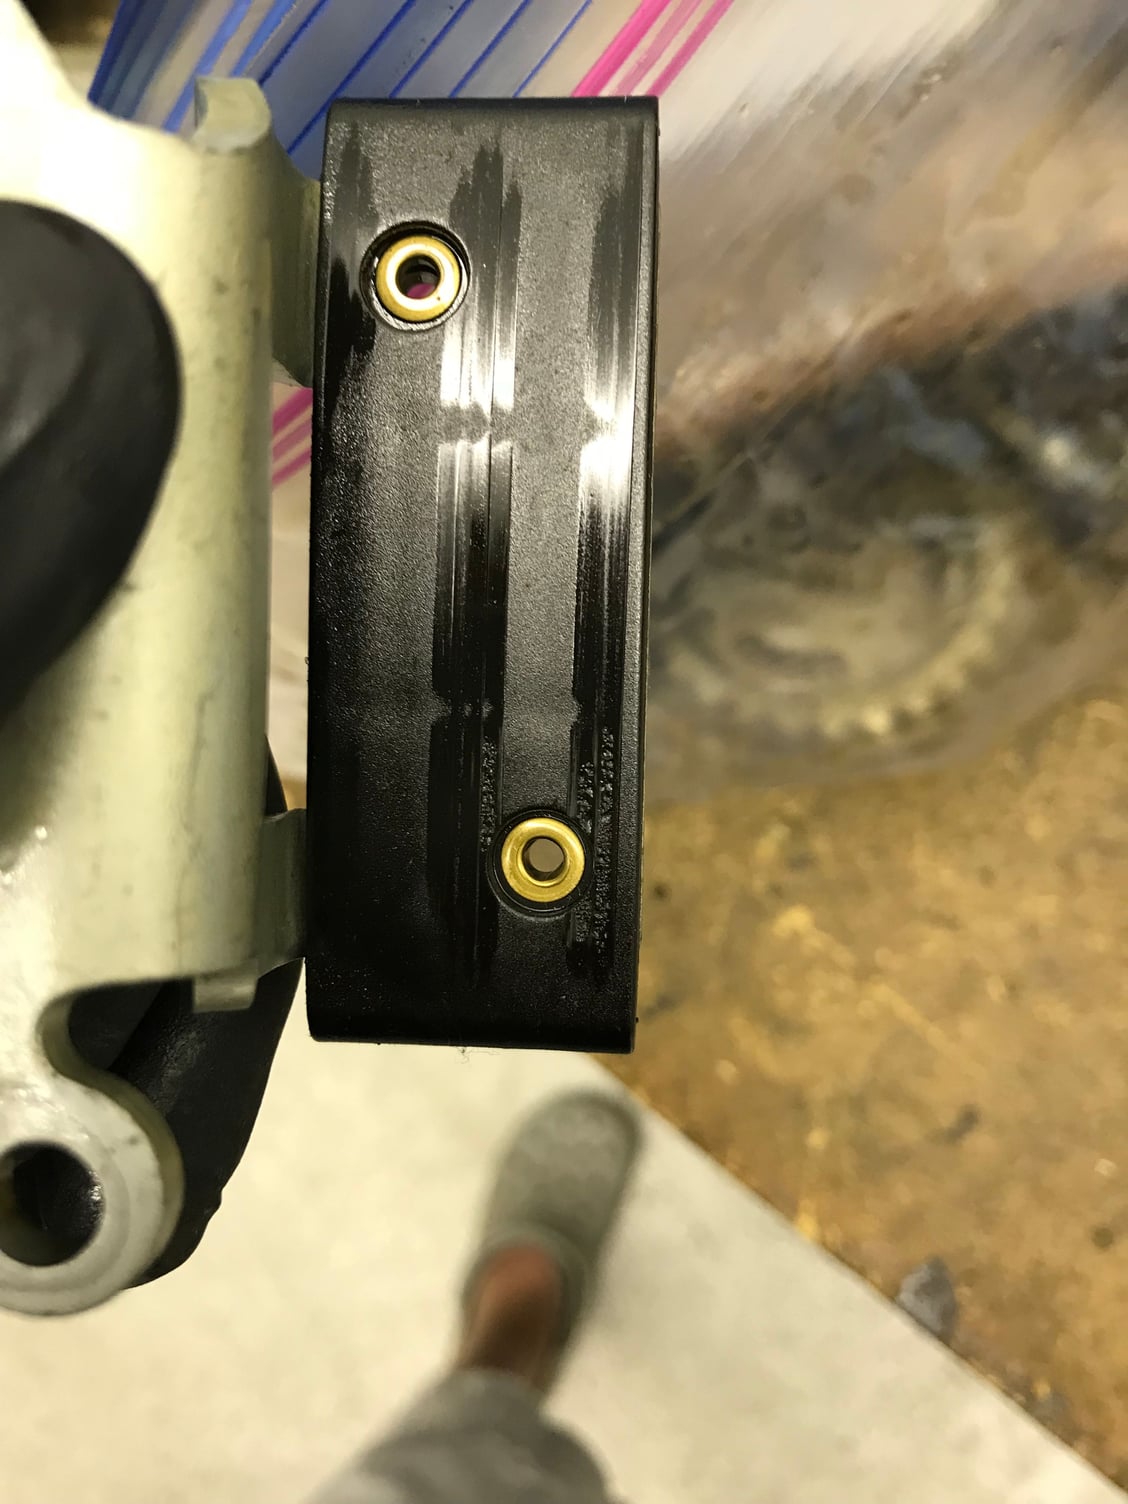
I’m happy to say that I feel vindicated on undertaking this task, Cyl 3 had a jammed intake lifter even when cold, I could push with my thumb the center of all the other intake lifters, but this one was jammed solid, and the center was raised by ~0.2-0.5mm vs the others. I’ll post pics to show this. I’m sure this was causing my misfire codes as the intake valve on Cyl 3 was always in high lift mode even at idle, so over filling the cylinder
I called it quits for the night at this stage, Bank 2 stripdown to follow, one think I did notice was to get to the camchain rail bolts on bank 2 you need to remove the oil pump housing…another email to Jim Ellis and a few extra seals to the parts order!
And good it wasn't a waste of time; it would be good if you could examine the failed lifter to see if there was a root cause of the problem, it might help someone else on the forum in the future.
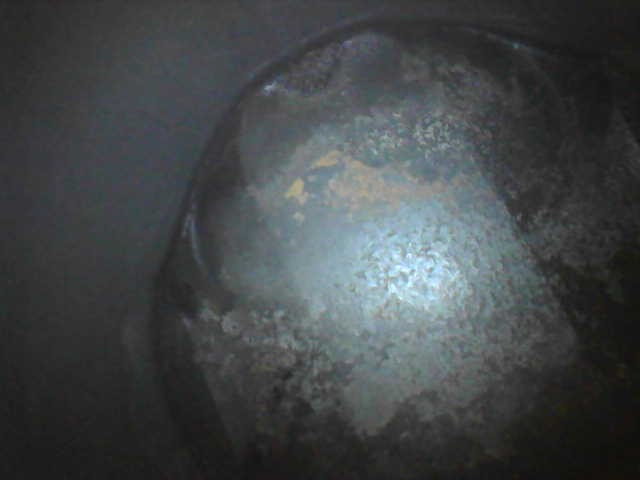
I purchased a cheap boroscope from Amazon, great to see that the bores all look in great condition, a helpful tool for $35
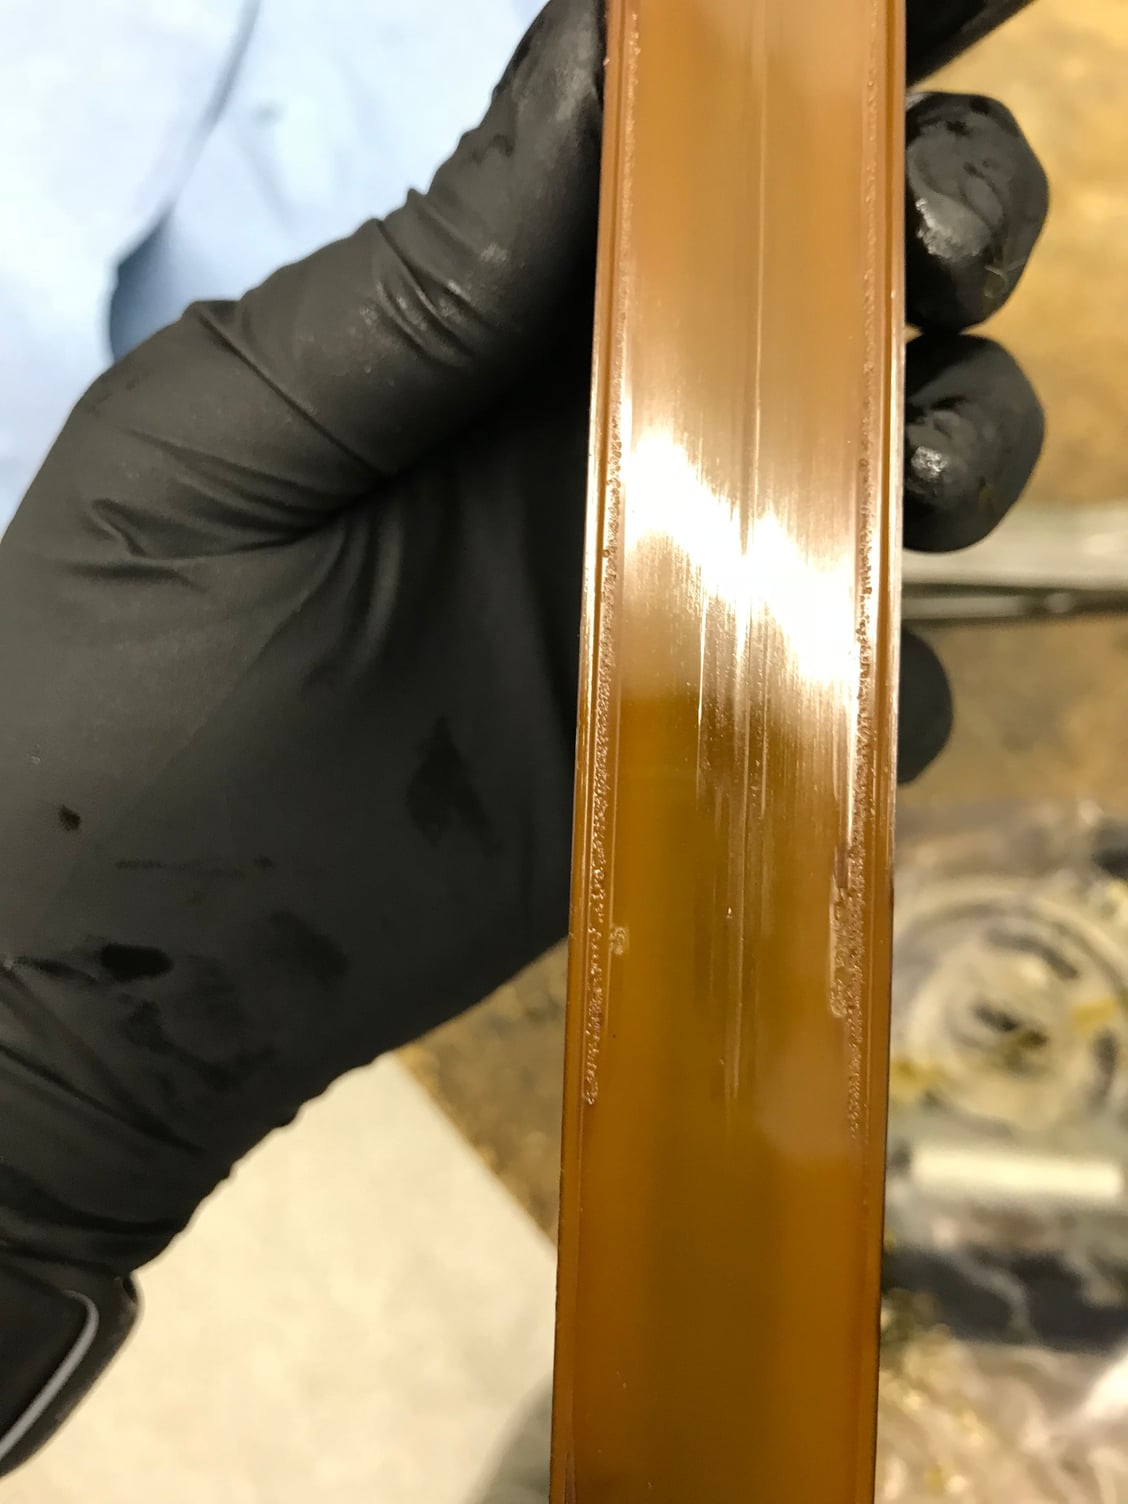
Here are the chain rails and guides, very little wear for 53k miles, but they do have the strange material breakdown that these Porsche parts seem to suffer from, be interesting to know if this is age or wear related
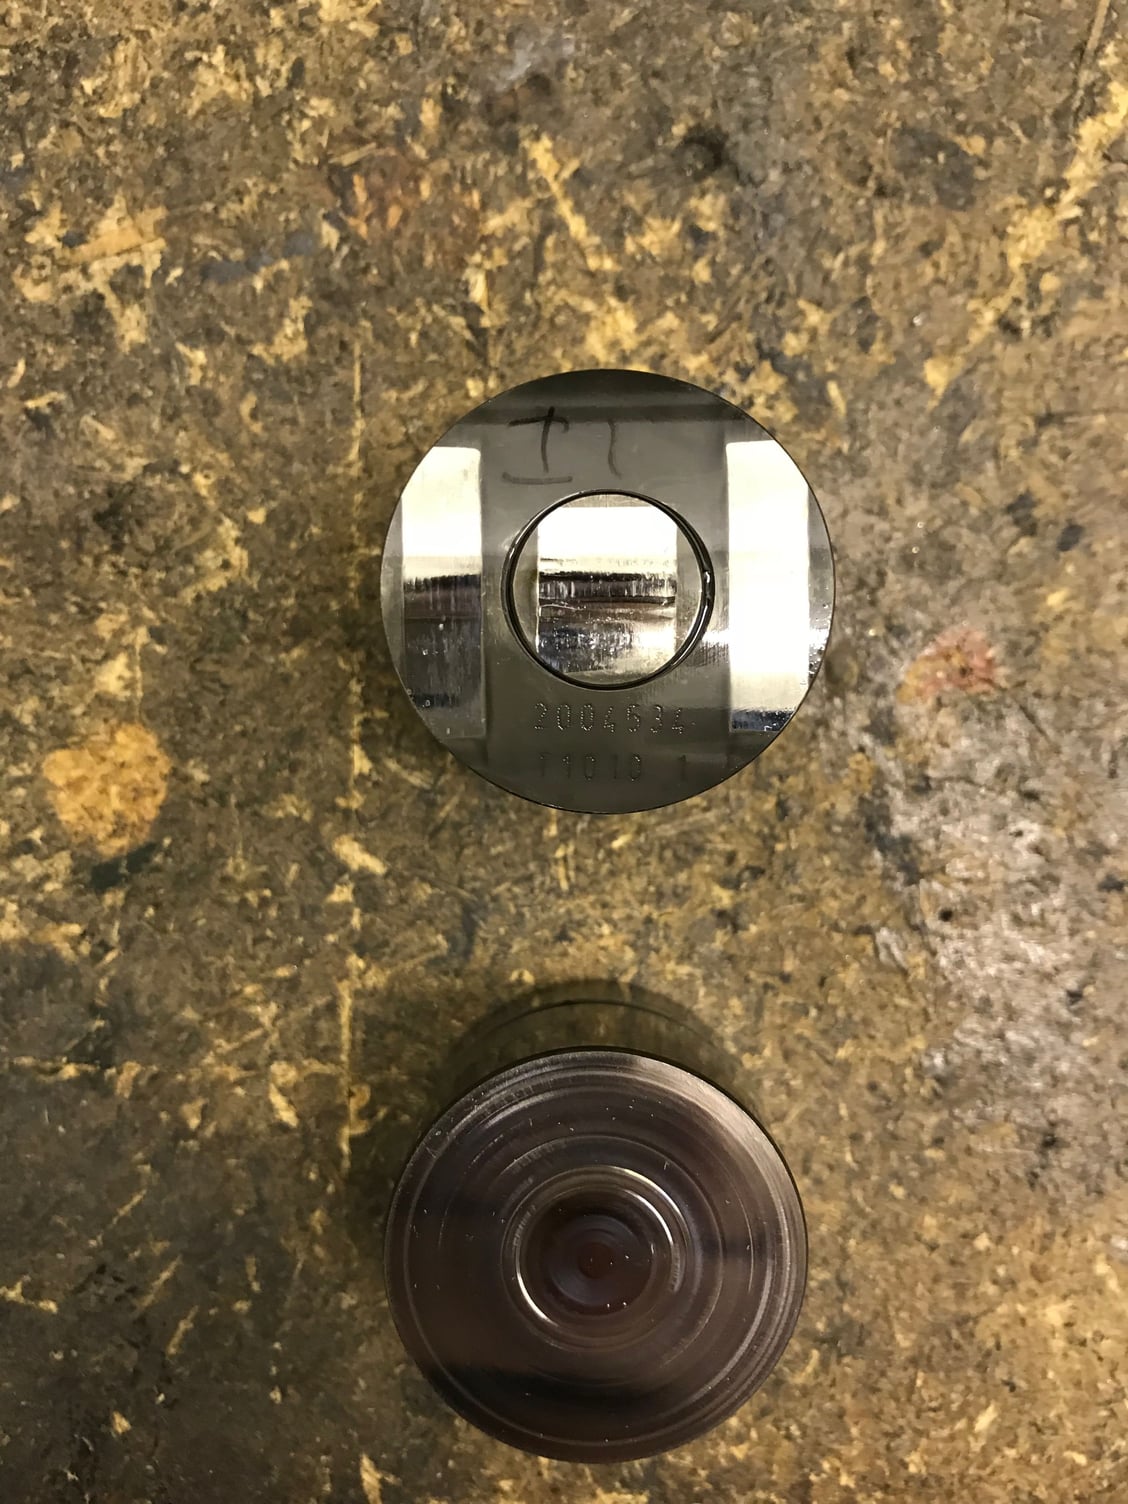
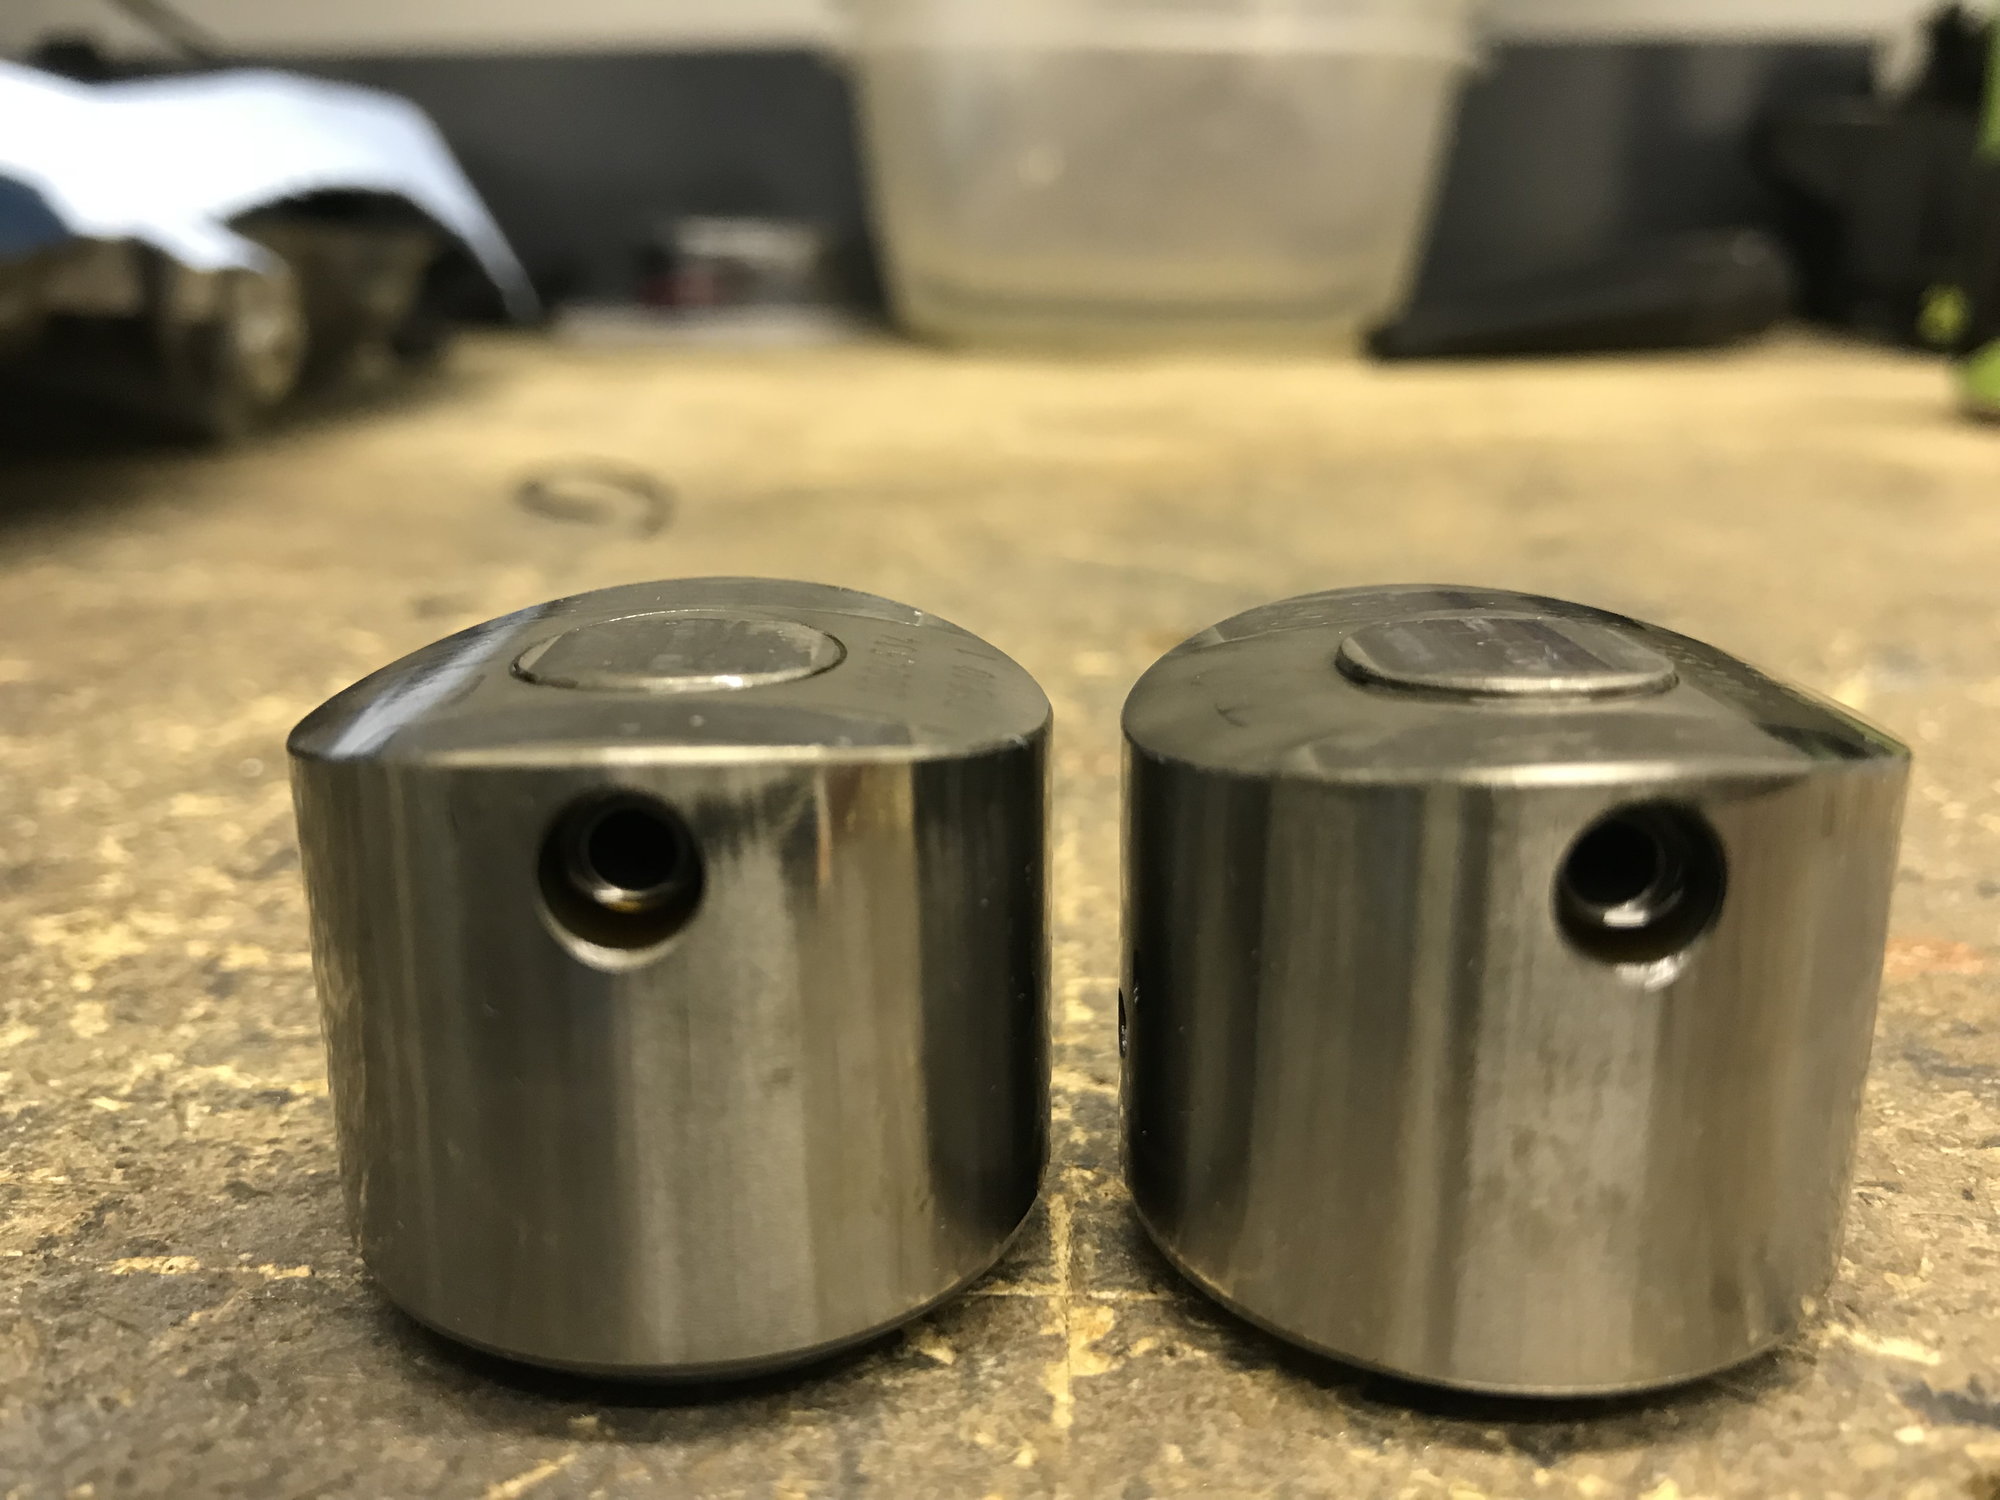
Here are the lifters, the intake on the top exhaust on the bottom, as mentioned earlier the 3.4 uses the bottom style lifter for both intake and exhaust
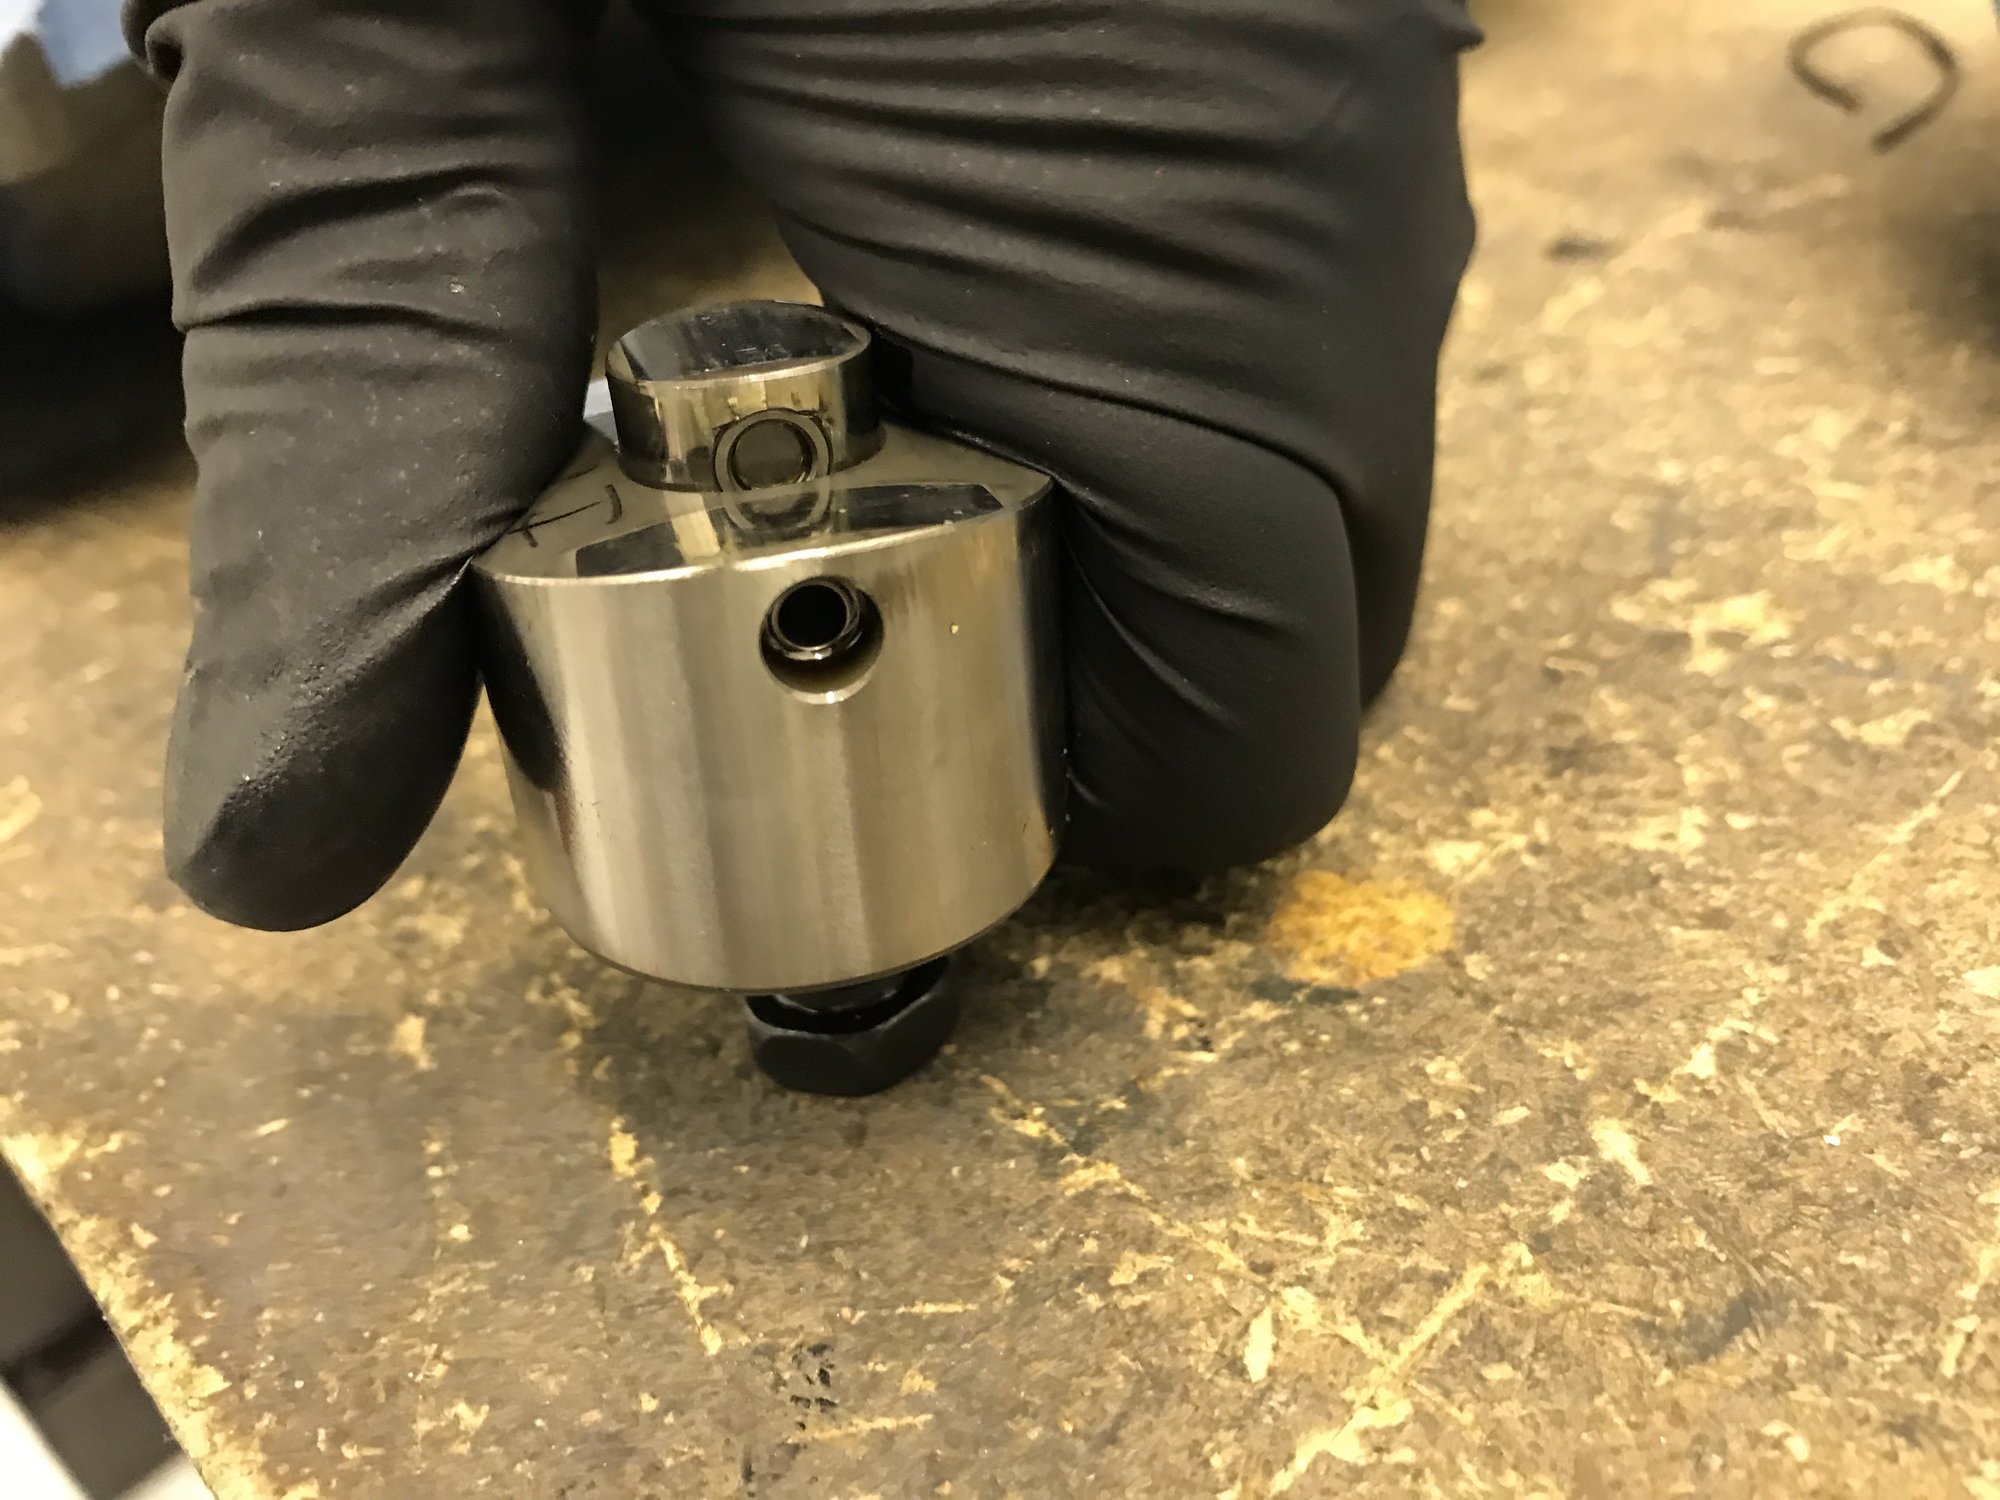
In normal operation the center seaction raises and lowers with the lifter opening the valve, then above ~3k rpm a pin locks the lifter in the closed/lowered position giving the valve extra lift
my bad lifter is on the right below, with real force I can get it to open but it’s definitely sticking vs the others. The pin isn’t sticking or locked so I do t think it’s oil contamination or debris, if you look below it doesn’t close flush like the good lifters. I think the issue may be that the center section deforms slightly where the can lobe runs on it, closing up the clearance causing it to ‘stick’ , this would the mean the valve is opening at full lift at lower rpm’s. Overfilling the cylinder and running rich causing the misfire
Nice work! Do you have the timing tools for when you go back together? I would also advise to replace the diamond washer on the cam adjusters. Possibly also check/replace your oil screens while youre in there.You may have already done all this, not sure just thought it would be worth mentioning.
Nice work! Do you have the timing tools for when you go back together? I would also advise to replace the diamond washer on the cam adjusters. Possibly also check/replace your oil screens while youre in there.You may have already done all this, not sure just thought it would be worth mentioning.
Yes on the 3.6 the cam locking tools set the timing, not as complex as the 3.4. And yes i’ve ordered replacement seals, washers and gaskets wherever possible
 04-26-2018, 11:28 AM