When you click on links to various merchants on this site and make a purchase, this can result in this site earning a commission. Affiliate programs and affiliations include, but are not limited to, the eBay Partner Network.
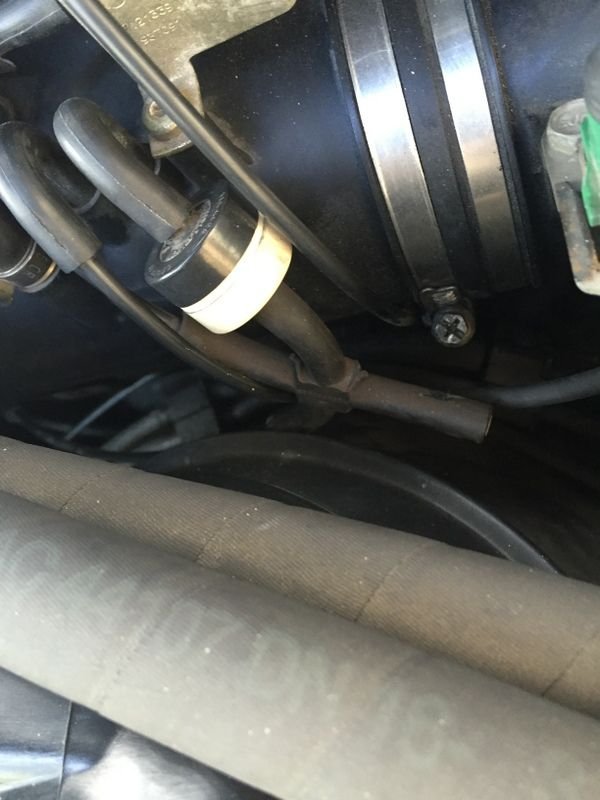
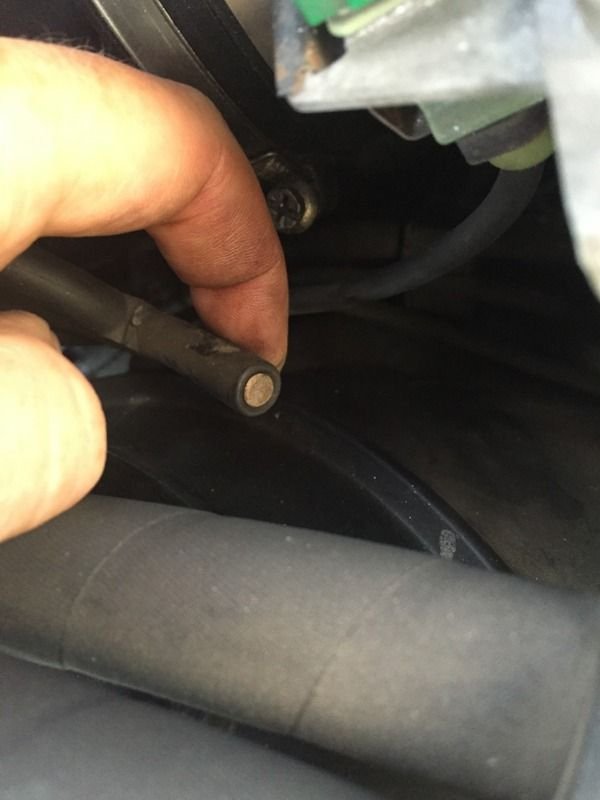
Just replaced the last old Varioram actuator, the one on the top left side of the intake manifold. I was able to replace it without dissembling other ancillary items. Takes a while to get the screws out and in using a closed end box ignition wrench as a handle for a screwdriver bit. Had to pass the old & replacement part behind the heater blower to get thing out and in. Tied up the actuator, vacuum hose, and all the tools with wire so they would not fall behind the engine into the abyss. Once cracked loose with the driver bit I was able to unscrew and reinstall the screws with my hands using surgical gloves enhancing the grip. Used tape and a sliver of sheetmetal to hold the screwdriver bit inplace. Having a 12 inch hemostat was very useful to remove and replace the screws and the vacuum hose. You will be running you knuckles against the insulating mat so if yours is dried out you may cause it to crumble. In retrospect ity be easier to do by cutting a flap in the mat and folding it back out of the way and then repositioning the flap once done.
Update: just ran the engine for a few moments. Turned the ignition off, turned it back on without starting the engine. All three Varioram actuators cycled. Looks to be a good functional system test to run whenever one experiences a running condition change.
Finally was able to take a joyride since patching up the vacuum leak (s). Now the torque comes on much earlier, 3000 rpm, makes the car feel a lot lighter and nimble. Eliminating the leaks is a big deal, like driving a new car!
Andy
I don't think I have a vac leak after checking
but noticed this which I didn't before - normal on a pre-vario 993 C2?
Pipe on the right/at 3 o'clock is blanked off ie one of the vac pipes off the main vac junction (4 way) facing you as you open the engine lid ie blanked off
... but it looks factory, right?
Easiest way to see if your car's vacuum lines are as original is to look them up in the Parts Catalog.
Wasn't hearing the vram kick in at higher rpms, and top end seemed a little light on power, so I tested the system with my son as helper.
The top left & right vacuum diaphragm actuators worked properly when ignition was switched on, but thE bottom center actuator did not engage even at rpms up to 6500. Diaphragm worked fine when directly connected to vacuum, so that wasn't the problem, and also confirmed vacuum was good and there were no leaks.
Tested the control solenoid for that diaphragm with a 12v source and it didn't engage. Replaced it with the solenoid off the fresh air flap and it worked fine. Road tested and noted the vram sound came on at about 5000 rpm (though a bit hard to hear this with the LPMM mod), and top end seemed to pull much better.
Interestingly, the bad solenoid measured ok at 32 ohms so while the coil may still be good there is some kind of mechanical failure inside it. The other ones click audibly when power is engaged, this one makes no sound and the valve doesn't open. The good news is, the solenoid is much cheaper than the vacuum diaphragm actuators...
Old thread but I am hoping you can help- can you advise where the solenoid for the resonance flap actuator is located please? I am having similar problems and I want to test/replace. Thanks
It�s been a couple of years since i looked at this but IIRC the solenoid for the resonance flap is attached to the varioram casting on the left (driver�s side). The air blower assembly has to be removed to access it. Once that�s out of the way, just trace the vaccum line from the resonance flap vacuum actuator back to the solenoid.
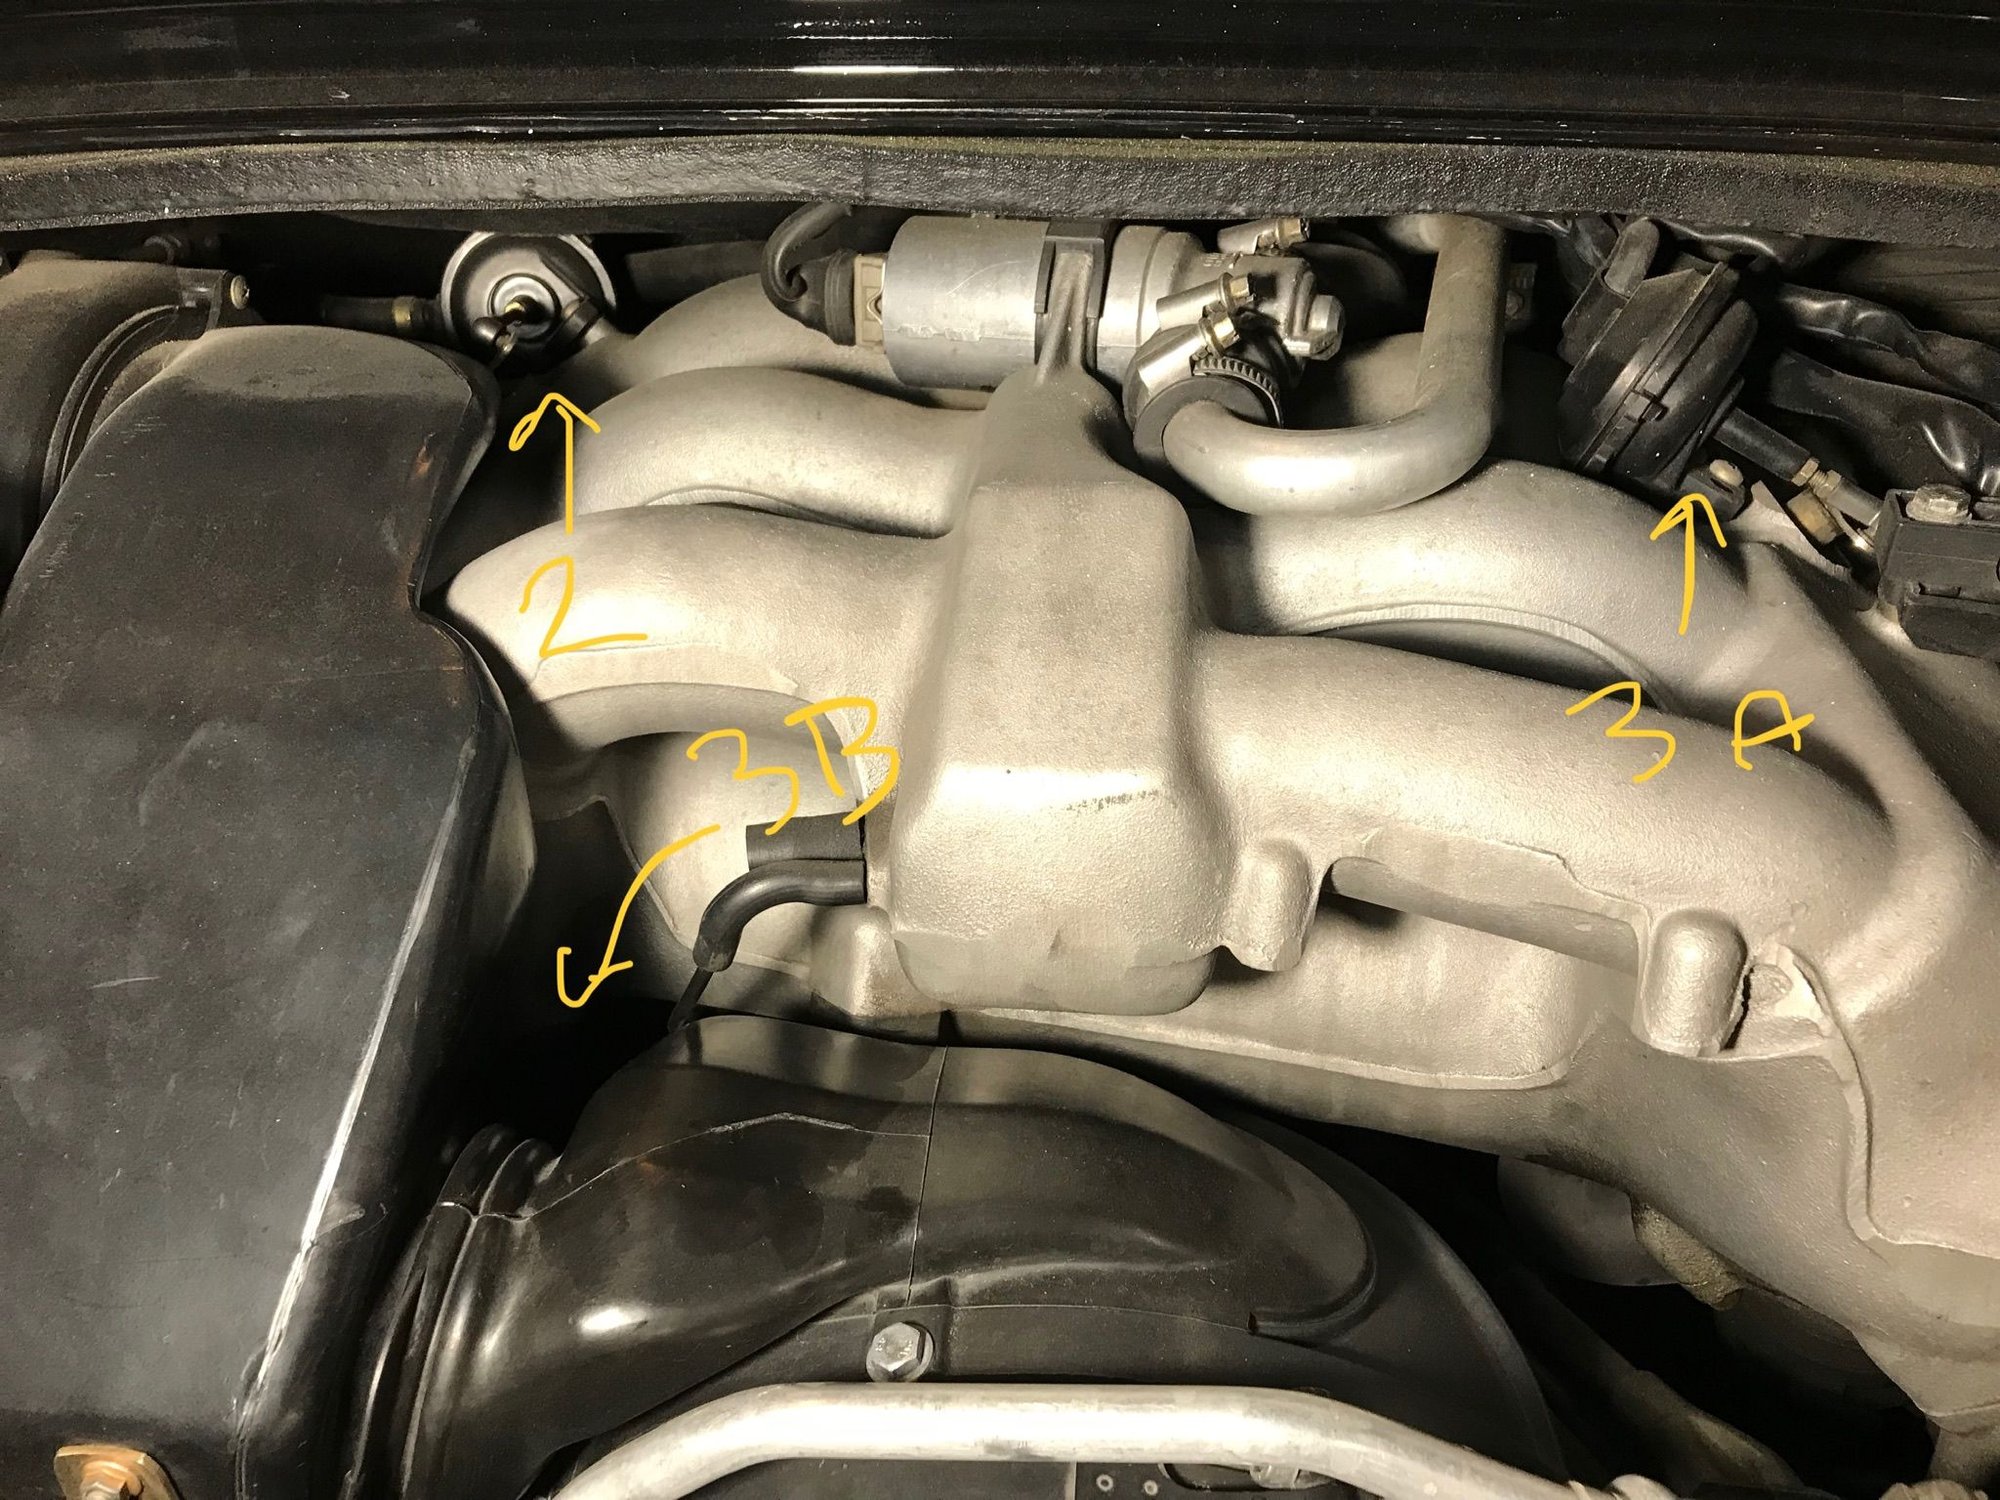
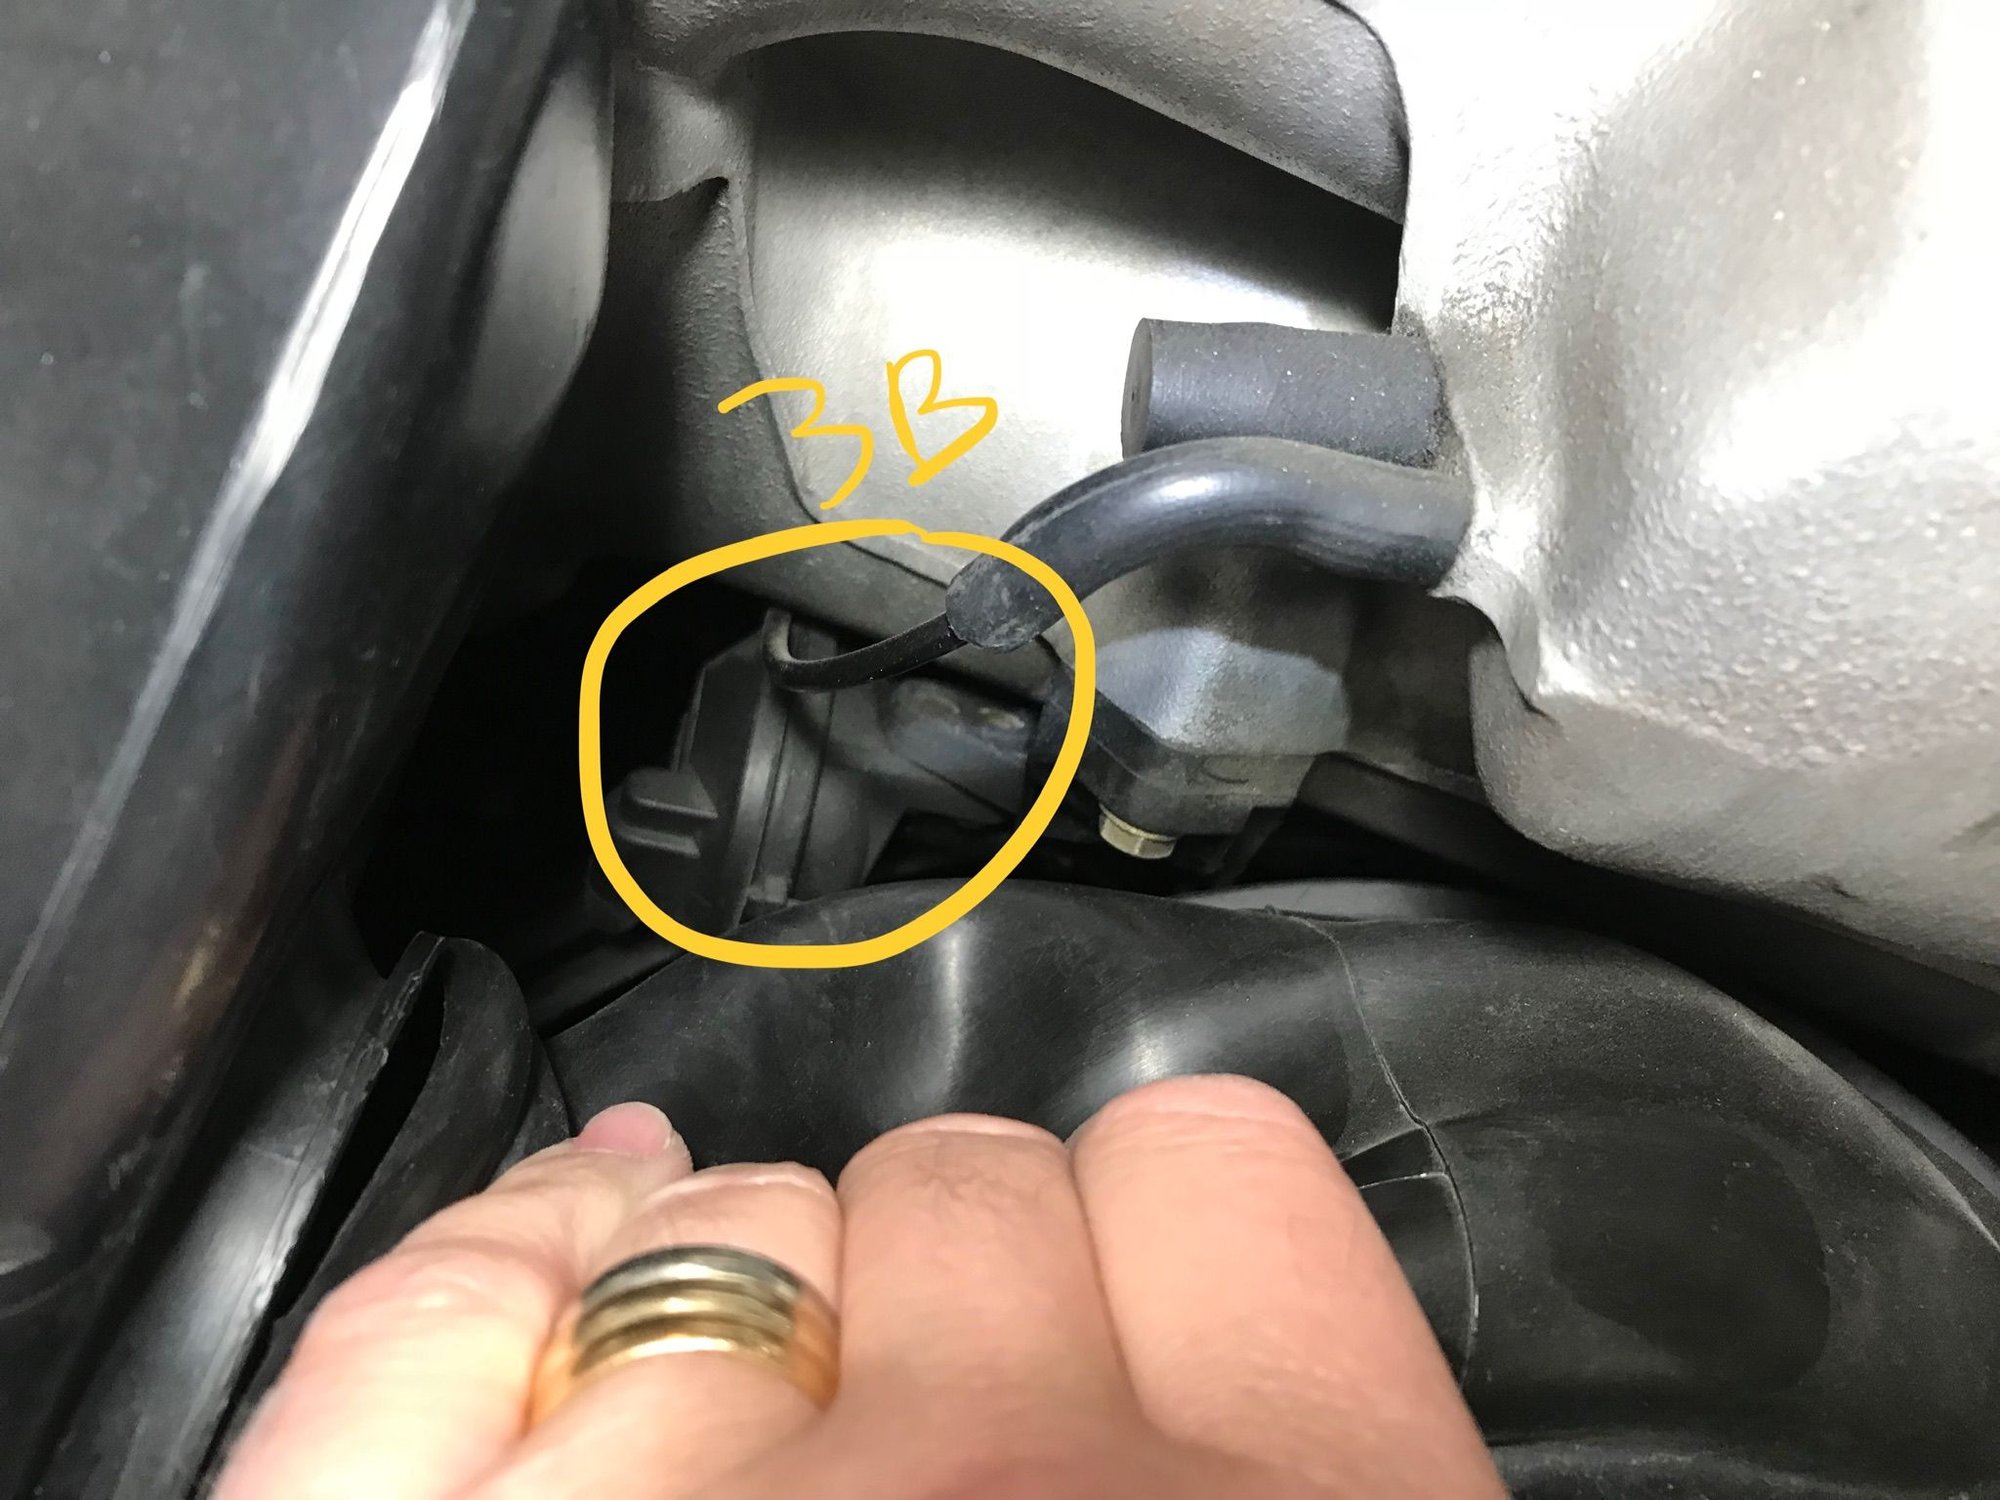
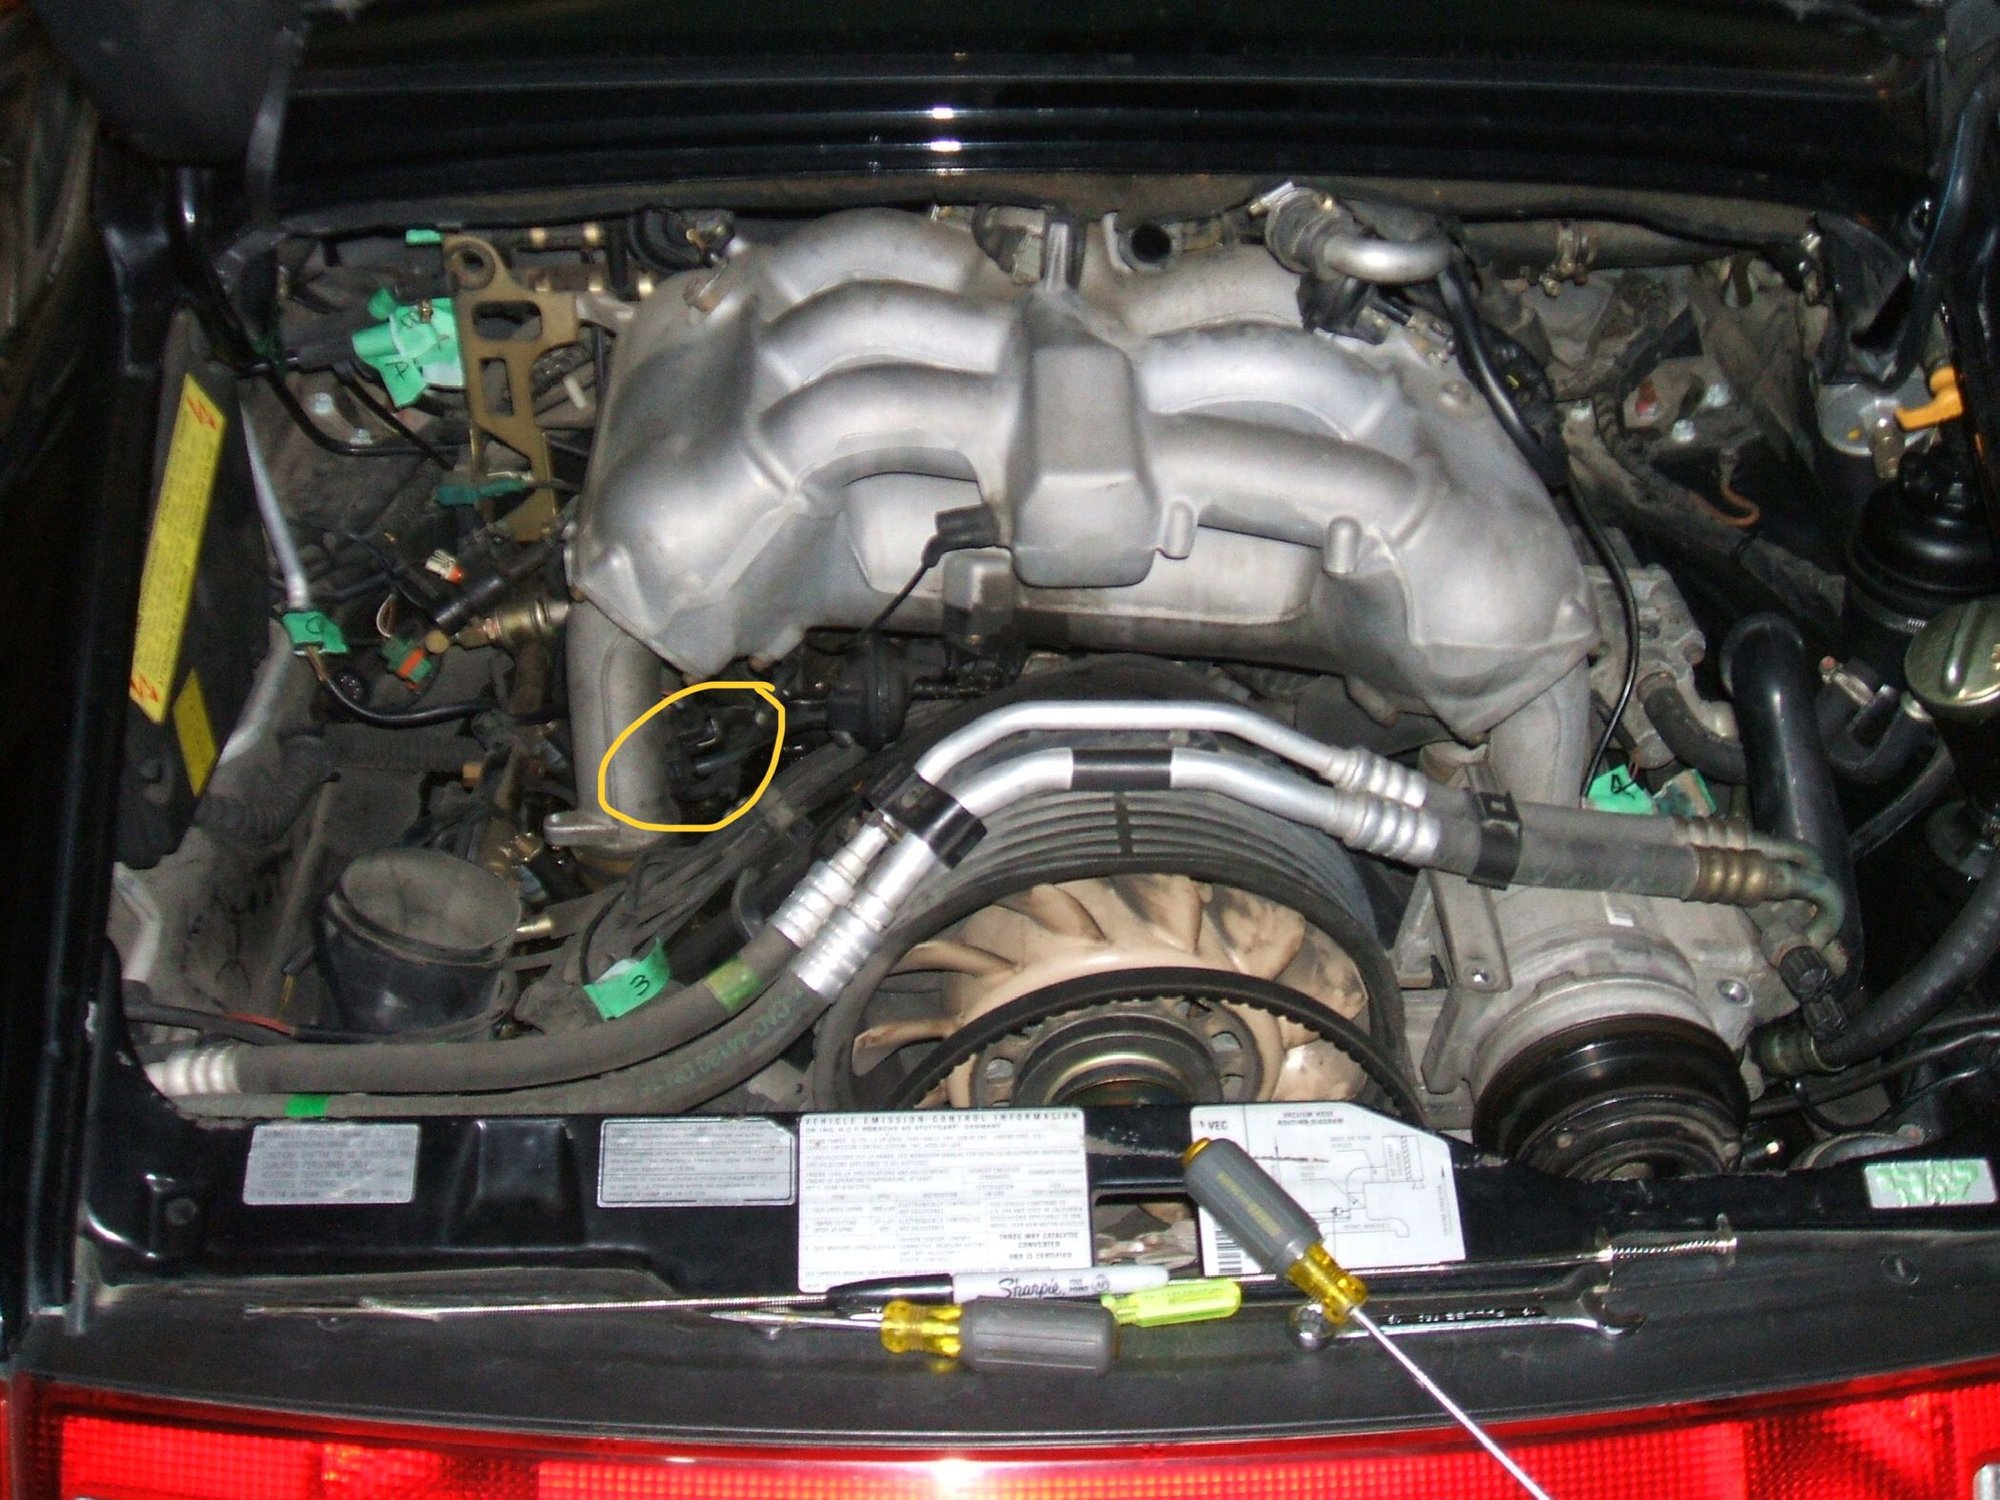
The resonance flap actuator is at the bottom middle of the varioram, hidden behind the rubber air ducting boot coming off the fan shroud - 3B in these pics:
Again, if memory serves, the solenoid for the flapper is attached to the varioram where the yellow circle is in this pic. The air blower assembly has been removed. Sorry not the greatest quality photo but hopefully this helps.
Thanks- ordered 4 as a precaution. Thinking two are accessible with engine in but the two at the top on either side look to be inaccessible without dropping it. We'll see.


 12-09-2015, 01:23 PM