When you click on links to various merchants on this site and make a purchase, this can result in this site earning a commission. Affiliate programs and affiliations include, but are not limited to, the eBay Partner Network.
I have always been very interested in lighting — Our home has multiple layers of lighting — overhead, wall wash, independent floor lamps, etc. I find that multiple layers of lighting always serves to enhance one’s experience of a space.
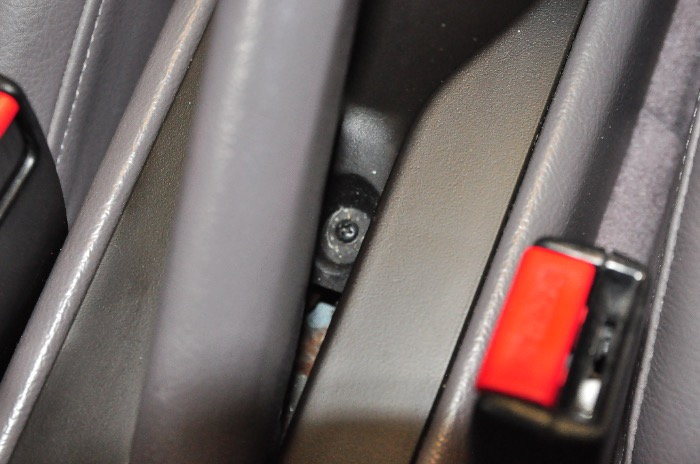
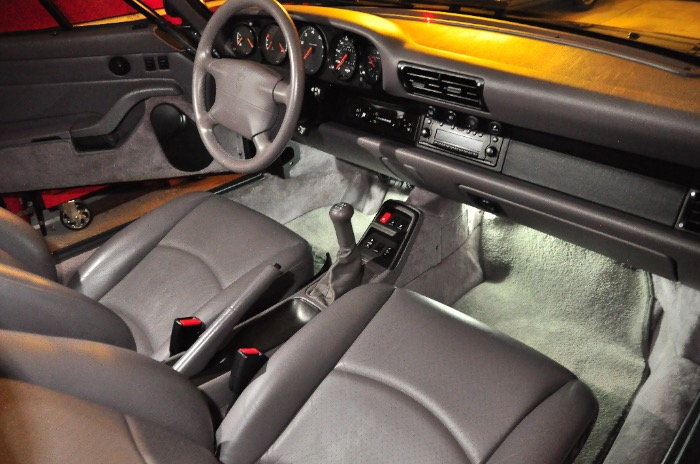
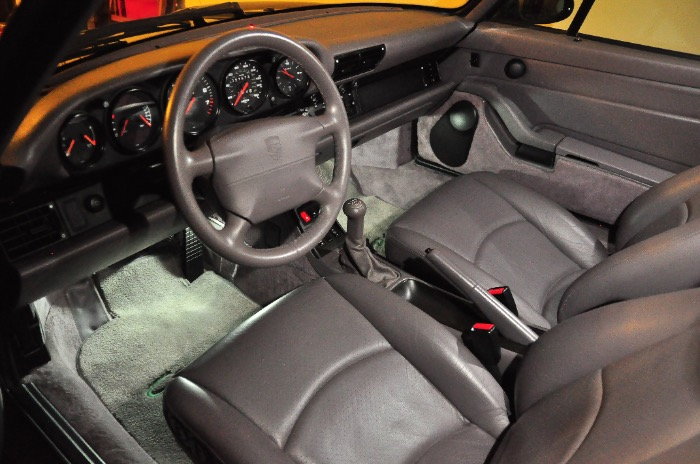
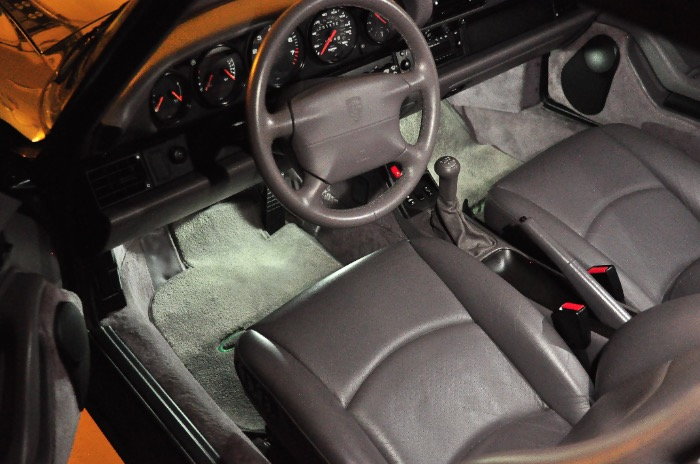
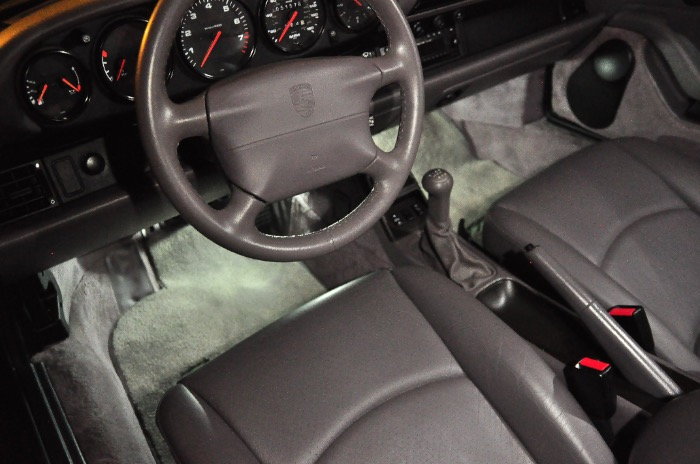
It is with this in mind that I decided to retrofit footwell lights — option XX2 — to my 993 — a $604 list price option when new (info courtesy M. Schneider) . The catalyst that caused me to start this was when I learned, through CupCar’s previous posts, that all 993 coupes have plastic knock-outs to install footwell lights in the center console.
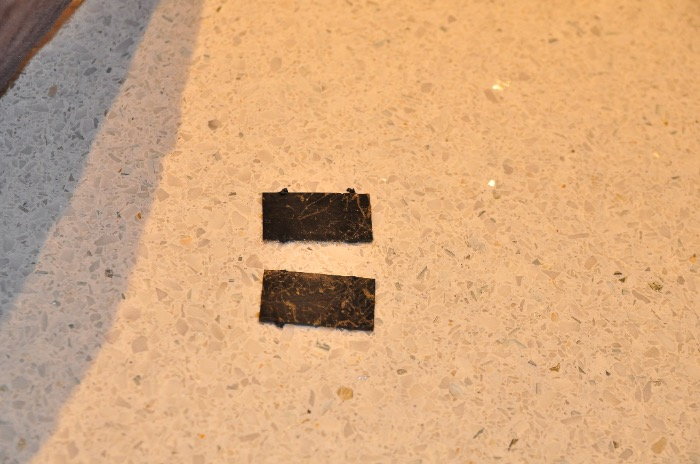
Below is a picture of what I had seen on RL, as well as a picture of my finished product —
To install the footwell lights you have to do the following steps:
1) Remove center console / shifter / handbrake-area plastic.
2) Remove front-section of console with switches for sunroof / hazard lights, etc.
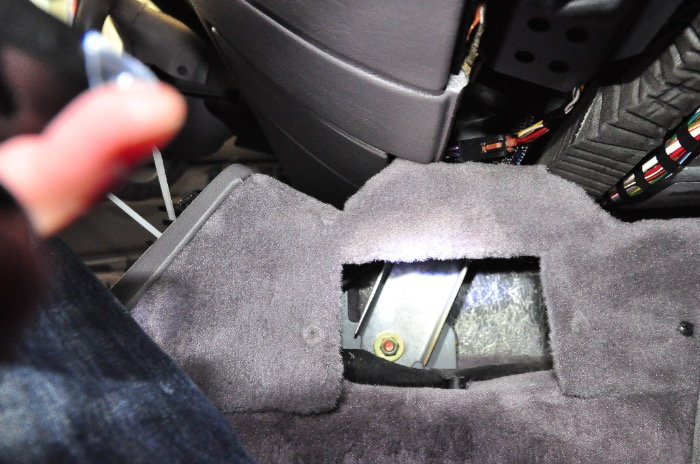
3) punch out knock outs from center console and cut carpet in front of knockouts.
4) install footwell lights into center console — the same lights as used in the frunk and engine bay — $10 each from sunset.
5) Power the lights from the frunk light — wire power and ground from the frunk light into the interior cabin by going through a grommet just under the frunk fusebox
6) Put everything back together!
NOTE — you don’t need to take apart the dashboard. I took apart the dashboard but later realized that I didn’t have to.
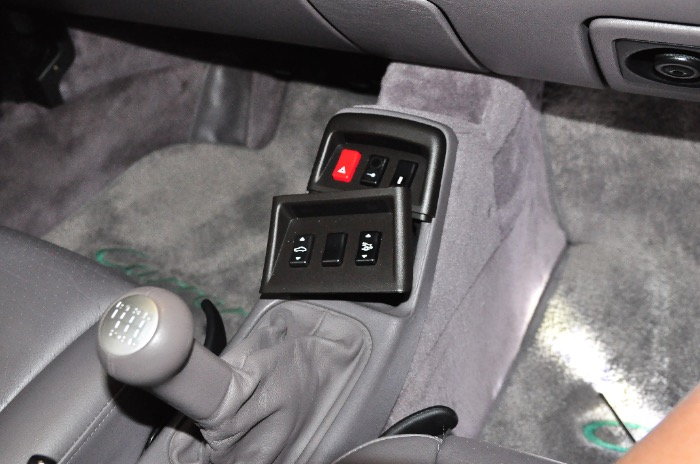
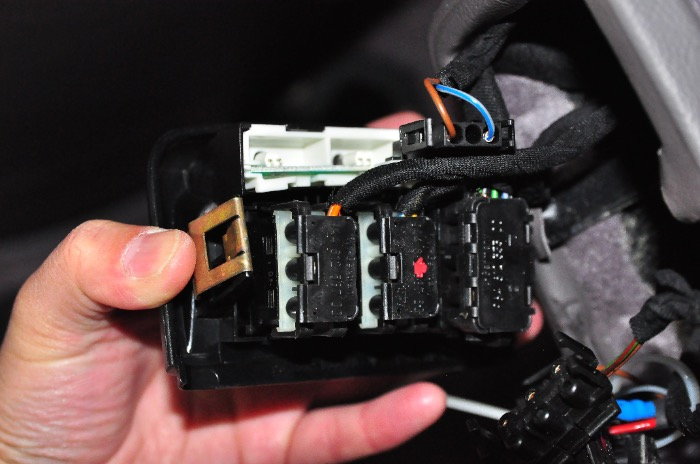
*********** STEP 1 — remove forward console switches and note the connector positions so that you can put it back together properly
*********** STEP 2 — Lift up shift boot. Push down on left side. The right side is the hinge. After you snap down the left side, you can work it out.
*********** STEP 3 — Remove these two screws in front of the rubber shift sub-boot
*********** STEP 4 — Remove two screws at 2nd terrace level of switch panel
*********** STEP 5 – Remove two screws at very forward end of front console (at very right in this pic) — note — you don’t need to remove the access cover like I did.
*********** STEP 6 — Lift up rubber pad @ back of center console. Remove the screw.
*********** STEP 7 — Remove two gold screws at back and 2 black screws holding the plastic surrounding the parking brake.
*********** STEP 8 – Remove the black screw just under the parking brake. You can angle the screwdriver.
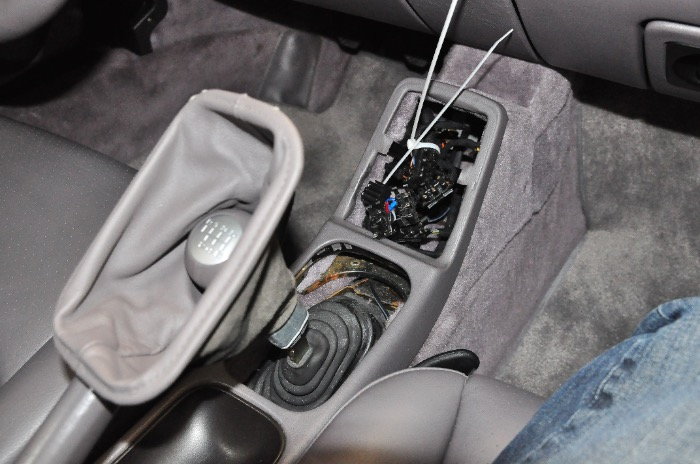
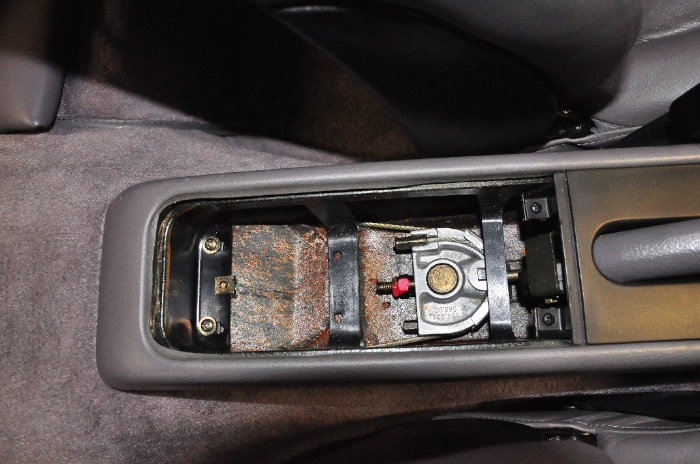
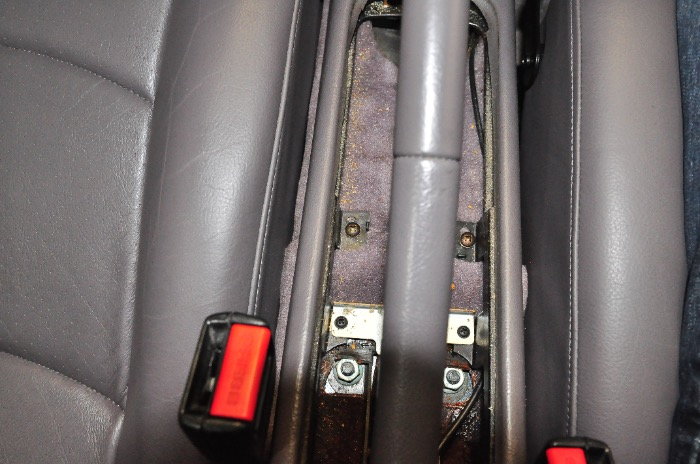
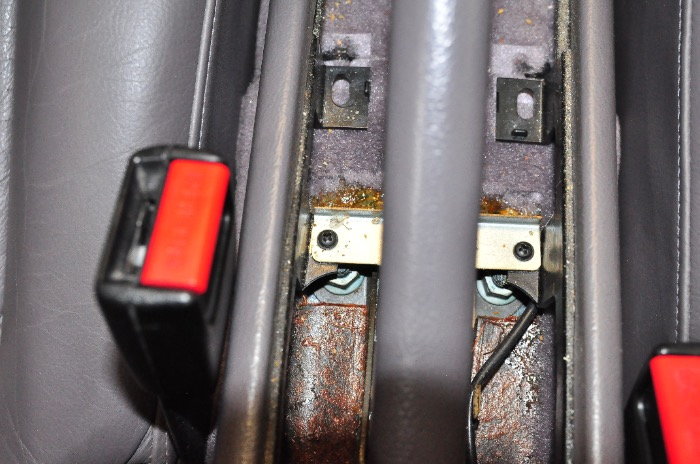
*********** STEP 9 – Remove the silver cross bar (flanked by two black screws) as well as the two long gold screws at the edges of the center console.
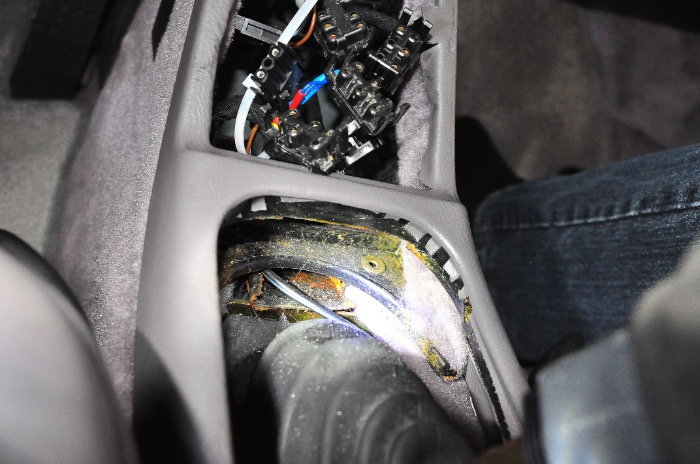
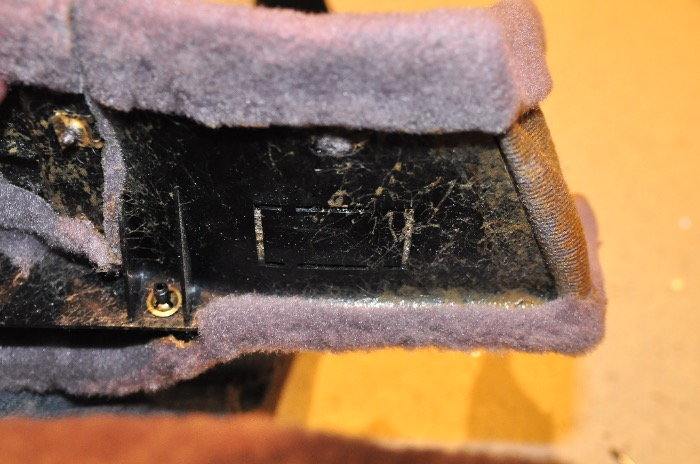
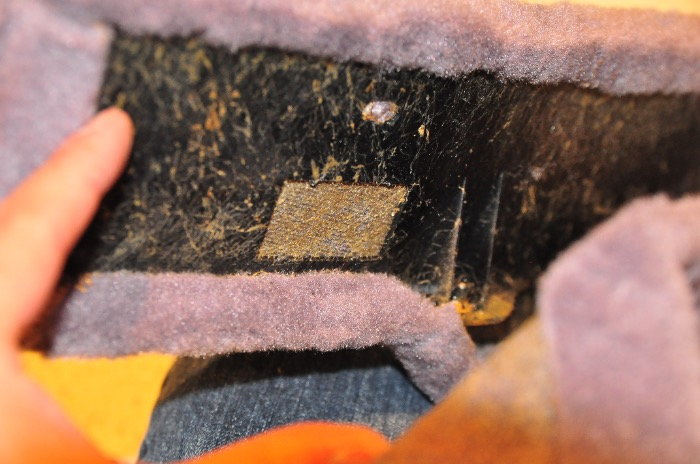
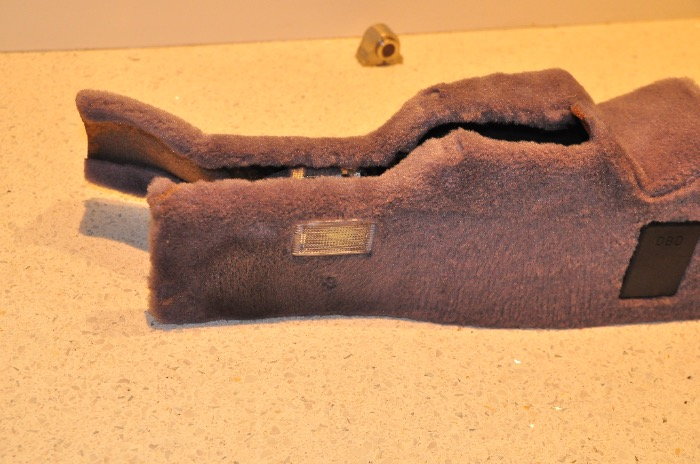
*********** STEP 10 — Remove the center console first, which then allows you to remove the front console from the car. Punch out the knock-outs and Score the carpet in an X. You can glue the carpet down, but I didn’t have to.
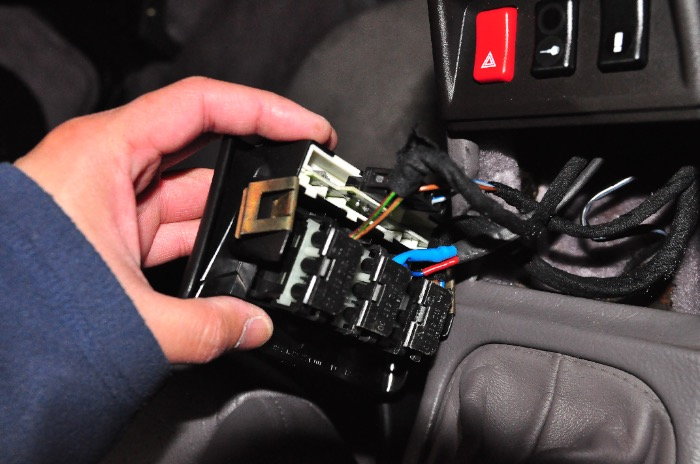
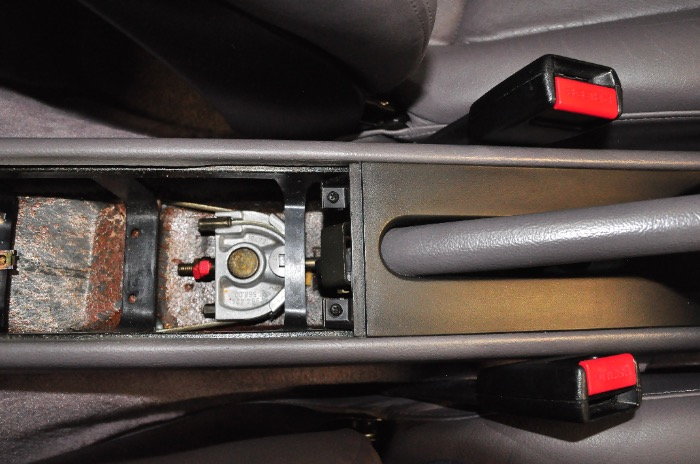
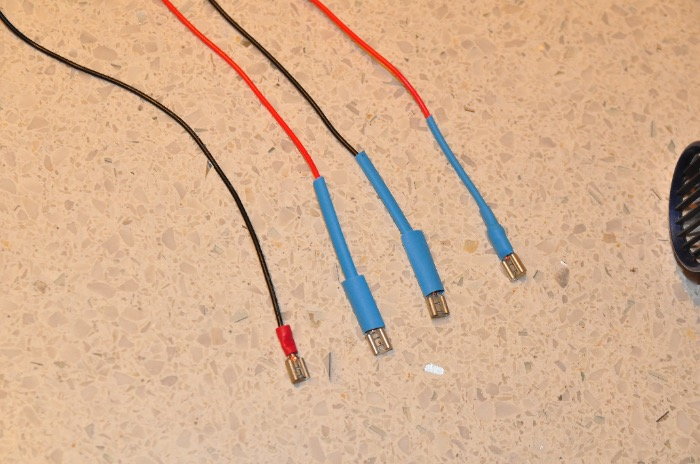
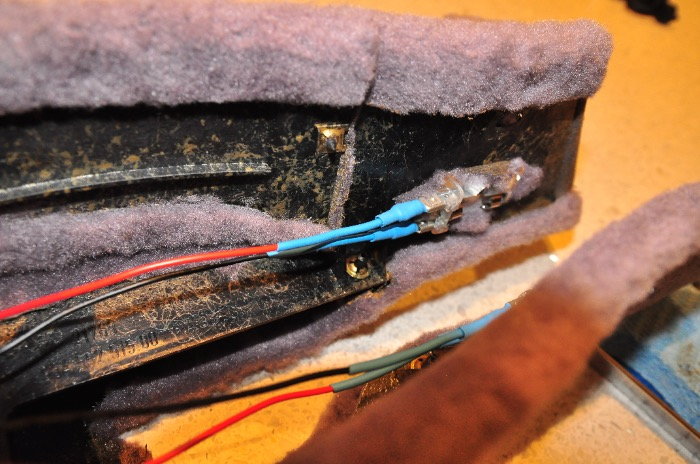
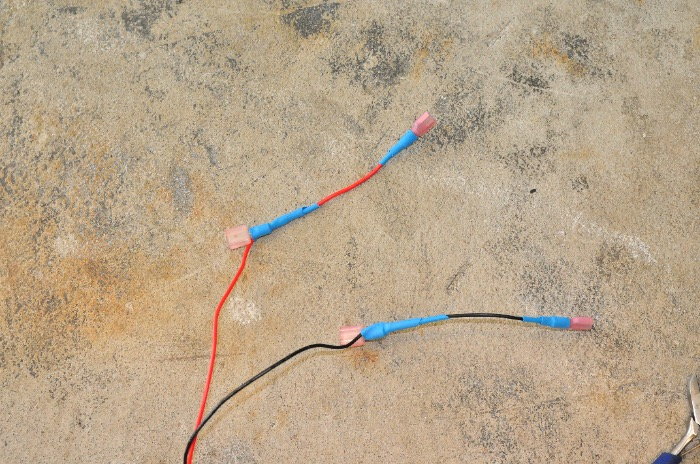
*********** STEP 11 — I made a wiring harness to connect to the footwell lights — I used crimp connectors and heat shrink tube. Note — these picture don’t show it, but you want to heat shrink the entire exposed connector to prevent shorts. I did that later after I accidentally touched connectors and popped a fuse.
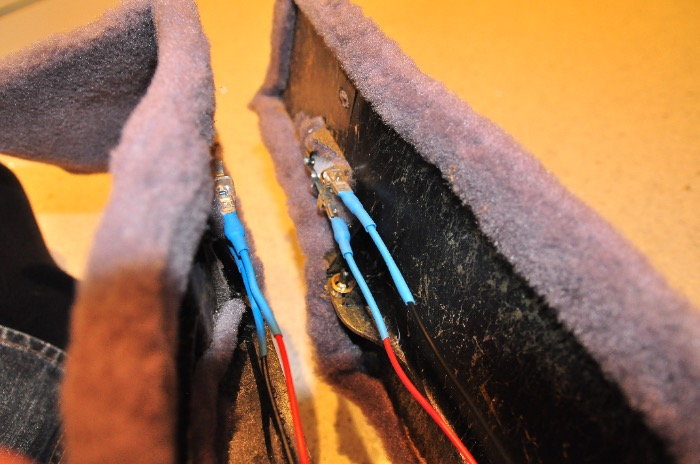
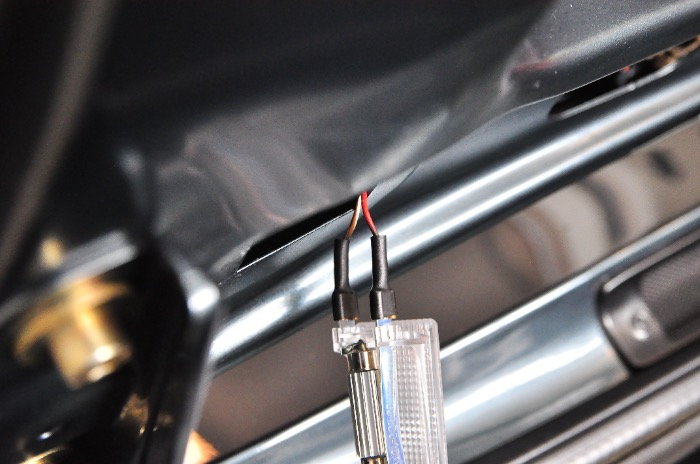
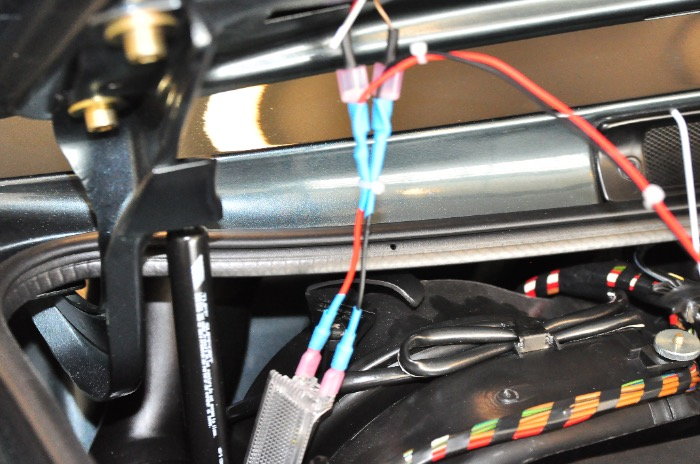
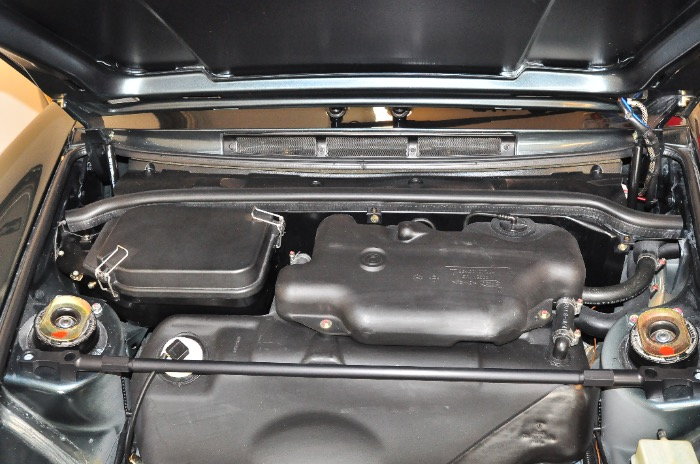
*********** STEP 12 – Remove Frunk light, and fabricate a wiring harness to tap off the frunk light. You do this so that you don’t cut any wires. Note my harness plugs into the original frunk light wires on one end and then powers the frunk light on the other end. My harness also Tees out (the long wires you see going off to the left/down) to go into the interior cabin
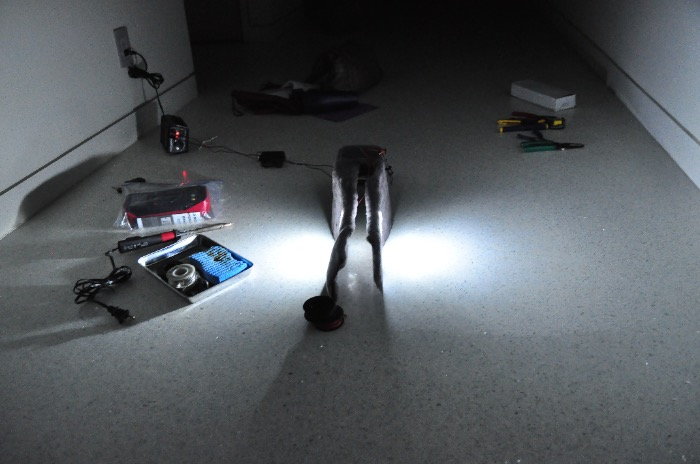
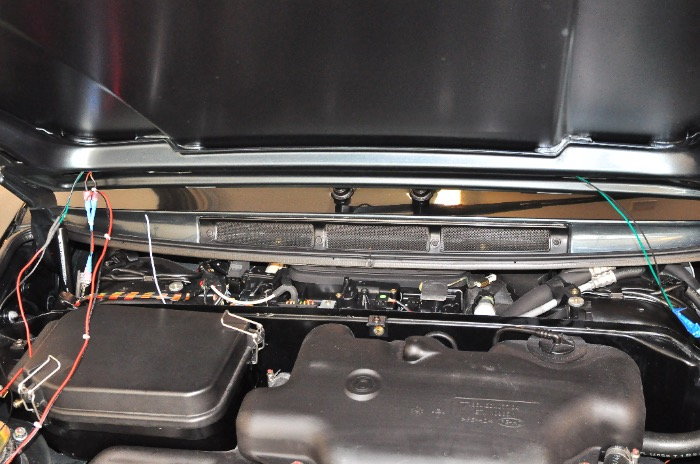
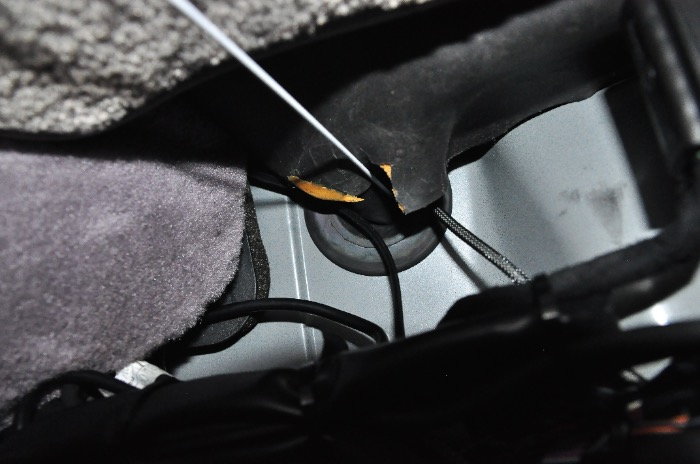
*********** STEP 13 — Use a coat hanger to follow the same wirepath as the OE frunk light wires to go to the drivers side from the passenger side ... In between the two layers of hood sheet metal ..... and go down the hinge like OE. You can see the blue heat shrink tubing off at the drivers side where my new wiring follows the frunk lid hinge down — and then I take my new wires and go off towards the passenger side. The goal is to enter the cabin at the passenger side where there is a grommet just under the fusebox
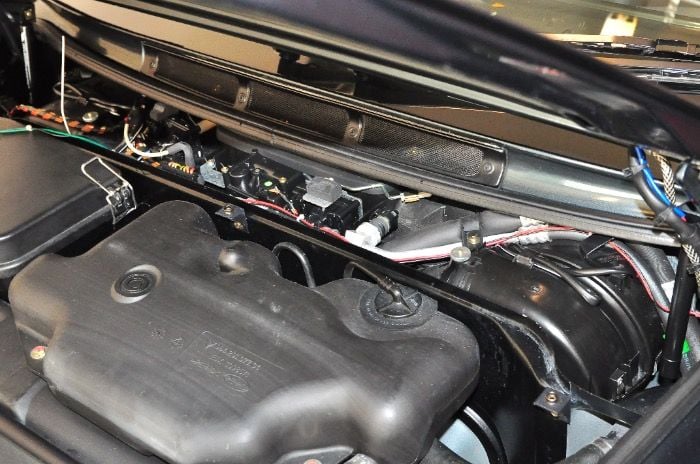
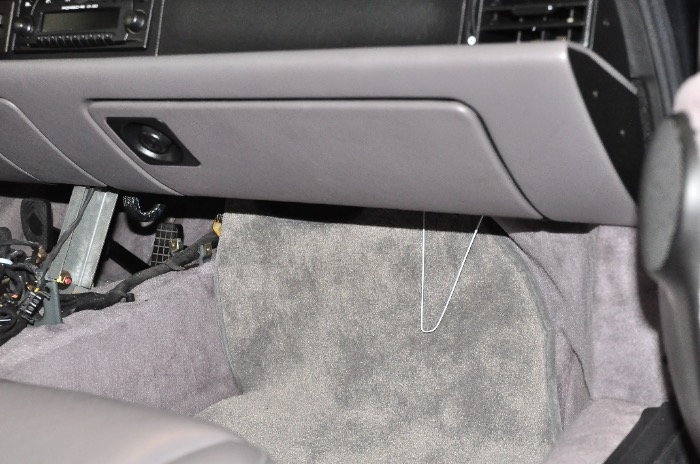
*********** STEP 14 — Use a Coat hanger —and start from the passengers foot well. You can see the approximate location here. If you start pushing w/ the coat hanger up (you are lying on your back in the passenger foot well) you well end up with a coat hanger that luckily shoots up right along side the fusebox.
In the pics in the previous step (13) you can see a white coat hanger poke up right next to the fuse box.....
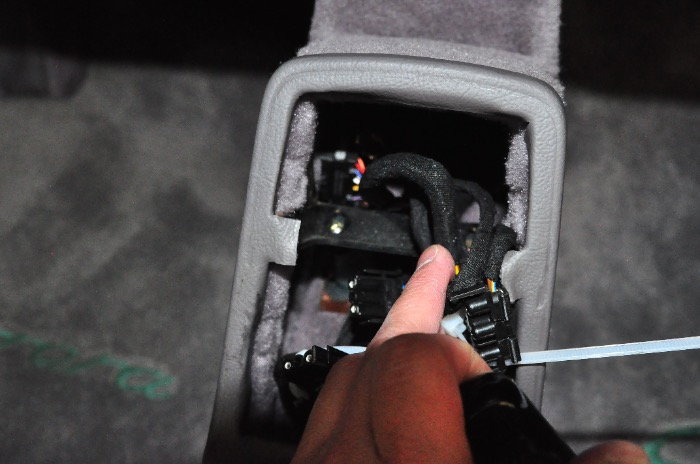
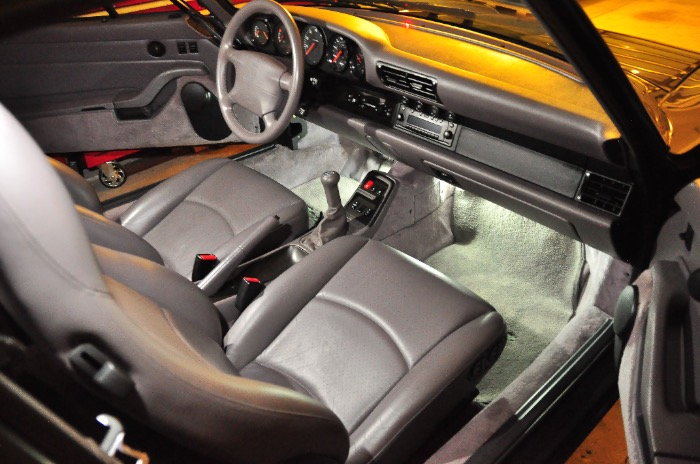
*********** STEP 15 --- — Pull the wires through. Wire tie everything. Be super tidy. Assembly is the reverse of removal. Be careful that your wires in the front console do not get fouled by the steel support. You should end up with this!
Just a thought. Would it be just as easy to pull off of the pass. overhead light above the door? Run just under the trim and the down behind A pillar to footwell?
Just a thought. Would it be just as easy to pull off of the pass. overhead light above the door? Run just under the trim and the down behind A pillar to footwell?
CupCar pointed out in a different thread that the OE wiring harness has a connection under the carpet below the right rear seat as well.
Therefore, in order to avoid cutting OE wires, one can make an adapter to steal power either from the overhead lights as you mention, under the RR seat, at the frunk light, or at the immobilzer.
Stealing frunk light power was pretty easy. Poking the coat hanger through the grommet and finding the coat hanger took 5 minutes. Knowing where to poke took many hours ..... Especially because I unnecessarily took apart the dash and dashpad thinking I could get from the upper to the lower daah easily that way. I was wrong.
Great write up and congratulations of figuring out how to do the job without removing the dash.
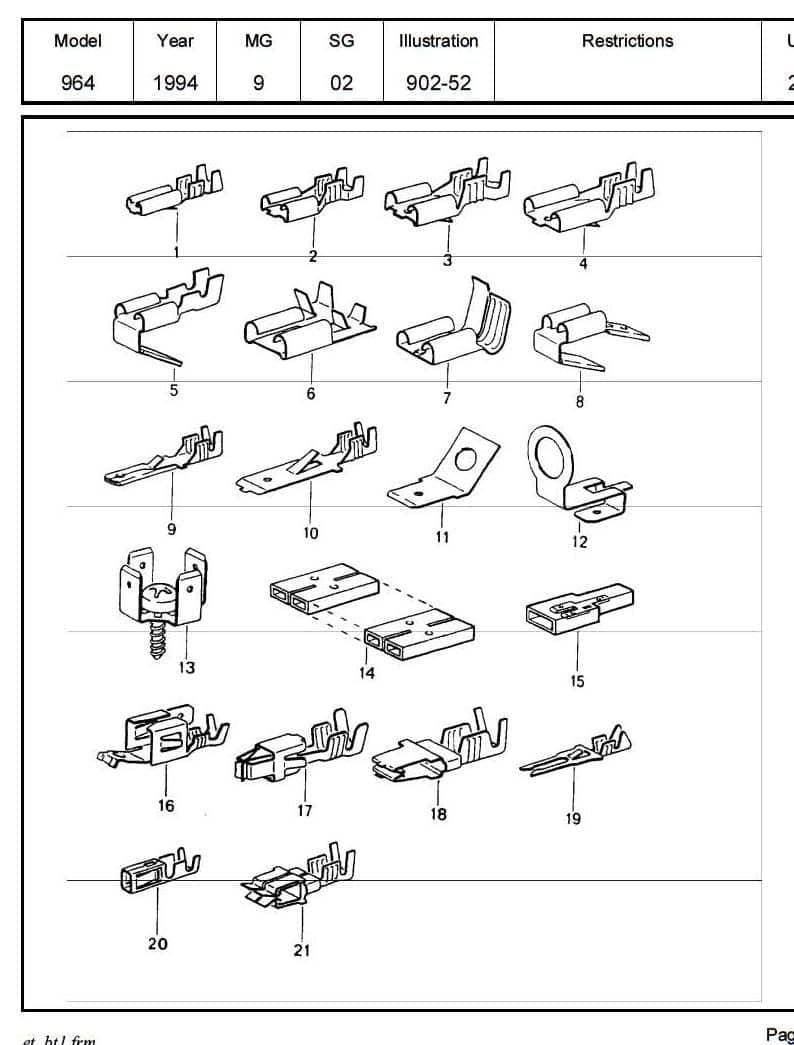
One thing, if one can get hold of a wire terminal like #5 (part number N 017 242 1) or #8 (part number 999.652.122.10) in the below diagram, it would be simpler to tap into the harness at the trunk light.
Cupcar, I can't believe you analyzed the Frunk light wiring harness "extender" so carefully that you then not realized but looked up and pasted a "backwards facing spade connector". Thank you. Sometimes I think I'm detail oriented, but then along comes other folks on this forum that make me feel like an amateur.....
Through owning a 964 once, I just knew about the section in the 964 parts manual that has the wiring connectors. There is no similar section in the 993 parts manual.


 04-27-2015, 02:47 PM


 XX2 discussion on JDHertz11's "Interesting options" thread.
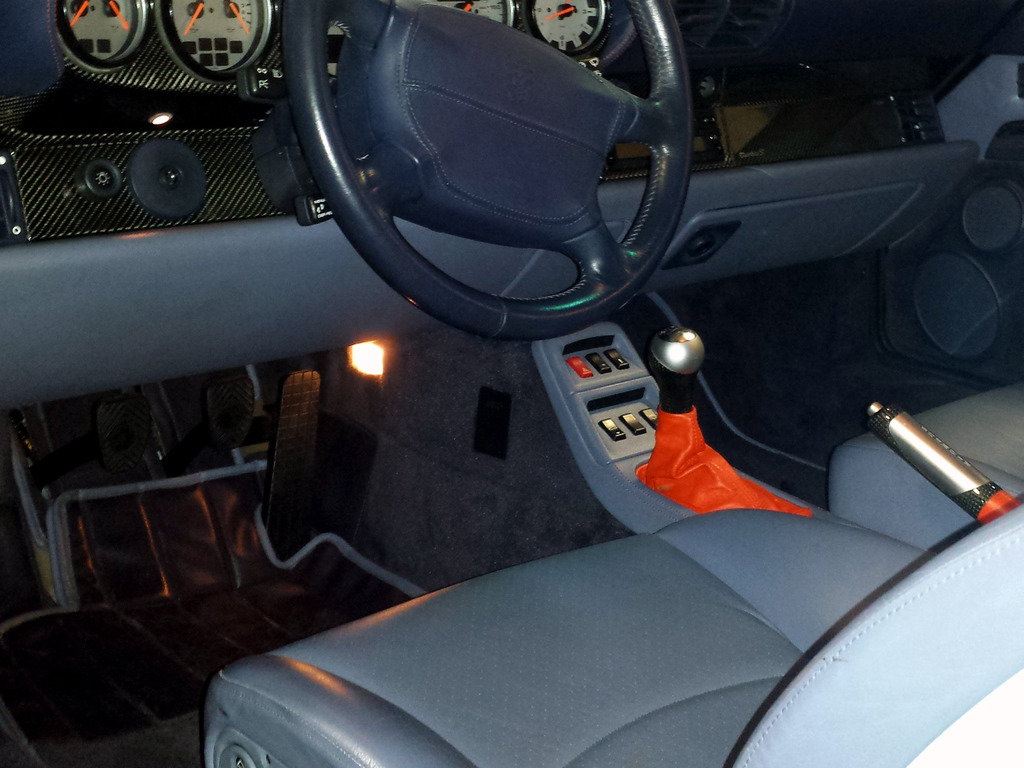

 ...
...