Remove brake line from caliper for rebuild?
 04-18-2014, 01:40 PM
#1
Rennlist Member
Thread Starter
Seems straight forward, but as far as i can tell, this is not really discussed directly in the searched results...
I am rebuilding the rear calipers because one side is sticking.
So I'll pull and rebuild the calipers, and replace rotors and pads (one rotor is beyond crack limit, and I decided to keep this axis symmetrical).
Car is on the lift, wheels removed, fittings soaking in PB blaster.
Do I simply disconnect the brake line at the caliper for this?
The 14mm, I have a set of Craftsman raise-panel flares and imperial line wrenches.
I'd rather not mess with the connection at the hard line at the moment.
Forgive me if I'm being overly paranoid...
 04-18-2014, 02:25 PM
#2

Yes, remove at the caliper...Autozone sells rubber tube block offs that fit snuggly over the brake line to mitigate the amount of fluid loss. A couple of bux if memory serves.
If there is a hard line at the caliper, try to tweak it as little as possible (maybe I'm thinking of the fronts?). This will aid in reinsallation, as sometimes getting the hardline threading to start, can be a bear.
Not sure I understand the statement above...Does this mean you are replacing both rear rotors, along with reworking both rear calipers? If so, it's probably a good idea while you're in there...
I'd save the one rear rotor that is not beyond the crack limits, just in case...But that's me.
If there is a hard line at the caliper, try to tweak it as little as possible (maybe I'm thinking of the fronts?). This will aid in reinsallation, as sometimes getting the hardline threading to start, can be a bear.
(one rotor is beyond crack limit, and I decided to keep this axis symmetrical).
I'd save the one rear rotor that is not beyond the crack limits, just in case...But that's me.
04-18-2014, 02:48 PM
#3
Technical Guru
Rennlist Member
Rennlist Member
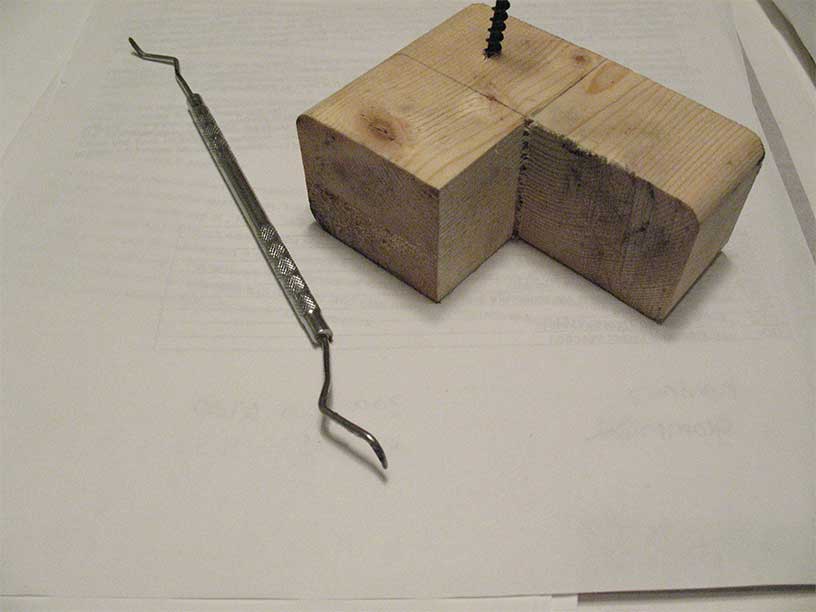
Wedge a board or something between the driver's seat and the brake pedal so that the pedal is pushed in a little bit past half way or so. That will prevent the fluid from completely draining out of the open lines.
04-18-2014, 03:27 PM
#4
Rennlist Member
And once you get them off, be real careful applying compressed air to push the pistons out, and use some wood pieces between the pistons - they can come out quite suddenly and with a lot of force. You may need a couple of 6" c-clamps to hold back the ones that come out first.
BTW, good call not messing with the hard lines... I just replaced a set on the rear that absolutely would not detach from the flexible hoses no matter what: pb blaster, blowtorch, careful application of flare wrenches etc. Routing one line above and around the transmission was not fun.
BTW, good call not messing with the hard lines... I just replaced a set on the rear that absolutely would not detach from the flexible hoses no matter what: pb blaster, blowtorch, careful application of flare wrenches etc. Routing one line above and around the transmission was not fun.
04-18-2014, 03:41 PM
#5
Rennlist Member
+1, but you just need a little take up on the pedal, I've never gone to 1/2 way- works like a charm, minimal drips.
04-18-2014, 03:50 PM
#6
Technical Guru
Rennlist Member
Rennlist Member
If you cut the soft line with a dremel tool or hacksaw, you can then put a socket over one end of the connections and apply an ungodly amount of force.
04-18-2014, 04:08 PM
#7
Rennlist Member
I did cut the flex line and do the socket thing but with 18 years of corrosion from new jersey and alberta winters, the flex and hard lines on the rear were utterly fused together, it was time for new ones. Fronts were a different story, not easy but eventually yielded to pb blaster and heat and let go with satisfying snap.
Also good advise from nine9six: "If there is a hard line at the caliper, try to tweak it as little as possible (maybe I'm thinking of the fronts?). This will aid in reinsallation, as sometimes getting the hardline threading to start, can be a bear."
After I replaced the hardlines, I cross-threaded one while attaching it to the aluminum connecting block for the rear brake hydraulics. $100 and waiting for it to arrive from Germany. Anyone doing this should unbold the connecting block from the body, to get more flexible approach angles for re-threading. Sorry for the thread hijack...
Trending Topics
04-18-2014, 05:00 PM
#8
Rennlist Member
Thread Starter
Thanks for the tips, guys. Everything is all apart. Line fitting to the caliper was super easy-was expecting a battle there.
5/8" socket fits best on the caliper bolts, by the way.
For the sticking side caliper, I had to pound the pads out from behind after removing the caliper - no way they were sliding out freely like the good side. As if they were too long. Has me wondering if that's the origin of my sticking and maybe not the pistons.
I'll rebuild tomorrow and report in.
Yeah, iPad thought I wanted to say axis instead of axle I guess. You understood it all right. Both front calipers have already been rebuilt, so leving one rear undone seemed wrong.
5/8" socket fits best on the caliper bolts, by the way.
For the sticking side caliper, I had to pound the pads out from behind after removing the caliper - no way they were sliding out freely like the good side. As if they were too long. Has me wondering if that's the origin of my sticking and maybe not the pistons.
I'll rebuild tomorrow and report in.
?..snip
Not sure I understand the statement above...Does this mean you are replacing both rear rotors, along with reworking both rear calipers? If so, it's probably a good idea while you're in there...
I'd save the one rear rotor that is not beyond the crack limits, just in case...But that's me.
Not sure I understand the statement above...Does this mean you are replacing both rear rotors, along with reworking both rear calipers? If so, it's probably a good idea while you're in there...
I'd save the one rear rotor that is not beyond the crack limits, just in case...But that's me.
Last edited by gtroth; 06-15-2014 at 08:01 PM.
04-18-2014, 05:48 PM
#9
Rennlist Member
I had the same problem with a new (Porsche brand) brake pad that was just too big to fit into the caliper. Used bench grinder to take one end down a hair (maybe 1/64") and touched up the exposed metal with caliper or hi-temp paint. Fits perfectly now.
04-18-2014, 10:12 PM
#10
Technical Guru
Rennlist Member
Rennlist Member
 04-19-2014, 01:20 PM
#12
Rennlist Member
Thread Starter
Bracket on sticking caliper is as low as 96.8mm on top, outer pad location (where pads are inserted) even after cleaning out what I could from between the bracket and the caliper. I don't think I'll be able to bend the brackets into submission.
Bracket on the non-sticking caliper is as low as 97.8mm (in the same place as the other caliper)
Pagid pads that came out were 98mm.
New Porsche pads are 97.6mm~97.7mm.
Any issues doing as bcameron59 has done (grind and paint the edge)?
05-12-2014, 06:13 PM
#13
Rennlist Member
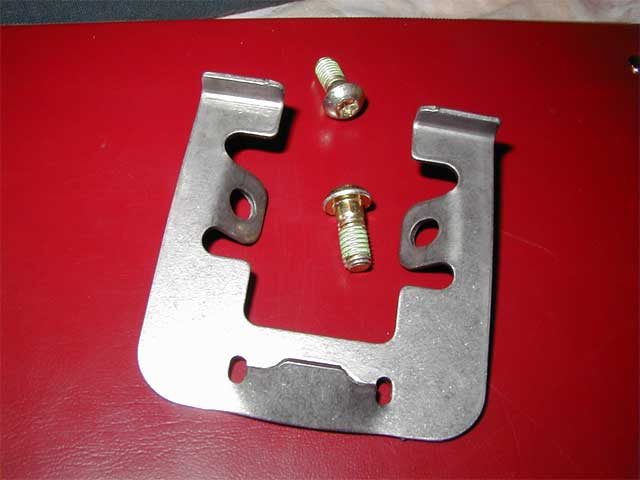
As usual, JasonAndreas had it right. Spring plates get stuff under 'em so eventually pads won't fit - too tight.
I just overhauled my front calipers and found the new pads wouldn't go in. So I pulled off the spring plates to see if cleaning behind them would help. Easier said than done, I had to use the chisel method to get the SS button screws undone as threads were badly corroded - one of them took me over an hour to remove.
When I got them off, there was a thick later of hard packed white powder which had built up on the caliper surface underneath the spring plate. It took quite a while to scrape off the worst of it, then grind and wire brush the rest to expose the metal. When I finally got down to the aluminum caliper material, it wasn't smooth but showed significant pitting. Fortunately after bending them back into shape, the SS plates cover the pits to provide a smooth guide for the pads, which now fit perfectly BTW. THANKS JASON!
I don't think this stuff is actually brake dust, I think it's corrosion, ie aluminum hydroxide. It looks identical to the white krud I had to scrape off the aluminum sway bar mount points, and also scrubbed out of the front side members (where the long bolts for the control arms go) using a metal bottle brush.
If your pads are a tight fit, this is worth checking out and resolving. If your car has ever seen road salt or lots of wet weather, this could be your issue.
05-12-2014, 07:16 PM
#14
Technical Guru
Rennlist Member
Rennlist Member
Maybe galvanic corrosion from the carbon/steel brake pad dust reacting with the aluminum caliper? I've found that spraying out the brake calipers pretty thoroughly every time you wash your car prevents this from happening!
05-12-2014, 07:55 PM
#15
Rennlist Member
http://en.wikipedia.org/wiki/Galvanic_corrosion
But my suspicion with this car is calcium chloride and sodium chloride ie salt used on winter roads here, which further supports your "spray out the brake calipers" recommendation. According to this link, chlorides are a leading suspect:
http://aluminium.matter.org.uk/conte...eid=2144416698
I used to say that life is too short to drive boring cars, but after seeing the effects of corrosion while overhauling most of my C4 over the last couple of year, I'm re-thinking driving it in winter.
