
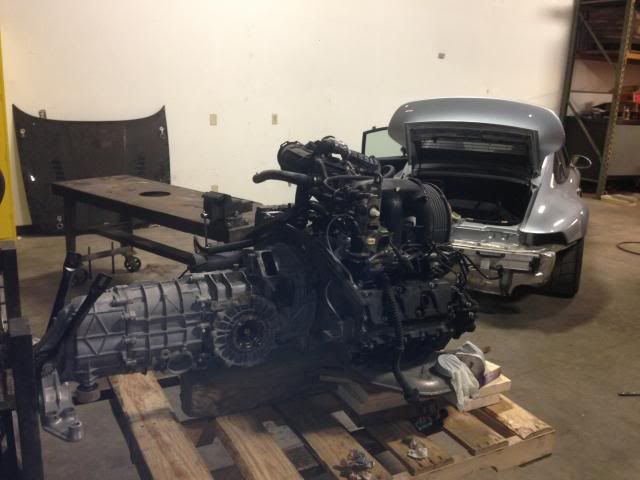
Motor drop.
 04-02-2014, 12:52 PM
#1
Instructor
Thread Starter
First off, THANKS to all who have given tips and tricks here on Rennlist and p-car.
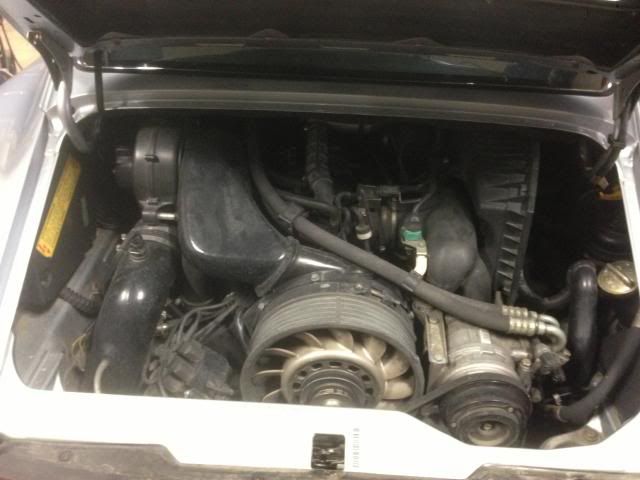
1995 c2. obd1.
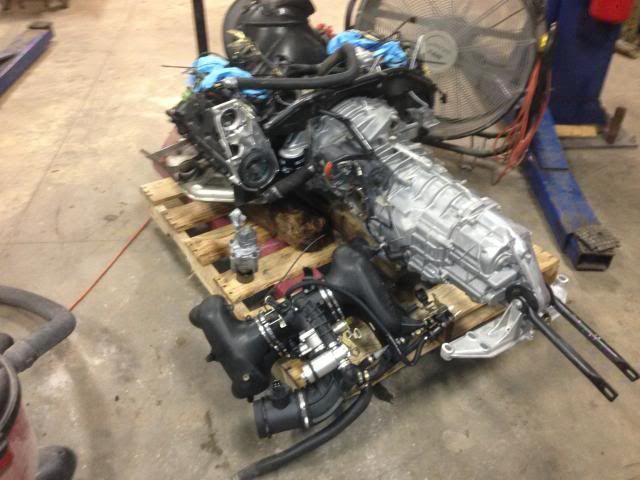
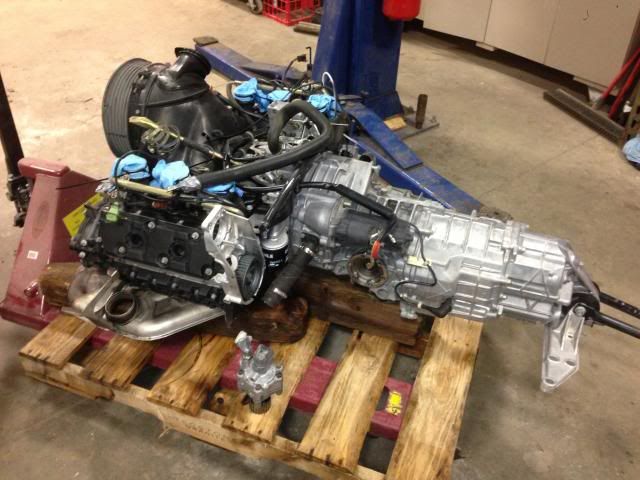
Dropped the motor to do a lot of little maintenance items:
Spark plugs.
Wires.
SAI removal.
Valve covers.
Cam covers.
Distributor belt.
and a good cleaning.
This is my first time working on a Porsche. Initial impressions: I was surprised to see both DIN and JIS head sizes. I have never needed to use so many tools!

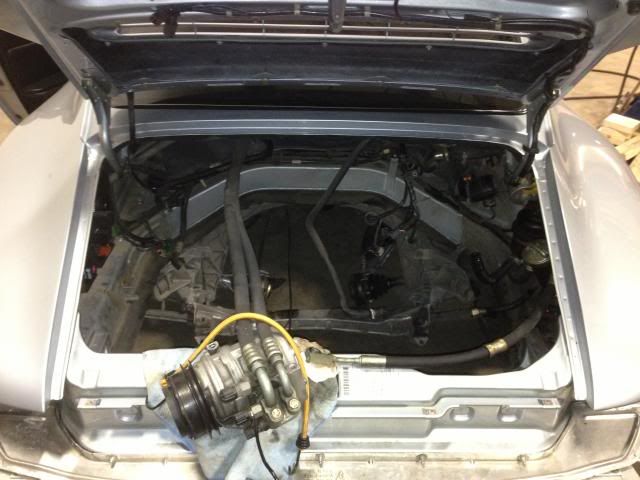
My car has the replaced engine harness from the recall. There was (1) loose connector floating near the blower without a home, and (2) terminated connectors. Can someone help me identify? Maybe Vram wiring not used?

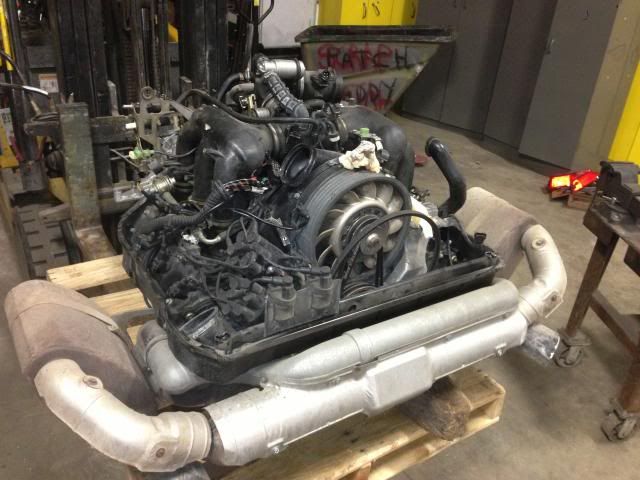
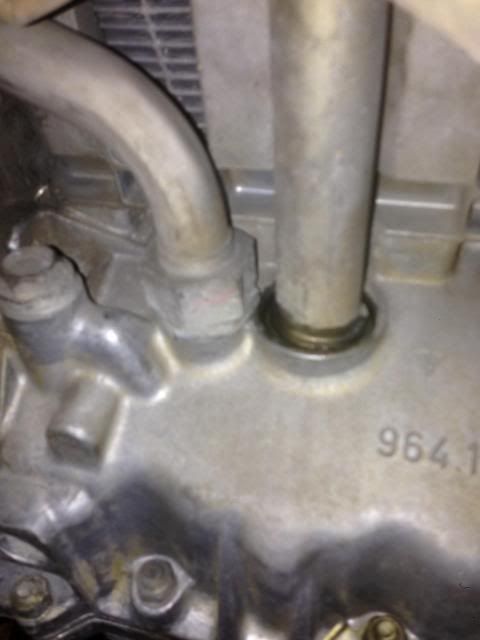
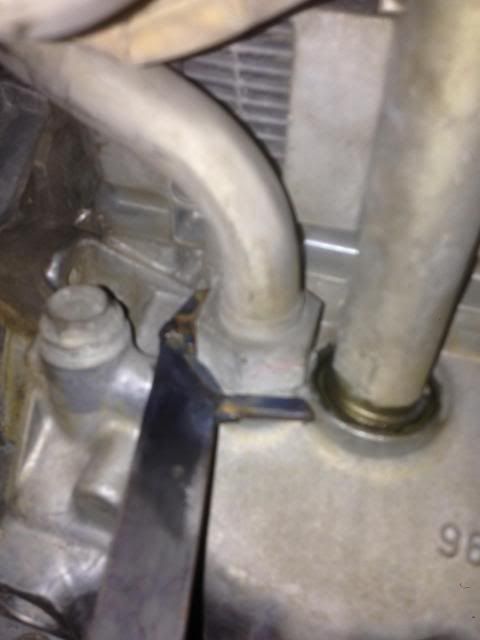
Largest hurdle: remove the oil line nut seen below. I came prepared with the 32mm and 36mm wrench. (as read from other posts.) Much to my surprise, they were both 32mm. After a little head scratching, I made my own thin 32mm that could fit in the tight space without blocking the movement of the other 32mm tube nut. Yes, I bent the tool numerous times as it was too thin and had to reinforce it. Ultimately, the best trick was found here on rennlist....... heat! After a liberal amount of electric heat (similar to an electric paint stripper) it easily came off. A spare 32mm and a grinder would have been the way to go. oh well.
Bumper can be removed without removing the lights electrical harness. There is a small electrical connector under cover to the rear right. this saves a lot of time trying to fish the license plate light wires.
More to come.
Cheers, Jason
1995 c2. obd1.
Dropped the motor to do a lot of little maintenance items:
Spark plugs.
Wires.
SAI removal.
Valve covers.
Cam covers.
Distributor belt.
and a good cleaning.
This is my first time working on a Porsche. Initial impressions: I was surprised to see both DIN and JIS head sizes. I have never needed to use so many tools!


My car has the replaced engine harness from the recall. There was (1) loose connector floating near the blower without a home, and (2) terminated connectors. Can someone help me identify? Maybe Vram wiring not used?

Largest hurdle: remove the oil line nut seen below. I came prepared with the 32mm and 36mm wrench. (as read from other posts.) Much to my surprise, they were both 32mm. After a little head scratching, I made my own thin 32mm that could fit in the tight space without blocking the movement of the other 32mm tube nut. Yes, I bent the tool numerous times as it was too thin and had to reinforce it. Ultimately, the best trick was found here on rennlist....... heat! After a liberal amount of electric heat (similar to an electric paint stripper) it easily came off. A spare 32mm and a grinder would have been the way to go. oh well.


Bumper can be removed without removing the lights electrical harness. There is a small electrical connector under cover to the rear right. this saves a lot of time trying to fish the license plate light wires.
More to come.
Cheers, Jason
Last edited by jason89i; 04-02-2014 at 05:18 PM.
 04-02-2014, 01:07 PM
#2

One more thought -- if you have over 100k and have never replaced the spark plug wires, now is an easy time to tackle that task. Its sooo much easier with the engine out.
-reiner
04-02-2014, 05:15 PM
#4
Instructor
Thread Starter

Best of luck. Not too bad, just time consuming.
 04-02-2014, 07:48 PM
#6

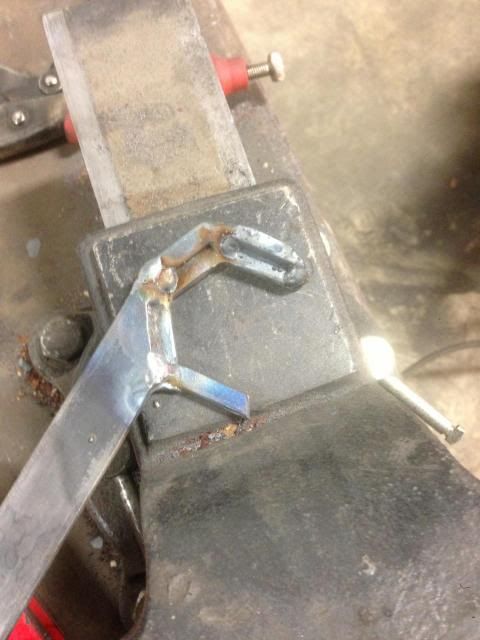
A little trick I just discovered for holding that 32mm oil line union. Order yourself a bicycle headset wrench from Amazon. These come in 32mm and are laser cut from very thin hardened plate. You can then just grind the profile down a tad and voila.
04-03-2014, 01:26 PM
#7
Top-Gun: Sounds like a priceless suggestion. I'm not familiar with bicycle tools. Are you recommending something like this one?
Trending Topics
04-03-2014, 11:09 PM
#8
I bought this one;
Same idea as the one you linked. They're only a few MM thick so its perfect to get on that union, just need to trim down the outer profile to clear the crankcase/oil tube.
Same idea as the one you linked. They're only a few MM thick so its perfect to get on that union, just need to trim down the outer profile to clear the crankcase/oil tube.
04-07-2014, 01:21 PM
#10
Instructor
Thread Starter
Made more progress on Saturday. Motor was cleaned and began the basic maintenance items.
A/C bracket removal:
I did not want to remove the crank bolt, but wanted to remove the A/C bracket to gain torque wrench access to the right timing chain cover. As many of you know, the A/C bracket cannot be removed with the crank pulley in place.
Remedy: After loosening the bracket, I used a hand drill and small bit to perforate the excess material of the cover. Drill very slowly, space the bracket with screwdrives. this will keep the bit from punching through and hitting the block. Break off along perforation, tidy up with grinding wheel and wire brush.
(sorry, no pics.)
04-07-2014, 01:24 PM
#11
Instructor
Thread Starter
Timing cover gasket:
I began to install the gaskets and noticed I had (2) left side gaskets. I assumed it was a mistake. After a little searching here and on-line, it appears they only sell left side gaskets. You are expected to flip the left side gasket to the right side.
reference to single gaskets: https://rennlist.com/forums/993-foru...ismatched.html
My concern is two fold:
1. the gasket cross section is egg shaped. (flatter on the cover side, more pointy on the engine side.) When you flip the gasket, the flatter side will go against the engine, pointy side towards the cover. This does not allow the gasket to firmly seat into the cover.
2. the gasket profile is different than the left side. while it is "close", there will need to be some additional bends and stretching to make it fit right. (specifically around the bottom inboard fastener which will need an additional 90deg bend and the top edge where the fastener spacing is off.
Of all the gaskets, I do not want the right chain cover to leak!
Any good remidees? Gasket sealer? Thoughts.
04-07-2014, 01:25 PM
#12
Instructor
Thread Starter
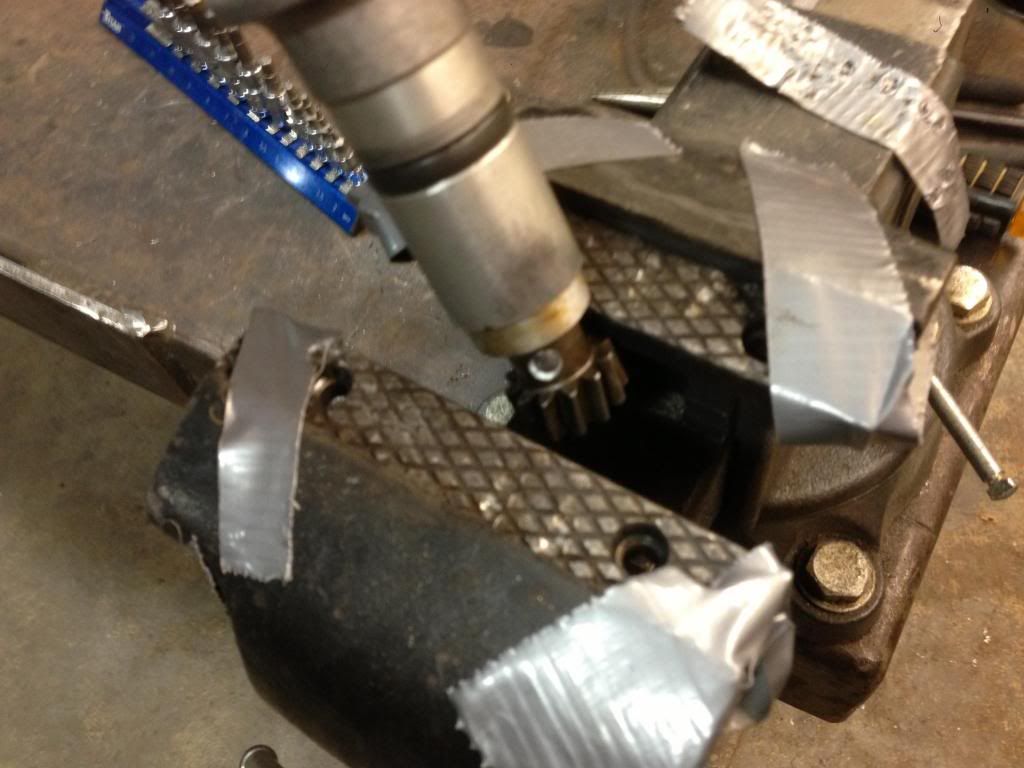
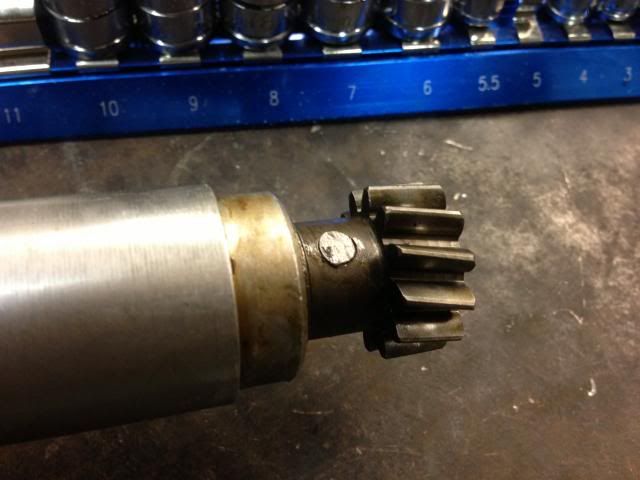
Distributor belt:
Pretty straight forward with using p-car and Rennlist instructions.
One problem was that the main shaft needed to be compressed into the housing for the shaft pin to be located. I only had 2 hands, so I carefully used a vise to compress the main shaft into the housing which allowed the alignment of the shaft pin on the gear.
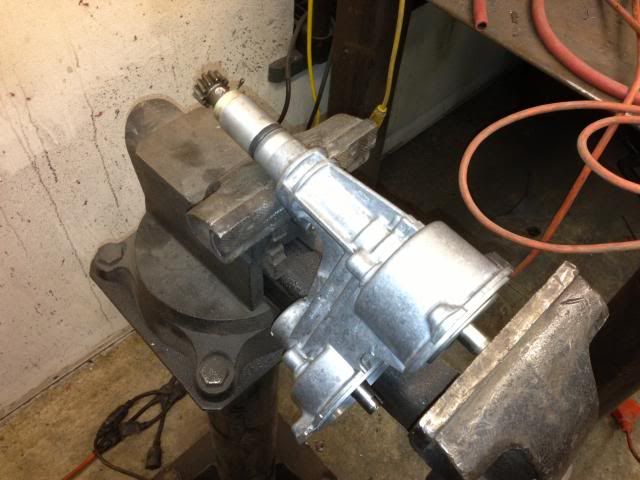
I used the shaft of a #12 screw as the tension pin. Needed a little wire wheel to take the zinc coating off to reduce the diameter. VERY close to the 5/32 diam. that was needed.
In lieu of using a hammer and punch to mushroom heads, I turned the vise heads that fit perfectly between the gear and housing. Seemed like a safer alternative.

 04-07-2014, 02:03 PM
#14
Technical Guru
Rennlist Member
Rennlist Member
I did not want to remove the crank bolt, but wanted to remove the A/C bracket to gain torque wrench access to the right timing chain cover. As many of you know, the A/C bracket cannot be removed with the crank pulley in place.
Remedy: After loosening the bracket, I used a hand drill and small bit to perforate the excess material of the cover. Drill very slowly, space the bracket with screwdrives. this will keep the bit from punching through and hitting the block. Break off along perforation, tidy up with grinding wheel and wire brush.
(sorry, no pics.)
The right gasket was taken out of production somewhere around ~2000(?) (according to PET) and nobody has really reported problems installing two left side gaskets without any additional sealant!
04-07-2014, 04:41 PM
#15
Instructor
Thread Starter
Thanks. and many thanks to Rennlist for the tech support.
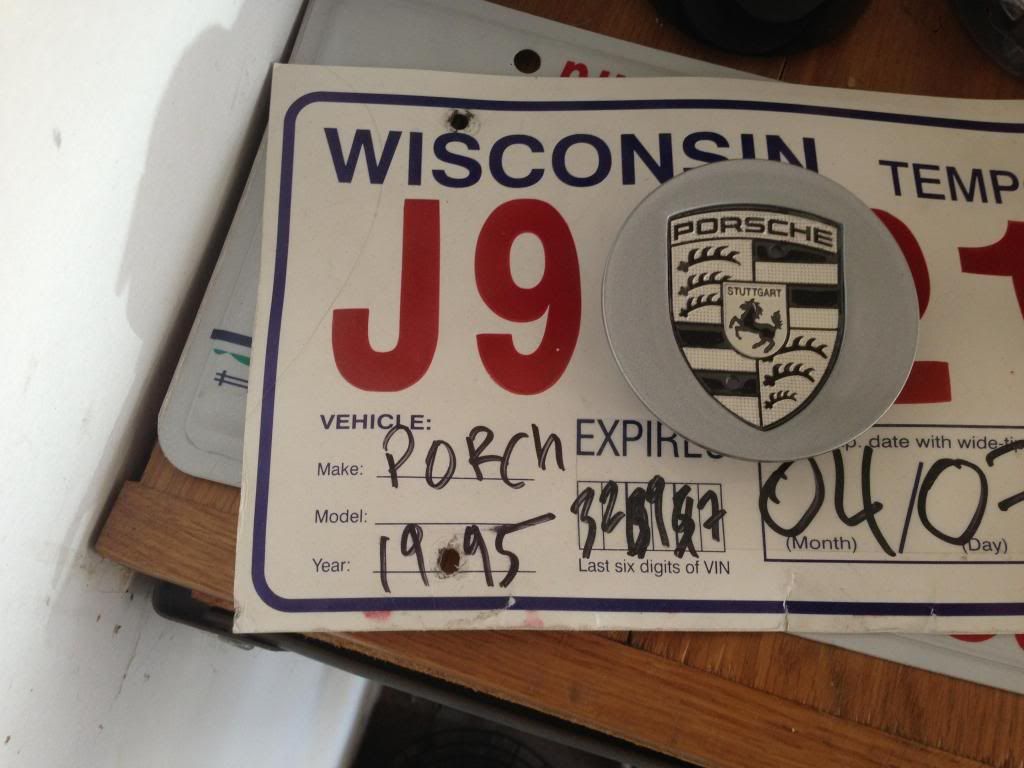
alright. Seems a little redneck for Porsche..... but, I will give it a whirl.
However, it should fit in with my temporary plate ...... that seemed a little redneck too.
For future reference, if somebody needs to remove the AC bracket and they are concerned about shearing the locating pin off the back of the crank pulley, just remove the four engine studs holding the bracket in place! And actually I vaguely remember there being an enough wiggle room in the bracket holes that you only need to remove the two upper studs?
Good tip. That would have been much less nerve wracking.
The right gasket was taken out of production somewhere around ~2000(?) (according to PET) and nobody has really reported problems installing two left side gaskets without any additional sealant!
Good tip. That would have been much less nerve wracking.
The right gasket was taken out of production somewhere around ~2000(?) (according to PET) and nobody has really reported problems installing two left side gaskets without any additional sealant!
However, it should fit in with my temporary plate ...... that seemed a little redneck too.
