
Upper Valve Cover Gasket replacement DIY instructions

Thread Starter
Rennlist Member

Joined: Sep 2005
Posts: 892
Likes: 13
From: Richmond VA
Folks,
I apologize for not taking many pictures because my hands were so oil coated.
It doesnt appear there are many threads about the upper gasket replacement.
Firstly I would recommend checking these before you do the lower gaskets. Oil leaks down (gravity!) so a lower gasket leak could very well be coming from the top as well. Several things may overlap because of how you access the upper gaskets. The lower ones are pretty easy to get to with just the wheel and heater tube removed. Also you should be able to wipe any drips off the heat exchanger while the wheel and hose are off. You should also consider whether you've heard any lifter ticking noise before you go to this point as well.
Replacing Upper Gaskets
Safely get the car to a working height.
When I pop the engine lid I typically push the latch closed to keep the light from coming on and killing the battery. If you do this you must remember to pop it open again and not slam it shut with the latch closed. Or cut it off however you like.
Remove the rear wheels and rear mufflers. If rusty this wont be fun.
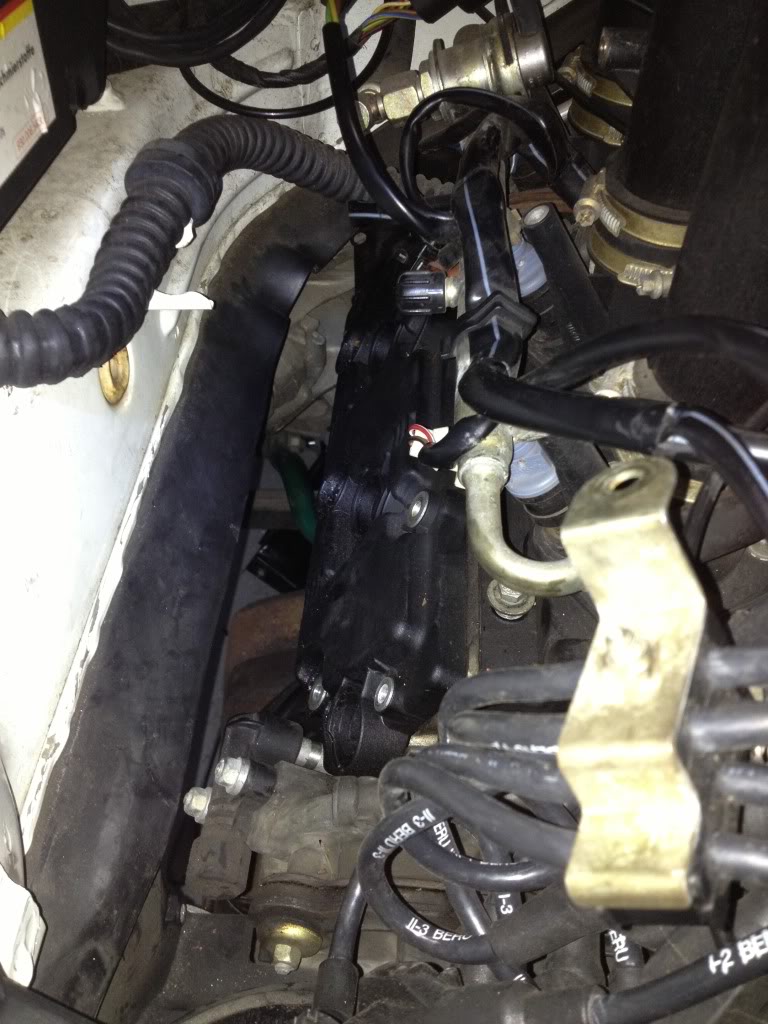
Remove the left side air blower assy by finding the two(10mm head) bolts that hold it from the driver side. It also sits in a grommet on the back of the blower and the lower tube holds it slightly. There is a harness behind the blower after you disconnect the two in the front as well as the wires in the tube and the distributer vent tube. Set aside in a safe place.
You'll need to remove the spark plug wire bracket (10 mm) bolt and remove the upper plug wires. You are pretty close to the plugs if they need to be done.
On the right side:
Remove the flexible clutch vent tube.
Remove the metal part of the vent tube, a couple of bolts from the bottom,and a hose clamp
Now we move onto the tin work
The tin work on the sides will need to be removed to get to the furthest away bolts or to get better leverage on any of the bottom bolts for the upper covers. If you want to know the "trick" to getting to them, this is it!.
Left side tin work:
There are two 10 mm bolts toward the front of the car and one on the back by the muffler area. In between there are 3x 6mm hex bolts in the middle. You'll need to push the wires through the hole one by one to get them out of the way of the tin work. They are labeled and the upper ones are also if you have factory wires. If not them label them yourself.
Right side tin work: Remove the three allen head bolts holding the engine tin in place.
Now that you have full access, many of the cover bolts will be difficult but with all of these items removed you will have the leverage and angle to make sure your 5mm hex bit is well placed in the allen heads and gets a good bite.
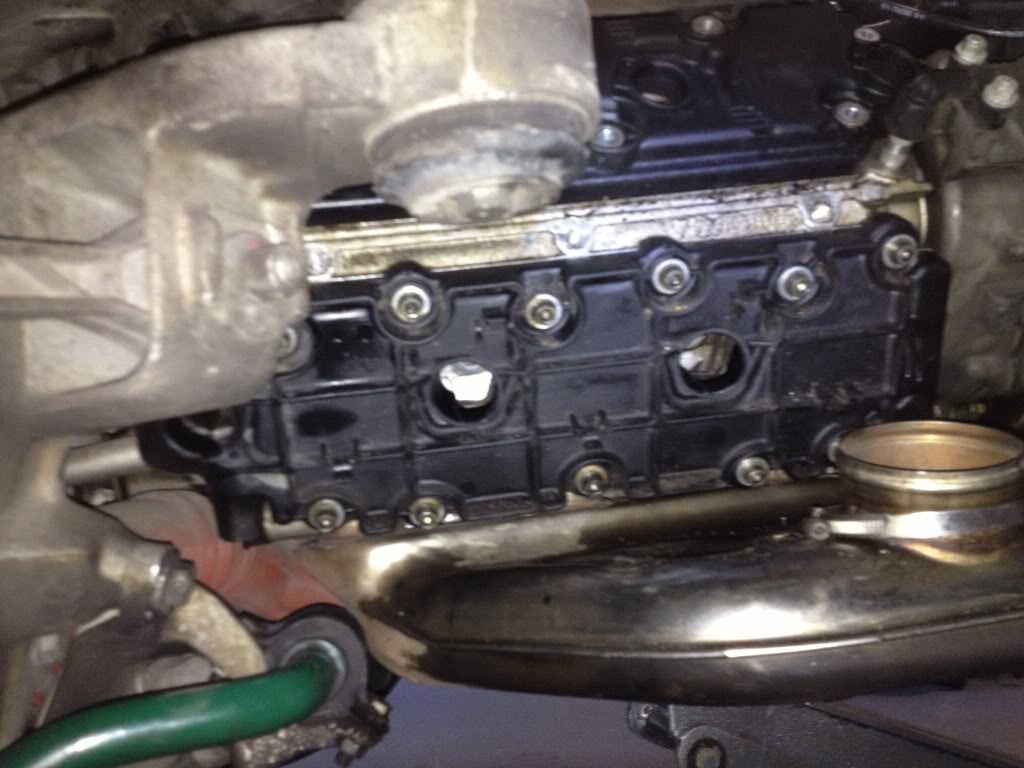
Once the bolts are all broken loose and removed you may need to pop the covers loose. I dont not recomend a screw driven inbetween on the aluminum. I just popped a hex wrench barely into one or two of the open reinforced holes of the valve cover to flex it and it popped right off.
3424B0D5-9B66-4102-AA44-8BBE040E5E0C-3364-000004A30529C503_zps432f34cc.jpg
FDB5A6D4-95A0-4CA8-98DE-29EDBC2A2749-3364-000004A2CFA94F21_zps69dff260.jpg
Lay everything out. New gaskets should be protected from grit and pop out the old ones so you can line everything up for reference.
I cleaned the covers with brake clean and wiped them down and then used a q-tip in the gasket grooves. I then used clean engine oil to wipe a very light coating on the seals. When reassembling make sure to tighten in a center out method as documented here before. If you look at the bolt pattern you will see it. I would reccomend a multi torque situation first snug them up in an inside out pattern and then retorque. You'll find everytime you torque others loosen. 7ft lbs it all it takes. Or do it by feel if you've installed rubber gaskets before.
I noticed the bolts were sturdy enough to be resused and no isues with them stripping out the centers because I wasnt working from an awkward position and I was able to get the hex bits all the way in the bolt heads.
Putting some of the things back mgiht be fiddly but, certainly nothing as bad as getting some of the bolts loose. The blower motor must be lined up with the lower tube for a dual motion to push it back in.If the plug leads ends are lined up correctly they will make a distinct snap when they are all the way back on the plugs.
Hope this helps someone that is looking for this info.
I apologize for not taking many pictures because my hands were so oil coated.
It doesnt appear there are many threads about the upper gasket replacement.
Firstly I would recommend checking these before you do the lower gaskets. Oil leaks down (gravity!) so a lower gasket leak could very well be coming from the top as well. Several things may overlap because of how you access the upper gaskets. The lower ones are pretty easy to get to with just the wheel and heater tube removed. Also you should be able to wipe any drips off the heat exchanger while the wheel and hose are off. You should also consider whether you've heard any lifter ticking noise before you go to this point as well.
Replacing Upper Gaskets
Safely get the car to a working height.
When I pop the engine lid I typically push the latch closed to keep the light from coming on and killing the battery. If you do this you must remember to pop it open again and not slam it shut with the latch closed. Or cut it off however you like.
Remove the rear wheels and rear mufflers. If rusty this wont be fun.
Remove the left side air blower assy by finding the two(10mm head) bolts that hold it from the driver side. It also sits in a grommet on the back of the blower and the lower tube holds it slightly. There is a harness behind the blower after you disconnect the two in the front as well as the wires in the tube and the distributer vent tube. Set aside in a safe place.
You'll need to remove the spark plug wire bracket (10 mm) bolt and remove the upper plug wires. You are pretty close to the plugs if they need to be done.
On the right side:
Remove the flexible clutch vent tube.
Remove the metal part of the vent tube, a couple of bolts from the bottom,and a hose clamp
Now we move onto the tin work
The tin work on the sides will need to be removed to get to the furthest away bolts or to get better leverage on any of the bottom bolts for the upper covers. If you want to know the "trick" to getting to them, this is it!.
Left side tin work:
There are two 10 mm bolts toward the front of the car and one on the back by the muffler area. In between there are 3x 6mm hex bolts in the middle. You'll need to push the wires through the hole one by one to get them out of the way of the tin work. They are labeled and the upper ones are also if you have factory wires. If not them label them yourself.
Right side tin work: Remove the three allen head bolts holding the engine tin in place.
Now that you have full access, many of the cover bolts will be difficult but with all of these items removed you will have the leverage and angle to make sure your 5mm hex bit is well placed in the allen heads and gets a good bite.
Once the bolts are all broken loose and removed you may need to pop the covers loose. I dont not recomend a screw driven inbetween on the aluminum. I just popped a hex wrench barely into one or two of the open reinforced holes of the valve cover to flex it and it popped right off.
3424B0D5-9B66-4102-AA44-8BBE040E5E0C-3364-000004A30529C503_zps432f34cc.jpg
FDB5A6D4-95A0-4CA8-98DE-29EDBC2A2749-3364-000004A2CFA94F21_zps69dff260.jpg
Lay everything out. New gaskets should be protected from grit and pop out the old ones so you can line everything up for reference.
I cleaned the covers with brake clean and wiped them down and then used a q-tip in the gasket grooves. I then used clean engine oil to wipe a very light coating on the seals. When reassembling make sure to tighten in a center out method as documented here before. If you look at the bolt pattern you will see it. I would reccomend a multi torque situation first snug them up in an inside out pattern and then retorque. You'll find everytime you torque others loosen. 7ft lbs it all it takes. Or do it by feel if you've installed rubber gaskets before.
I noticed the bolts were sturdy enough to be resused and no isues with them stripping out the centers because I wasnt working from an awkward position and I was able to get the hex bits all the way in the bolt heads.
Putting some of the things back mgiht be fiddly but, certainly nothing as bad as getting some of the bolts loose. The blower motor must be lined up with the lower tube for a dual motion to push it back in.If the plug leads ends are lined up correctly they will make a distinct snap when they are all the way back on the plugs.
Hope this helps someone that is looking for this info.
Last edited by hkspwrsche; Oct 9, 2013 at 01:24 PM. Reason: correct wording
Drifting

Joined: Sep 2006
Posts: 2,413
Likes: 8
From: San Diego, CA


