When you click on links to various merchants on this site and make a purchase, this can result in this site earning a commission. Affiliate programs and affiliations include, but are not limited to, the eBay Partner Network.
I've been thinking about this mod for quite some time now and I finally got all the pieces together to make it work.
It's actually super easy once I figured out what will fit and what will give me the quality of the new projectors which I was looking for.
I got my hands on a second set of headlights to do this mod. I already used HID burners for low and hi. The only difference now is that I have a new technology projector with a slider for low and hi beam.
The projector is a Mini Morimoto H1, all my burners and and ballasts for both light sources use H1 with 4300k and 55w ballasts.
Here's how and what I did:
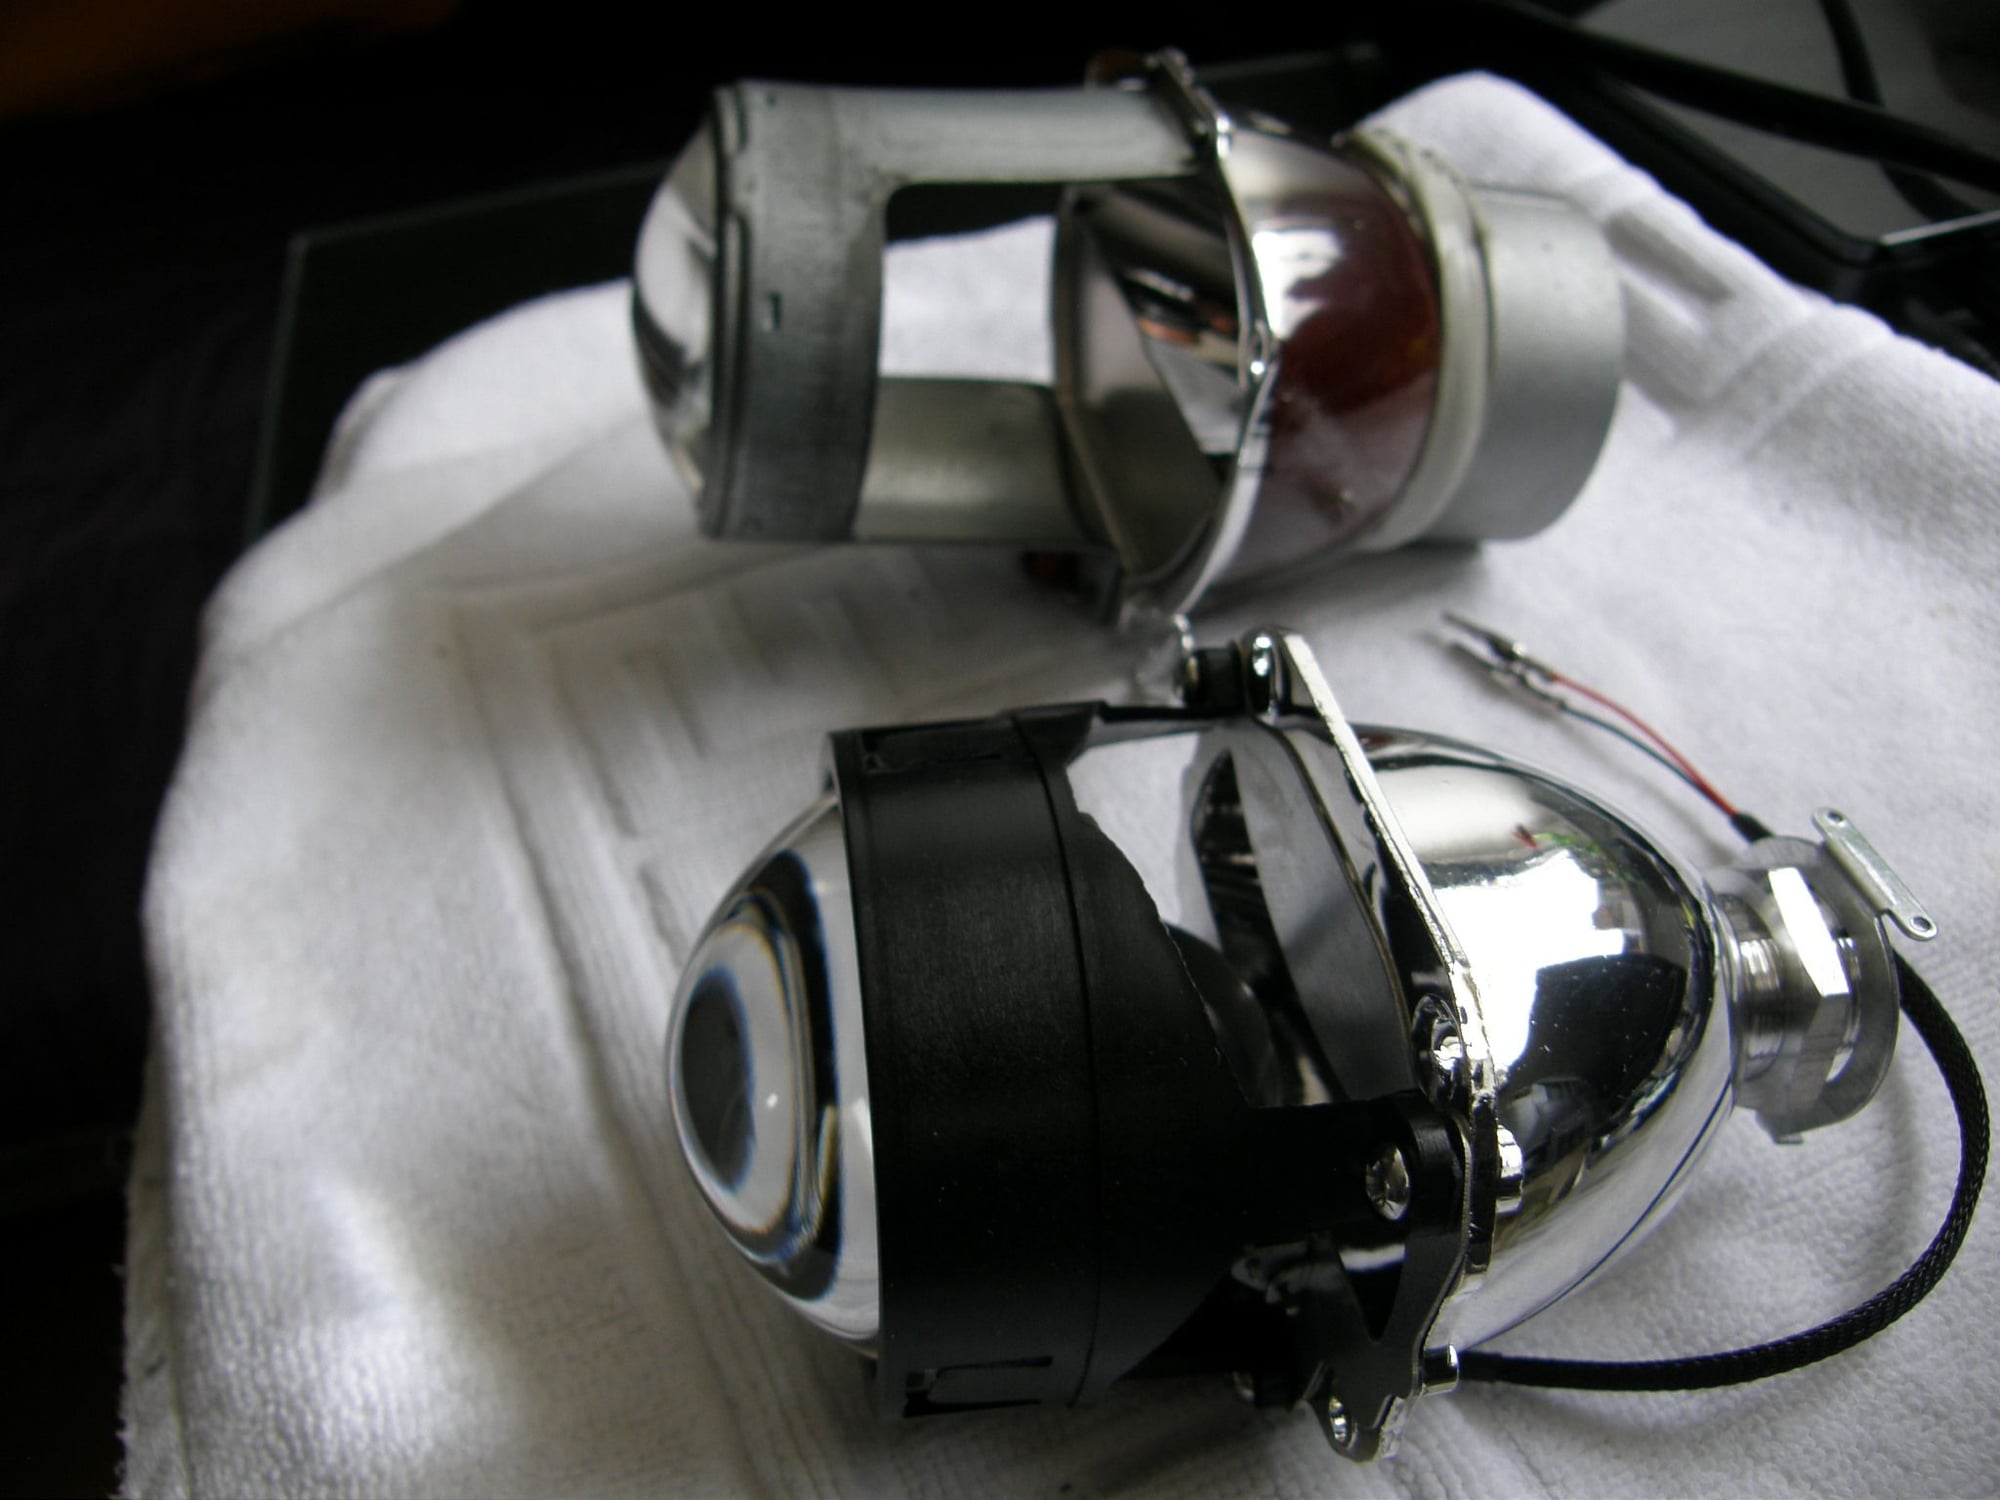
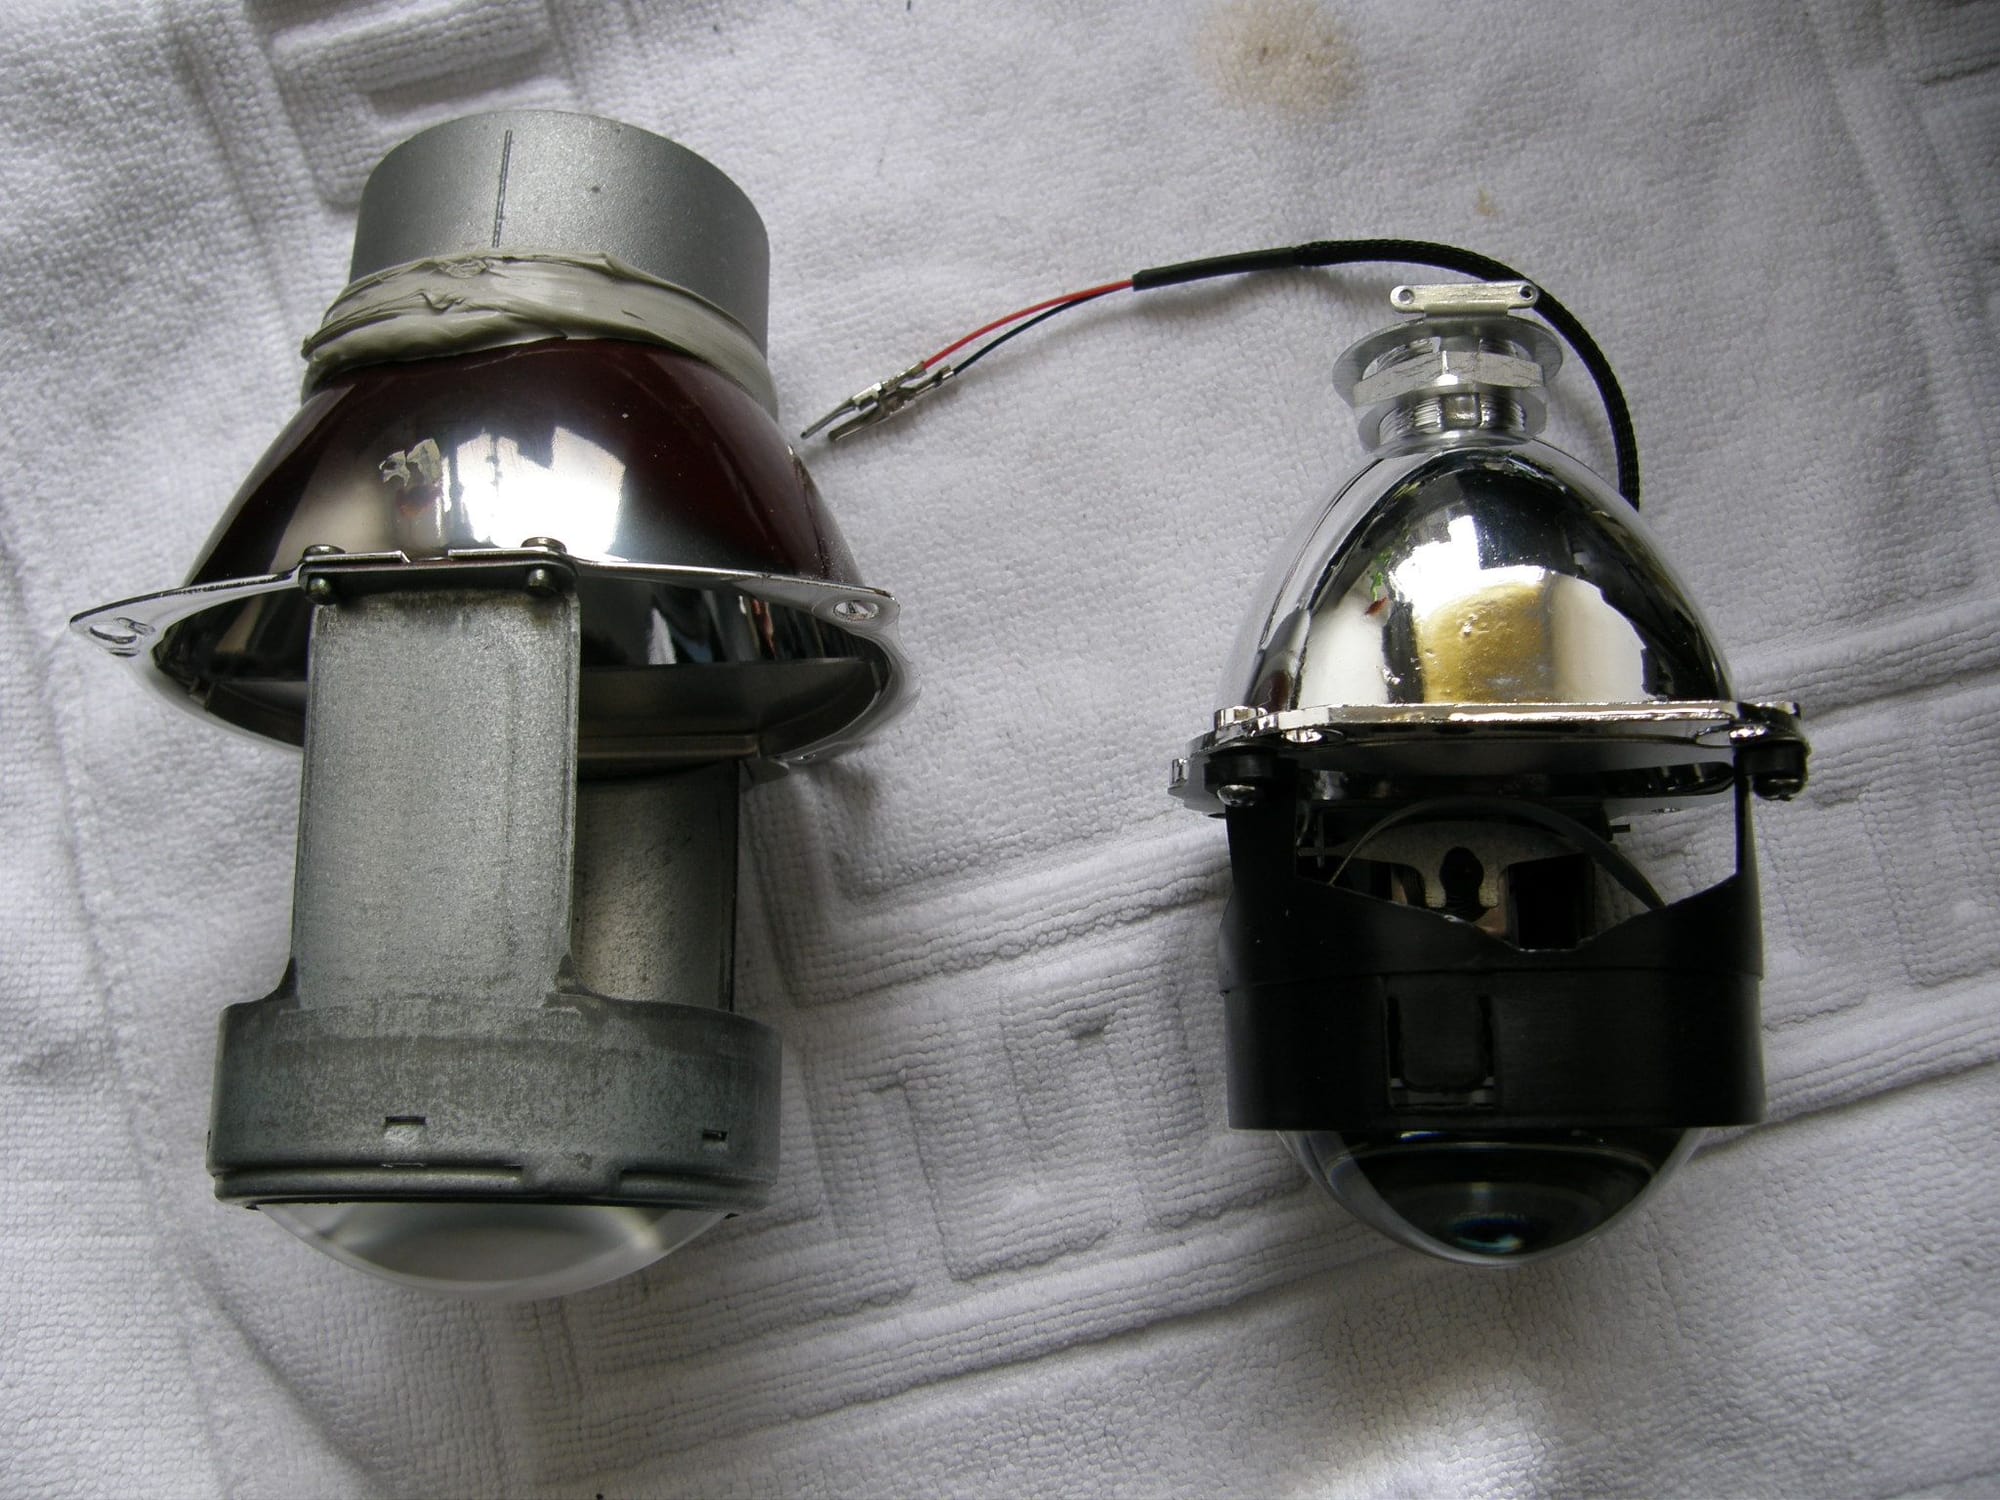
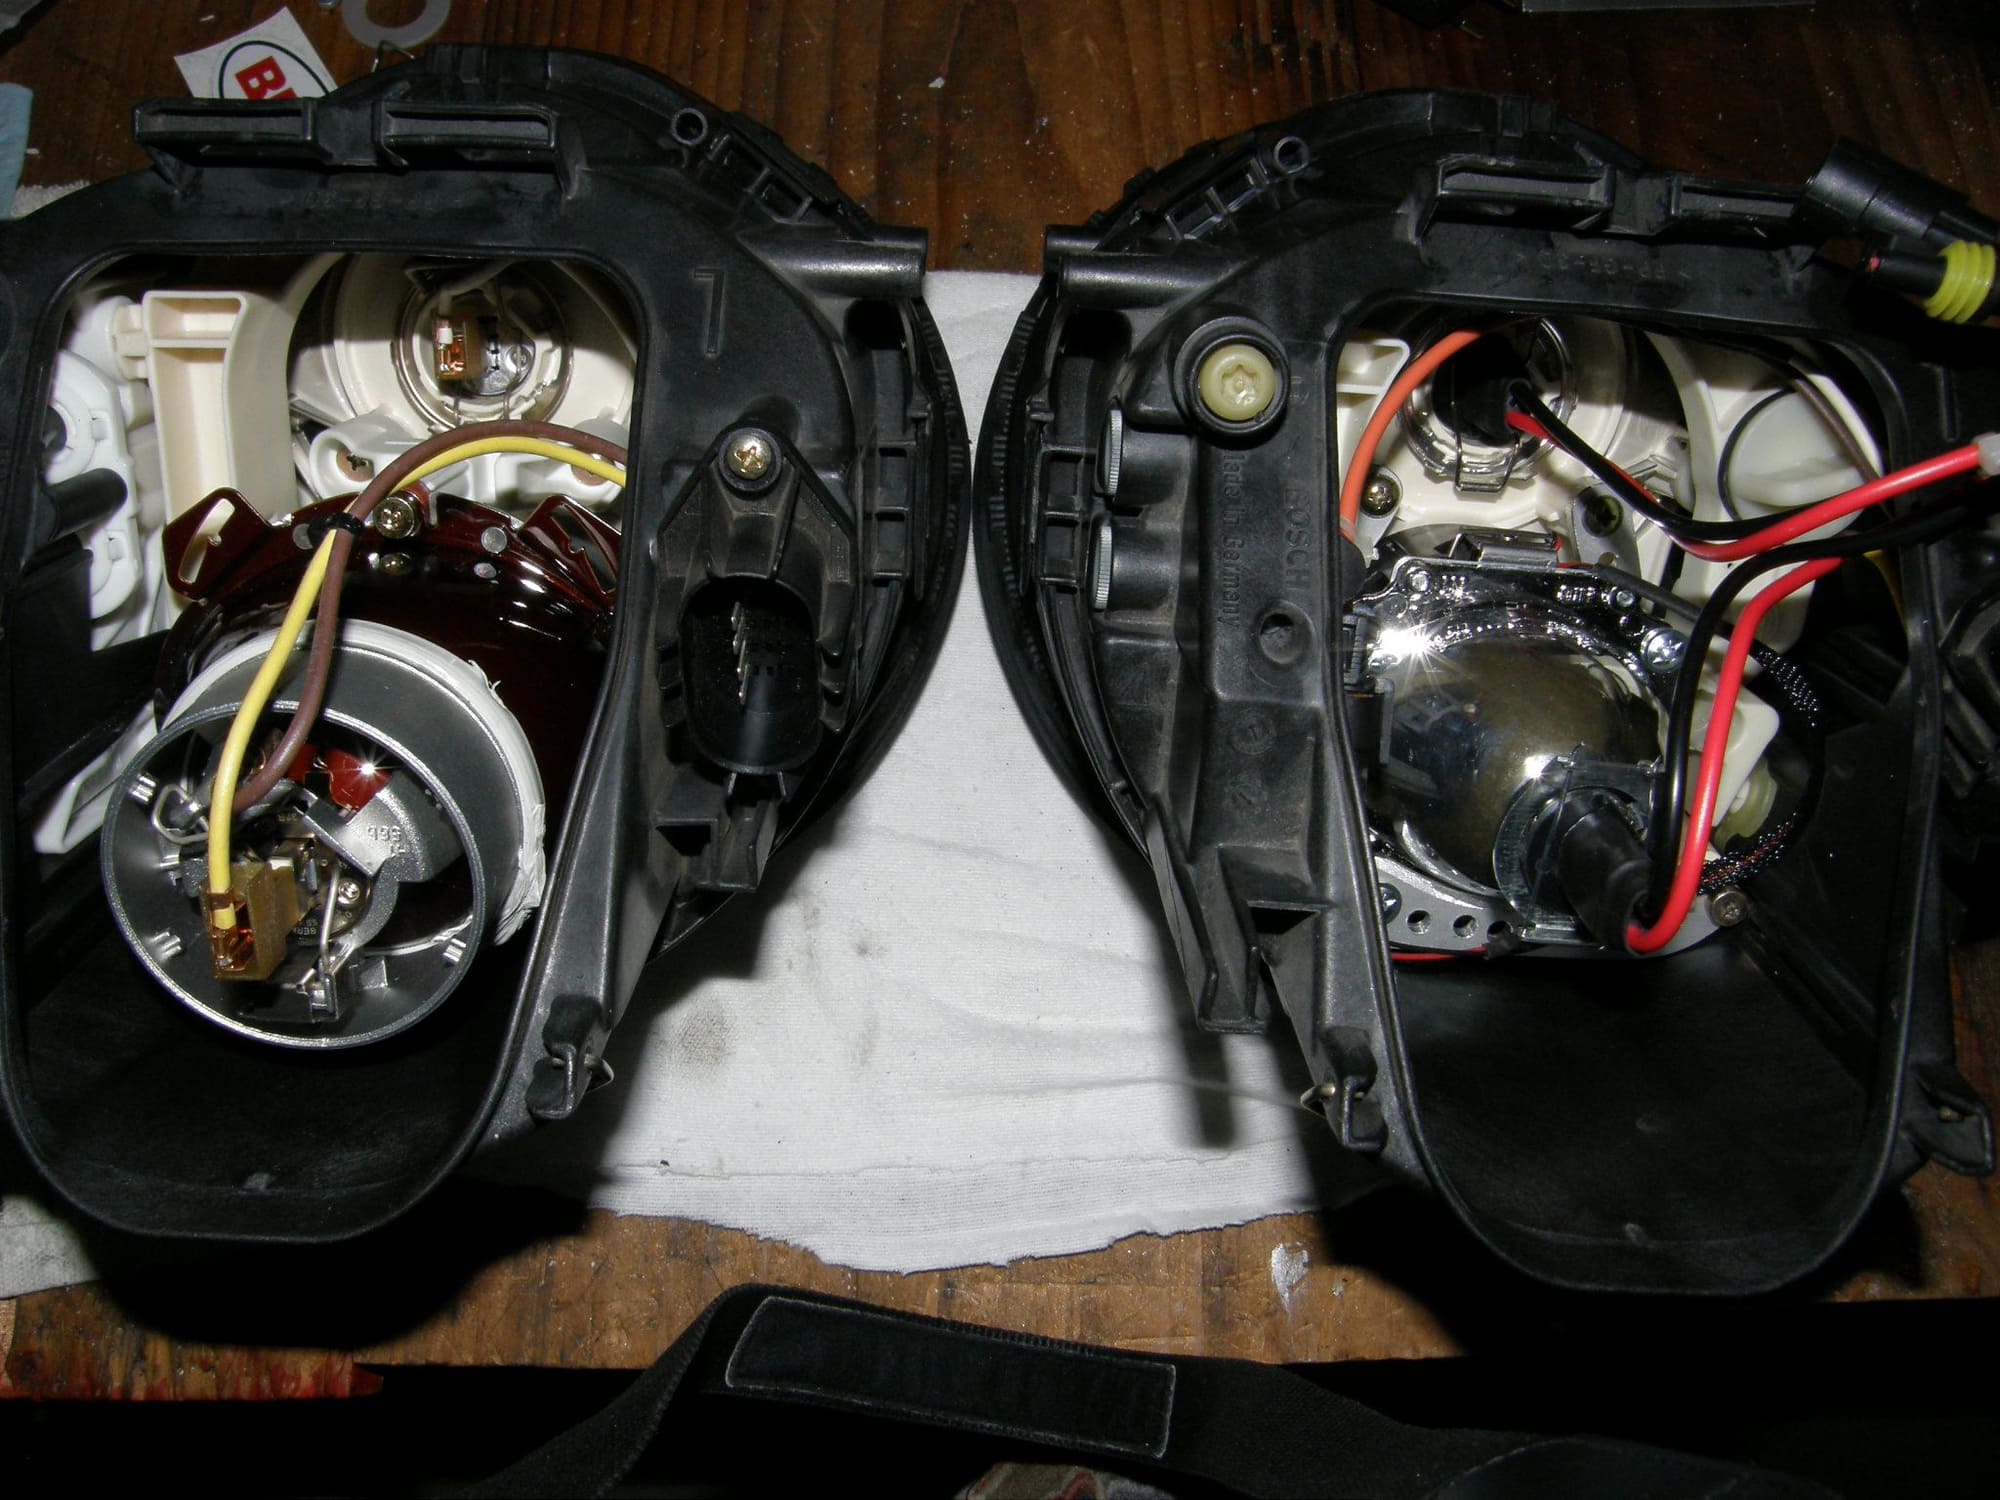
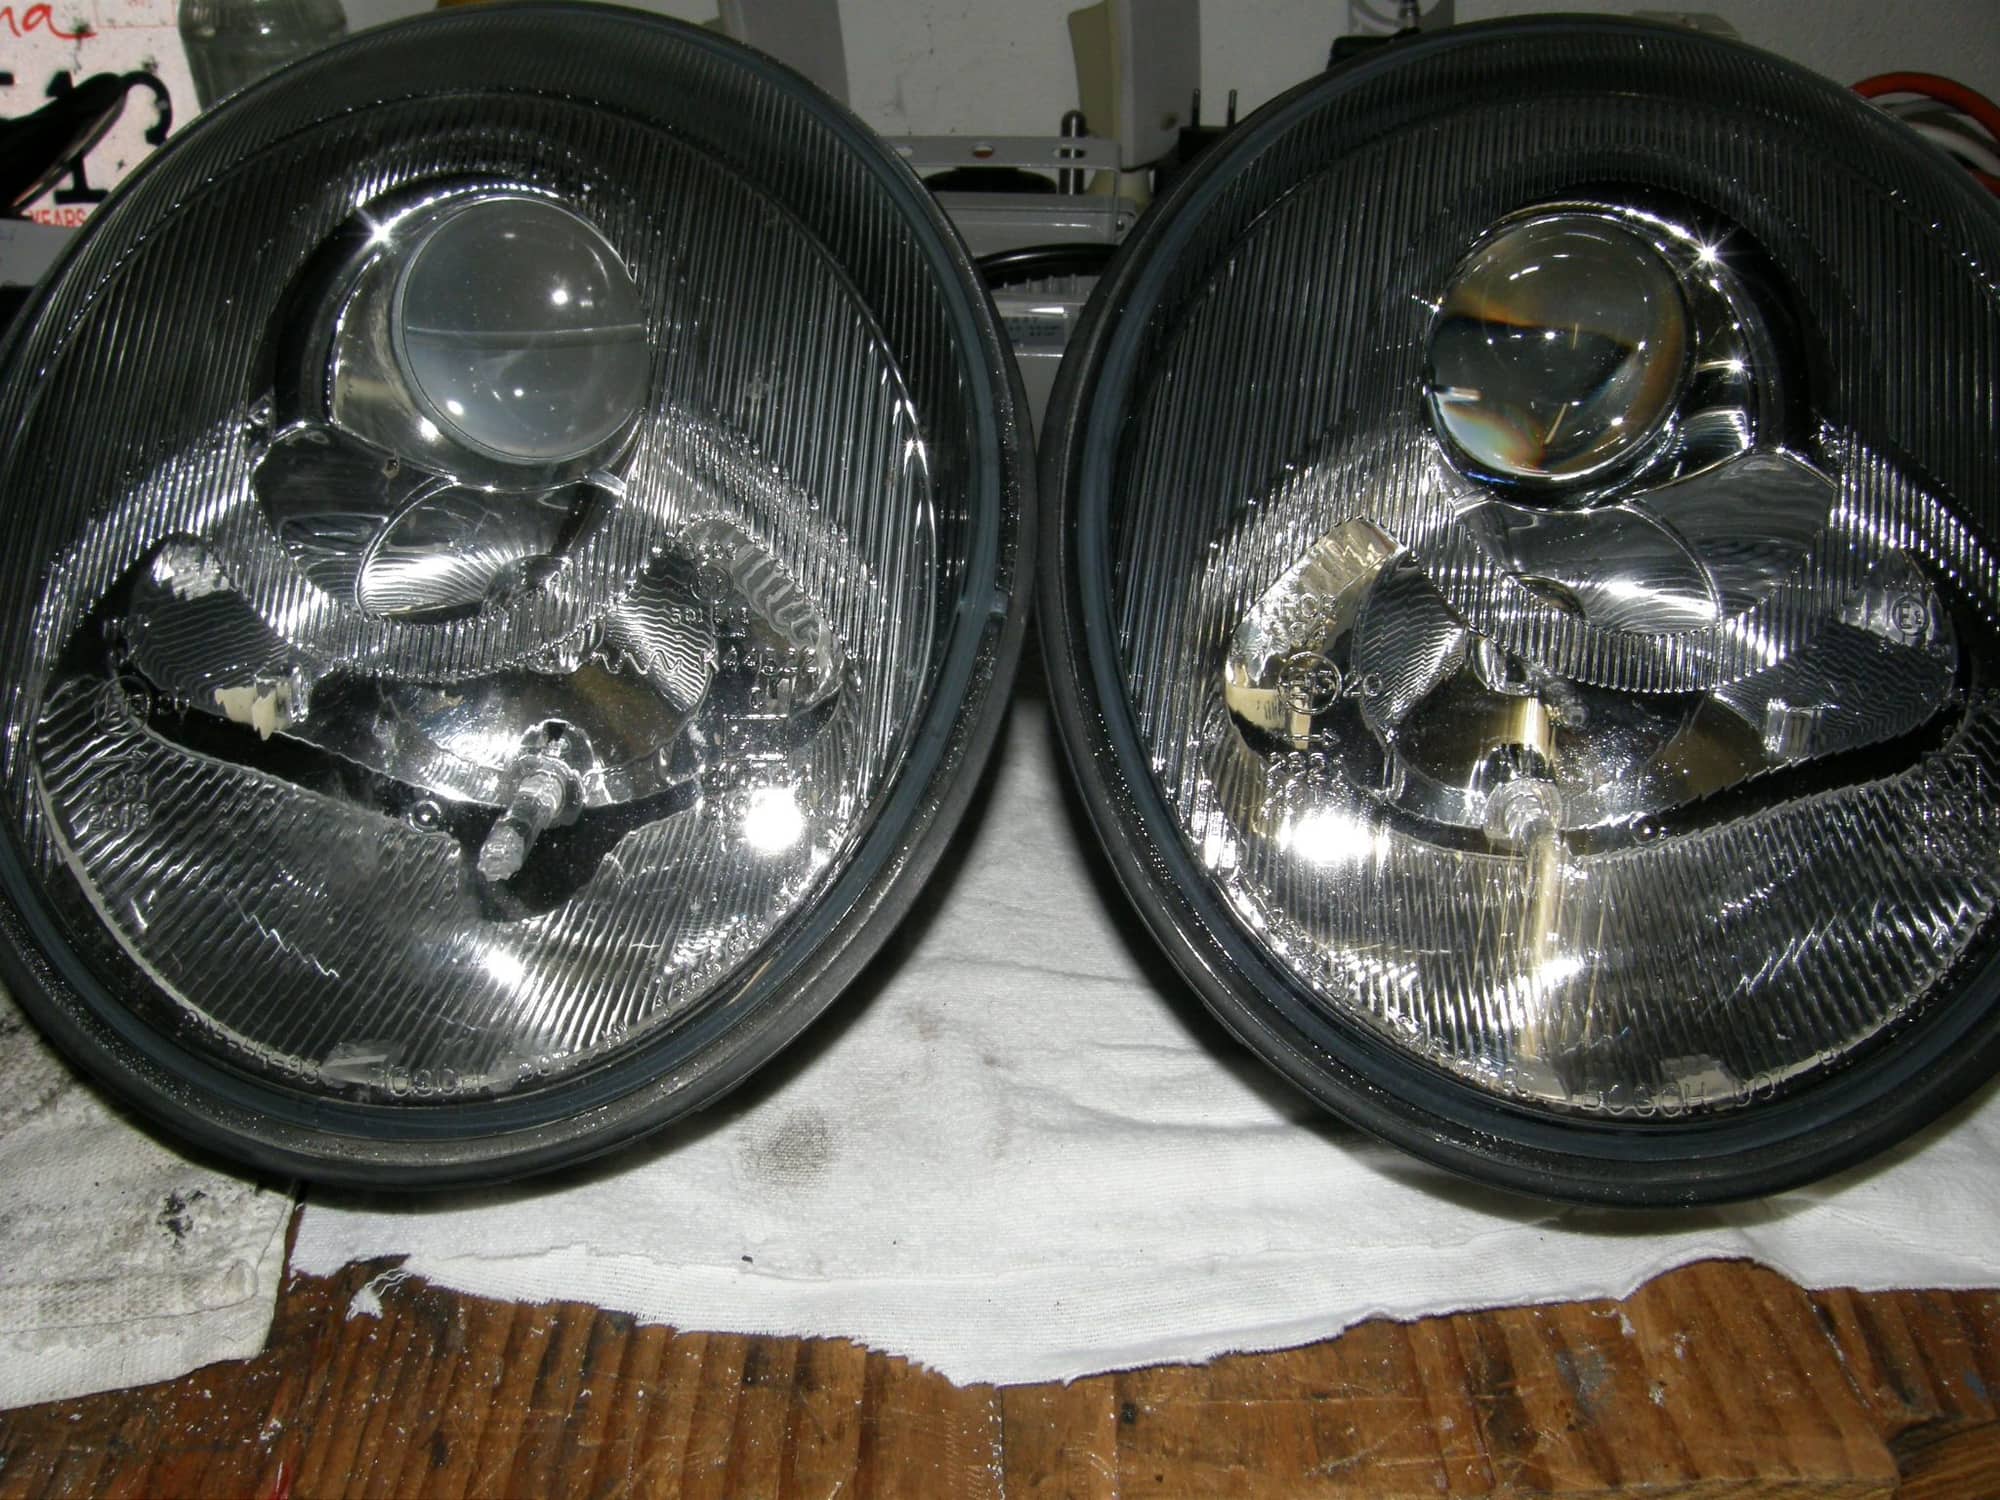
Comparison of old and new projectors:
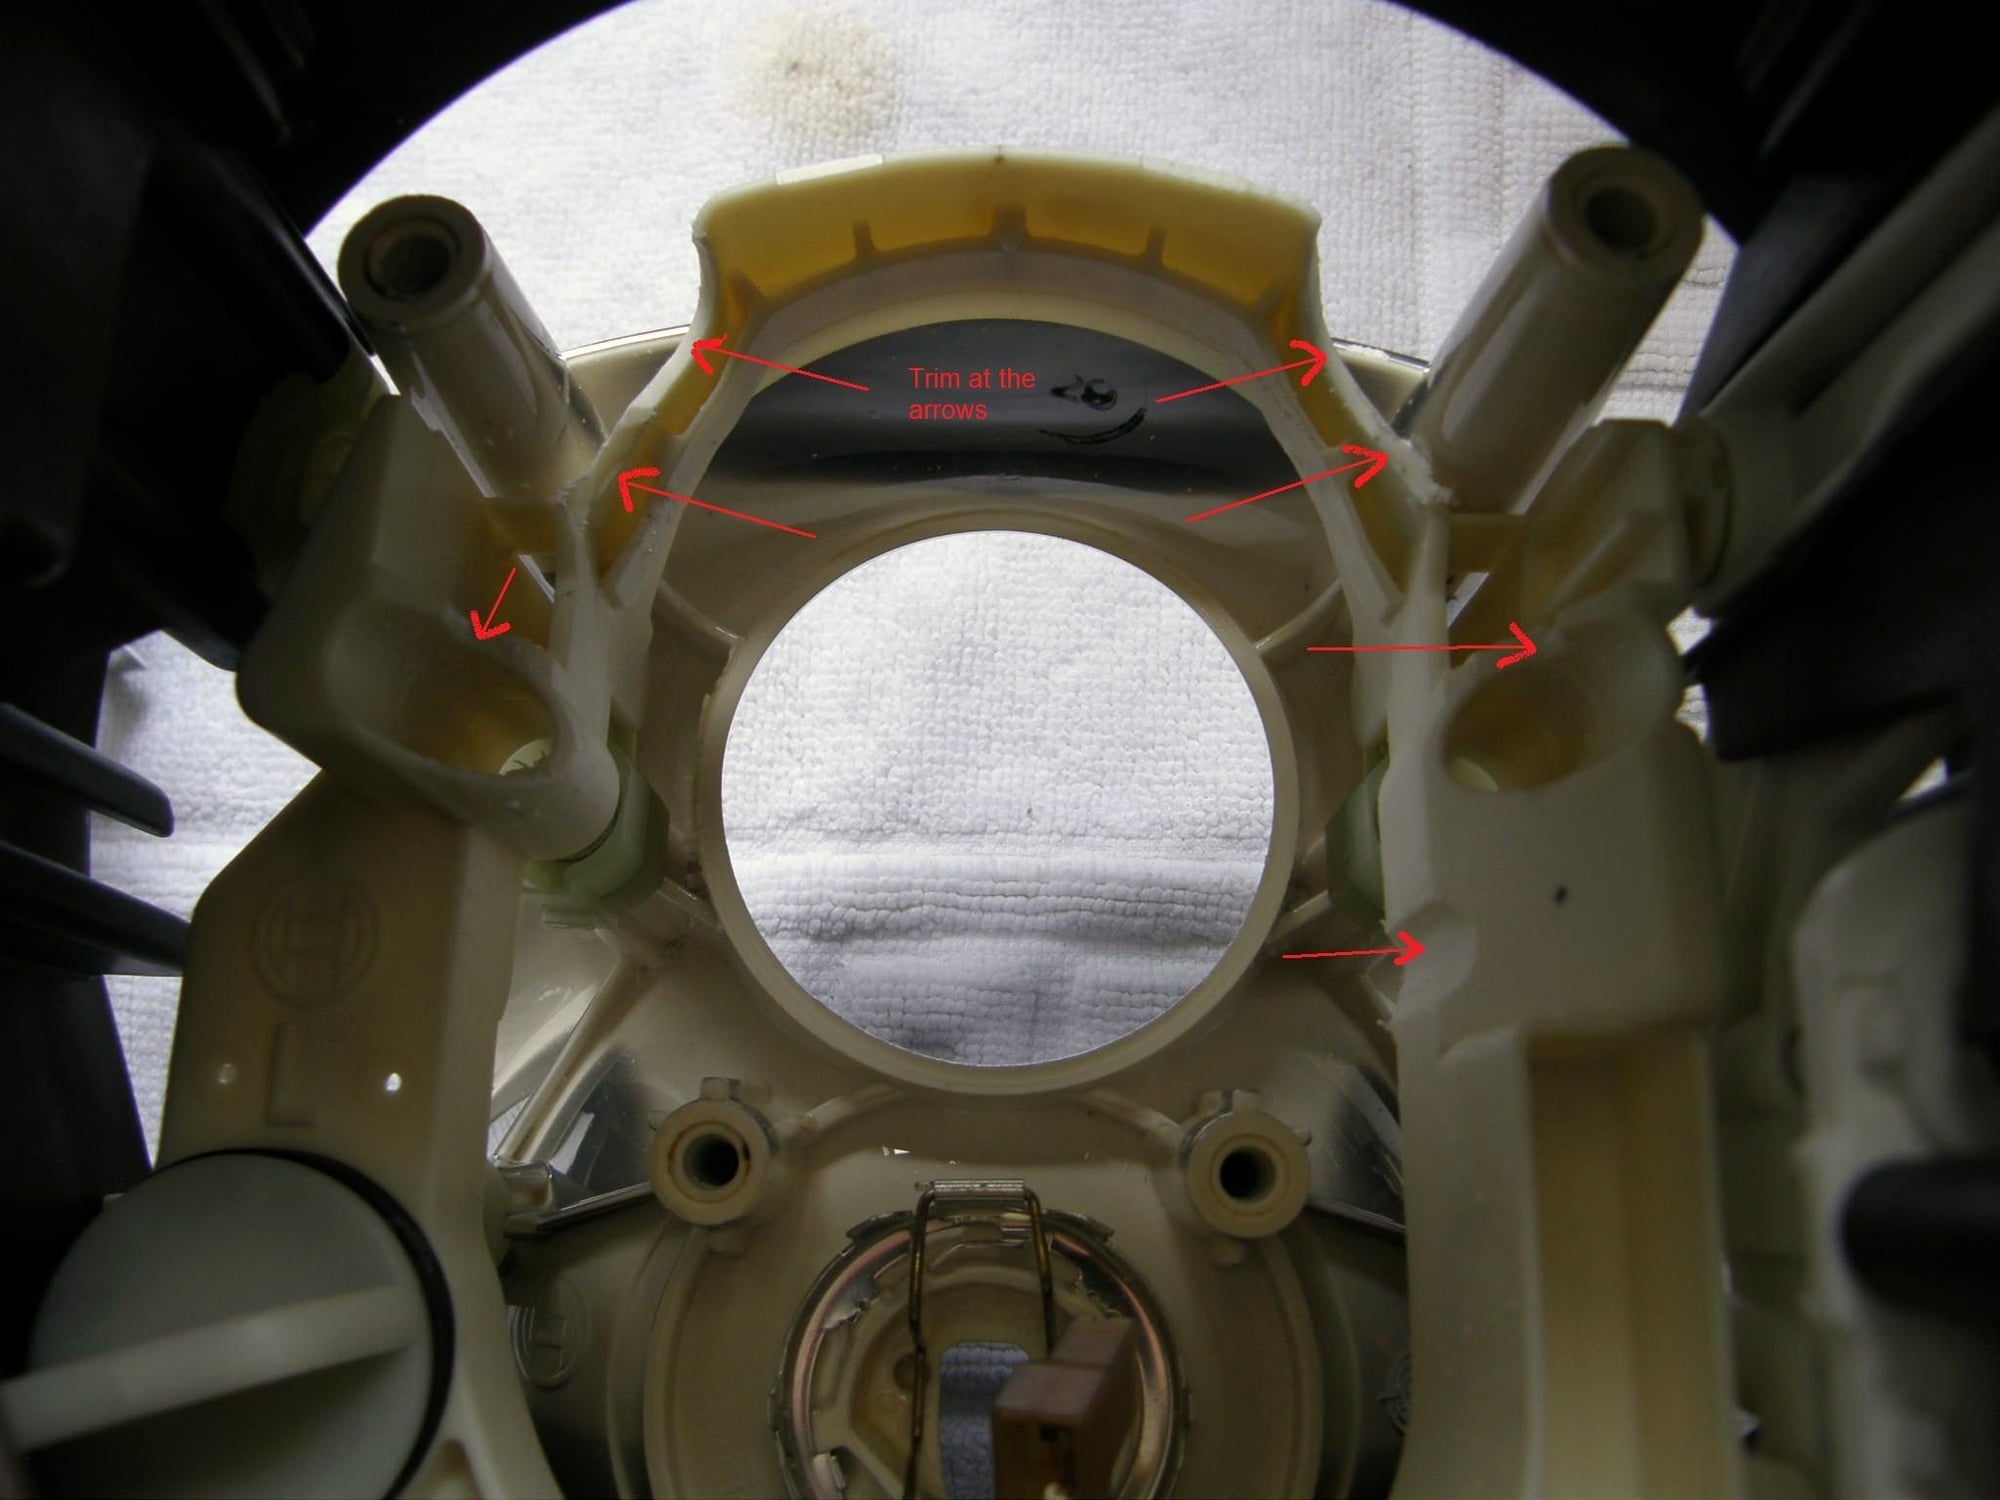
I took out the old lens and trimmed a bit at the following locations:
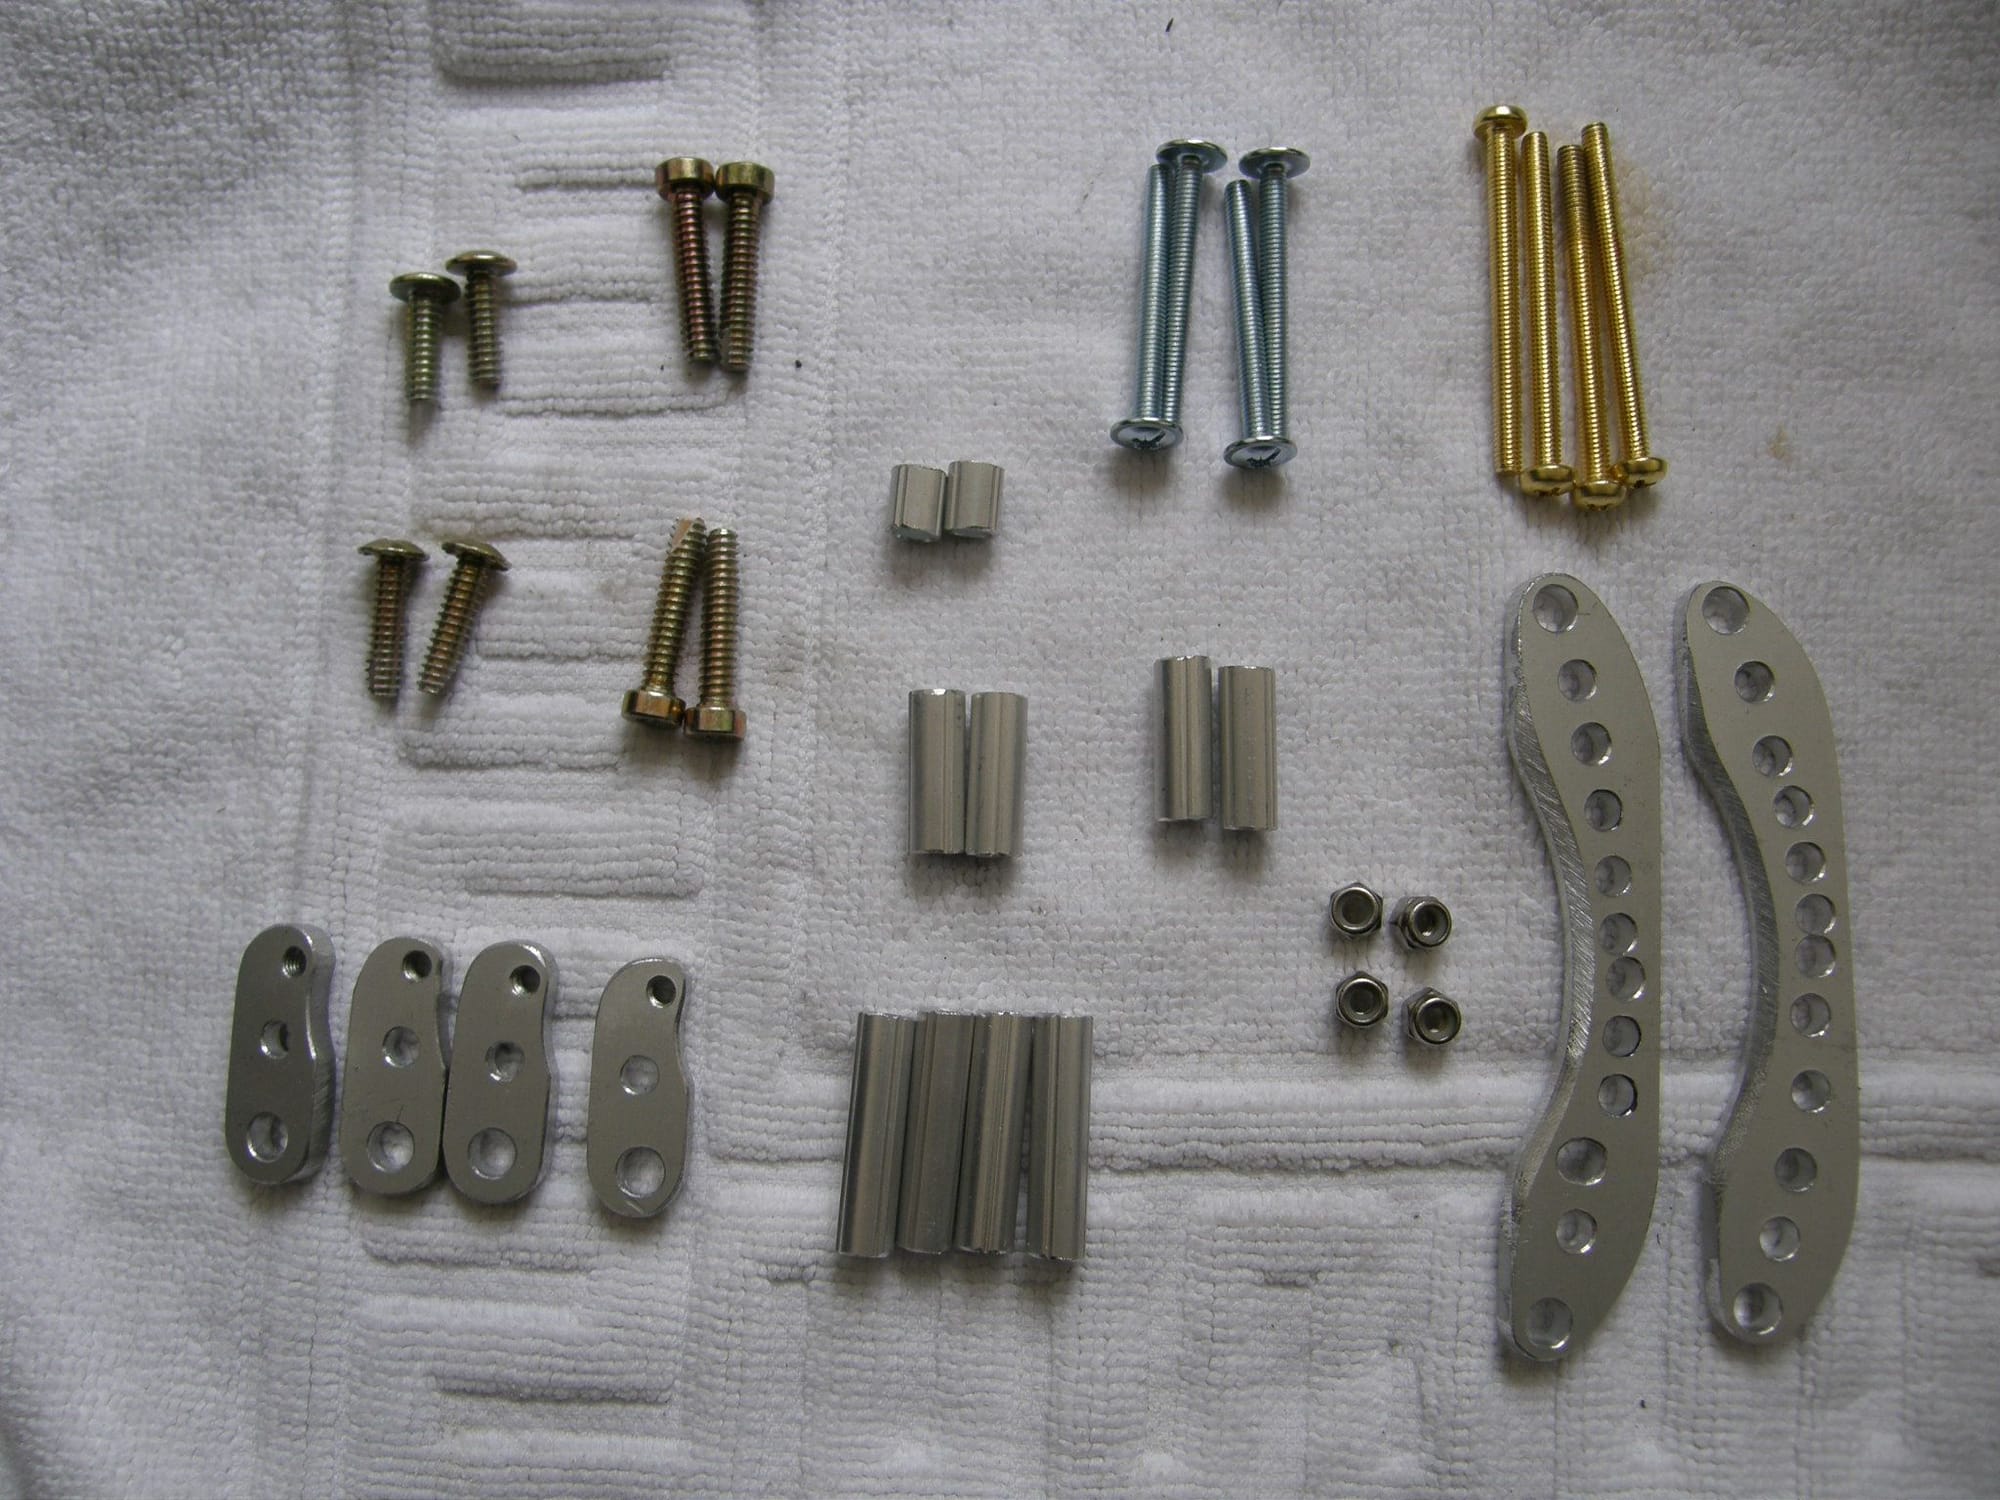
This is all you need for the brackets and hardware to secure the new projector into the housing. Never mind the random holes I drilled for weight saving. I could have done a better job but who's going to see it?
The measuring for all the dimensions took a few hours but I wanted to ensure proper and solid fitment. Once I had that, it was easy to install.
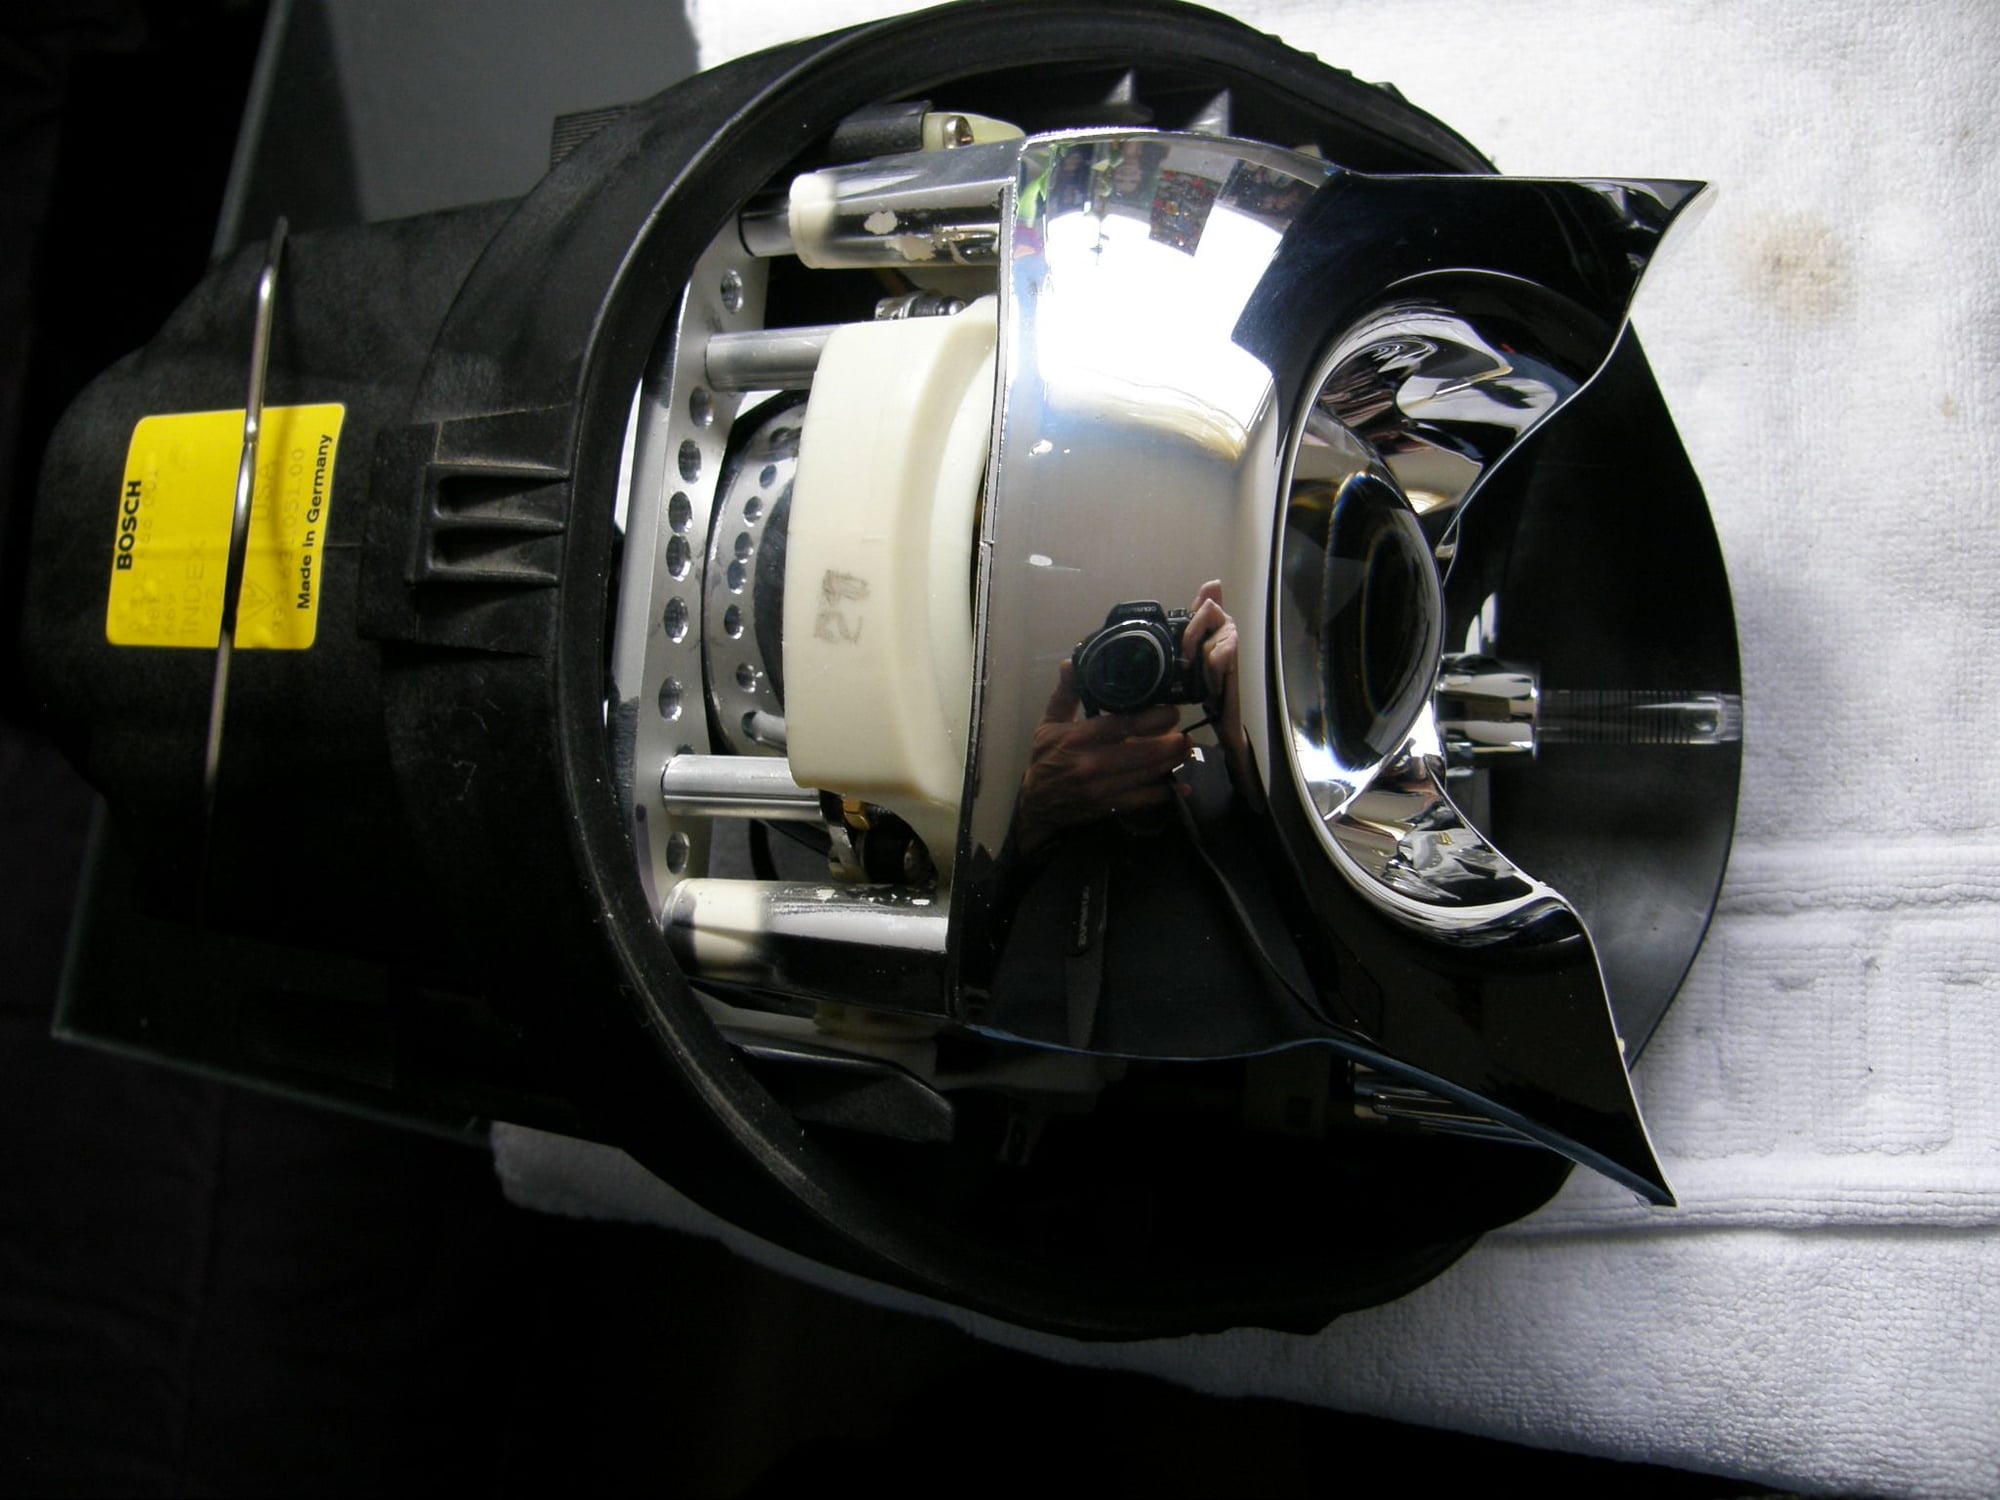
Here you see the lens installed
Here's a comparison between old and new. There's a lot more room now as the new lens bundles the beam very differently.
This is what you see from the front. Notice the new lens is clear.
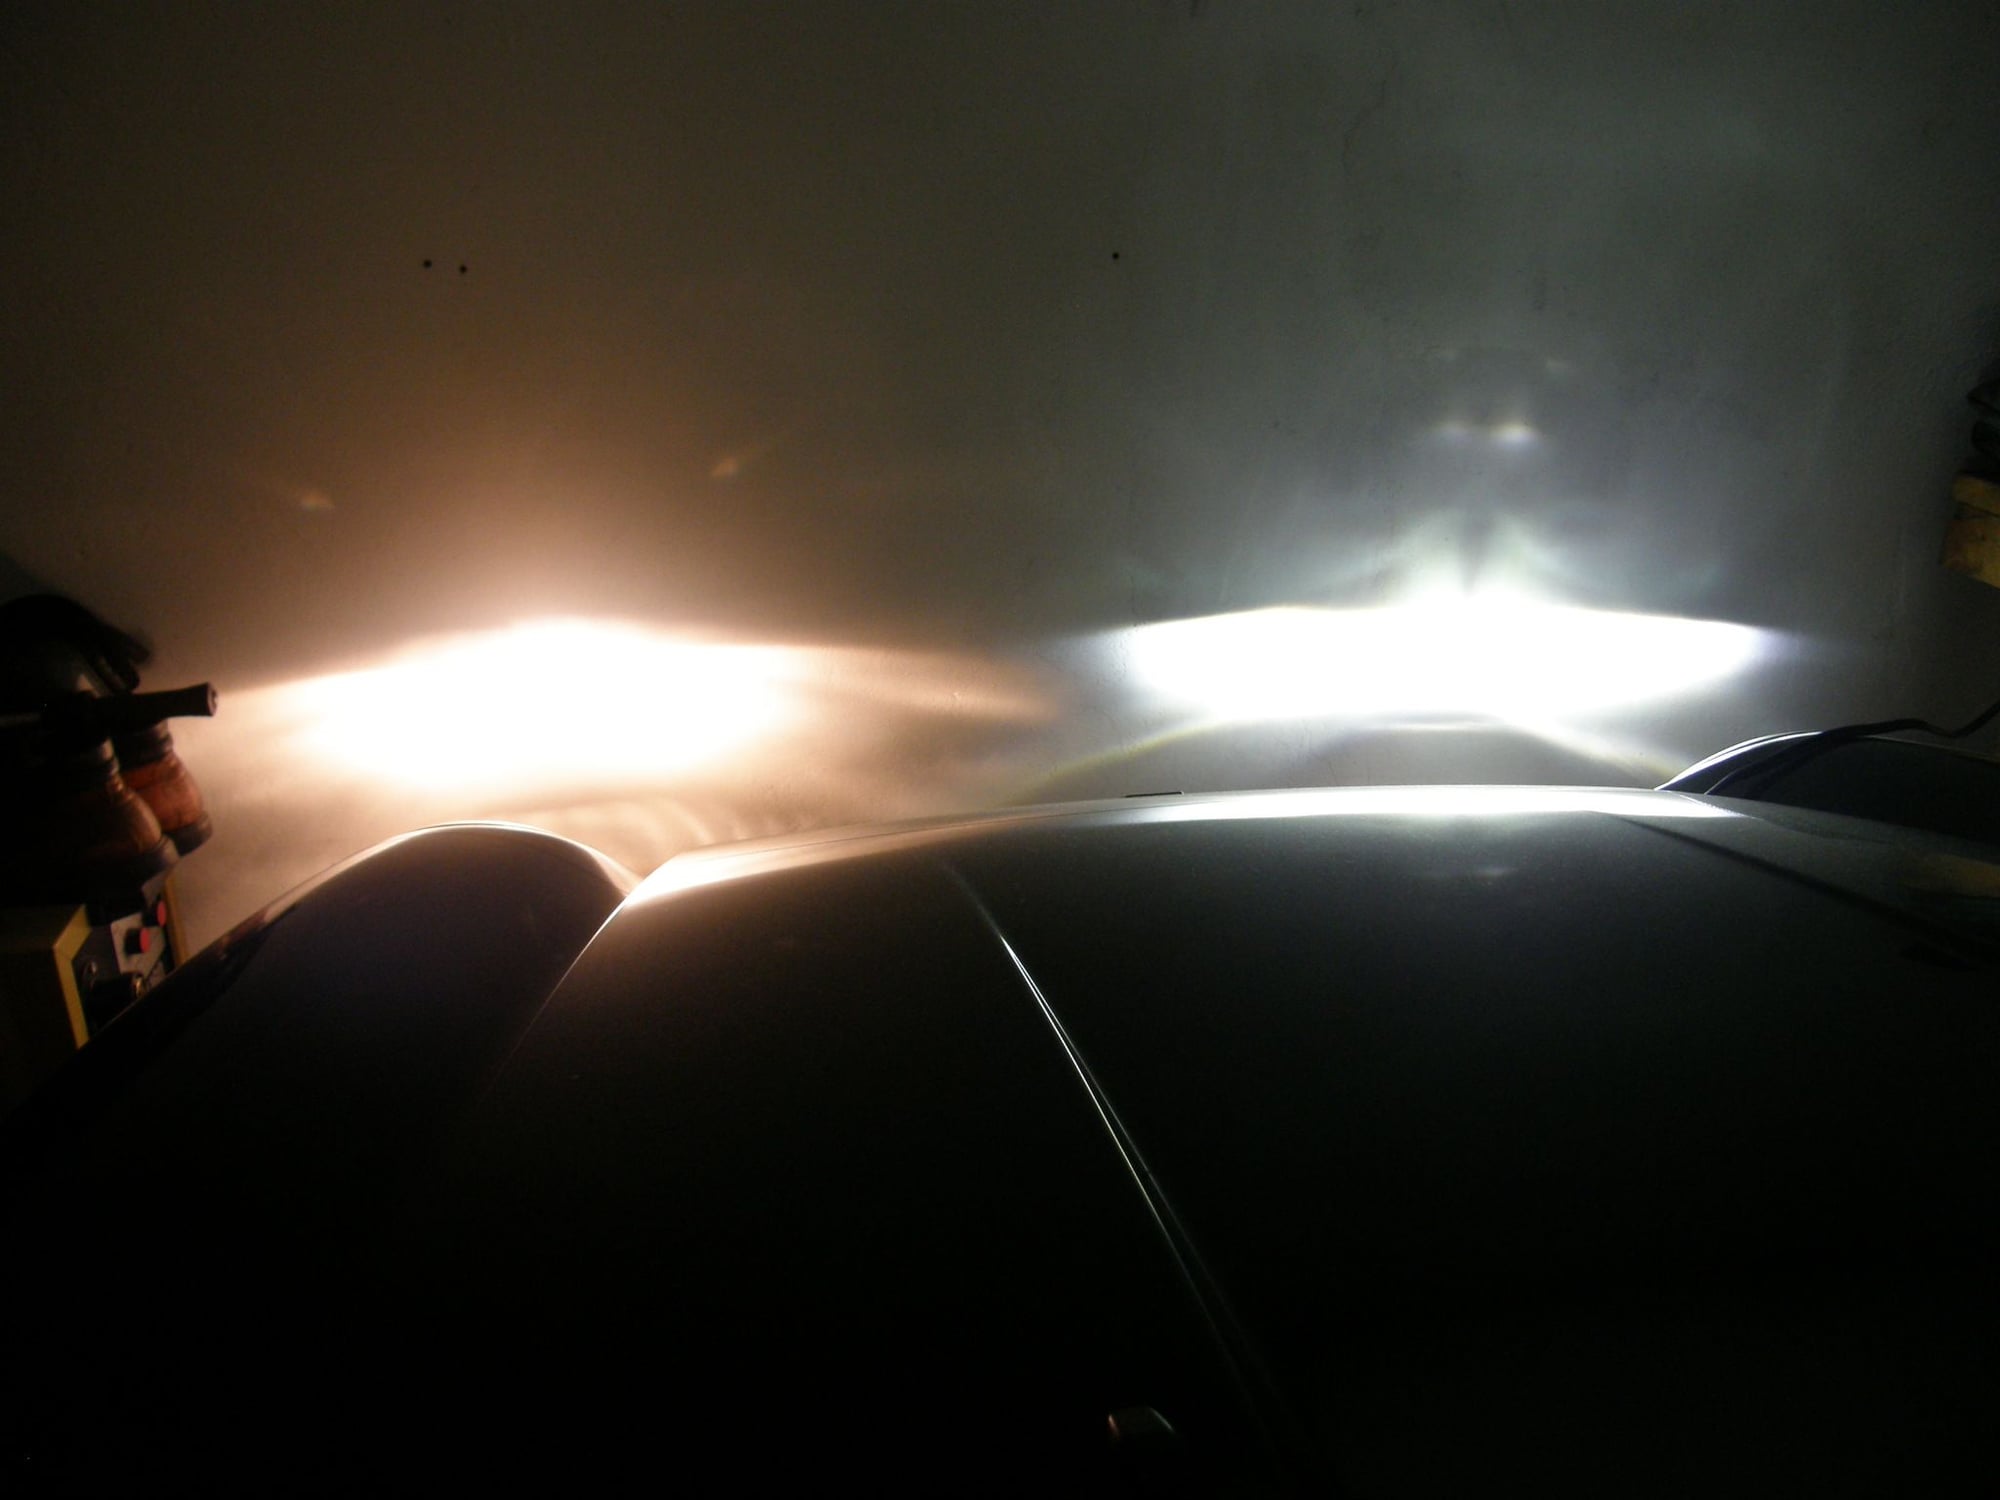
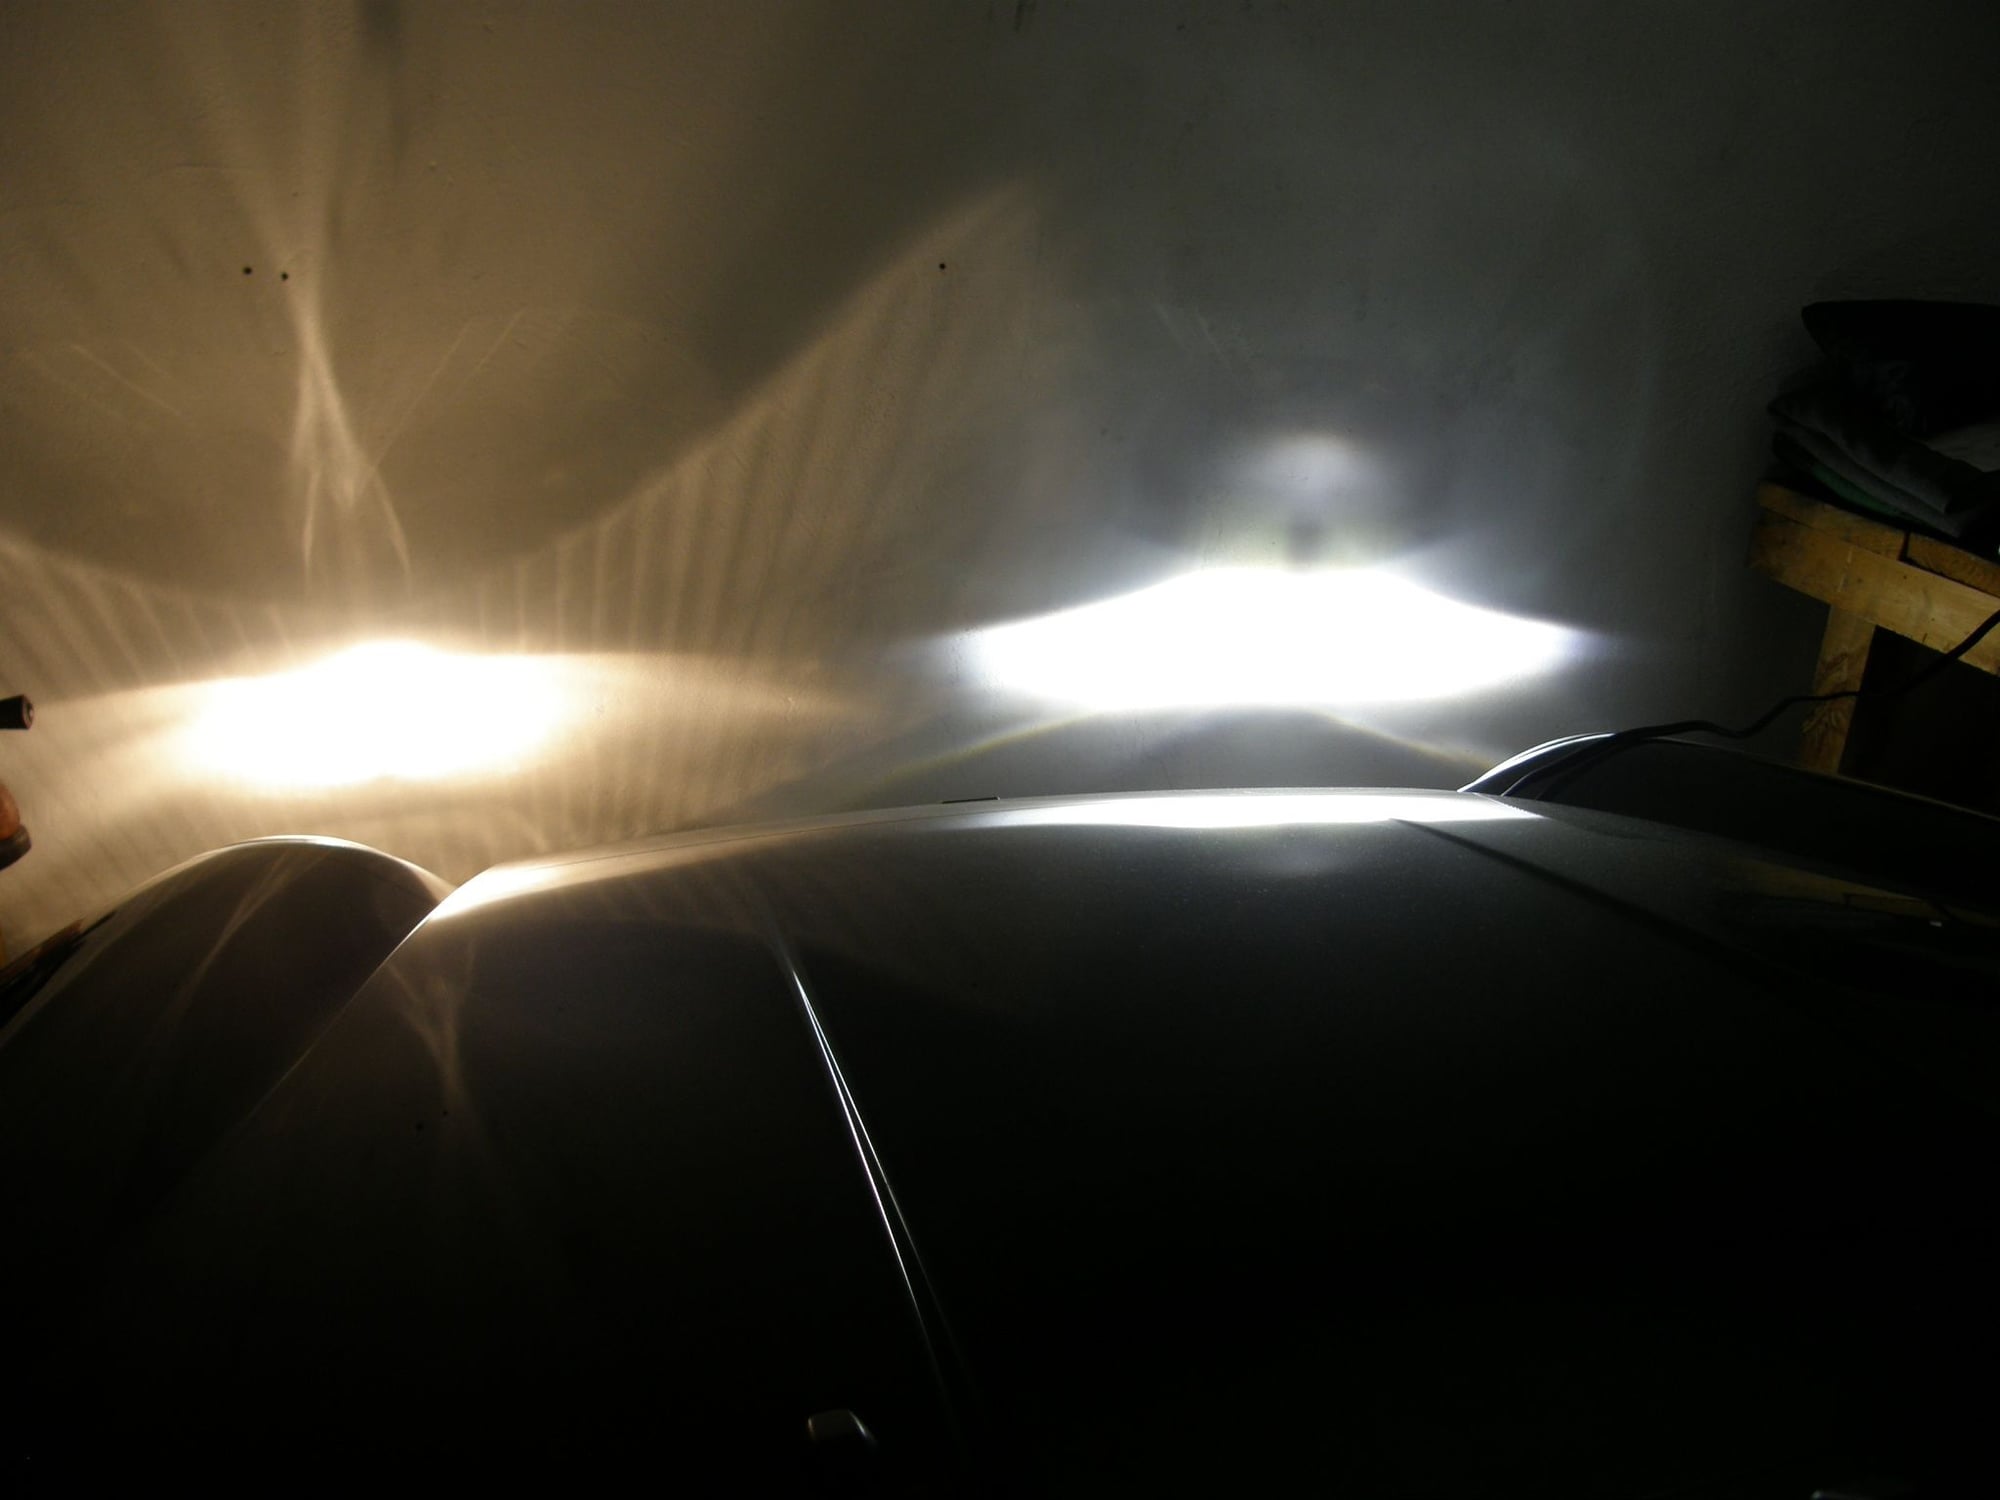
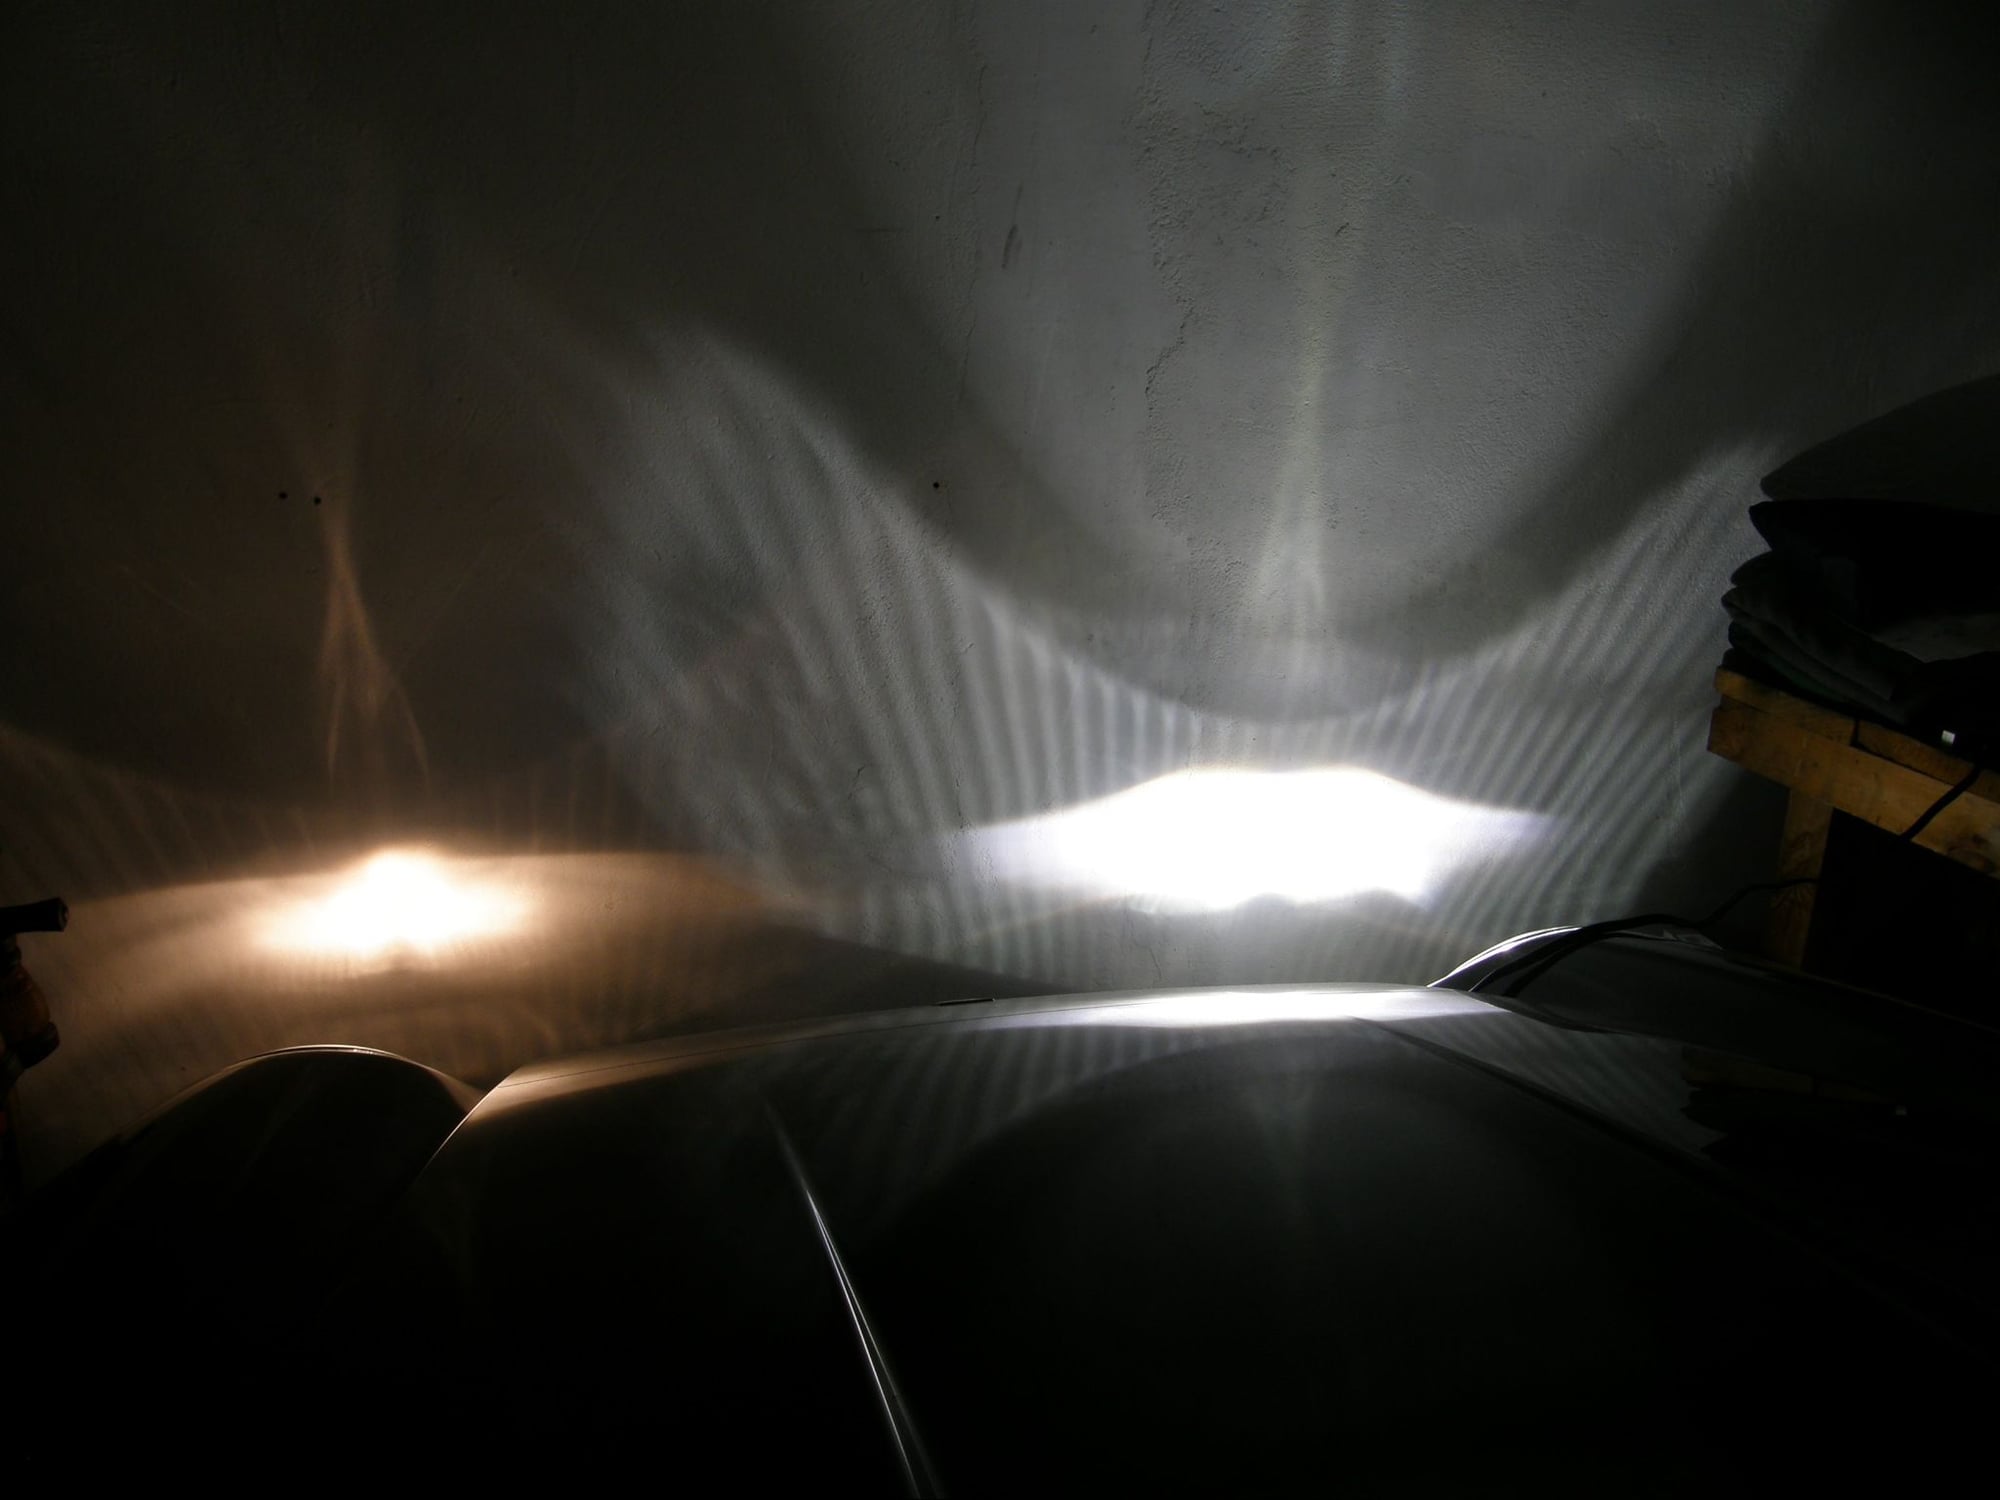
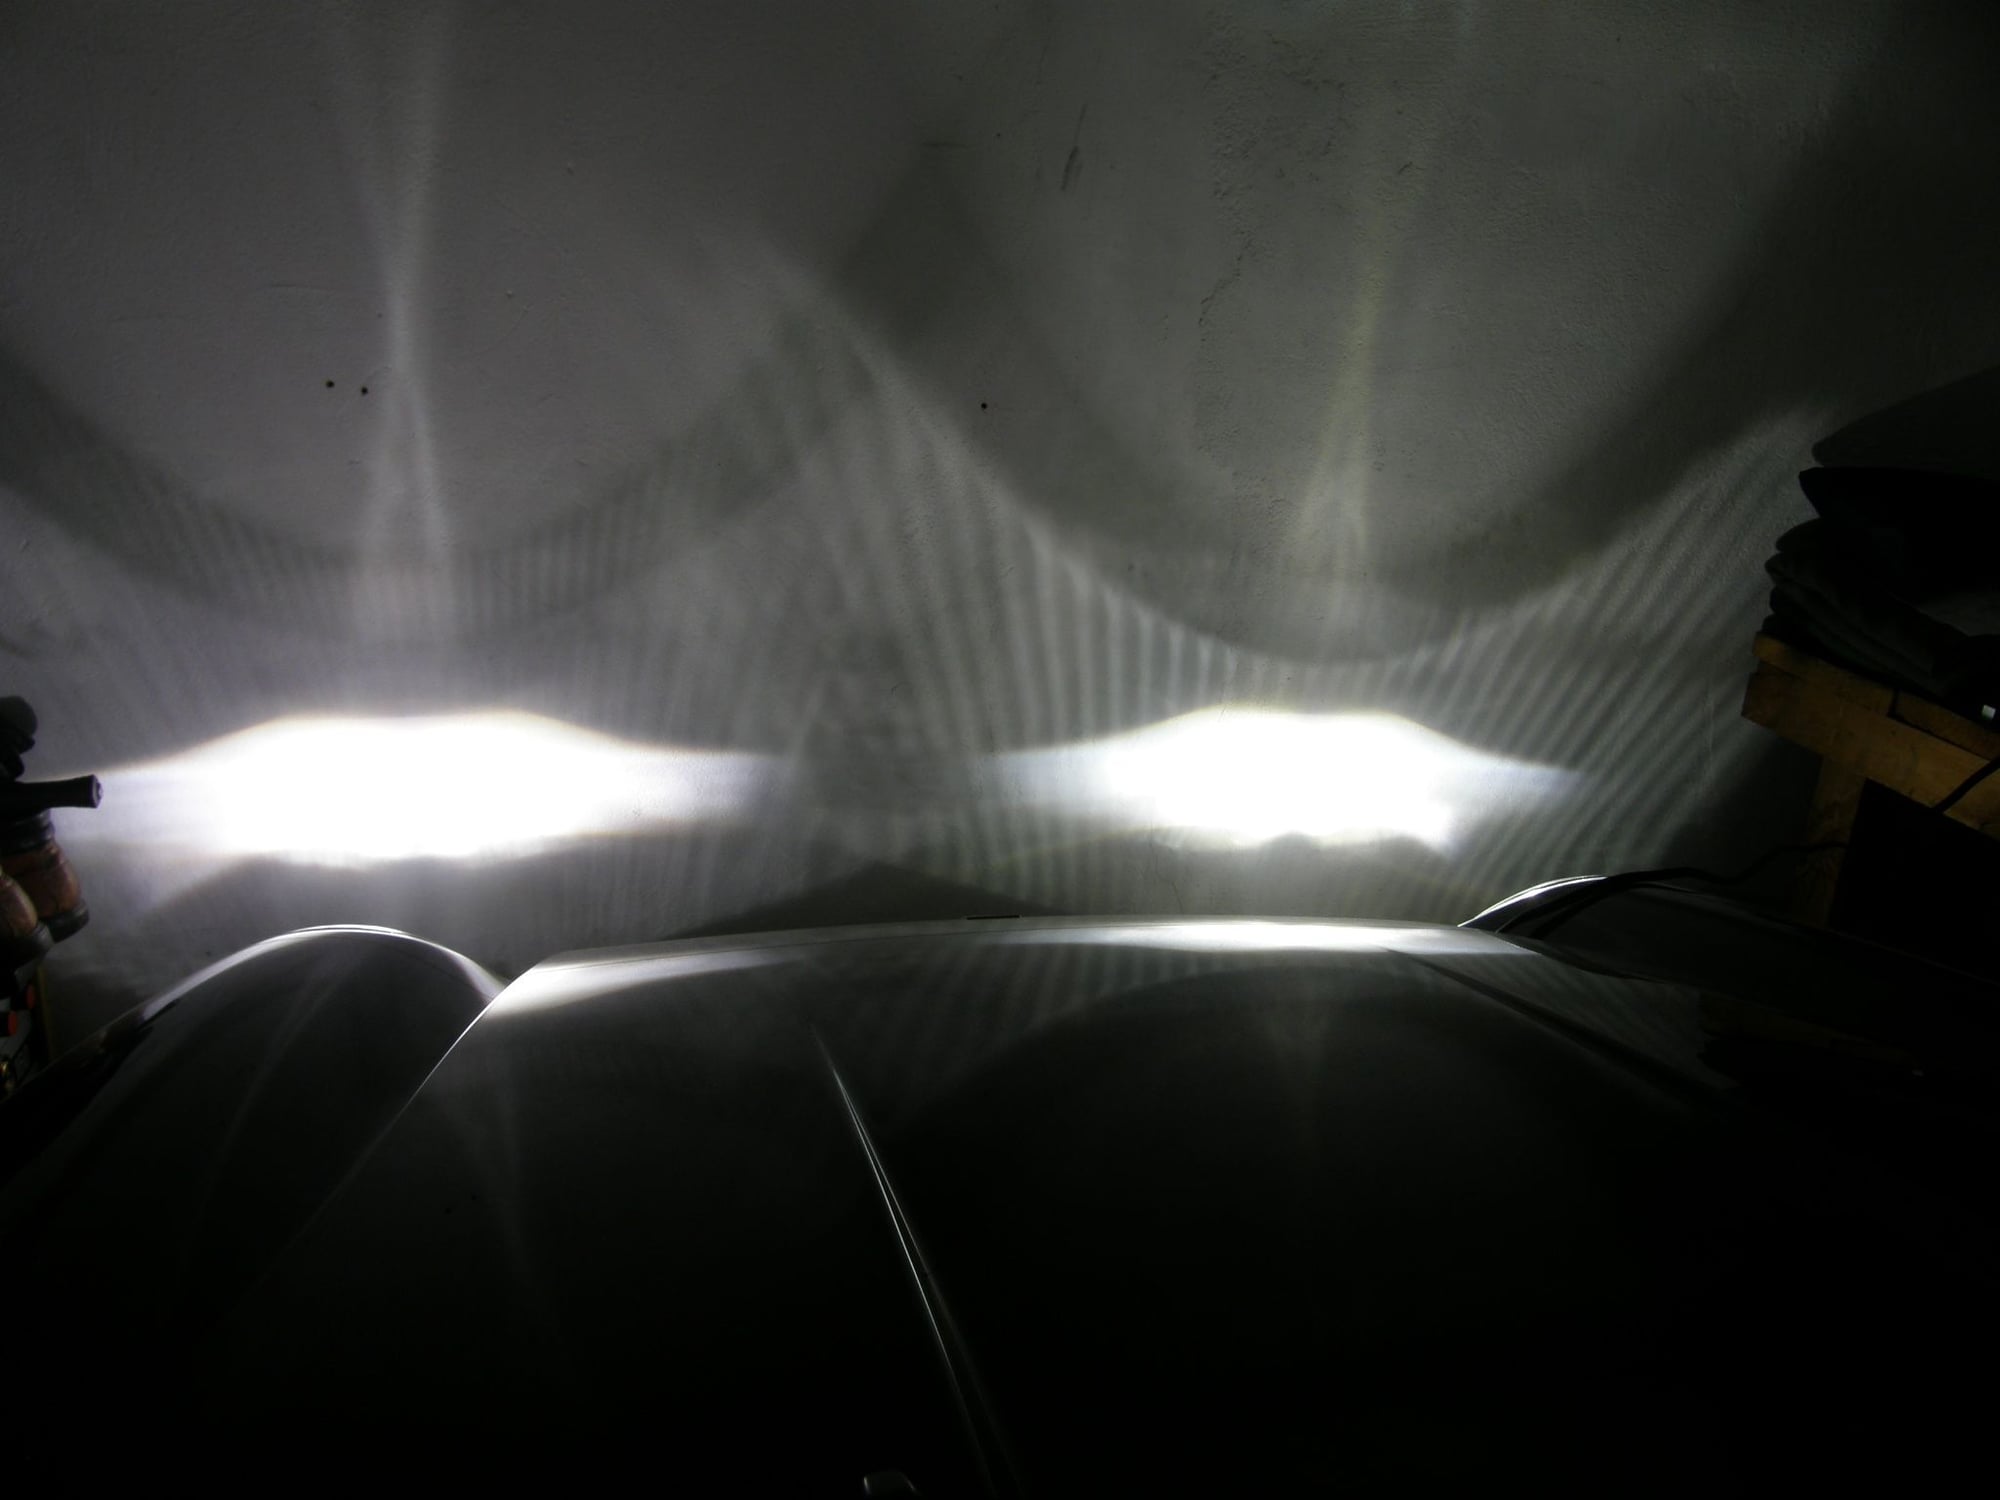
I did a quick comparison in the garage so you can see the difference between old halogen and new projector. I didn't compare the old lens with an hid burner as I didn't want to keep swapping the burners more then I needed to. Eventually, I'll get out to some dark alley and record again.
This pic shows low halogen to low new lens
This pic shows low and hi halogen and high with only the slider engaged, no 2nd hid burner from the hi beam below
This pic shows low and hi halogen and high with slider engaged plus 2nd burner from the hi beam below, basically 2x 55w hi beams. At this point I was wearing sunglasses. I had a hard time looking at the wall.
This pic basically shows 4x 55w hi beams, sliders engaged plus the 2nd burners from below. It looks like the right hand beam always looks smaller as I held the camera at an angle. In reality both beams are identical.
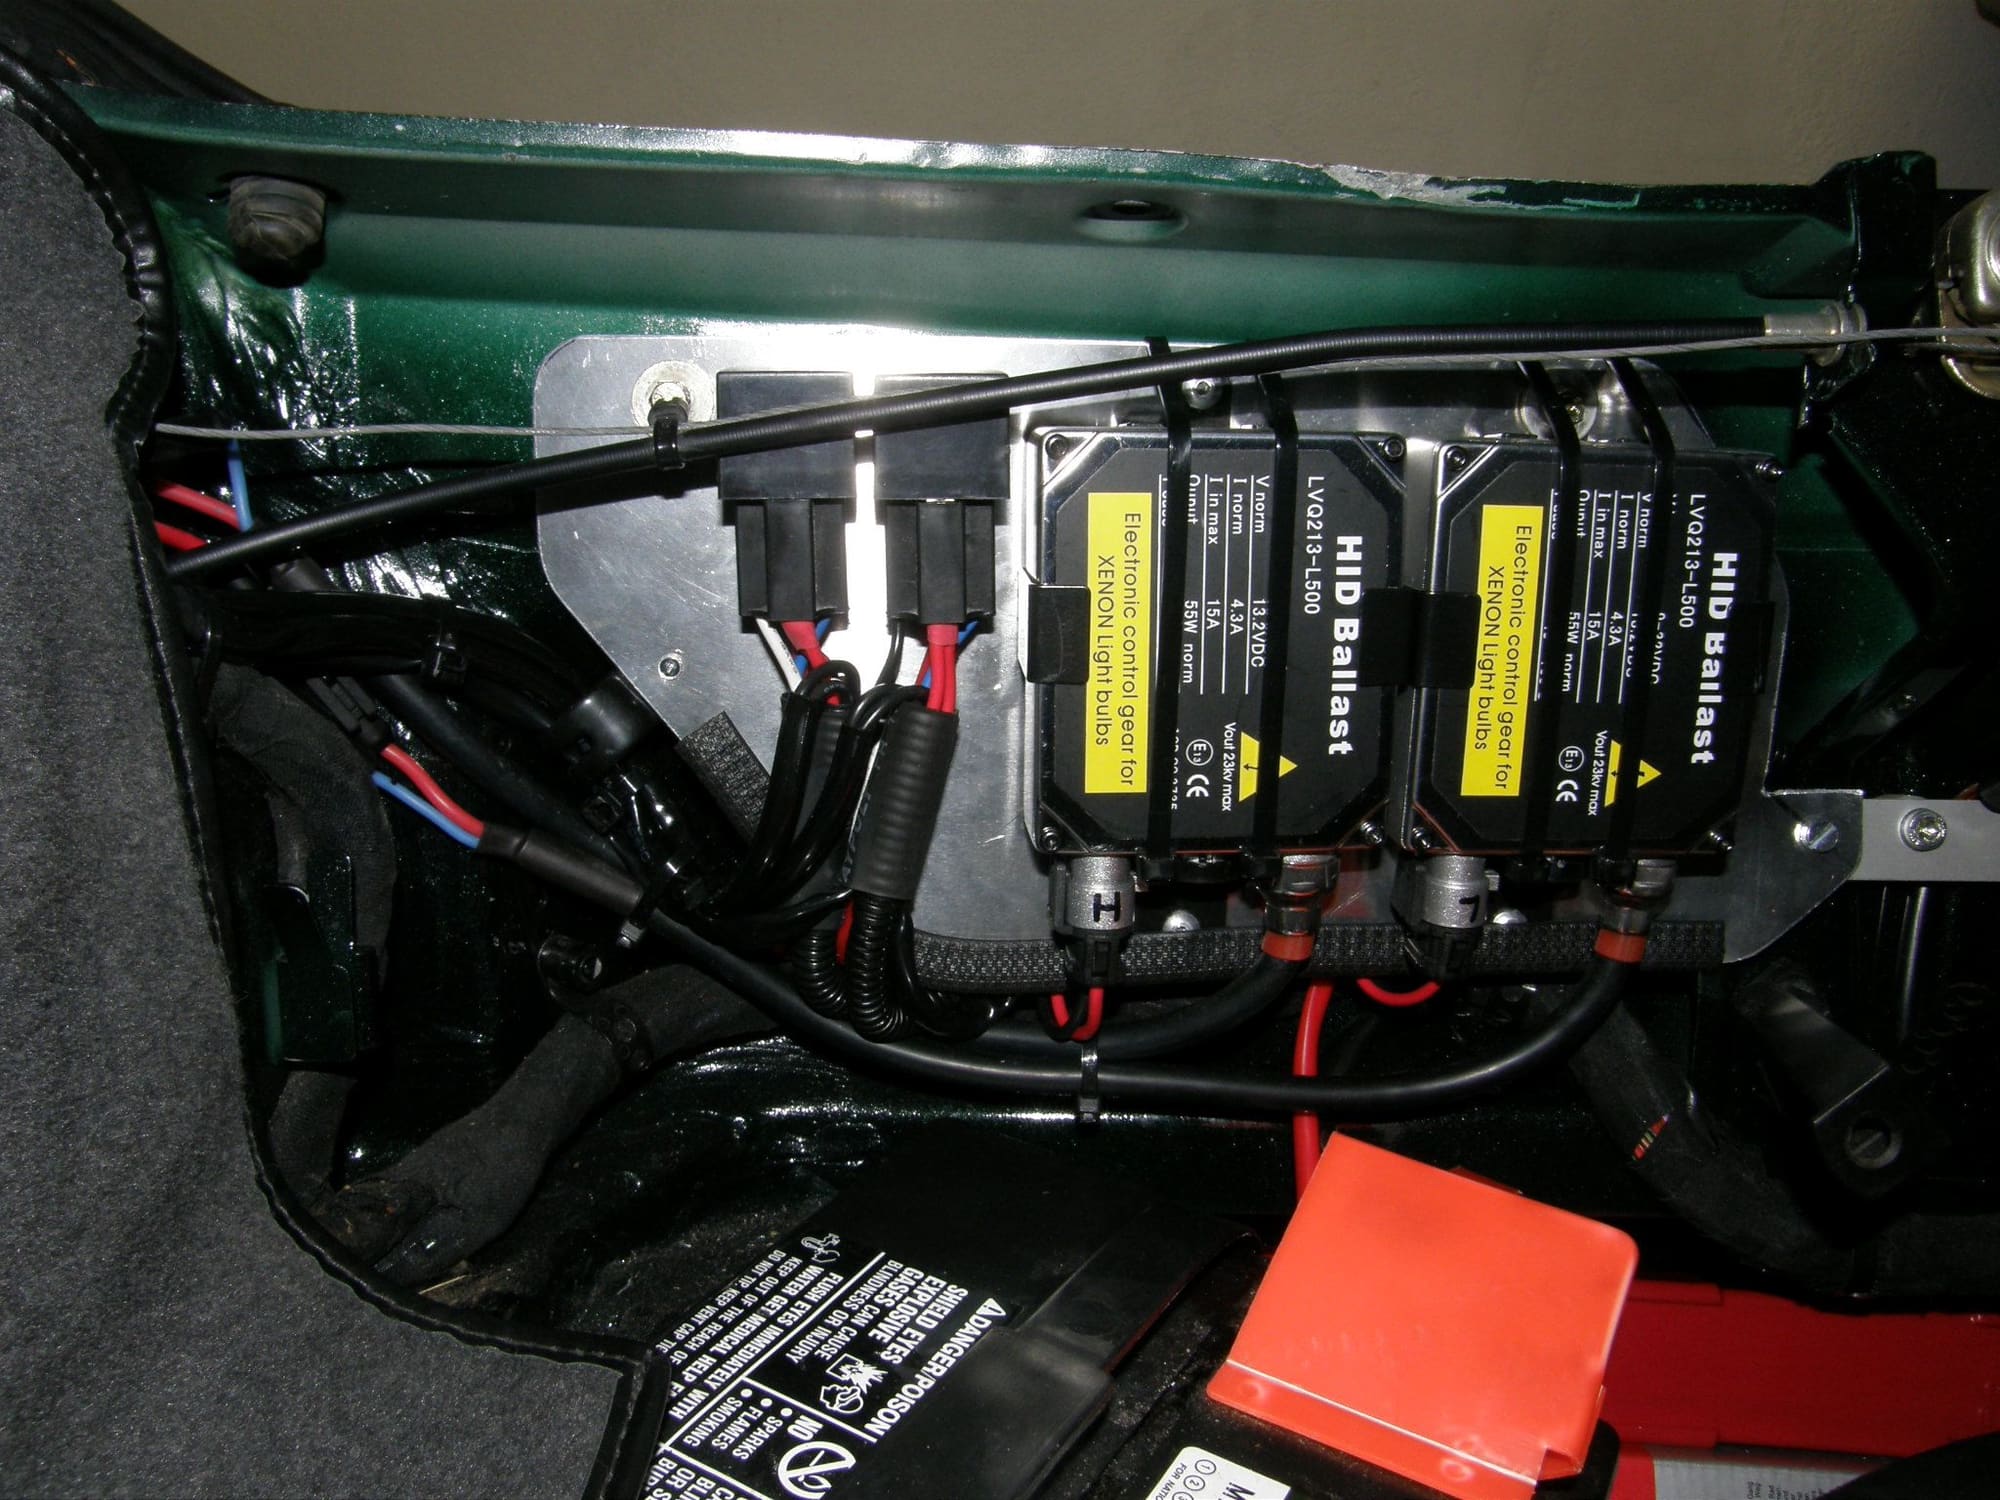
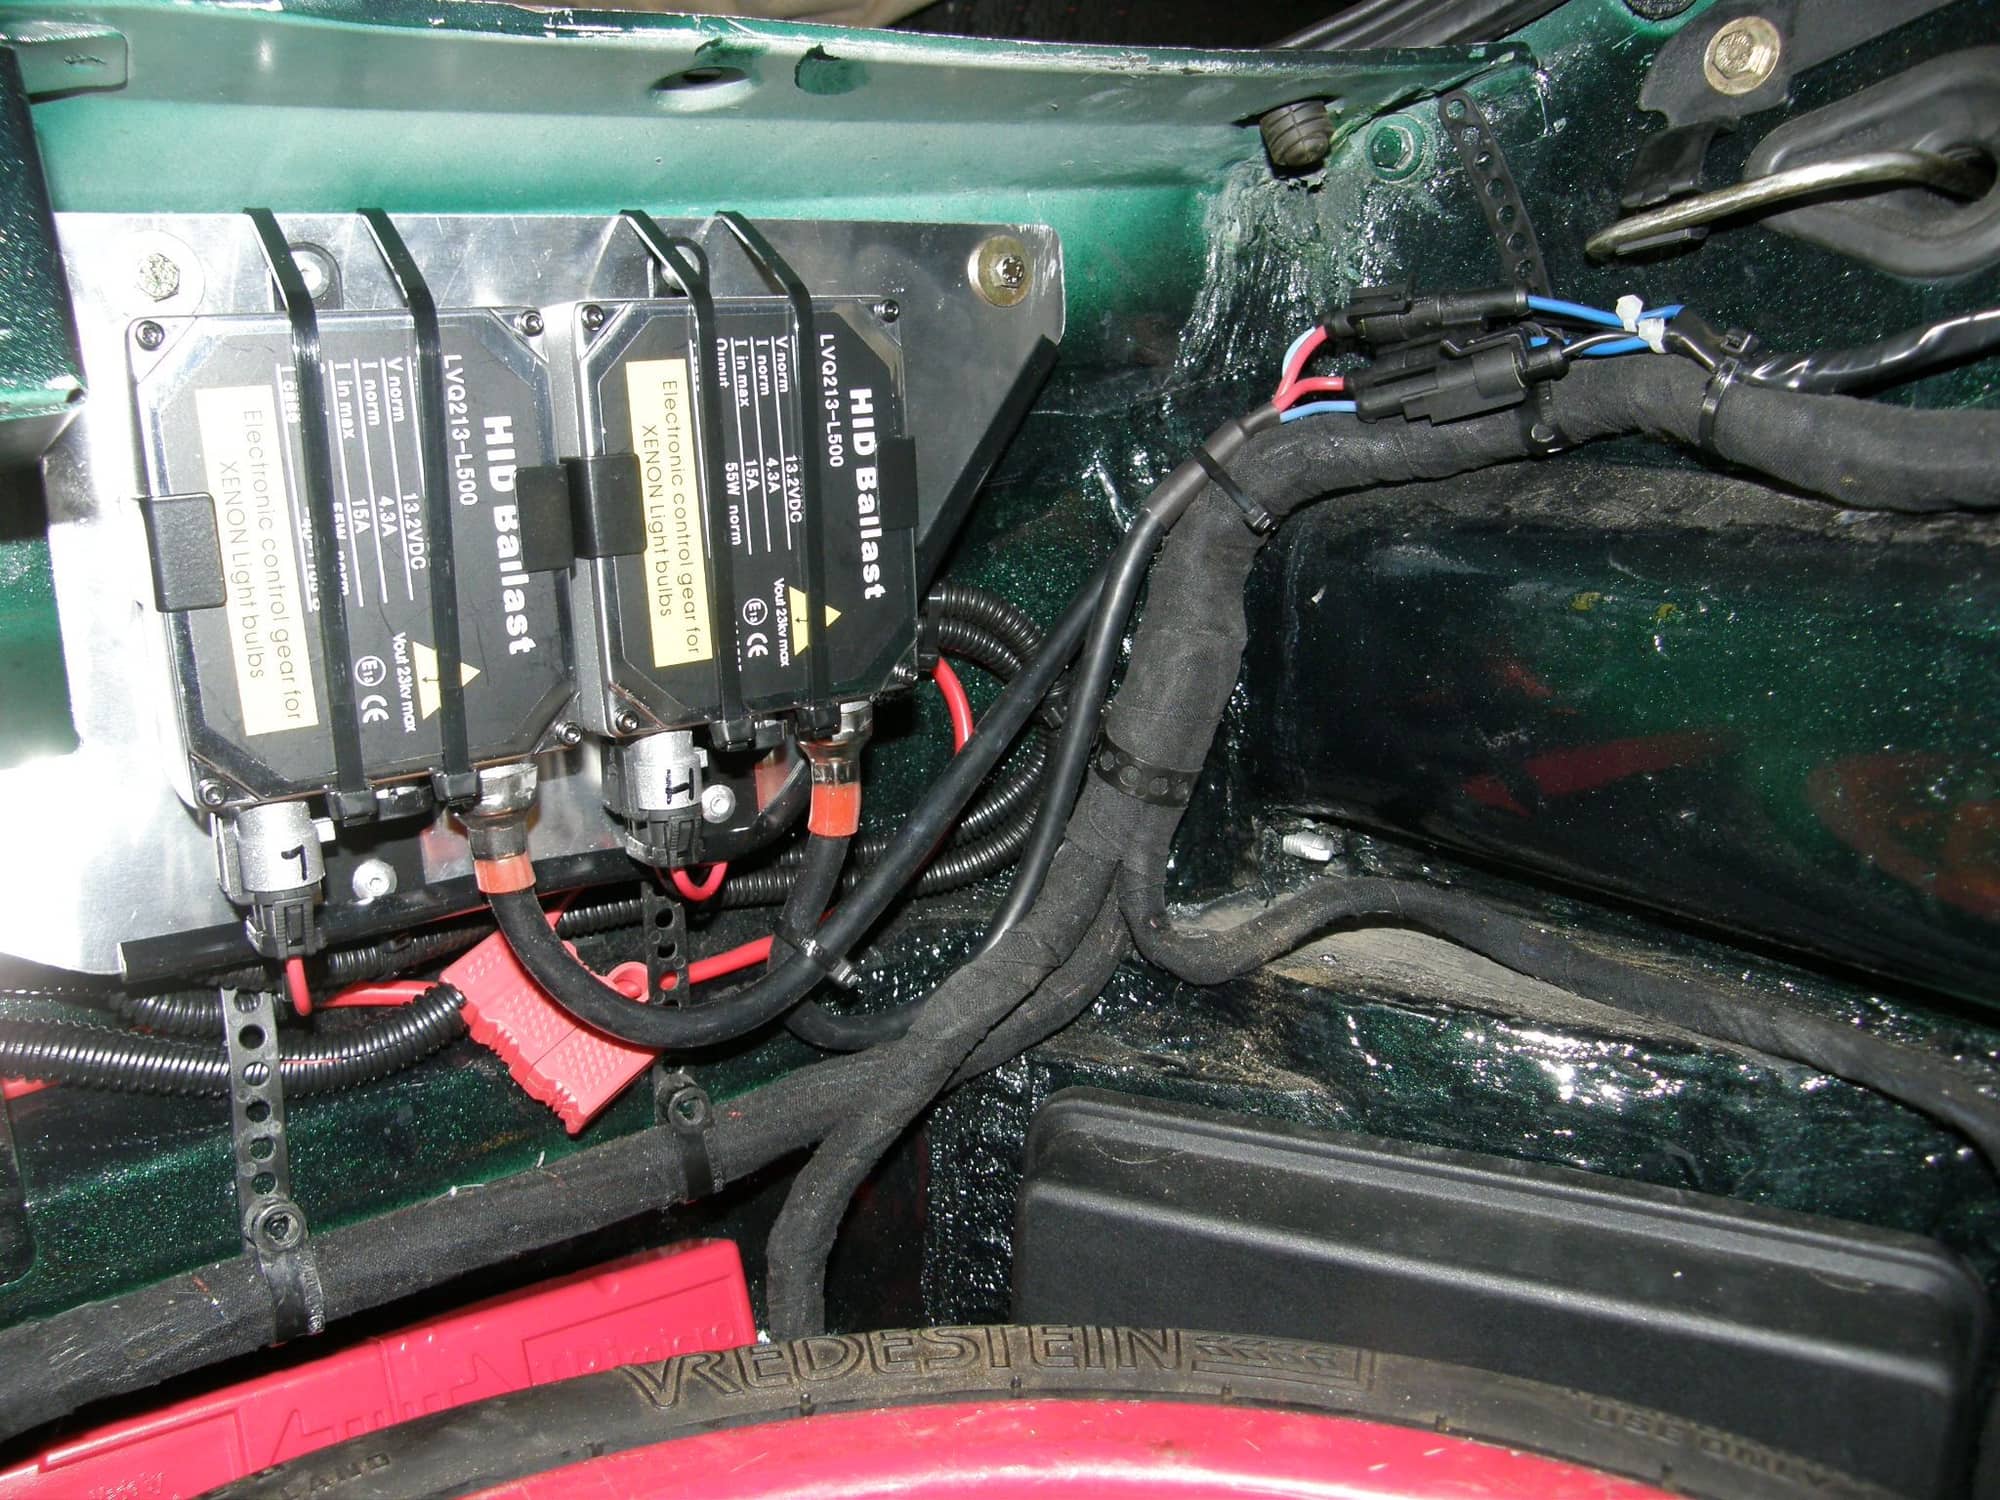
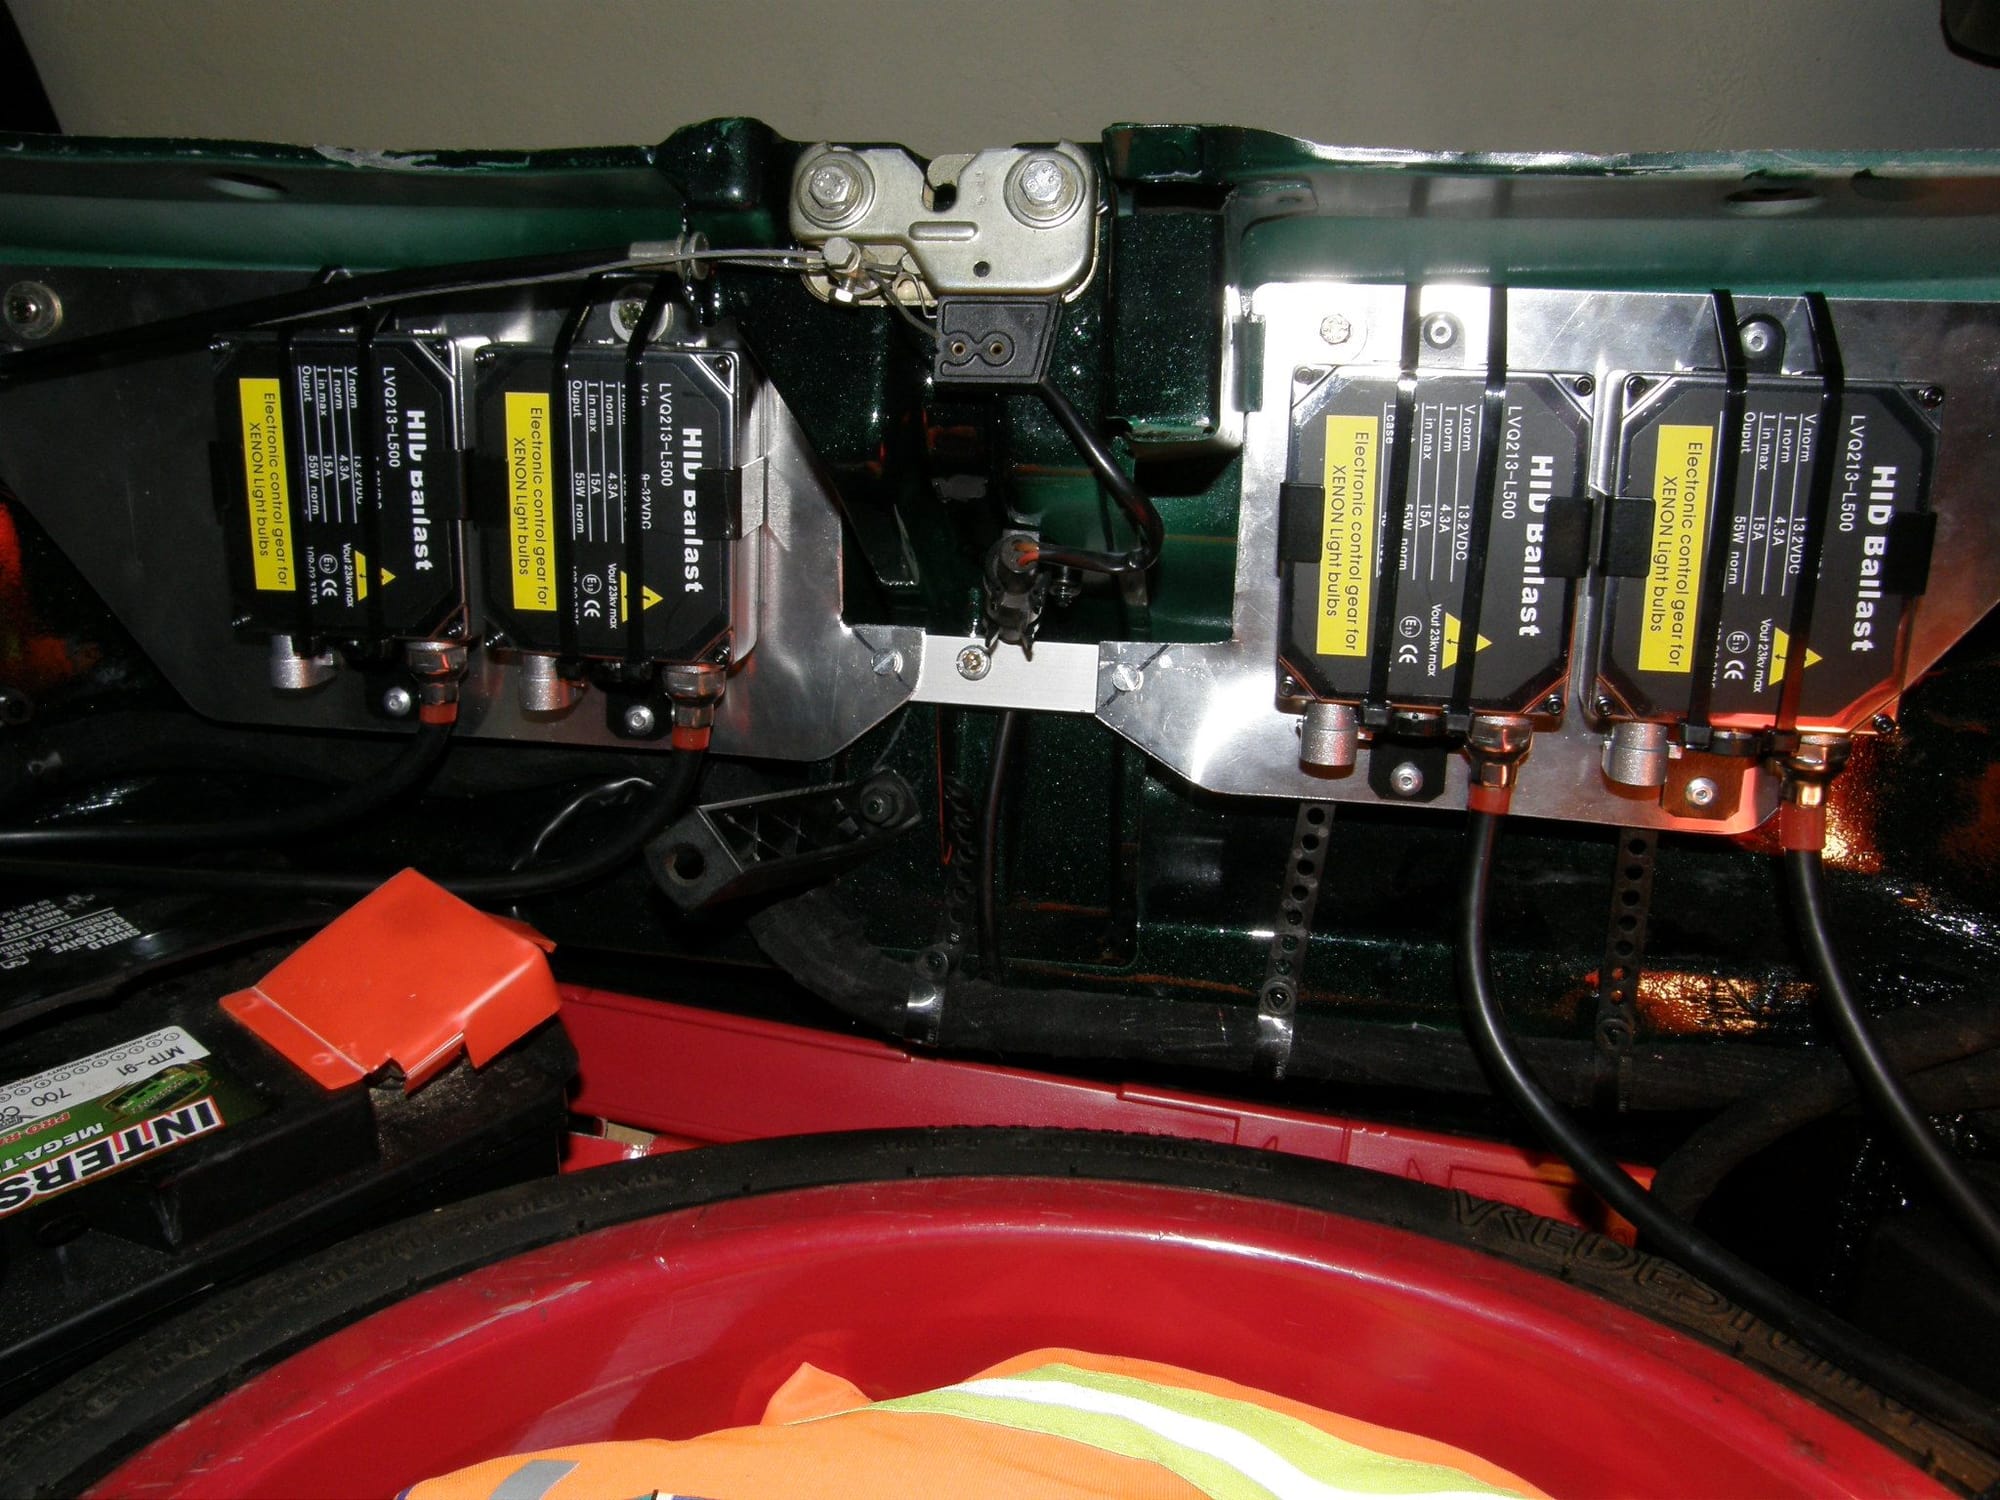
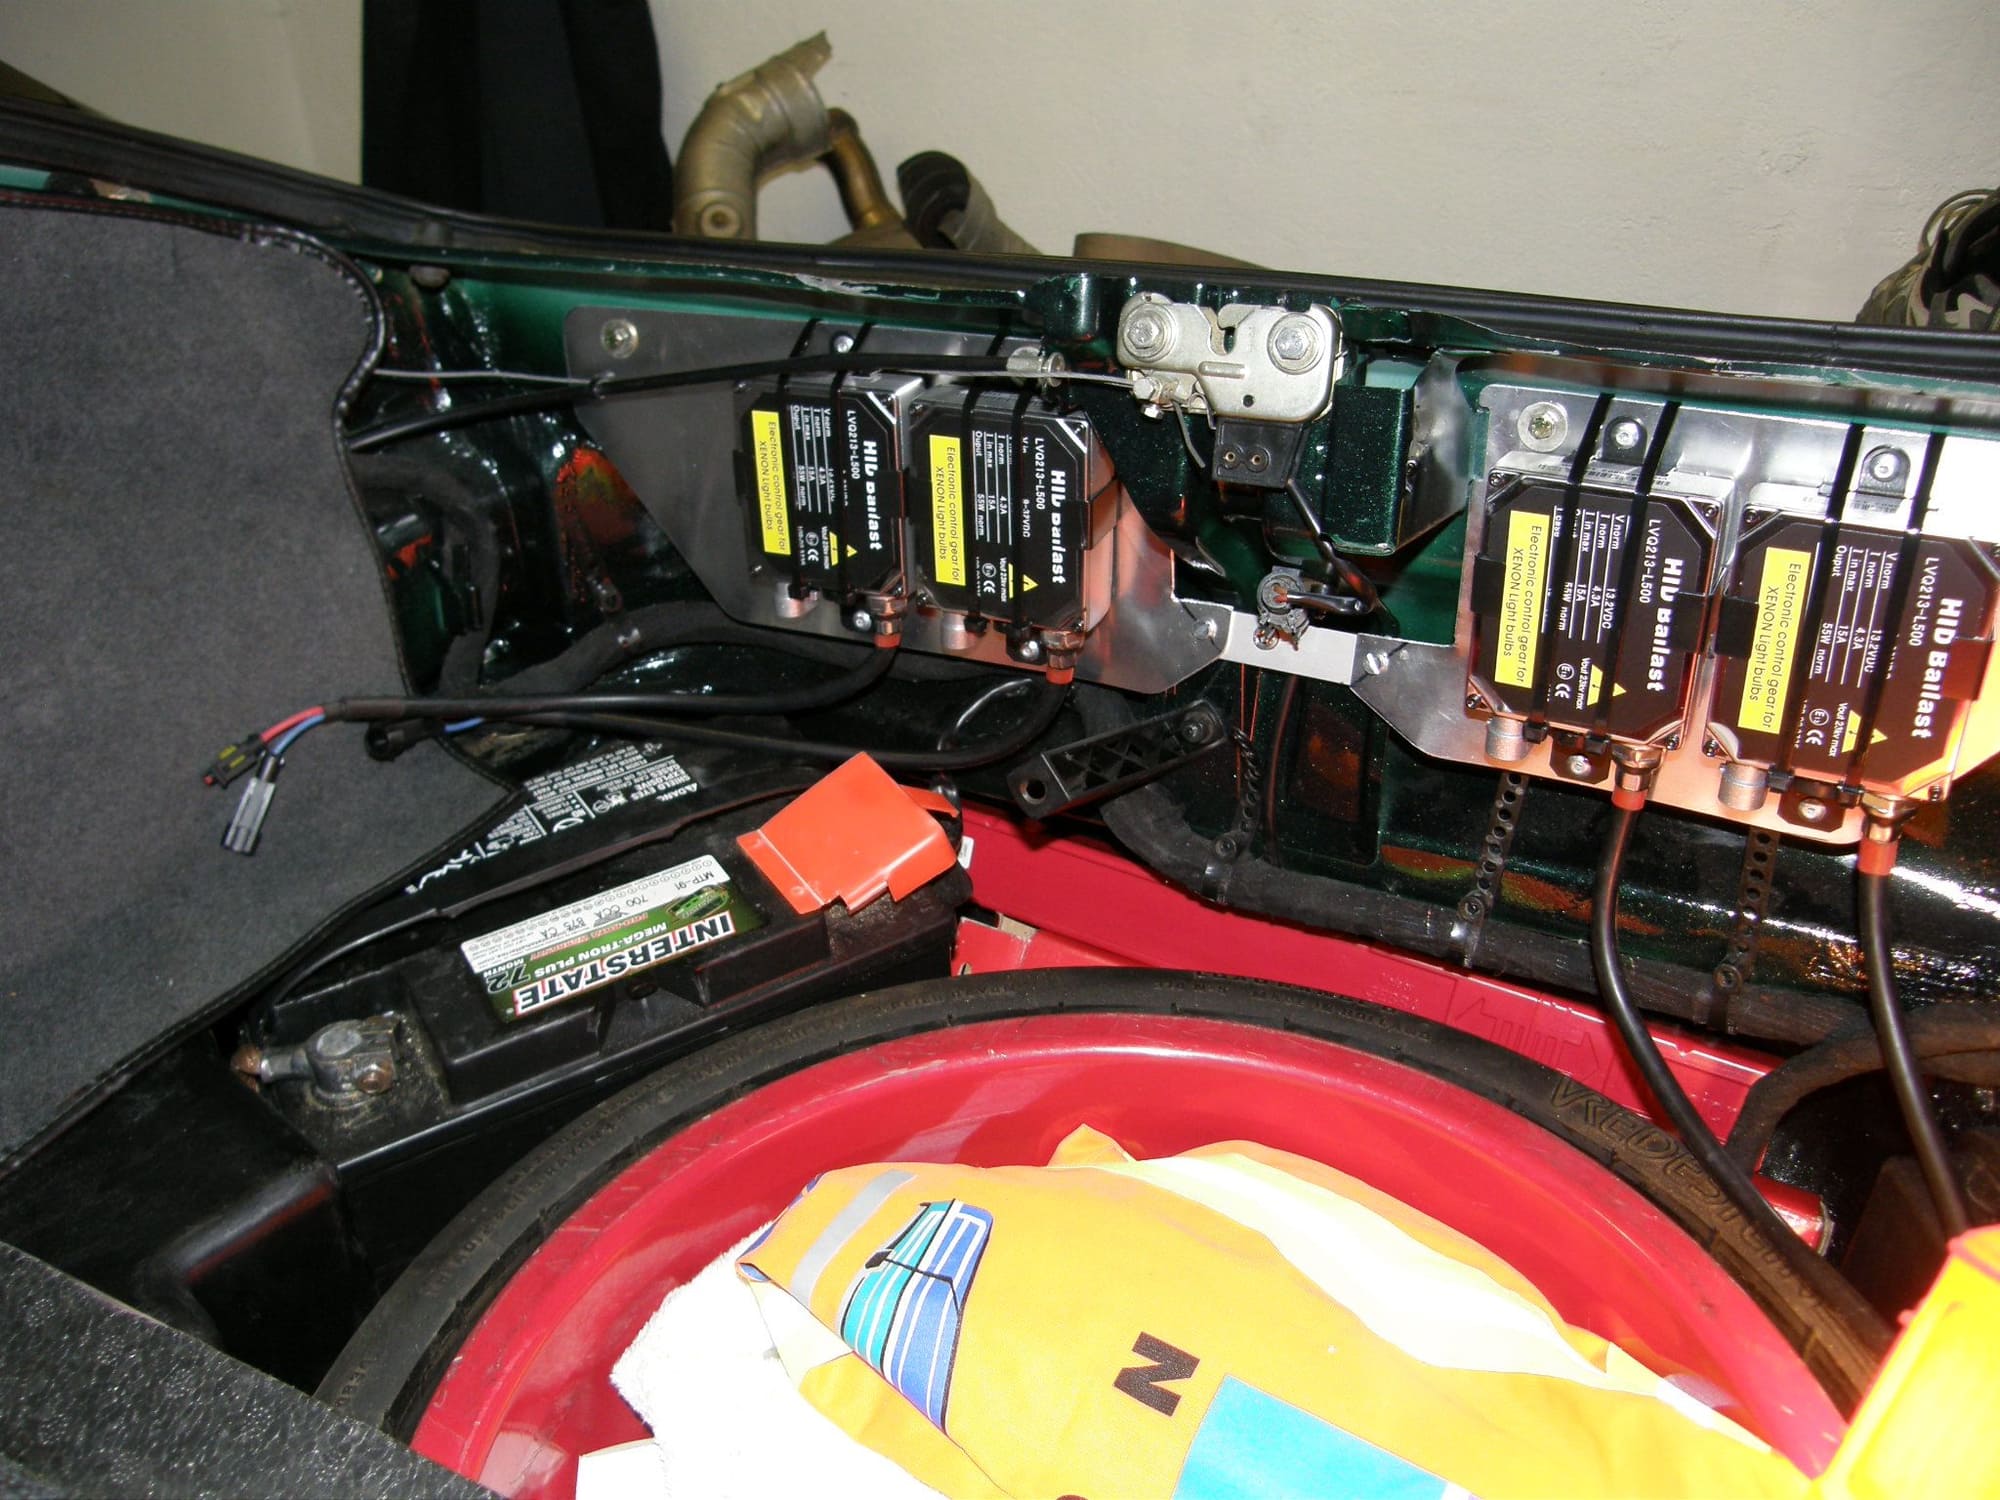
I didn't have to change anything in the way I mounted the ballasts and wiring harness as it was already there. This is what the mounting of the ballasts look like
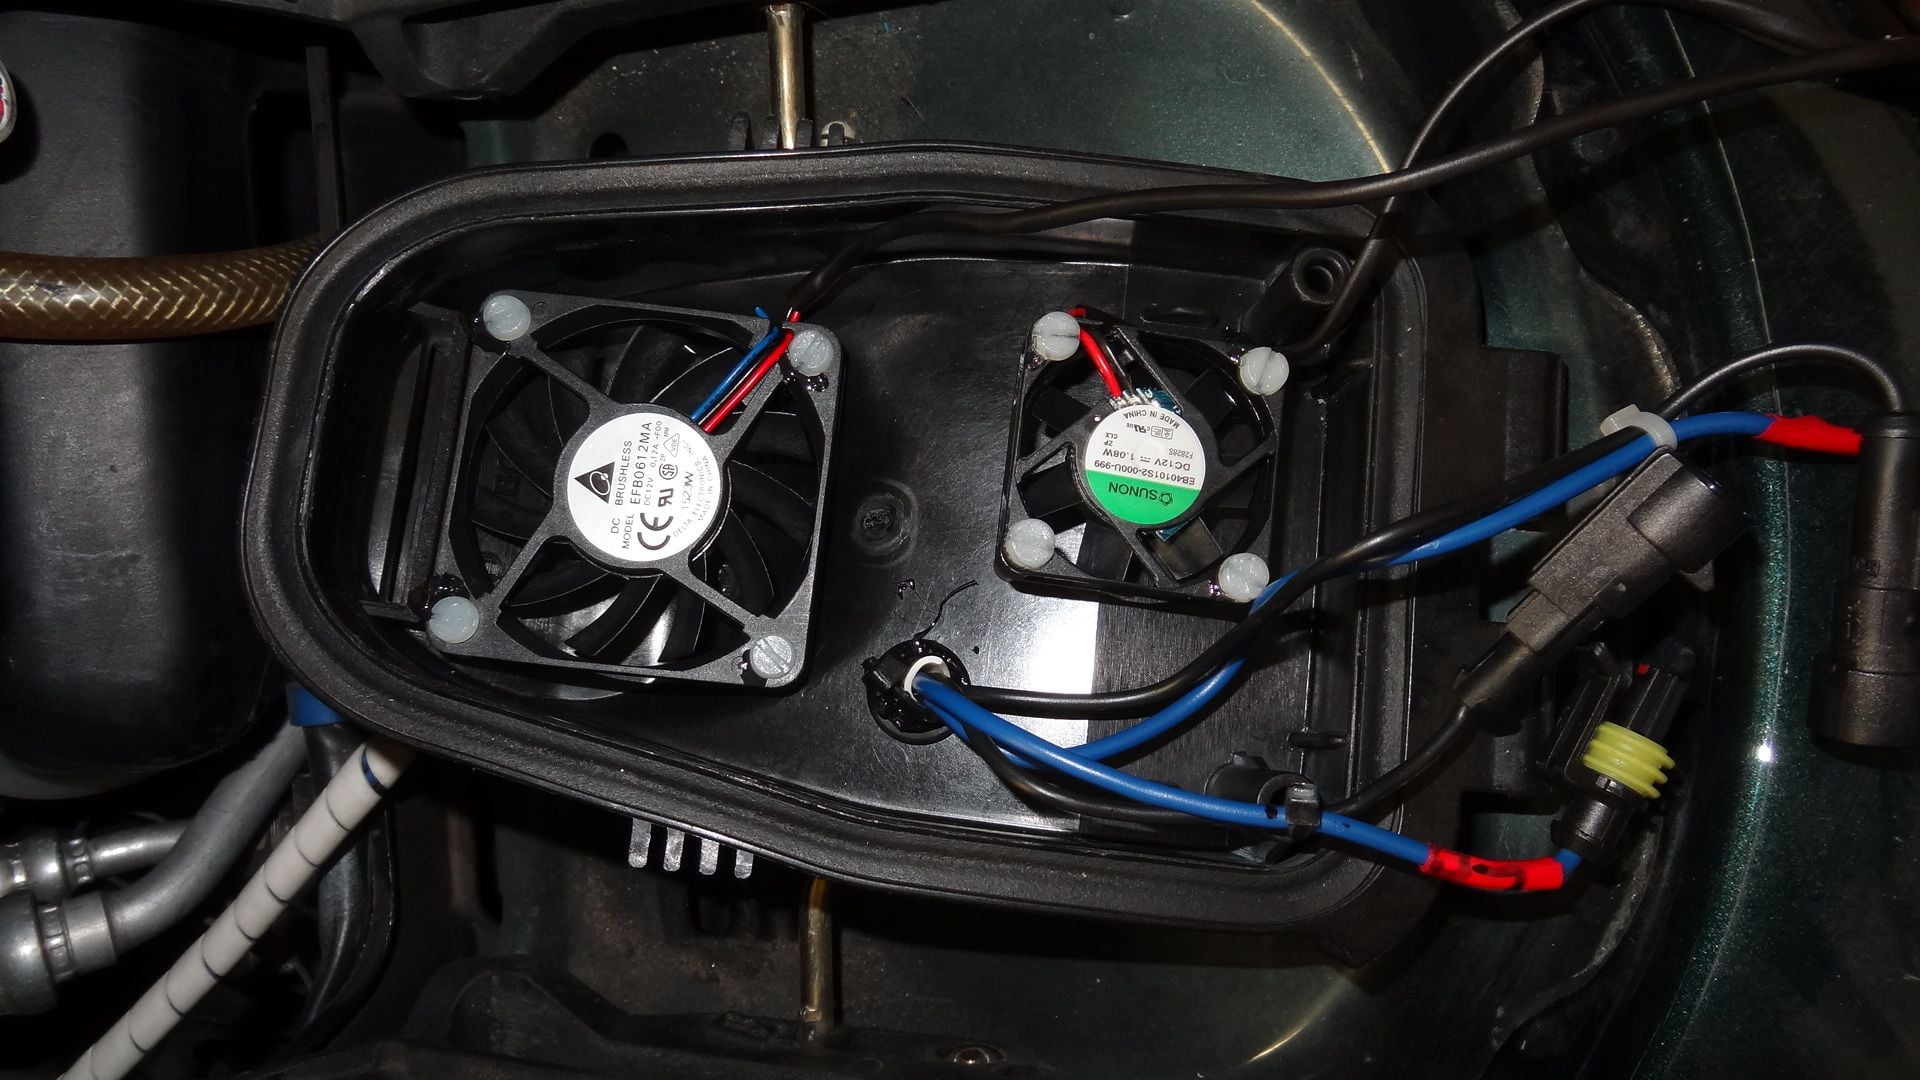
I ended up adding cooling fans to the inside of the housing lid, for piece of mind.
You'll find plenty of people that have installed Mini Morimotos and posted it on youtube. The light output is just awesome and I like the immediate slider action from low to hi.
I spent a good day measuring and fabbing brackets for the new lenses. I think it was all worth it and easily doable for someone who's a bit handy with regular tools.
The trimming on the plastic housing is so minor that if I wanted to, I could reinstall the old projector and make it stock again. So even if you don't have a 2nd set of headlights, I'd do it again but at the time I had no idea if it would fit or not. All I knew was that the new lens had the same diameter as the old one and that the housing was smaller. I didn't think it was going to be this easy.
If anybody has ideas on how to improve it let me know. I hope it provides some ideas to others out there too.
Ed
Sonny1,
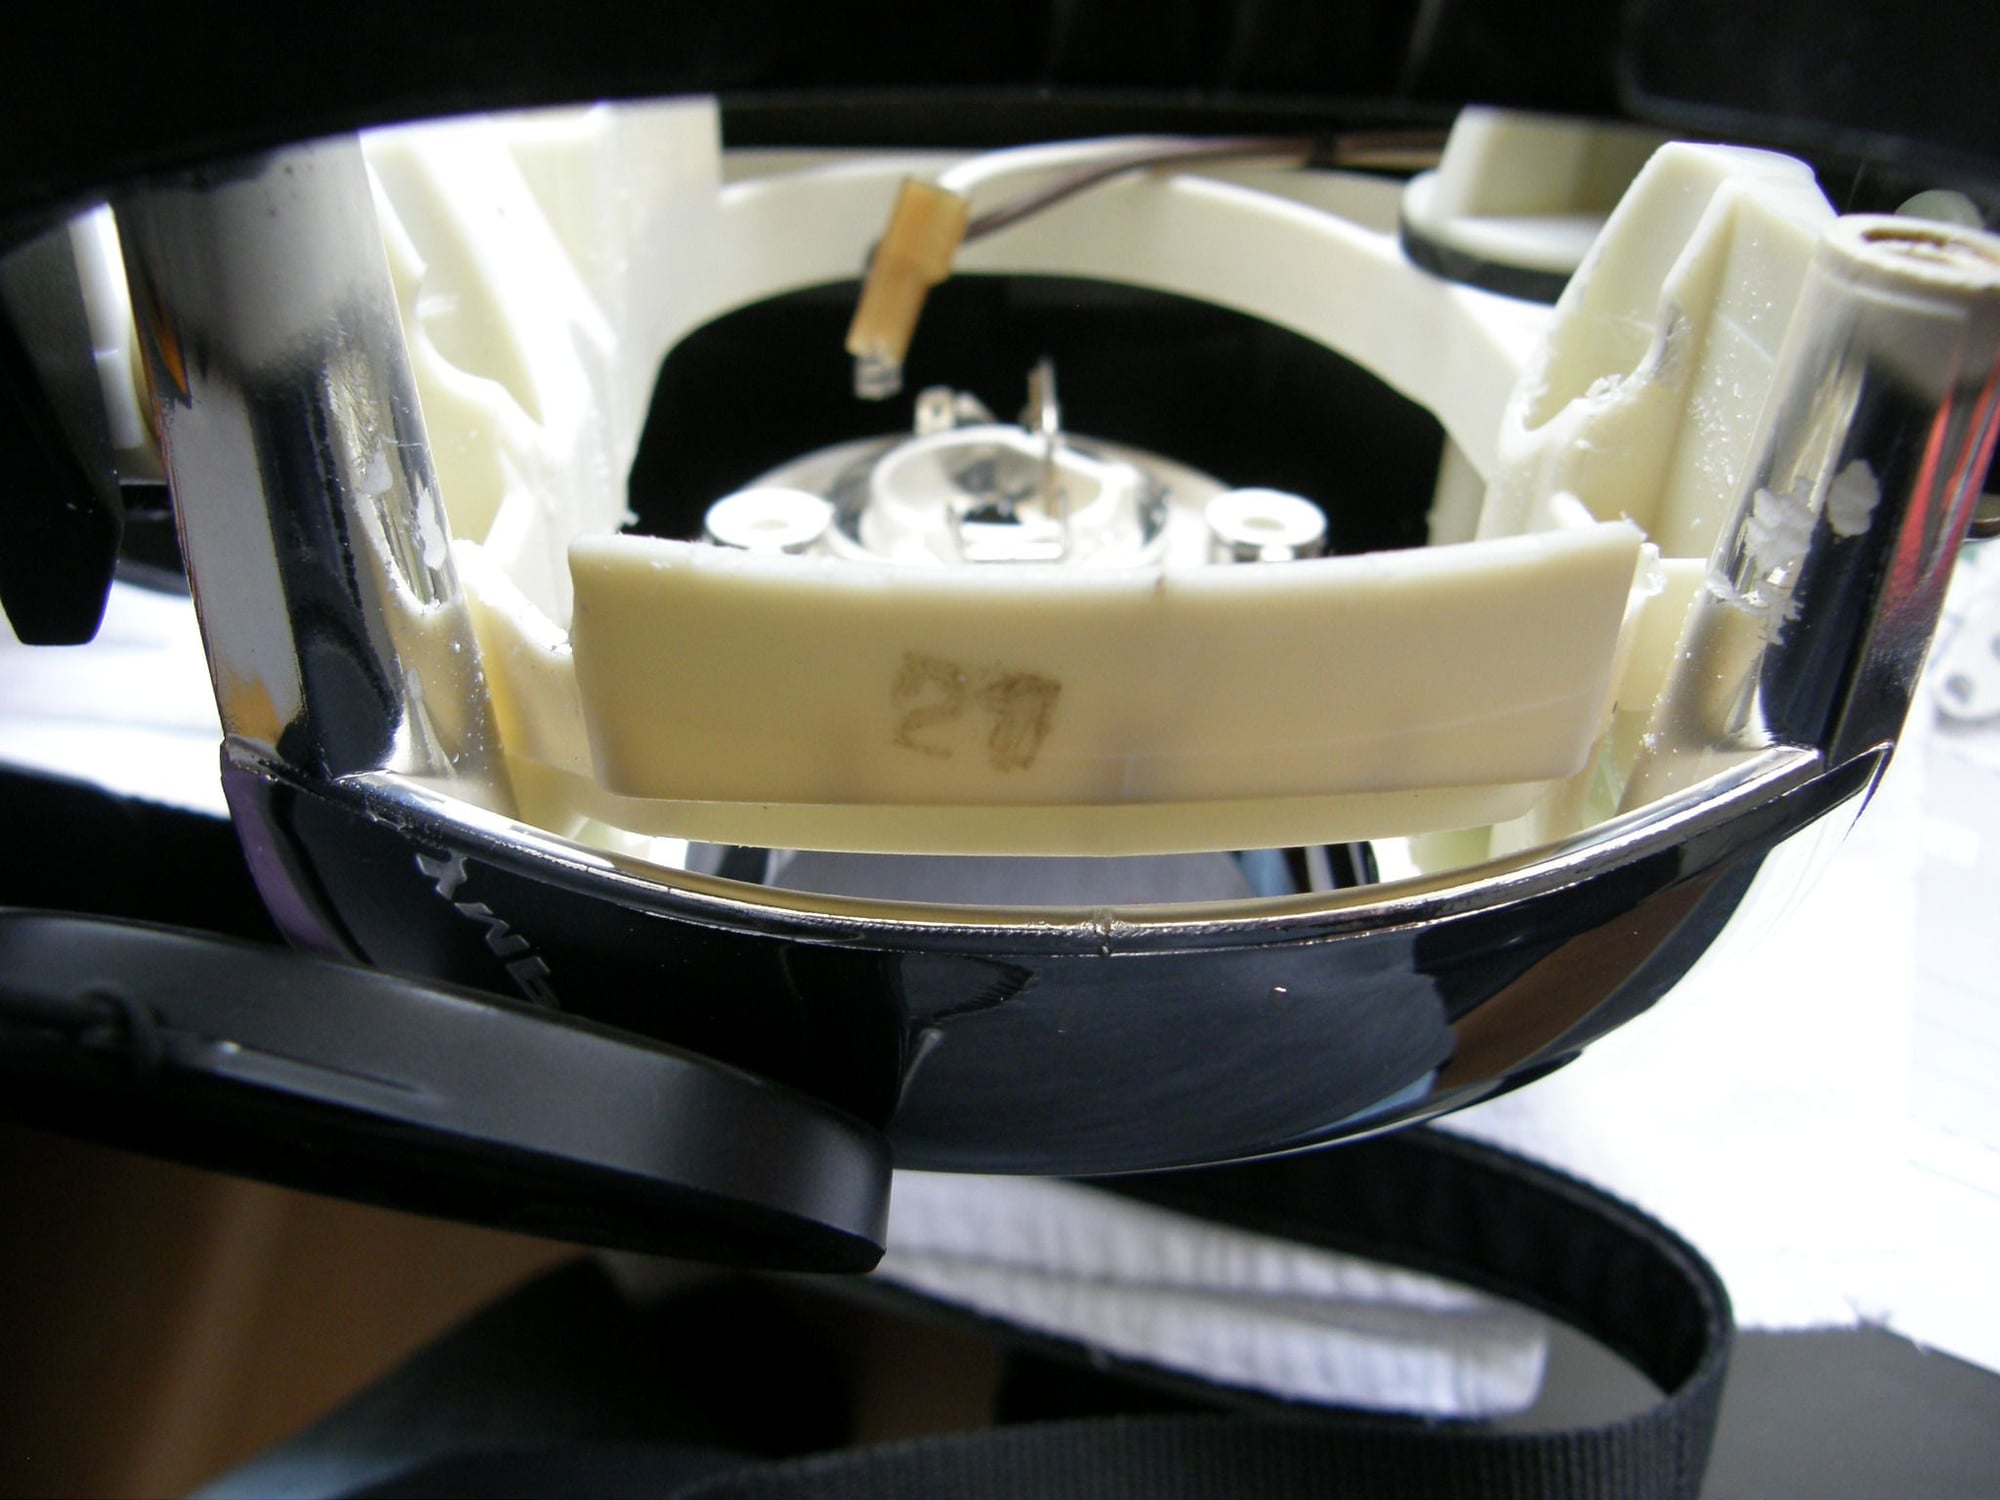
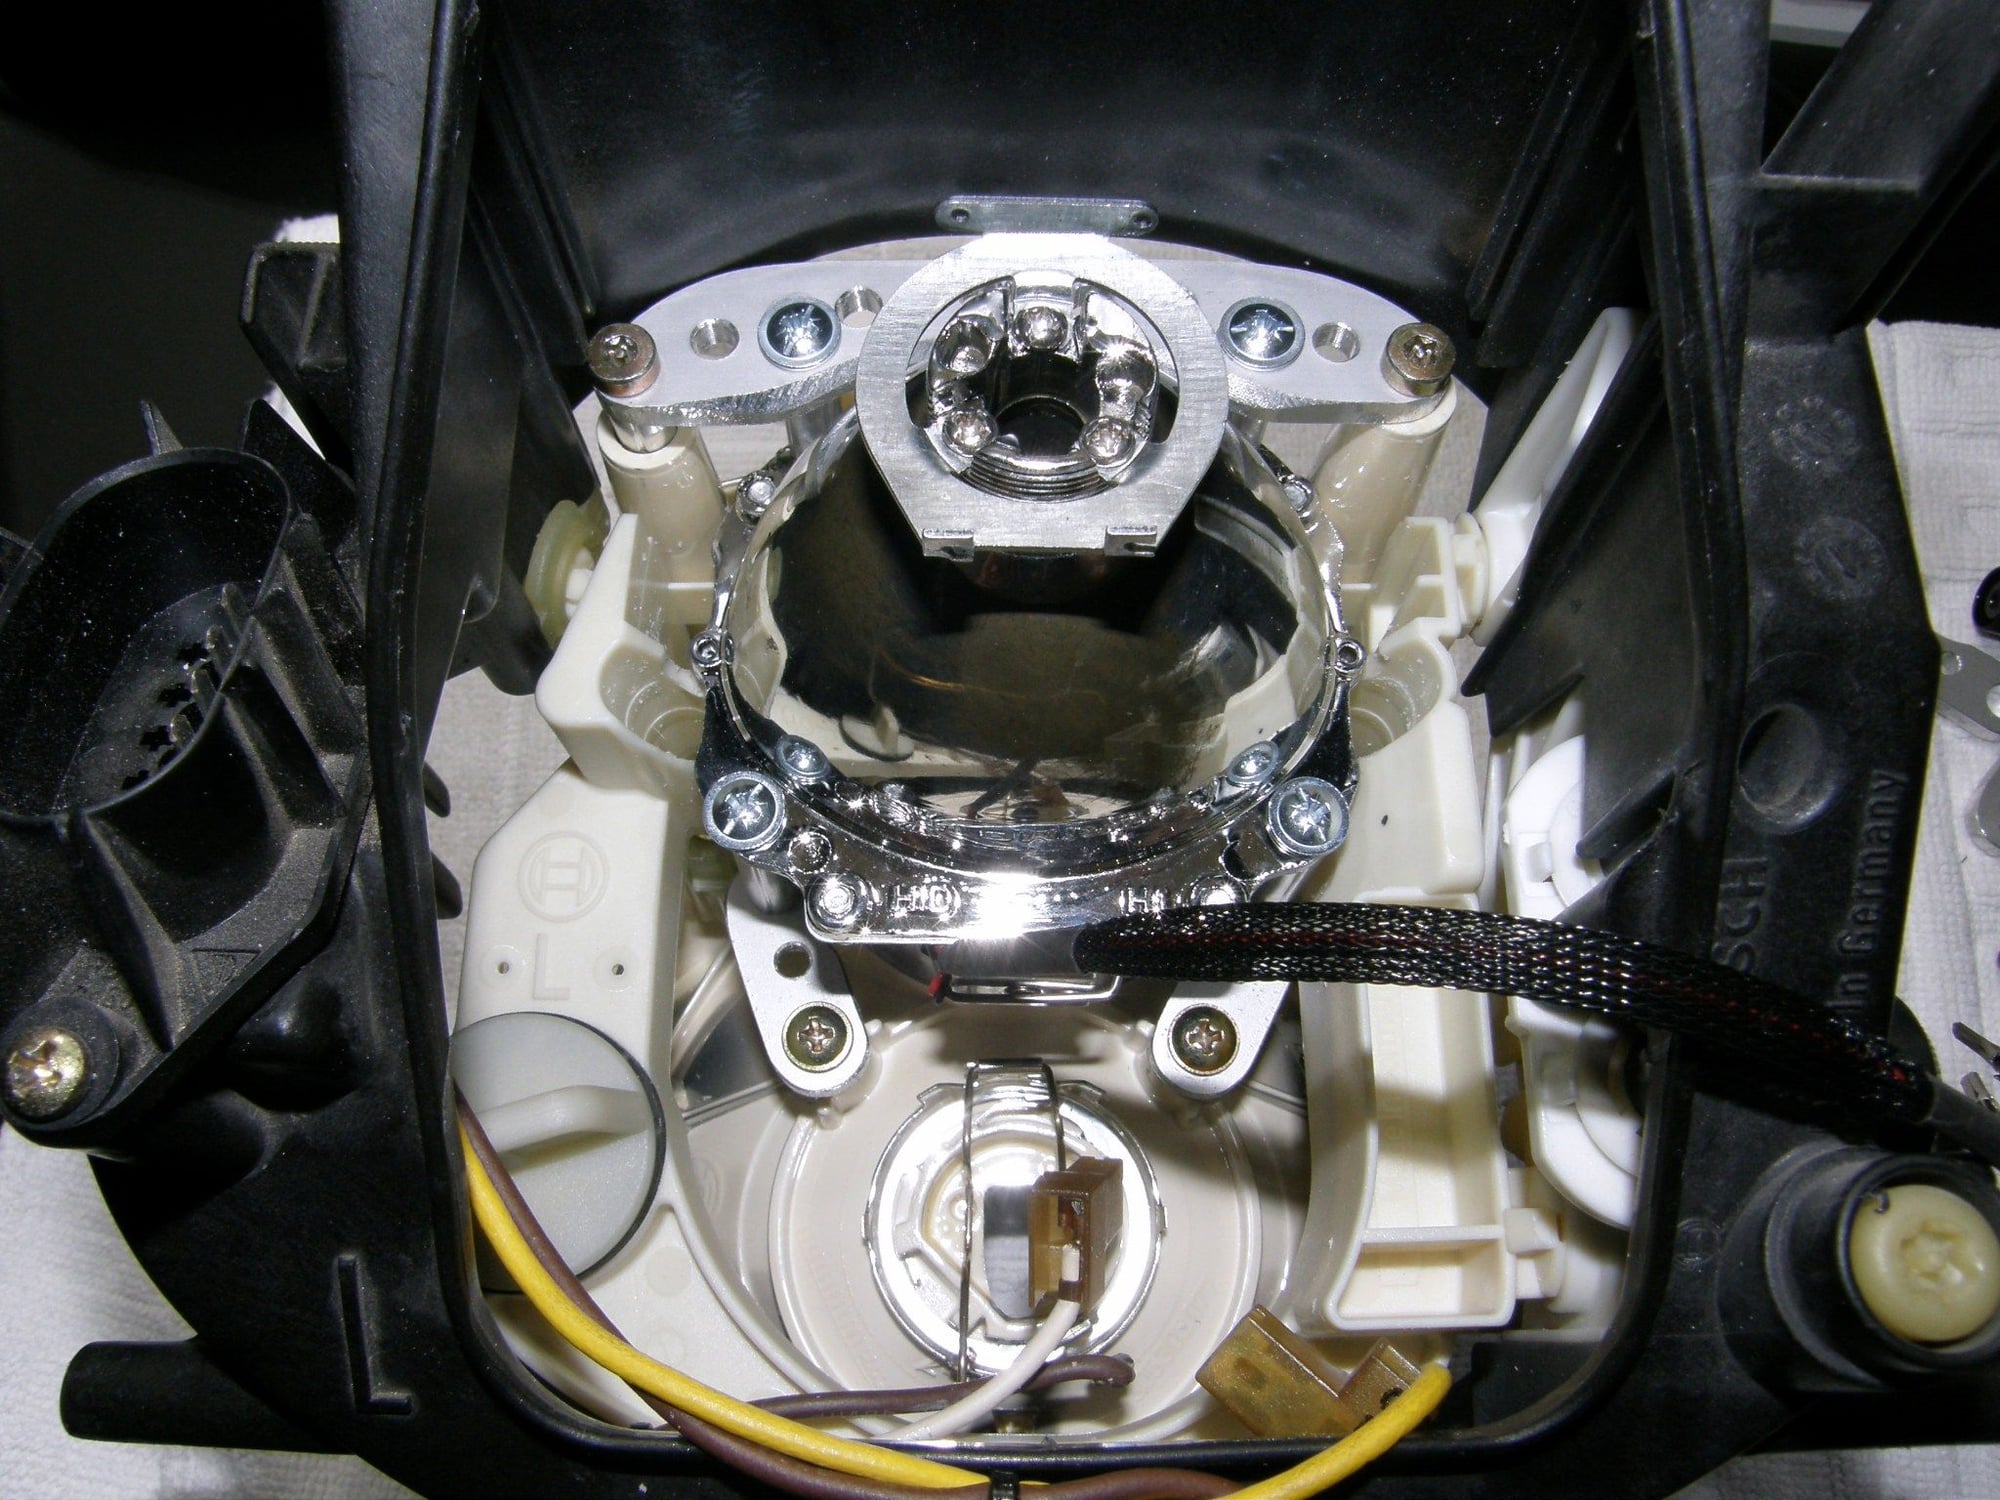
Take a look at the 2nd pic. You see an arc shaped piece of metal inside the housing. There's a small coil attached to it. So when you hit the hi beam switch, the coil energizes and moves that piece away from the beam of the light. So all the light can now move through the glass lens forward. It's like an obstruction that's controlling the light beam into different shapes.
It's mechanical so the burner doesn't move inside. Kind of like your sun visor. You put it down and you cut the light. You put it back up and have full view.
Ed
Your avatar shows you now live in Bavaria. Is that the Euro one or one in N.A.? The reason - I expect you looked around for the best kit for this, and was wondering where you picked it up? Save myself some further Googling ... Thanks.
Hello Slangford,
This is a kit you can't really buy as I did all the brackets myself. The projectors are Mini Morimoto. You'll find them on the web. I came up with the rest. It's pretty straight forward if you're handy with tools.
This was my way of installing it. I don't think many 993 drivers have installed true Bi Xenons. The common thing is to just retrofit H1 burners but I liked the idea to have the fast HID response from low to hi plus the added light output of a 2nd set of burners for hi beams. This way it doesn't matter that they take 5 seconds or so to fully warm up. The turbo lag is gone so to say.
Ed
For anybody who's interested in a pro kit, the retrofit source team has now built an upgrade kit for bi xenons for our 993.
I was just browsing for new stuff and found this:
This is pretty much what I've done 3 years ago and now it seems it's even easier to do. Check it out. I'm not affiliated in any way. Just wanted to pass on the info.
Ed
All in, bi-xenon's, new ballasts, drivers, bulbs, harness, dual hi beam thingy, etc...about $320. This would probably cure the insufficient high beam issue with the car....
Great write-up! I am about to do the same to my headlights.
I was unaware that slight modifications were needed with the Morimoto projectors. I thought the Morimoto projectors were a direct replacement for the old ones. Was I mistaken?
 04-06-2013, 06:22 PM