When you click on links to various merchants on this site and make a purchase, this can result in this site earning a commission. Affiliate programs and affiliations include, but are not limited to, the eBay Partner Network.
I believe Wolf is 1/2 correct, and JB 1/2 correct.
Think, the straw theory, exhaust gasses passing through SAI port to another cylinder with lower pressure. Good valve seals/ Pistons rings, not a lot of burnt oil also passing.
However, if you are burning oil, those fumes would be travelling the passage, leading to clogging?
I think there may be some contribution of a bad SAI valve to clogged ports. It would be interesting to know if anyone with clogged ports had a good SAI valve. On my car, the SAI valve and the manifold corroded out and then I got the CEL. The valve and manifold have been finxed, but now the ports are clogged.
Juat a thought: What would happen if I pour Textron into the SAI ck valve hole, fource compressed air into ck-valve hole, then close off ck valve hole; then start car ? Would the exhaust ports blow the carbon out the CAT and mufflers ? I ask because removing and reinstalling the exhaust manifolds on a high miles non-garaged-northeast 993 always creates bolt/nut $problems. Those who are removing their exhaust manifolds: Are you just catching the carbon in the visible ports and no other reason ?
Why not just reinstall the check valve, it blows air for +/- 2 minutes when you first start the car. I think if you just closed it off, the Textron would likely just sit in the passages.
I think if there is any carbon buildup, the techron may loosen it, but most people seem to need to physically agitate the carbon with something (bike brake cable, guitar string etc) to get it to break up combined with the flushing to get it to come out.
I think I read somewhere techron is not good for your cats either....
Would sticking an internal pipe wrench or screw extractor down the throat of the valve achieve the same result as the pound down the socket approach w/o exposing the engines body to the pounding force/shock?
Juat a thought: What would happen if I pour Textron into the SAI ck valve hole, fource compressed air into ck-valve hole, then close off ck valve hole; then start car ? Would the exhaust ports blow the carbon out the CAT and mufflers ? I ask because removing and reinstalling the exhaust manifolds on a high miles non-garaged-northeast 993 always creates bolt/nut $problems. Those who are removing their exhaust manifolds: Are you just catching the carbon in the visible ports and no other reason ?
I've done a similar process in the past however I used Hoppe's #9 gun cleaning solution. However, w/out the exhaust manifold off you have no idea which/how many ports are flowing, which are clogged and need further attention. Plus, you don't want something like the Hoppe's #9 getting into your exhaust system/cats, that stuff would stink for quite a while.
I usually separate the lines so I only flow fluid thru 1 bank of cyls at a time to concentrate the flow.
Mike, I have the same issue or similar on my 97 c2.
I am currently searching for solution.
To share info, the DME tries to protect the motor when CEL is on.
Note- it also retards ignition timing = the longer cel is on = potential damage to Cats. Very expensive part. The longer the light is on, engine continues to reduce power.
First ran PIWIS tester and showed both ports - error code 208 /80
Did a smoke test next - checking for Vacuum Leeks.
It showed air leek from diaphram aka Vacuum Unit. aka Resonance Flap
993 110 462 02
My car was pinging. Drives me Insane!
Terrible in traffic - yes daily driver - so sliding thru congestion, low rpm in 2nd - ping ping
Changed the Vacuum Unit or aka Resonance Valve (as per BillV or Steve Weiner recomendations - earlier opost) and my car is Much more driveable.
Great now slidin thru congestion!
Undfortunately the pinging and CEL came back on.
Going to re-do smoke test next few days and seee if there are any new leeks / other leeks and then likely drop exhaust but will do all tests including removing check valve and ensuring the SHUT OFF VALVE is functioning as it should.
Also, check plug wires on distributor cap - I found a non-firing plug - terminal coated with white substance - so changed all plugs to Bosch Fr5.
Add diolectric grease to terminalks when re-attaching wires to the D Cap
Originally Posted by MDamen
I think there may be some contribution of a bad SAI valve to clogged ports. It would be interesting to know if anyone with clogged ports had a good SAI valve. On my car, the SAI valve and the manifold corroded out and then I got the CEL. The valve and manifold have been finxed, but now the ports are clogged.
Even though the check valve is well upstream of the passages in the head, if the valve is holding tightly with no leakage, no exhaust gasses should enter the passages. Much like if you block the end of a straw with your finger and dip the straw into a glass of water, no water enters the straw.
Hmmm, water and air molecules are of significantly different densities; and for this reason, the comparison above may be somewhat debatable.
What if you put your finger over the end of the straw and stuck it into glass of hot gasses? Would the hot gasses be able to commingle and flow up into the straw? This seems the more apples to apples question.
In consideration, I would believe yes, the hot gas molecules would be able to mix and readily commingle, especially as things heat up.
Do I believe a faulty SAI check valve is the root cause of the clogged passages? No. I think its the design of the system that is faulty.
Even if everything operated as intended, carbon build up would eventually accumulate in and around the SAI passages, and eventually constrict and clog.
I believe a system design flaw is the root cause, which is further exacerbated by worn valve guides, and a faulty check valve; all of which help perpetuate clogged SAI passages.
BTW, Pelican sells a SAI DVD & kit. The kit consists of a Snap-On crowfoot machined to fit nicely under the valve along with a sai valve adapter with an air fitting to hook up to your compressor after injecting the de-carbonizer down the adapter. The P-Car guys are the ones doing the SAI operation..........they have they own site at www.p-car.com.
(attached a YouTube clip trailer from the Pelican site)
Today I replaced the SAI check valve. It has been 2 years to the day since
I first changed it at 73,852 miles. I now have 105,821 miles on the car. So
that is 31,969 miles on the SAI check valve.
I think this is a good service interval as the valve is already showing signs of
corrosion. I have not had any SAI-related diagnostic trouble codes in that
time. If you will recall, I did not use any chemical cleaners in the SAI passages.
I simply used a wire cable in a drill to clean the ports. Time will tell how long
the ports will remain clear enough to forgo more invasive attention.
In the process of doing the replacement, I took the opportunity to revise and
update the procedure. I will include a clear text version in the post as well as
a PDF version which can be printed out for reference.
The previously published link to a photo album is still valid, and in this post I
will include some photos inline to supplement.
First, here is a link to an album for Air Cleaner Assembly removal. I have no
standalone instructions for this. They are usually somewhat included into the
various DIYs. But the captions include information that may help for this
common task. It's kind of an orphan so I thought I would include it here.
Added sealing ring to SAI check valve. Replaced 1/2 inch breaker bar with a
1/2 inch ratchet and pipe extension. Added head protection on lid latch. Added
instruction to disconnect injector wire harness and move. Added rear service
cover. Replaced long P2 phillips screwdriver with socket and locking extension.
Added instruction to disconnect knock sensor and move.
Materials Needed
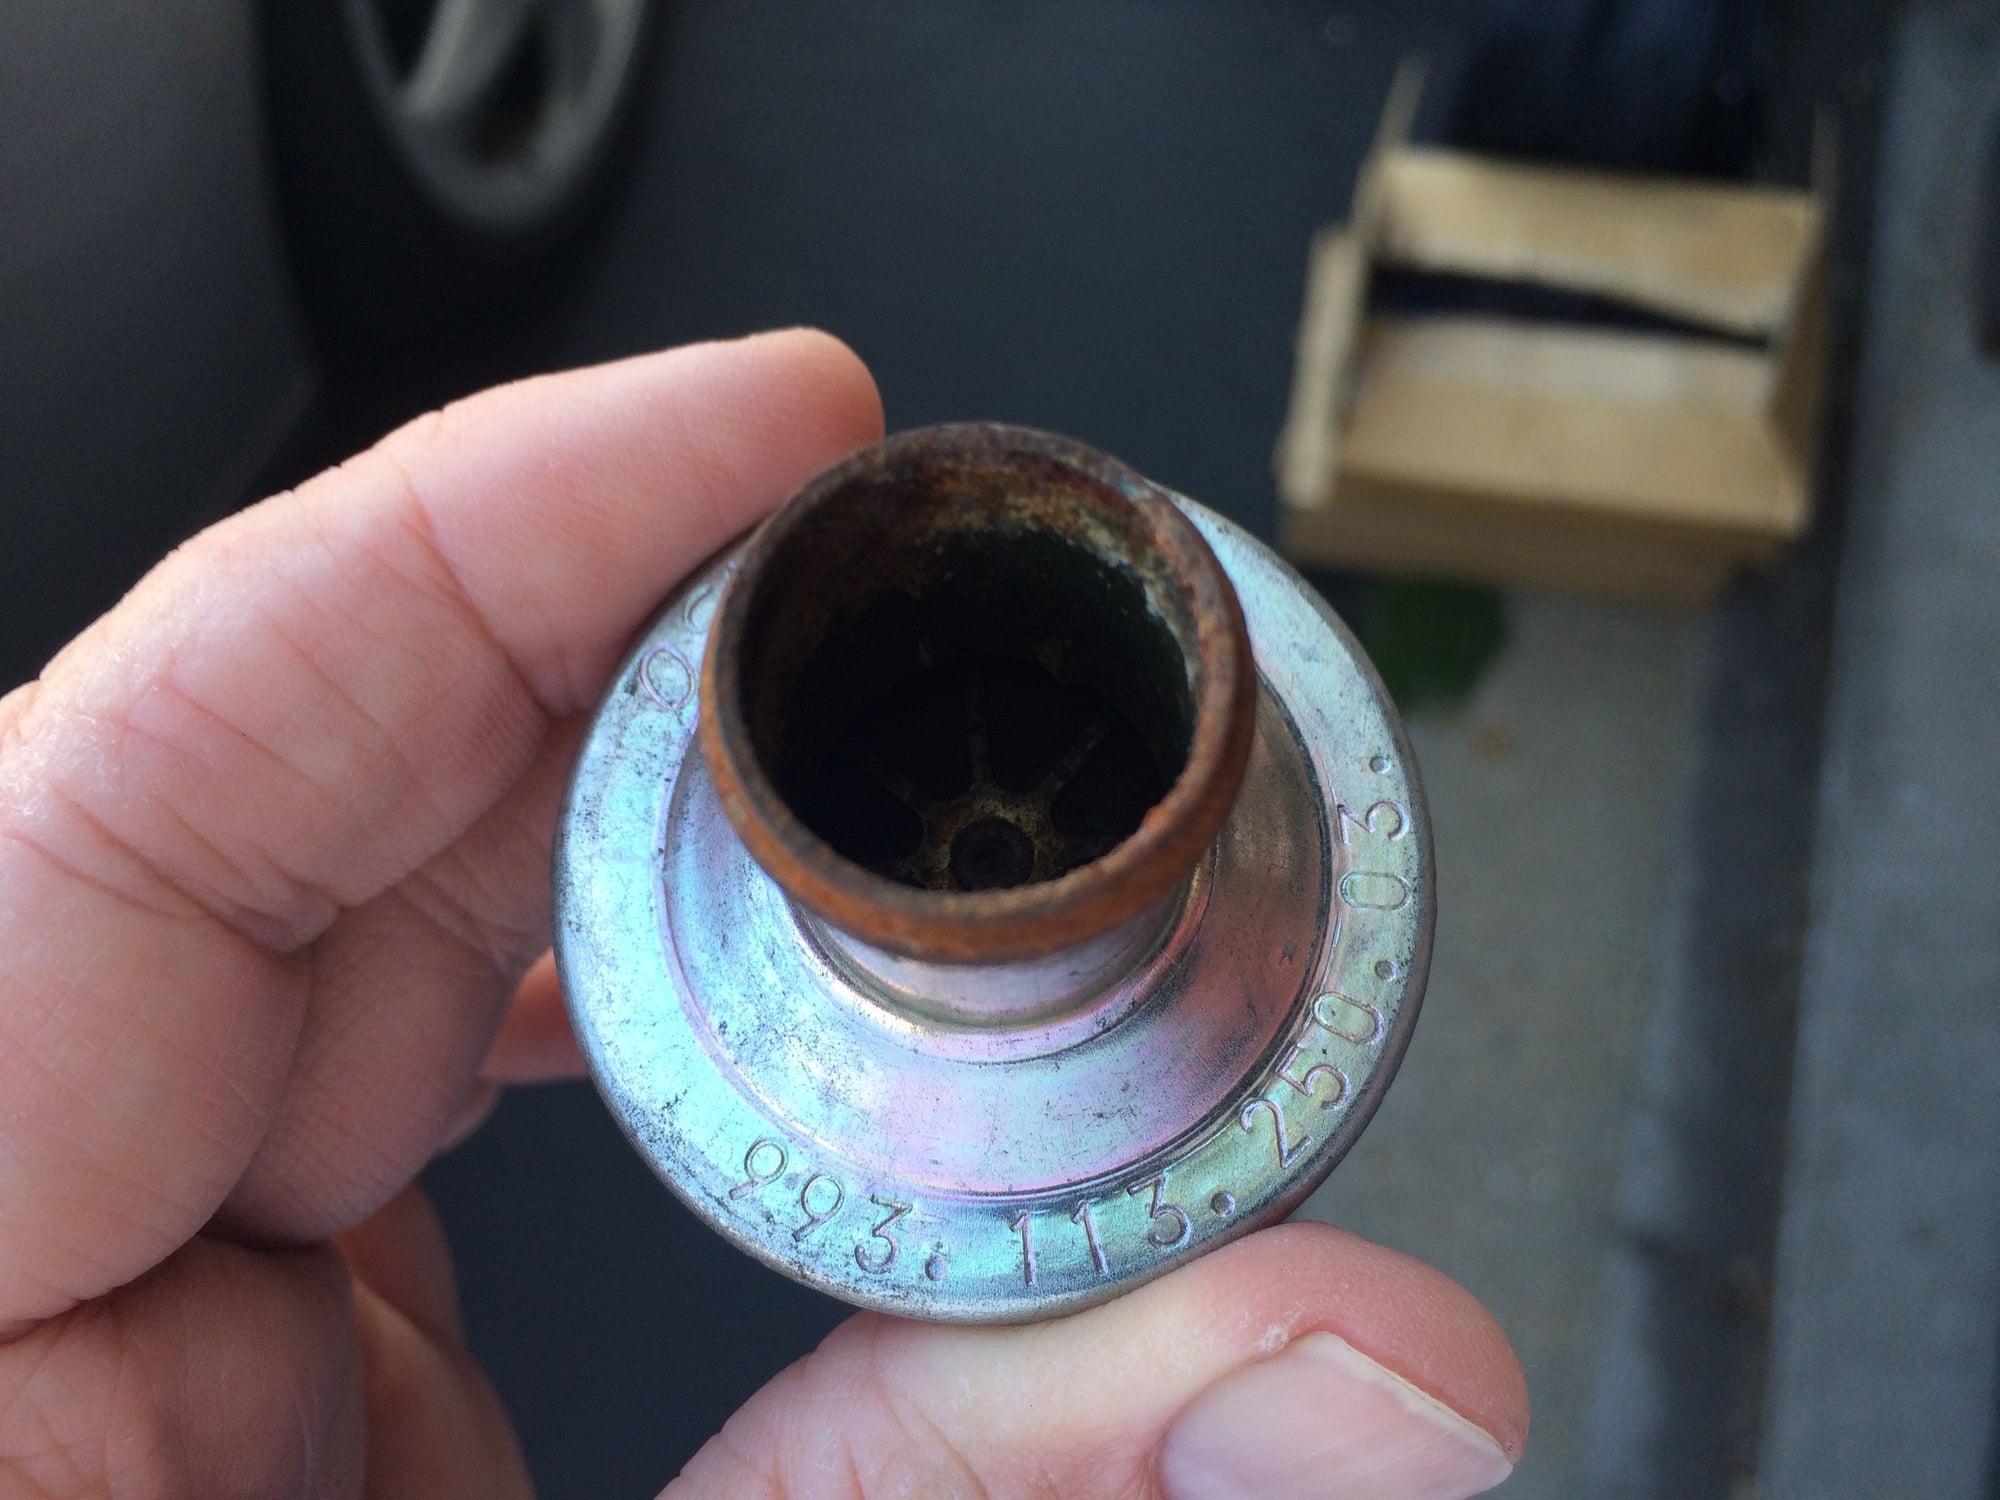
SAI Check Valve 993-113-250-03
Sealing Ring 900-123-118-30
Copper Anti-Seize Paste (Liqui-Moly LM 508)
Rear service cover
Knee pad
Nitrile gloves
Tools Needed
10mm socket 1/4 inch drive
1/4 inch drive ratchet
7mm deep socket 1/4 inch drive
10 inch locking extension 1/4 inch drive
6 inch nut spinner handle 1/4 inch drive
7mm flexible nut driver
special tool (modified 27mm crowfoot)
10 inch long 3/8 drive extension
3/8 to 1/2 inch drive adapter
10 inch long 1/2 inch drive extension
1/2 inch drive ratchet
pipe extension for 1/2 inch ratchet
2x3 inch inspection mirror
Steps to remove and install the SAI check valve:
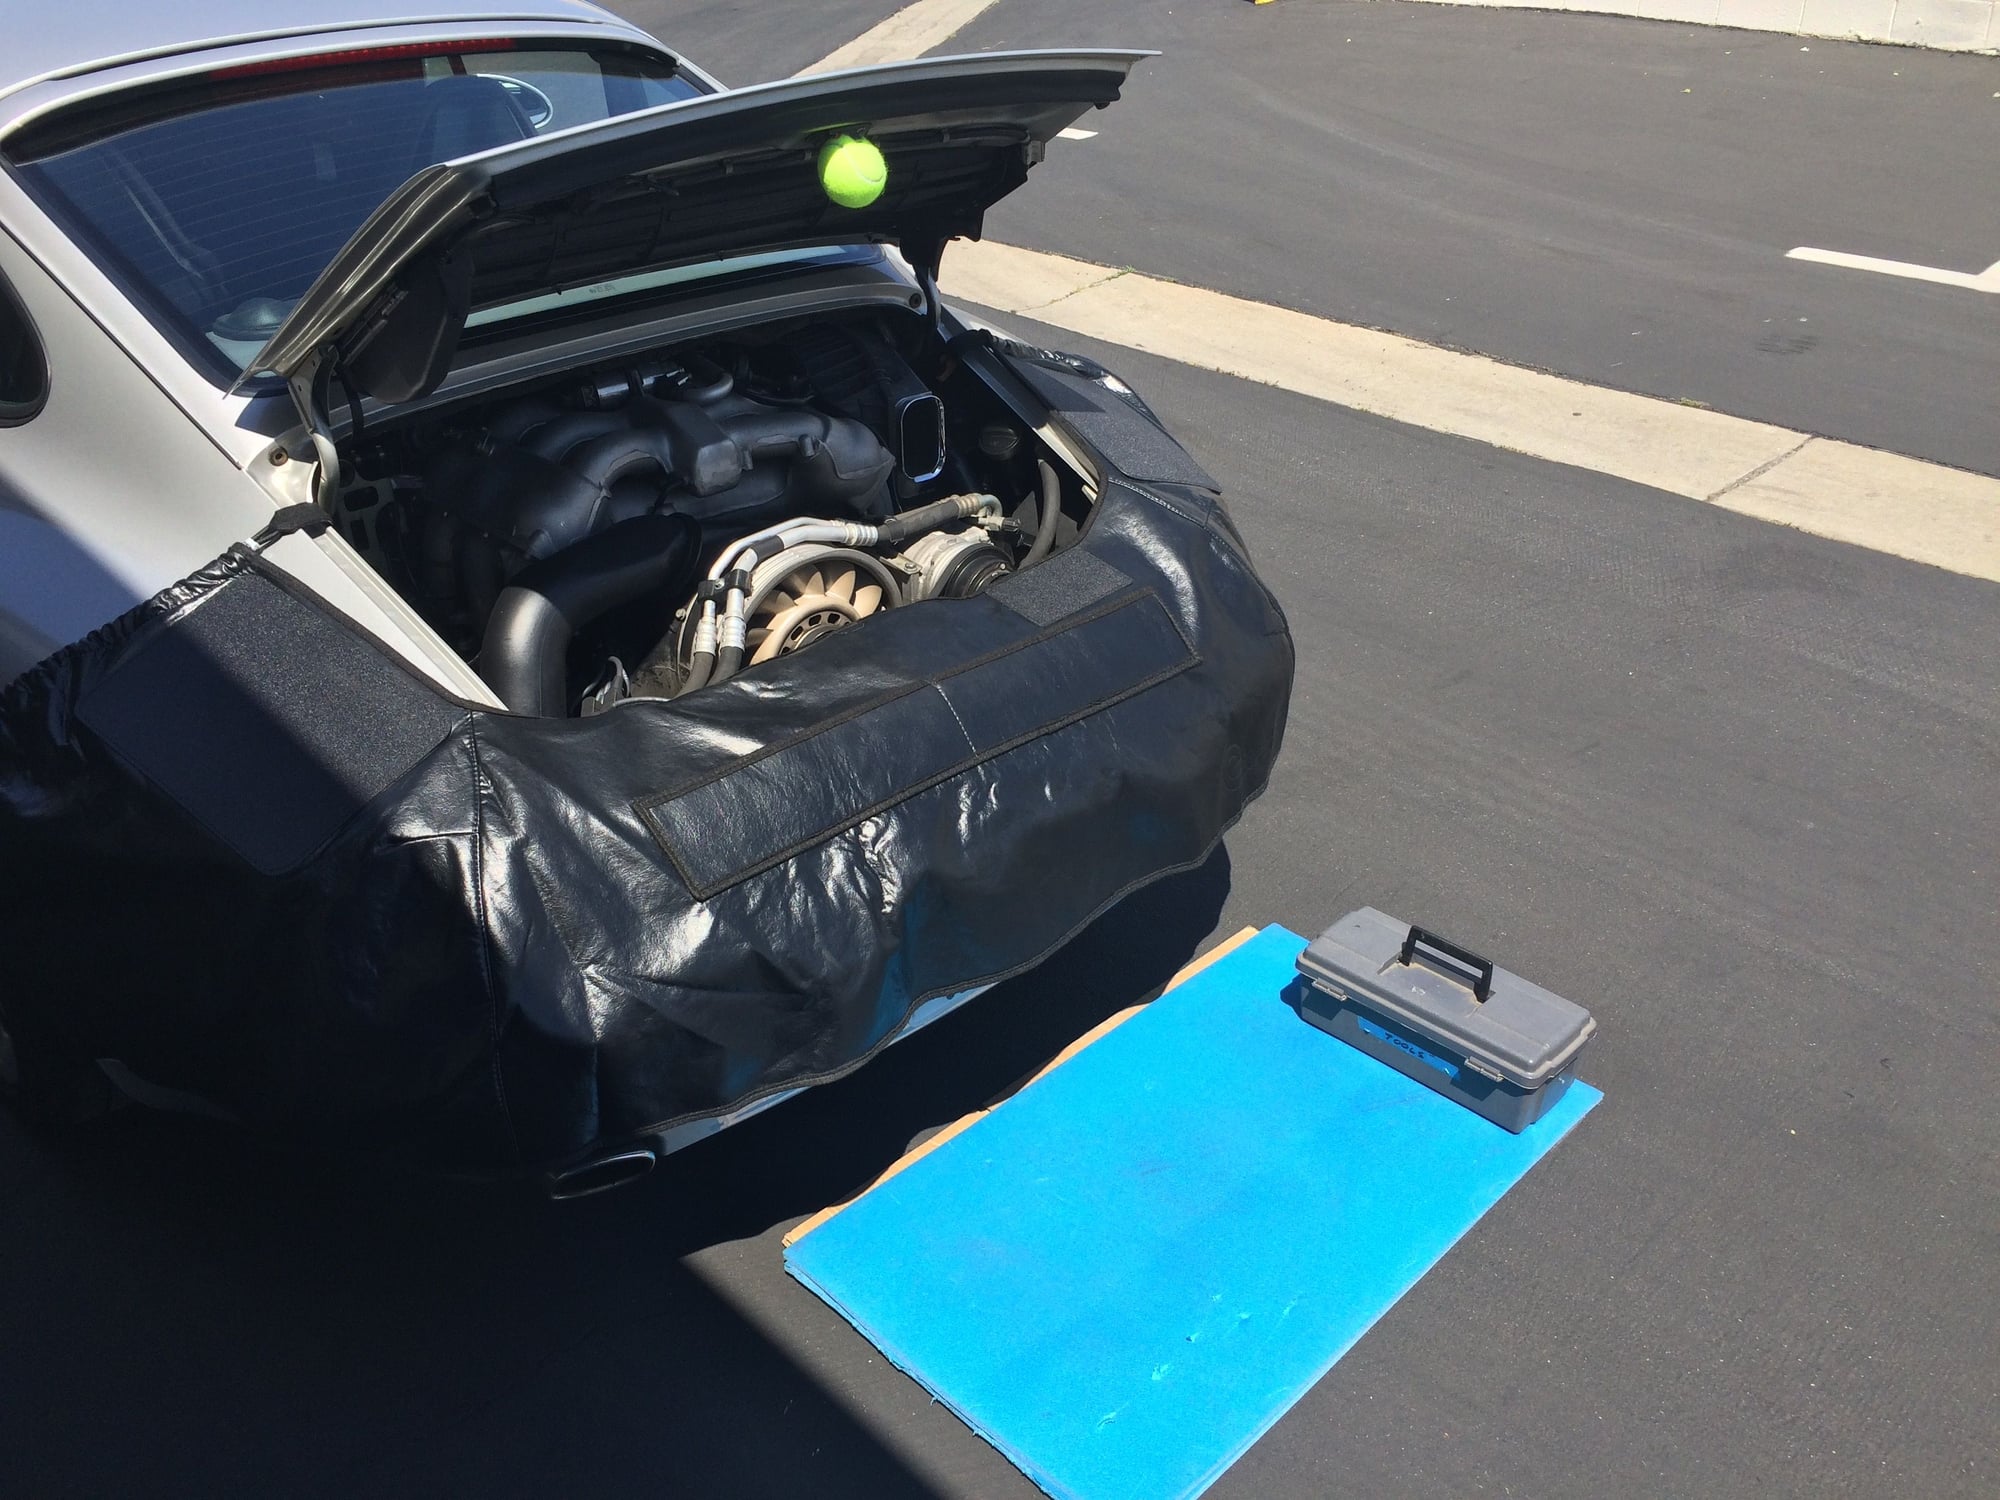
Setup
Note mileage
Open the engine lid and press the latch down to turn off the compartment light
Place rear service cover
Place knee pad on ground
Place tennis ball on lid latch to protect from head injury.
Removal
Remove the air cleaner assembly and MAF sensor.
10mm socket 1/4 inch drive and ratchet
7mm deep socket + locking extension + nut spinner handle
Loosen the hose clamp securing hose to shut-off valve on top of SAI check valve
and move it up and tighten so it will not get lost.
Pull hose off valve and move out of the way.
Disconnect the injector connectors. Remove the plastic clips securing the wire
harness to the fuel rail. Pull the wire harness under the right bank air tube and
move out of the way.
Disconnect the knock sensor for the right bank and move out of the way.
Position crowfoot under the check valve using the 3/8 extension in the rear
most position.
Remove the 3/8 inch extension and snap-on the 1/2 inch extension with
3/8 inch adapter to the crowfoot.
Attach the 1/2 inch ratchet and slip the pipe extension over the handle for
extra leverage and break the valve loose.
If anti-seize paste was used previously, the valve can now be removed by hand.
Take care to not loose the sealing ring under the check valve.
Installation
Apply some copper anti-seize paste to the threads.
Place the sealing ring carefully onto the check valve port of the SAI manifold.
Install the check valve by hand until snug.
Using the crowfoot special tool tighten the valve an additional 1/8 turn.
Install the hose on top of the valve and position the hose clamp for easy access.
Check the vacuum line connection between the shut-off valve and the
change-over valve. It will come off. Use a mirror and flashlight to confirm.
Reconnect the injector wire harness and connectors. Refit the plastic clamps
securing the wire harness to the fuel rail.
Spray clean the MAF sensor with MAF sensor cleaner and refit.
Refit the air cleaner assembly.
Refit the knock sensor connector.
Finish Up
Remove rear service cover and lid latch protection.
Pull the engine lid latch release before closing the lid.
Update the log.
Next, here are some photos from today's replacement.
Rear service cover, knee pad and head protection from lid latch placed and ready to begin.
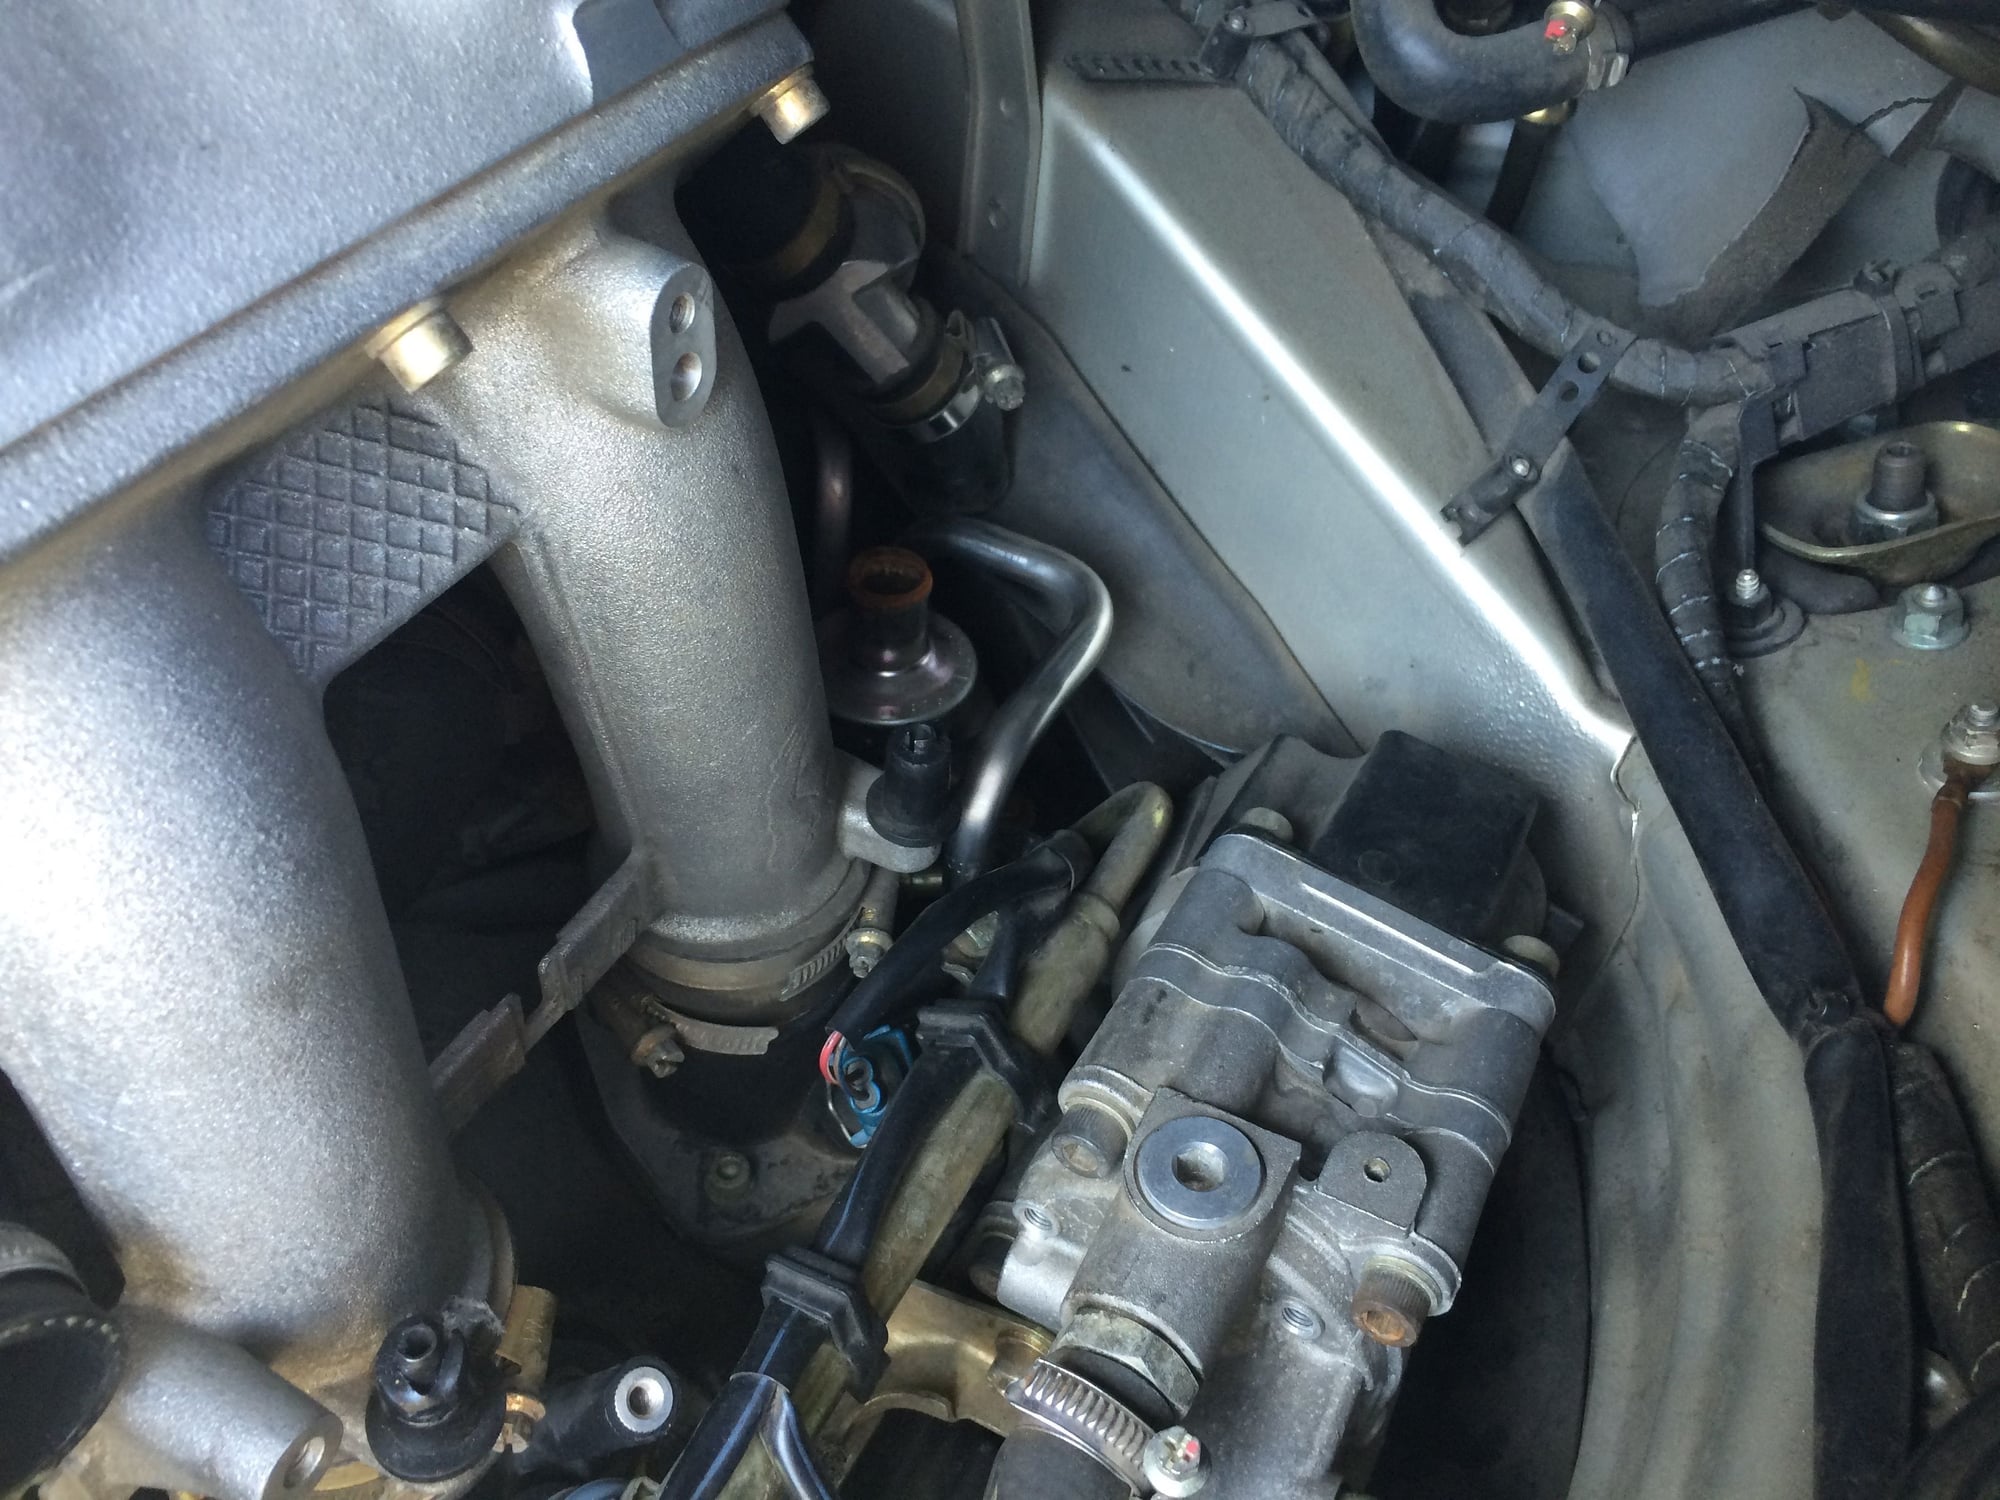
Air cleaner assembly removed revealing the SAI check valve. Hose removed from top of valve.
Note hose clamp moved up and tightened so it won't get lost. Signs of corrosion apparent on valve.
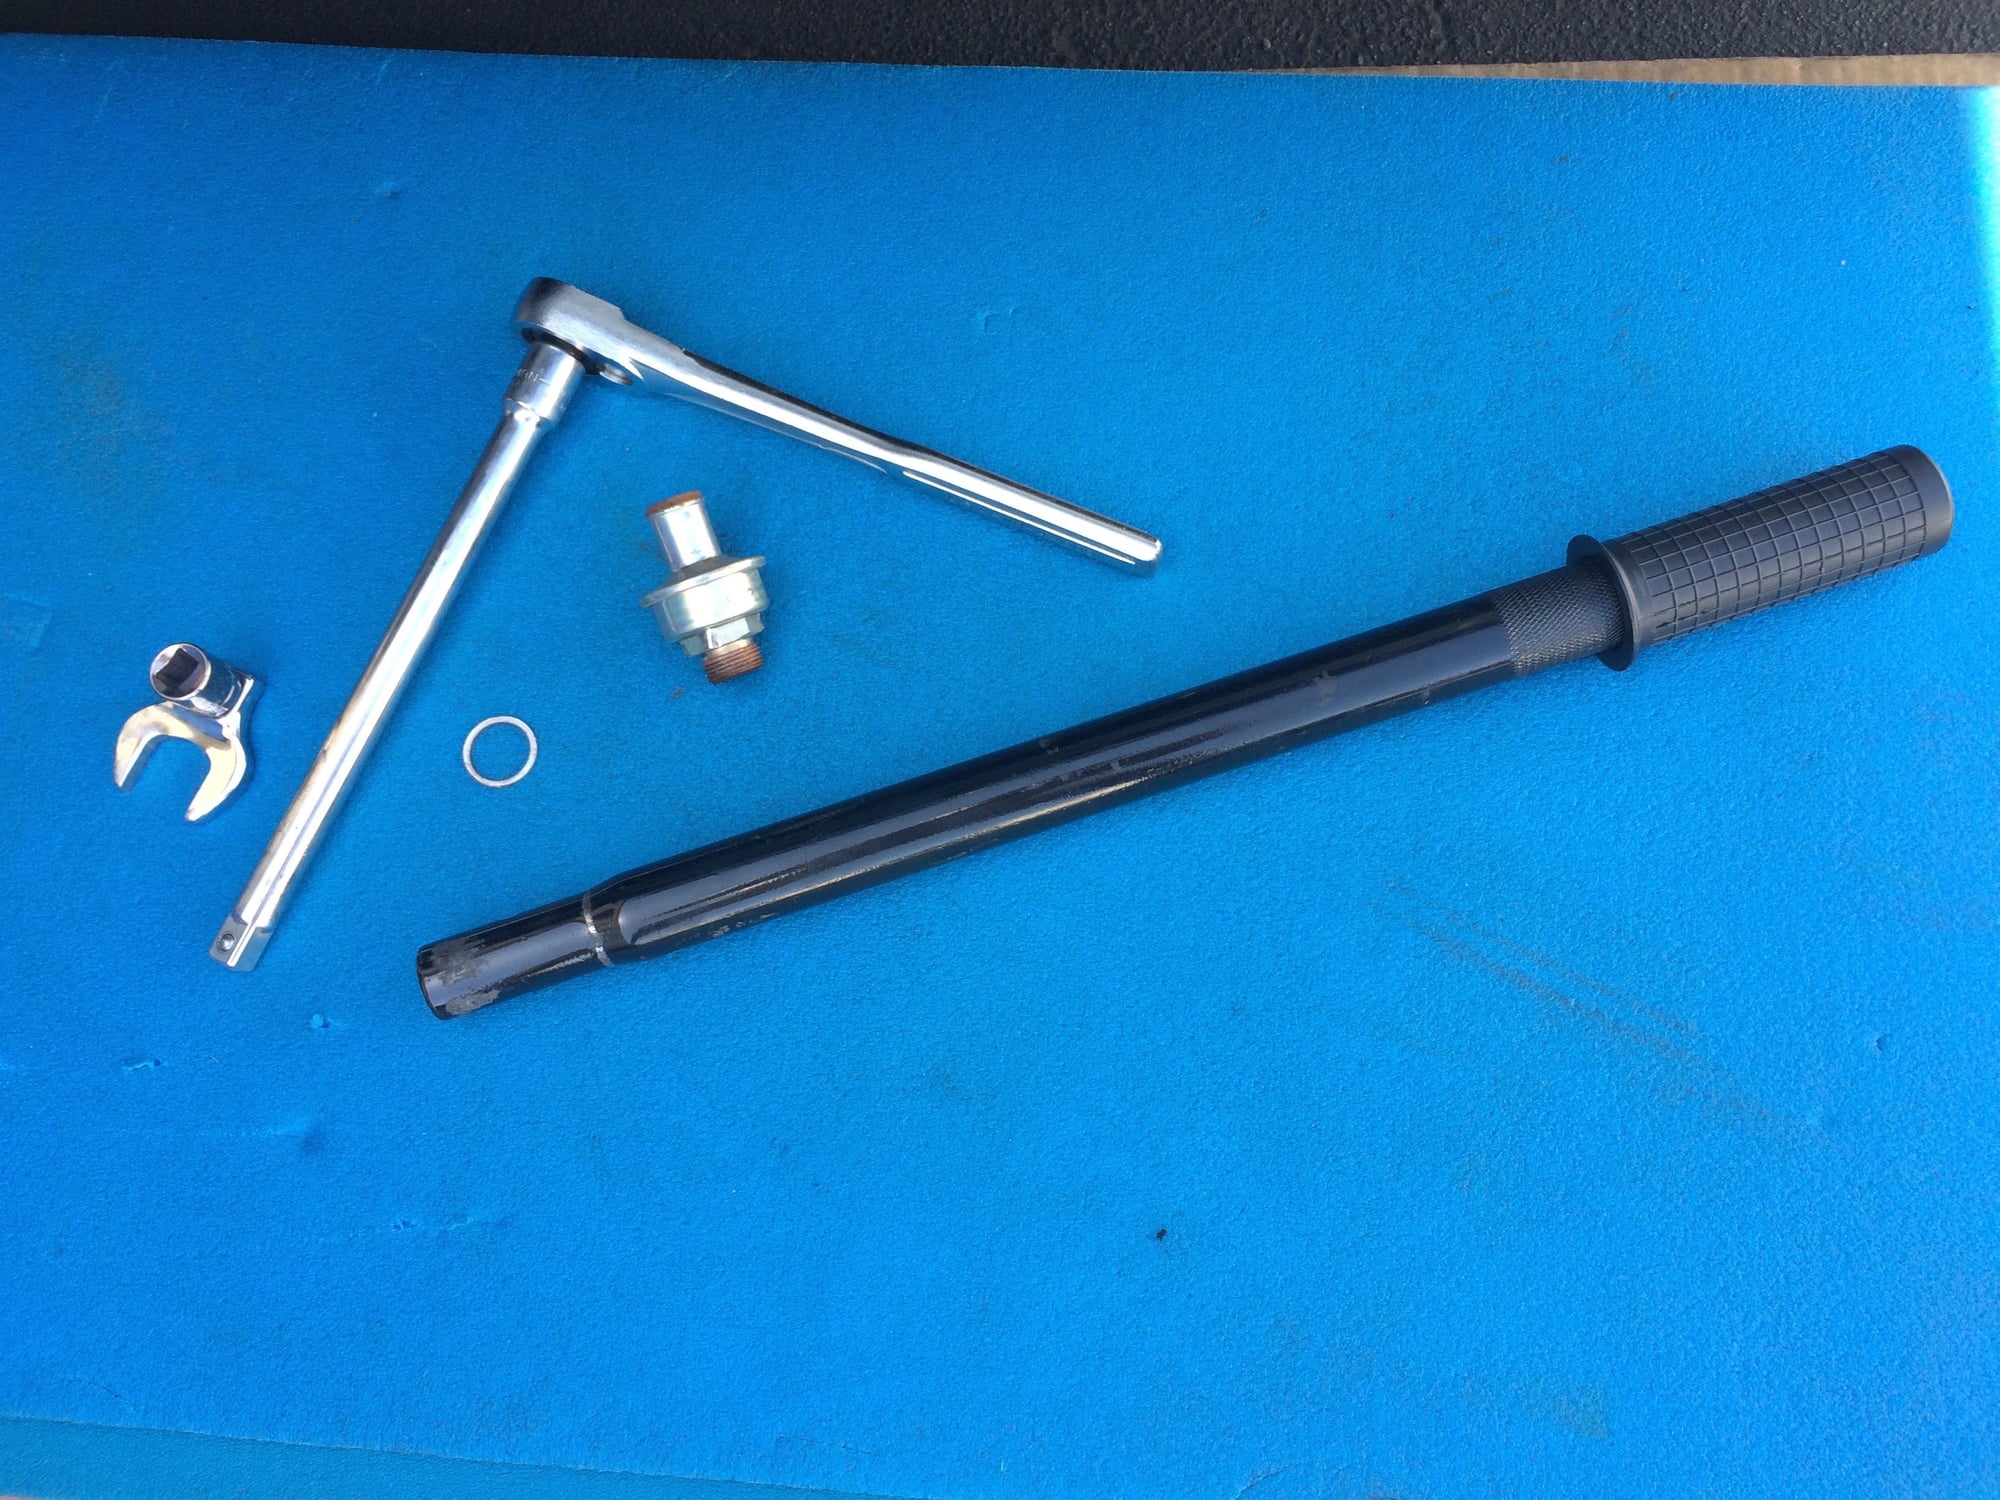
My setup to remove the valve. Two important things to note. 1) use a ratchet to position the lever optimally. 2) use a pipe extension for greater leverage. This is part of the handle to my Sears floor jack.
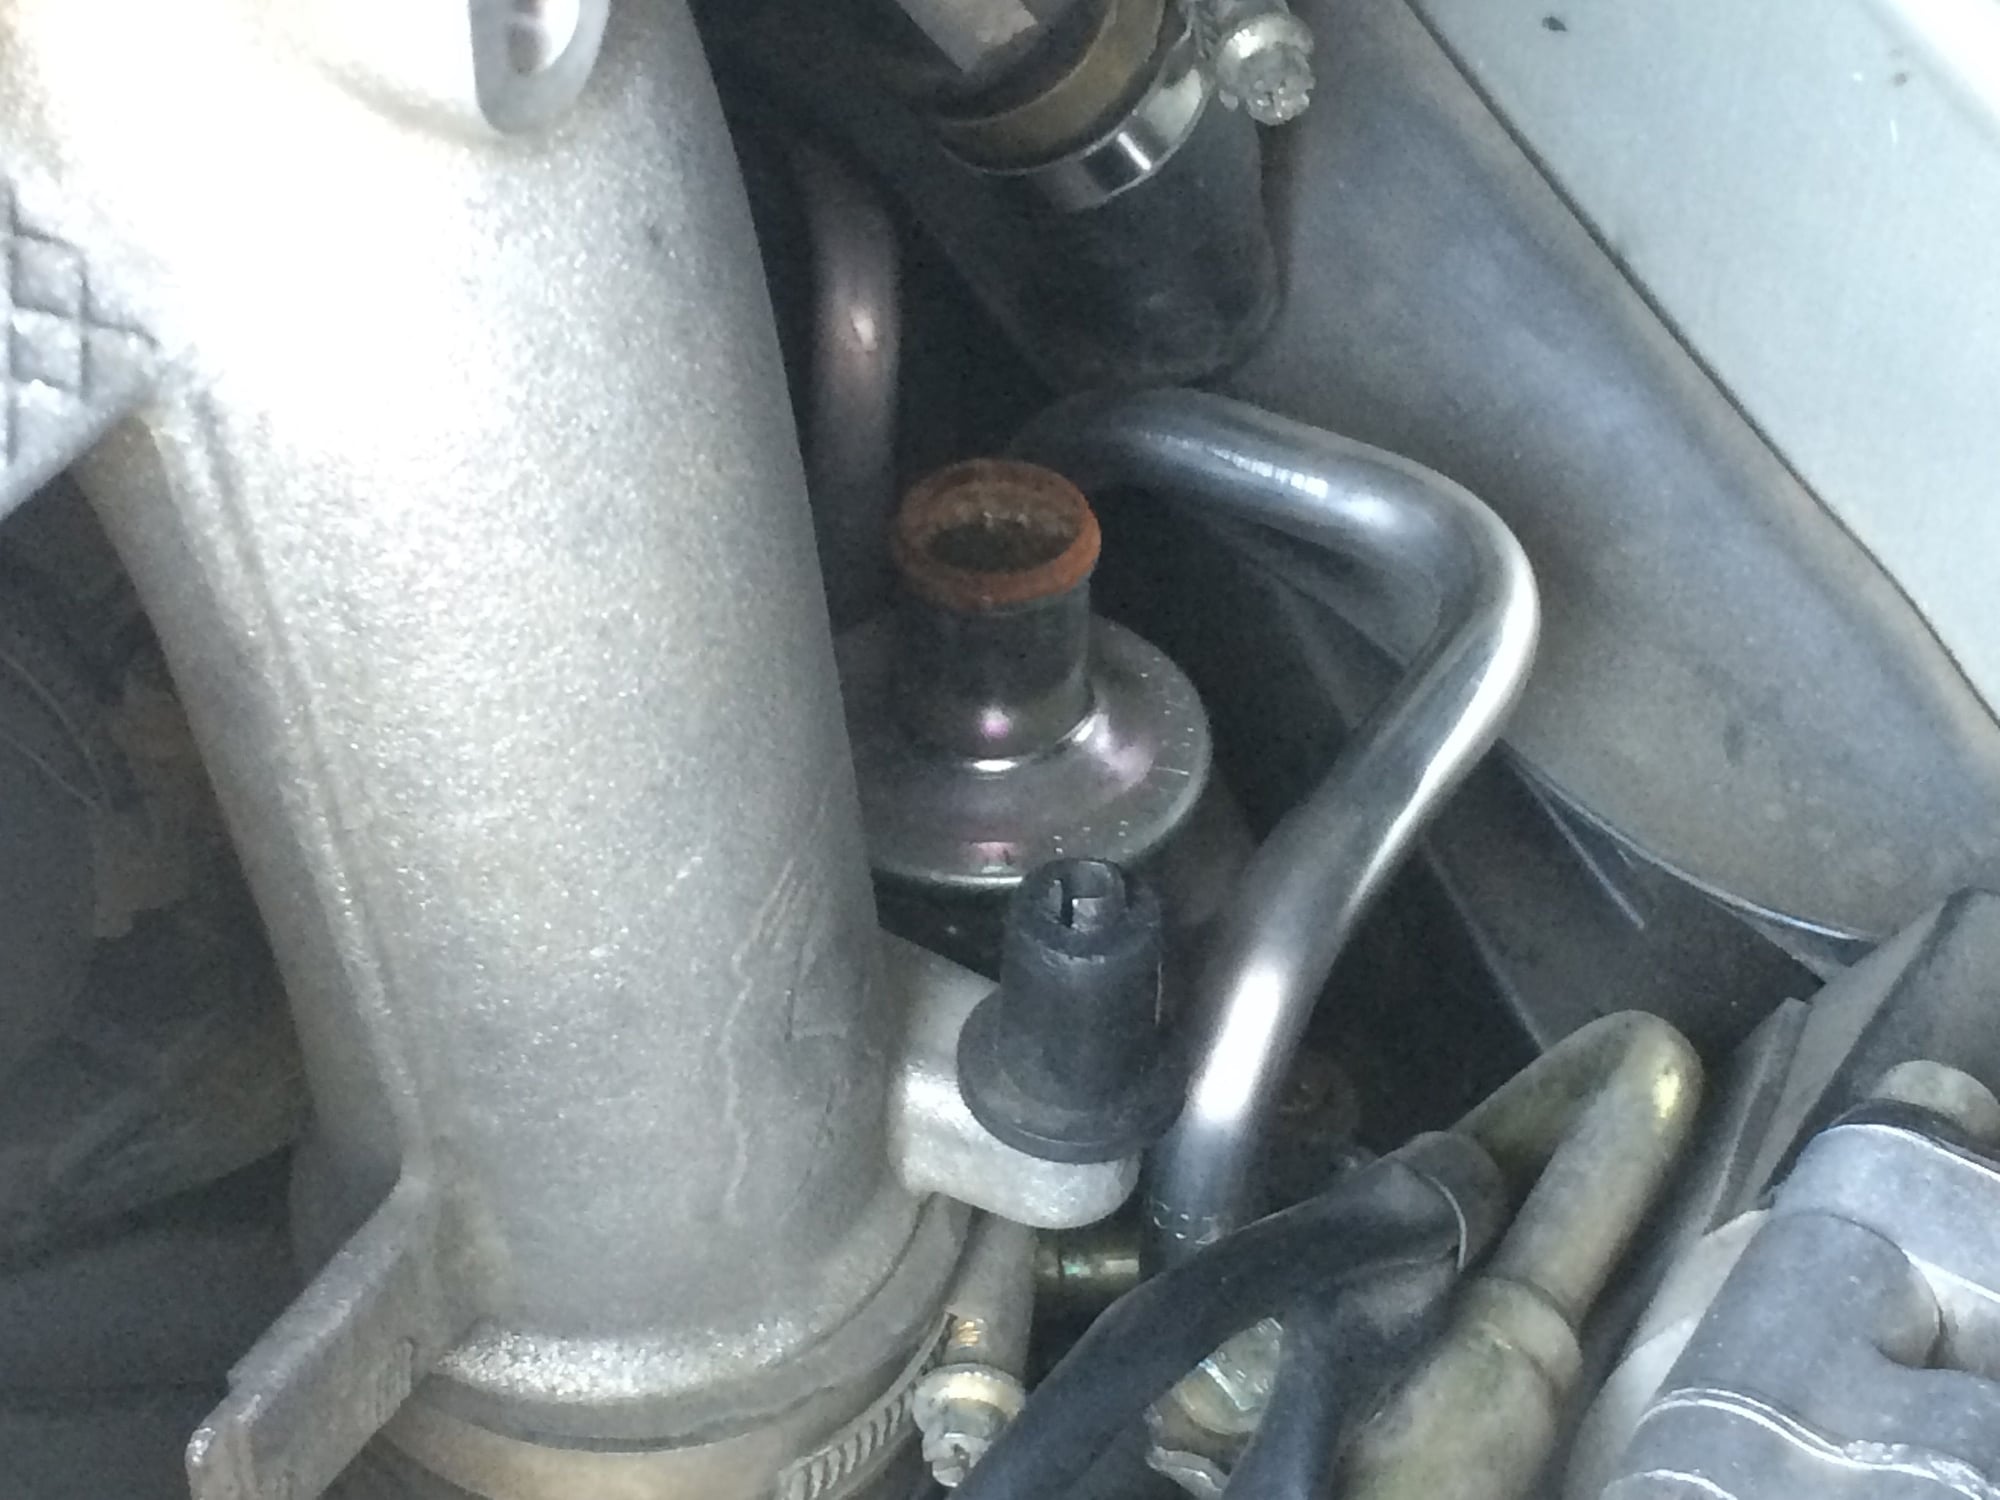
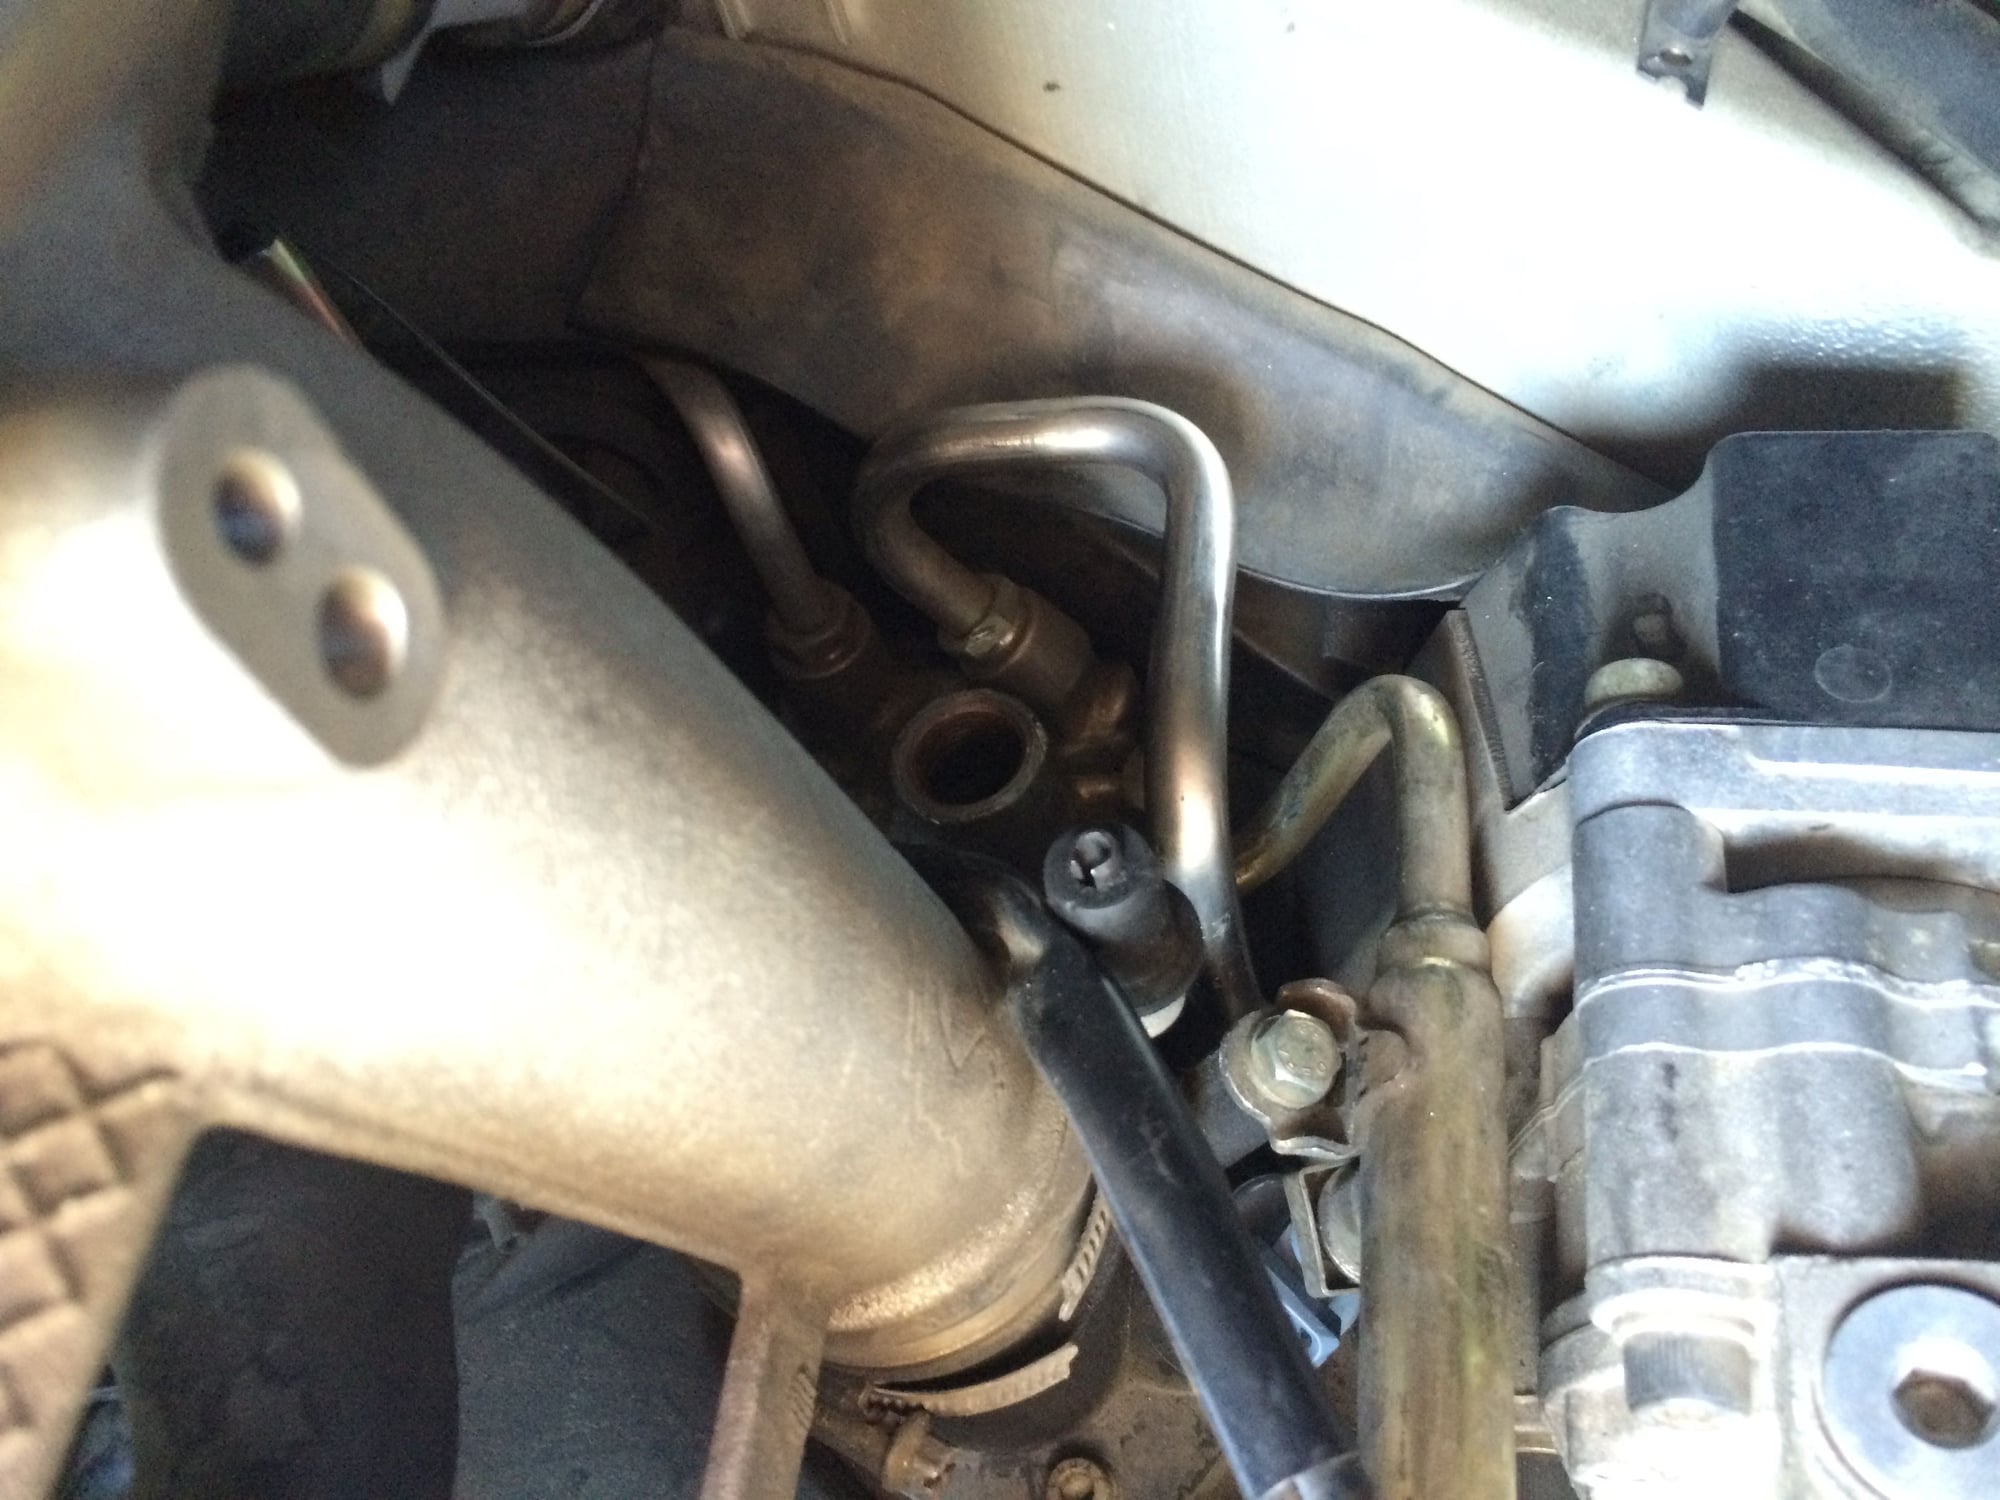
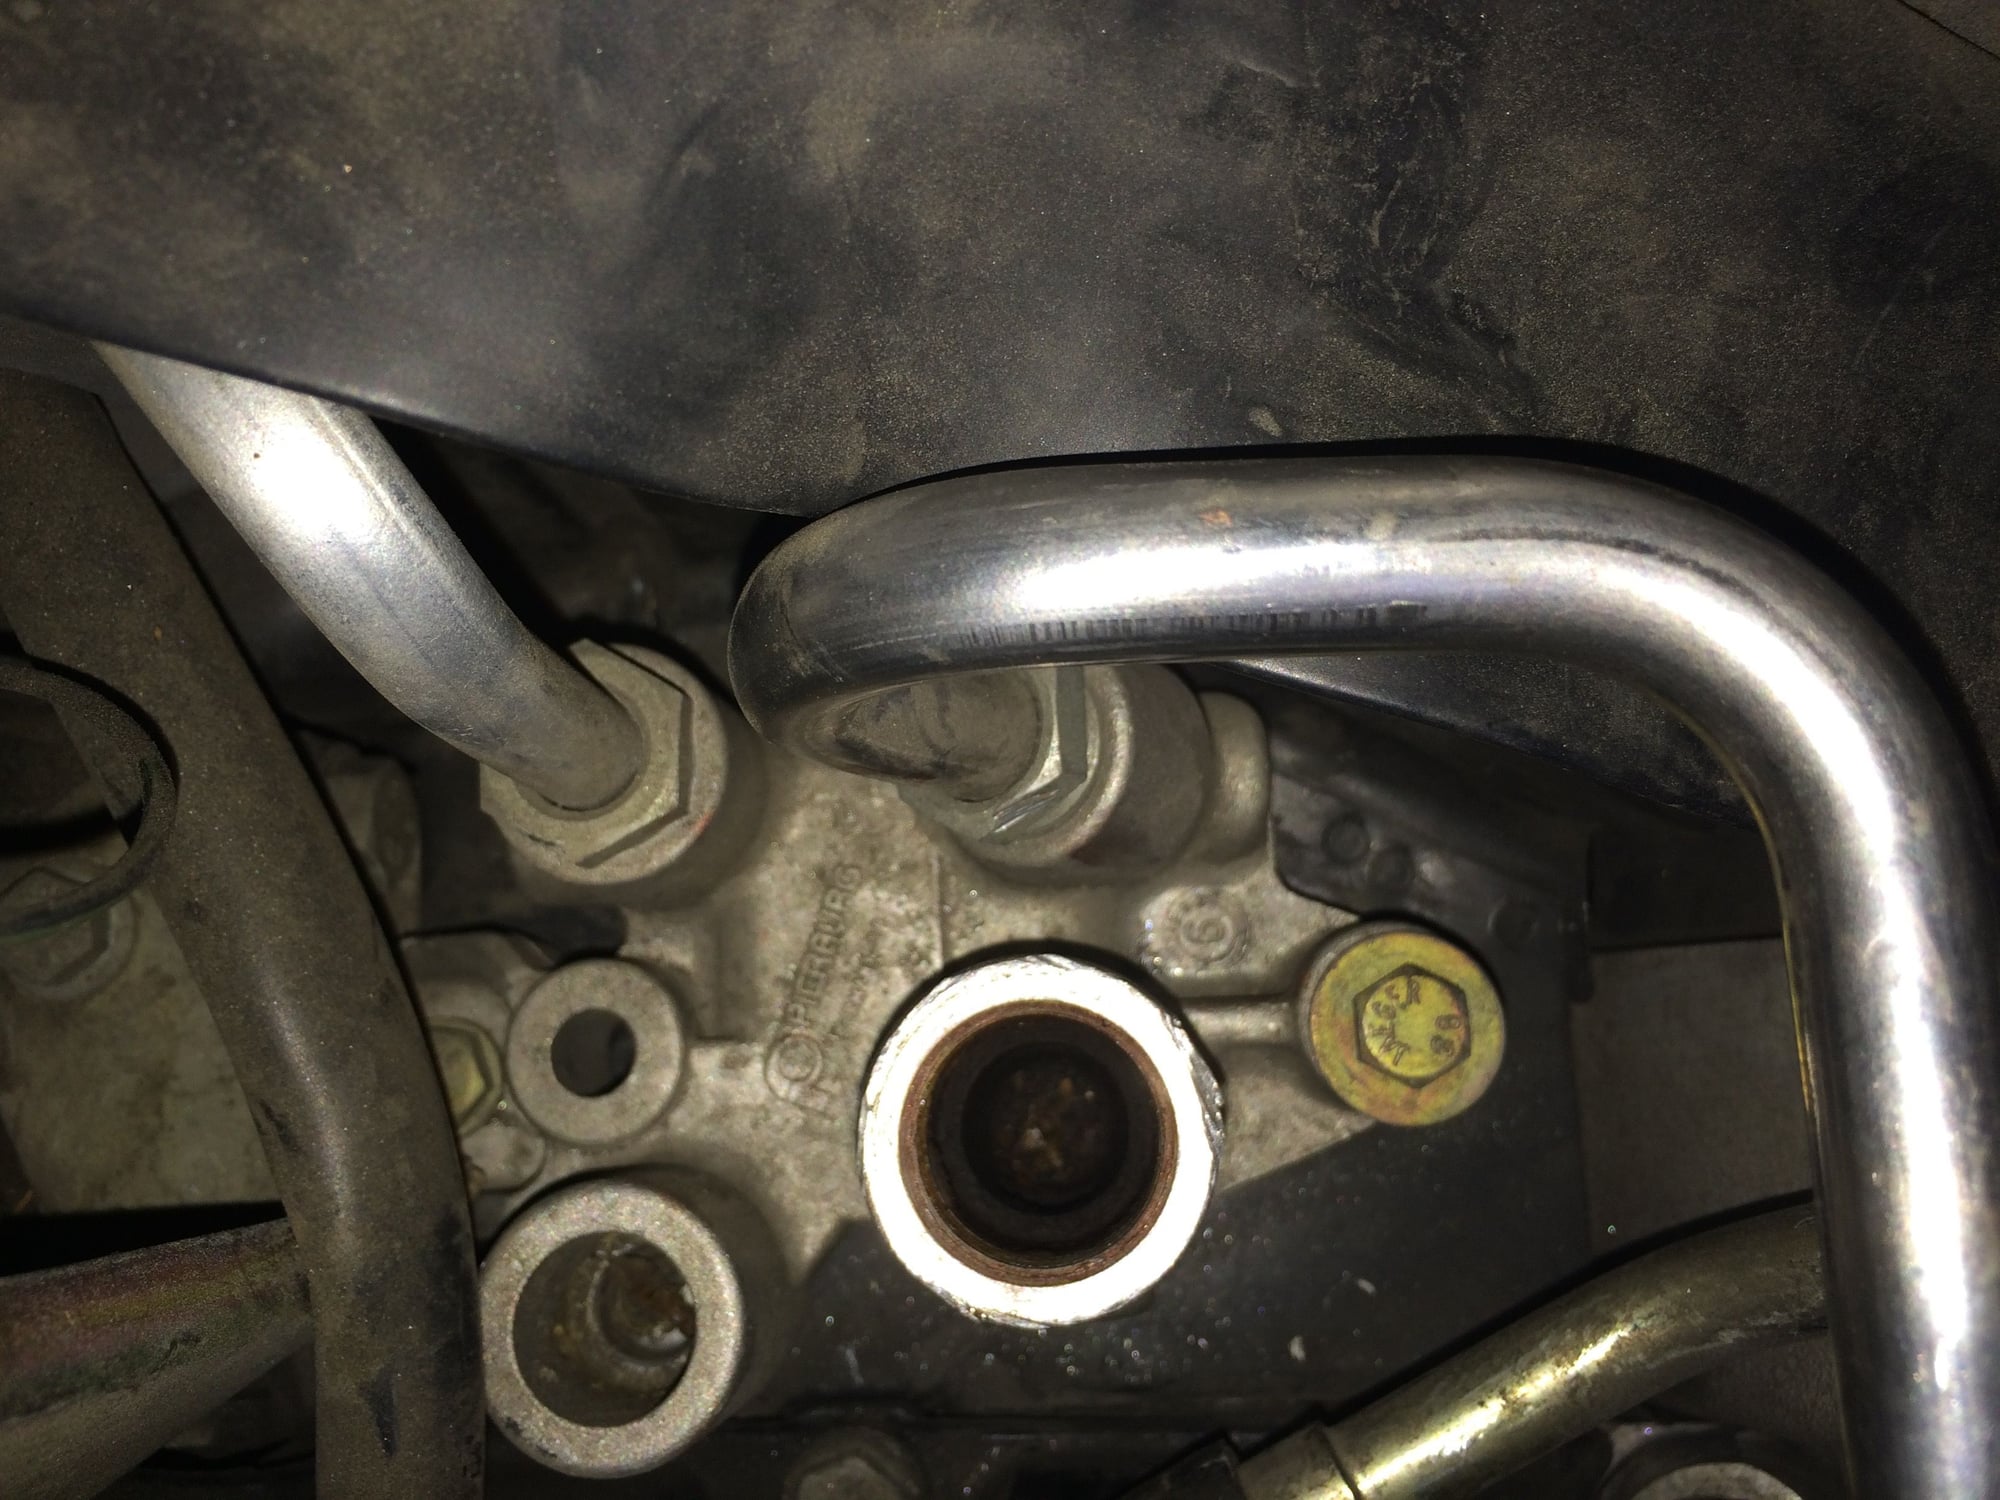
Valve removed. This is the view you will see from the rear of the car.
Closeup of the corrosion on the valve top port.
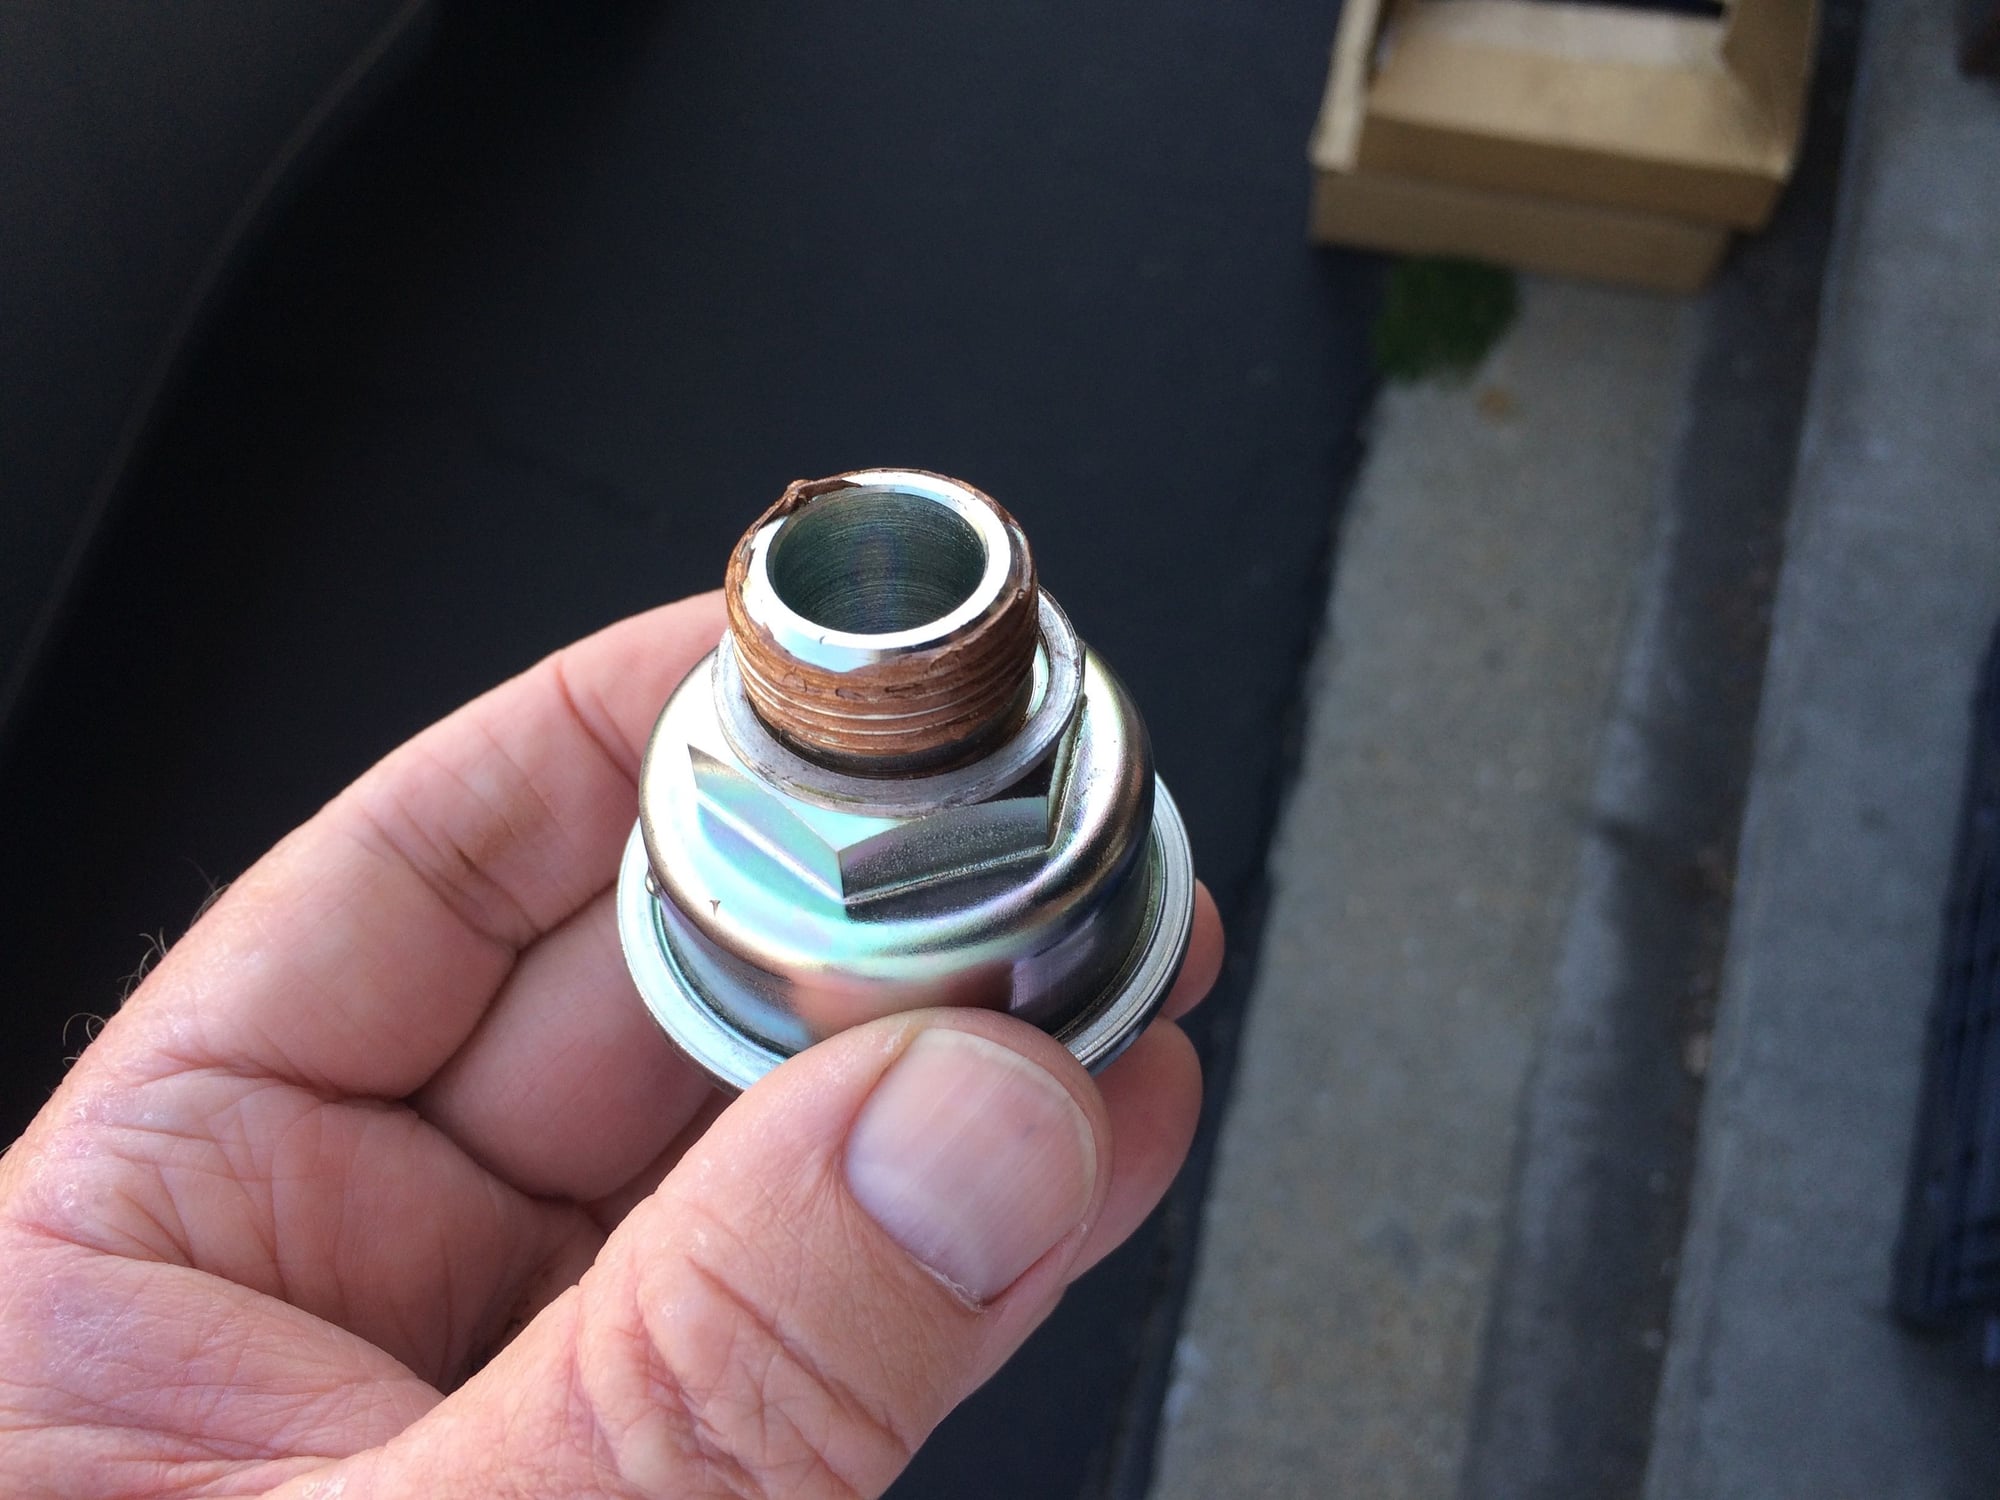
Copper anti-seize paste applied to the new valve. This stuff really works. After breaking the old valve free, it unscrewed by hand easily.
This is a view looking straight down at the SAI manifold. There is no way to visually inspect the freeze plugs on the SAI manifold without removal.
Just wanted to bump this super-helpful DIY thread and report that I've just rolled 3K miles after my SAI clean out and valve replacement procedure last summer. I passed Smog/DriveClean test with flying colours last week and no CEL yet! Those three long days of Techron induced hallucinations and rigorous roto-rooting with a bike brake line worked! High fives to Bruce7 for this (and all of his other) DIYs!
My tips:
1. Be patient and clean out those passages until the carb cleaner/techron flushes clear.. This will take a long time.
2. I highly recommend buying the SAI kit from Pelican ~ just for that machined Hazet crow's foot alone.


 10-10-2013, 02:13 PM