When you click on links to various merchants on this site and make a purchase, this can result in this site earning a commission. Affiliate programs and affiliations include, but are not limited to, the eBay Partner Network.
Did you consider weather proofing the new resister and / or relocating it to an easier access point? That came up in some old threads.
Rin, the new resistor is of a different design with respect to sealing them. I installed it in its original location. It is well protected from the elements, considering it is outside of the cabin.
The old and original series resistor was sealed using some type of cement.
As removed from my 993...
The new style series resistor is sealed with some type of silicone sealant, top and bottom...
The low speed A/C fan speed is operational again.
I'll measure the voltage across the resistor to calculate power (V^2/R). Just curious what it runs at.
My personal preference is to forget the OE resistor locations ..... and the resistors themselves, for that matter.
Regardless, should you choose a new OE resistor, it is a simple matter to pull the plug or cut the leads from the old resistor leaving it in place, and remount the new one in the location indicated in the pic ..... simply drill a hole in the bracket. This spot is directly ahead of the wheel, behind the fan either side, and merely requires lifting the front of the wheel liner.
The modified resistor shown mounted was 'Design I', and the second pic indicated the 'Design II' , which I have had in service since Feb, '09 ....
The details are discussed here should anyone wish to make a truly bullet proof resistor pack .... I suspect that even the latest OE version will eventually fail again, as the body remains molded of porous ceramic
I'm just in the process of replacing my A/C Fan Series Resistor and going through Part 2 of your DIY, I came across the following: "There is no need to apply thermal compound to the side of the cooling plate that will attach to the cooling assembly air guide".
By that do you mean you did not apply compound between the metal disc under the series resistor and the metal frame the condenser sits in? Why not? Isn't the idea to transfer heat to a heat sink which is what that metal condenser frame acts as.
BTW, removed and installed the series resistor with everything in place as shown in this thread. Tedious but very doable. I even ran a tap through the existing threads to clean them up of any corrosion/dirt. That was tricky.
Next, the oil cooler series resistor. Both were gone.
Hi Alex,
On my car the disk did not sit flush to the air guide as I remember due
to a seam I think. So putting compound on it would be useless.
Sorry for the delay in answering, looking for a new job so not much time
to be on the forum.
I just finished installing new series resistors over the last few weeks. I decided to take some measurements, so here are some numbers if anyone is interested.
These are from the AC condenser fan series resistor since it can be placed into operation by simply turning on the AC.
Actual measured resistance of series resistor = 0.49 Ohm. Determined by I vs V plot.
Conditions: engine idling, battery voltage = 14.0V.
Voltage across series resistor (87-87c) = 4.80V
Voltage across AC condenser fan motor (87-ground) = 8.64V
Relay supply voltage (30) = 13.64V
Power calculated = 47 Watts.
Power rating of series resistor = 52.5 Watts.
Talk about running at the limit, but then, the original series resistor did last some seventeen years.
Just did my A/C resistor yesterday. Since I have the 4S/turbo bumper, I had to remove the whole thing if I wanted to drop the condensor. I worked without removing the condenser. It was a very tight squeeze but mission complete. I use a 4mm hex and a small adjustable wrench. To my surprise, it didn't take that many turn to tighten the screw down upon installation. I thought I'd crossed thread but the resistor was tight and secured. Thanks Bruce
"Power calculated = 47 Watts.
Power rating of series resistor = 52.5 Watts."
Another marginal Porsche design, i.e. typically one designs-in a component
with a rating which is twice what's needed. Given the heat developed and
the resulting thermal expansion/stress on the ceramic, no wonder it fails.
Yes, there is a heat sink but what's the thermal resistance to body of the car?
And when the outside temp is 90 deg F, what's the resistor's temp?
In this post I describe how to check and change the AC & Oil fan series resistors. There are many postings on this forum and elsewhere that address this procedure, but what I hope to do is to edit down the subject matter to something more concise and manageable and yet add to the existing information with the aid of photos and a specific materials and tools list that will give you all the info you need to perform this DIY before you start.
Special acknowledgements to pcarworkshop and Tore Bergvill and the many RL forum members that have contributed to this subject.
Part 1 describes how to check the series resistors. (Part 1 photos)
Part 2 describes how to change the AC fan series resistor. (Part 2 photos)
Part 3 describes how to change the Oil fan series resistor. (Part 3 photos)
-bruce
one of the best & thorough D.I.Y write ups I've seen - thanks Bruce, going to print this all out for when I do mine.
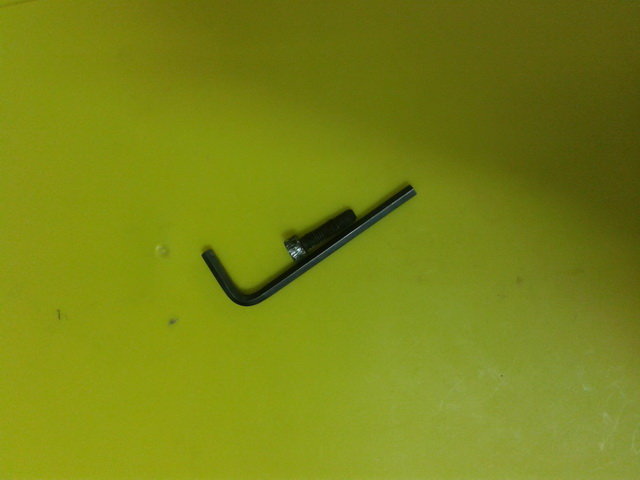
I used a allen key combined with a small steel tube to extend the handle.
~ The Eagle ~
---------------------
'96 Polar Silver/Black C4S, manual, litronics, LED's in the positioning lights, alu/leather shifter & handbrake,
silver face gauges with alu rings, hardback sport seats, full leather interior, motor sound airbox, stainless door sills,
valve caps Porsche crested brushed alloy, front protection bar, with split rear grill and layered with Meguiar's NXT Tech Wax
__________________
'92 Carrera 2 (Sold)
'89 Carrera 3.2 (Sold)
Good job! I had trouble getting the screw started so that's why I lowered the fan.
Originally I was trying to hold the cooling plate and resistor together so that the
notch did not rotate. I was unaware at that point that the notch does not matter
on this side like it does on the oil fan side. So it's ok to let it rotate while trying
to get the screw started.
This was the first time I did this, but I think if I have to do it again I would try it
without lowering the fan and using a rachet spinner (which I had but didn't think
about at the time). With the rachet spinner you can get more rotation on the screw
to help get it started than with the rachet handle and it's easier to turn than the small
socket bit by itself.
Here's a shot of what I'm referring to.
-bruce
Both of mine needed replacing as soon as i bought the car, i wish i would of had this tool, brilliant
Enso


 08-15-2013, 10:50 AM


 , which I have had in service since Feb, '09 ....