When you click on links to various merchants on this site and make a purchase, this can result in this site earning a commission. Affiliate programs and affiliations include, but are not limited to, the eBay Partner Network.
I'm surprised no ones had the nads to simply install double piped thin self adhesive automotive seal around either location instead of this ridiculous felt w glue.
Sounds like what you attempted took a lot of finesse. Congrats! Some day I will have to do the same when the yearly Sharpy pen touch up no longer cuts it.
Referencing to post #15, page one of this thread...
in the interest of full disclosure.
i was not 100% happy with the ends of my front sunroof felt. the passenger side was tucked down SOME and the drivers side end was perpendicular, not tucked. this was bothering me enough that i addressed it.
i pulled the rear inch of felt from the car cleaned the adheasive off carefully, then using 3M weather stripping glue (this is nasty stuff, i would not use this stuff to affix the entire felt like some do), i just glued the ends of the felt down and INTO the the car. They essentially wrap down and adhere to the underside of the roof upside down. clamped it and left over night.
if i had to do this again, i would use permatex contact cement for the entire felt just like i did before, then leave the last inch of the ends glue free. allow it all to cure. then go back and affix the ends properly.
My rear felt has come apart and I am needing to repair/replace it. Don't know how to get at it...from reading this thread it sounds like the roof has to come out?
Yes, roof panel comes out, but it's not overly complex to R & R. Just pulled mine off as part of prep for a full respray, it was pretty straightforward if you follow one of the various DIYs.
Not looking forwards to lining up the felt when it comes time to reinstall tho.
I'm surprised no ones had the nads to simply install double piped thin self adhesive automotive seal around either location instead of this ridiculous felt w glue.
I am as well!!! I hate this felt thing!!! I might do some digging and see what's available. Surely (don't call me Shirley) there's got to be a suitable seal out there from the "custom" segment!?!? I am sure the hot rod industry has faced the dilemma of needing a non-facotory seal!
Has anyone else done some research on this? What thickness and width am I looking for?
I need to replace my rear felt as well, but in no hurry to do it. I like the idea of an alternative. I know MkII/III VW's had a velvety rubber sunroof gasket that press-fits on to the sunroof lip. No glue.
Well,
Just finished my sunroof seal, and I would like to thank those who posted their suggestions! The seal on the roof panel is explained well, so I will only address the main body seal.
Here are a few of my own, with photos included. We all like pictures!
First, kind of a two person job I only had me, so I made tools!
Stop at lumber store and pickup a 1/2 inch dowel, about a 6 foot section, so you can have spares.
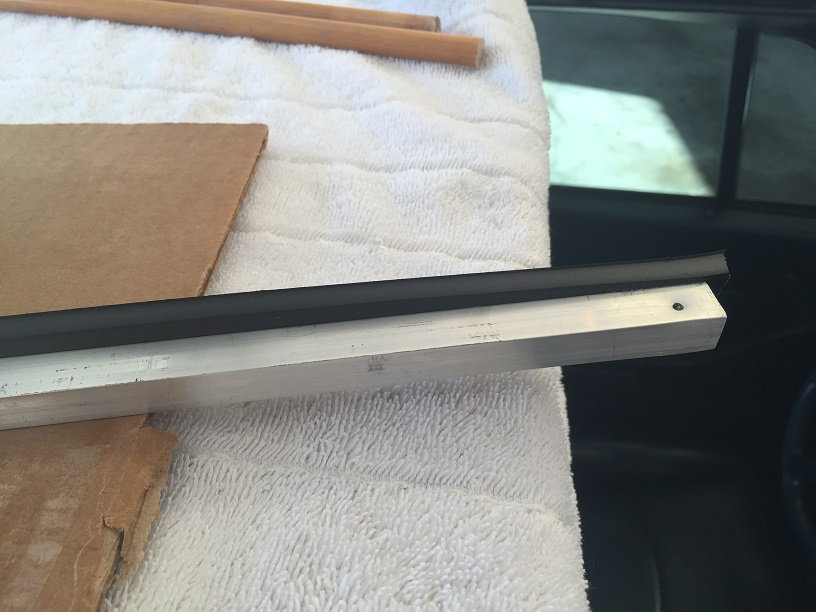
Also a couple metal pieces, about 1/2 inch square and about 1 ft long. Not too long
Also pickup a piece of rubber door /window seal. Make this:
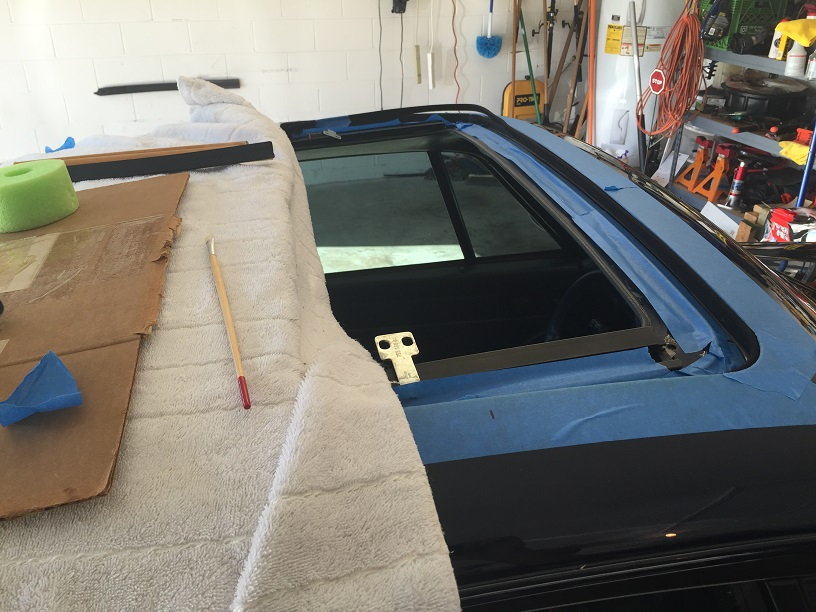
Start by positioning the front seal on the body
Also a good idea to follow the prior tip of taping around the body.
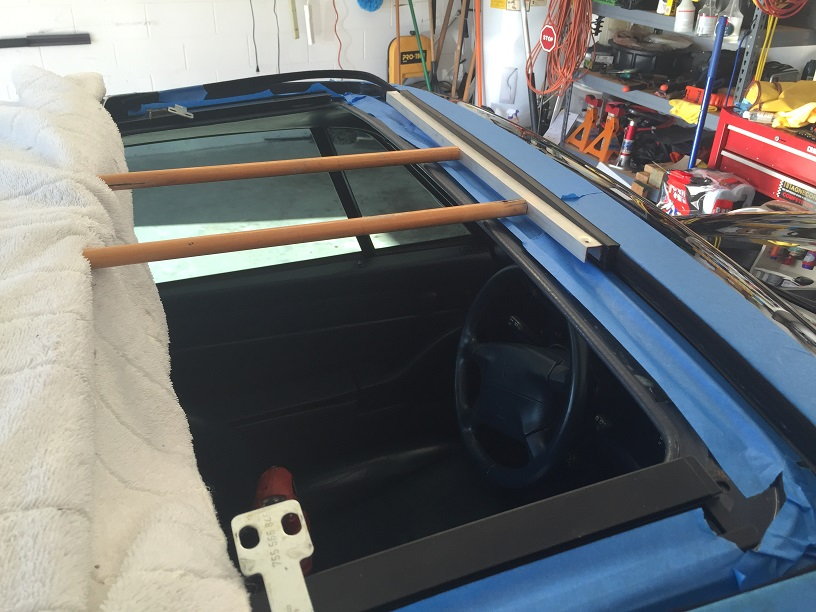
Many use tape to also hold the seal in place. I used the homemade brace. After you make your brace, do a mockup with a piece of the old seal, the rubber/metal brace, and cut a few dowels to length to prop the brace in position. Cut the dowel just a little short, and use the towel shown to fill in so there is no paint damage.
Here I am testing, getting ready to glue.
I only made one brace, so I did one section at a time, kept the brace in place overnight, and did the next section a day later. Here is the second section in progress. I would do about 3 inches at a time, loosen the brace, slide over to the newly glued area, and prop it tight.
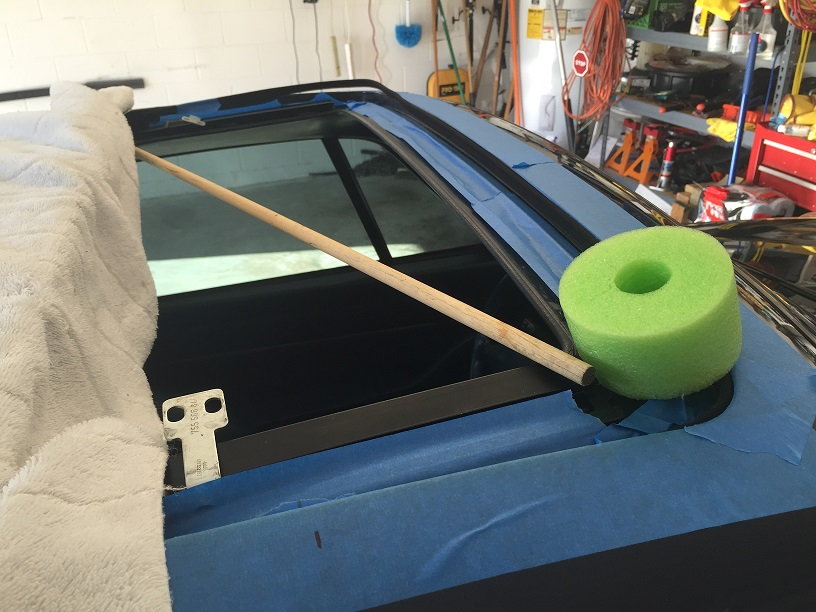
Hmm, now, how to do the corners, with the radius?
A slice of the pool float fit perfect! I did not use the dowel in the picture, I just taped it tightly in place.
Patience, and well lotta patience. Not so much for application, but old glue removal!!
I'm getting ready to glue the sunroof felt so I thought I'd resurrect this thread with a question after doing a lot of research. I saw some Youtube videos where a couple of guys were showing an alternate and perhaps better way of using contact adhesive. They did the usual application to both surfaces then leave to touch dry, anything up to 15 minutes, but then the new bit, they reapplied a light coating of contact adhesive to one surface only, giving them the option of being able to move a little what they were glueing to get the fit right. Without doing this as we all know there is NO wriggle room when bringing the surfaces together to be bonded.
Has anyone used this method before and have they used it on the sunroof felt?


 06-08-2013, 08:54 PM