
Replace bellows on clutch master cylinder?
 07-18-2012, 05:37 PM
#1
Rennlist Member
Thread Starter
Ok, I am in the midst of replacing the clutch kinematic lever (clutch pedal not always returning fully, changed the slave already which worked for a year or so). Going smoothly, but I see the bellows on clutch master cylinder is torn. Can we get a replacement for that? It's not in PET and the dealer says 'comes with the cylinder'.
 07-18-2012, 06:21 PM
#2

the master cylinder is only 75 bucks or so.
I'm going to suggest that finding the correct bellows and taking your current cylinder apart to replace the bellows is more time and money than just buying a new cylinder.
plus once the rubber was torn probably dirt and grit got into the current cylinder making it sticky and in need of replacement.
I'm going to suggest that finding the correct bellows and taking your current cylinder apart to replace the bellows is more time and money than just buying a new cylinder.
plus once the rubber was torn probably dirt and grit got into the current cylinder making it sticky and in need of replacement.
07-18-2012, 11:25 PM
#3
Rennlist Member
The bellows comes with the clutch master cylinder. Mine was torn as well after 16 years.
I replaced my clutch master and slave cylinders as well as the hose last winter. I also cleaned, greased and rebuilt my pedal assembly.
Pics are here if you need to see what items look like or how they go together.
I replaced my clutch master and slave cylinders as well as the hose last winter. I also cleaned, greased and rebuilt my pedal assembly.
Pics are here if you need to see what items look like or how they go together.
07-19-2012, 10:19 PM
#5
Rennlist Member
Thread Starter
Well, I wasn't planning to R&R the clutch master cylinder, but now I think it's a good idea to do it while I'm here.
The DYI is pretty weak on this point ( '(8). Remove the two bolts that secures the master cylinder, and remove the master cylinder' ), but of course you have to remove the spring assembly first in order to access one of the nuts, as discussed in the FSM. Unless I am missing a trick?
The DYI is pretty weak on this point ( '(8). Remove the two bolts that secures the master cylinder, and remove the master cylinder' ), but of course you have to remove the spring assembly first in order to access one of the nuts, as discussed in the FSM. Unless I am missing a trick?
07-19-2012, 10:33 PM
#6
Rennlist Member
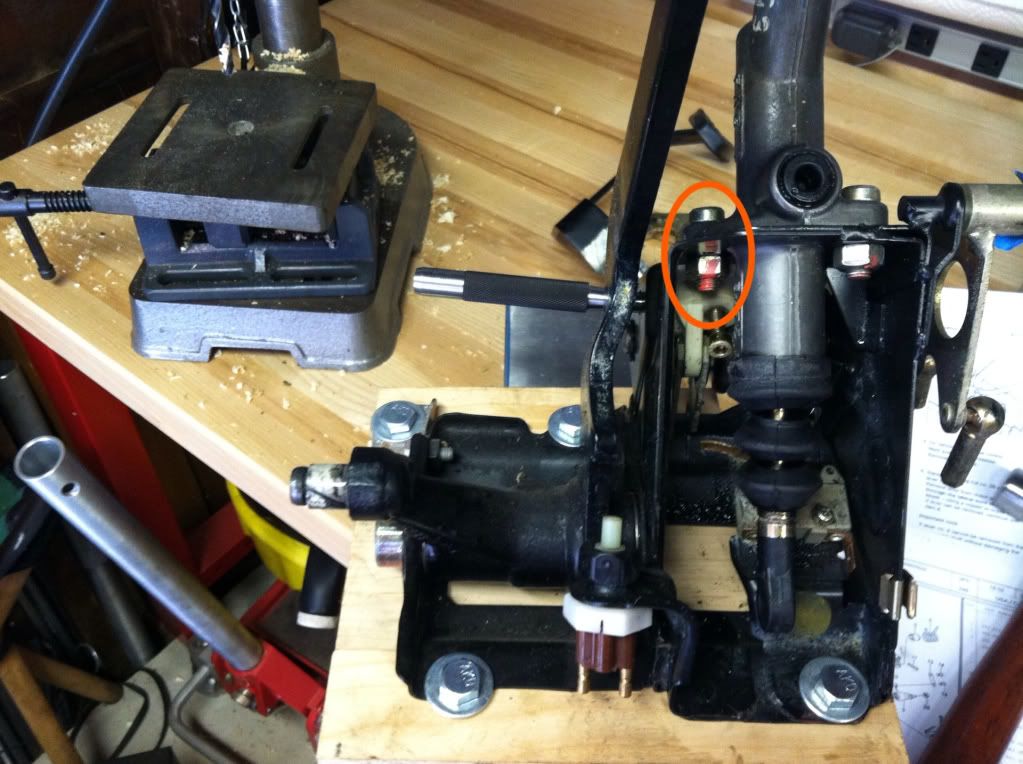
You do not need to remove the spring assembly to rebuild the pedal assembly or to remove the clutch master cylinder. And I had all parts of the pedal assembly removed except for the spring and parts associated with the spring.
Here is a pic with the spring still in place and tensioned...


Trending Topics
07-20-2012, 09:35 AM
#8
Rennlist Member
Thread Starter
You do not need to remove the spring assembly to rebuild the pedal assembly or to remove the clutch master cylinder. And I had all parts of the pedal assembly removed except for the spring and parts associated with the spring.
Here is a pic with the spring still in place and tensioned...
Here is a pic with the spring still in place and tensioned...
 07-20-2012, 09:59 AM
#10
Rennlist Member
I got mine at Pelican Parts.
A bit of time spent taking pics and writing up a thread is time well spent if it clarifies a DIY for other members.
07-20-2012, 10:07 AM
#11
Rennlist Member
Take the locknut off the right side first; the one that is easily accessible.
Then I think I used a 13 mm 1/4" drive socket, a 1/4" drive universal and a 1/4" drive extension to loosen and remove the locknut on the left. As you are loosening that last locknut, pull the clutch master cylinder away from the bracket to maintain the clearance you need at the locknut.
07-20-2012, 02:30 PM
#13
Rennlist Member
Thread Starter
Yeah, piece of cake, took less than a minute. 1/4 drive socket was the key (I'm a dope sometimes I guess). Plus u-joint, plus 3" extension. Thanks again
07-21-2012, 07:48 AM
#14
button queen
Dan, I usually don't buy into too many things (no secret here), but that Motive Products Power Bleeder is a nice tool to have. You can use it "wet" as intended or you can modify it for dry use...I like putting my tools away clean and I hate cleaning up at the same time.
At any rate, the DIY stuff is great....thanks again.
07-21-2012, 09:06 AM
#15
Rennlist Member
BTW, although I did replace my kinematic lever, I never had any issues of the clutch pedal hanging up with the original lever. I would suspect either air in the clutch system (how does it get in there if not there in the first place) or a need to make an adjustment. BTW, without the hydraulics connected, the clutch pedal will go over-center and remain "floored" when you activate it...so don't be surprised at that.