

Intake trumpet removal - Broken intake bolts!
 04-18-2012, 10:19 AM
#16
Rennlist Member
Thread Starter
Quick questions for you, after you drill the pilot hole, did you 1. use left handed drill bits and 2. did you actual it it to where you could use needle nose pliers to pull the coil?
 04-18-2012, 11:46 AM
#17
Rennlist Member
I did not have fancy left hand drill bits, and I did not use close size drill bits neither.
I use a 2 mm thinner carbon drill bit and cutting oil.
Then I introduce a flat screwdriver and turn the pierced stud counter-clockwise. It comes out with zero effort.
In the video they show you needle nose pliers and the coil going out, to show how it makes you drill precisely.
If you don't have cutting oil, take a bit of engine oil, as much water, and mix fast until you have a milky substrate.
04-18-2012, 01:35 PM
#19
Rennlist Member
that is correct, and no threading or tapping after.
Just introduce an old bolt slowly to clean the threads.
Just introduce an old bolt slowly to clean the threads.
04-19-2012, 01:11 AM
#20
Rennlist Member
Thread Starter
Geo -
Have you ever used one of these babies?
http://www.theinductor.com/index.php?m=41
Looks kind of cool to me.
Have you ever used one of these babies?
http://www.theinductor.com/index.php?m=41
Looks kind of cool to me.
04-19-2012, 04:03 AM
#21
Rennlist Member
Looks good but $$$,,,
All of our cooking Hobs are induction here since early 1990's.
Works well on ferrous metals, but not aluminum, magnesium or light alloys.

All of our cooking Hobs are induction here since early 1990's.
Works well on ferrous metals, but not aluminum, magnesium or light alloys.
04-19-2012, 04:06 AM
#22
Rennlist Member
Looks good but $$$,,,
All of our cooking Hobs are induction here since early 1990's.
Works well on ferrous metals, but not aluminum, magnesium or light alloys.
All of our cooking Hobs are induction here since early 1990's.
Works well on ferrous metals, but not aluminum, magnesium or light alloys.
04-19-2012, 04:21 AM
#23
Rennlist Member
why can't I delete my post ????????????????????
04-19-2012, 10:17 AM
#25
Rennlist Member
Those fasteners are socket heads I believe. Whatever the fastener type, I always strike the fastener head-on with a hammer and punch (not to the point of deforming the fastener)...in the case of a socket head type, I use a punch that fits loosely in the end of the socket head.
Aluminum has roughly twice the expansion rate of steel; that is why heat is used in hopes that a gap can be formed between the two to either diminish the grip on the fastener or at least provide a channel for a product like PB Blaster. You want to apply the heat to the aluminium, not the bolt.
This is where the patience part comes in. If the fastener can only be loosened 5 degrees (or whatever) before getting tight, screw it back in half way and apply more PB Blaster. Add heat, add vibration and repeat. I’ve removed stubborn fasteners this way with zero damage to the important parts. And some of them weren't even threaded; the shank of the fastener was seized in the clearance hole of the part...so much for a clearance hole.
As for dealing with a broken fastener...
As for using EZ Outs or anything similar, they are useless in my opinion on a seized fastener. If the shank of the fastener can’t remove the bolt, the EZ Out won’t. And if you snap an EZ Out, good luck trying to drill it.
If you are damn good and lucky enough to drill a broken fastener straight down the center, you can enlargen the hole till all you are left with are the threads...sort of like a Heli-Coil and then pick the threads out. By the way, with the end of a broken fastener nicely filed/ground square, what appears to be the center isn't really and its tricky center punching it because of that.
I've repaired broken bolts & studs on other owner's cars by using a Time Sert. They are available in kits for various sizes and thread lengths. They are a top not fix!
As for the remaining bolt holes, clean them up with a quality tap and use anti-seize on the next fastener that you screw in.
04-22-2012, 04:57 PM
#26
Rennlist Member
Thread Starter
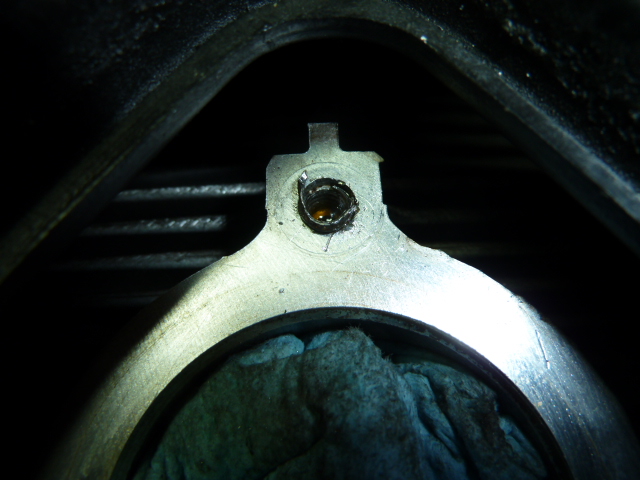
First, I wanted to say thank you for all of those that weighed in and gave me support, answered questions etc. This was definitely the nastiest bind I've encountered in my DIY efforts over the years. Now, onto the fix...
I started off by buying PB Blaster last week and hitting both broken bolts over the week every night, tapping etc. while I waited for my QuikCenter to arrive.
I tackled to exposed bolt first, using a combination of PB blaster and heat from a heat gun that I bought. Eventually the combination worked and I was able to back it out with a vise grip. Next I went to the bolt snapped flush. This was difficult as the QuikCenter did not have much to grab on to, so the drill was not as stable as it would have been with a snapped bolt higher above the surface. Using cutting oil as recommended, I drilled a pilot hole, followed by larger bits until practically the bolt was gone. Then, using a tap, I cleared the threads of the old bolt. After a few times I put a new bolt in and everthing works! I wouldn't say that the fix is 100% perfect but man does it feel good to have this behind me.
Overall this took about 4 hours to do. I thought that the QuikCenter was definitely good, but it didn't 100% center the hole which made it a little more difficult. I think that if I were able to screw the QuikCenter onto the bolt, it would have been much easier and would have centered the pilot hole exactly. Either way, I think it is probably 100x better than try to hole punch it.
If anyone has any questions, feel free to reach out to me. I can't say enough how helpful you all were. Thanks again and I owe you one!
02-25-2014, 04:26 PM
#28
**Resurrecting an old thread
This has been a stress inducing situation. I did shock all of the bolts with a punch prior to removing them but two gave me problems. One pulled some threads but I was able to chase it and save the threads. The other broke flush. I have drilled the bold as near center as I am able but am scared to use an easy out. I actually believe I may have lost some thread with the drill. Why does Porsche have a tendency to overtighten bolts?
I should mention that I doused this with PB but can't get the bolt (what's left of it to budge. Heli-coil?
What should I do?????
 02-25-2014, 05:11 PM
#29
Rennlist Member
They don't over tighten them. Fasteners just set after a while. Its sort of like static friction when initially moving a crate across a floor.
I just removed all 12 original exhaust nuts and barrel nuts from the engine of a 964 last Monday. Without getting each nut cherry red using my oxy-acetylene torch, all 12 exhaust studs would have snapped.
You might try heating the cylinder head next to the broken off stud, but you have to be careful since aluminum does not give you much warning as to when it'll melt. Find someone experienced to do that for you. Use an easy-out gently when the head is warmed up. Do not heat the stud directly.
Other possibility is using a Time Sert. I don't have much use for Heli Coils.
02-25-2014, 07:09 PM
#30
Rennlist Member
Thread Starter
My issues were completely resolved on this one and the threads were able to be saved without a helicoil. I think it really takes patience and a good tap and you should be fine. I would recommend you fill that intake port though.