

removing rear suspension
 09-25-2011, 07:55 PM
#76
Racer
Thread Starter
Join Date: Apr 2009
Location: London
Posts: 427
Likes: 0
Received 0 Likes
on
0 Posts


 09-25-2011, 11:21 PM
#78
Pro
Hi Jackal
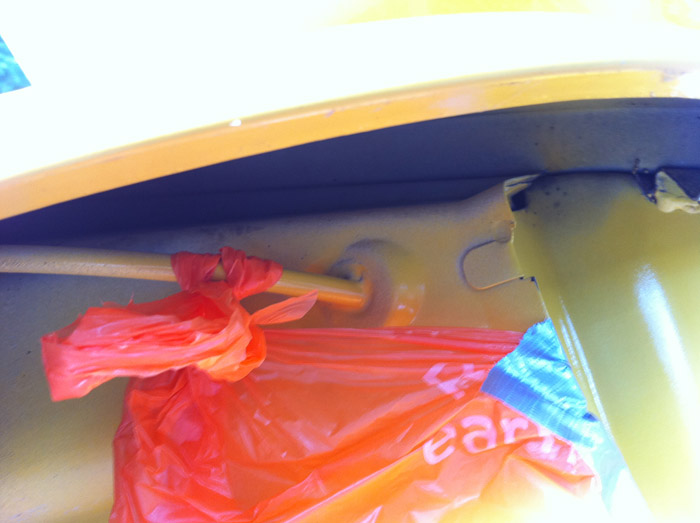
Very nice work. The only thing that I would do is to run some "dum dum" or similar into the open curved seam that runs above the rear hub, as seen in your photo "rebuild%285%29". If water gets forced up there it can get into the box section and find it's way into the rear footwell in a similar mannner to the way water in the front luggage compartment can run into the front footwells.
All the best
Berni
Last edited by berni29; 09-25-2011 at 11:27 PM. Reason: sp
09-26-2011, 10:15 AM
#80
Racer
Thread Starter
Join Date: Apr 2009
Location: London
Posts: 427
Likes: 0
Received 0 Likes
on
0 Posts
thanks guys
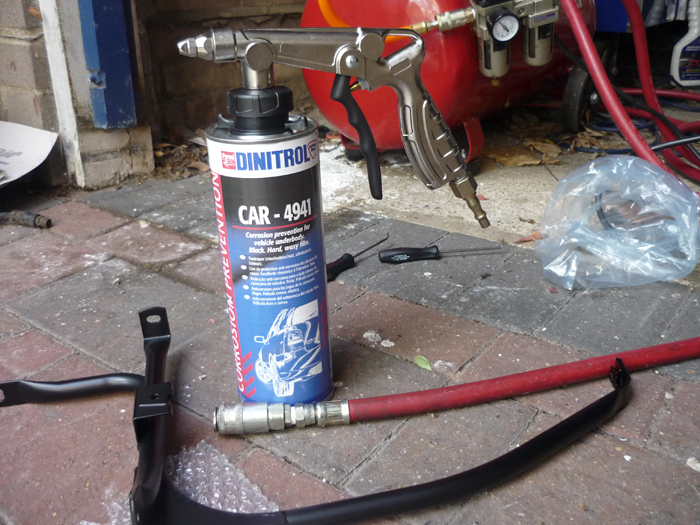
thanks berni, thats a good idea, some dinitrol 4941 should do the trick... there will be a fair amount of that going elsewhere on the car during reassembly
thanks berni, thats a good idea, some dinitrol 4941 should do the trick... there will be a fair amount of that going elsewhere on the car during reassembly
09-27-2011, 08:15 AM
#81
Instructor

Join Date: Jan 2011
Posts: 148
Likes: 0
Received 0 Likes
on
0 Posts
You inspire me. My wife thought I was mad cleaning a wheel arch (which took me longer to clean than fitting the front suspension struts and Wlarod bushes). About to tackle the rears but not on the scale you have.....
10-05-2011, 05:40 PM
#82
Racer
Thread Starter
Join Date: Apr 2009
Location: London
Posts: 427
Likes: 0
Received 0 Likes
on
0 Posts
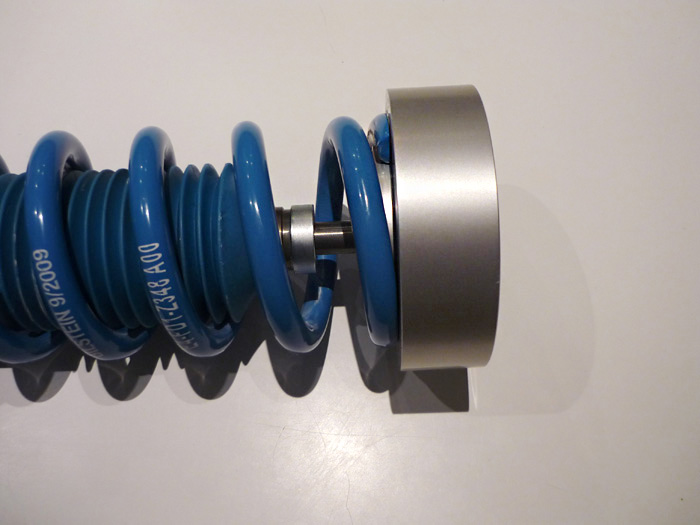
rear bilstein PSS10 with its correct top hat
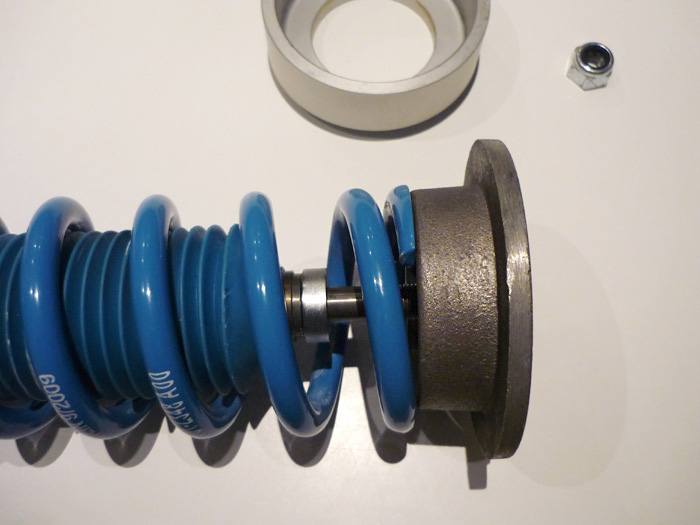
rear bilstein PSS10 with ill fitting 993RS top hat

RS, Bilstein, Mine

Newly fabricated custom top hat to work with RS top mounts. I had these made as exact replicas of the RS mounts pretty much but with the correct fitting collar for the spring.
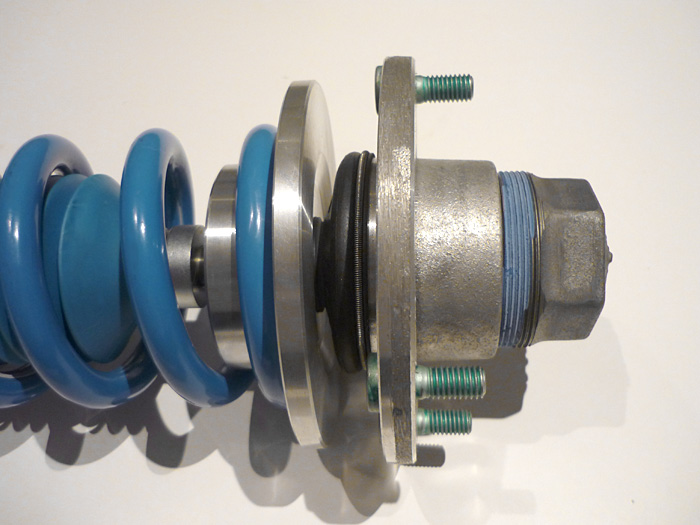
Voila
if anyone needs some of these fabricated to their chosen spring diameter then I can get them done for �50 a pair plus p&p
10-05-2011, 06:31 PM
#83
Three Wheelin'
Fantastic Work going on here...
One suggestion, though it is probably too late now. I have the same aluminum valve covers. I am going to glass bead them and apply yellow iridite to prevent corrosion.
I can't wait to see the finished result. Job well done!!!!!!!!!!!!
One suggestion, though it is probably too late now. I have the same aluminum valve covers. I am going to glass bead them and apply yellow iridite to prevent corrosion.
I can't wait to see the finished result. Job well done!!!!!!!!!!!!
10-05-2011, 09:07 PM
#84
Racer
Thread Starter
Join Date: Apr 2009
Location: London
Posts: 427
Likes: 0
Received 0 Likes
on
0 Posts
thanks ... i was going to coat the valve covers and also refurb the chain box covers but decided it was a step too far and I will tend to this when the engine comes out for a full detail next year
10-23-2011, 08:06 PM
#85
Racer
Thread Starter
Join Date: Apr 2009
Location: London
Posts: 427
Likes: 0
Received 0 Likes
on
0 Posts
Cracking on with phase 2 then.
On the nearside you have the boot release cable housing which runs into the engine bay. It might be worth having a prod around the area where the cable goes through as this can be a real hive of rust. Mine was fine though.
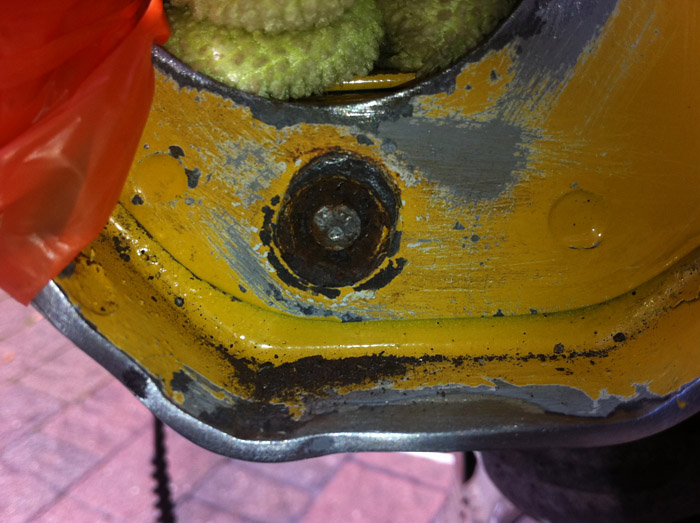
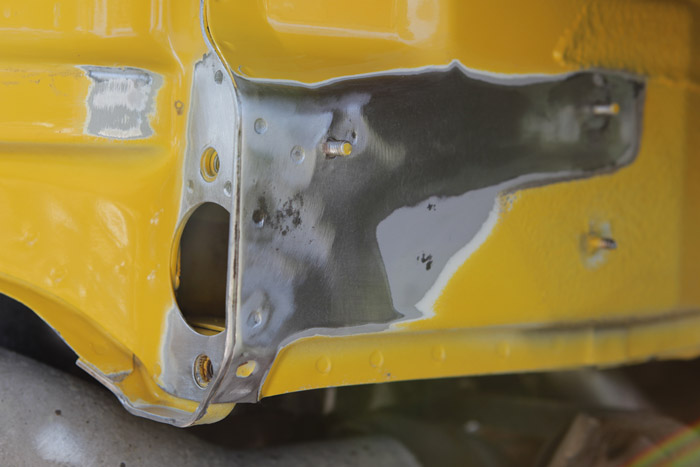
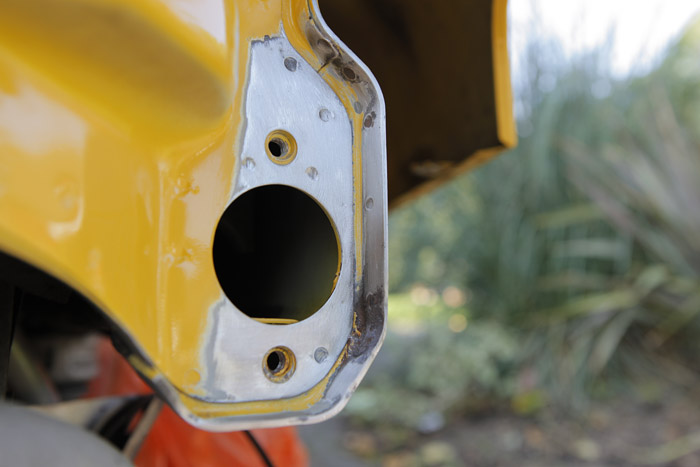
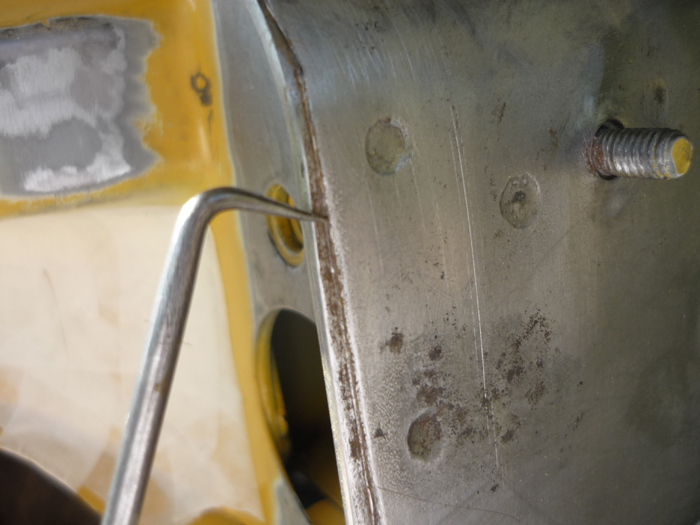
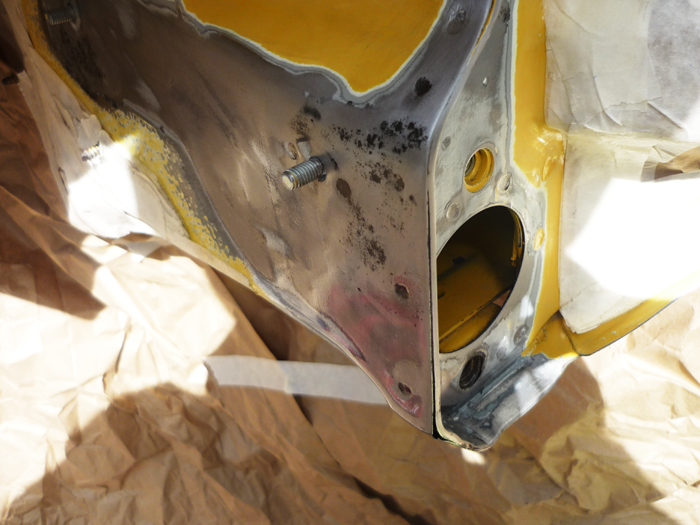
Onto those chassis leg ends .... difficult to get to. I did as best as I could with regular wet and dry. You can see that I had a sheared screw as well in my lower thread where the bumper impact bracket goes.
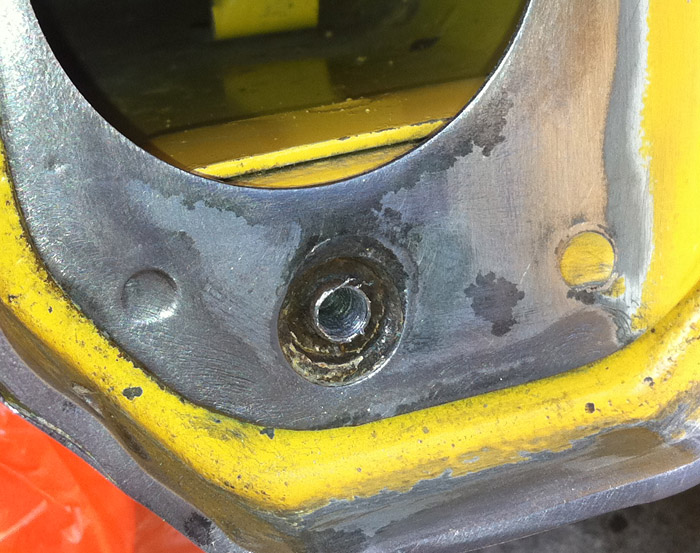
I had to drill through this ... a real pain in the neck.
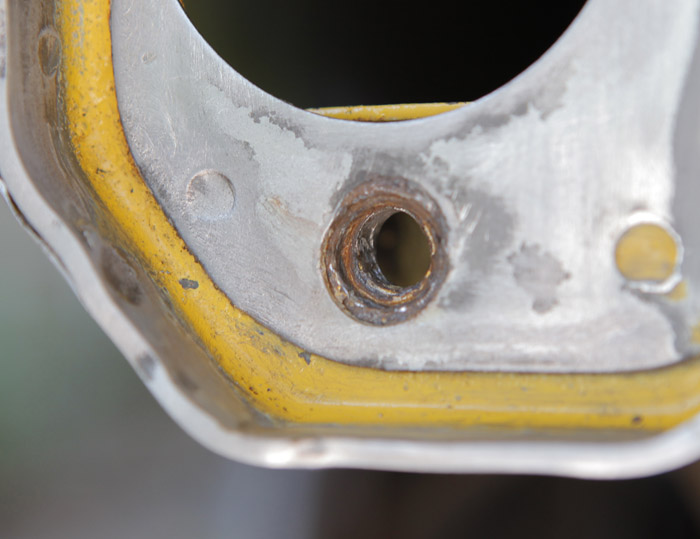
Here it is finally out with plenty of rust left over.
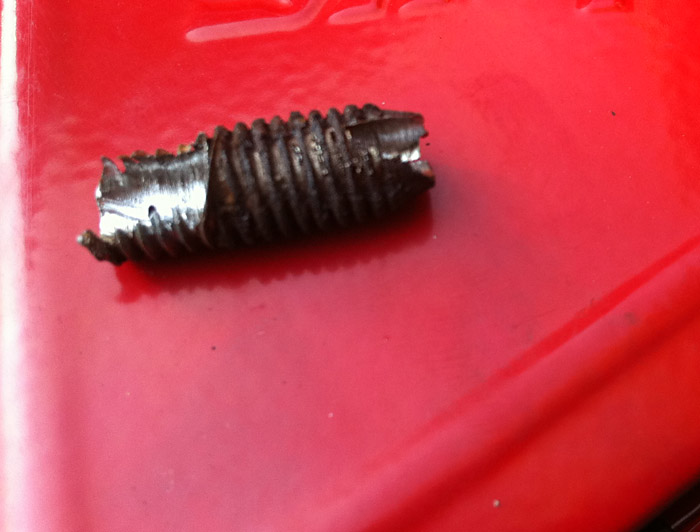
The offending screw.
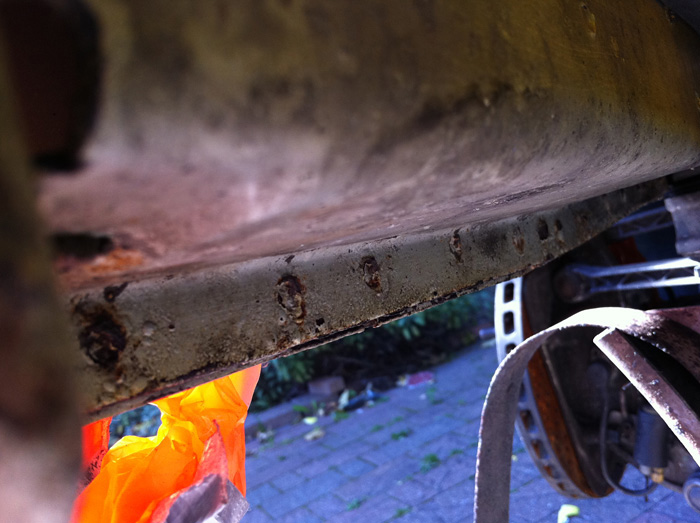
On the underside of my chassis legs I also notice a little surface rust.

So sanded this down also in readiness for a coat of POr15 and painting.

Ditto the other side. A few spots of rust and a bit if paint missing here and there.
More sanding ...
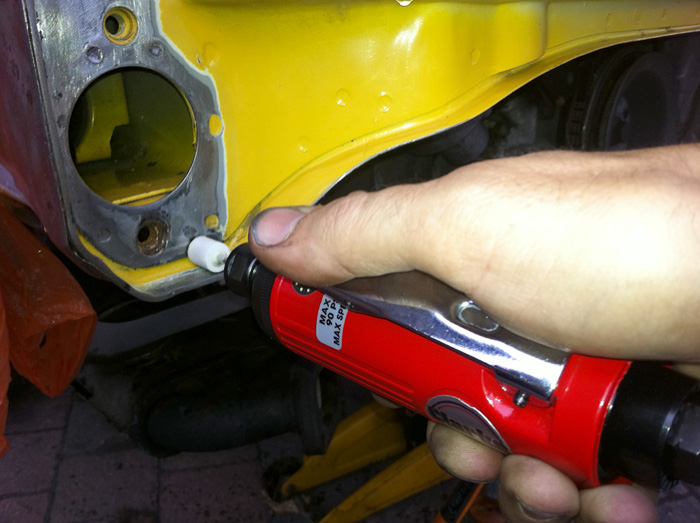
And now out with the rotary to get into those nooks and crannies.
A hook to get right into those seams.
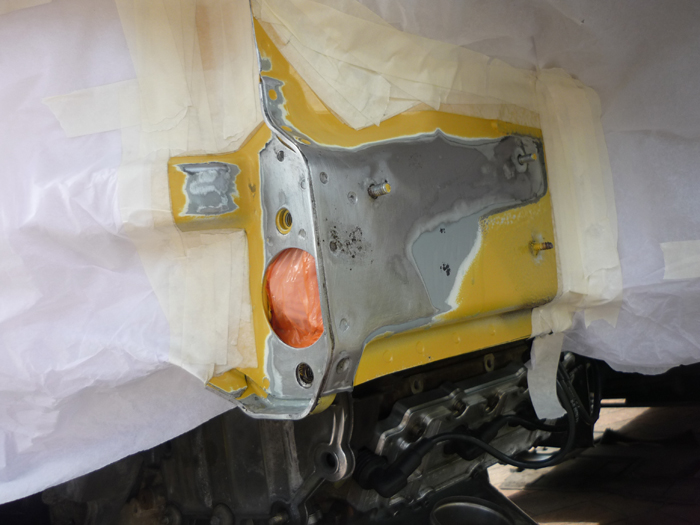
Pretty much ready for the POR now.
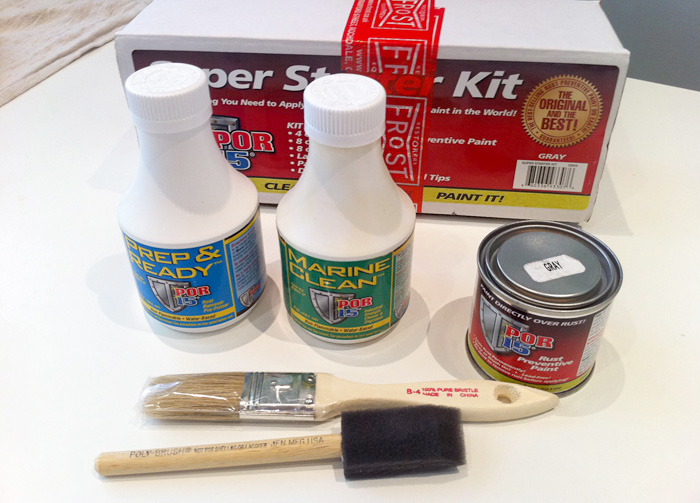
Here's the kit. I have to say that having gone through the experience I wouldn't want to go this route again. Firstly, POR15 is best if actually painting on rust and surfaces that are well past their best. Secondly, its a pain to prep, a pain to apply and the whole primer process is also a bit of a nightmare. It's expensive too. In hindsight I should have just used a regular high build primer and then topcoat and lacquer. Still, I suppose is it nice to to know that I have that extra layer of protection.
Clean the surface with Marin Clean, Wash with water. The soak with Prep and Ready rust rmover for 30 mins or so and the wash again with water. Then dry. Then paint on the POR15. It doesn't go on that easily at first but after youve got some on and it starts to dry a bit you can get a thicker layer on. I did 2 laters on total. It does even out quite well do you should get a smooth surface.
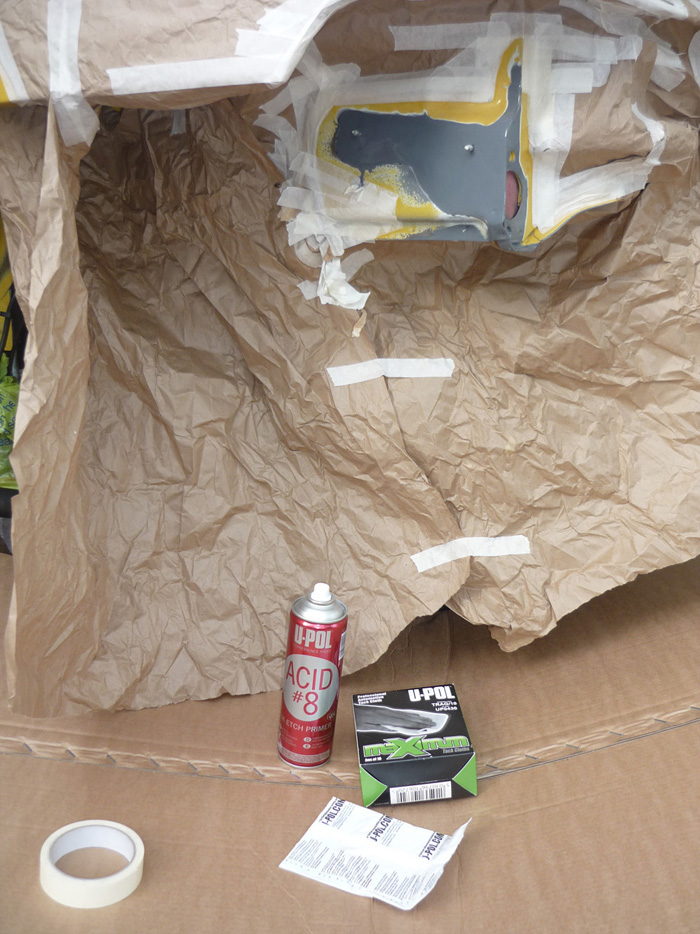
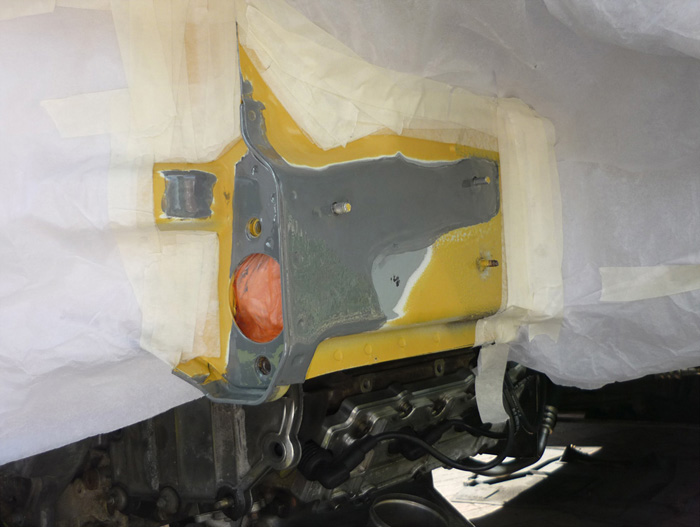
I initially decided to use a UPOL acid etch primer. The manual says you have to apply any 3rd party primers whilst the POR15 is still tacky and not fully dry to allow for a good chemical bond.
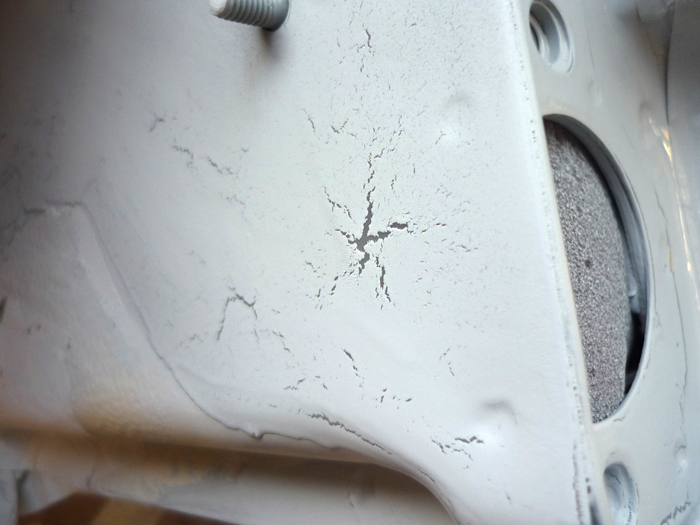
Well I tried that and this is what happened. Maybe I it was a little too tacky but bottom line is its very hard to judge and a right fiddle.

So onto plan b which is the only option left now that the POR15 is dry. That is sanding down the POR15 with some 500 grit and using their very own Tie Coar primer which is another expensive product.
The tie coat primer is VERY thick and a real pain to use. Once I had a couple of coats fully dry after a few days, it was so lumpy and bumpy and had such variance in surface height that I found that trying to sand it flat and smooth was near impossible because sooner or later certain areas would go be inadvertantly sanded back to POR15 or even bare metal again ! So I just left mine as a pretty rough uneven finish.
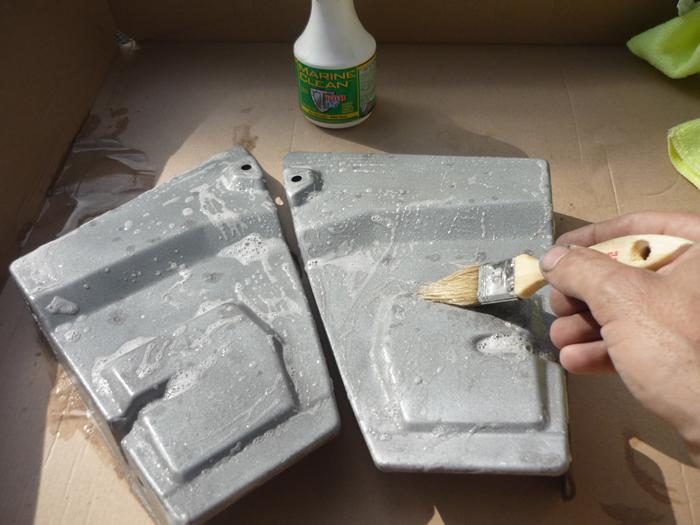
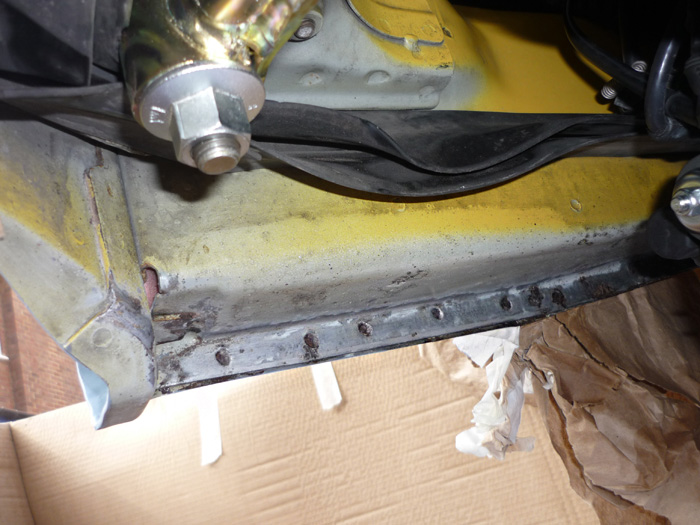
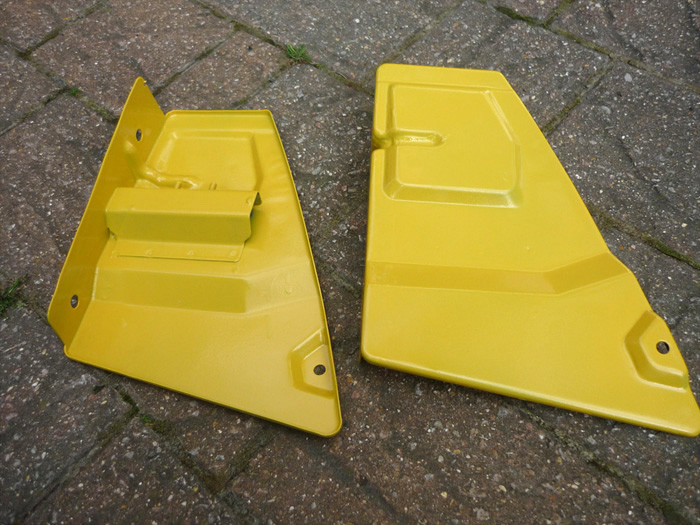
Now onto those side supports. I had mine grit blasted. here I am prepping them wuth the marine clean degreaser.
Now with 2 layers of POR15 at the edge faces and then regular etch primer elsewhere. These will NOT be going rusty any time soon !
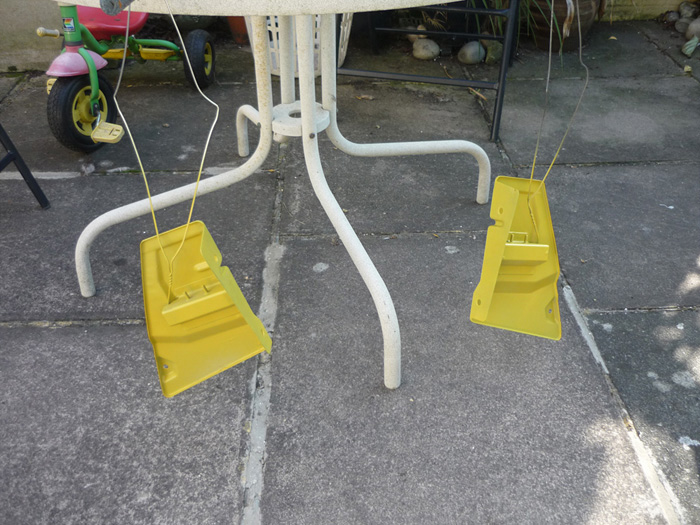
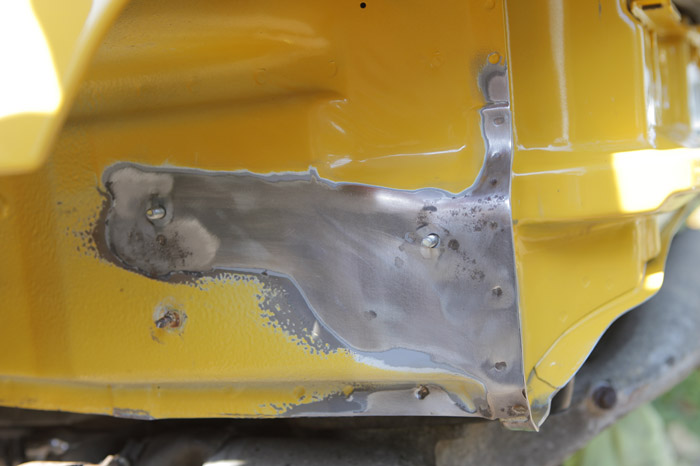
Speed Yellow top coat.

Couple of layers of lacquer as well. I was obviously not going for a perfect finish here and good job because I'm pretty useless at this paiting lark ! My number one priority here is no more rust.
Here the chassis sides have been sprayed with 3 coats of speed yellow (which doesnt match because speed yellow never does) and then topped off with a couple of coats of lacquer.
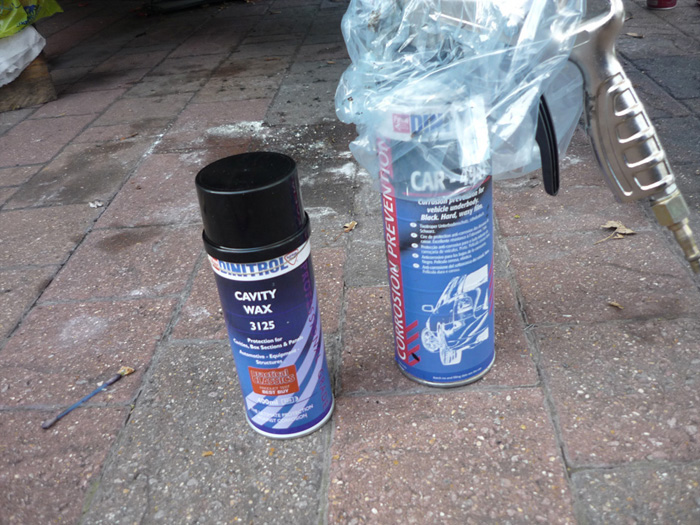
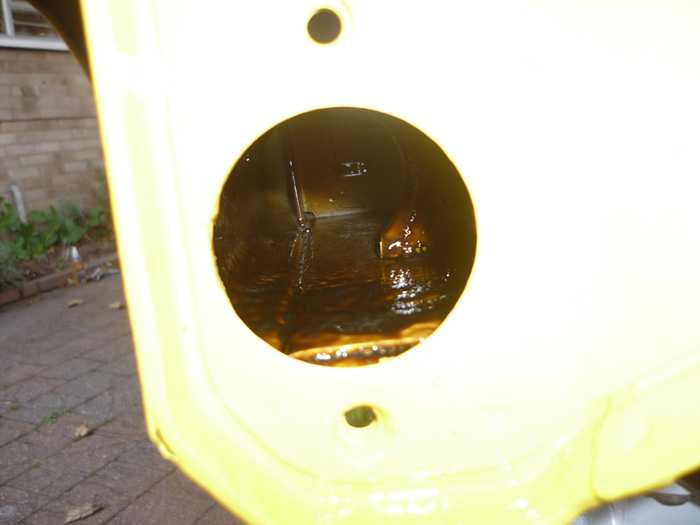
I applied both of these inside the chassis legs. Fist the 3125, allow to dry and then the 4941.
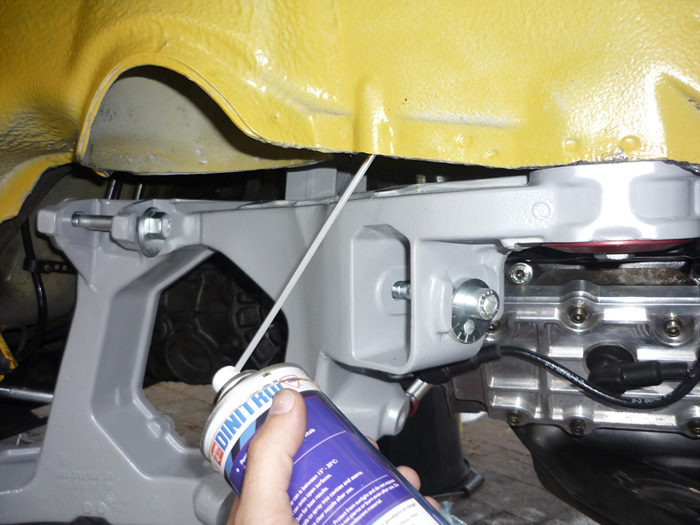
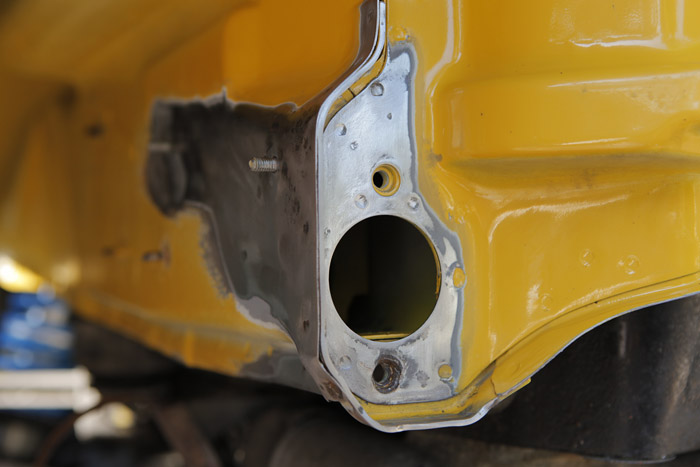
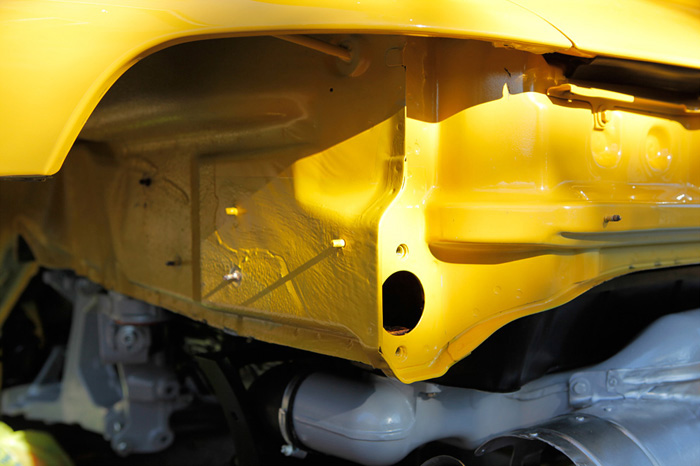
I also applied 3125 and 4941 all along the seams and up into any cavities and openings.
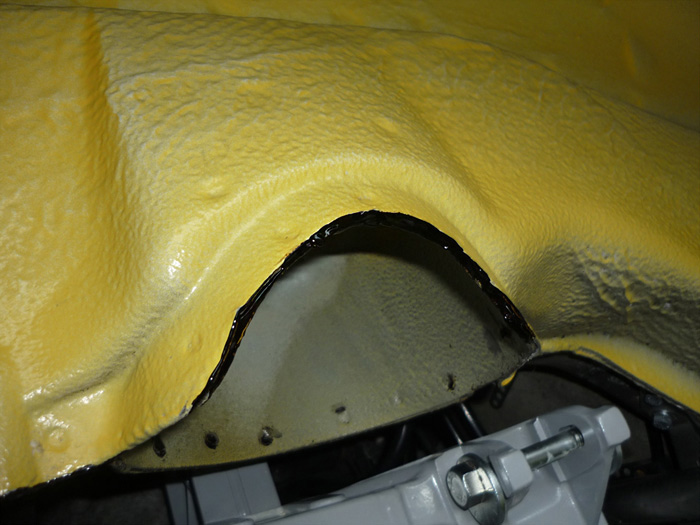
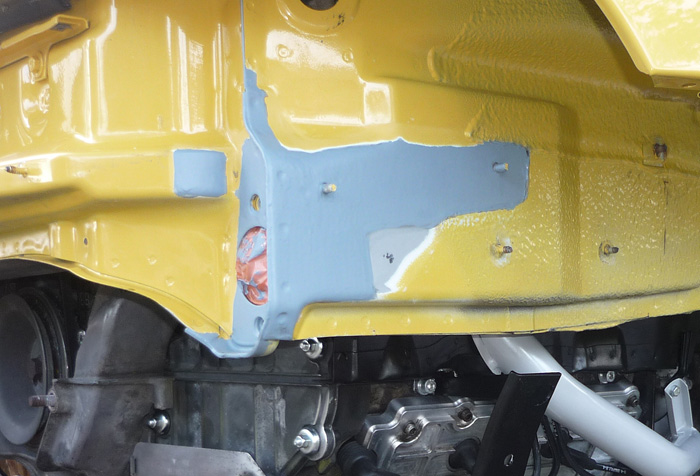
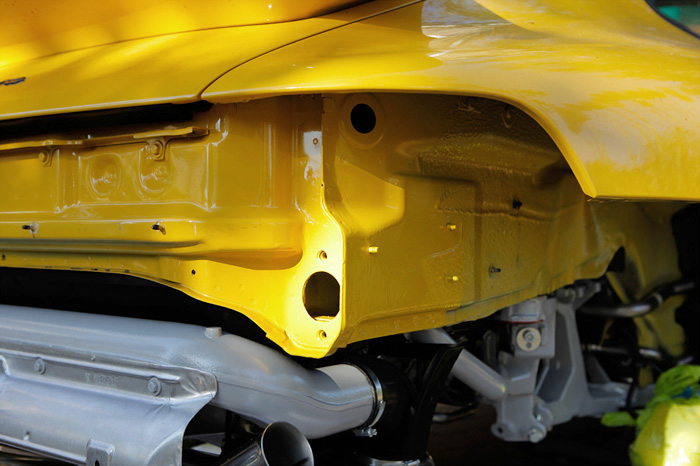
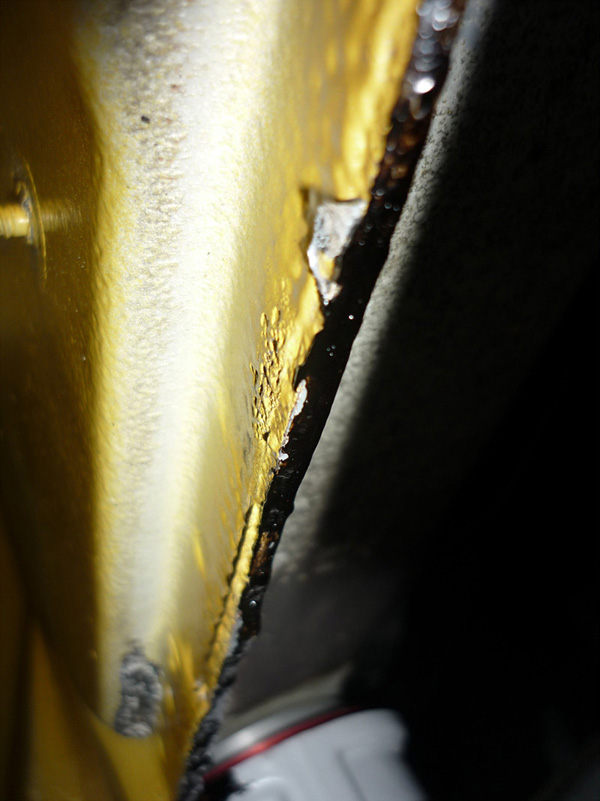
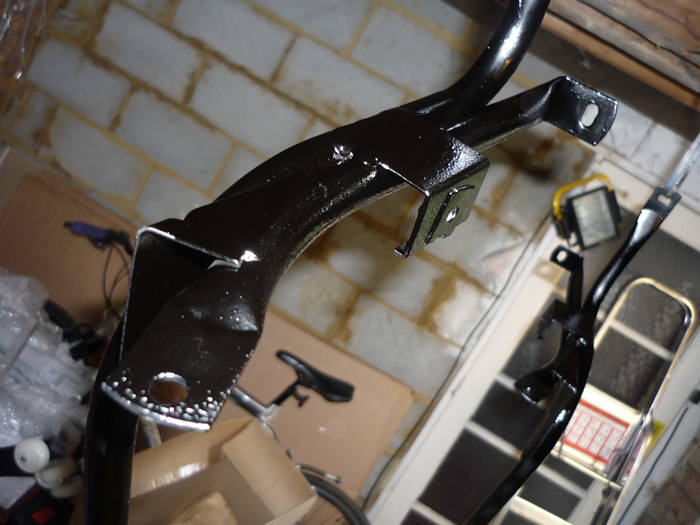
4941 applied as a bead along the pinch seam of the suspension turret.
etc...
Impact absorbers ..
As they also seem to collect a large amount of rust I also applied some 4941 on the back faces before fitting them.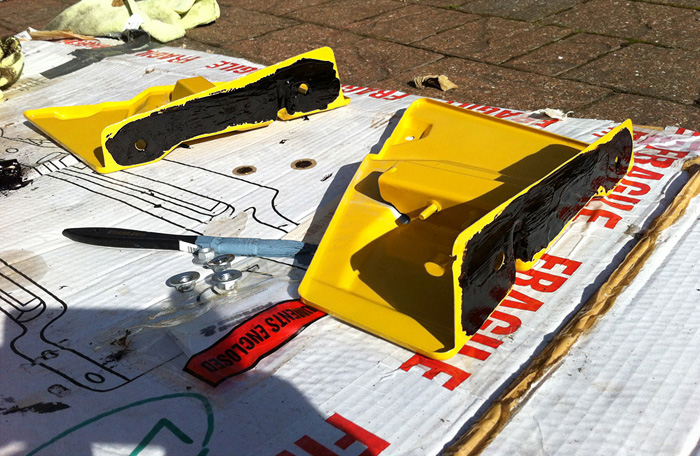
Same with the chassis supports. A layer of 4941 as a last final measure.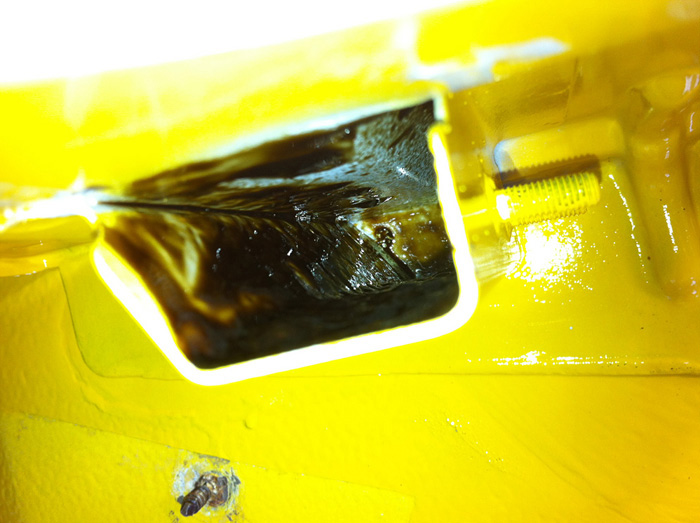
And more Dinitrol inside those box sections that the bumper supports sit against.
fitted
278 different shades of speed yellow !
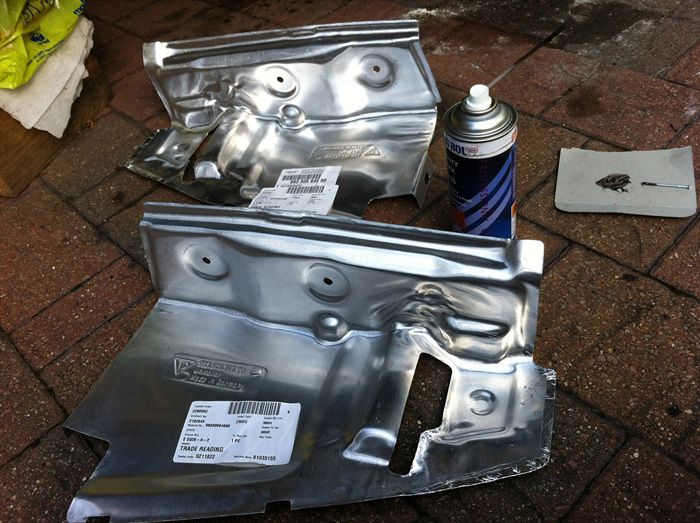
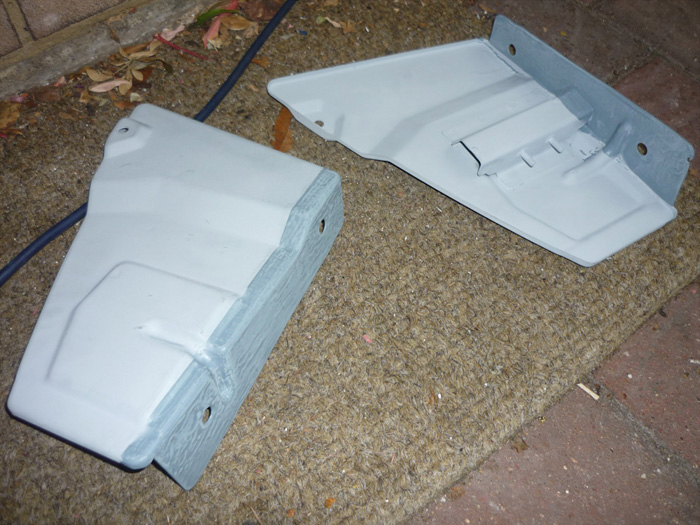
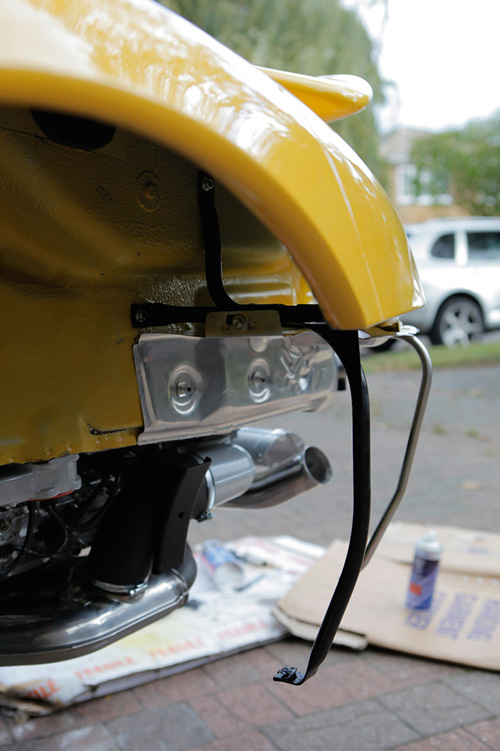
I have refurbed and fixed most heatshields at the rear but these I coulndt help replace as they were so messed up. I could have grit blasted the originals and it would have worked but given the new paint and the newly restored side supports my feeling was that new would be best. These were still soemthing like £50 each.
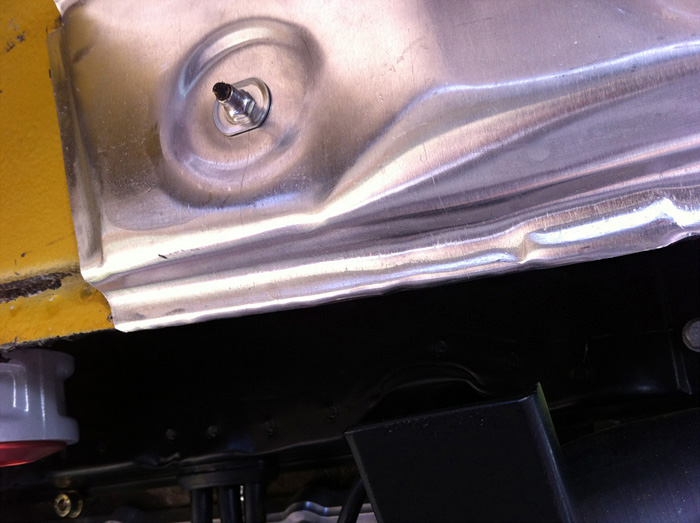
I gently bent the side faces into a curved shape so that the lower edges pushed up against the bodywork when fitted. I then also formed the very edges under around and under the chassis seam by pressing a round socket up against the edge. This will hopefully stop the mud getting between the heatshield. I will also be adding a layer of aluminium tape and bending it right back under the other side.
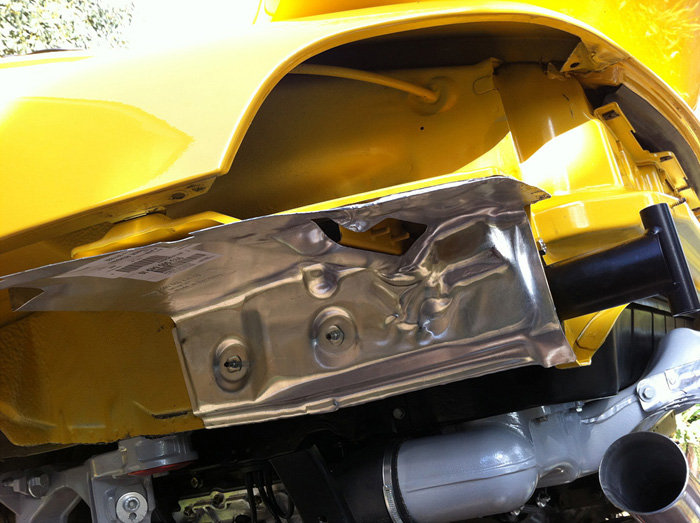
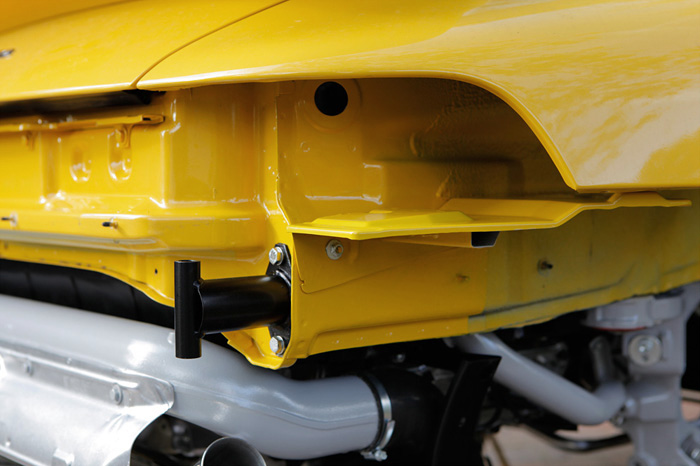
One heatshield in place.
Looking good.
On the nearside you have the boot release cable housing which runs into the engine bay. It might be worth having a prod around the area where the cable goes through as this can be a real hive of rust. Mine was fine though.
Onto those chassis leg ends .... difficult to get to. I did as best as I could with regular wet and dry. You can see that I had a sheared screw as well in my lower thread where the bumper impact bracket goes.
I had to drill through this ... a real pain in the neck.
Here it is finally out with plenty of rust left over.
The offending screw.
On the underside of my chassis legs I also notice a little surface rust.
So sanded this down also in readiness for a coat of POr15 and painting.
Ditto the other side. A few spots of rust and a bit if paint missing here and there.
More sanding ...
And now out with the rotary to get into those nooks and crannies.
A hook to get right into those seams.
Pretty much ready for the POR now.
Here's the kit. I have to say that having gone through the experience I wouldn't want to go this route again. Firstly, POR15 is best if actually painting on rust and surfaces that are well past their best. Secondly, its a pain to prep, a pain to apply and the whole primer process is also a bit of a nightmare. It's expensive too. In hindsight I should have just used a regular high build primer and then topcoat and lacquer. Still, I suppose is it nice to to know that I have that extra layer of protection.
Clean the surface with Marin Clean, Wash with water. The soak with Prep and Ready rust rmover for 30 mins or so and the wash again with water. Then dry. Then paint on the POR15. It doesn't go on that easily at first but after youve got some on and it starts to dry a bit you can get a thicker layer on. I did 2 laters on total. It does even out quite well do you should get a smooth surface.
I initially decided to use a UPOL acid etch primer. The manual says you have to apply any 3rd party primers whilst the POR15 is still tacky and not fully dry to allow for a good chemical bond.
Well I tried that and this is what happened. Maybe I it was a little too tacky but bottom line is its very hard to judge and a right fiddle.
So onto plan b which is the only option left now that the POR15 is dry. That is sanding down the POR15 with some 500 grit and using their very own Tie Coar primer which is another expensive product.
The tie coat primer is VERY thick and a real pain to use. Once I had a couple of coats fully dry after a few days, it was so lumpy and bumpy and had such variance in surface height that I found that trying to sand it flat and smooth was near impossible because sooner or later certain areas would go be inadvertantly sanded back to POR15 or even bare metal again ! So I just left mine as a pretty rough uneven finish.
Now onto those side supports. I had mine grit blasted. here I am prepping them wuth the marine clean degreaser.
Now with 2 layers of POR15 at the edge faces and then regular etch primer elsewhere. These will NOT be going rusty any time soon !
Speed Yellow top coat.
Couple of layers of lacquer as well. I was obviously not going for a perfect finish here and good job because I'm pretty useless at this paiting lark ! My number one priority here is no more rust.
Here the chassis sides have been sprayed with 3 coats of speed yellow (which doesnt match because speed yellow never does) and then topped off with a couple of coats of lacquer.
I applied both of these inside the chassis legs. Fist the 3125, allow to dry and then the 4941.
I also applied 3125 and 4941 all along the seams and up into any cavities and openings.
4941 applied as a bead along the pinch seam of the suspension turret.
etc...
Impact absorbers ..
As they also seem to collect a large amount of rust I also applied some 4941 on the back faces before fitting them.
Same with the chassis supports. A layer of 4941 as a last final measure.
And more Dinitrol inside those box sections that the bumper supports sit against.
fitted
278 different shades of speed yellow !
I have refurbed and fixed most heatshields at the rear but these I coulndt help replace as they were so messed up. I could have grit blasted the originals and it would have worked but given the new paint and the newly restored side supports my feeling was that new would be best. These were still soemthing like £50 each.
I gently bent the side faces into a curved shape so that the lower edges pushed up against the bodywork when fitted. I then also formed the very edges under around and under the chassis seam by pressing a round socket up against the edge. This will hopefully stop the mud getting between the heatshield. I will also be adding a layer of aluminium tape and bending it right back under the other side.
One heatshield in place.
Looking good.
10-23-2011, 08:06 PM
#86
Racer
Thread Starter
Join Date: Apr 2009
Location: London
Posts: 427
Likes: 0
Received 0 Likes
on
0 Posts
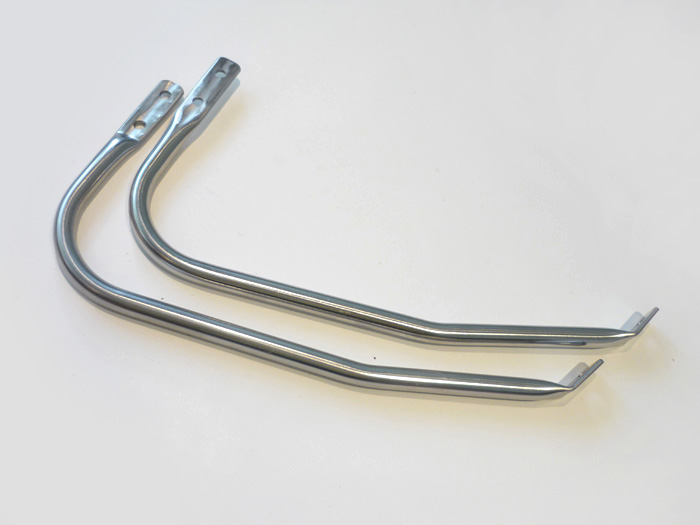
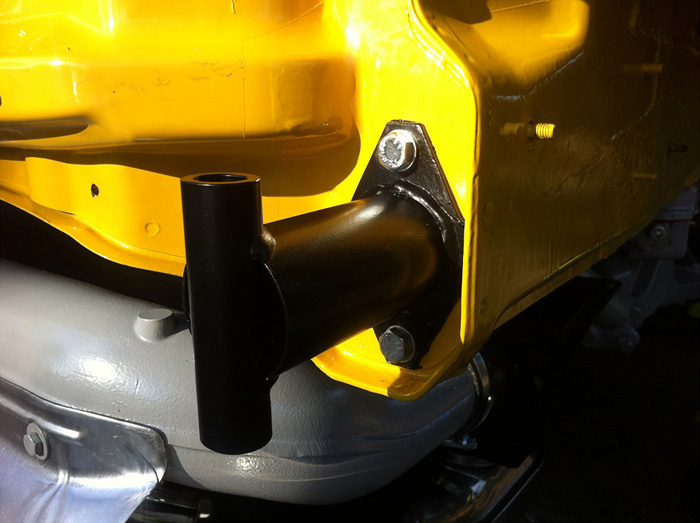
A pair of rear bumper supports custom made in stainless steel by a very kind chap from the 911uk forums.
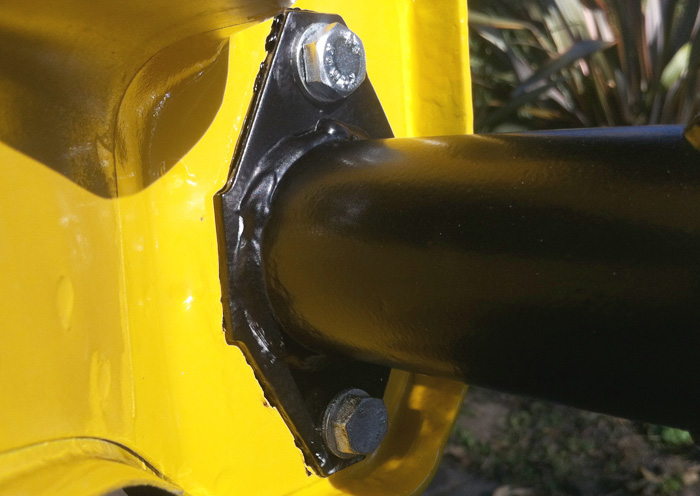
The larger forward bumper brackets were grit blasted, powder coated then treated with a liberal coating of 4941
And left to dry.


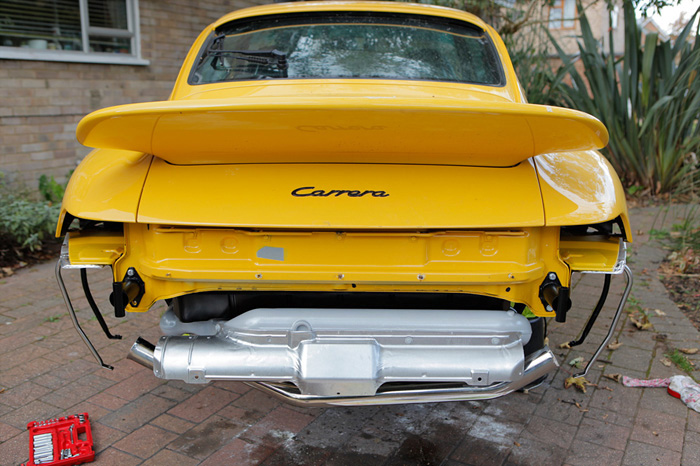
I also went round the whole rear of the car with everything still off, and applied Dinitol on various spots that I thuoghht were vunerable to rust attack or wherever I spotted any paint loss.
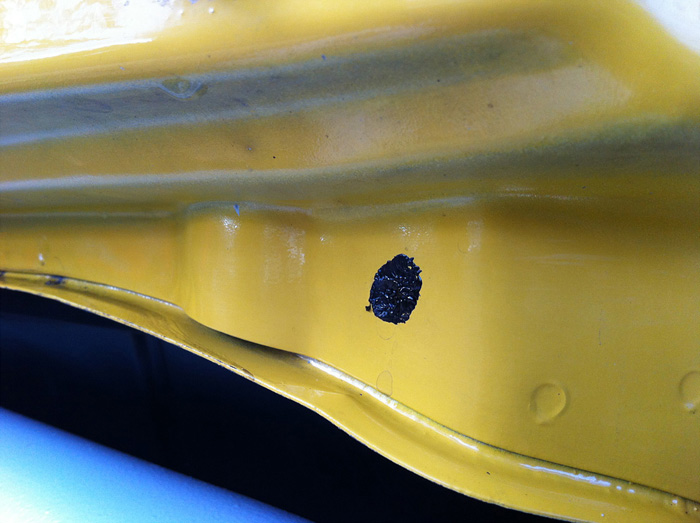
like these spots here....

Sorted. If the car lasted 15 years before rotting away fully here at the rear, then with the POR15 and the much better rust protection it shouldn't be until 2035 or so until another look is needed.

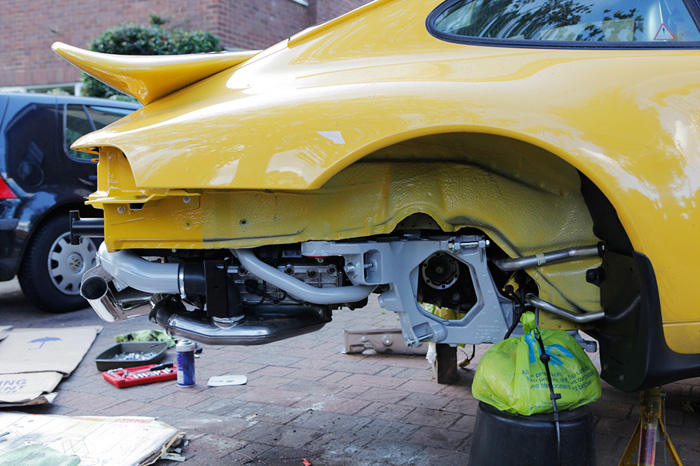
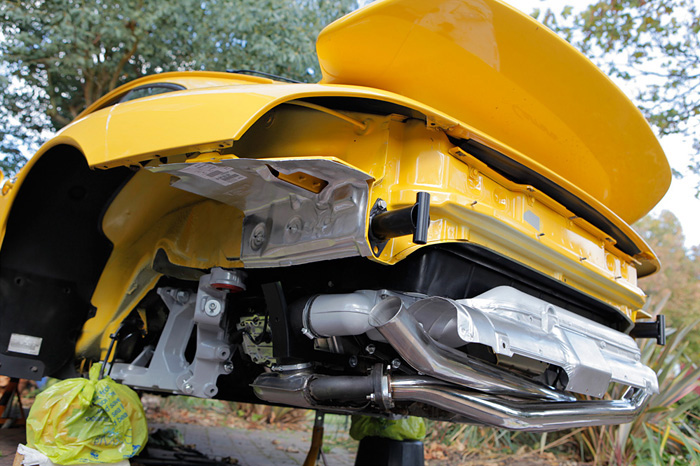
Bumper supports in place.
 10-23-2011, 08:17 PM
#88
Racer
Thread Starter
Join Date: Apr 2009
Location: London
Posts: 427
Likes: 0
Received 0 Likes
on
0 Posts
It actually doesnt rain that much in the south east of England. It used to a lot I think when i was a kid but not so much now. When it does though, I just don't work on the car. Believe it or not, parts of the UK are officially classed as being in drought. I guess the politicians would have you believe that its global warming.
10-23-2011, 08:25 PM
#89
Rennlist Member