What has been your most difficult 993 DIY?
#1
I’ll start since I’m still suffering.

Mine = removing the delicate / brittle plastic grills from an Aerokit II (Turbo S) tail.
I needed to change the color, so I needed to remove the grilles.
They are held in with 4 X M3 fasteners and much to my misery way too much rubbery, neopreney, incredibly tenacious adhesive.
Taking the nuts and washers off the threaded speed nut was trivial, but did open up the possibility of dropping the nuts into the bowels of the wing.
I had to cut through the adhesive using monofilament.
Those 9 words do not in any way convey the magnitude of challenge it was to get the monofilament behind the adhesive pads so that I could saw through it. If you’ve worked on your P car, you know how “good” they are at tightly packaging stuff.
The rear wing is no exception. Visibility was very very poor.
I got to use interesting combinations of monofilament, 28 gauge piano wire, picture hanging cable, wooden dowels, (because my hands were getting thrashed when winding the cutting media around them and applying force to saw). And lot’s of patience.
I ended up having to push the 28gauge wire where I needed it, put a loop in it, tie the monofilament to the loop, pull the monofilament back through, wind it onto the dowels and saw.
JOY!
The monofilament was too “floppy” to push where I needed it to go and the 28 gauge wire was too brittle to use as the saw and kept breaking.

If any of you ever do this, read it again and smile, I just saved you many hours of fun.

I thought about taking pictures and writing a DIY, but there was no way to clearly photograph where you need to cut (see the annotated photo below for adhesive pad locations).
This was definitely harder than changing the plugs, but closely compares with routing spark plug cables over the engine and under the VRam to the passenger side.
Routing the wires isn’t too tough, but installing the wire looms into the housing was not fun. There isn’t much room in there if you leave the VRam on.
Cheers
Craig
Ps. taking the C shaped outer wing section off the tailbase so that you can access the top of the grills was also a good time when I found the fasteners were corroded and didn't work very well as removable parts anymore.....

Mine = removing the delicate / brittle plastic grills from an Aerokit II (Turbo S) tail.
I needed to change the color, so I needed to remove the grilles.
They are held in with 4 X M3 fasteners and much to my misery way too much rubbery, neopreney, incredibly tenacious adhesive.
Taking the nuts and washers off the threaded speed nut was trivial, but did open up the possibility of dropping the nuts into the bowels of the wing.
I had to cut through the adhesive using monofilament.
Those 9 words do not in any way convey the magnitude of challenge it was to get the monofilament behind the adhesive pads so that I could saw through it. If you’ve worked on your P car, you know how “good” they are at tightly packaging stuff.
The rear wing is no exception. Visibility was very very poor.
I got to use interesting combinations of monofilament, 28 gauge piano wire, picture hanging cable, wooden dowels, (because my hands were getting thrashed when winding the cutting media around them and applying force to saw). And lot’s of patience.
I ended up having to push the 28gauge wire where I needed it, put a loop in it, tie the monofilament to the loop, pull the monofilament back through, wind it onto the dowels and saw.
JOY!
The monofilament was too “floppy” to push where I needed it to go and the 28 gauge wire was too brittle to use as the saw and kept breaking.

If any of you ever do this, read it again and smile, I just saved you many hours of fun.

I thought about taking pictures and writing a DIY, but there was no way to clearly photograph where you need to cut (see the annotated photo below for adhesive pad locations).
This was definitely harder than changing the plugs, but closely compares with routing spark plug cables over the engine and under the VRam to the passenger side.
Routing the wires isn’t too tough, but installing the wire looms into the housing was not fun. There isn’t much room in there if you leave the VRam on.
Cheers
Craig
Ps. taking the C shaped outer wing section off the tailbase so that you can access the top of the grills was also a good time when I found the fasteners were corroded and didn't work very well as removable parts anymore.....
#4
Removing the engine & tranny for the first time with no directions and hand tools. Took 5 hrs but ONLY bc of one god damn exhaust housing bolt on the turbo (which didn't have to come off anyway to drop the motor)
These cars are sooooooooo simple to work on its one of the great things about them!
These cars are sooooooooo simple to work on its one of the great things about them!
The following users liked this post:
911F1 (08-23-2020)
#7
I feel your pain 
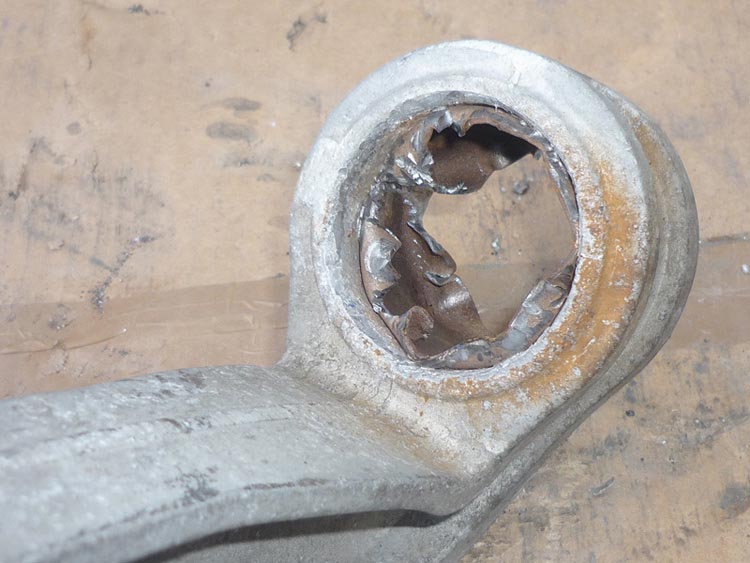
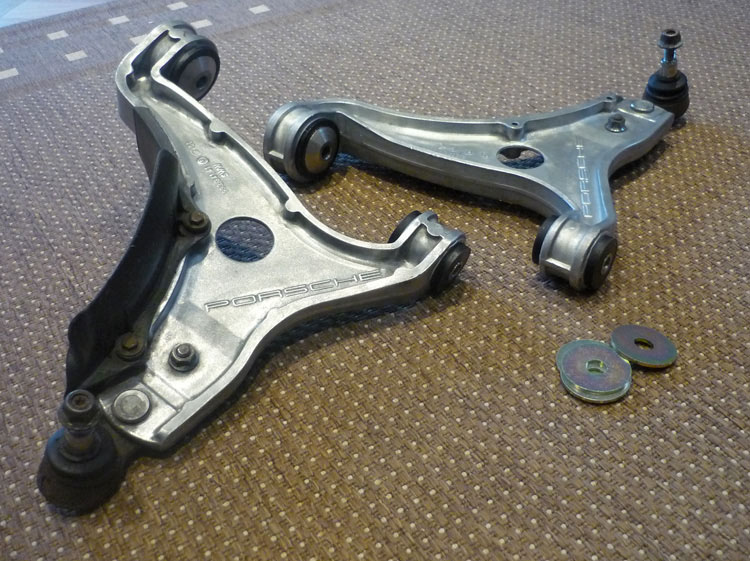
getting the bush sleeves out of my wishbones was the worst, mainly because i had no vice and no proper chisels. It took me hours and hours. I also had no hand guard so bashed/hammered my hand up good and proper.
my fault really... ALWAYS get the right tools before starting any job !

was well worth it though


getting the bush sleeves out of my wishbones was the worst, mainly because i had no vice and no proper chisels. It took me hours and hours. I also had no hand guard so bashed/hammered my hand up good and proper.
my fault really... ALWAYS get the right tools before starting any job !

was well worth it though

Trending Topics
#11
for me, probably trying to program pia immobilzer, and removing the eccentric bolt which I now have the right know-how. But wait, you fly of buildings so everything on the 993 should be childs play.
 But wait, you fly of buildings so everything on the 993 should be childs play.
#12
Clutch slave: in freezing weather, while hunkered in a steel rental unit with no heat and ****-poor lighting. That was my first 993 DIY, and thankfully, everything since has been pleasurable.
Andreas
Andreas
#13
DIYs
1-10 difficulty, 1 easy, 10 difficult
Engine remove and replace, 7.5
Engine out

Bob-
1-10 difficulty, 1 easy, 10 difficult
Engine remove and replace, 7.5
Engine out
- Plug wires, 4
- Distributor cap, 2
- Plugs, 2
- Oil/filter change, 2
- LWFW & clutch, 5
- Power steering belt, 2
- Hydraulic valve lifter replacement, 3
- Upper and lower valve cover gasket replacement, 2
- FDM SSK and Golden Rod, 3.5
- Al. shift ****, 2
- 996 3 spoke steering wheel, 3
- Brake pad/ anti squeal spiders replacement, 3
- RS motor mounts, 3.5
- Hydraulic system flush, 4
- PSS10 install, 6
- MO30 Front and rear sways, 3
- Fister Stage IIs, 3
- Spoiler wall replacement, 3
- Install Gt3 furniture, 4
- Air/pollen filters, 2
- Oil/filter change, 4
- Third brake light led replacement, 2.5
- Lower valve cover gasket replacement, 3.5
- get rid of the switchblade key, 2

Bob-
Last edited by boulderbobo; 01-14-2010 at 05:38 PM.
#15


