
Rear Seat Delete DIY
 07-07-2008, 03:59 PM
#1
Addict
Rennlist Member
Rennlist Member
Thread Starter

I'm not sure which was harder - Doing the RSD DIY or posting the procedure to the web site. Sheesh!
You can find it in the DIY Submission Forum.
Best wishes to all - I'm glad I can finally give back to all of you who have given me so very much.
You can find it in the DIY Submission Forum.
Best wishes to all - I'm glad I can finally give back to all of you who have given me so very much.
 07-07-2008, 09:45 PM
#3
Rennlist Member
It's in the "DIY submission forum"...
Go to "All Forums" and scroll down...
https://rennlist.com/forums/showthre...ferrerid=35947
Looks very thorough but I can't see the pics?
Nice job Howard!
Go to "All Forums" and scroll down...
https://rennlist.com/forums/showthre...ferrerid=35947
Looks very thorough but I can't see the pics?
Nice job Howard!
07-07-2008, 10:55 PM
#4
Rennlist Member
I speak from personal experience when I say that this write-up helped me perfectly perform this DIY.
By the time I got to the bolts he had trouble with for the rear seat supports, I already had gone out to purchase a "wrecking-bar" length ratchet as my seat belt bolts had been tightened by Hans (or Franz). [BTW: Those are the first bolt's you get to in the instructions... ]
]
Howard - thanks for a great DIY!
By the time I got to the bolts he had trouble with for the rear seat supports, I already had gone out to purchase a "wrecking-bar" length ratchet as my seat belt bolts had been tightened by Hans (or Franz). [BTW: Those are the first bolt's you get to in the instructions...
]Howard - thanks for a great DIY!
01-14-2010, 10:43 PM
#6
Addict
Lifetime Rennlist
Member
Lifetime Rennlist
Member
Big toast to RLer PorscheRalph for e-mailing me Howdy993's complete DIY w/ pix in a PDF document ~a year ago  Russ-- +1 (even though I'm without RSD, I recognize the value of Howard's efforts to help others)Smiles-- Looking at the RL 993 DIY archive, the most recent posting is July 2008, so you've got a great question
I'm guessing it's because we have the luxury of Mike J's pcarWorkshop.com & Robin Sun's p-car.com. Since I didn't see this DIY covered on their sites, it seemed even more worthy for helping share hereMark, etc.-- As you mentioned, the photographs have gone inactive in Howdy993's thread. Due to requests for me to e-mail the DIY PDF to others & a desire to figure out how to share it (the PDF was too large for RL's limits), I transferred the embedded Adobe Acrobat photos to JPG format; incorporated with what I now realize is Howdy993's original text below.
Russ-- +1 (even though I'm without RSD, I recognize the value of Howard's efforts to help others)Smiles-- Looking at the RL 993 DIY archive, the most recent posting is July 2008, so you've got a great question I'm guessing it's because we have the luxury of Mike J's pcarWorkshop.com & Robin Sun's p-car.com. Since I didn't see this DIY covered on their sites, it seemed even more worthy for helping share hereMark, etc.-- As you mentioned, the photographs have gone inactive in Howdy993's thread. Due to requests for me to e-mail the DIY PDF to others & a desire to figure out how to share it (the PDF was too large for RL's limits), I transferred the embedded Adobe Acrobat photos to JPG format; incorporated with what I now realize is Howdy993's original text below.
Last edited by curve lover; 01-14-2010 at 11:00 PM.
01-14-2010, 10:45 PM
#7
Addict
Lifetime Rennlist
Member
Lifetime Rennlist
Member
Here's the "993 cab Rear Seat Delete installation" thread I posted yesterday to the "DIY Submission Forum" before stumbling across Howdy993's in the 993 "DIYs and "How To" Archive" today. (I'm glad to realize Howdy993's the author, but wish I'd figured that out a day earlier  )...
)...
________________________________________________________________________ ________
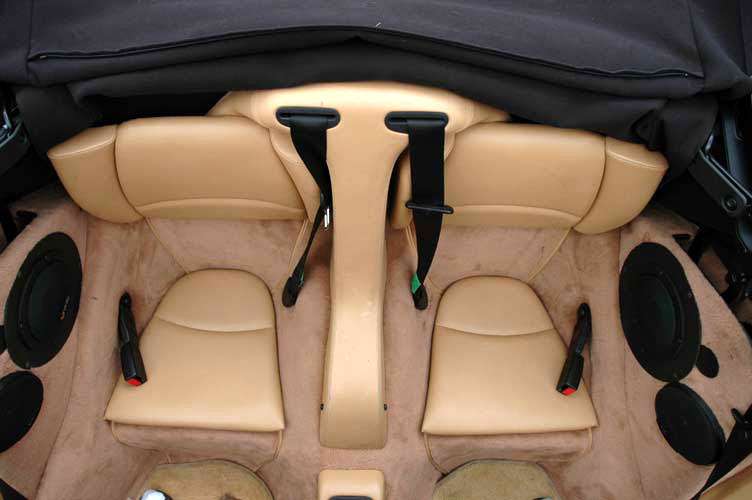
Start by leaving the Cabriolet top UP - this will allow easier access to bolts you will be removing
Begin the Rear Seat removal by moving the front seats all the way forward.
)...________________________________________________________________________ ________
Start by leaving the Cabriolet top UP - this will allow easier access to bolts you will be removing
Begin the Rear Seat removal by moving the front seats all the way forward.
Trending Topics
 01-14-2010, 10:47 PM
#10
Addict
Lifetime Rennlist
Member
Lifetime Rennlist
Member
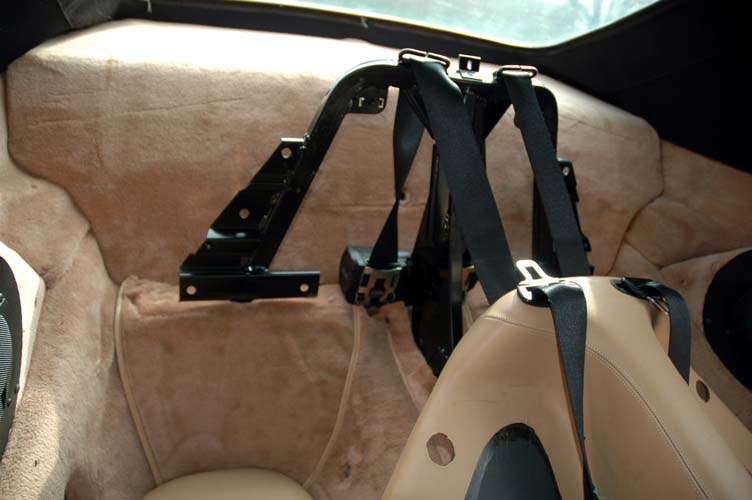
This panel is glued at the bottom so removal will meet with resistance
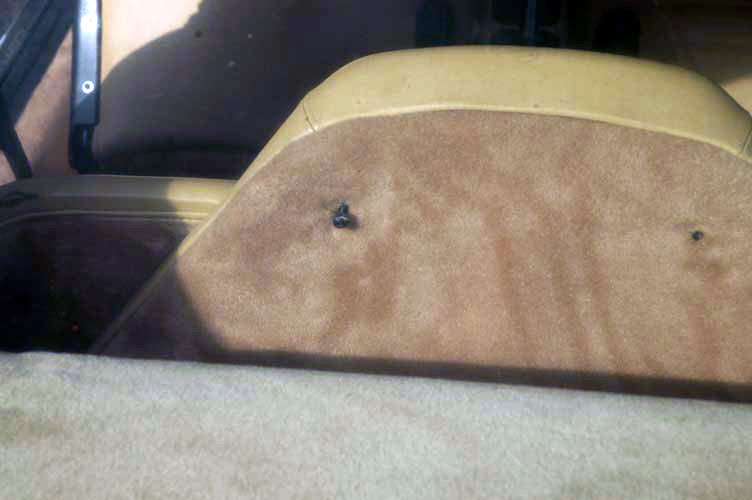
Remove the back rest bolts (3 per side) and take off back rests.
This picture is taken with the RSD already removed for clarity.
Remove the back rest bolts (3 per side) and take off back rests.
This picture is taken with the RSD already removed for clarity.
 01-14-2010, 10:51 PM
#13
Addict
Lifetime Rennlist
Member
Lifetime Rennlist
Member
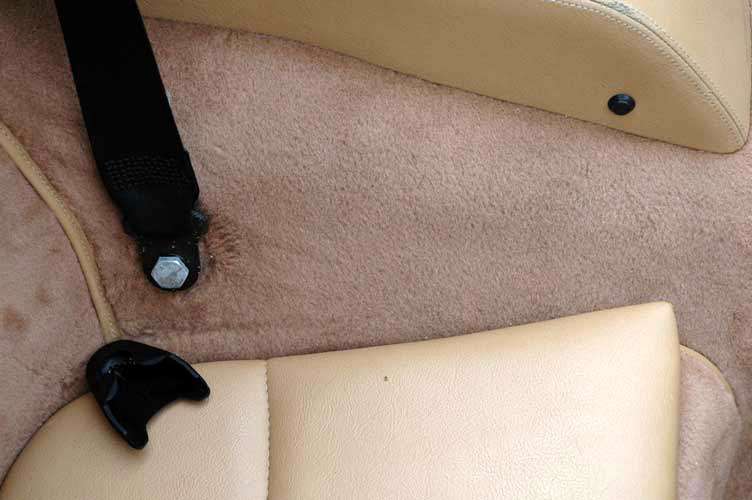
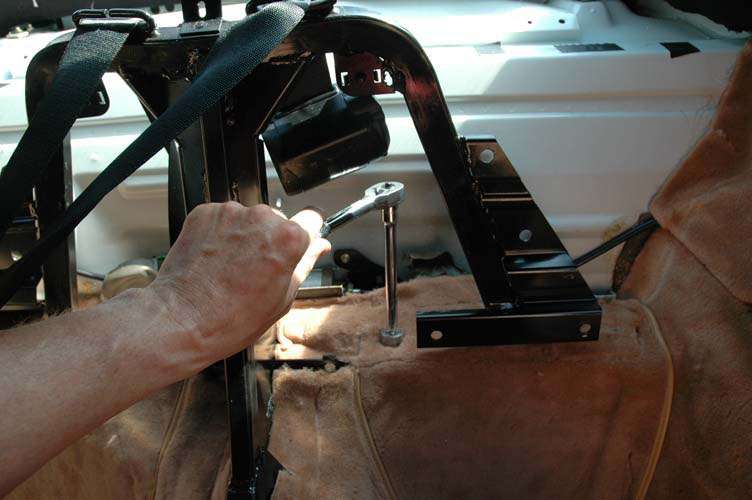
Remove the remaining Phillips screws that hold the frame cover to the frame, and then remove the frame cover.
Remove the rear carpet panel � the one attached with the big plastic screw
Remove the rear carpet panel � the one attached with the big plastic screw
01-14-2010, 10:51 PM
#14
Addict
Lifetime Rennlist
Member
Lifetime Rennlist
Member
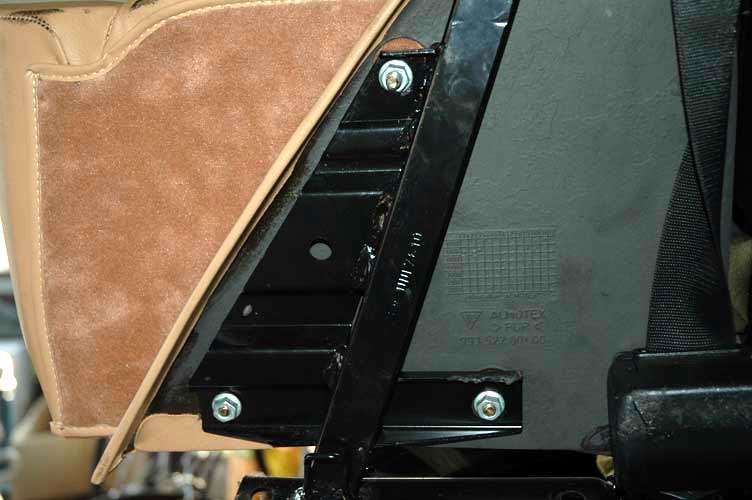
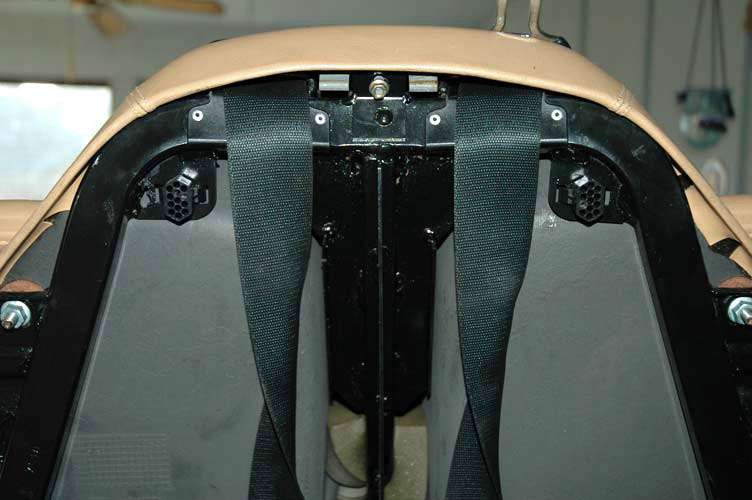
You will also have to unbolt the seat belt retractors and remove them to set the frame cover aside.
The heavy sturdy frame is bolted into place in 6 places. � 4 in back 2 in front.
Feel for the bolt heads under the carpet and make �X� cuts across the tops of the bolts.
The 6 frame attachment bolts are highly torqued & the same bolts will be surrounded by gooey carpet cement, so be forewarned.
The heavy sturdy frame is bolted into place in 6 places. � 4 in back 2 in front.
Feel for the bolt heads under the carpet and make �X� cuts across the tops of the bolts.
The 6 frame attachment bolts are highly torqued & the same bolts will be surrounded by gooey carpet cement, so be forewarned.
01-14-2010, 10:52 PM
#15
Addict
Lifetime Rennlist
Member
Lifetime Rennlist
Member
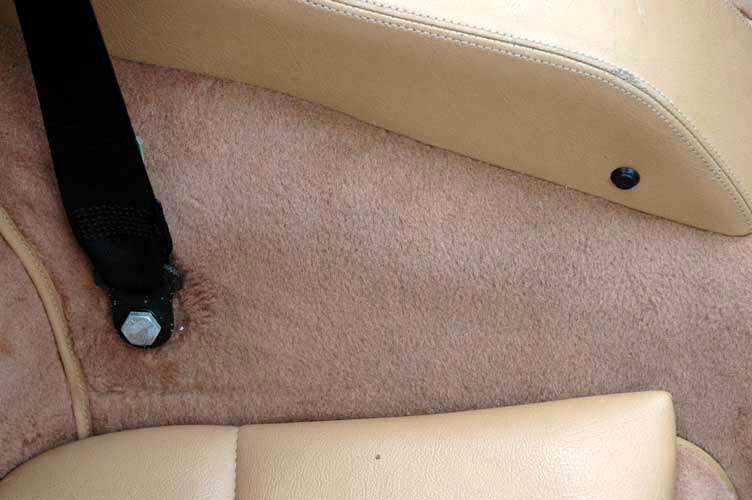
Once all the bolts have been removed, you will need to carefully cut the carpeting and fill padding to remove the Rear Seat frame.
In the front section there is a large amount of foam that is attached to the metal frame yoke.
Separate this foam from the frame carefully, then remove the frame.

In the front section there is a large amount of foam that is attached to the metal frame yoke.
Separate this foam from the frame carefully, then remove the frame.