When you click on links to various merchants on this site and make a purchase, this can result in this site earning a commission. Affiliate programs and affiliations include, but are not limited to, the eBay Partner Network.
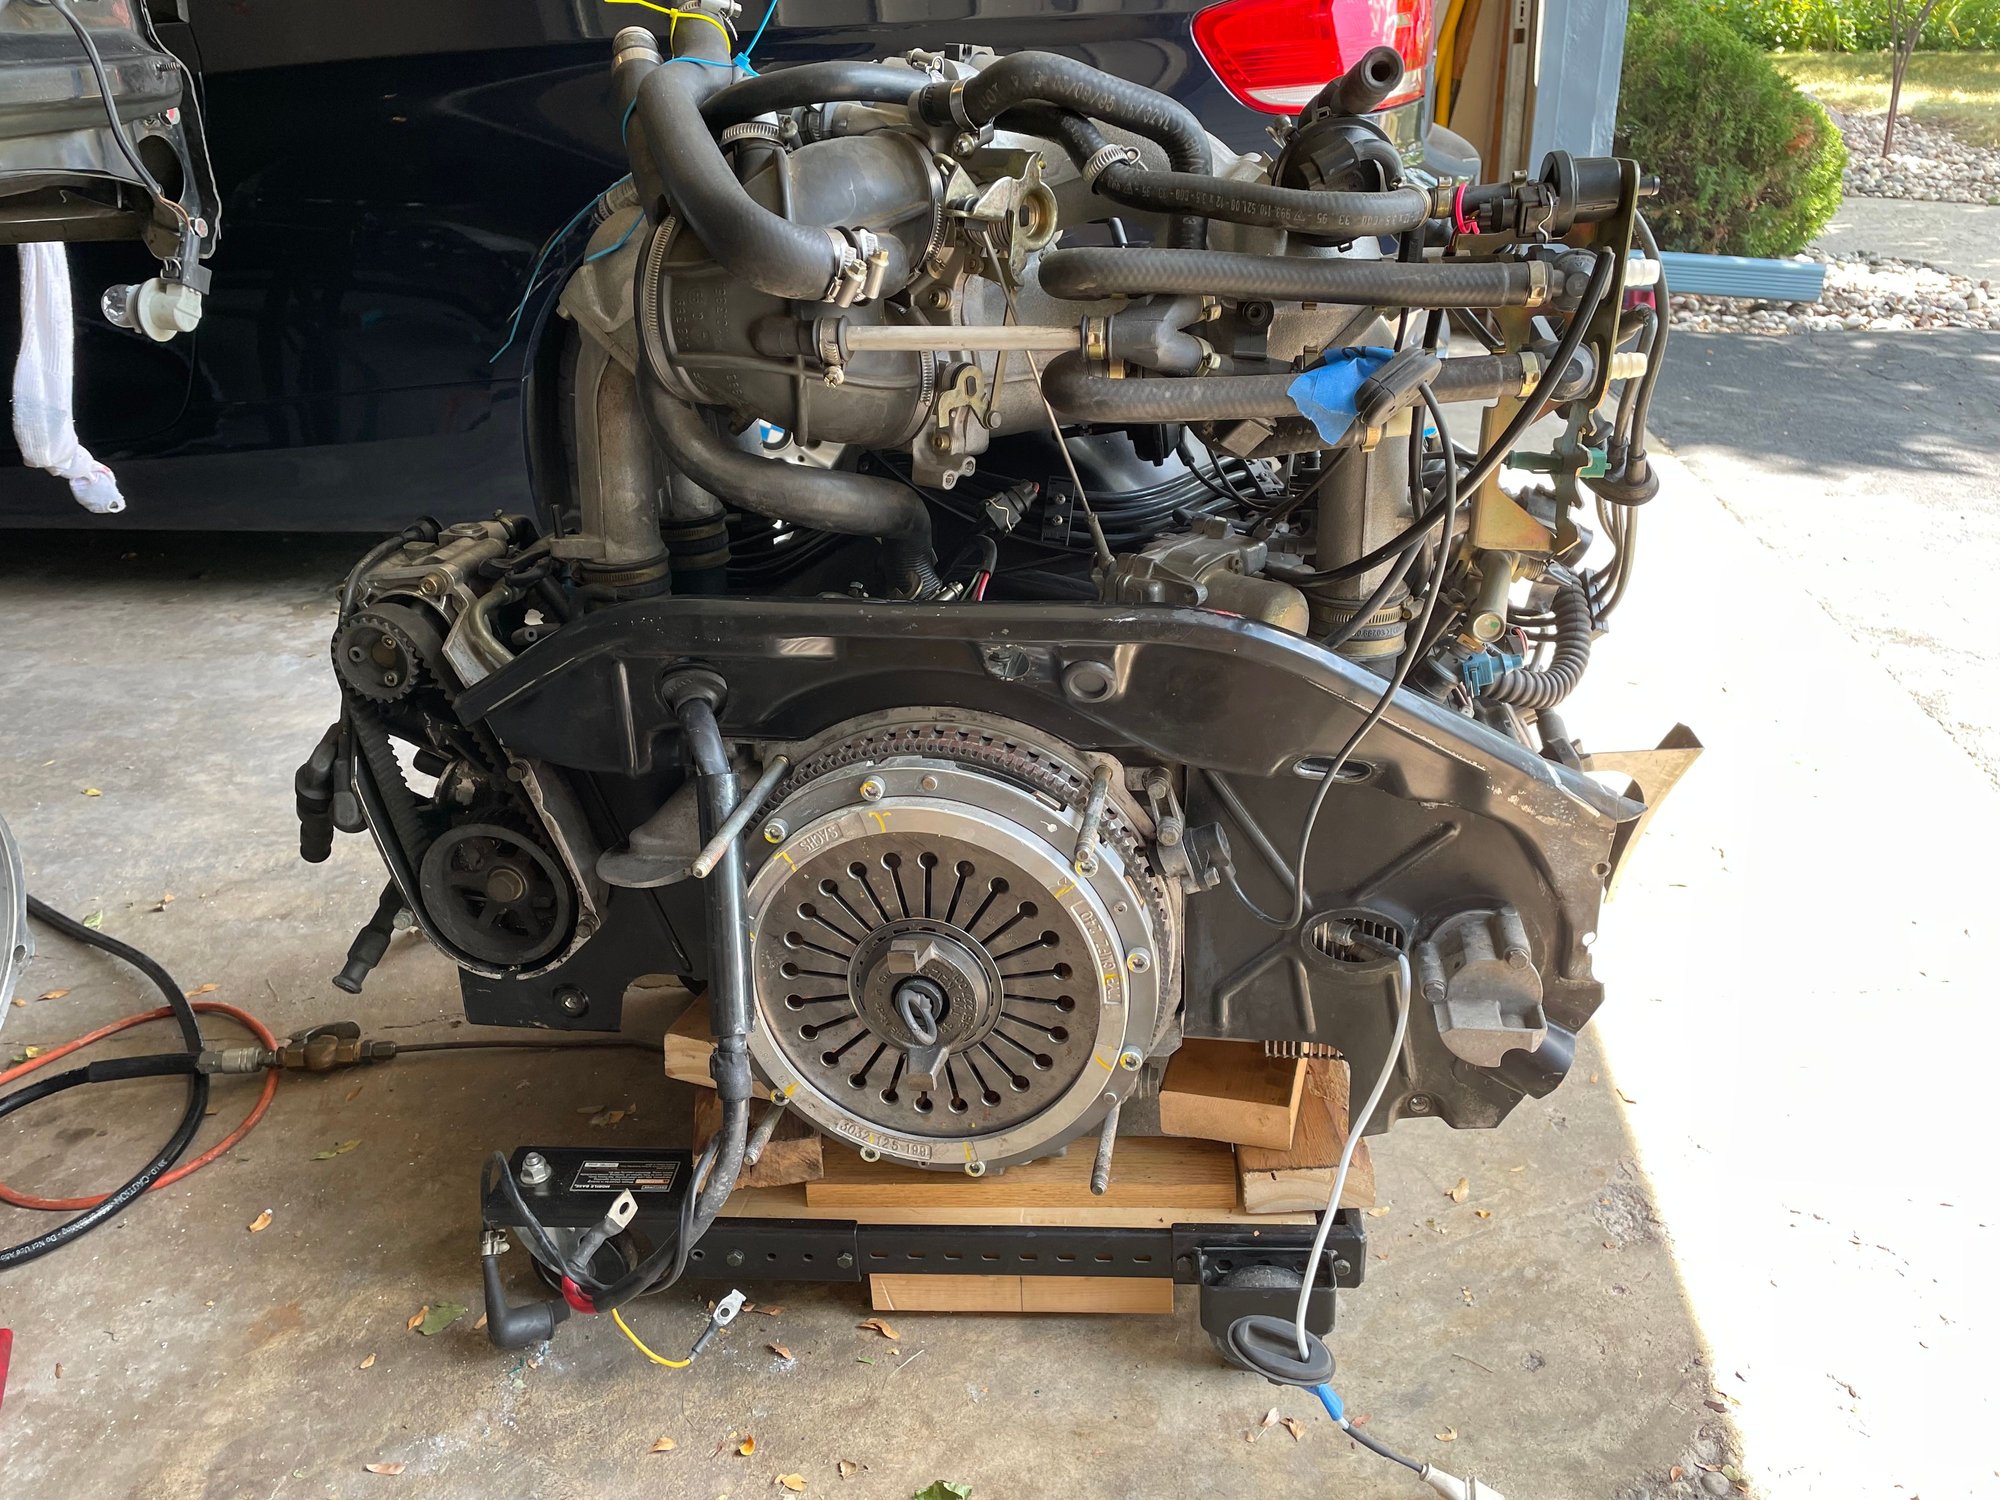
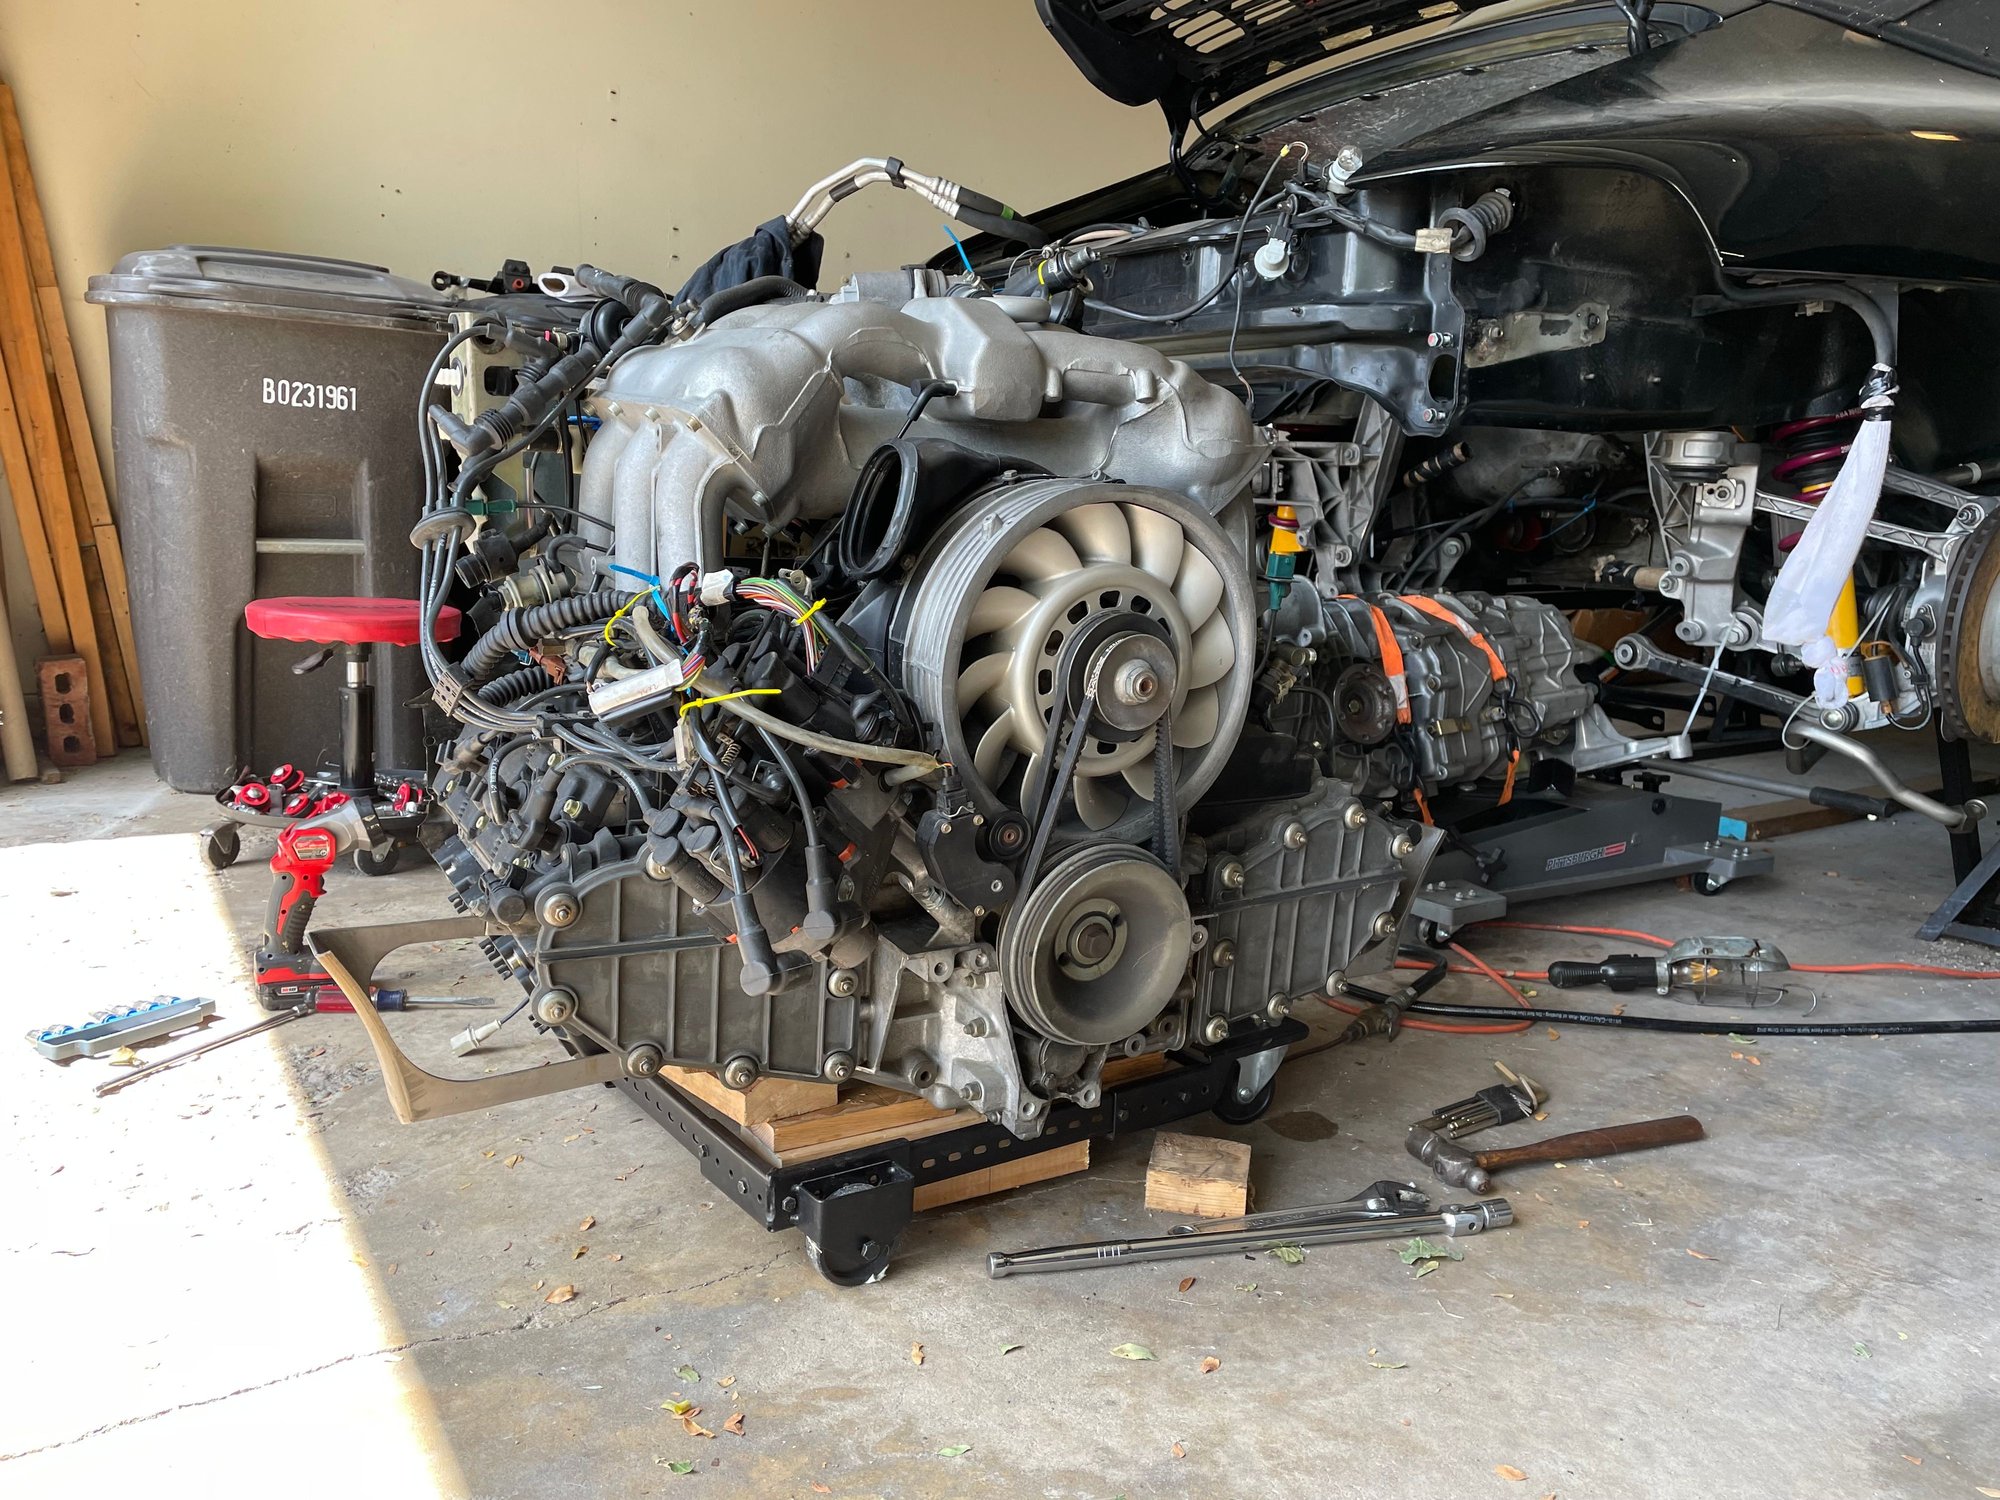
Well I went ahead and did it, I dropped the engine. I am replacing the clutch etc and could not get the transmission back in alignment with the clutch plate/pilot bearing after hours and hours of trying so I resorted to plan B. It really did not take much thought to go ahead and do it. I wanted to join the "dropped the engine" club anyway. All went remarkably well but took some time, however I am in no rush and I am enjoying the journey. I have my extensive list of the "while I am there" maintenance to perform and worn parts to replace, all advice provided to me by Rennlisters in previous threads-Thanks to all of you!
I am going to give both the car and engine a thorough cleaning since I have unobstructed access to all of those nooks and crannies. I do have a few questions however to complete my journey,
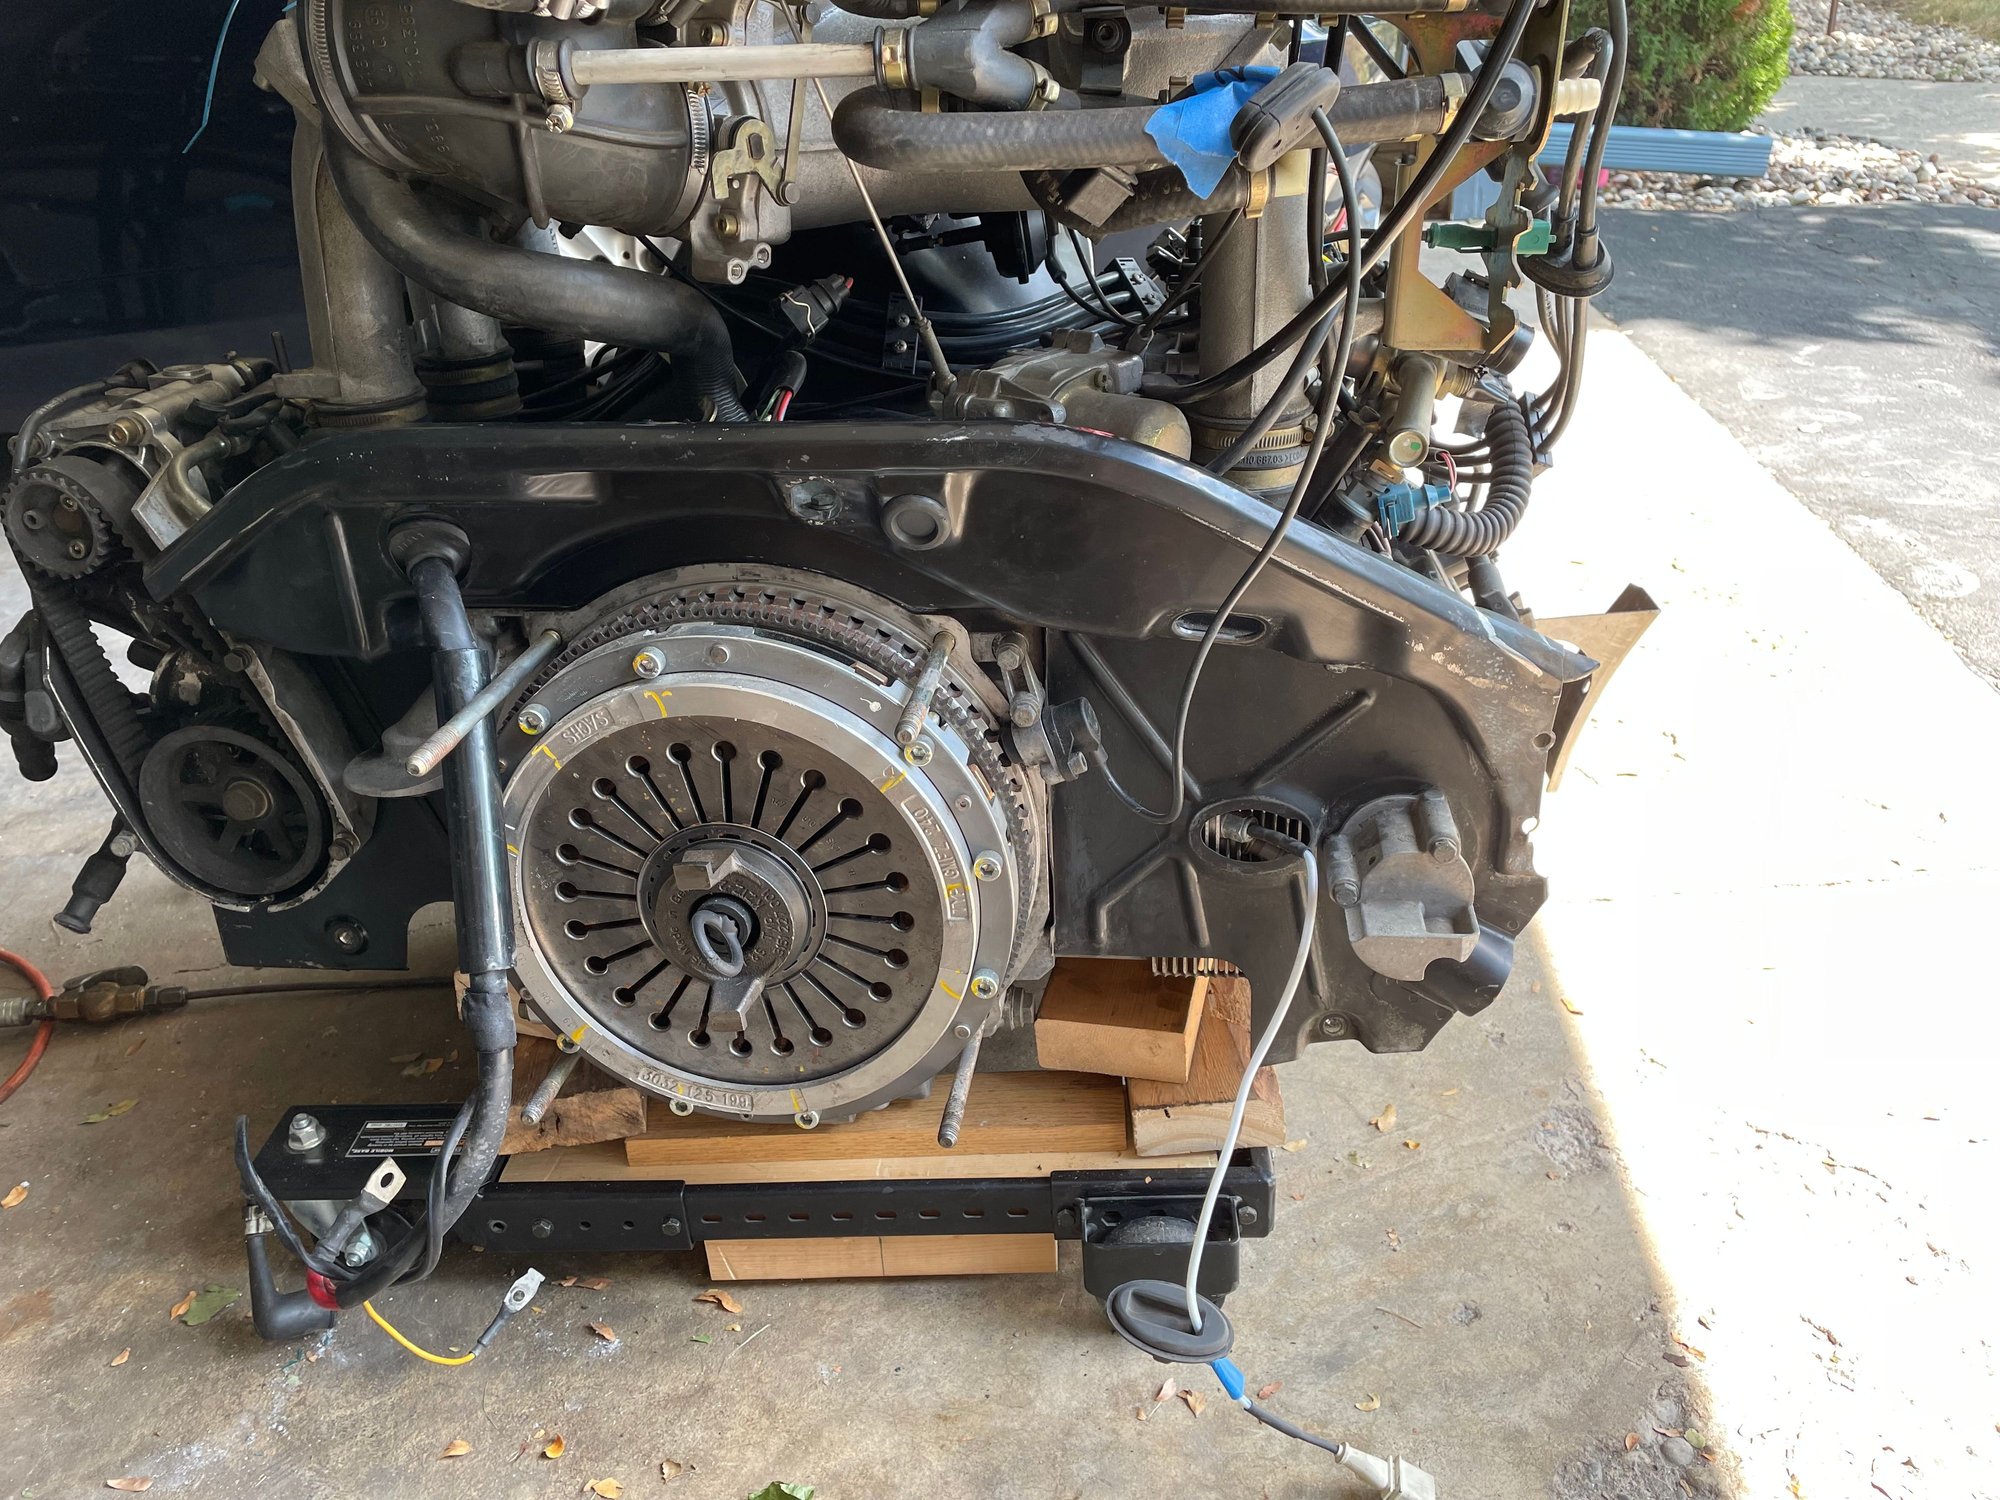
I am in the process of removing the rear engine tin so I may clean properly but it is held in place by bolts yes but two items I am leery about that need removal.
First is an item listed as a Lid in the parts manual. I don't know a lid for what and it requires an o ring. It located on the left side of the engine/camshaft housing over what would be the left camshaft. Can I remove this 'Lid" with no untold problems down the road or needing special alignment tools to reinstall?
Second is the power steering pump bracket and belt housing. Can I remove this without lots of effort for reinstall?
These are obviously in the nice to do column for cleaning purposes but I do not need to open any can of worms right now since everything is going quite smoothly(knocks on wood).
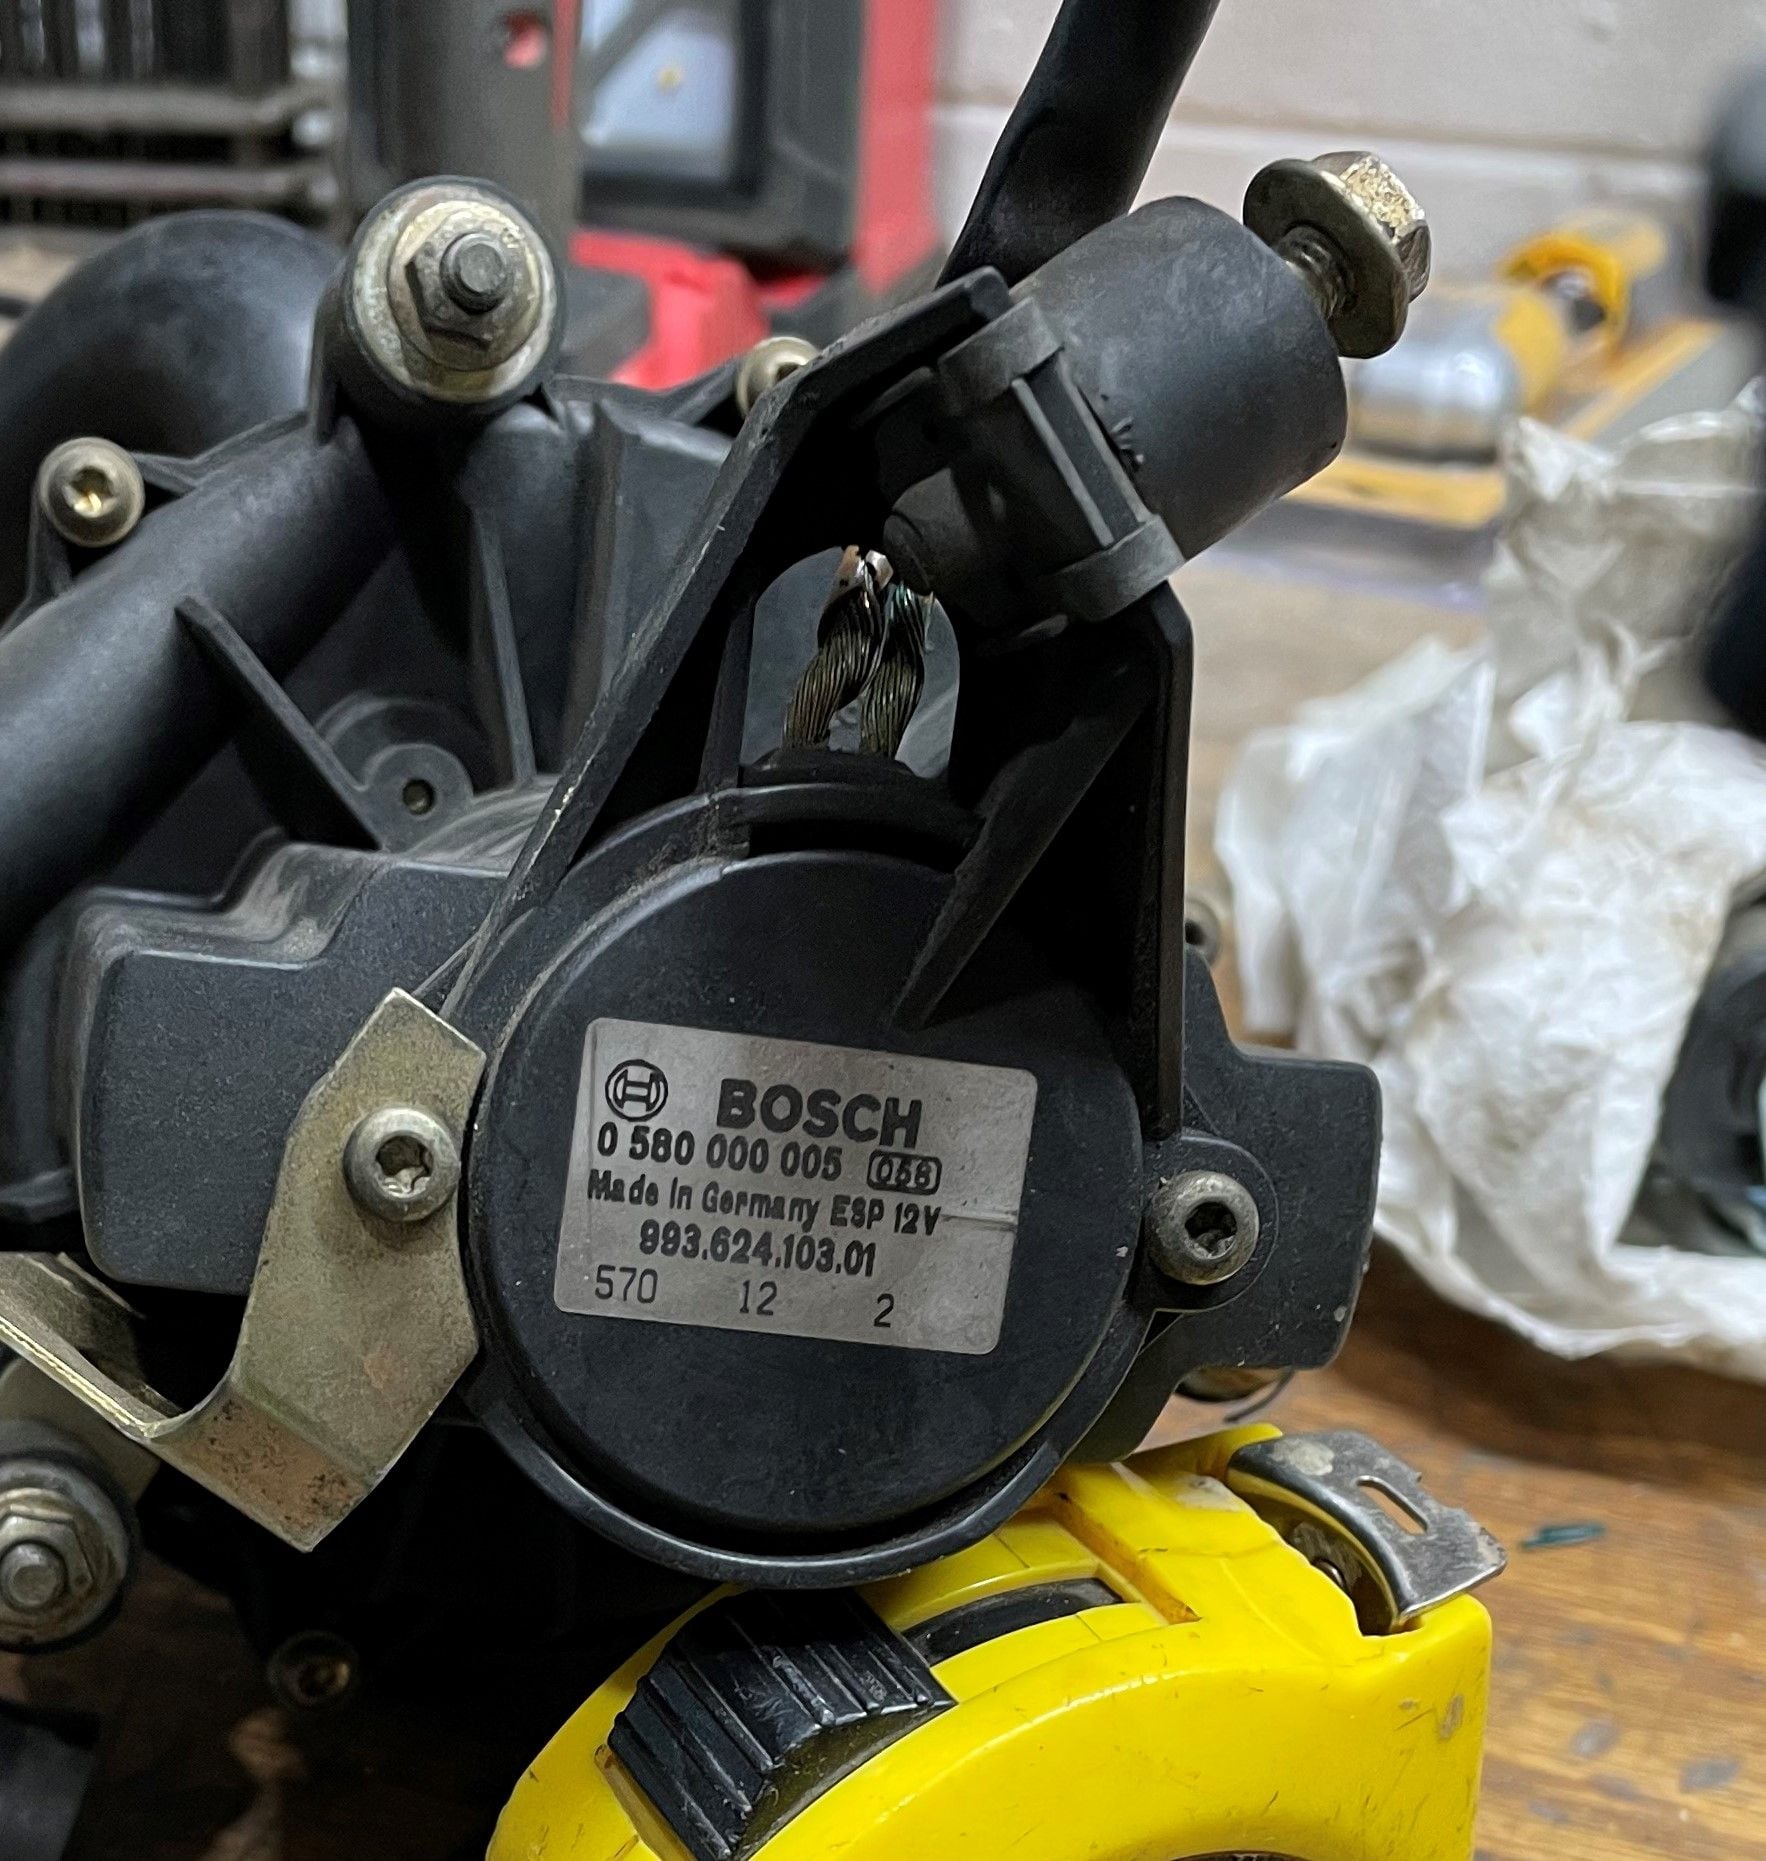
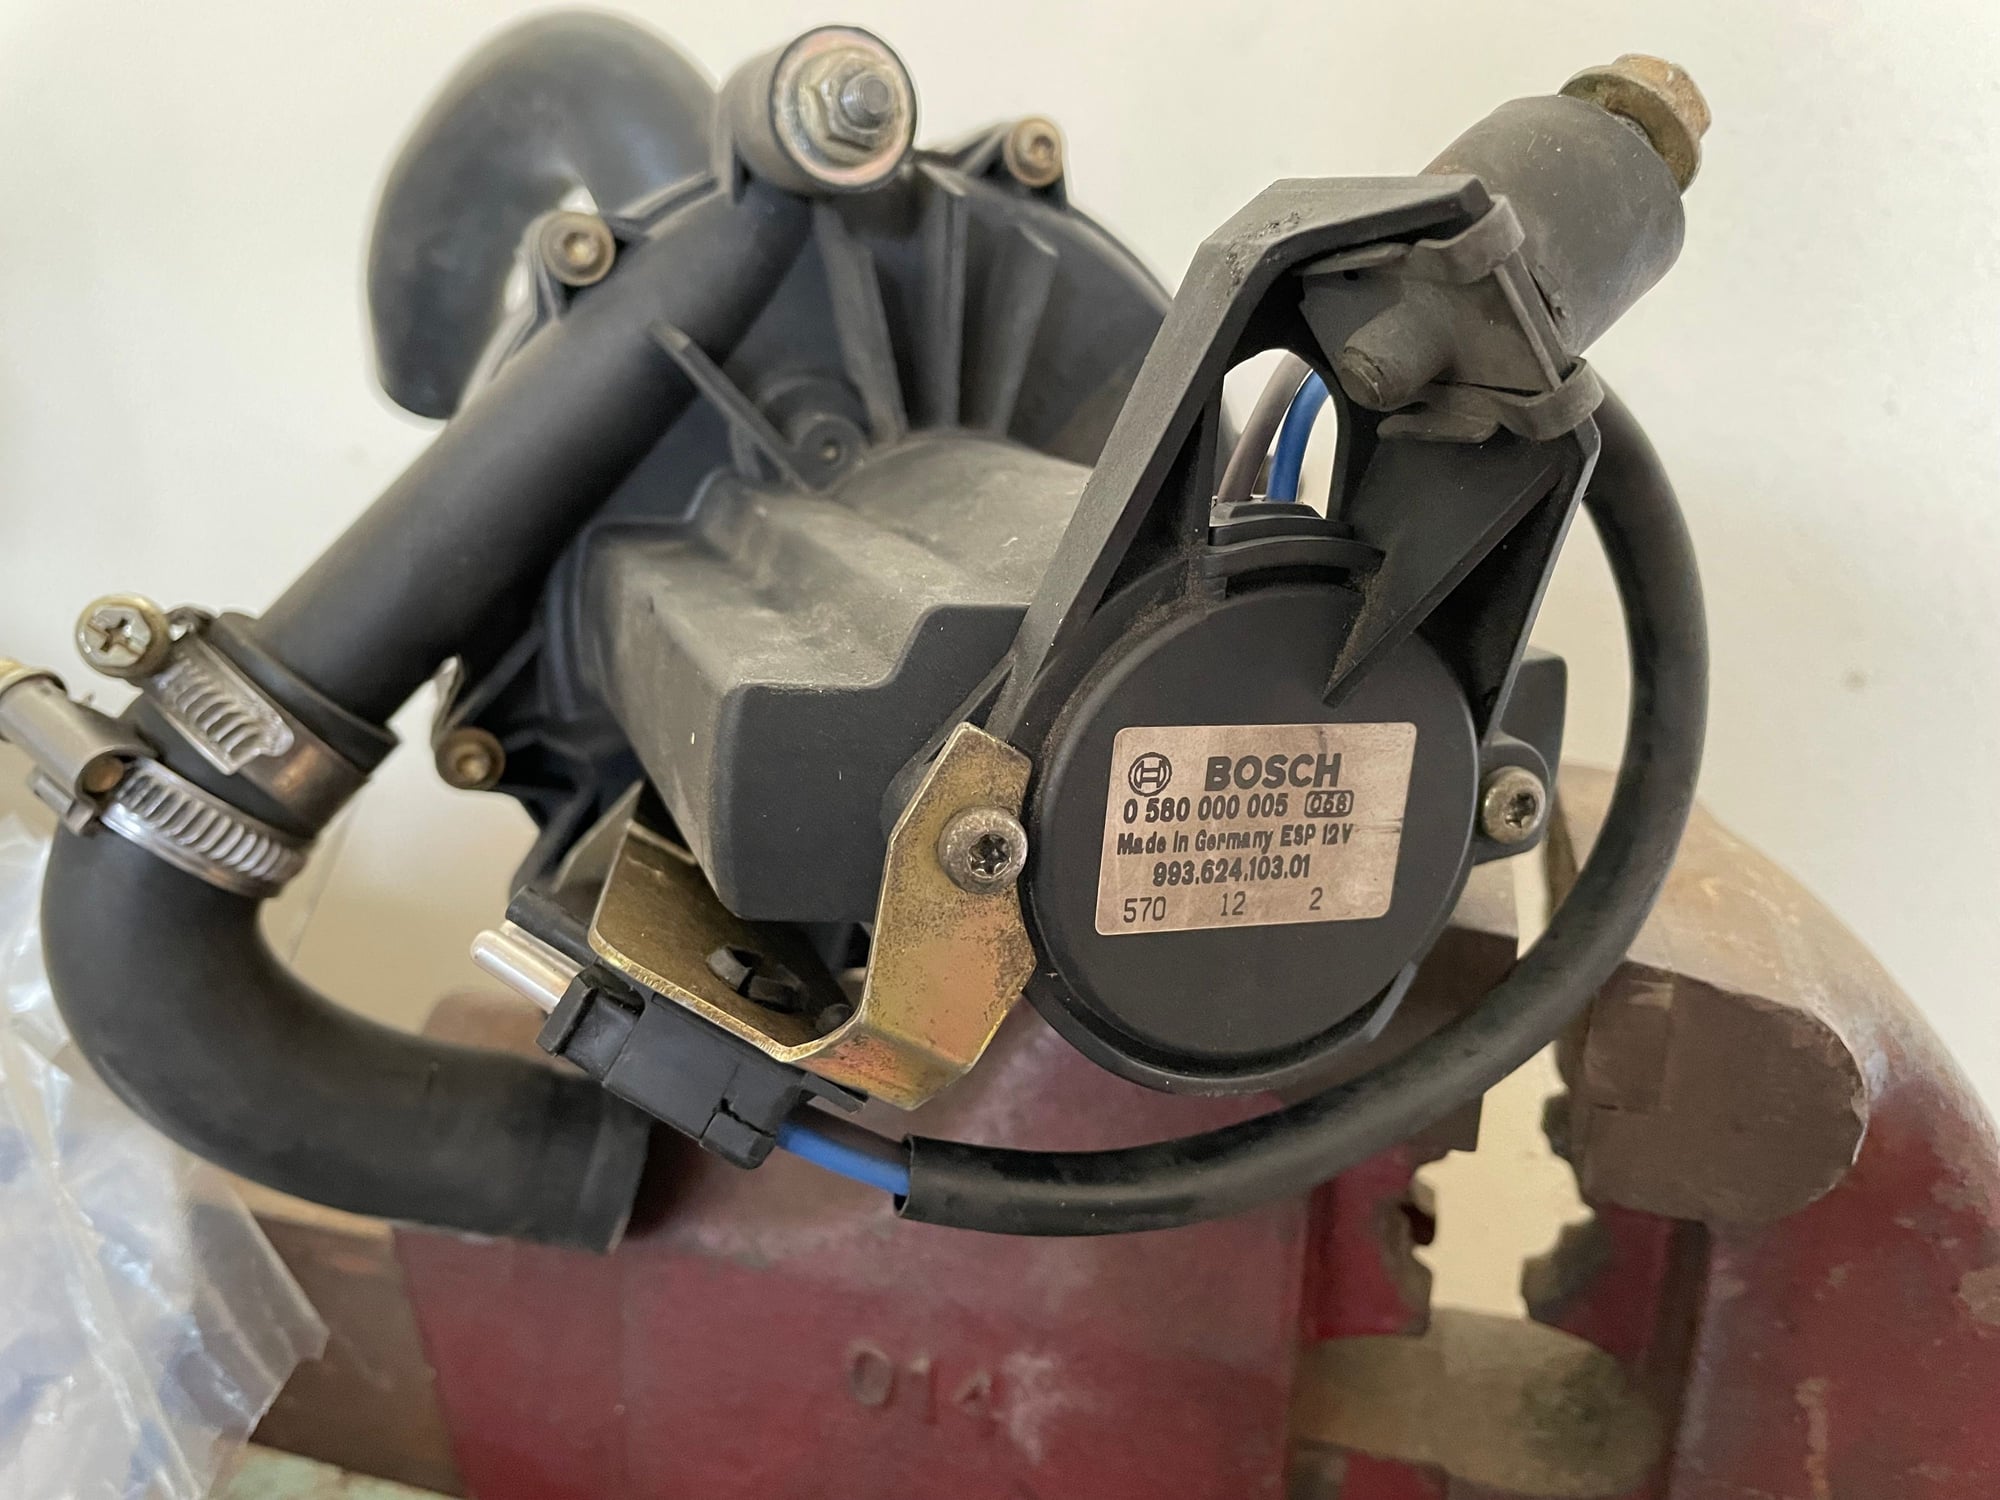
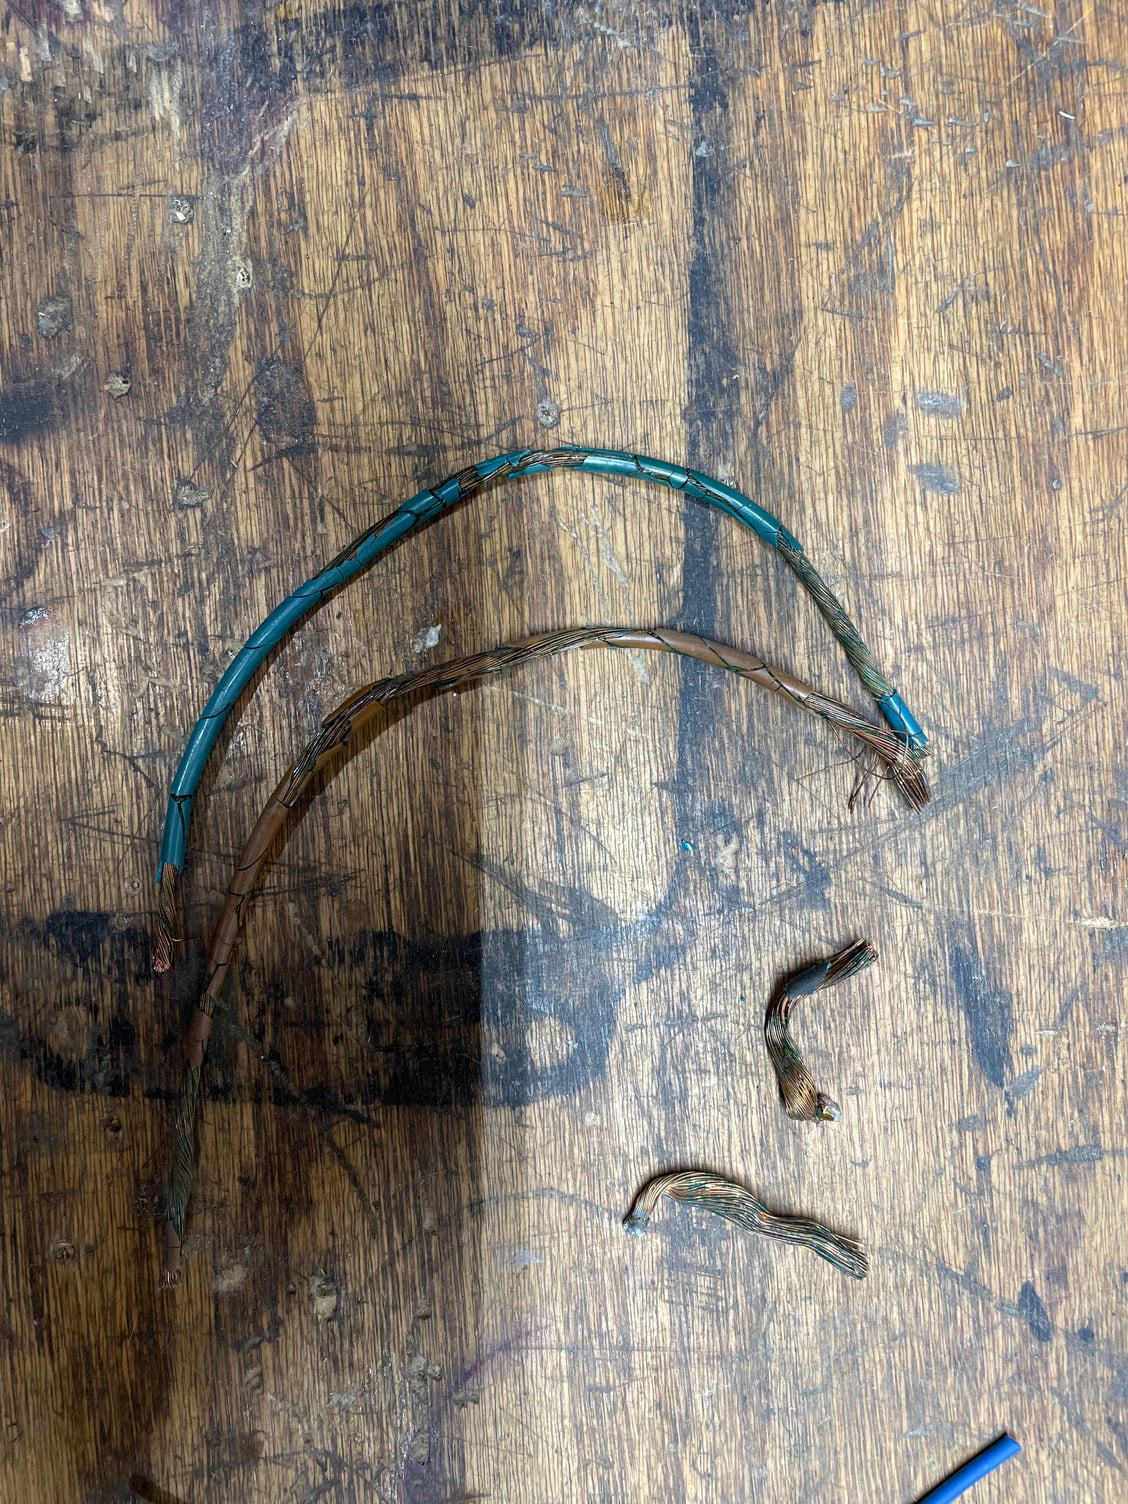
bad sai wiring....never would have looked without advice from my Rennlist friends replaced wiring with color correct GXL wire dried, cracked and missing insulation on wiring within the tubing
Last edited by Dan Riley; Aug 3, 2021 at 03:33 PM.
Reason: poor grammer
First, congrats on the engine drop. It really isn�t much more involved than dropping half the lump.
as for the �lid� you�re referring to....is this it?
if so, it�s a simple cover that covers the end of the camshaft. I am not sure if your mileage or if you have weeping oil there but it�s simple to change the o-ring while you�re in there. Just a couple 10mm bolts and maybe a gentle tap with a soft mallet to loosen.
heres what it looks like removed....
as for the power steering bracket, that can be a little more involved. The lower pulley bolt is torqued to the back of the camshaft at 85 ft lbs or something close. You�ll need a strap wrench to hold the pulley and not transmit torque to the cam/timing chains IF you don�t remove the chain covers and hold cam and use appropriate tooltip counter hold.
I determined the existing wires to be equivalent to a 14 awg. I bought ten feet of each brown and dark blue GXL wire from Wire Barn. GXL wiring is a high grade primary automotive wire. I just randomly chose Wire Barn because they sold small quantities. Only one foot is needed of each color. A 45 watt tip in my Weller soldering iron made short work of it.
Thanks so much for the explanation with pics. I will go ahead with the removal of the rear engine tin.
Any reason you're taking off the rear engine tin? You can do ALOT without removing it. I have only removed it when I stripped the motor down to the case.
Yeah, those SAI wires are really something. I bet almost all 993s look like that by now if not replaced. Sort of scary, but I guess you have to rely on the fuse if the wires touch.
I wanted to remove it so I can clean the engine easier and more importantly to see what's underneath. I have spent more time just looking at everything making mental notes for future reference. I can read all about a subject and see pics but nothing equals hands on in person experience.
Off topic: For you advanced engine folks....where is the oil pump?
Last edited by Dan Riley; Aug 4, 2021 at 11:09 AM.
I planned carefully and tried to anticipate any material and parts.....wrong! I have at a minimum a weekly delivery from Pelican Parts or FCP or Autohausaz.
I wanted to remove it so may clean the engine easier and more importantly to see what's underneath. I have spent more time just looking at everything making mental notes for future reference. I can read all about a subject and see pics but nothing equals hands on in person experience.
Off topic: For you advanced engine folks....where is the oil pump?
Dan,
The oil pump is inside the case and requires splitting the case. How many miles are on your engine?