When you click on links to various merchants on this site and make a purchase, this can result in this site earning a commission. Affiliate programs and affiliations include, but are not limited to, the eBay Partner Network.
I need a definitive answer from those who have actually done this task..there seems to be many opinions but prefer facts.
1998 C2S-. Do the hub bearings have to come out to install longer studs? (65mm)
I feel confident the fronts do not need hub disassembly, but know not of the rears and would be nice to know ahead of time so I can prepare.
Thanks in advance.
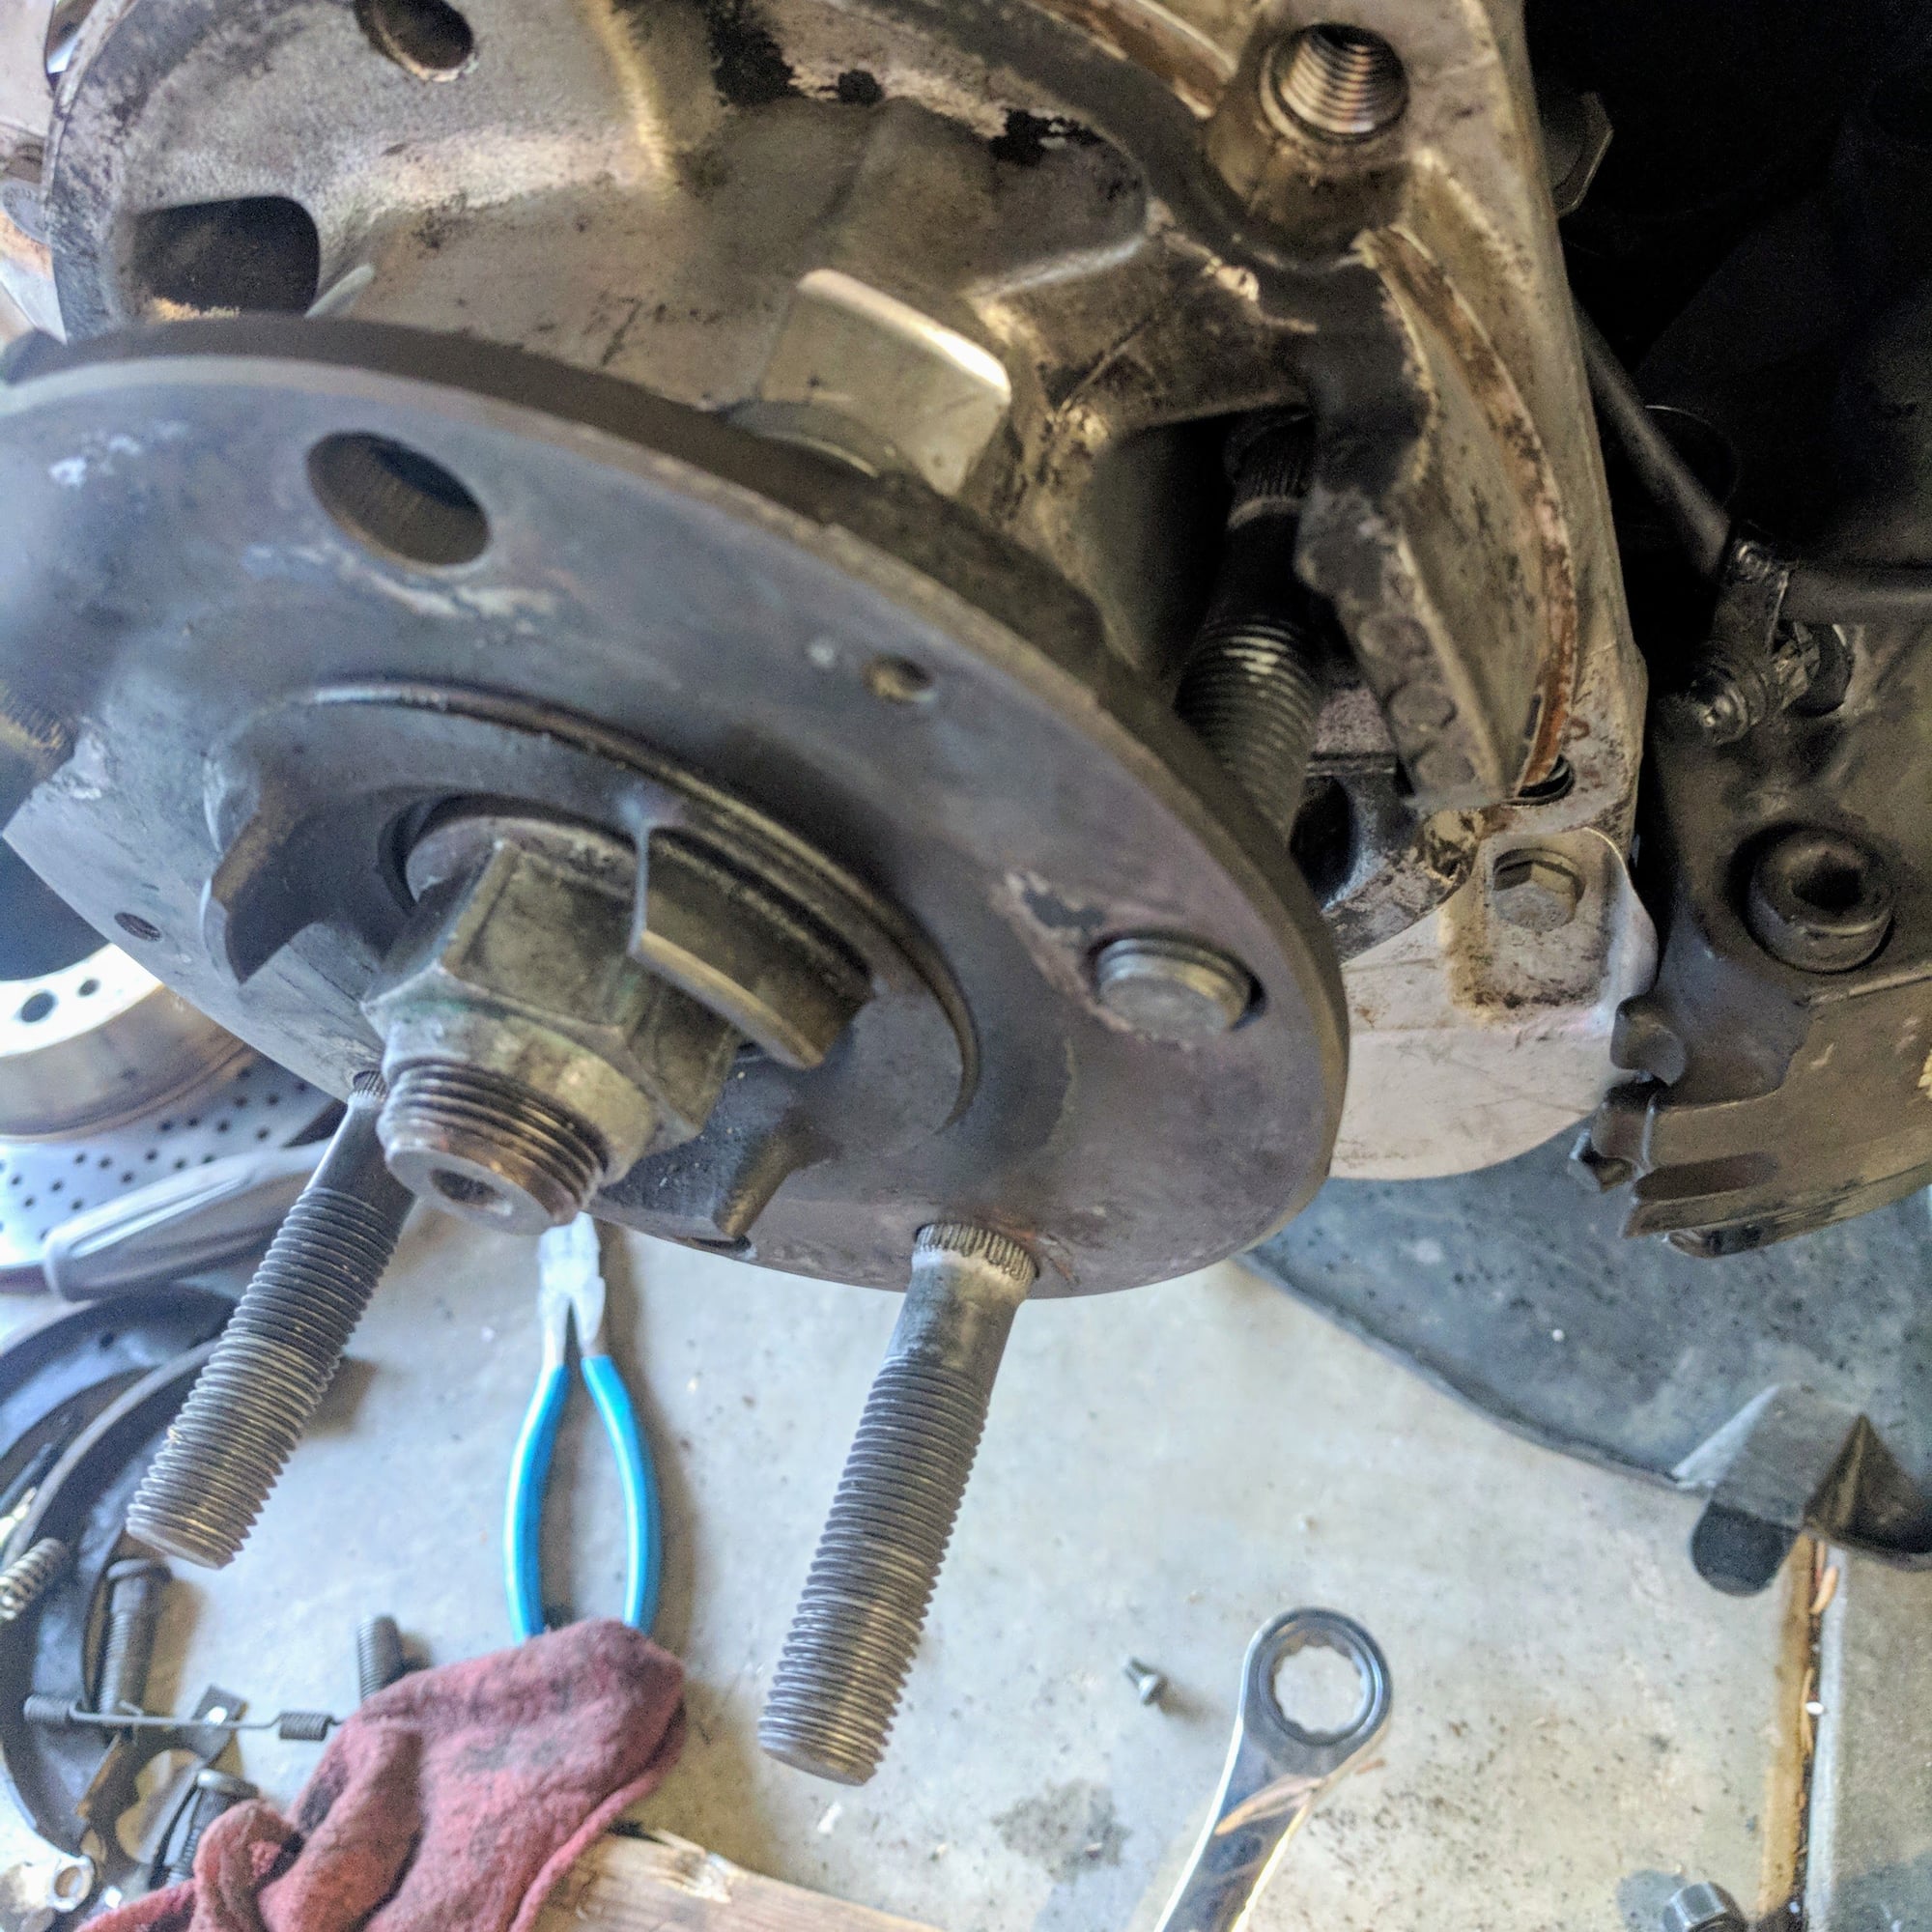
Nope. No need to pull the hubs even for the long 66mm ones. The front is easy to do. The rear is more work. You do need to remove the parking brake assembly from the hub. Here are some pics...
1. Remove the old studs with a tie rod separator
2. Put the stud into the pocket/opening where the parking brake cable comes through the carrier. You may need to bench grind the OD lip of the stud slightly so the stud can sit all the way back into the pocket.
3. Pull the stud through the hub. You may need to twist the hub to get the stud through the opening before you can set the stud into the hub with the splines.
Last edited by samurai_k; Apr 14, 2019 at 12:45 PM.
I timed out the wheel studs on my track car last winter, instead of replacing with the porsche 66mm again I went with MSI Racing Products.
read thru the website a bit, decide the length you want, then call them up to order, or just to ask a bunch of questions.
these are a bit more expensive, and it will add up.
but these things are gorgeous, seriously, not even for just a wheel stud.
this is a beautiful and extremely well made product.
whether for your track car or just for the look on a street car, you will not be disappointed.
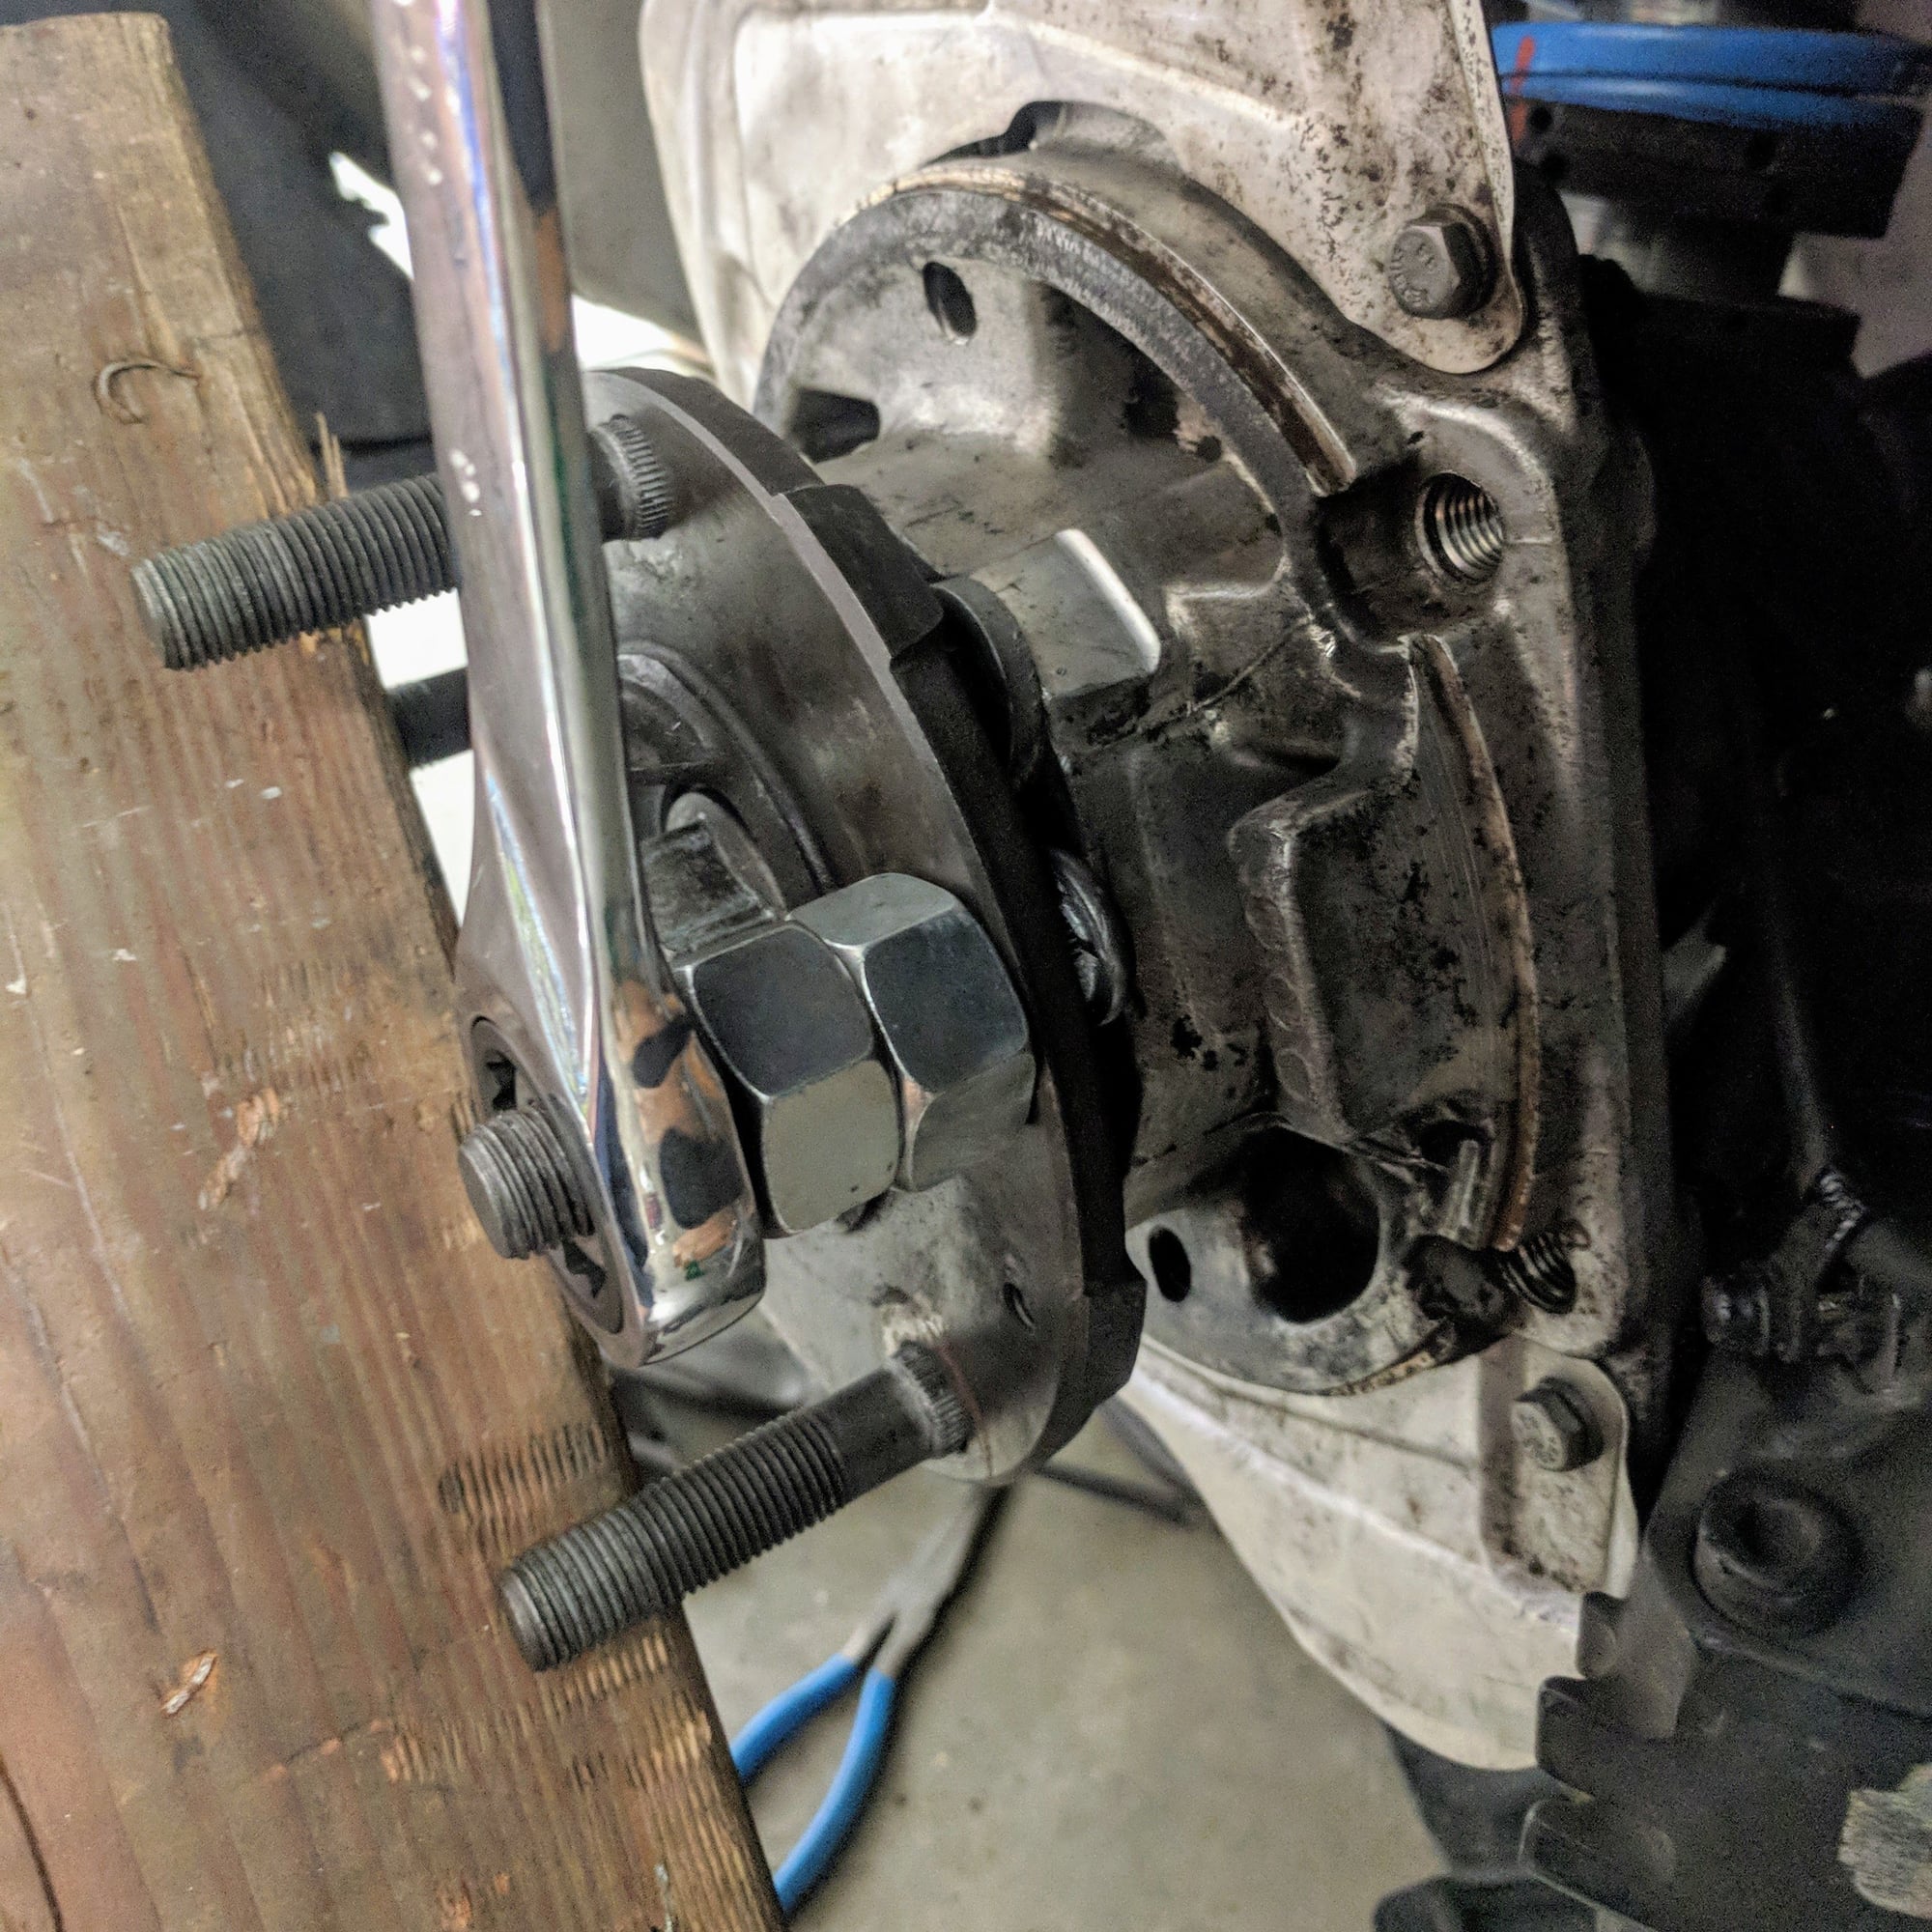
You can get even longer studs in the rear than 66mm after removing the E-brake equipment. Relatively easy once you get the process down, first rear took hours, the other side took 45 min. Fronts can be done with a BFM in about 30min total if you don't mind that route. I realize its not the preferred method.
To bump this thread back up, it seems that even a very long stud should be able to fit into the rear hub via the parking brake cable through hole.
Does anyone have R&R procedures on how to remove the ebrake shoes and cable from the rear hub, however? Can all of this be vacated from the hub without messing with the ebrake handle inside the car to release tension, and done purely at the back of the car?
And say you can get enough tension released just at the rear hub to remove the ebrake able from the hub... how do you take off the metal bracket ends of the cable so you can actually pull it out of the hub? It looks like that bracketry is held onto the cable with a pin... what tool did you guys use to press out this pin in the car?
Last edited by Ericsworld; Aug 31, 2020 at 11:21 PM.
thanks I actually found that thread after I made my reply and I think your post in it was especially helpful. Sounds like you don�t need to touch the handle inside the car, just remove the shoes and springs, and then the ends of the ebrake cable comes apart, and it can be pulled through the hub?
yes, once the pin is dropped the lever comes off and the cable can be pushed in towards the center out of the way.
hopefully you won't have the same issues as coleman.
you don't need to mess with the handle inside, but if the brake adjustment is set tight it would make sense to loosen
the adjustment to create more cable slack.
Great! Most other threads I've read, it seems like that pin at the end of the cable just drops out... not sure why Coleman had to use a motorcycle chain tool to press his out, possibly a case of rust?
I compiled the attached PDF based on all of the reading and manual look ups I've done. A lot of the info was pulled from your instructions in the thread you linked. Hopefully this helps others in the future to have one consolidated PDF to reference.
Last edited by Ericsworld; Sep 1, 2020 at 10:18 PM.
Great! Most other threads I've read, it seems like that pin at the end of the cable just drops out... not sure why Coleman had to use a motorcycle chain tool to press his out, possibly a case of rust?
I compiled the attached PDF based on all of the reading and manual look ups I've done. A lot of the info was pulled from your instructions in the thread you linked. Hopefully this helps others in the future to have one consolidated PDF to reference.
Just to circle back on this and provide more info to those attempting in the future, I finished the stud install and parking brake shoe replacement yesterday in the rear. Do not need any tools to remove the pin holding together the piece at the end of the cable, it just falls out (unless it's seized on).
Also, ran into an issue midway through the job where the 63mm bullet nose studs I had were too long. Luckily Elephant Racing was down the road from me and I bought a set of 56mm bullet nose studs and they were able to fit in from the back, just barely. For future reference on how long you can go at the rear, before you need to completely pull the hub, 56mm bullet nose or 66mm non-bullet nose seems to be the limit.
Does anyone have a recommendation for a Spring tool when doing the parking brake shoes on the 993? I got it done with a multitude of needle nose pliers and flat head screwdrivers, but it was a bear.
Reinstalling the parking brake pads is a bit of a PIA. What you need to do is line up one pad into position, then slant the second pad in an angle, hook up the the two tension springs, pull the slanted pad into position, then insert the cylindrical adjuster between the two pads. A long screw driver works as a lever to help you spread the pads to get the adjuster into position. It will take a few tries of cursing with parts/springs flying in your face so be careful with some goggles and some gloves.
Last edited by samurai_k; Oct 19, 2020 at 12:40 PM.